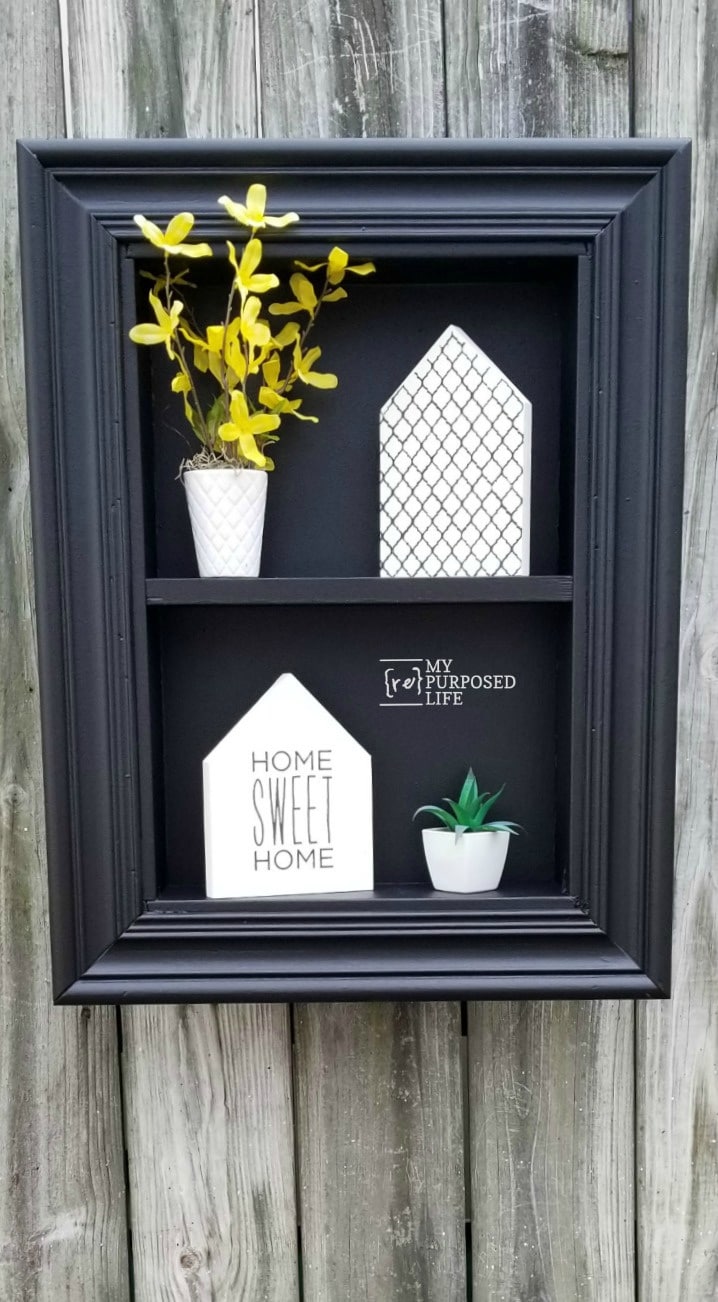
Repurposed Drawer Shadow Box
As an Amazon Associate, I earn from qualifying purchases.
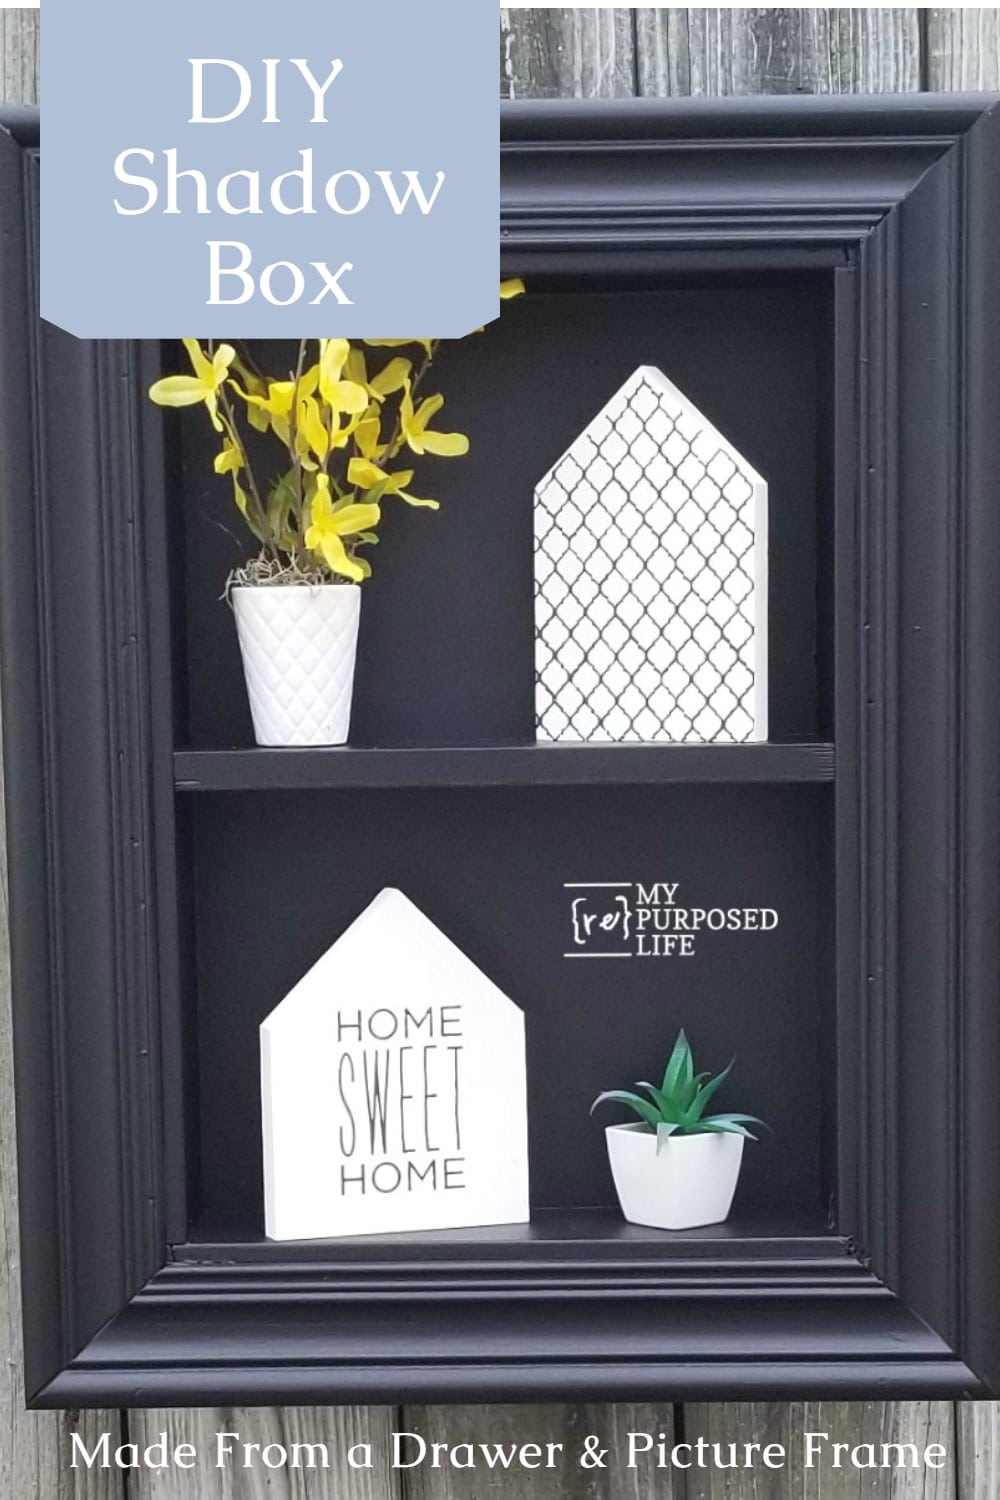
Build a Frame Around a Drawer to Make a Shadow Box
I love an excellent drawer upcycle! While looking around the basement shop, I had a brilliant idea. Why not make a repurposed drawer shadow box? I’ve made shadow boxes out of picture frames by building a box. How about I use a drawer for the box and a frame to finish it off? Seriously, it was one of those forehead-thumping moments!
I hope you save & share this on Pinterest!
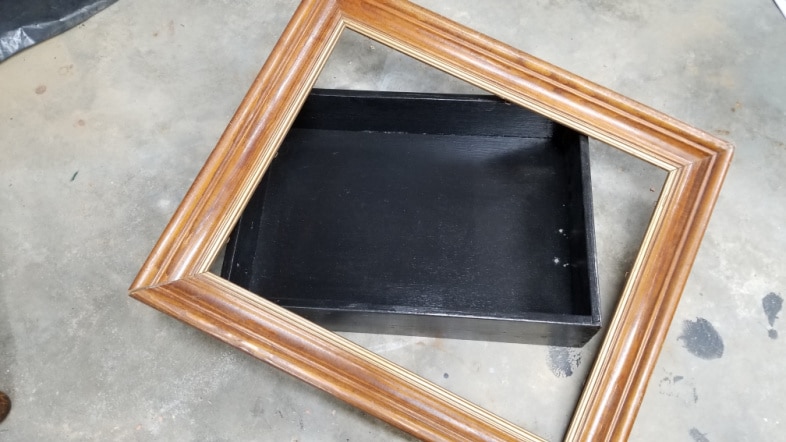
Here are the items I started with. This drawer is from a project I made for my daughter Jamie when I started blogging. The drawers were made into modular shelves. Years later, she gave me the drawers back, and I brought them home. I’m not sure when they ended up in the basement shop. The large picture frame was also stored under the workbench in the basement. Lucky me?
Visit the My Repurposed Life Amazon Store to shop my favorite items.
Dismantle Picture Frame
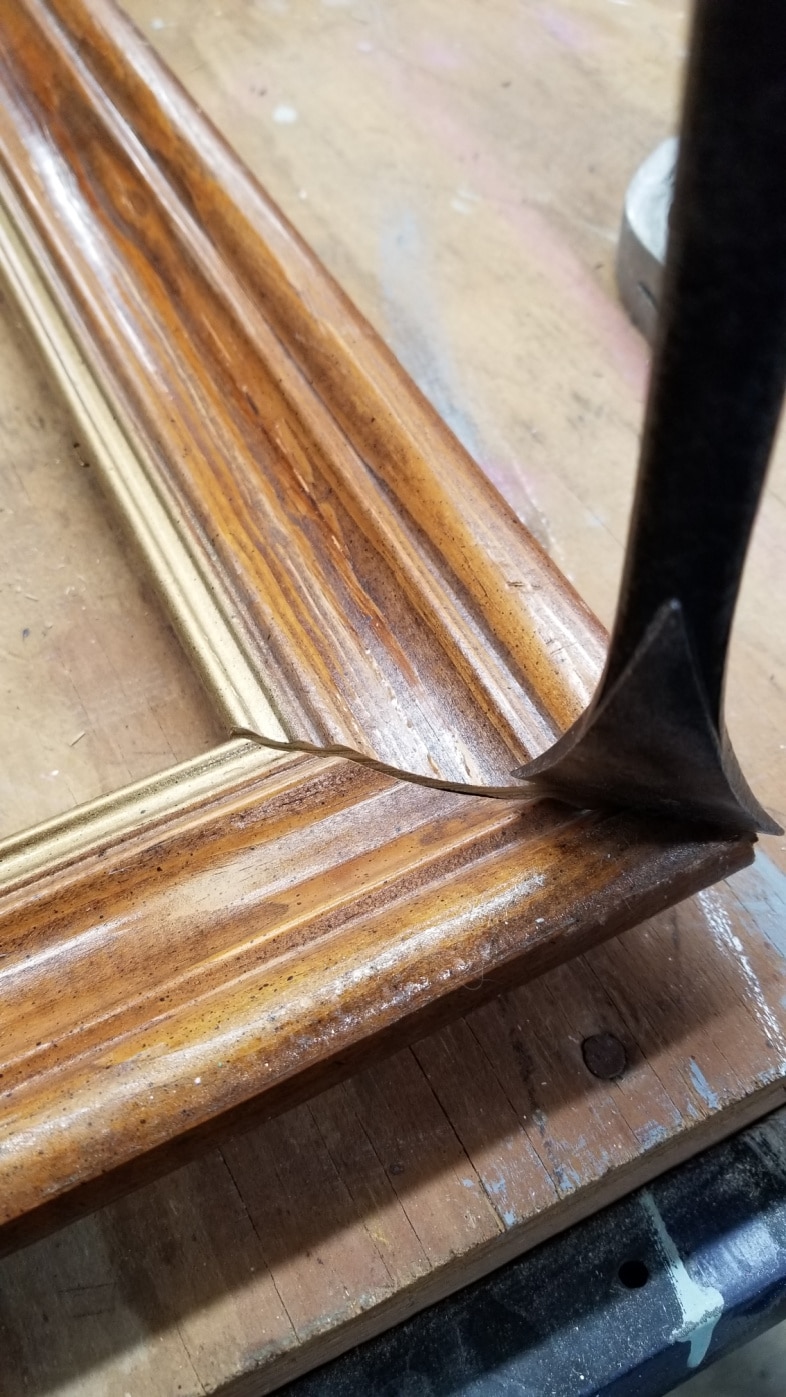
Using a small pry bar I separated each corner of the picture frame. I was careful and took my time so I wouldn’t cause too much damage.
Picture frame ideas from My Repurposed Life
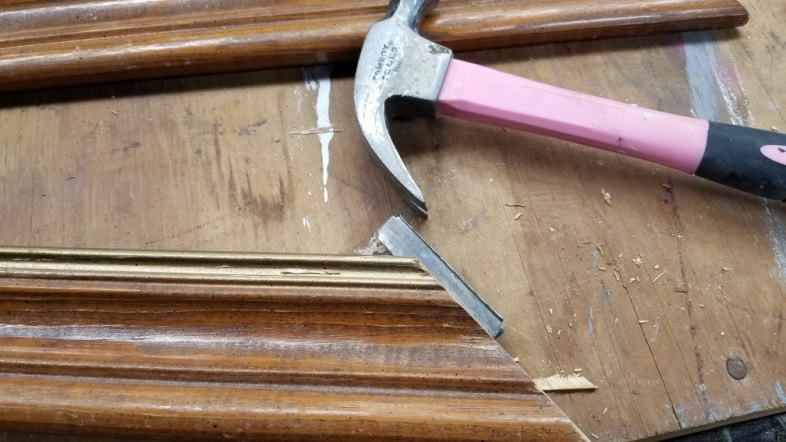
These metal supports were inside each corner. I used the hammer to tap and tap them out of place.
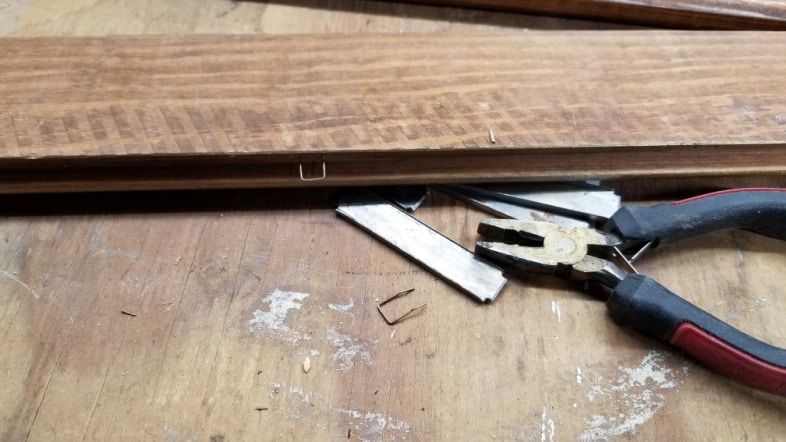
After removing the supports, I used small pliers to remove the staples that initially held the print in place.
Trim Picture Frame on Miter Saw
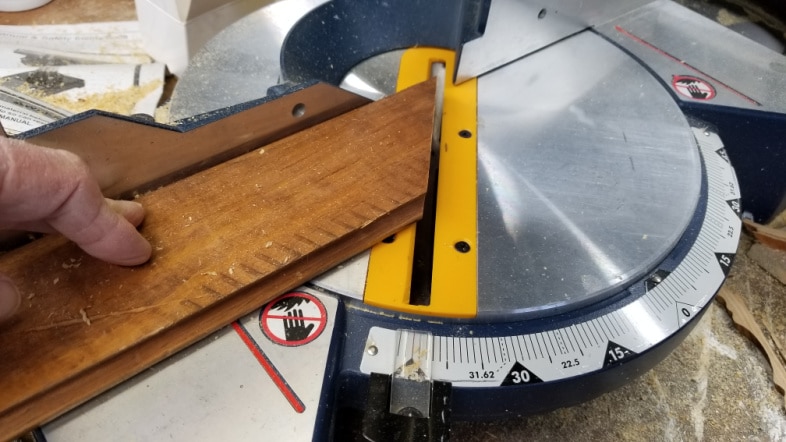
The original frame was on a slight angle and leaned inward. I knew I didn’t have much room with the short sides, so I only ensured they were on a 45° angle with a straight cut.
Measure Picture Frame Pieces for Shadow Box
First, I did the short sides, marking them to fit the drawer shadow box. The little ledge fits perfectly on the drawer, exposing some edges.
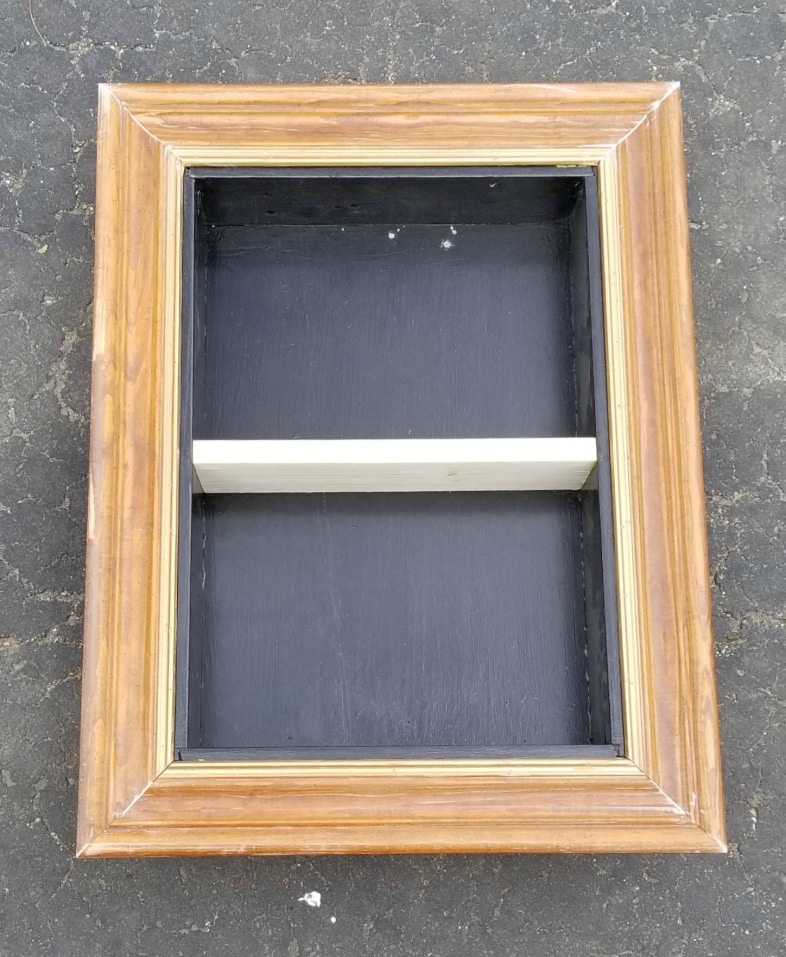
Measure | Cut Repurposed Drawer Shadow Box
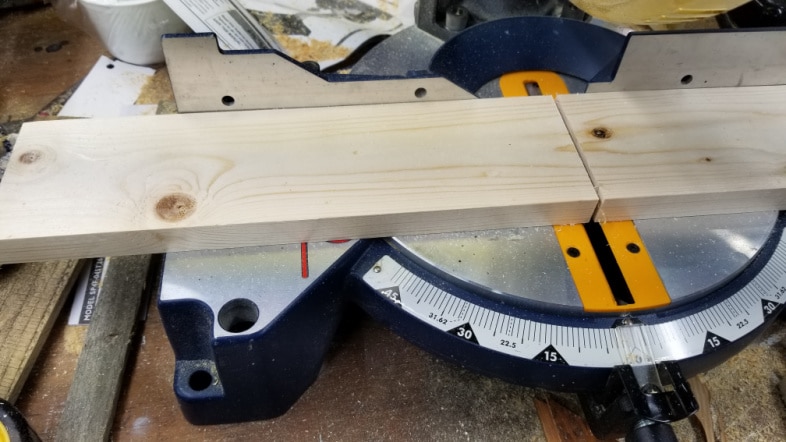
A 1×4 was perfect as a middle shelf for the drawer shadow box project. I measured and cut it on the miter saw. Generally, I cut my boards like this just a little longer to ensure they fit tight. I can always take a little off if needed.
Dry Fit to Test Shelf

I did have to trim off just a little to make it fit in the drawer.
Sand 1×4 Shelf
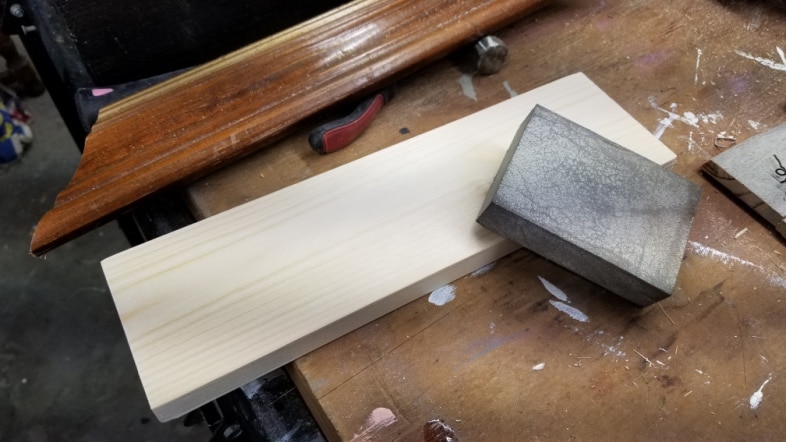
It’s best to keep a sanding sponge near your saw so that you can immediately brush off any shavings and smooth any rough edges.
Install Shelf in Drawer Shadow Box
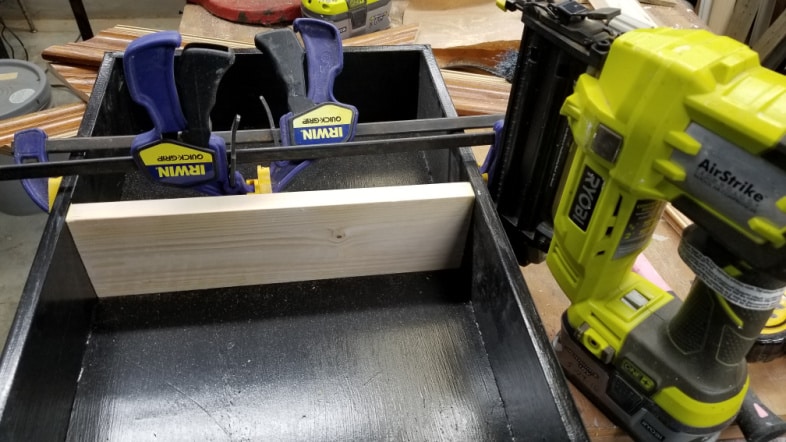
Did you know you can use two clamps when one isn’t long enough? Gorilla Wood Glue is excellent for extra strength. After gluing, I secured it with the clamps, then finally shot small brad nails with my nail gun.
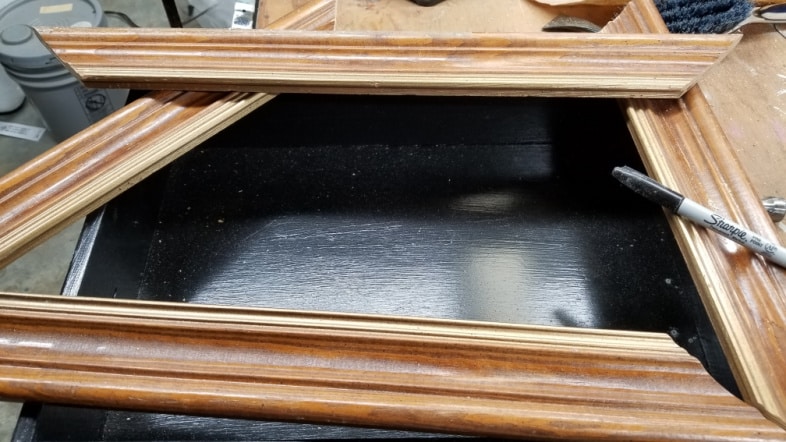
Glue Picture Frame onto Drawer
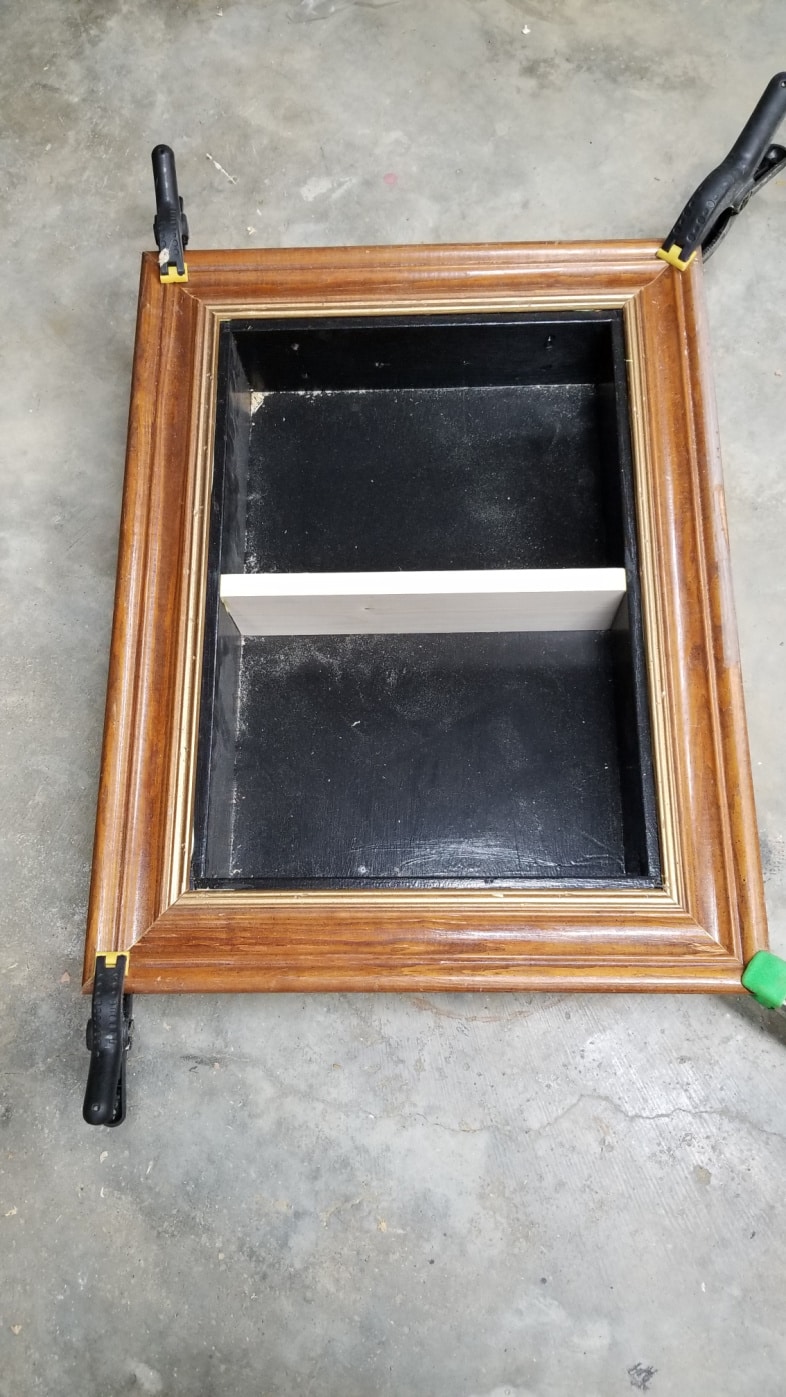
Initially, I only glued (and clamped) the picture frame to the drawer shadow box. I used glue along the original routed edge of the picture frame and each corner. I clamped each corner and let it set up overnight.
The following day, I used small brad nails and a nail gun to shoot at a slight angle and secure the picture frame in the drawer.
Drywall Mud or Wood Filler?
I prefer to use drywall mud to patch my woodworking projects. The only time it doesn’t work is when I’m using spray paint. The paint’s coverage is just weird over the drywall mud. Here’s a tip: when starting a DIY project, this large bucket (found in the contractor area) is much cheaper than buying those small tubs in the paint department. I’ll explain more about the baby wipes below.
Getting Ready to Paint the Repurposed Drawer Shadow Box
To prep the drawer shadow box for painting, I had to clean it up and dust it off.
Make Your Own Primer
Because the drawer was such a glossy black, I mixed some homemade chalky paint primer using plaster of Paris and water.
After mixing the Plaster with water, I poured in the black paint and stirred well.
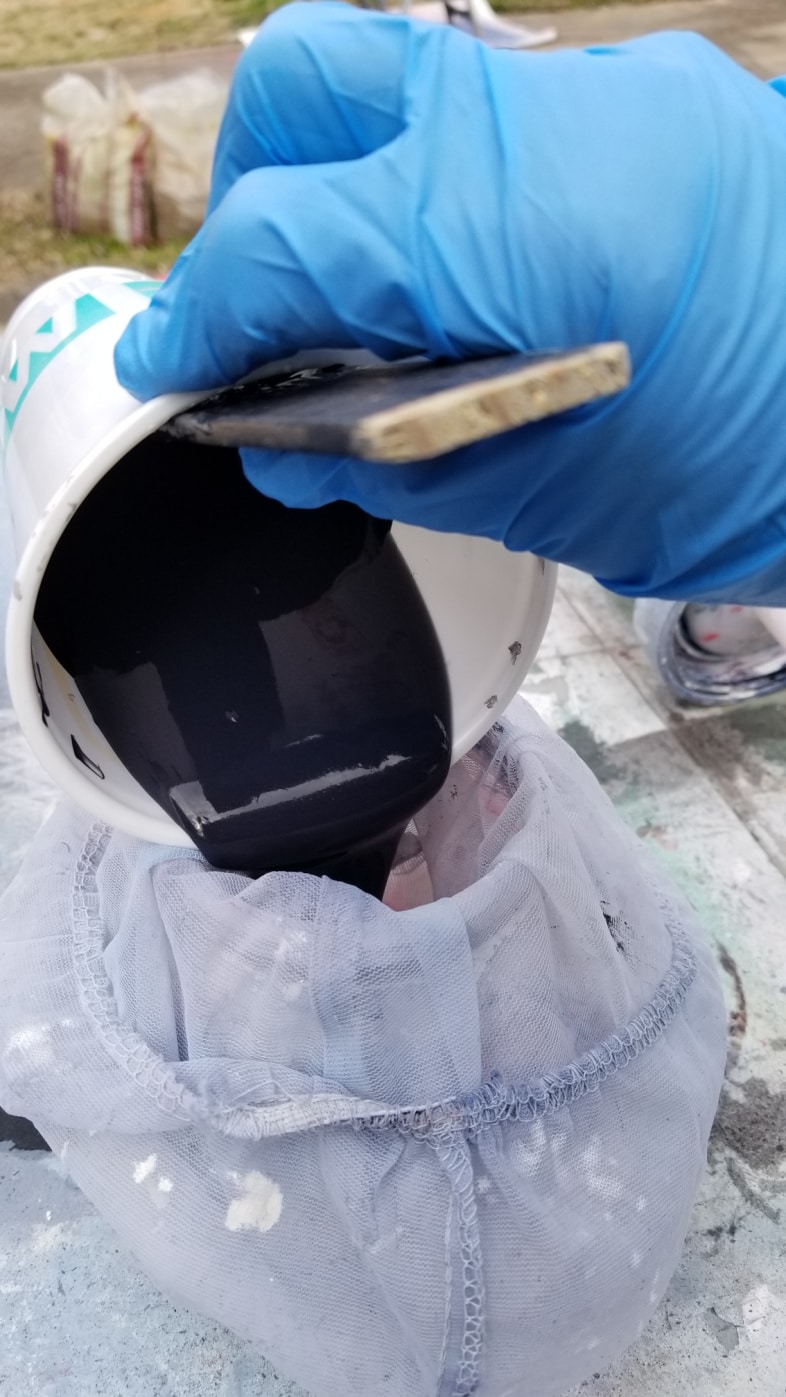
Next I poured the mixture through my mesh strainer.
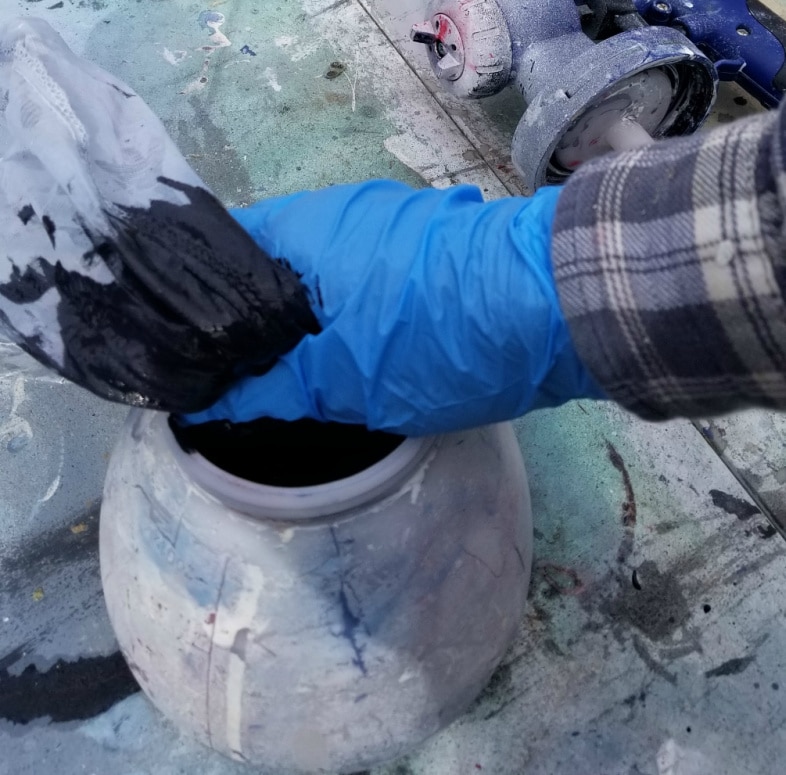
Using latex gloves is the best way to ensure that most of the paint makes it into the cup. These mesh filters are reusable for years!
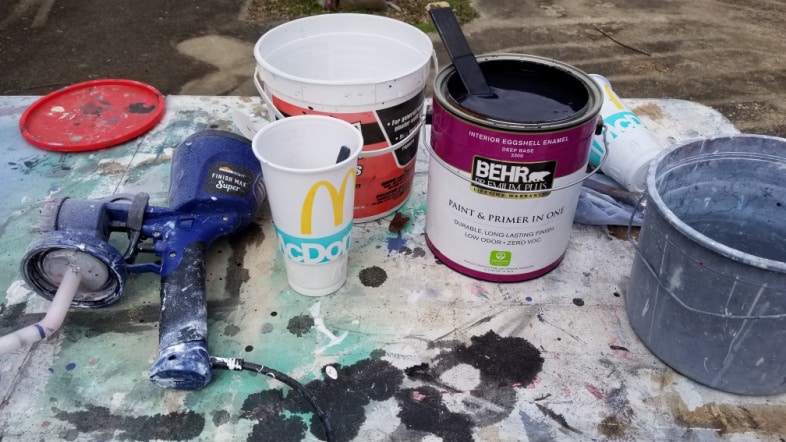
Easy Project Painting with the Finish Max

The Super Finish Max paint sprayer is the best way to get any job done quickly. I prefer to paint the back first, so it won’t be so noticeable if anything gets scuffed when I turn it over.
The drawer shadow box received three light coats of chalky paint primer. Because it’s flat, the paint dries quickly. However, black paint tends to leave handprints until it’s sealed.
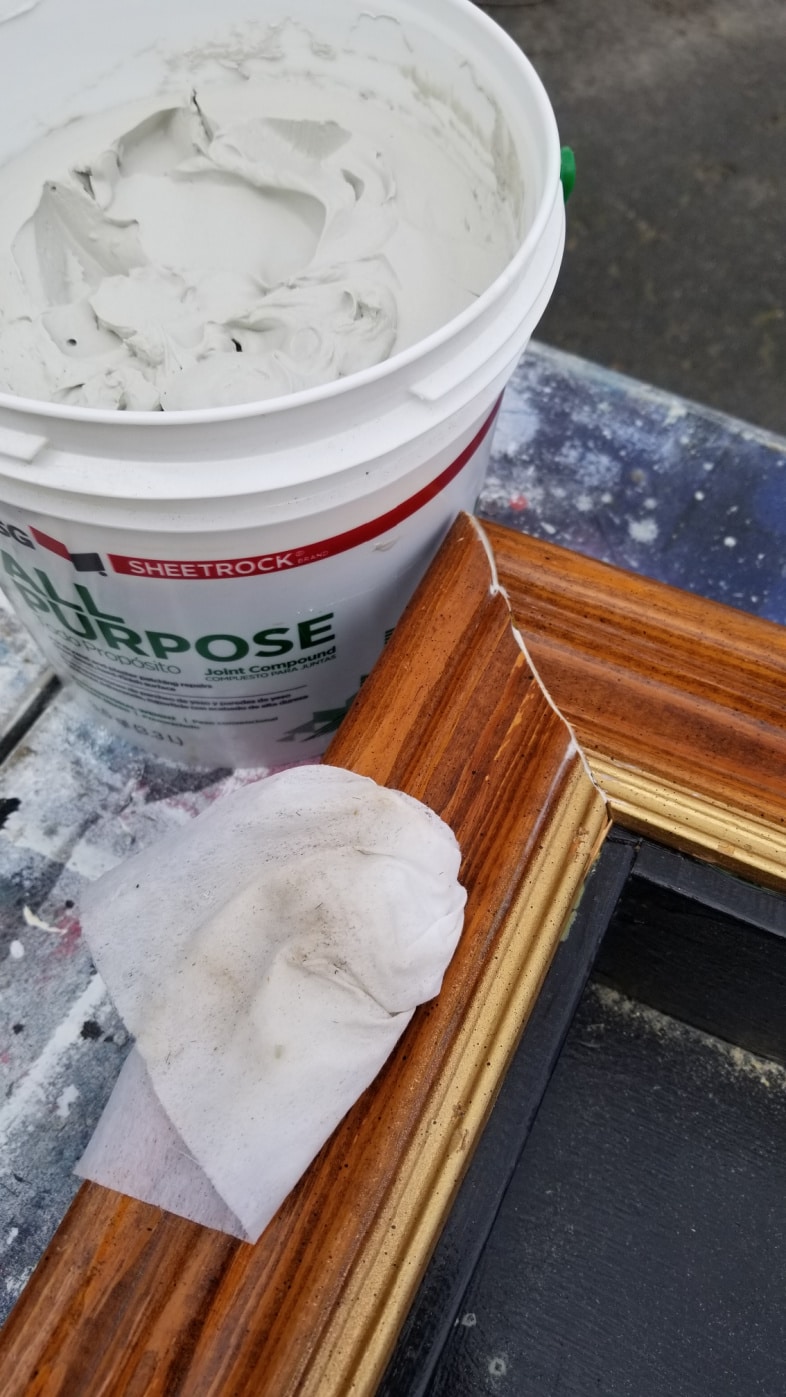
Time to Patch Nail Holes
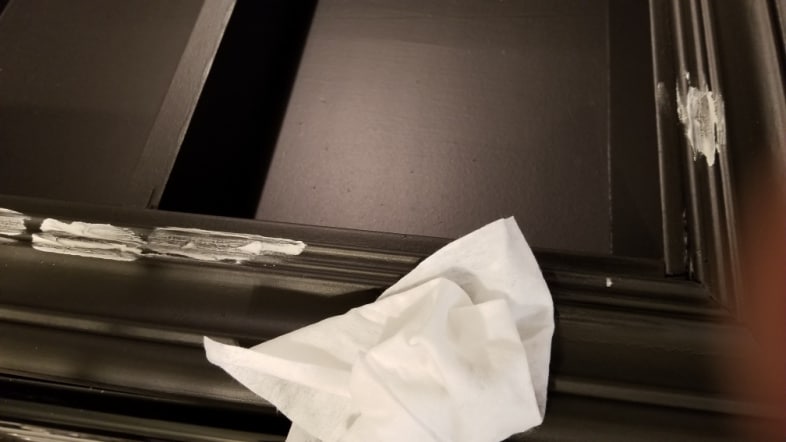
The brad nails left minor dents that were very obvious after the black primer. I had intended to use black as an undercoat and white as a topcoat with medium distressing, so I didn’t think the nail dents would be an issue.
Again, I reached for the drywall mud and baby wipes. I used my finger to fill the tiny nail holes, which was quite messy. But if you look closely at the top left corner of the picture, you will see that I have wiped away the excess drywall mud, and the hole is perfectly filled. After filling the holes, I let the drywall mud set up for about 10 minutes before I used the baby wipes to clean up the mess. No sanding is required!
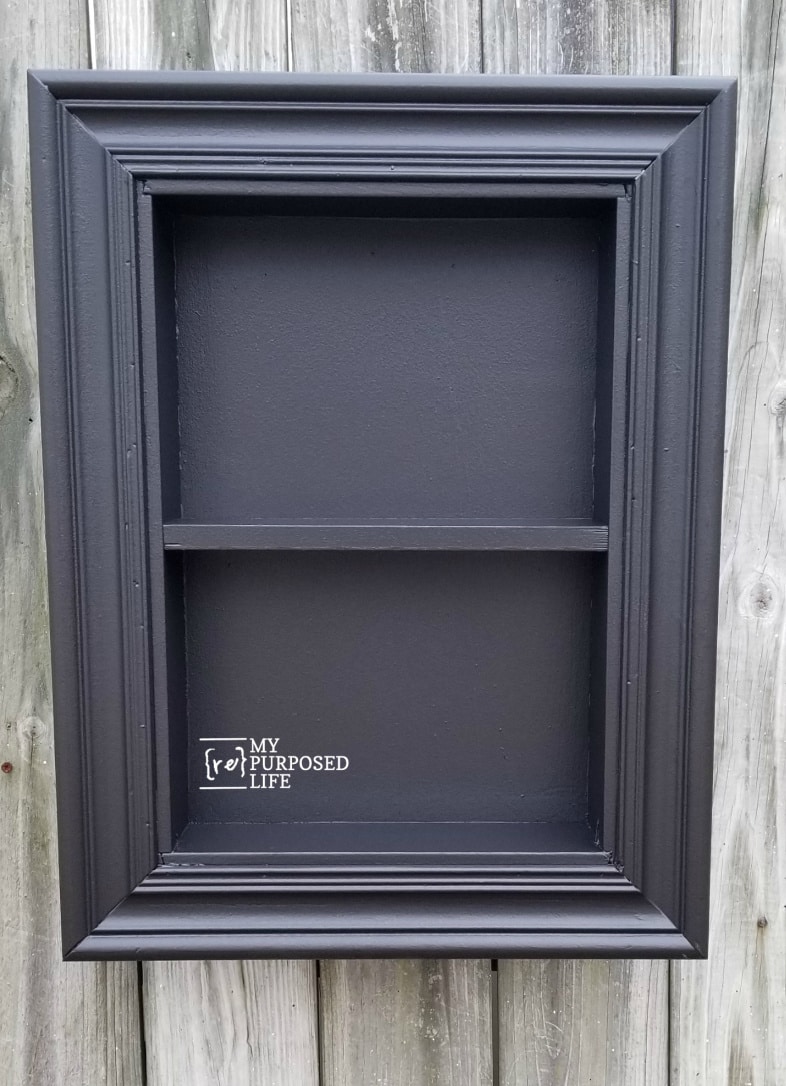
The black drawer repurposed shadow box isn’t perfect, but I love it!

See? Isn’t it so cute? I also love the new transfers in The Junky Chalker Shop, seen here on a couple of DIY wooden houses I made.
Green Picture Frame Shadow Box

This picture frame shadow box is one of my very favorite shadow boxes. It was recently featured in Country Sampler Farmhouse Magazine!

See that snippet at the bottom? It’s the Designer Challenge: Old Frames, New Uses! I was so thrilled!
Do you love shadow boxes as much as I do? Have you ever seen a repurposed drawer shadow box before?
gail

Leona,
Great idea about the silver. I think my silver rub-n-buff has dried up. It’s time to restock. 🙂
Bookcases? I do have a few ideas about using more doors I have in storage!
Have you seen all of the ones I’ve already made?
Here are a few . . . https://www.myrepurposedlife.com/?s=bookshelf
https://www.myrepurposedlife.com/?s=bookcase
gail