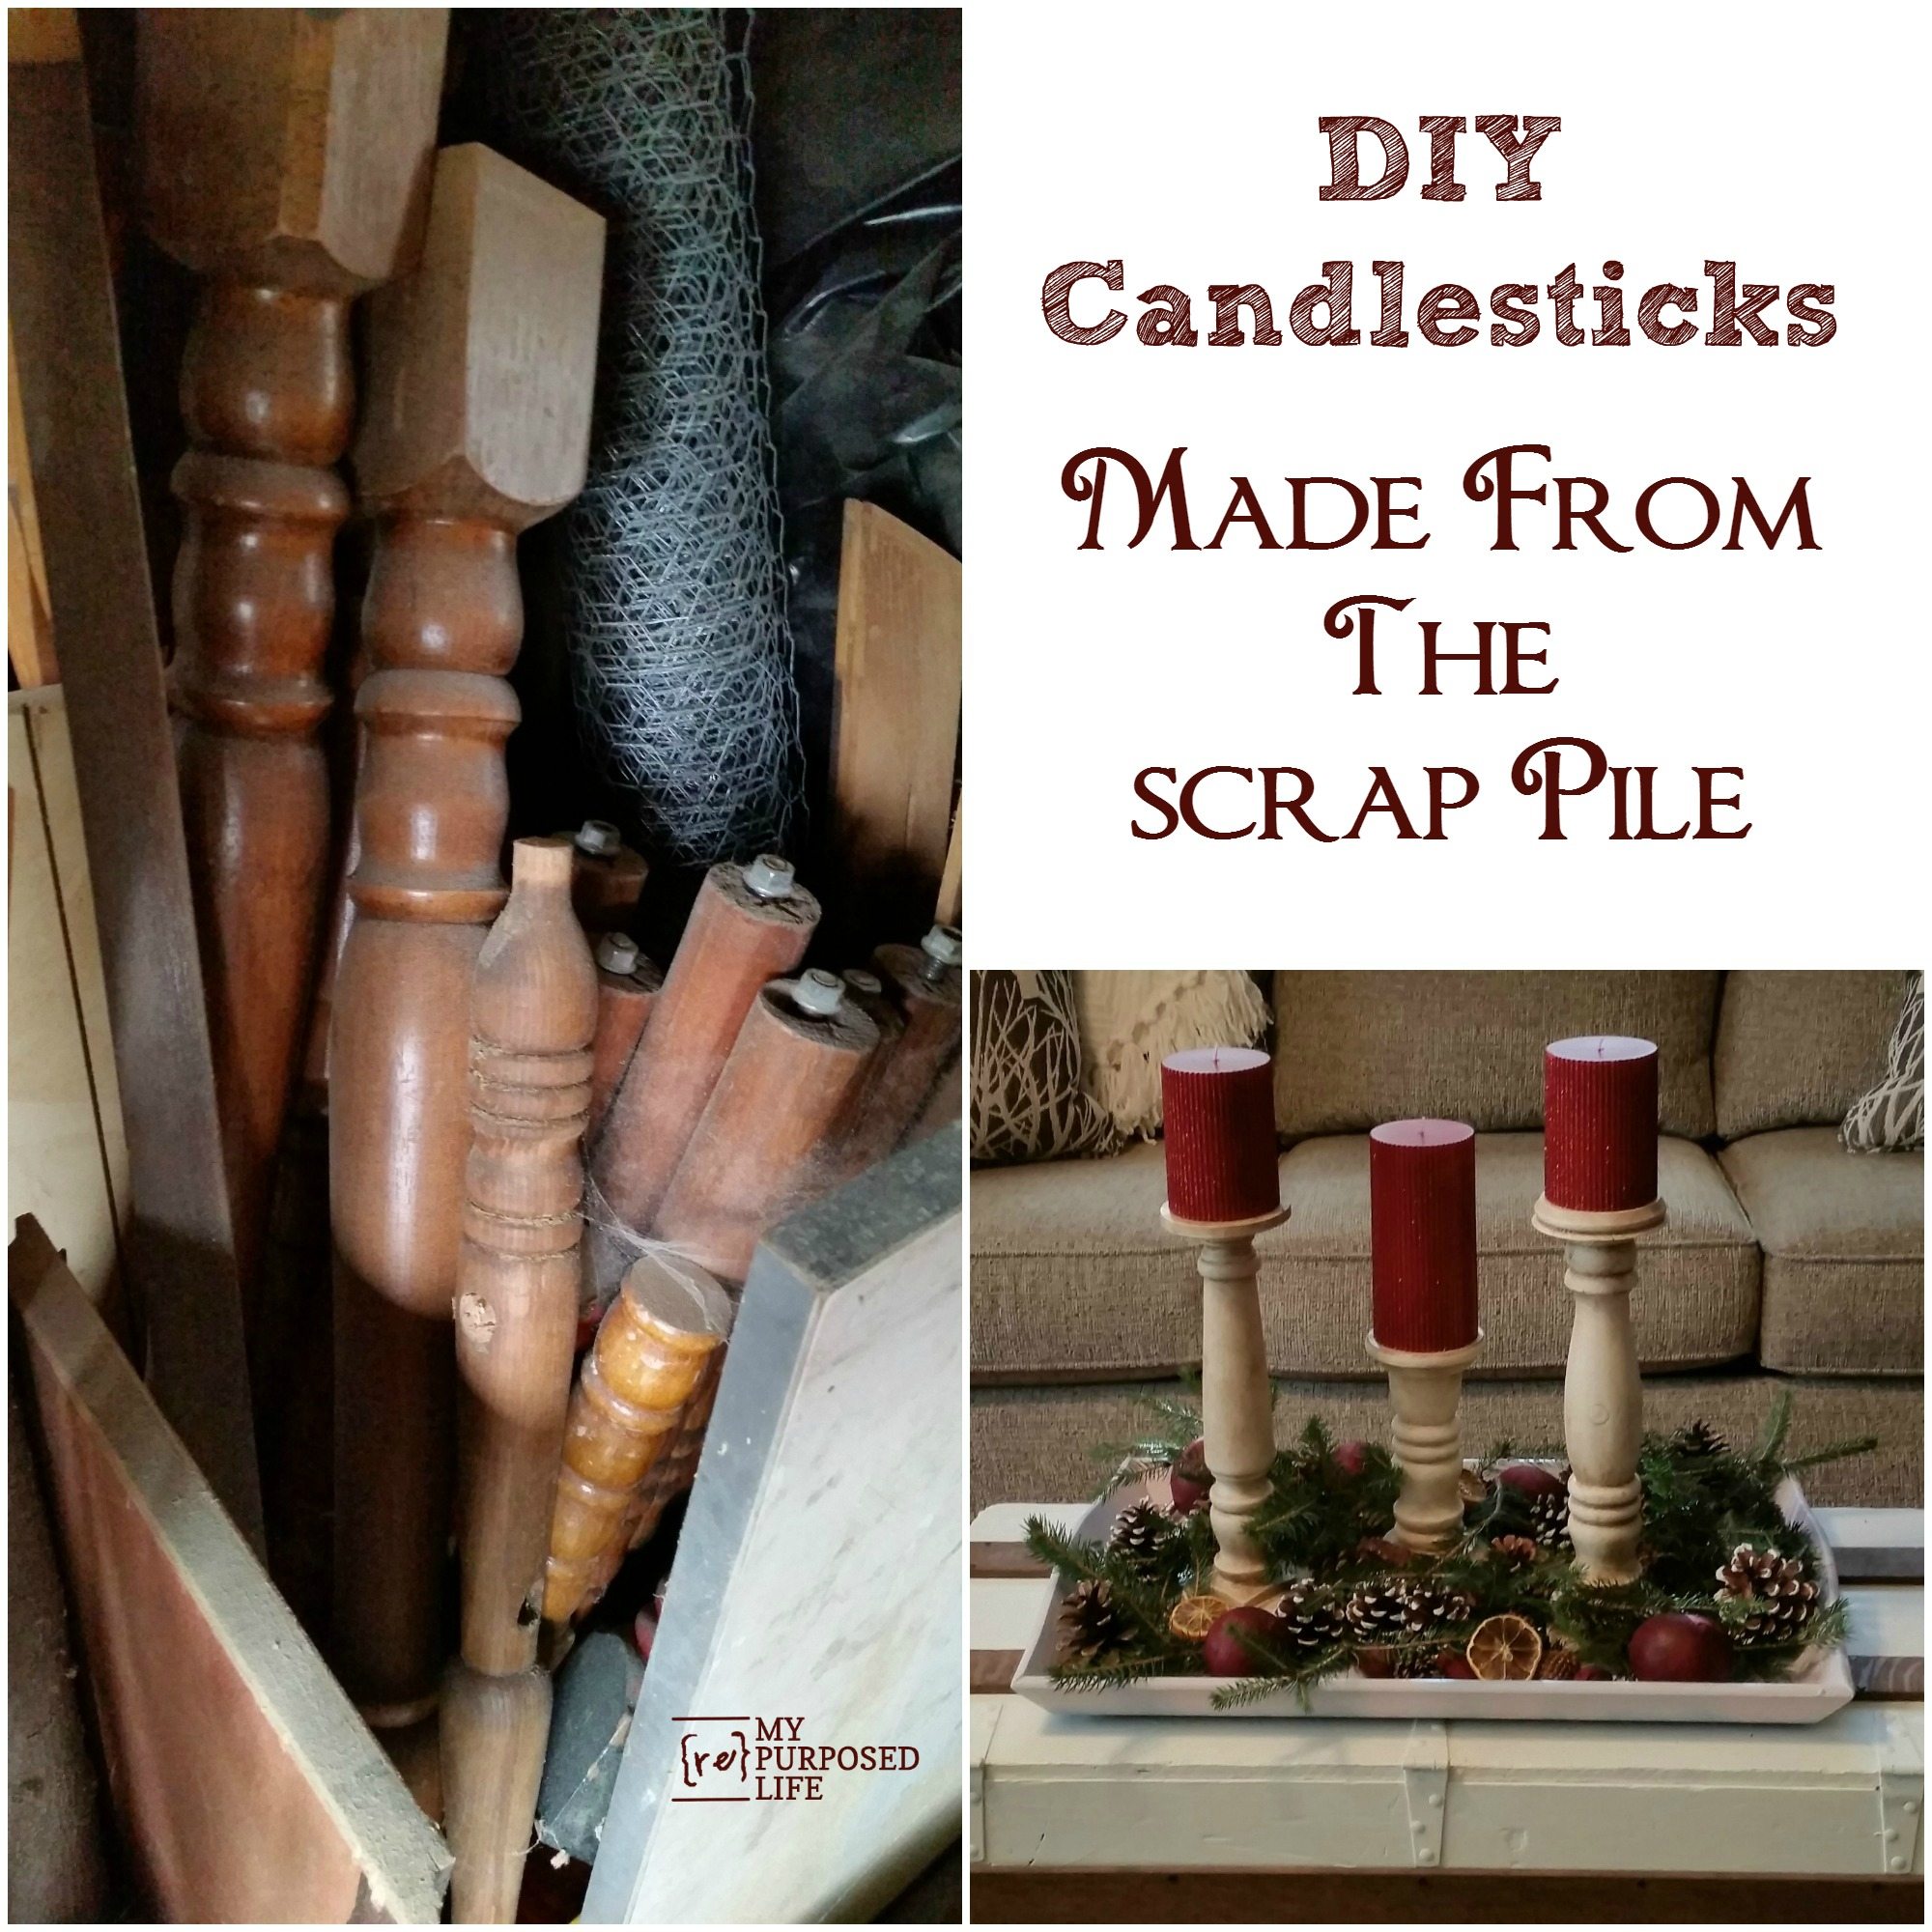
Scrap Pile DIY Candlesticks
As an Amazon Associate, I earn from qualifying purchases.
These DIY Candlesticks are just in time for the Holidays!
I love a great challenge! Sandra from Sawdust Girl issued a challenge to make something from your scrap pile. My scrap pile may not be like your scrap pile, because I hoard fun stuff that makes awesome projects. Granted, I do have the regular scrap pile with scraps of lumber too. . .
But these diy candlesticks are made out of random scrap stuff.
Make DIY Candlesticks out of Bedposts
 These are some headboard parts left over from a headboard bench I made.
*this post contains affiliate links, read more here*
Cut bed posts on miter saw

I trimmed both ends off of the two bed posts.
Round bases for DIY candlesticks
 This is the perfect way to get some round tops and bottoms for candlesticks.
Chair parts and spindles
 You can see that I’ve had these chair parts for quite a while—in fact I would guess I’ve had them for at least 6 years. I actually made some other candlesticks and finials years ago out random items.
Cut to varying lengths
 I began trimming the chair legs into different heights.
Combine spindles and bases
 After getting some bits and pieces, I started designing my new candlesticks.
 I just LOVE playing with bits and pieces. Doing easy projects like this really makes me happy.
Look for random scrap pieces for your base
 Can you guess what parts I grabbed from this scrap pile? Yep, those random square blocks that came off of this drawer I used for a headboard bench. I knew when I took them off of the drawer they would make great bases for candlesticks.
Square base on chair legs
 Because the above parts are squared, I decided that it would be nice to leave some squared off pieces on a couple of the chair legs.
 See? Aren’t they a perfect pair?
Repair dowel holes
 There were some repairs I needed to make. Instead of filling the large dowel hole, I used an extra dowel and some Gorilla Wood Glue to fill the hole, then cut it flush with my Dremel Multi-Max, then switched out the head so I could sand it.
Attach bits and pieces with wood glue and brad nails
 After plugging the hole I patched it with some wood filler. I used my Ryobi nail gun and Gorilla wood glue to secure all the pieces together.
 It was fun putting all the pieces together like a puzzle. You can see where I patched the holes on these chair legs.
Paint diy candlesticks
 Time to paint! Painting these by hand would not be fun at all. All those turned chair legs? They were begging for the Homeright Finish Max treatment! As always, I started painting them upside down.
 Of course I used my old standby of diy chalky paint primer in some new oops paint.
Glaze scrap pile candlesticks
 I wanted a nice glazed look for my candlesticks so I used some Heirloom Traditions dark umber wax. Another great option is my favorite smoked glaze.
 I love their mismatched look!!!

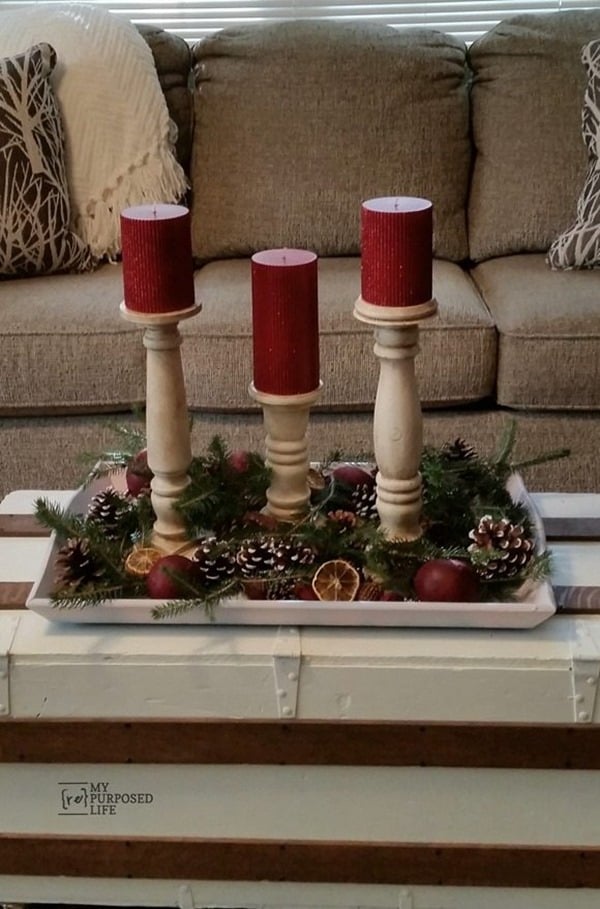
Scrap Pile DIY Candlesticks as Christmas Decor
 I used three of them to make this fabulous arrangement in the living room.
Related Content: Candlesticks Made With Glass Chandelier Parts
Thanks for Sharing & Saving on Pinterest!

Gail, the candlesticks are perfect! No one would even suspect these were made from wood scrap pieces. Very pretty!
I’ve been making these for a couple years and always struggle with cutting them perfect. Because frequently the dowels/ spindles get more narrow on one end and thicker on the other. I find the chunky they are the easier they are to work with. Do you have any suggestions?
Renee
I try to use clamps when I can. I also routinely flip the piece around to see if holding it on one end of the spindle is better than holding it on the other end. I always use extreme caution, take my time and hold the wood very tight, and recommend you do the same.
a shim under the end you’re holding may help keep it level. You could even TAPE the shim in place so that the spindle is held in place.
Although these are tips from me, it is UP to YOU to keep yourself safe when using power tools.
I’m about to do some of these today, you can see them on the blog next week. 🙂
be safe!
gail
Those are awesome! Very clever and I must now go and see if I have anything useable in my scrap pile! It is quite a small scrap pile, but you have given me ideas about what to look for when out and about to enlarge it!
my stupid computer gives me a hard time trying to reply and leave comments, I love,love these gail ad I do have some bits and scraps that I might be able to make some xx
Gail this are so pretty!! I love the finished look, and they look sooo expensive! I love them!! Great project, I think I need a fun easy project to do…too many hard ones lately, glad you had fun with these! 🙂
those are AWESOME! i need to learn how to use wax for glazing like you did!