Spindle Crate
As an Amazon Associate, I earn from qualifying purchases.

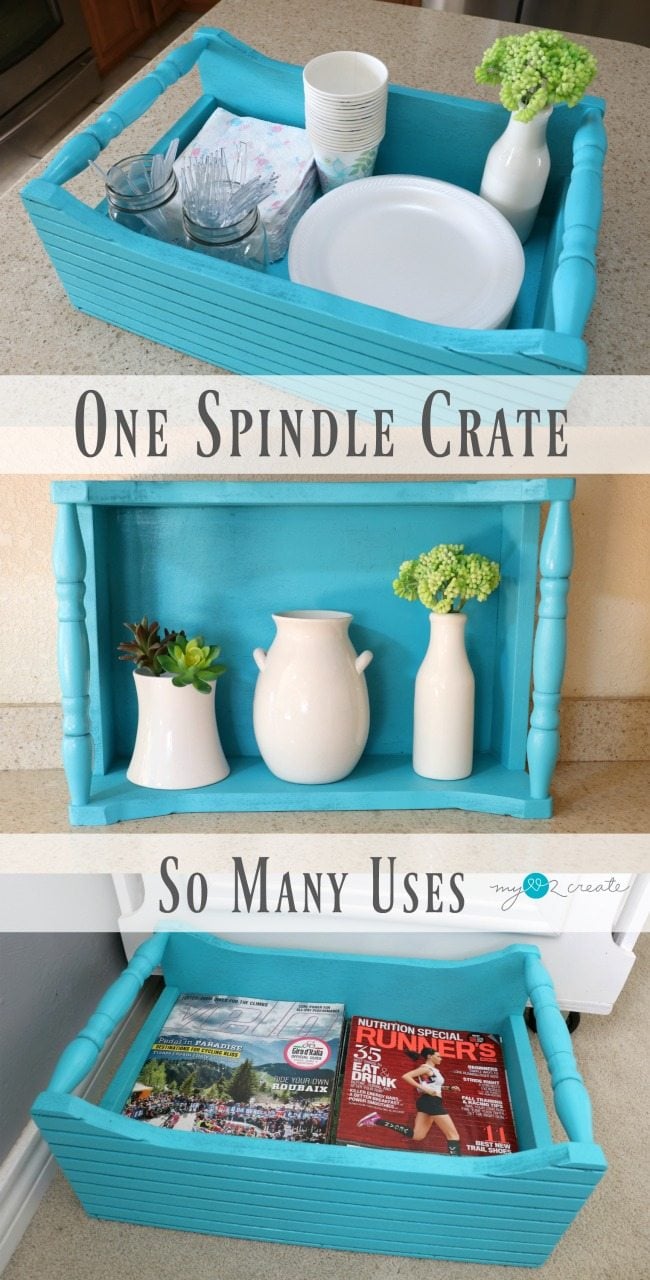
See what I mean?! Cute and useful!
Now let me show you how easy it is to build!
How to build a spindle crate
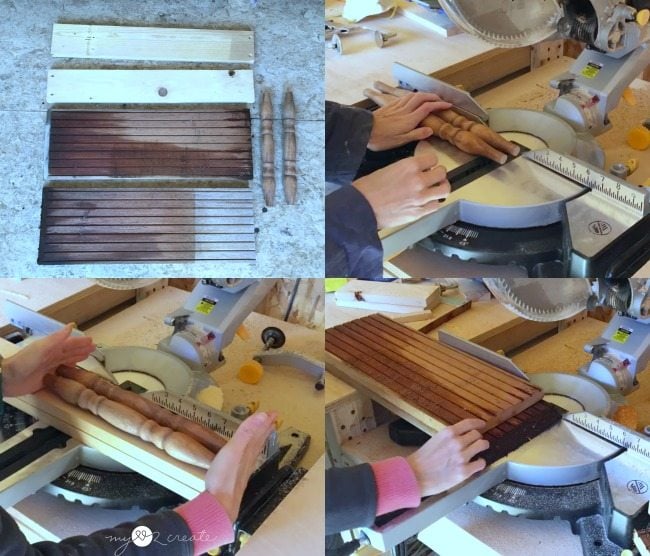
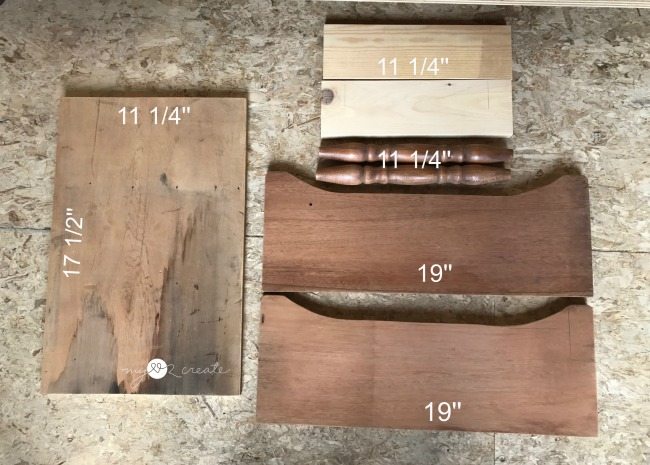
All scrap and reclaimed wood for this crate. I used 1×4’s, 1×8’s (the boards with grooves, not sure what this wood was used for), a 1×12 (not pictured), and then some spindles from an old chair. I cut the spindles and the ends the same length, and then the long sides.
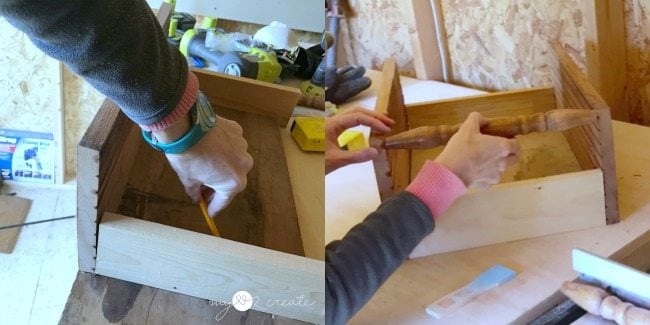
Now I needed a bottom piece. I found an old 1×12 board and it was the perfect size. I had cut the ends and spindles at 11 1/2” so I just needed to trim them down to 11 1/4” so they would be the same width as the bottom board. Then I used a long side piece and the ends to mark how long to cut the bottom piece(left). On the right I am doing a dry fit to make sure everything matches up.
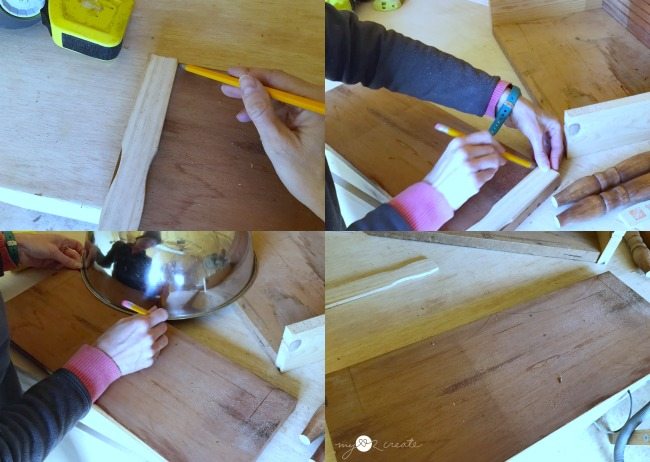
While doing my dry fit I realized that I wanted some sort of scallop on the long sides. I grabbed a 5 gallon paint stick and used it as a guide on the sides, it is 1 1/2” wide so that is where I started my semi circle that I traced with a bowl (bottom left). I ended up doing two scallops (bottom right).
Use a jigsaw for the detail cuts
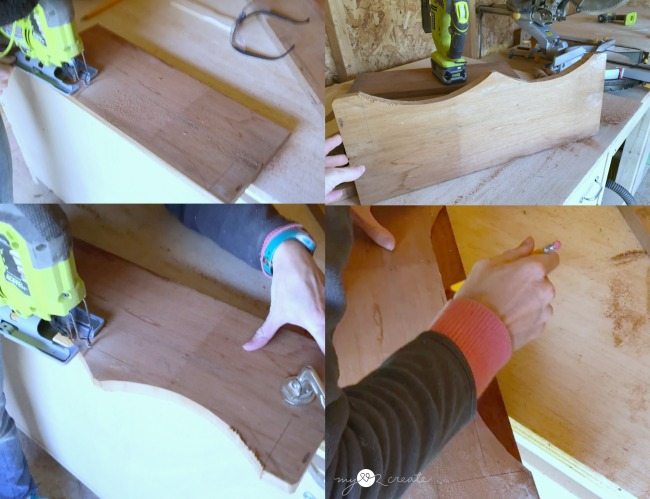
With my design traced on I grabbed my Jig Saw to cut it out (top left). When I finished (top right) I didn’t love it…so I drew a straight line to connect the bottom of the semi circles and cut off the excess (bottom left), I liked it much better. Once it was cut out I traced the shape onto the other side board (bottom right) and cut it out as well.
Parts for Spindle Crate
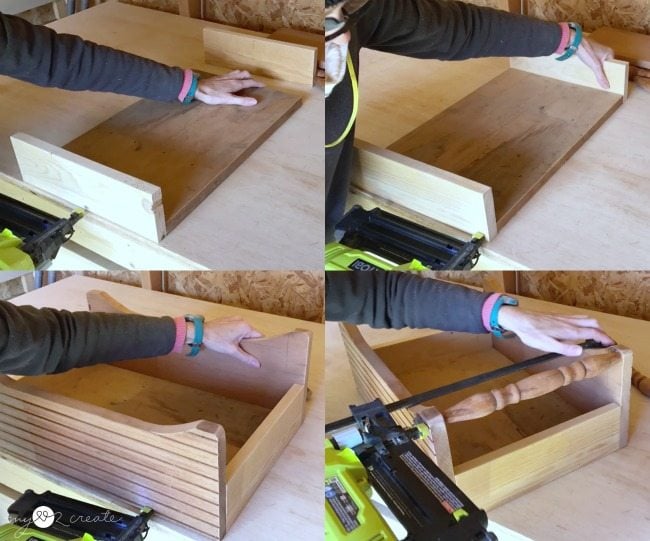
Assemble the Crate
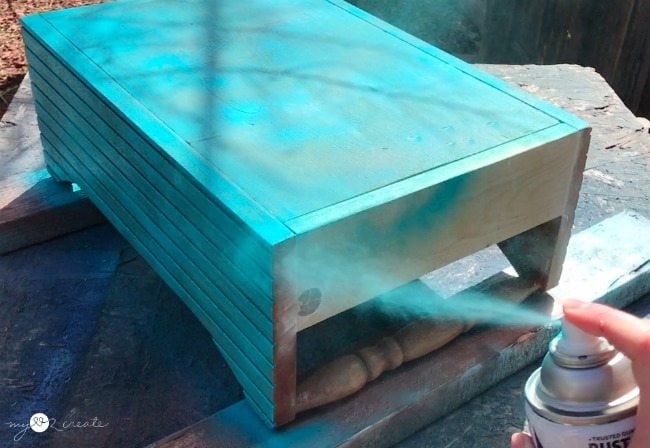
Time to Paint
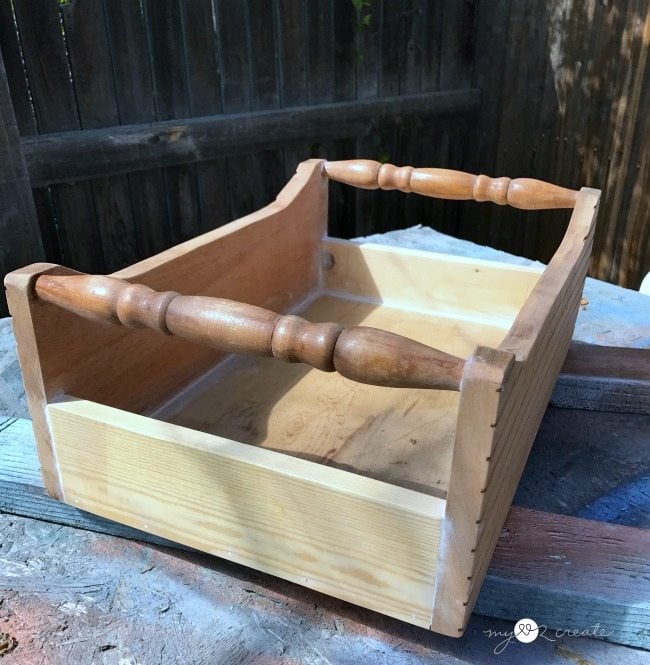
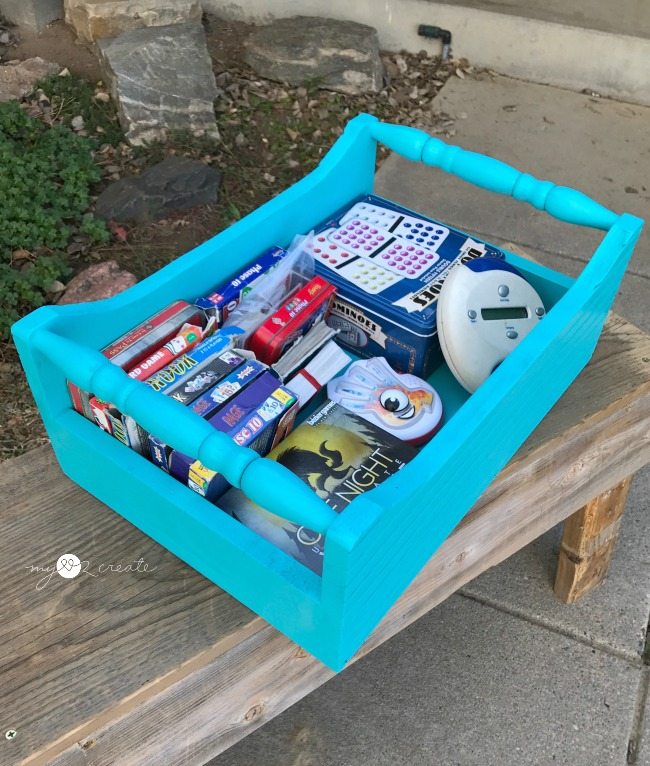
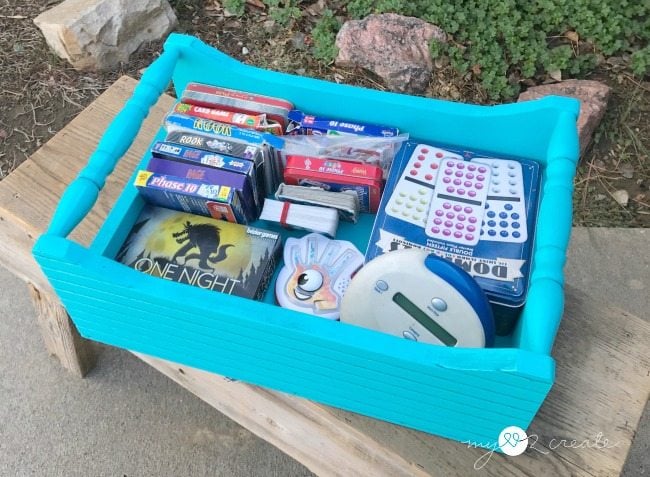
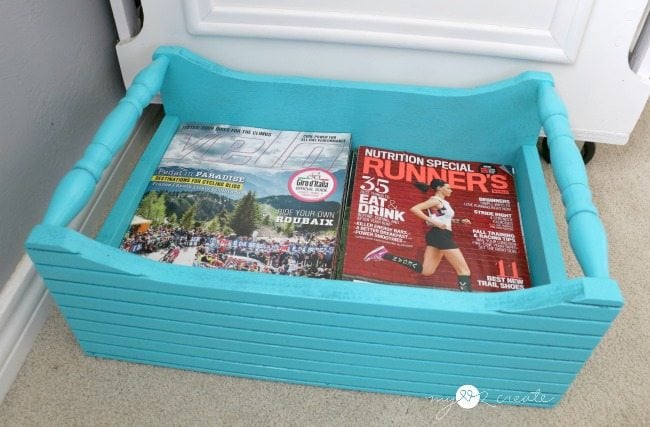
Wooden Spindle Crate for Storage
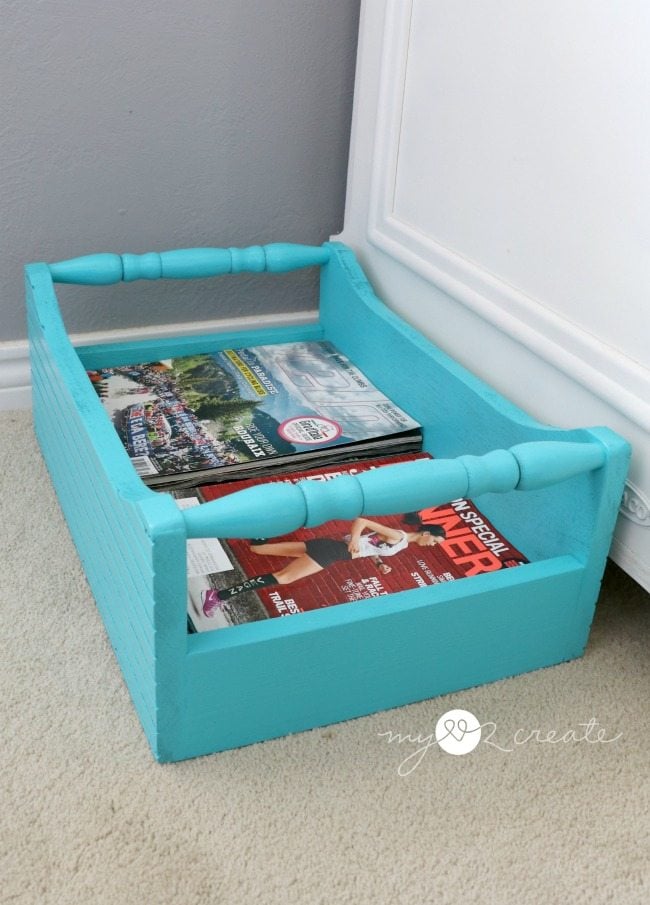
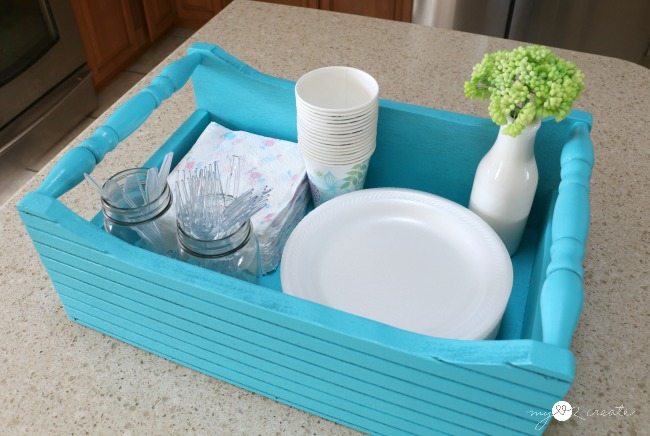
Wooden Crate for Special Occasions
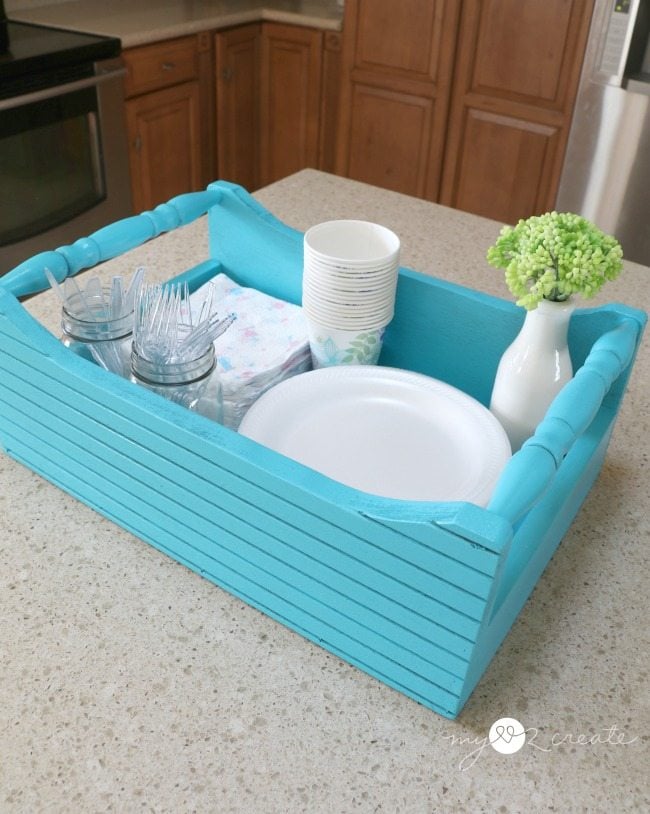 Since I was trying different purposes for this crate I headed to the kitchen. You can never have enough ways to keep your paper goods organized when hosting a party…
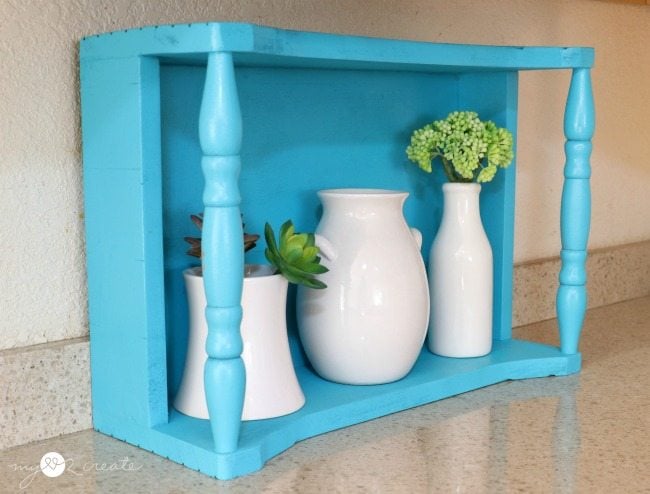
Wooden Spindle Crate for Decor
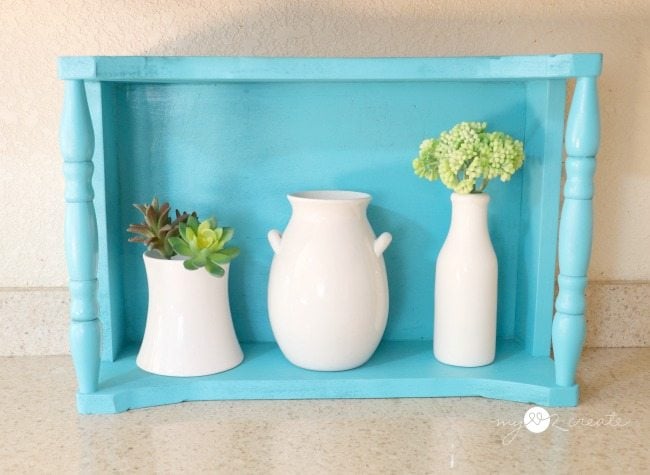
I love your little crate;especially on its side as a small shelf unit. I would have it filled up with doo dads before you could finish blinking!
What a great reuse of all that scrap wood Mindi – and so many pretty ways to use it!
I have a question about attaching the spindles. You used 3, 2 inch nails on each side so a total of 12 nails in those little spindle legs? Is that correct? Using that many didn’t split them? Are they finish nails?
HiCathy! Yes I did use finish nails, three in each side so that would be 12 total. I put them very close together at the center. I had no problems with splitting. If you don’t have finish nails, you could pre-drill a hole and add 2” screw instead, but be sure to pre-drill first, or you could have problems with splitting. I hope that helps!
A BLUE spindle crate! What a surprise. 😉 I really like the design, and agree about changing the double scallop. I love it just the way it is.And icing on the cake? How versatile and useful it is. Way to go!
Great tutorial with lots of tips. Thanks for sharing here on MRL.
gail
Thank you so much Gail, you know I love my blues! 🙂 Thanks for letting me share on your blog, It is such an honor!