Storing Reclaimed Lumber | The Woodshed
As an Amazon Associate, I earn from qualifying purchases.
Storing reclaimed lumber has been an issue for me in recent years. I don’t search out reclaimed lumber, but when it finds me—I rarely turn it down. And old saying in our family “it’s not eating anything” so why not store it?
I got this stuff almost 3 years ago and I still have some of the fence boards and 2×4’s. Are you ready to see the ugly truth of where I’ve been storing it?

yikes! This is a long narrow building attached to a garage. Way back in the day I used it for my Finish Max painting projects. For the last couple of years it has become a dumping ground. Don’t get me wrong, I would still grab lumber from here—but it had pretty much become useless as a storage solution. The roof has leaked for years, so I haven’t been able to store much more than reclaimed lumber here. Years ago there was an overhead light fixture, but some people who tried to repair the roof tore it out. ugh!

Shameful, right? I only show a really ugly before picture if I have a fabulous AFTER picture . . .

. . . not yet! ![]() First I have to show you how it was coming along. One of the major problems of the woodshed was how dark it was without a light. See how bright it is? While planning the makeover, Rodney (neighbor) and I discussed a skylight. But, that was too expensive! We improvised with one of those huge windows on the right. At this point, the original roof had been torn off, repairs of rotted wood had been made and Rodney cut the hole in the roof where the window would fit. Had it not been so well lit, I wouldn’t have been brave enough to go in there and clear this stuff out.
First I have to show you how it was coming along. One of the major problems of the woodshed was how dark it was without a light. See how bright it is? While planning the makeover, Rodney (neighbor) and I discussed a skylight. But, that was too expensive! We improvised with one of those huge windows on the right. At this point, the original roof had been torn off, repairs of rotted wood had been made and Rodney cut the hole in the roof where the window would fit. Had it not been so well lit, I wouldn’t have been brave enough to go in there and clear this stuff out.
I helped Rodney on the roof on the first day, and thereafter whenever he needed help. But my job quickly became clearing out the woodshed. The upper shelf on the left held some deteriorated sheetrock and lots of fluorescent bulbs for the garage. The work bench in the back AND the upper shelf were full of feces! Huge clumps of poop!!! I’m not sure if it was raccoons or possums. I really don’t care. It was so GROSS. I donned safety goggles, you know, the kind you wear for science experiments—a hat, mask and gloves to clean all that up. Then I promptly removed it all so that the critters would lose their outhouse!

VOILA!
Empty AND clean! It’s not the best building in the world, but it’s what I have. Hindsight 20/20, I now realize that we could have easily put in a couple of windows in the walls. A window in the back would be really helpful. Oh well. You can see the sun shining through the roof/ceiling onto the floor.
The hardest part of organizing

The hardest part of organizing any big job is deciding what to keep and what to toss. I kept the reclaimed lumber sorted as I pulled it out of the woodshed. Some of it is for building projects, and some of it is for Etsy signs. I don’t want to use premium fence boards for building when I need it for making pretty rustic wedding signs.

Funny story! I have had these barstools for a few years. I took them apart and saved the turntable that makes them swivel. Then they sat upside down in the woodshed waiting for a useful purpose. I decided to put them to the curb. I carried one to the street and set it down as you see here. Suddenly it occurred to me that the two of them would actually sit right next to each other making a great double chair bench! Needless to say, I brought them back to the woodshed.
I did end up putting a LOT to the street. I like to put stuff out a couple of days before garbage pickup to give scavengers a chance to rummage. It worked. By the time the garbage man came, all the good stuff was gone and the only stuff left was worthless.
ps I also kept the two bases for these stools.
Video tour Storing Reclaimed Lumber

You can watch the video, or check out the pictures below . . .
Storage options for junk and reclaimed lumber

Utilizing wall space is a great option to keep things neater. I inserted long screws that allowed me to hang a patio table, leftover lattice work and more. The lattice is very old, but I put it to good use making a garbage can enclosure!

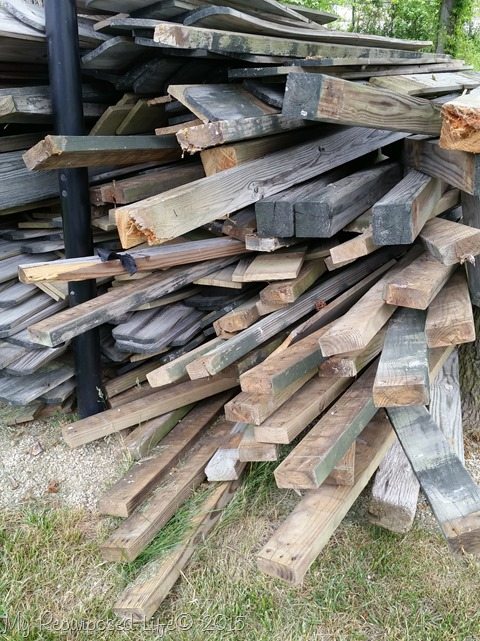
Vertical storage of reclaimed lumber is the best way to easily sort and grab just what you need.
This woodshed naturally gathers yard debris and leaves. It will be nearly impossible to keep the floor tidy unless I install doors across the front. For now, I’m calling it done! I’m so thankful to be able to use my rolling paint table and my large work table (also on wheels) again! I have already used both tables in the last couple of days.
Next week I’ll share a little about the roofing process, using a reclaimed window as a skylight and forming your own flashing.

One more look at the amazing empty space! I’d love for you to share this with your friends on Pinterest!
gail
We live in a 95 year old house without a garage so we too have a shed (2 actually) that look like the before photo. I’ve been out of the “business” for several years & have thrown much to the curb but the sheds never seem to empty. What if we were to get rid of it all & then find we needed something? Great job on the hard work of cleaning it up!!!
I totally understand that Gabby! I’ve been busy collecting more wood over the last week. I have lots of stuff to work on.
gail
I hope I can create some things from your great examples. You have also inspired me to build a lean to on the side of my garage. Love to have a dedicated place to store my precious “junk”! Thanks. I’m glad I found you!!
Awesome Dianna! Wishing you lots of luck. Happy you found me too!
gail
I love the story about the stools! It’s always nice to get things organized, I need to do some of that myself.
Unfortunately messy sheds and garages are the norm for those of us who like to repurpose. We can’t turn down those treasures we find on the side of the road or that friends give us (they know our weakness and use it to clean their own sheds lol). We think we have it all under control and then, one day we open the door and realize we should be on an episode of Hoarders! Great job cleaning up your wood shed! It looks great!
hahahah so true Pam!!
It’s a good thing I’m not one of your neighbors. I’d be WAAAAAY too tempted by the stuff you kick to the curb, and I’d end up with a garage more crowded than your “before” woodshed! I do think it’s really nice that you put things out prior to trash day to give people time to scavenge. Makes them happy, and less goes to the landfill!
ohhh, Love your comments Judy! Thanks so much for being so like minded as me! 🙂
gail
Perhaps you can use some windows to close off half of the open end of the shed to help keep debris or critters out. I see window walls in treehouse tv shows and they are cool. Or build some barn doors to enclose it. And if you have some narrow windows that won’t be useful, put them up high in the side wall for light.
All great ideas Terri! Thank you!!!
I got some spray stuff, hoping it helps keep the critters away!
gail
amazing. makes me just tired looking at all that work you did… lol
Love the video Gail! Wow that space has really been transformed!
Debbie
You are sooo talented. I don’t know if you have ever checked out Shanty 2 Chic? They built storage for all their lumber in their garage I think. You could add rollers. I could so see you doing that too! Guess you could use an old filing cabinet too. You are always such an inspiration! Thank you!
Jamie,
Yes, I know the Shanty girls. I have built storage and tool carts for my REAL garage. This is just temporary storage for the woodshed. Thanks for that suggestion. I appreciate your comment!!!
gail
What a transformation! Nice “sky light”, too!
Thank you Fonda! I’m soooo happy this is behind me. I’m really enjoying my “new” space and having my work tables back! The secret is to JUST begin! So often I look for where to start or what to do. The key is just get started. There’s no right or wrong way. 😉
gail