RV Arrival Checklist
As an Amazon Associate, I earn from qualifying purchases.
Things to remember when you arrive at a campground, plus a camper checklist!
As a newbie, I found early on that having an RV arrival checklist was a must.
So, you’ve arrived at your campground destination, now what? Check in with the gate attendant and confirm your campsite. Ask for a map of the campground. These campground maps will generally have the campground rules and important information. You will also receive a “hang tag” for your vehicle. Display this in your window so it is visible to the campground hosts as they make their rounds.
The Campground Hosts are There to Help You
If you’re uneasy about backing into the campsite, ask the gate attendant if they can “spot” you. These folks have a lot of experience with their own campers, and are pretty adept at helping even the most novice drivers achieve this task without any damage to their camper and tow vehicle. If you’re new to the campground, you can also ask for an escort so you can find your campsite easily without driving around in circles.
After you’ve parked your travel trailer, (see step #1 on the rv arrival checklist below) you’re ready to set up and unhook your camper from your tow vehicle. These tips are for travel trailers, and some are not relevant for a Fifth Wheel or a Class A, B, or C.
There is a specific order to unhooking your camper from your tow vehicle. On my first trip out, I totally messed up the whole anti-sway bar thing. That is when I didn’t have my own rv arrival checklist. That’s when I was parking the camper with them still on.
What’s the first thing to do? It’s not on the checklist, but the first thing to do is take a deep breath.
Visit my Amazon Store to See My Favorite Camping Items
I’ll list the steps (with an explanation) and near the bottom of the post, you will find a checklist to print out and take with you on your next trip.
Camping solo? See my article RV Camping Solo for great tips about camping alone.
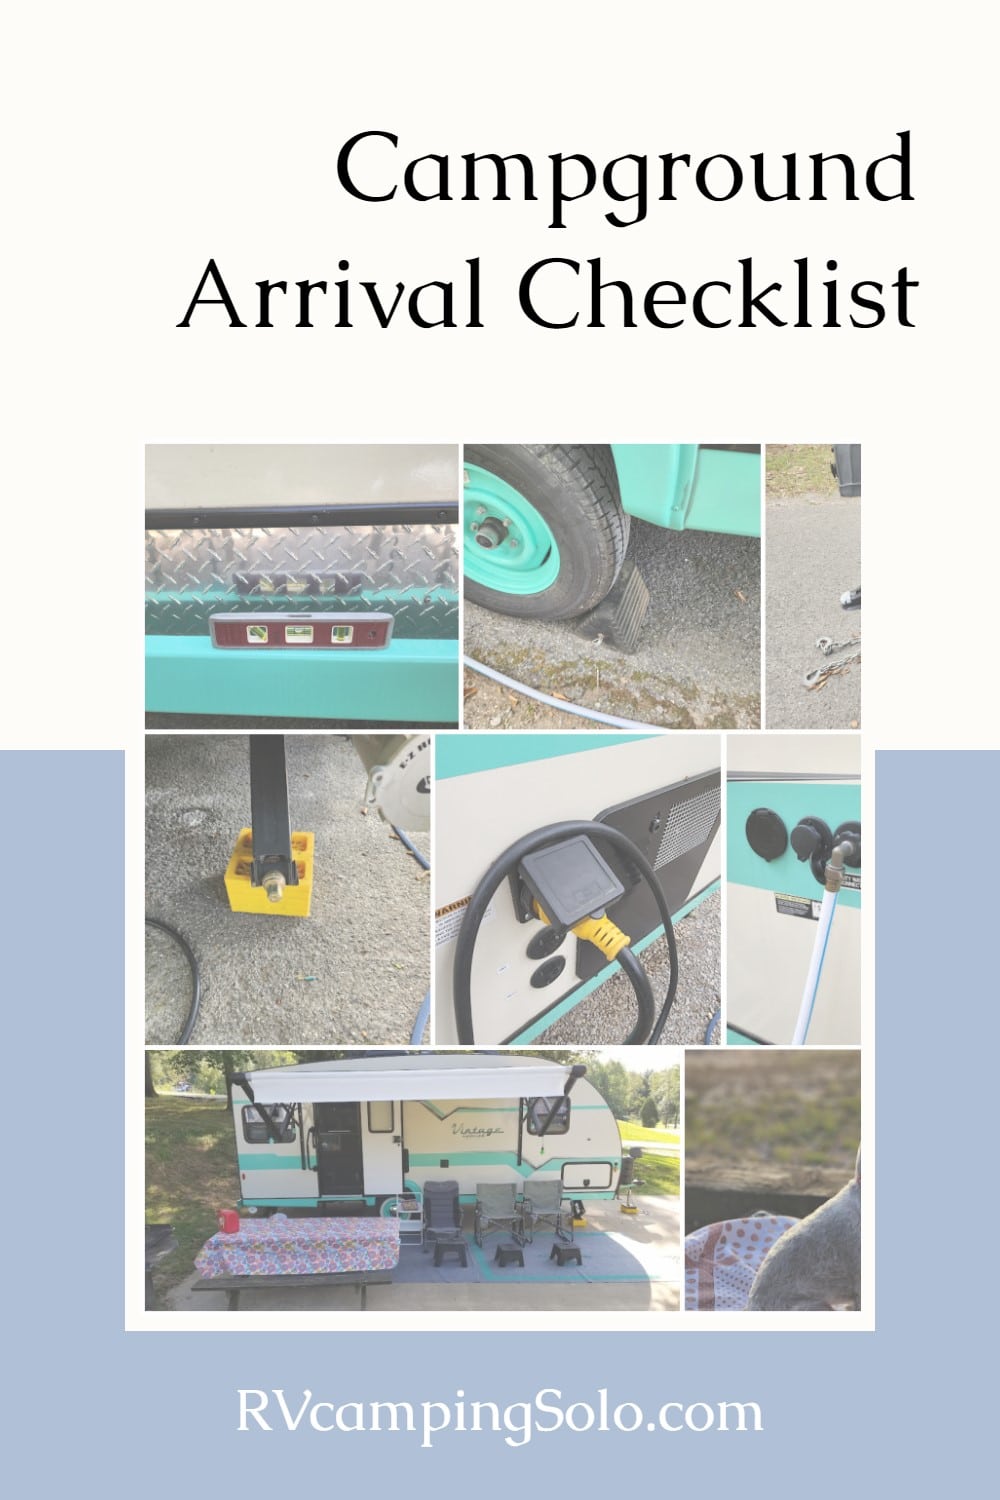
20 Step RV Arrival Checklist for Camper Setup

- Remove Anti-Sway Bars (Sometimes tight turns while backing in can put your anti-sway bars in a bind)
- Back In GOAL-this stands for Get Out and LOOK! Seriously, if you’re rv camping solo, and you don’t have someone to help you, it’s so important to know exactly where the back of your camper is going. Adjust as needed. I have been known to pull up and try again. If you really get screwy, pull away, make a loop and come back to make a new approach. Yes, people WILL be watching you, it’s what we do. But just know that everyone has been right where you are and they are NOT judging you.
- Parking Break ON Seriously, do not walk around your camper and tow vehicle while it’s running without setting the parking brake.
- Check for Level Get your level out and see that your camper is level from side to side. If not, this is the time for you to pull up onto a leveling block of some sort. You will thank me for this tip. It’s something I didn’t do for the first couple of years. Being unlevel from side to side can interfere with your fridge, and your doors. Sometimes it can even mess with plumbing and cause leaking in the bathroom or shower. I place the level on the back bumper, and I even go inside the camper to test the bathroom door.
- Chock Camper Wheels I use these wheel chocks. I place one in front of the wheel on one side and in the back of the wheel on the other side.
- Disconnect Chains and your breakaway cable from your tow vehicle.
- Unplug the 7 Pin Plug I prefer to do it at this point, so that it is NOT plugged in to my truck when I connect shore power.
- Unlatch and Raise Jack Remove the safety pin, unlatch and raise the jack off of the trailer hitch. Note: it might make a loud noise, your camper may move slightly when it’s disconnected. THAT is why you have to have your wheels chocked.
- Pull Tow Vehicle Forward Now you will need to pull your tow vehicle forward so that you can lower your jack. (don’t forget to reset that parking brake)
- Adjust Jack for Level Find a good place to rest your level so that you can make sure your camper is level from front to back. I place my magnetic torpedo level on one of my storage compartment’s ledge.
- Turn Breaker Off Now it’s time to connect to shore power. Make sure the breaker on the electrical box (on the pole) is turned off before you connect.
- Connect Shore Power from the pole to your camper. Flip the breaker on, and confirm that you have electricity in your camper.
- Connect City Water Connect your drinking water hose from the CITY WATER connection on your camper to the faucet. Tip: Make sure your water is turned OFF in the camper. If you don’t have full hookups, you don’t want to accidentally have a faucet on inside and add unnecessary water in your gray tank.
- Confirm Water & Power Are On When camping with others, it’s great to have someone be inside while you’re outside. However RV camping solo doesn’t allow that luxury.
- Lower Stabilizer Jacks Utilizing the stabilizer jacks will make for a much smoother camping experience. I use an adapter on my drill so I don’t have to do this task by hand. However, I do carry the original tool with me “just in case”. These jacks are not intended to SUPPORT your camper, but merely to stabilize it so it doesn’t rock.
- Turn on Propane If you will be using a gas stove, or gas water heater, you will need to turn on the propane. If you have hybrid, use shore power (electricity) instead of propane. You’re not charged for the electricity you use. 🙂
- Turn on Fridge There are lots of opinions on traveling with the fridge on. Whether you do or don’t is up to you. There are some regulations and statutes about driving with propane on while in particular states and/or going through tunnels. It can also be an issue when refueling your tow vehicle at the gas station. This is not for me to decide for you.
- Turn On Water Heater Trust me when I say you don’t want to forget this. After a long day of driving and setting up, you don’t want to end the evening stumbling around with a flashlight so you can take a shower. Yeah, been there done that. Another detriment to camping solo, you’re on your own here!
- Hook Up Sewer Line yes, if you’re lucky enough to have full hookups, it’s now time to connect the sewer hose to the connection in the ground. Generally, I camp at state parks, with only water and electricity hookups at the site.
- Set Up Chairs, Rugs, Grill Etc If you’re new to camping, even if you’re going solo–you will be surprised at how much stuff you carry along with you! If you still have the energy, you will be thankful you did this upon arrival. The next morning you can leisurely fix that morning coffee and relax at your campsite.
Do you have questions about my rv arrival checklist? Simply leave a comment and I’ll reply as soon as possible.
As promised, here is the checklist to download. Click the image below, it will open in a new window. Select SAVE (download arrow) or PRINT in the upper right corner.

Is there any item on my rv arrival checklist that you don’t do? Did I miss anything?