Wooden Silverware Box Makeover
As an Amazon Associate, I earn from qualifying purchases.
For this month’s Thrift Store Décor Makeover, I’m sharing how I changed up a wooden silverware box with some paint and paper clay appliques made with IOD molds.
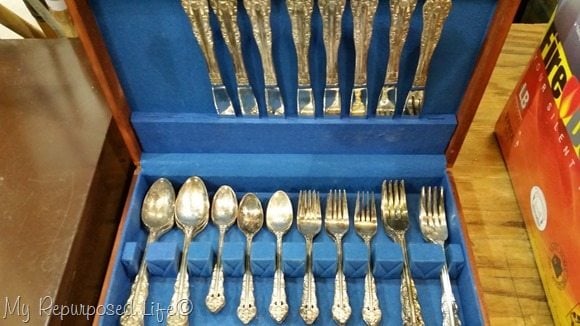
Late last Summer I came across this silverware box from Joey’s booth at Vendors’ Village.

I ended up sending some of the silverware to Betsy from My Salvaged Treasures in exchange for her making me a sweet necklace from one of the pieces.
How to strip the inside of a lined silverware box

So, that left me with a silverware box that I could repurpose. I’m sort of addicted to buying boxes. I think they are cool in all shapes and sizes.
 Removing the lining of the silverware box was quite challenging, but I didn’t give up! That being said, the inside will need to be lined, as painting will not be sufficient.
It’s time to paint the box
 I sanded the finish a little, and used some Heirloom Traditions chalk type paint (Buttermilk) and a cheap chip brush to apply the paint to the outside of the wooden silverware box.

You can see there was some bleed through on the first coat, so I applied another coat.
Impatient crafters use hair dryers

Keeping it real folks—I was a mess trying to get this Thrift Store Décor project done before leaving for Utah (SNAP) today. If you look in the background you may or may not see a more than messy kitchen. The sewing machine was drug out of the basement on Monday to hem some jeans for the trip.
The paint continued to bleed through, so I tried using some white semi-gloss paint I had on hand. That paint STILL wouldn’t cover the bleeding of the tannin in the wood.
It will work out . . . somehow!
How to line a repurposed silverware box

I took the inside measurements of the box bottom, and added the height of the sides to it and cut some wrapping paper. A little bit extra was added to allow some room with the paper.
I drew a line on each of the four corners and then used my scissors to cut the corner to allow the paper to fold back on itself once placed inside the box.
 You can see that the cut corners worked really well, and I have a slight lip on the paper all the way around that will be trimmed later.
Here’s the secret to hiding the bleed in the paint. I used Heirloom Traditions Dark Antiquing Patina, which is basically tinted decoupage medium. If I were to do this project again, I would use my favorite Smoked Glaze. It gives such a better color.
Odd way to decoupage?

I used a cheap chip brush to apply the antiquing medium under 1/2 of the paper, on the bottom, front and sides. Then I laid the paper down, then did the same to the back half of the paper.

I did the same to the top.
Okay, at this point, all I can think about is how much stuff I have to do before I leave town. So pictures are scarce.

Not shown-I drilled a hole in order to attach a pull that I bought at Hobby Lobby. I used an exacto knife to trim the paper, and some sand paper to sand back the rough edges of the paper. You could use an emery board.
Add paper mold appliques
 Early in the morning I made some paper clay appliques using my IOD Molds. I’m going to use the ones in the center (top). I had one, but needed to make three more.
It’s so fun to make these appliques for projects.

I did a dry fit of the paper clay appliques to see if the fit okay.
 I sort of painted some Gorilla Wood Glue onto the back of the paper clay appliques to secure them to the top of the wooden silverware box.
 Some of the antiquing glaze was used to highlight the paper clay applique.
Repurposed silverware box as a memento keepsake box
 This former silverware box is perfect to use as a keepsake holder. You may also love this silverware box memo project.

I’m thinking I should add another large paper clay applique to the center, what do you think?
Be sure to check out my friends’ projects by clicking the links below.
")
Petticoat Junktion’s Seashell Wall Art
Our Southern Home’s French Farmhouse Candle Holder
Domestically Speaking’s Easy Mason Jar Candle Lantern
My Repurposed Life’s Wooden Silverware Box Makeover
My Uncommon Slice of Suburbia’s Upcycled Tray
Bliss Ranch’s Shoe Lasts Wall Hooks
I love it just the way it is! I don’t think I would add any more embellishments to it, it might be too much and make and it look too busy. It came out beautifully!! I have an old one that’s been just sitting waiting for some kind of i spi of inspiration to hit, lol.
Have a great trip!
Thank you Candy for stopping by and taking the time to leave a comment. It’s greatly appreciated.
Have fun with your project.
gail
A primer like Zinsser 1-2-3 would have eliminated the bleed on the inside…..but priming is a pain!
yes, Priming is a pain! Thanks for stopping by and taking the time to leave a comment…. it’s greatly appreciated Lyn!
gail
If you were going to add one to the middle, maybe make it an initial of the last name of the person whose keepsakes would be inside…?
Hi Gail,
This is the first time I’ve seen mention of the IOD molds. And paper clay? Do you have more posts on this that I can go back to, or can you explain what the molds are and how they work and what is paper clay???
Thanks!!! Love everything you do!
Laurie
Laurie
This is my first post using the IOD molds and the paper clay. My friend Debbie did a post here: http://refreshrestyle.com/vintage-decor-mould-iod/
I am loving having the option to make my own appliques whenever I need them.
gail
I love the box and the molds! I do think adding one in the middle will look good! Pinning!
I love what you did with the old silverware box. I knew those pieces looked familiar, lol. Hope you’ve been enjoying your necklace
This is really pretty, love how it turned out, hope you are having a great time at Snap!
looks lovely! great job!
I love the finish you put on the box Gail and the inside is GORGEOUS!
I don’t know about adding another clay piece to the center, but in general those mold things are pretty darn cool. And I might still have my little measuring thing from HomeEc class, Lord knows it didn’t get a work out from me with sewing.