Wooden Valance Box to hide Cord Clutter in the Camper
As an Amazon Associate, I earn from qualifying purchases.
I made this wooden valance to hide cords in my camper. Maybe you don’t have a camper, but I bet you have someplace that you are dealing with a mess of cords. With all the electronics we have these days it’s becoming a real challenge to make all those cords stay neat and tidy.
Cord Clutter under T.V. in the Camper
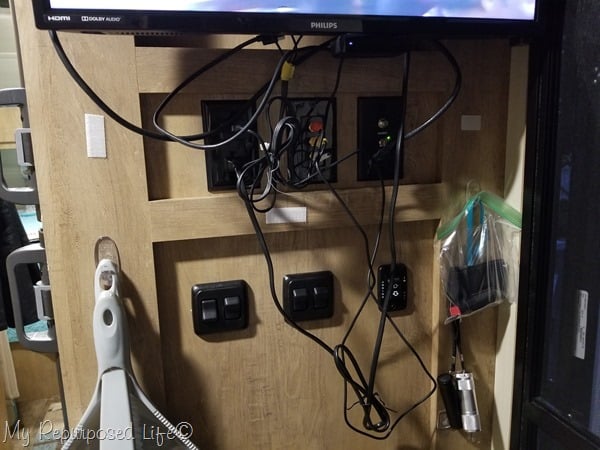 Look at all that cord mess under the t.v. right inside the door of my camper. Between the cords and the three outlets in the panel below the t.v. I was beside myself with what to do with it all. I used some twist ties to try to corral all the mess. It wasn’t working. The mess includes the power cord for the t.v. the audio cords for the dvd player, the cable cord and the ROKU cord. As I said, this right inside the door and I knew I had to get control of the mess!
While camping, I noticed a cute little vinyl covered valance over the kitchen sink window. That got me thinking that some sort of box to hide all the cord mess would be perfect.
*this post contains affiliate links, read more here*
Construct Small Wooden Valance
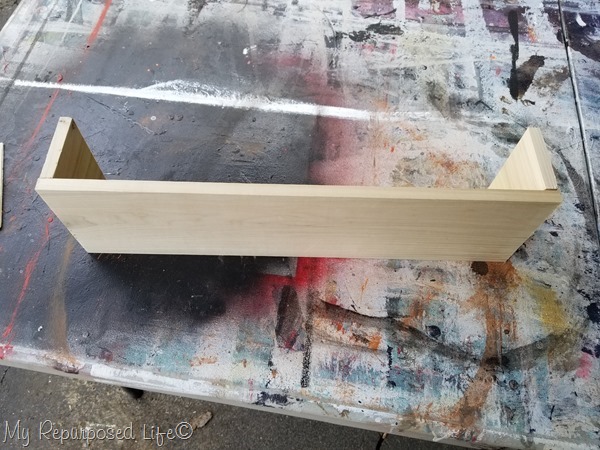
I bought 1/2 “ thick stock at Home Depot and cut the boards to size. I used Gorilla Wood Glue and my nail gun to connect all the boards. Not shown, I also cut a bottom and attached it with glue and nail. Also not shown, I painted it black with regular ole Behr latex wall paint. I’m not sure if I forgot to take pictures or if I accidentally deleted them.
Hang Wooden Valance to hide Cord Clutter
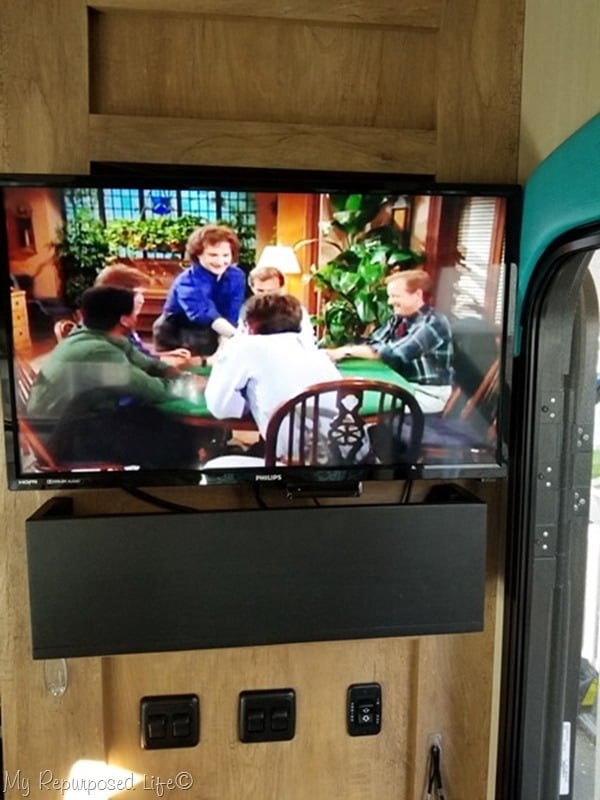
I used Command Strips for picture hanging to hang the wooden valance box. I attached the hook and loop pieces to the wall and the wooden box. I toyed with the idea of using keyhole hangers but I will be hanging and removing this cord cover on a regular basis.
Originally, I thought I might stain the box. However, as I was testing the fit under the t.v. I decided to paint it black to match the t.v. But, I felt like it needed a little something to decorate it.
Chalk Couture Happy Camper Transfer
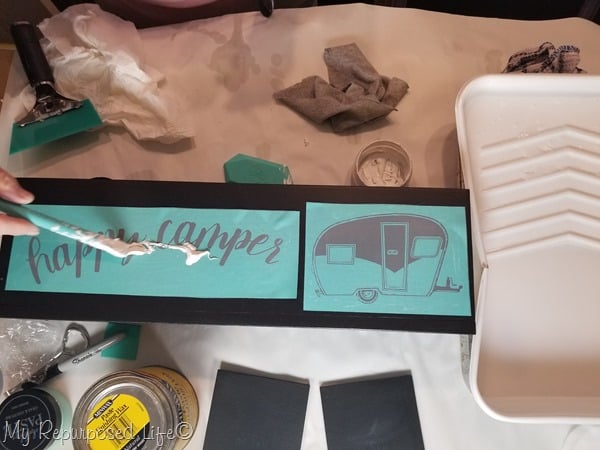
This Happy Camper Transfer from Chalk Couture was the perfect option for my cord valance. The transfer is huge and has several pieces. I chose the smaller camper and the words Happy Camper to chalk onto my new cord organizer.
Apply Chalk Paste
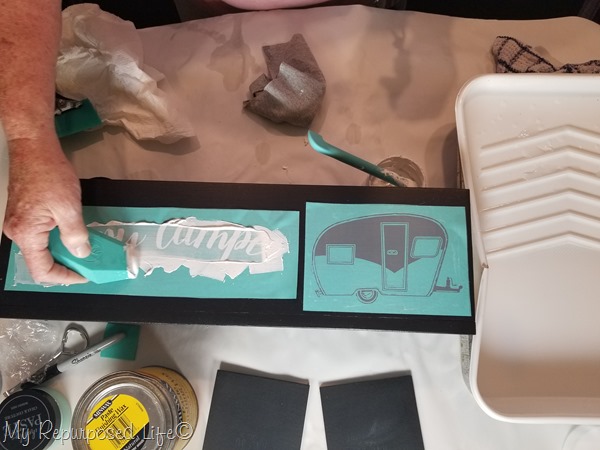
I applied white chalk paste with the angled squeegee, scraping off the excess paste.
Peel away Happy Camper transfer
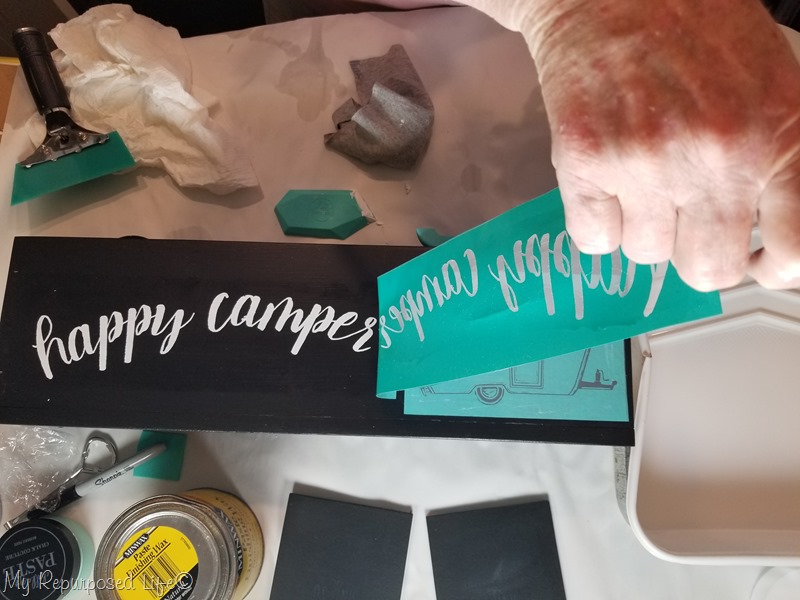
As soon as I finished applying the chalk paste, I peeled the transfer away and placed it in a pan of water. Then I was ready to apply the chalk paste to the camper transfer. Keeping it real, I did this on a facebook live and it didn’t turn out. I was nearing the end of my chalk paste and it was a little dry. But here’s the thing, it’s just chalk paste. It easily wiped away allowing me to give it another try. I added a little water to the jar of white paste and it went on perfectly.
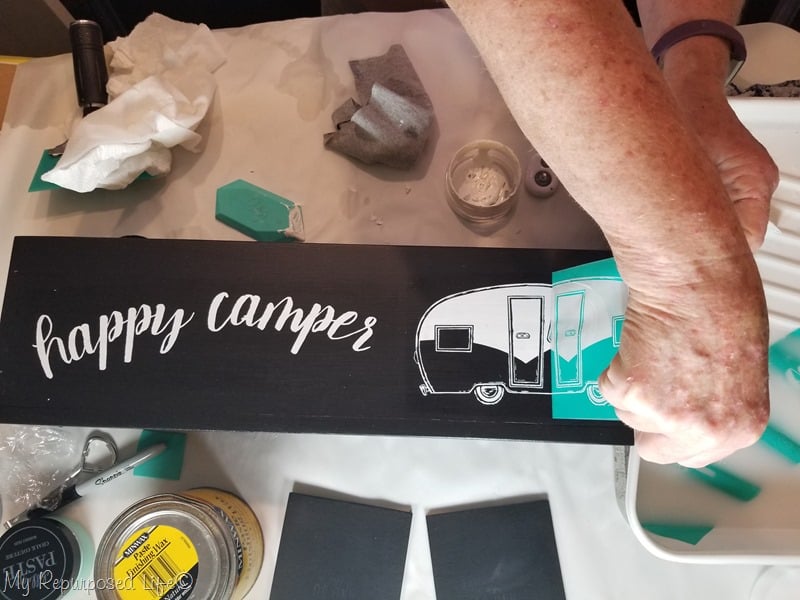 The white paste on black paint is my favorite look for the Chalk Couture transfer projects.
New wooden valance hides power cords and more
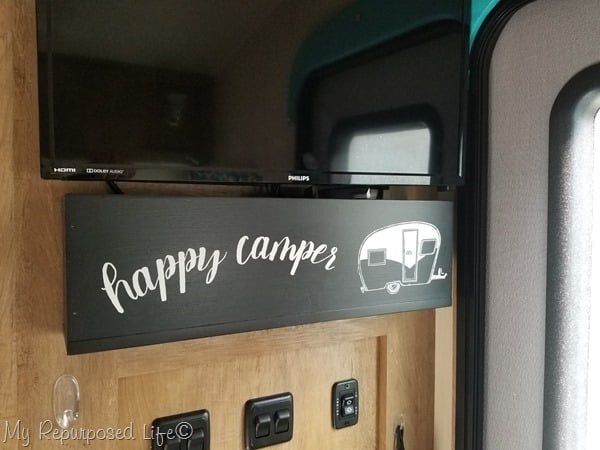 Ohhh, isn’t it so much better? I really am so happy with how this small wooden box covers up all the cords and outlets. I’ll be making me a happy camper t-shirt with this transfer very soon. For the t-shirt I’ll be using Couture Ink that will make the transfer permanent. I didn’t seal this chalk paste, so if I wanted too, I could wipe it off.
I recently spent 3 nights 4 days at Patoka Lake Indiana. It was so much fun. I truly wish I could get some fall weather camping in. It was in the low 90’s on this last trip.
I’m really enjoying the camper and all the little diy projects that make my life so much easier “on the road”. You can see more projects I’ve done for the camper here.
Does this project spur an idea where you could use a small wooden box such as this to disguise or cover up something that annoys you? I sure hope it does! Maybe this project will give you an idea to help hide cord clutter.
gail


Brenda,
I’ve had my own issues with stencils. I’ve done videos and lots of tutorials on stenciling. When I use stencils, I use contact paper in my Silhouette. This product is not a stencil, it’s a screen print available in my online store. They turn out so much better than stencils!
You can see some of my tutorials on stenciling here: https://www.myrepurposedlife.com/tag/stenciling/
You can see videos on youtube here: https://www.youtube.com/playlist?list=PLOqvgP56oqhtblk603H-R9a5u4bnk32JZ
Good luck, let me know if I can help further.
gail