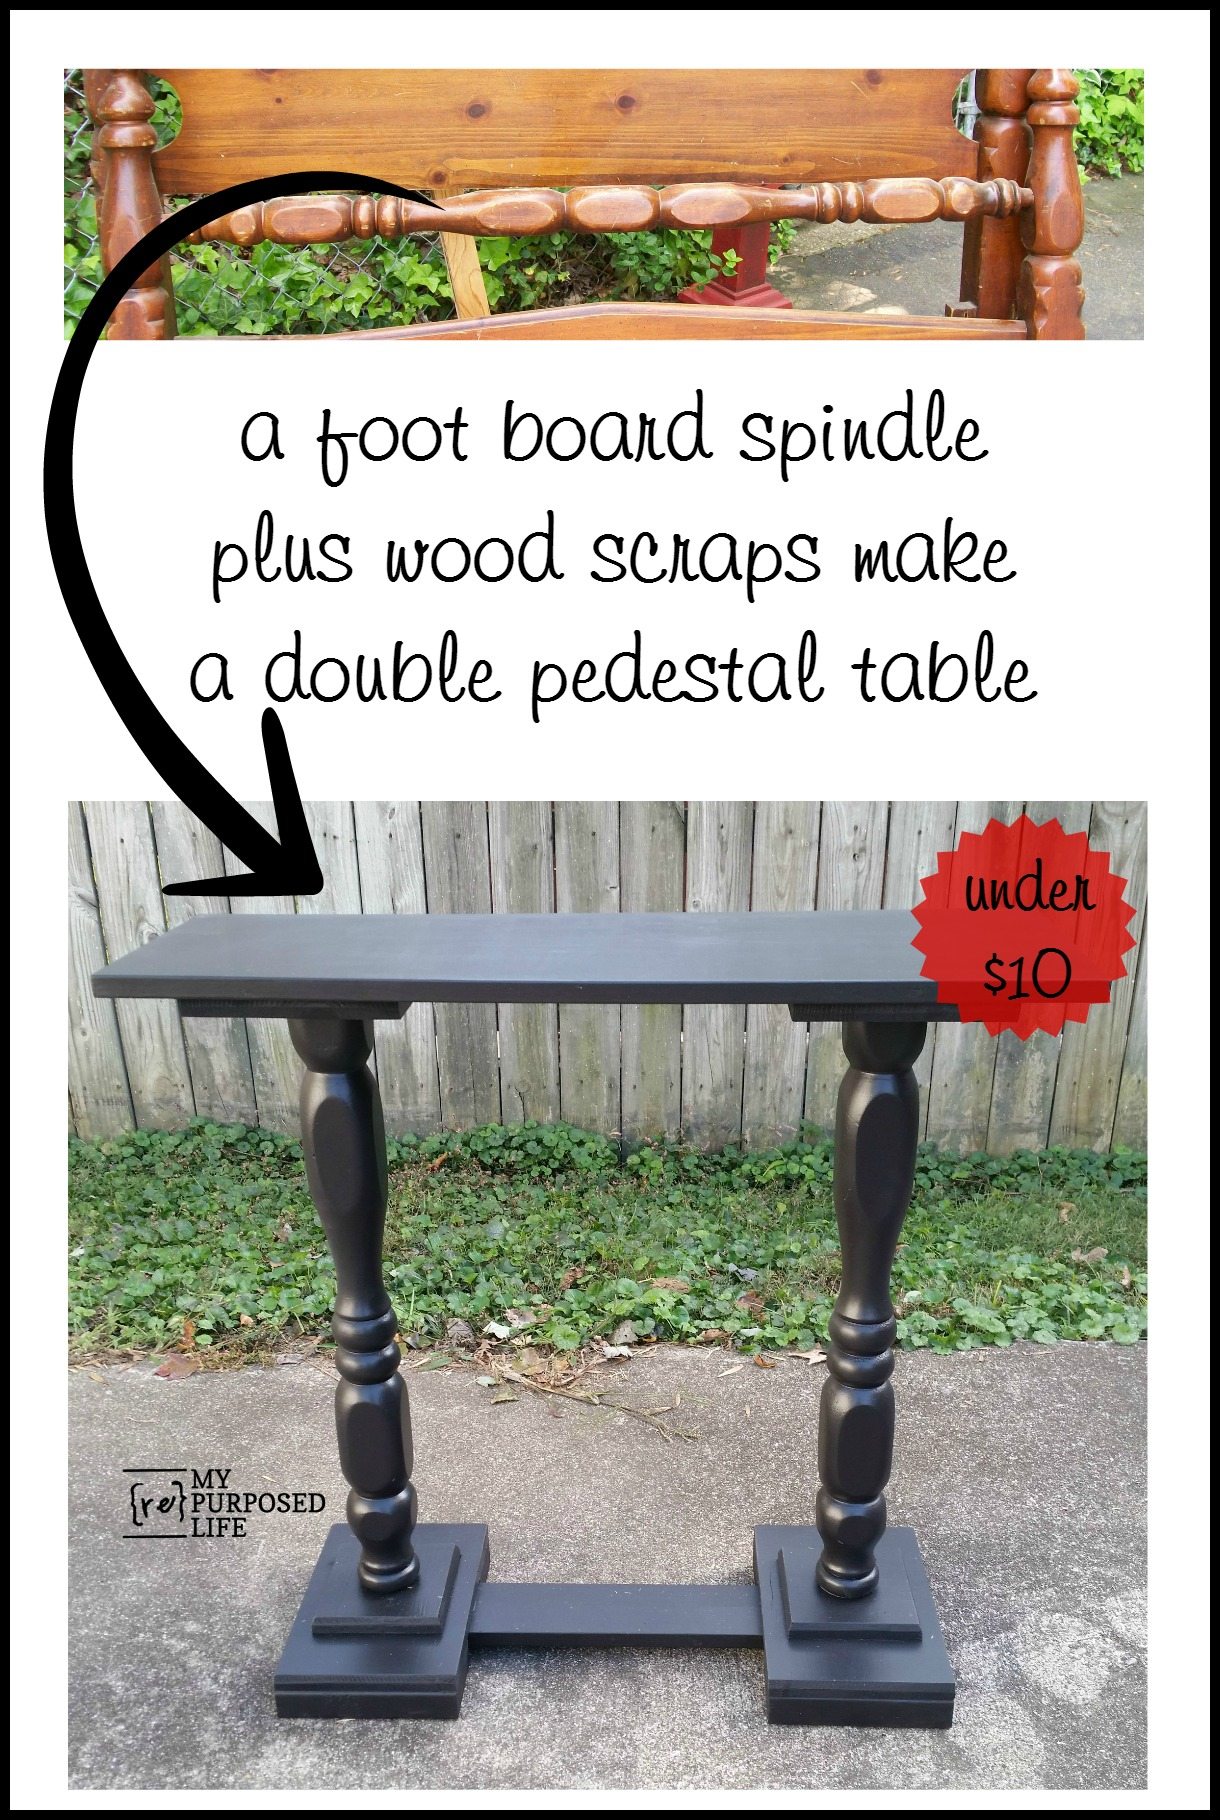
Double Pedestal Table
As an Amazon Associate, I earn from qualifying purchases.
Y’all I’m so excited about this month’s Power Tool Challenge project, a double pedestal table. As always, the team will be showing you what we did, but in addition, you get to join in on the fun!
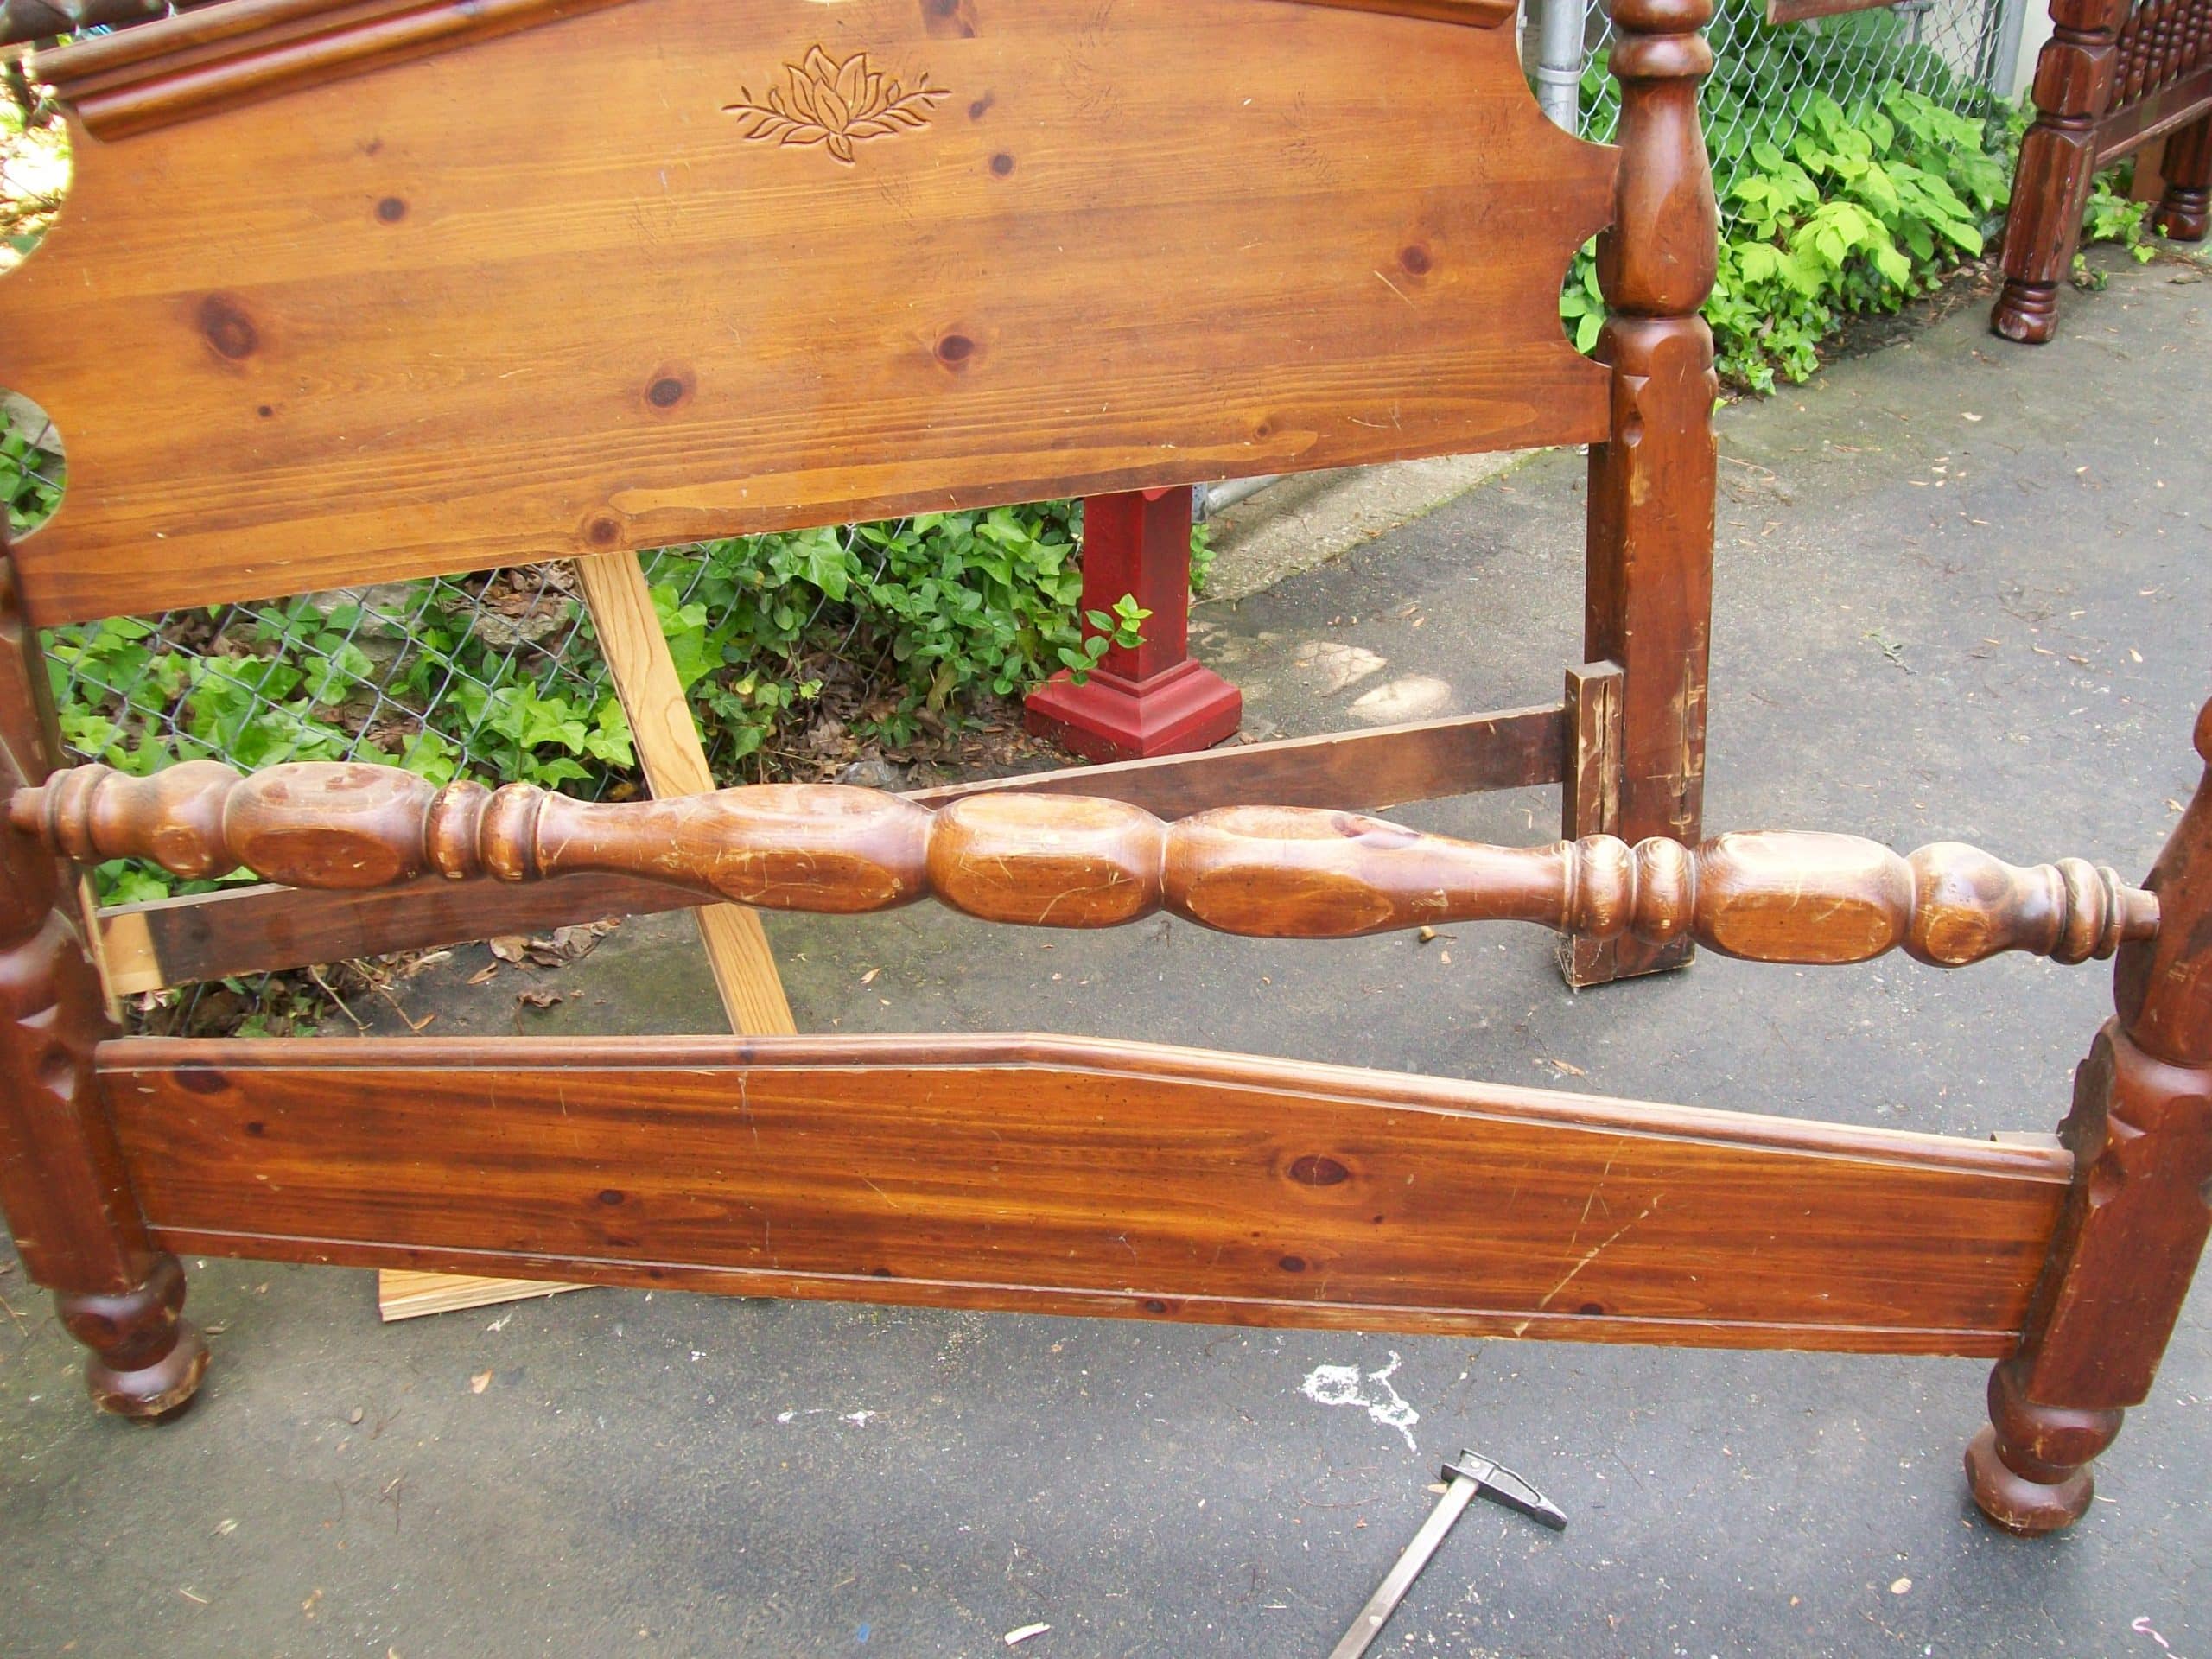
I never throw anything away. When I made a double headboard bench out of the headboard, I parted out the foot board.
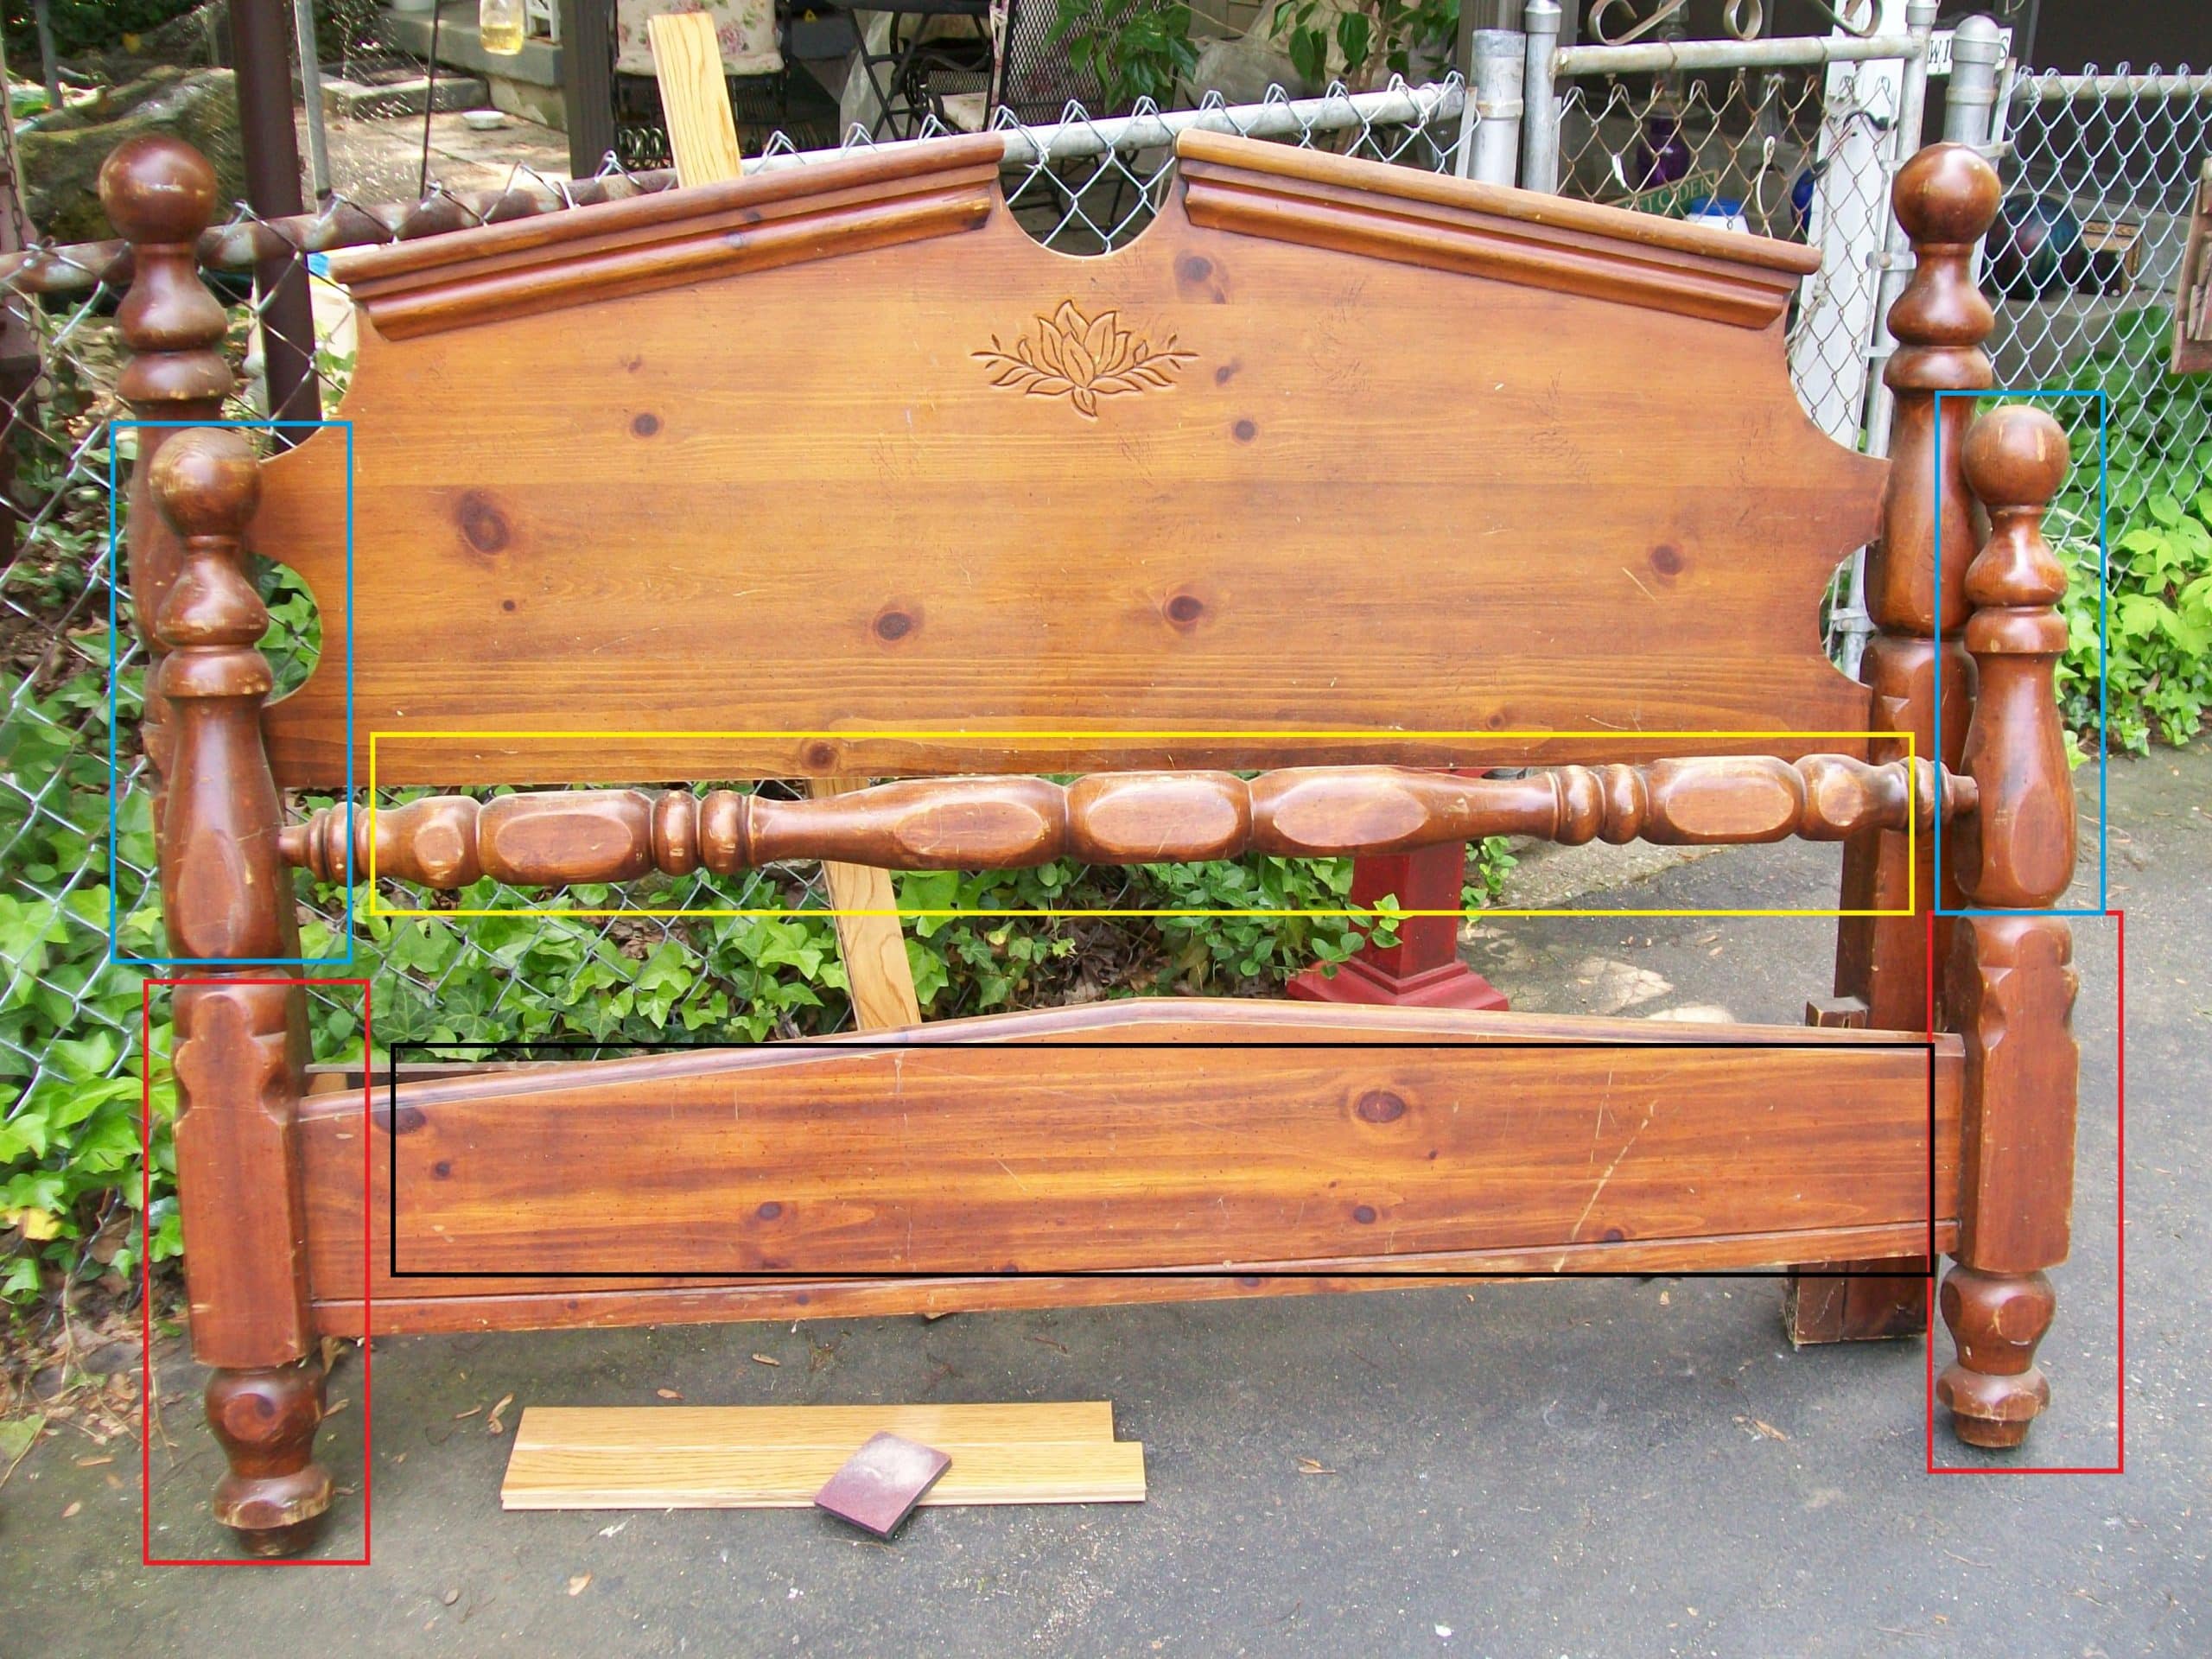
“The Blue and Yellow pieces will be used for future projects. The Black piece was used for And They Lived Happily Ever After. The Red pieces were used for this bench.”
Above quotes are what I said in the original post. I honestly can’t remember if I’ve used the “blue” pieces on a project. But today I’m going to show you what I finally made with the “yellow” piece, more than FIVE years later!
I’m really excited about this project. It came together really quickly and easily, and the best part? I only had to use part of a new 2×4. The rest of the pieces were in my countless scrap piles located all over the garage.
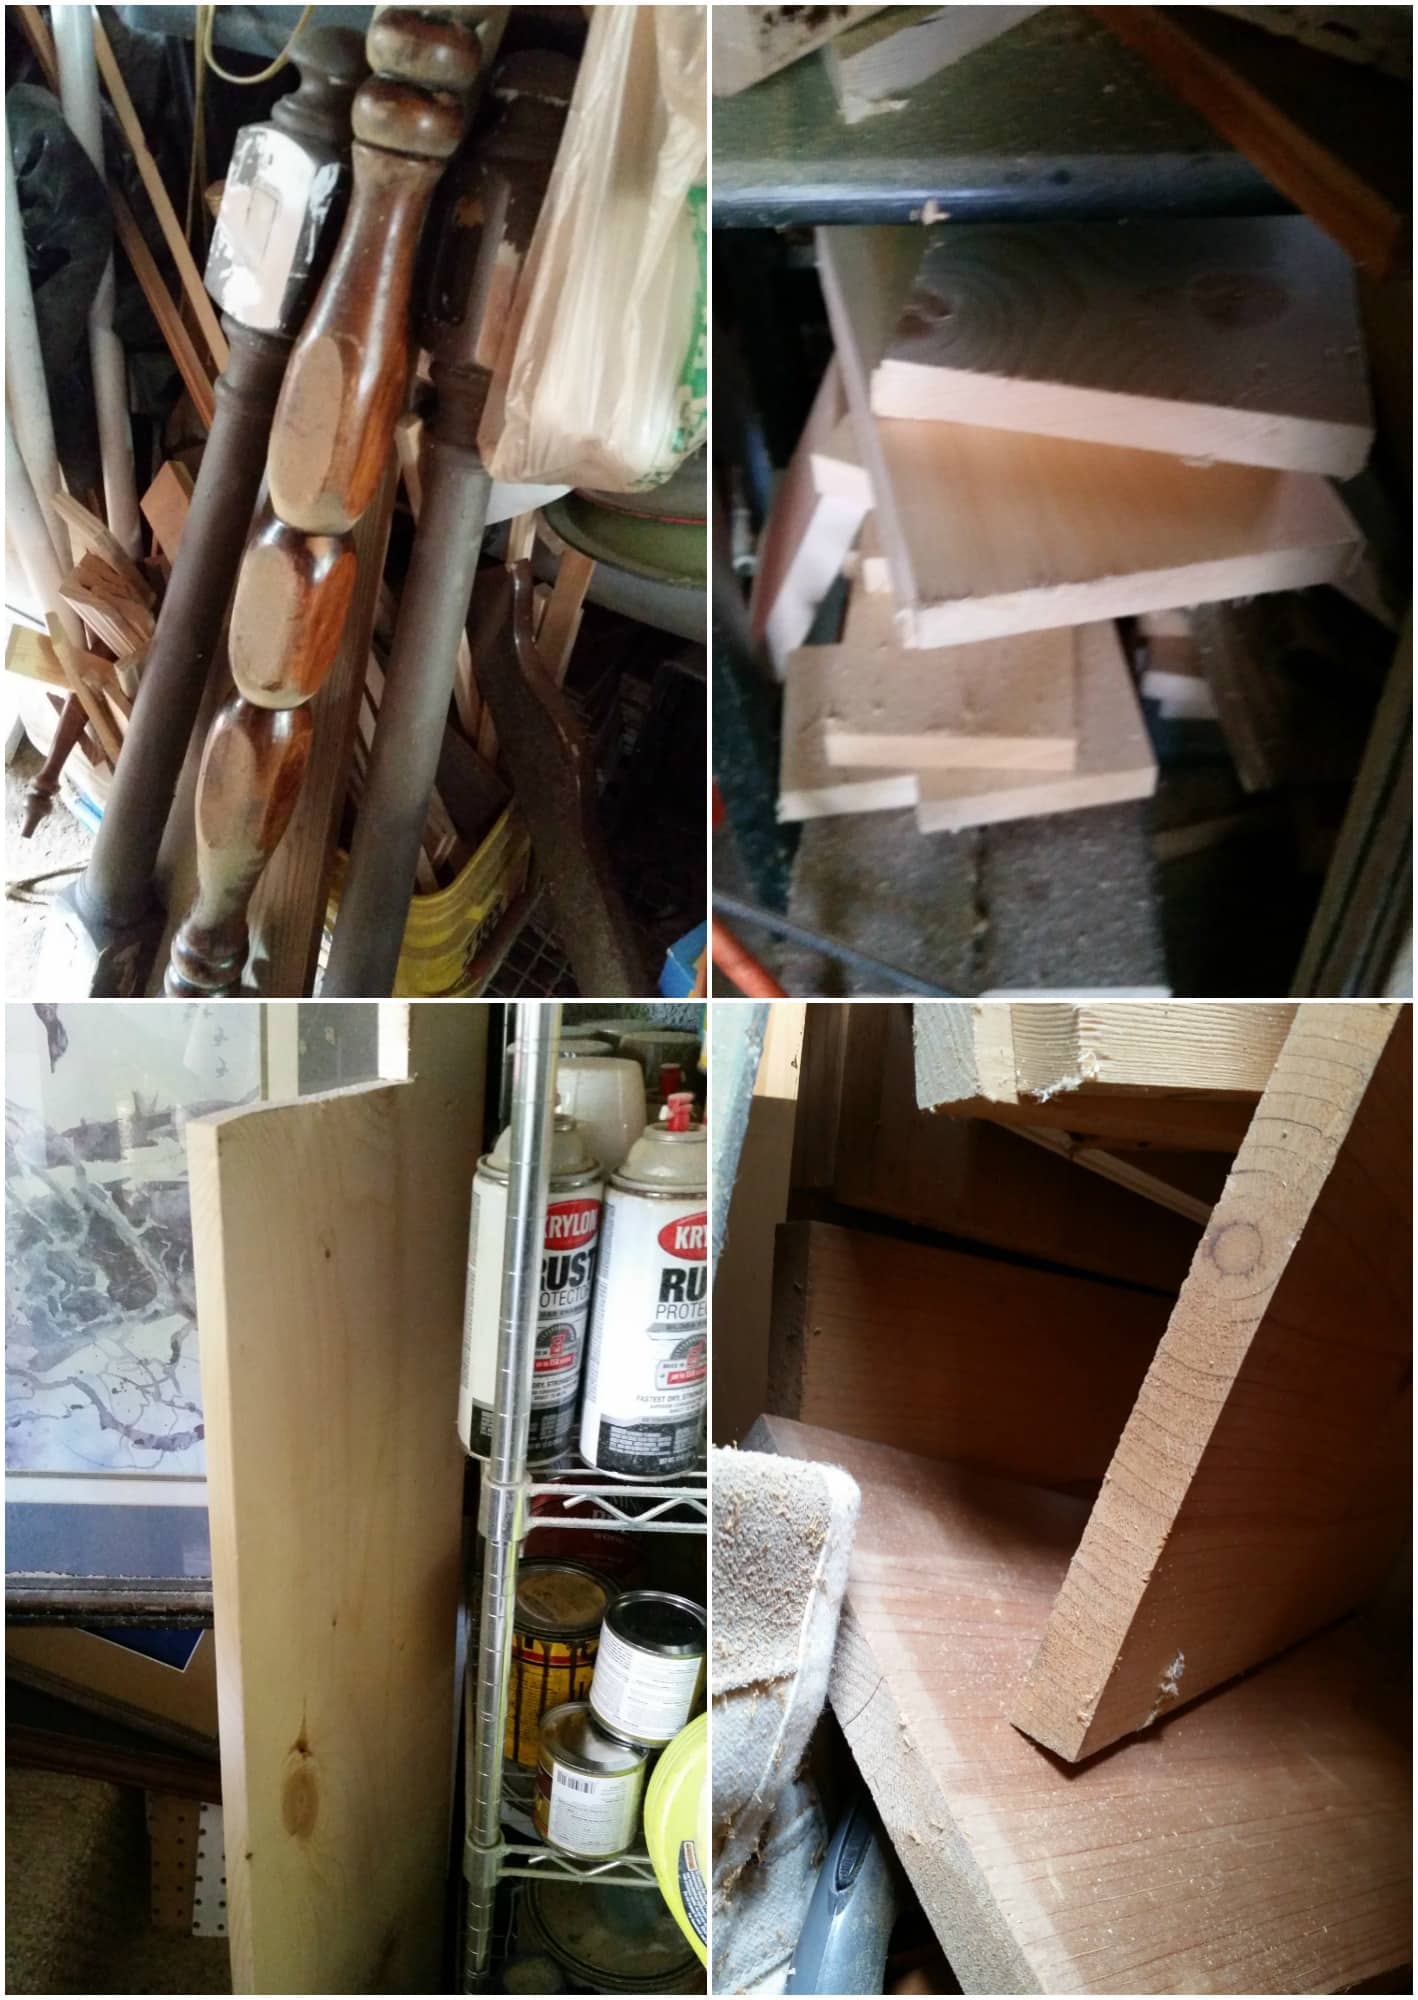
Top Left – one large spindle from a foot board, Top Right – Scrap 1x’s to make up the bottom base, Bottom Left – FREE 1×12 from the local hardware store that was going to throw it away last winter while I was putting up the diy picket fence became the table top, Bottom Right – really old scraps I used to make the upper portion of the table top.
After collecting all these scraps, I got busy designing and playing around with all the bits and pieces…
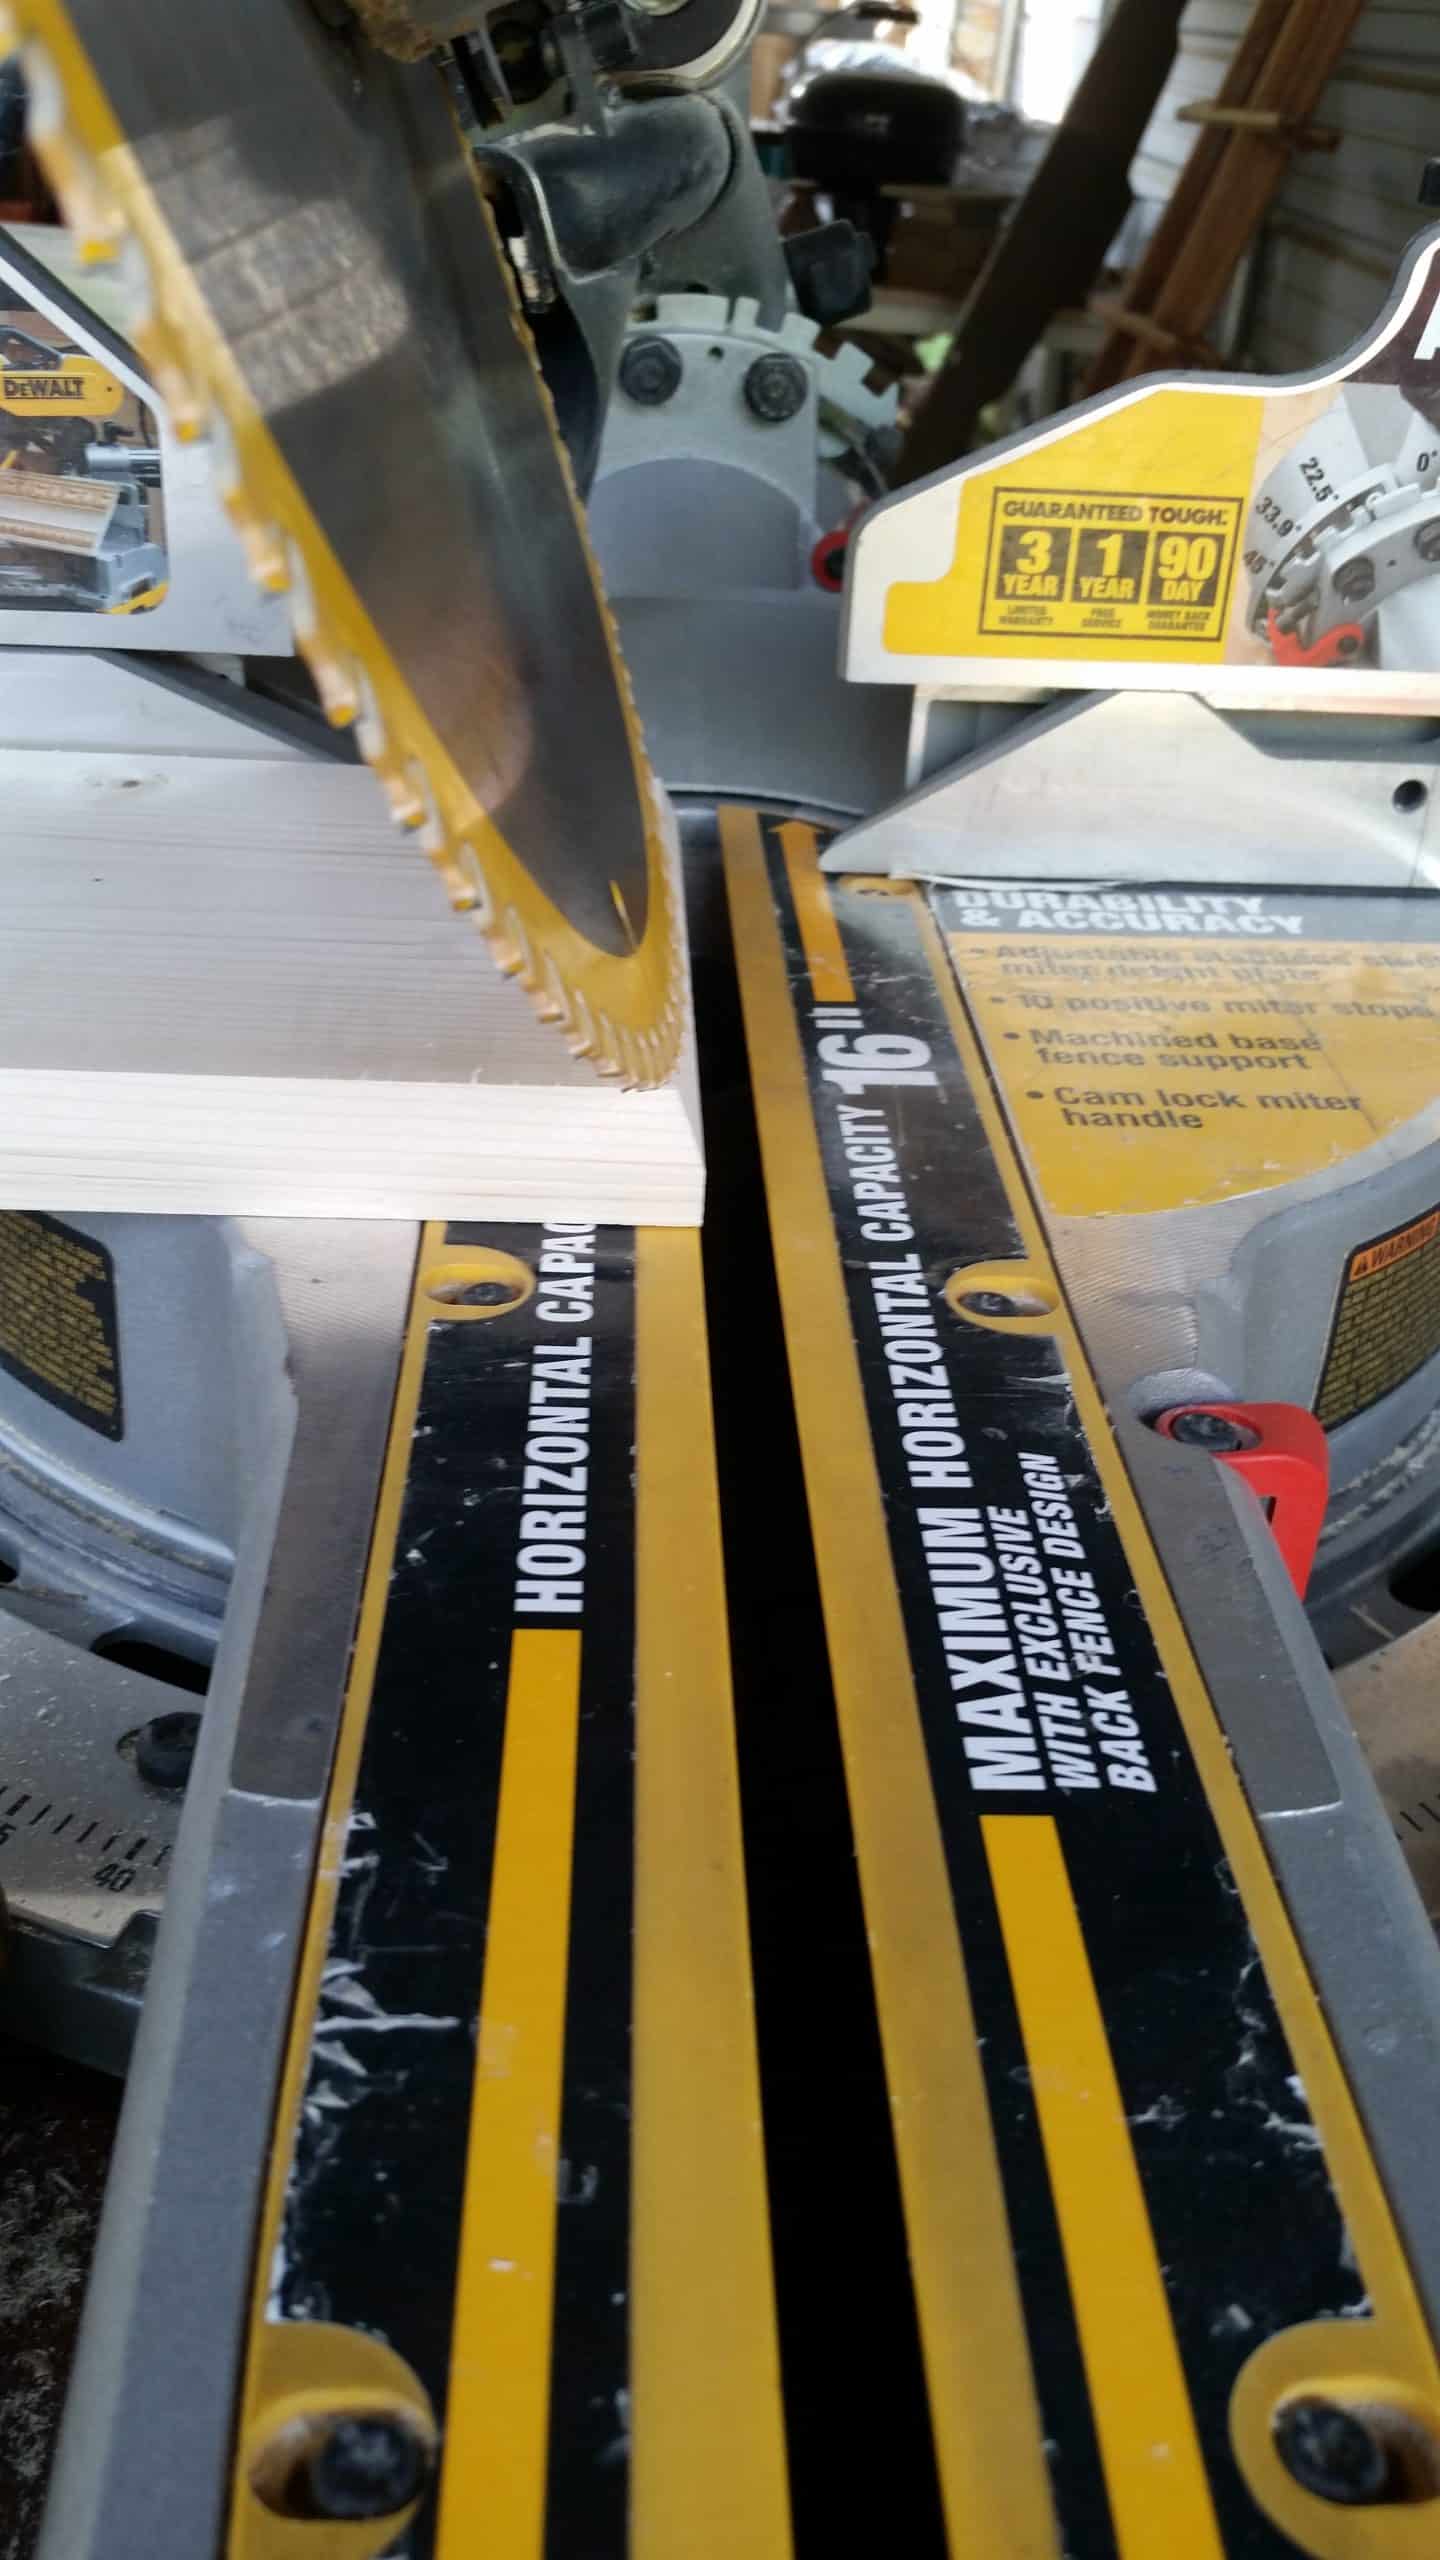
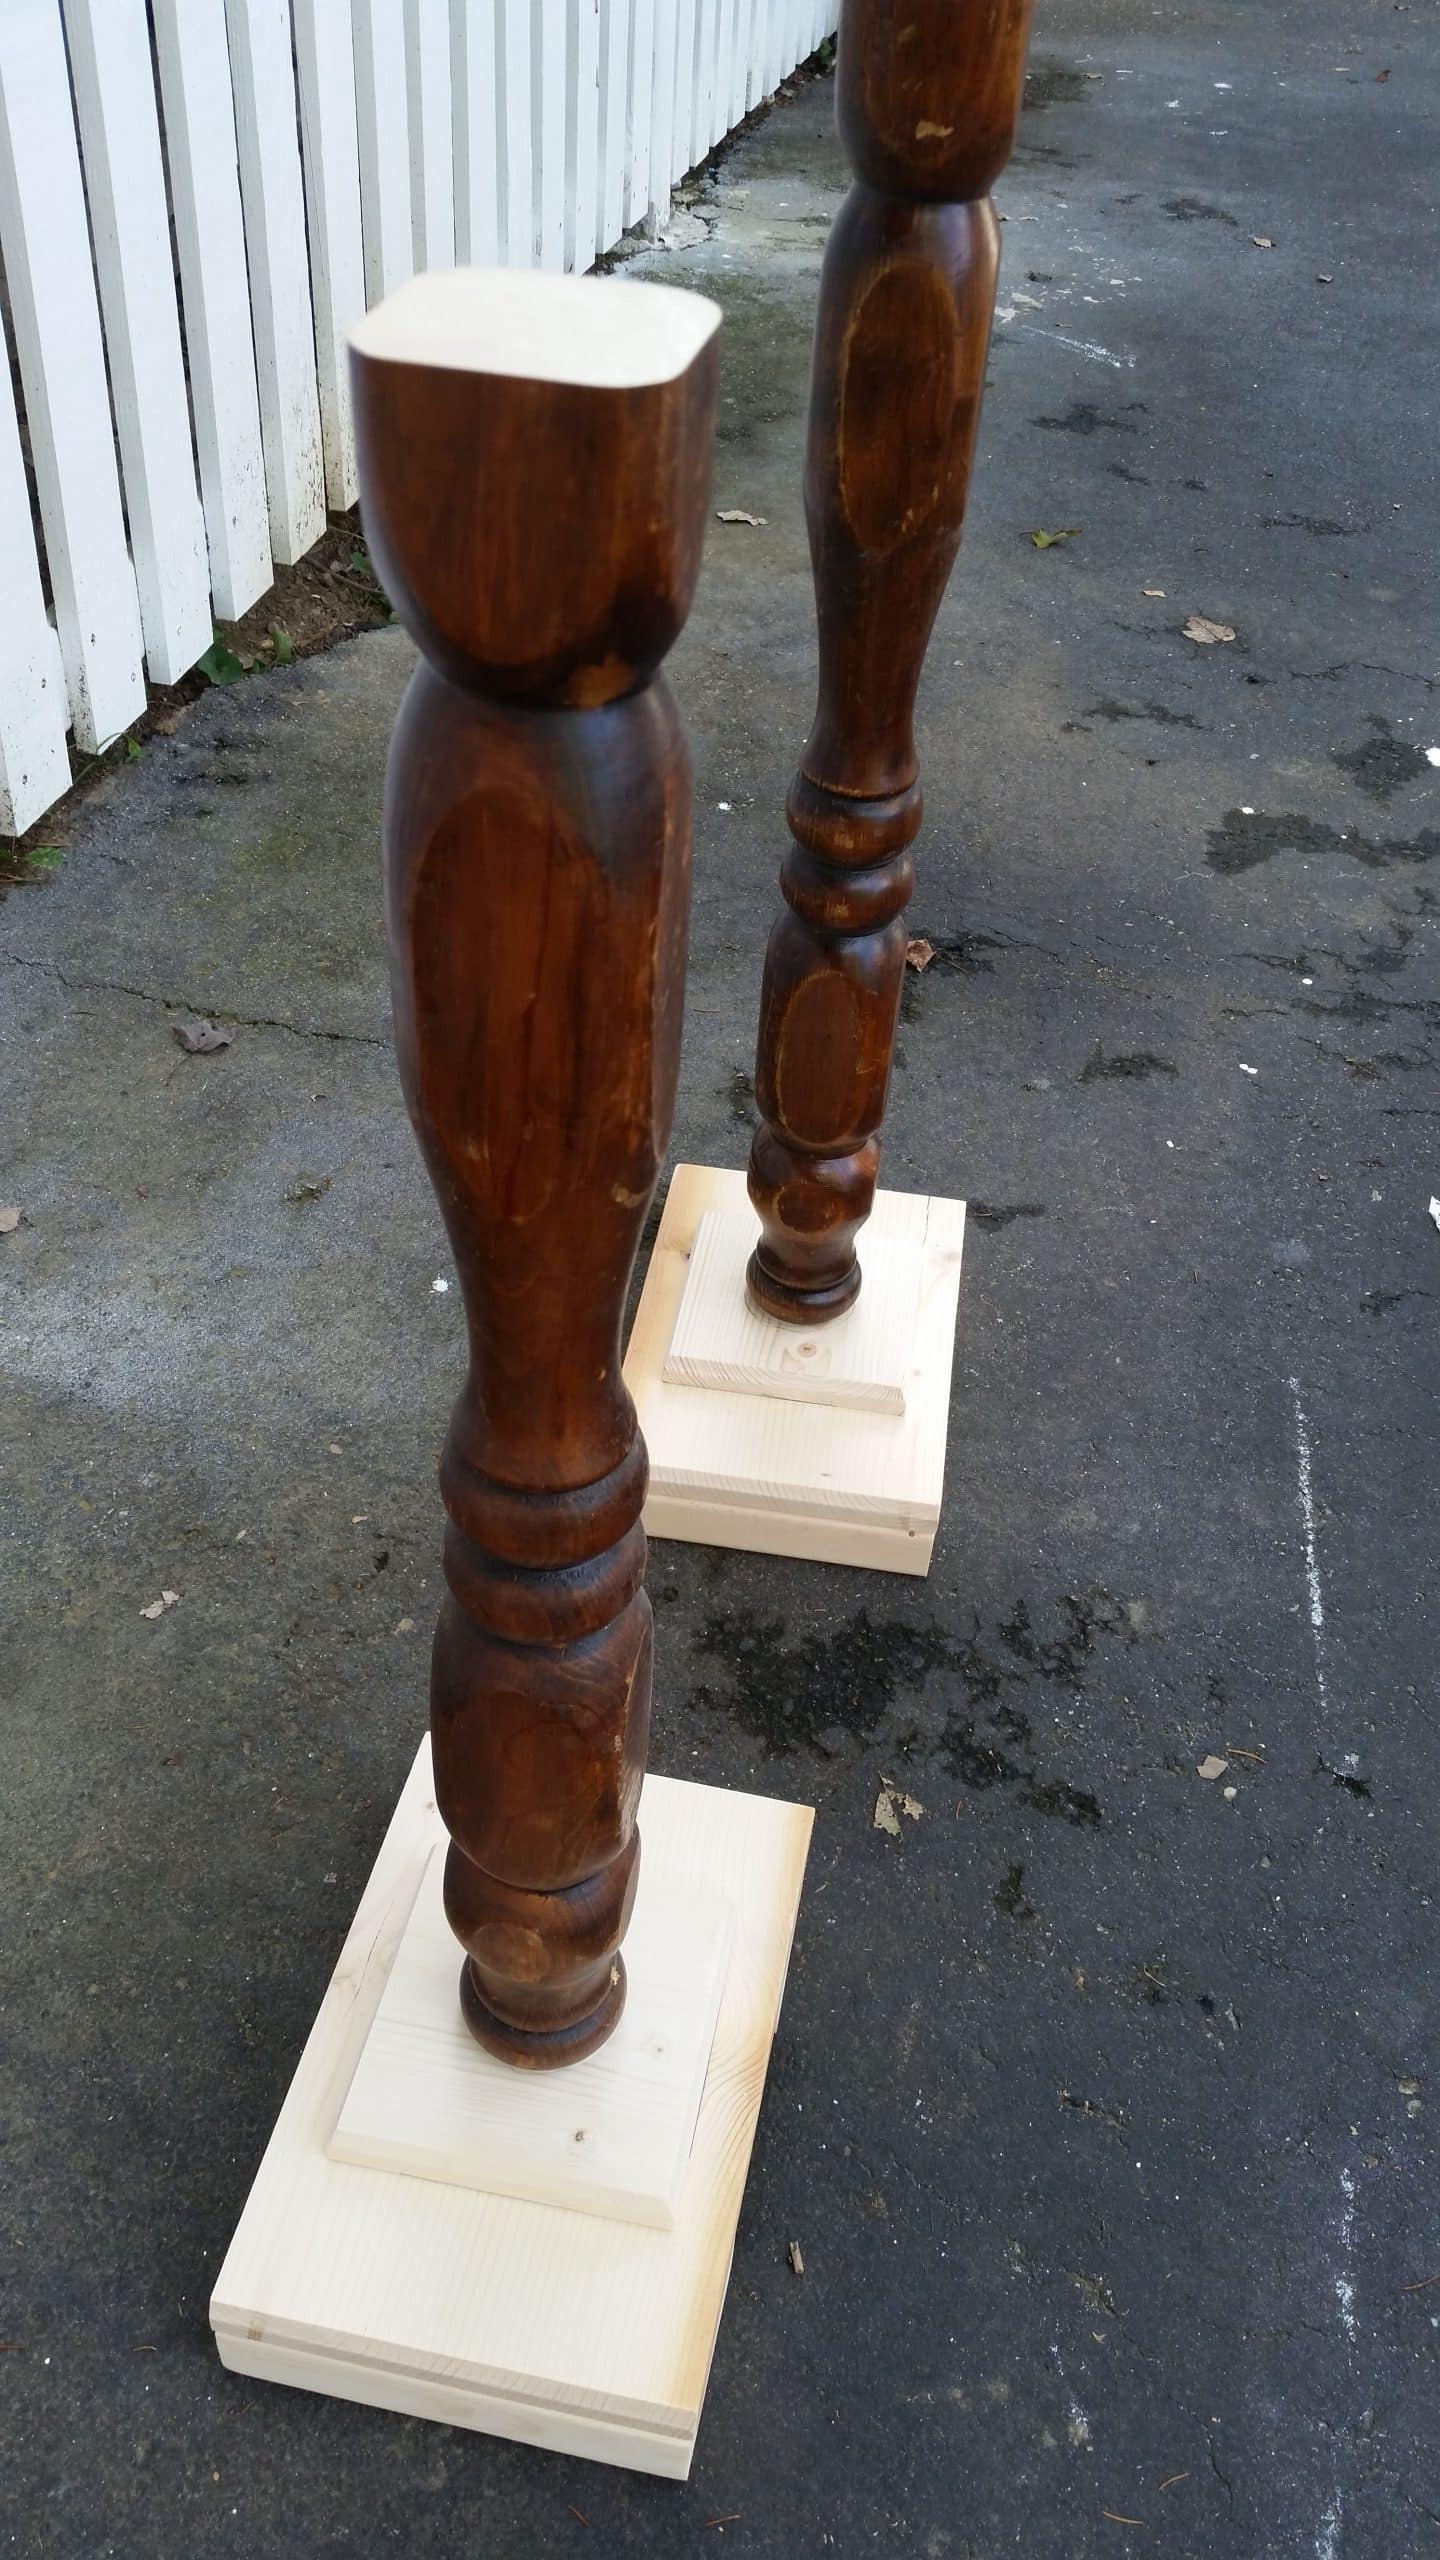
Cut bedposts on miter saw
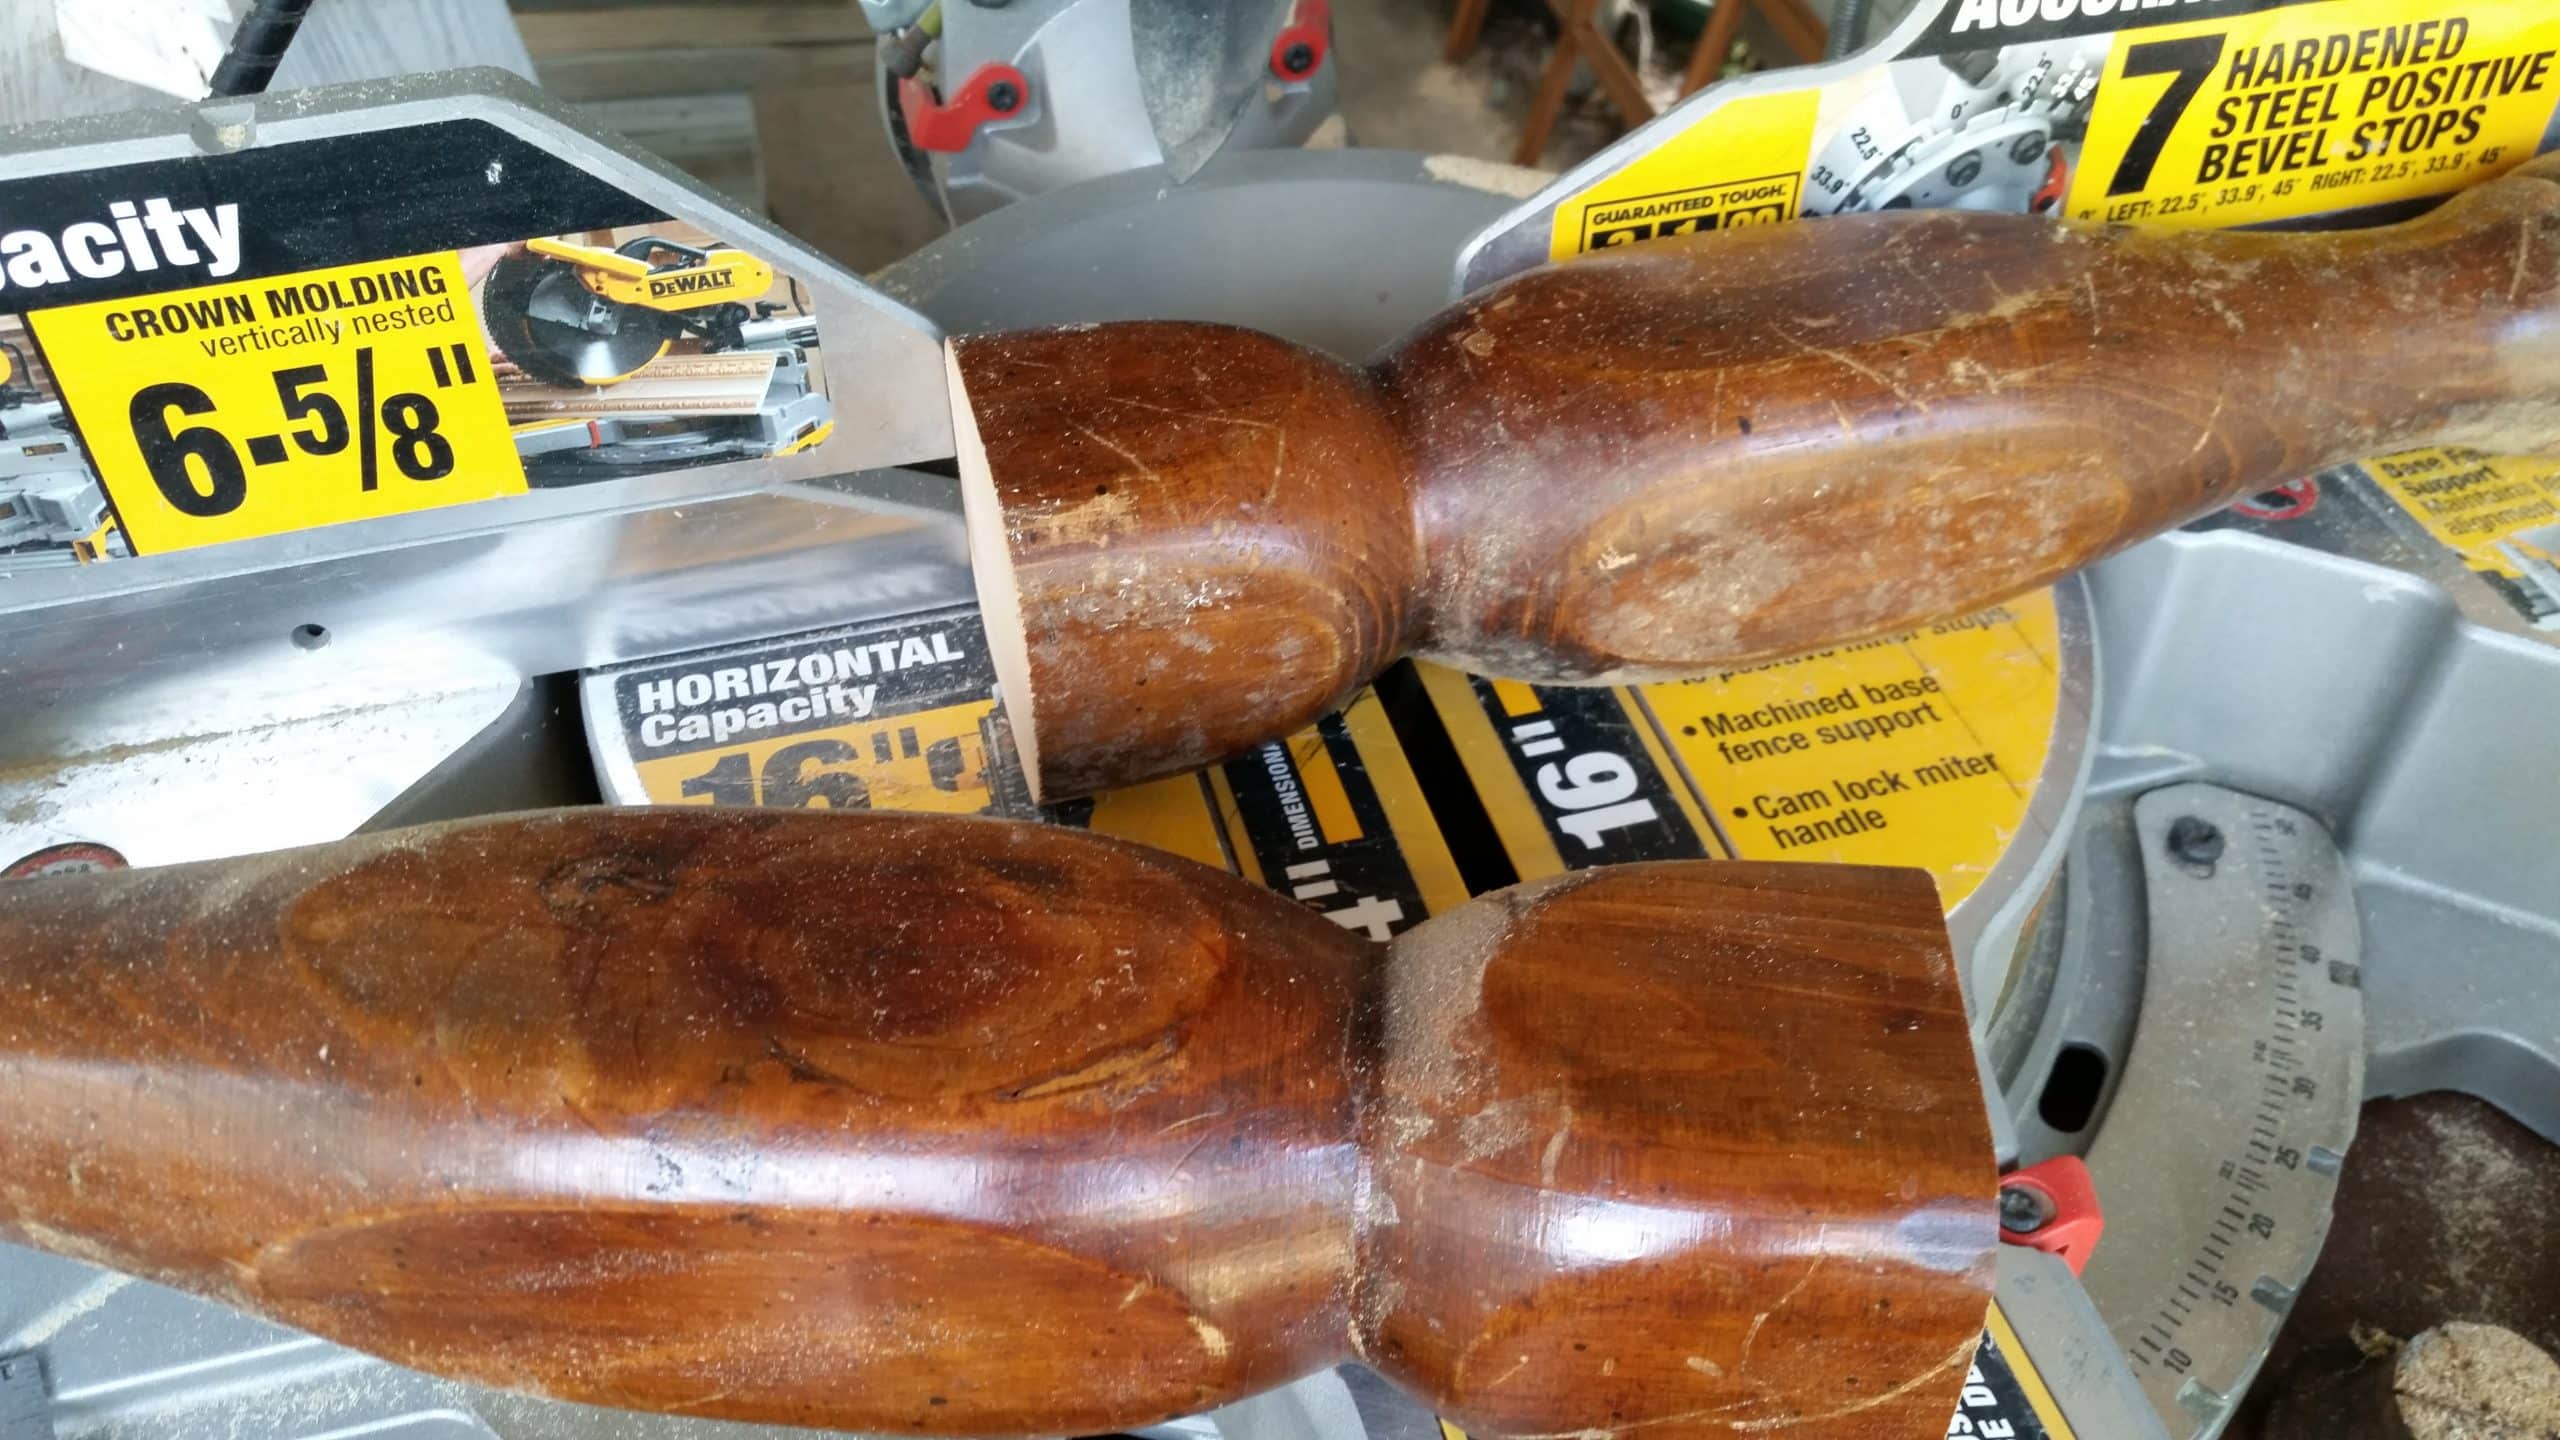
I cut the pedestal in half on the compound miter saw.
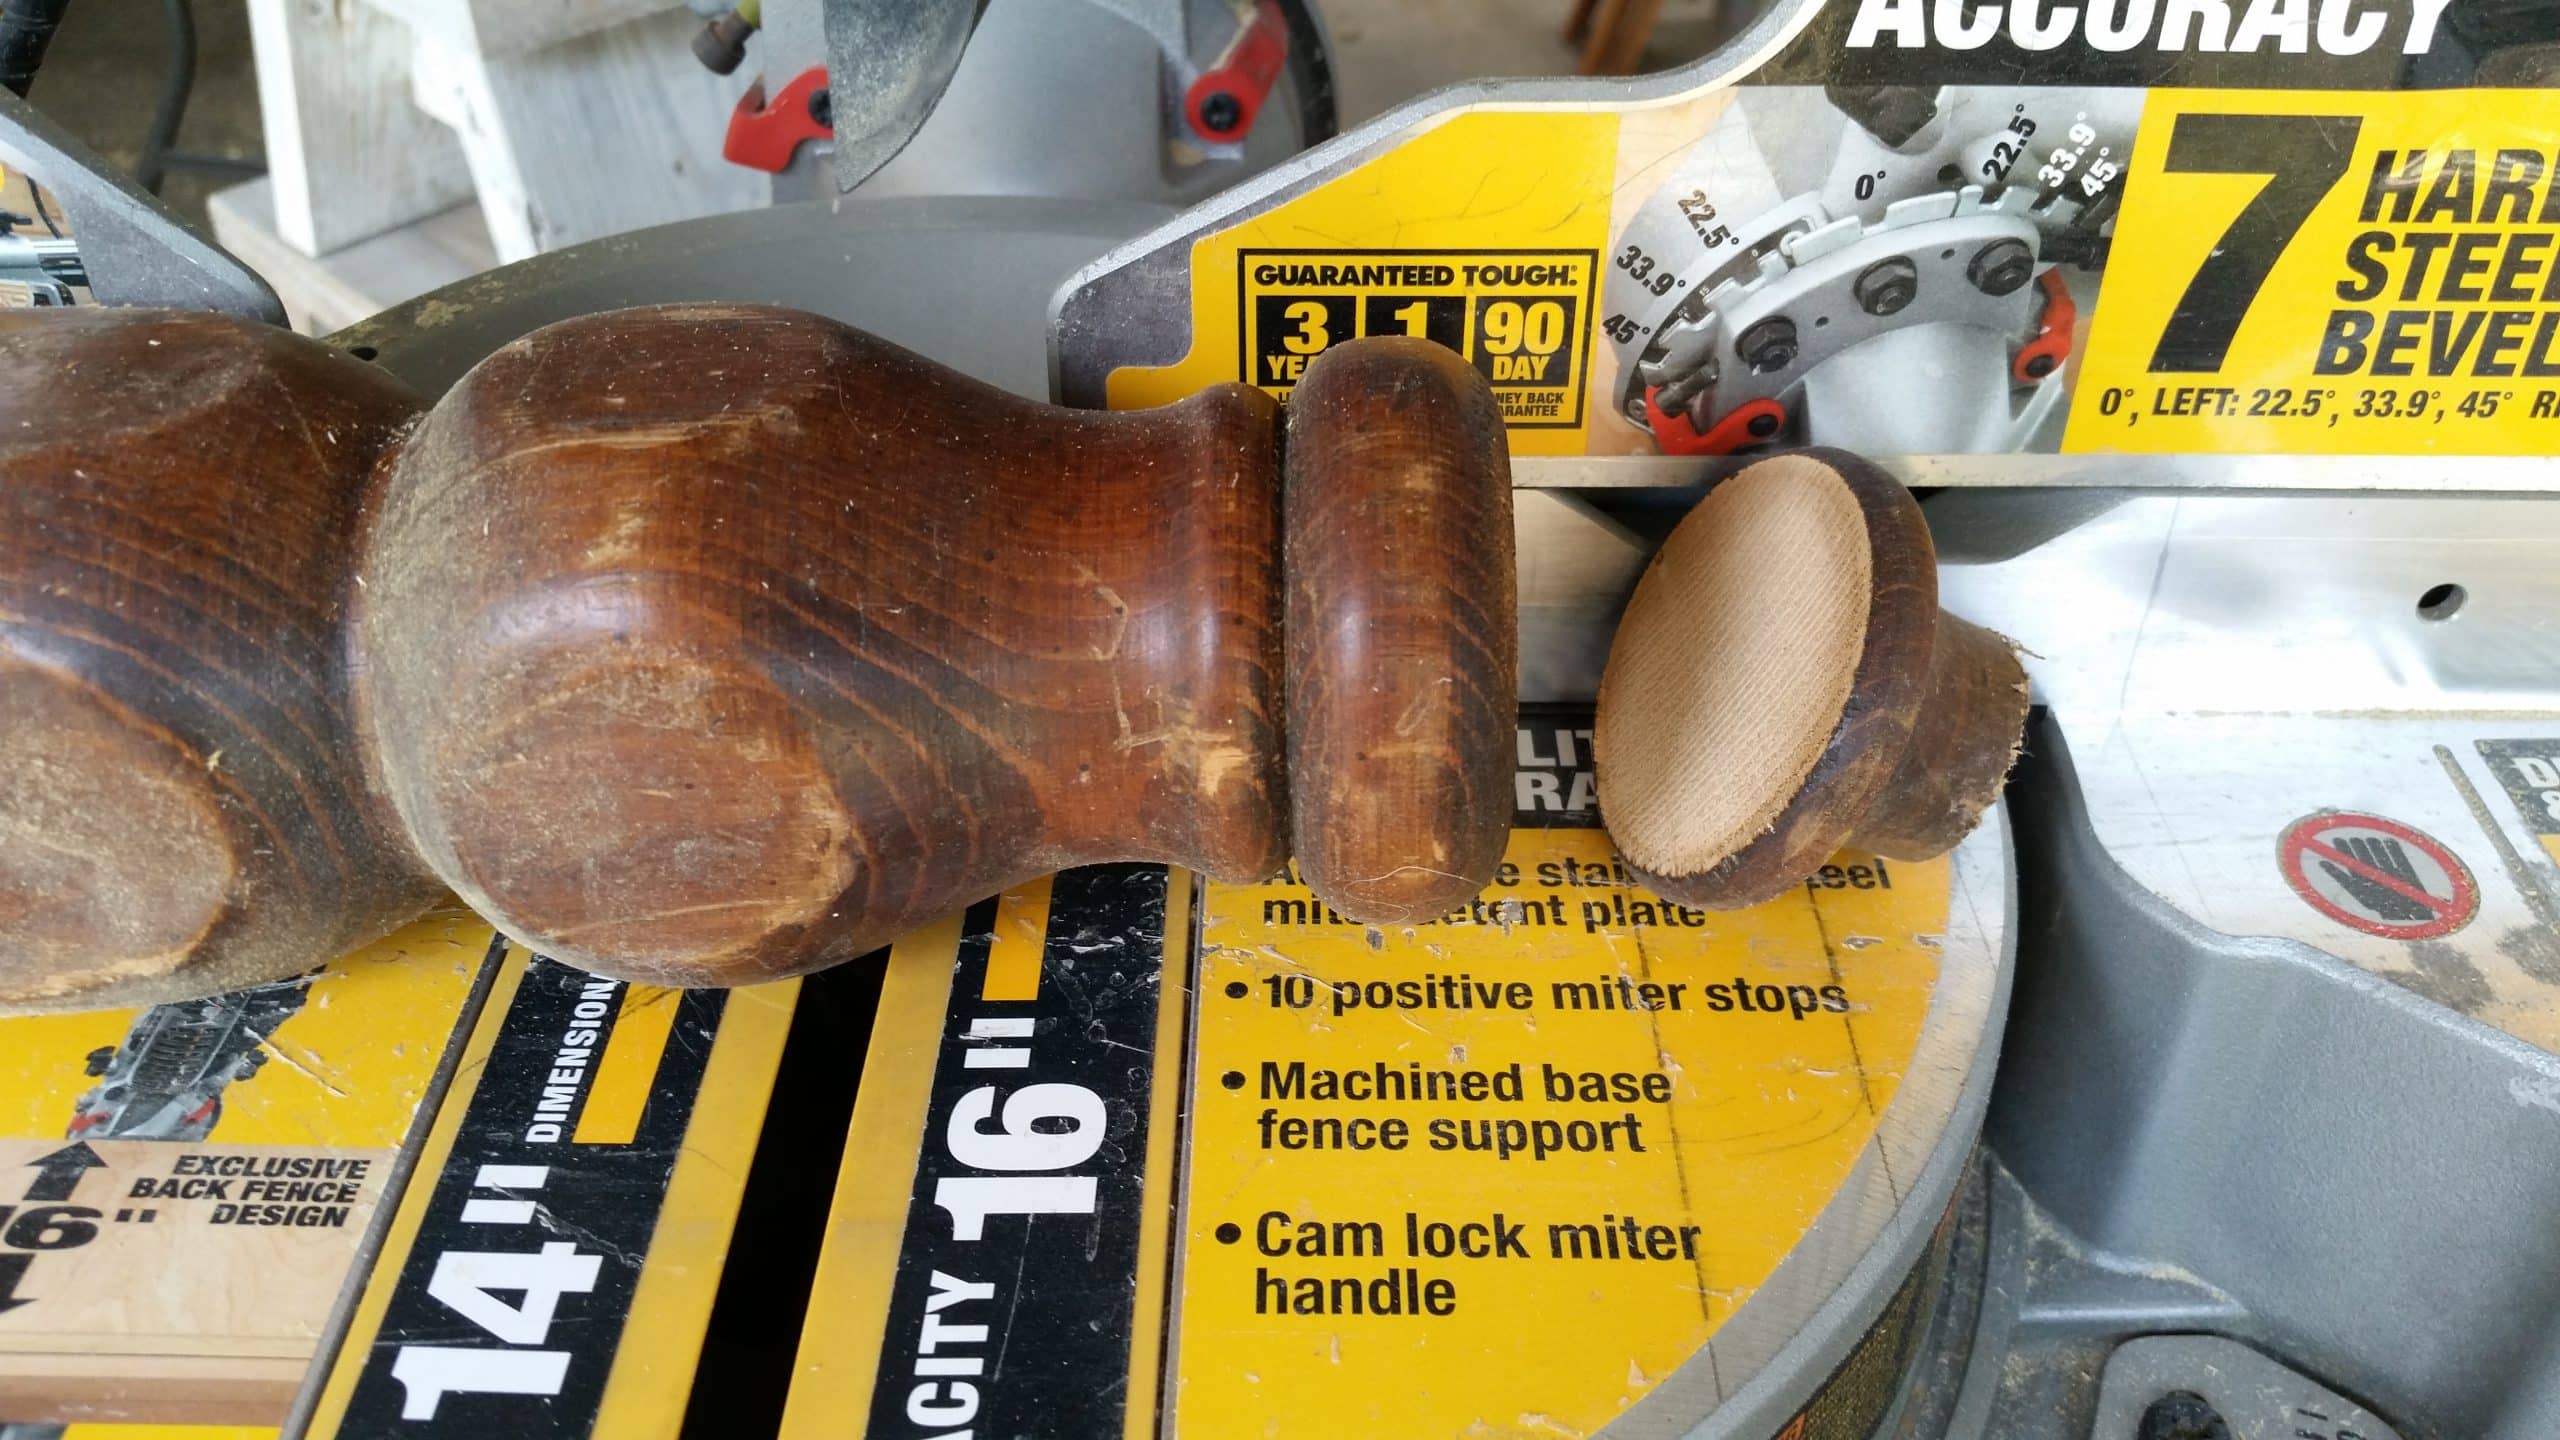
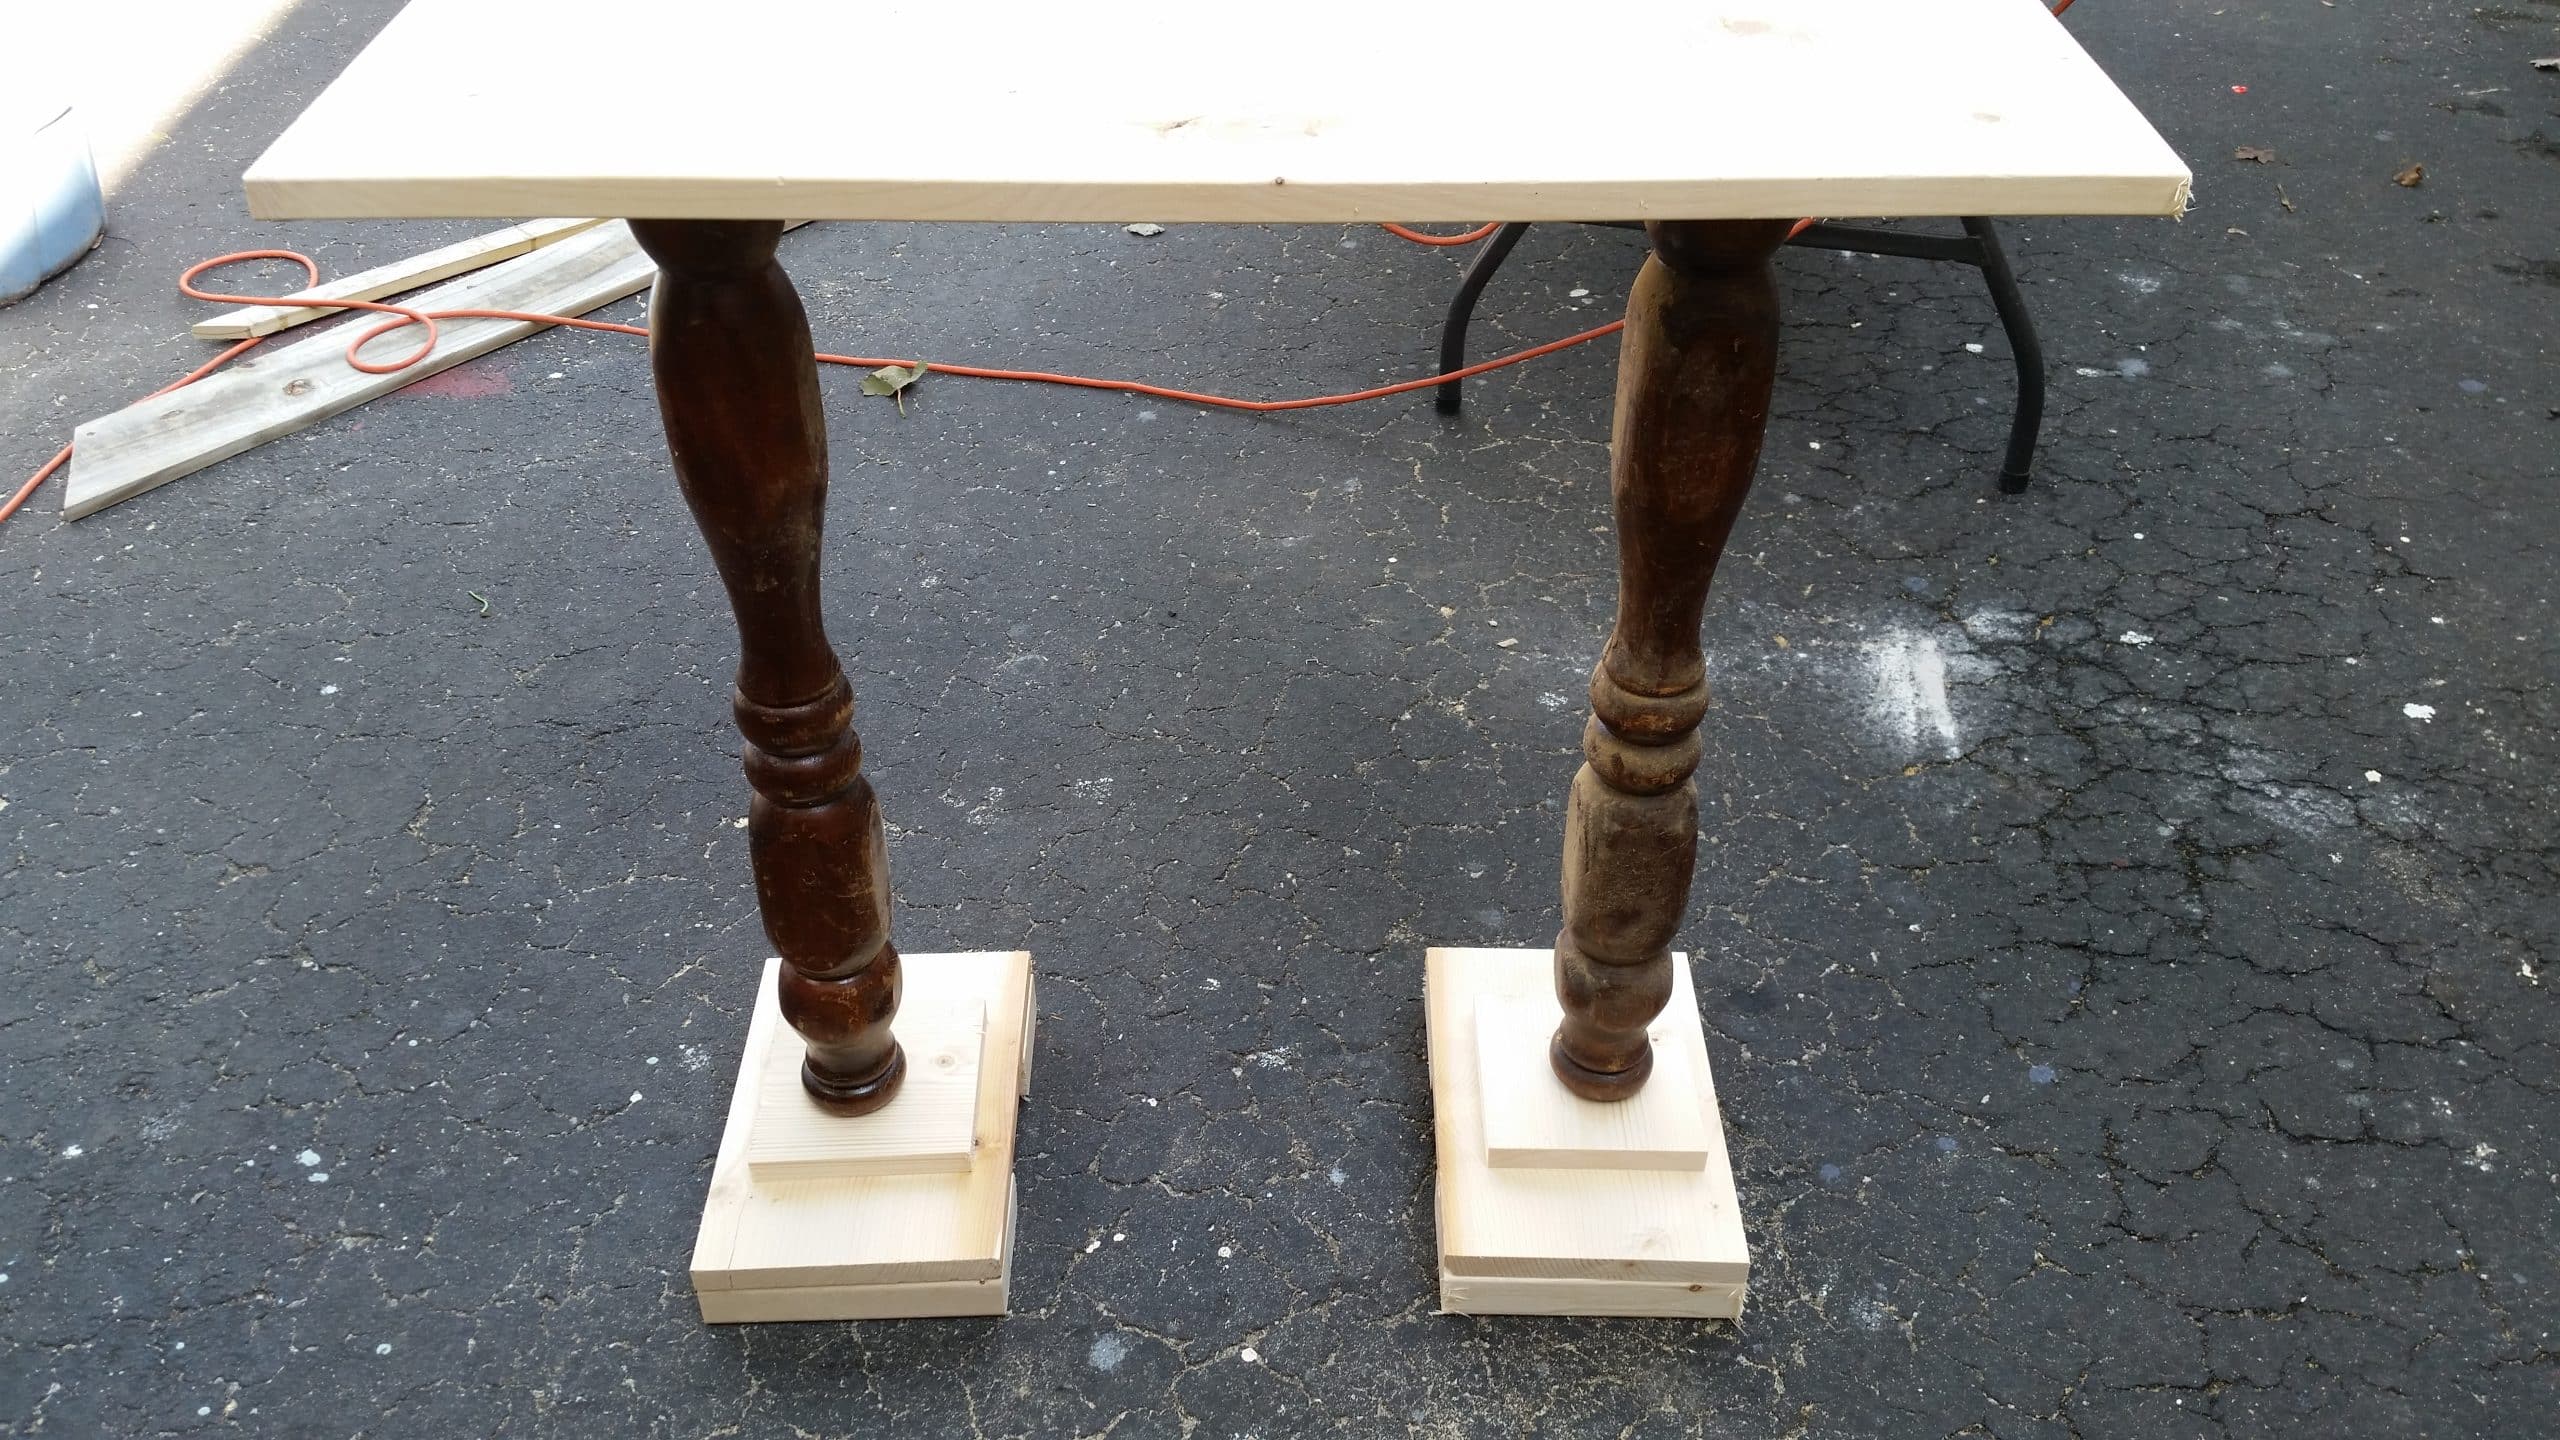
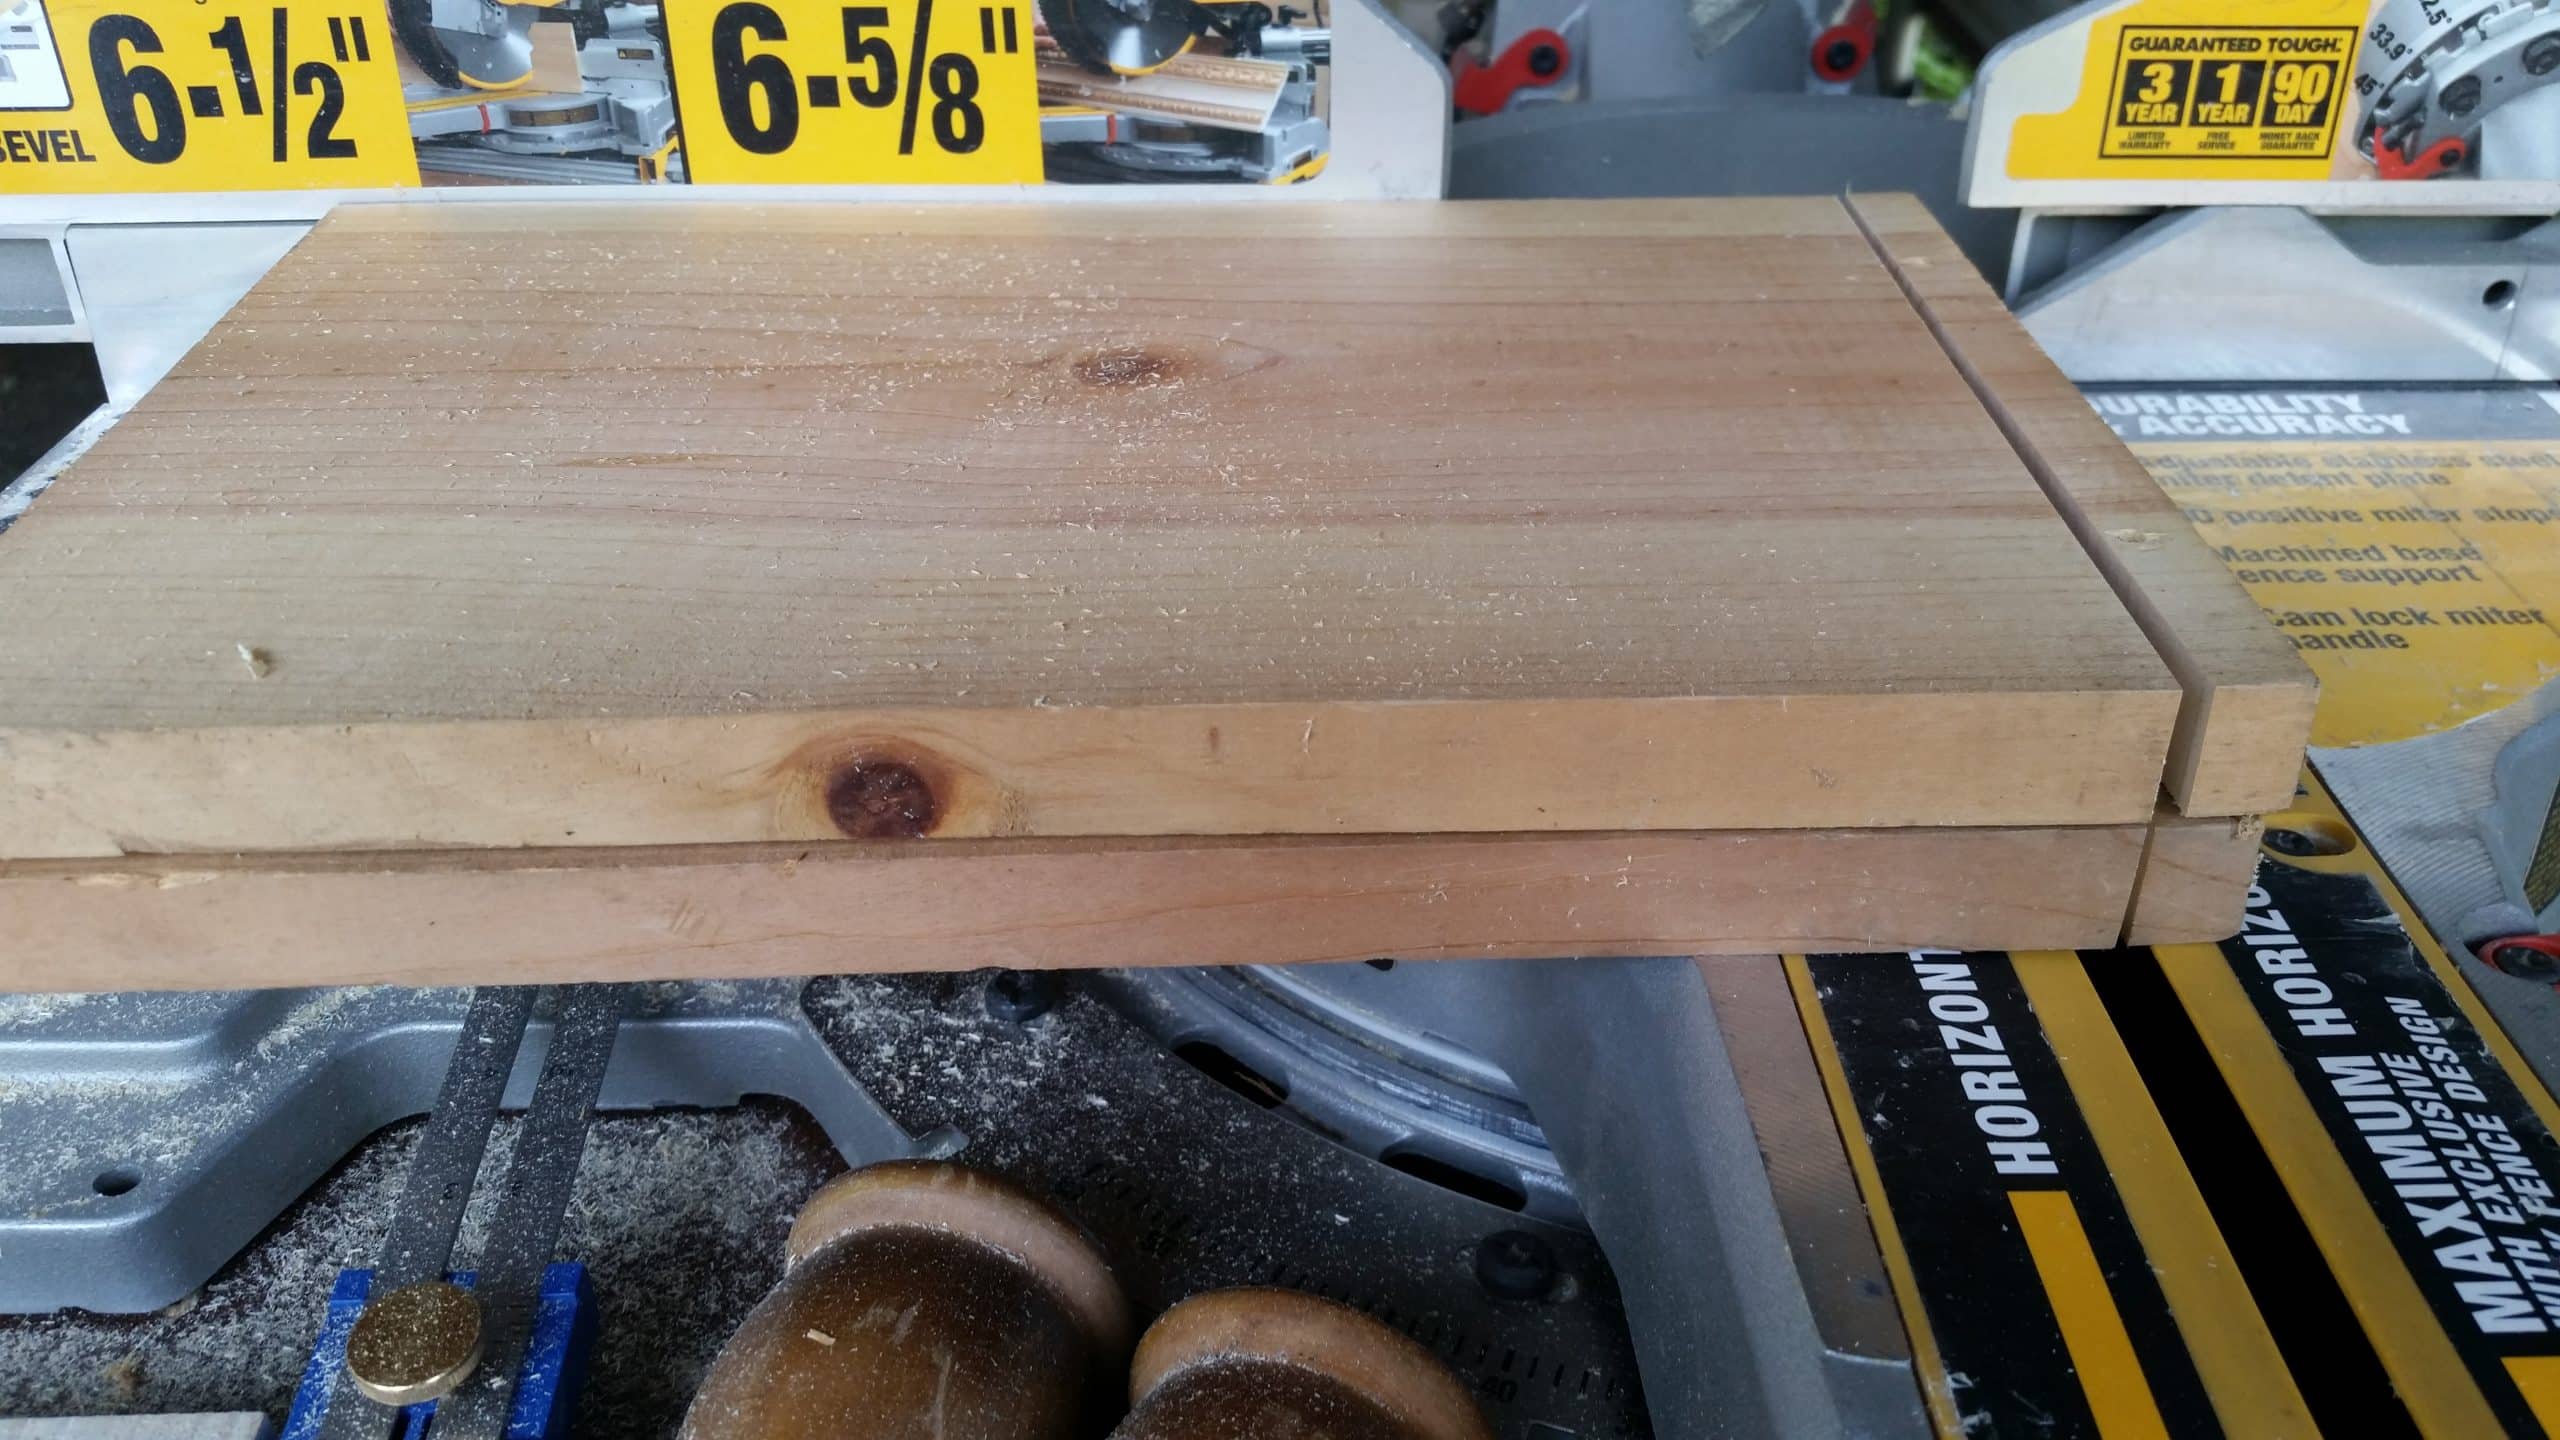
I cut the ends off of the pedestal to get a larger “footprint” for the bottom of the table pedestals.
Cut table top on miter saw
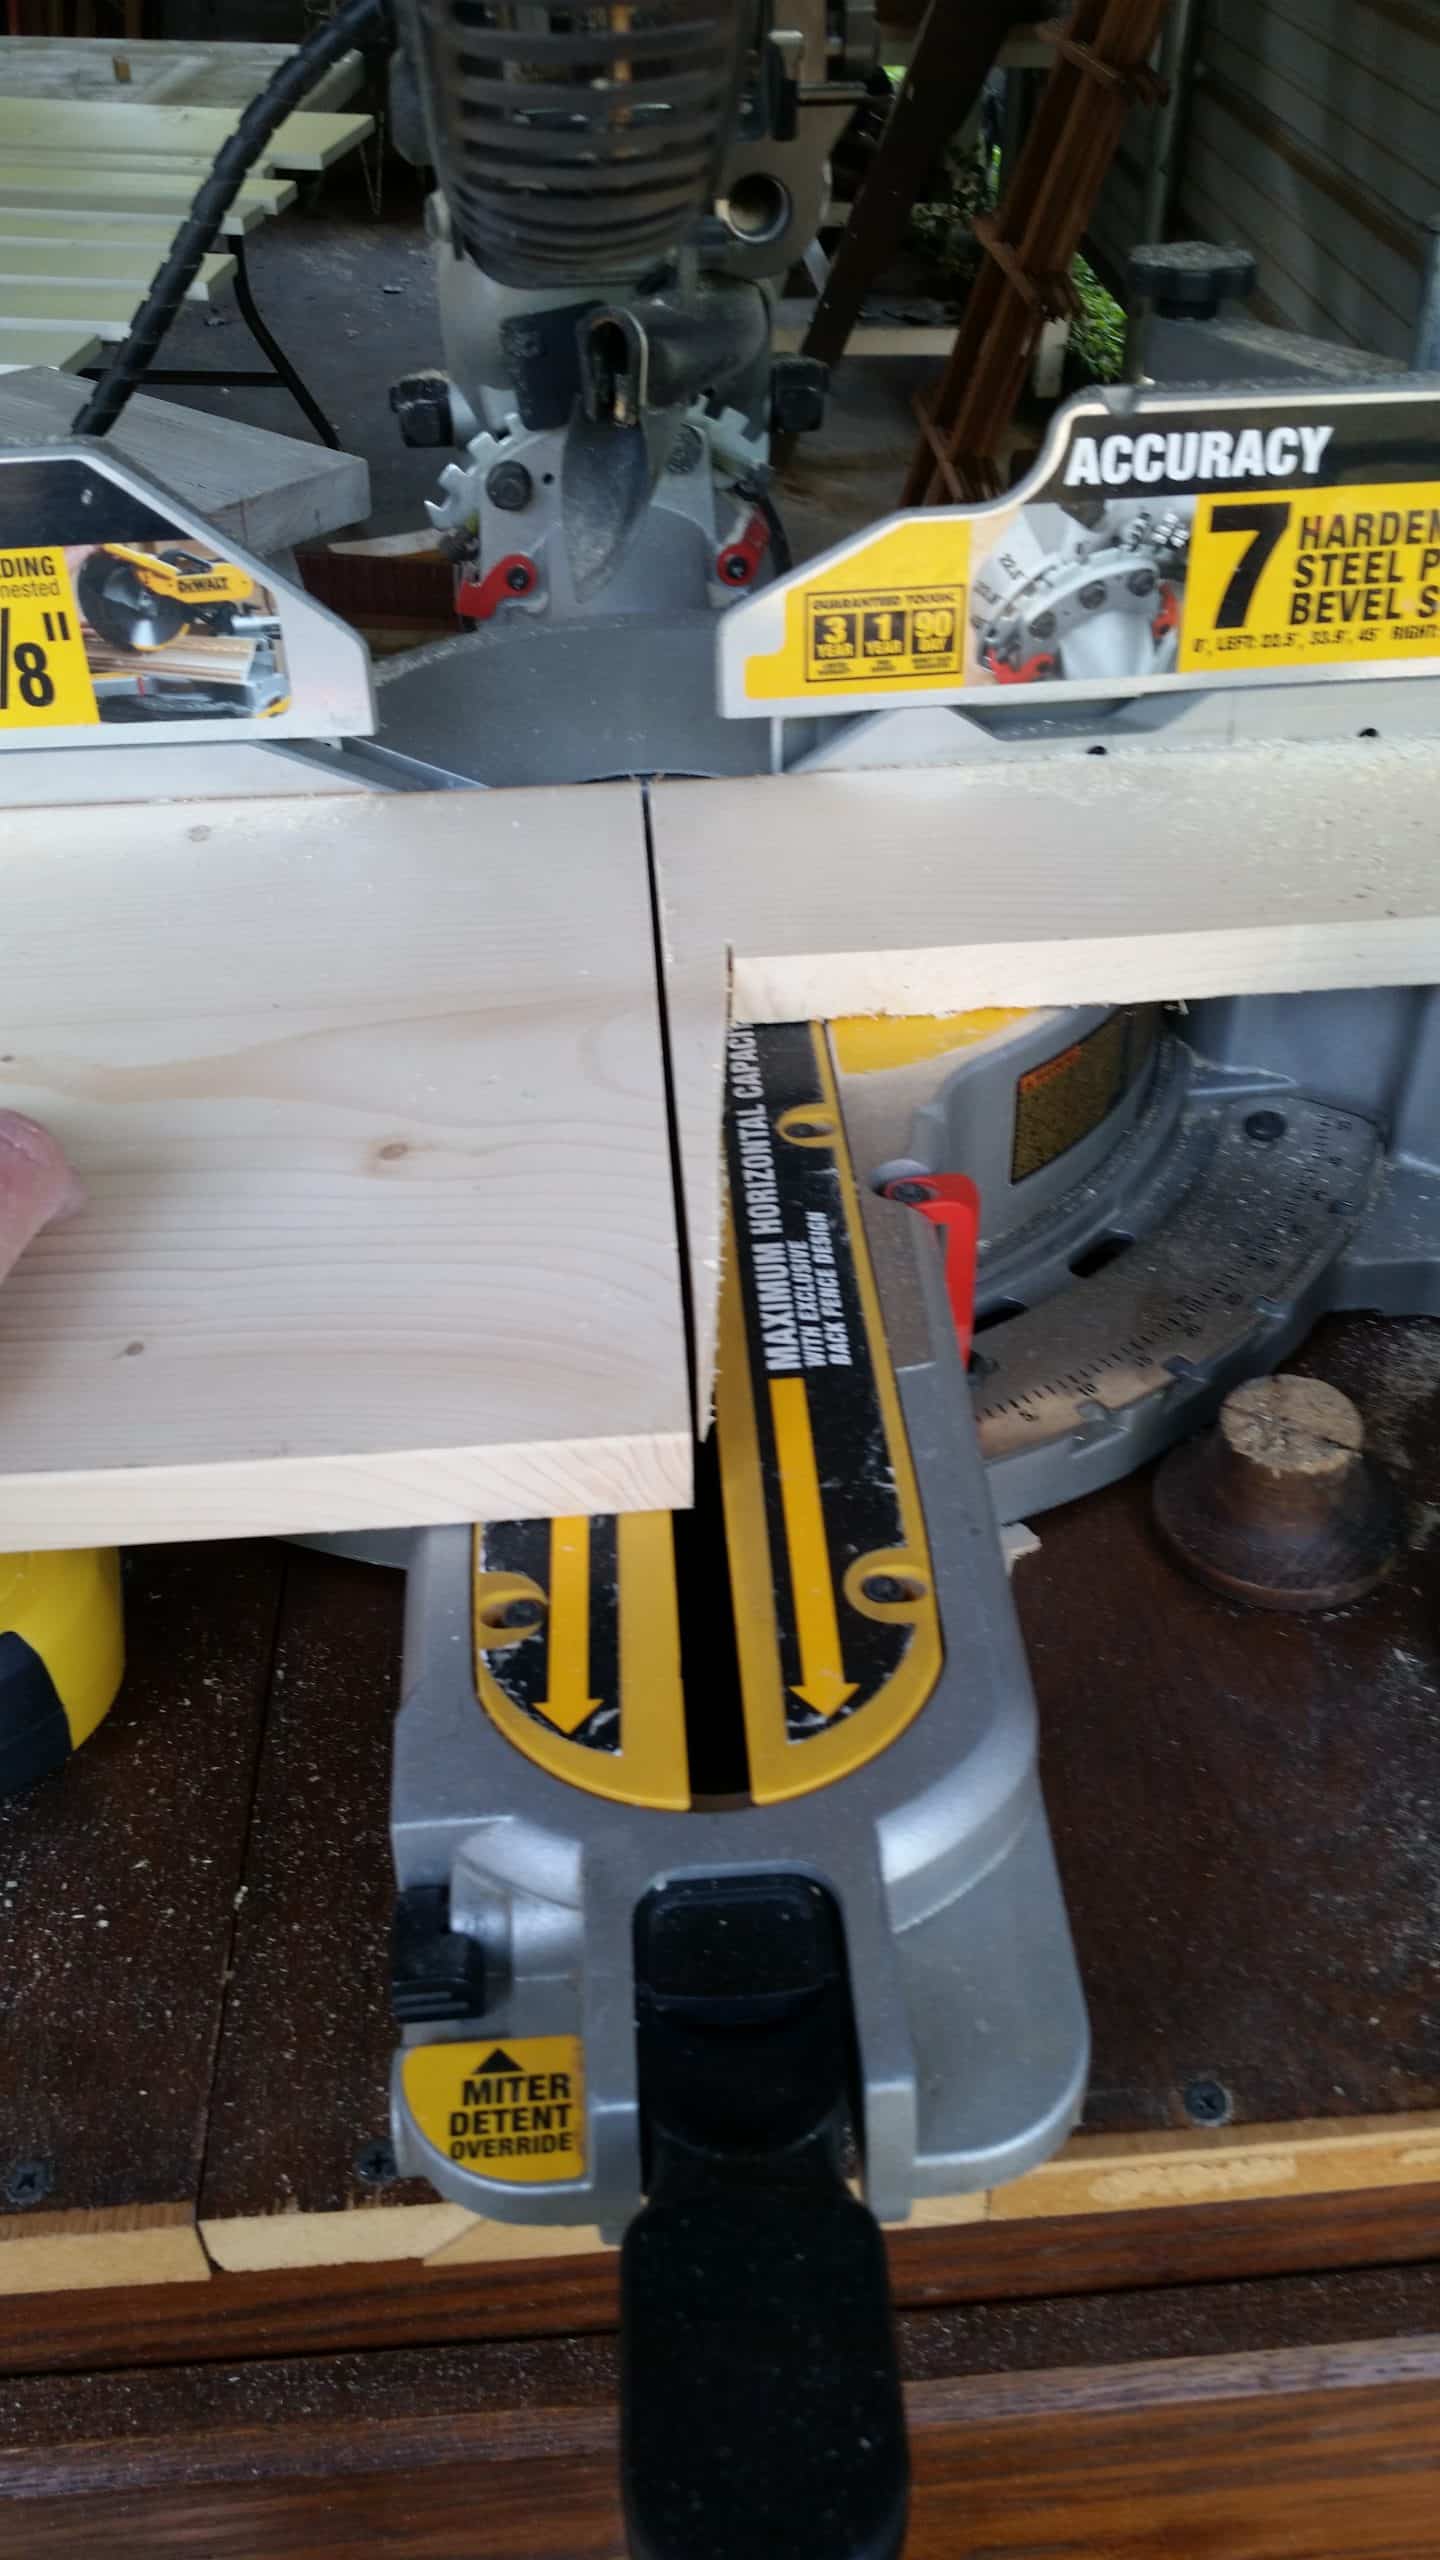
The free 1×12 needed to be squared up on the compound miter saw. I had to trim up both ends making it as long as possible.
Design double pedestal table
This is step one of the design stage. It’s a little short, but after I add all the other scraps it will slowly get taller.
The only new lumber I used for this entire project was about 2 feet of a 2×4. All of the other 1x pieces came from the scrap piles.
I was really fortunate that I was able to find just the right size pieces of scraps. These pieces are for the upper brace—you can see I had about an inch to spare, so I cut off the ends that had some holes.
Miter trim pieces
Instead of digging out my router table, I did a small beveled edge on the square pieces on the bottom “feet”. I set the saw at 22.5 degrees and lined up the edge of the board with the very edge of the saw cutting area. Don’t you love my technical jargon?
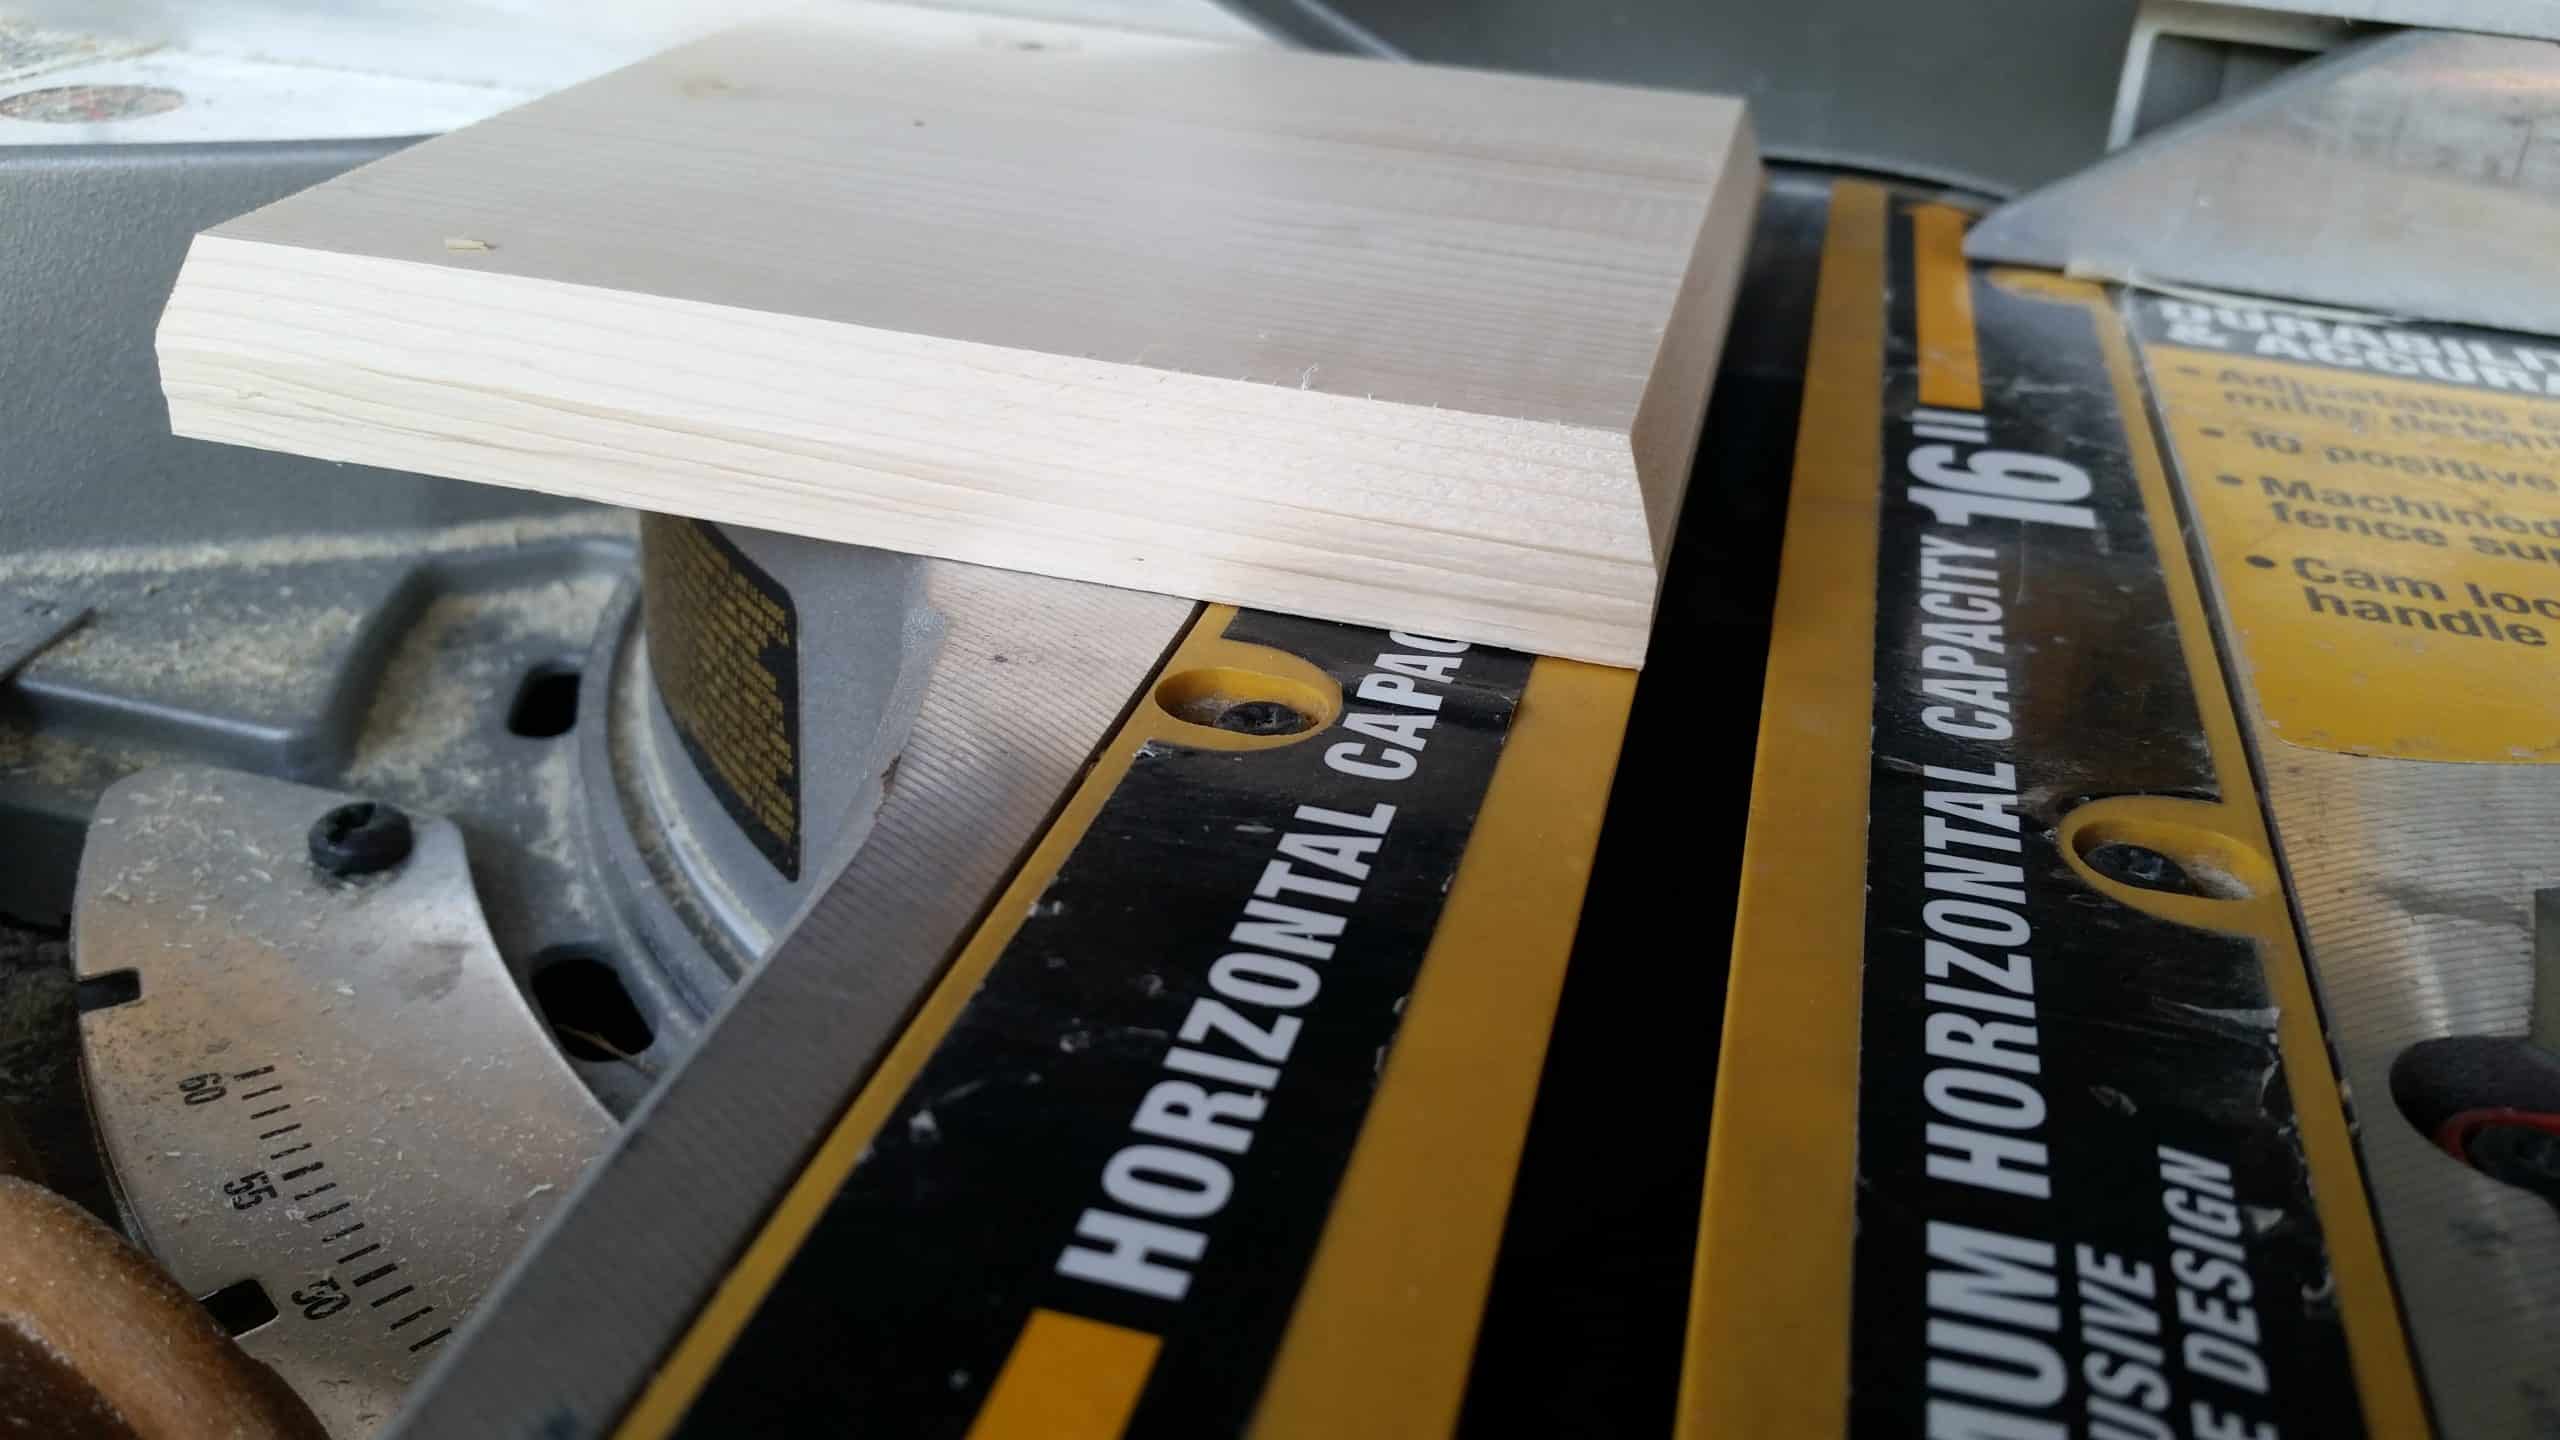
See how nice it looks? No router needed!
ALWAYS USE CAUTION when using a miter saw, if you feel you’re not qualified to make a cut—do NOT take any chances.
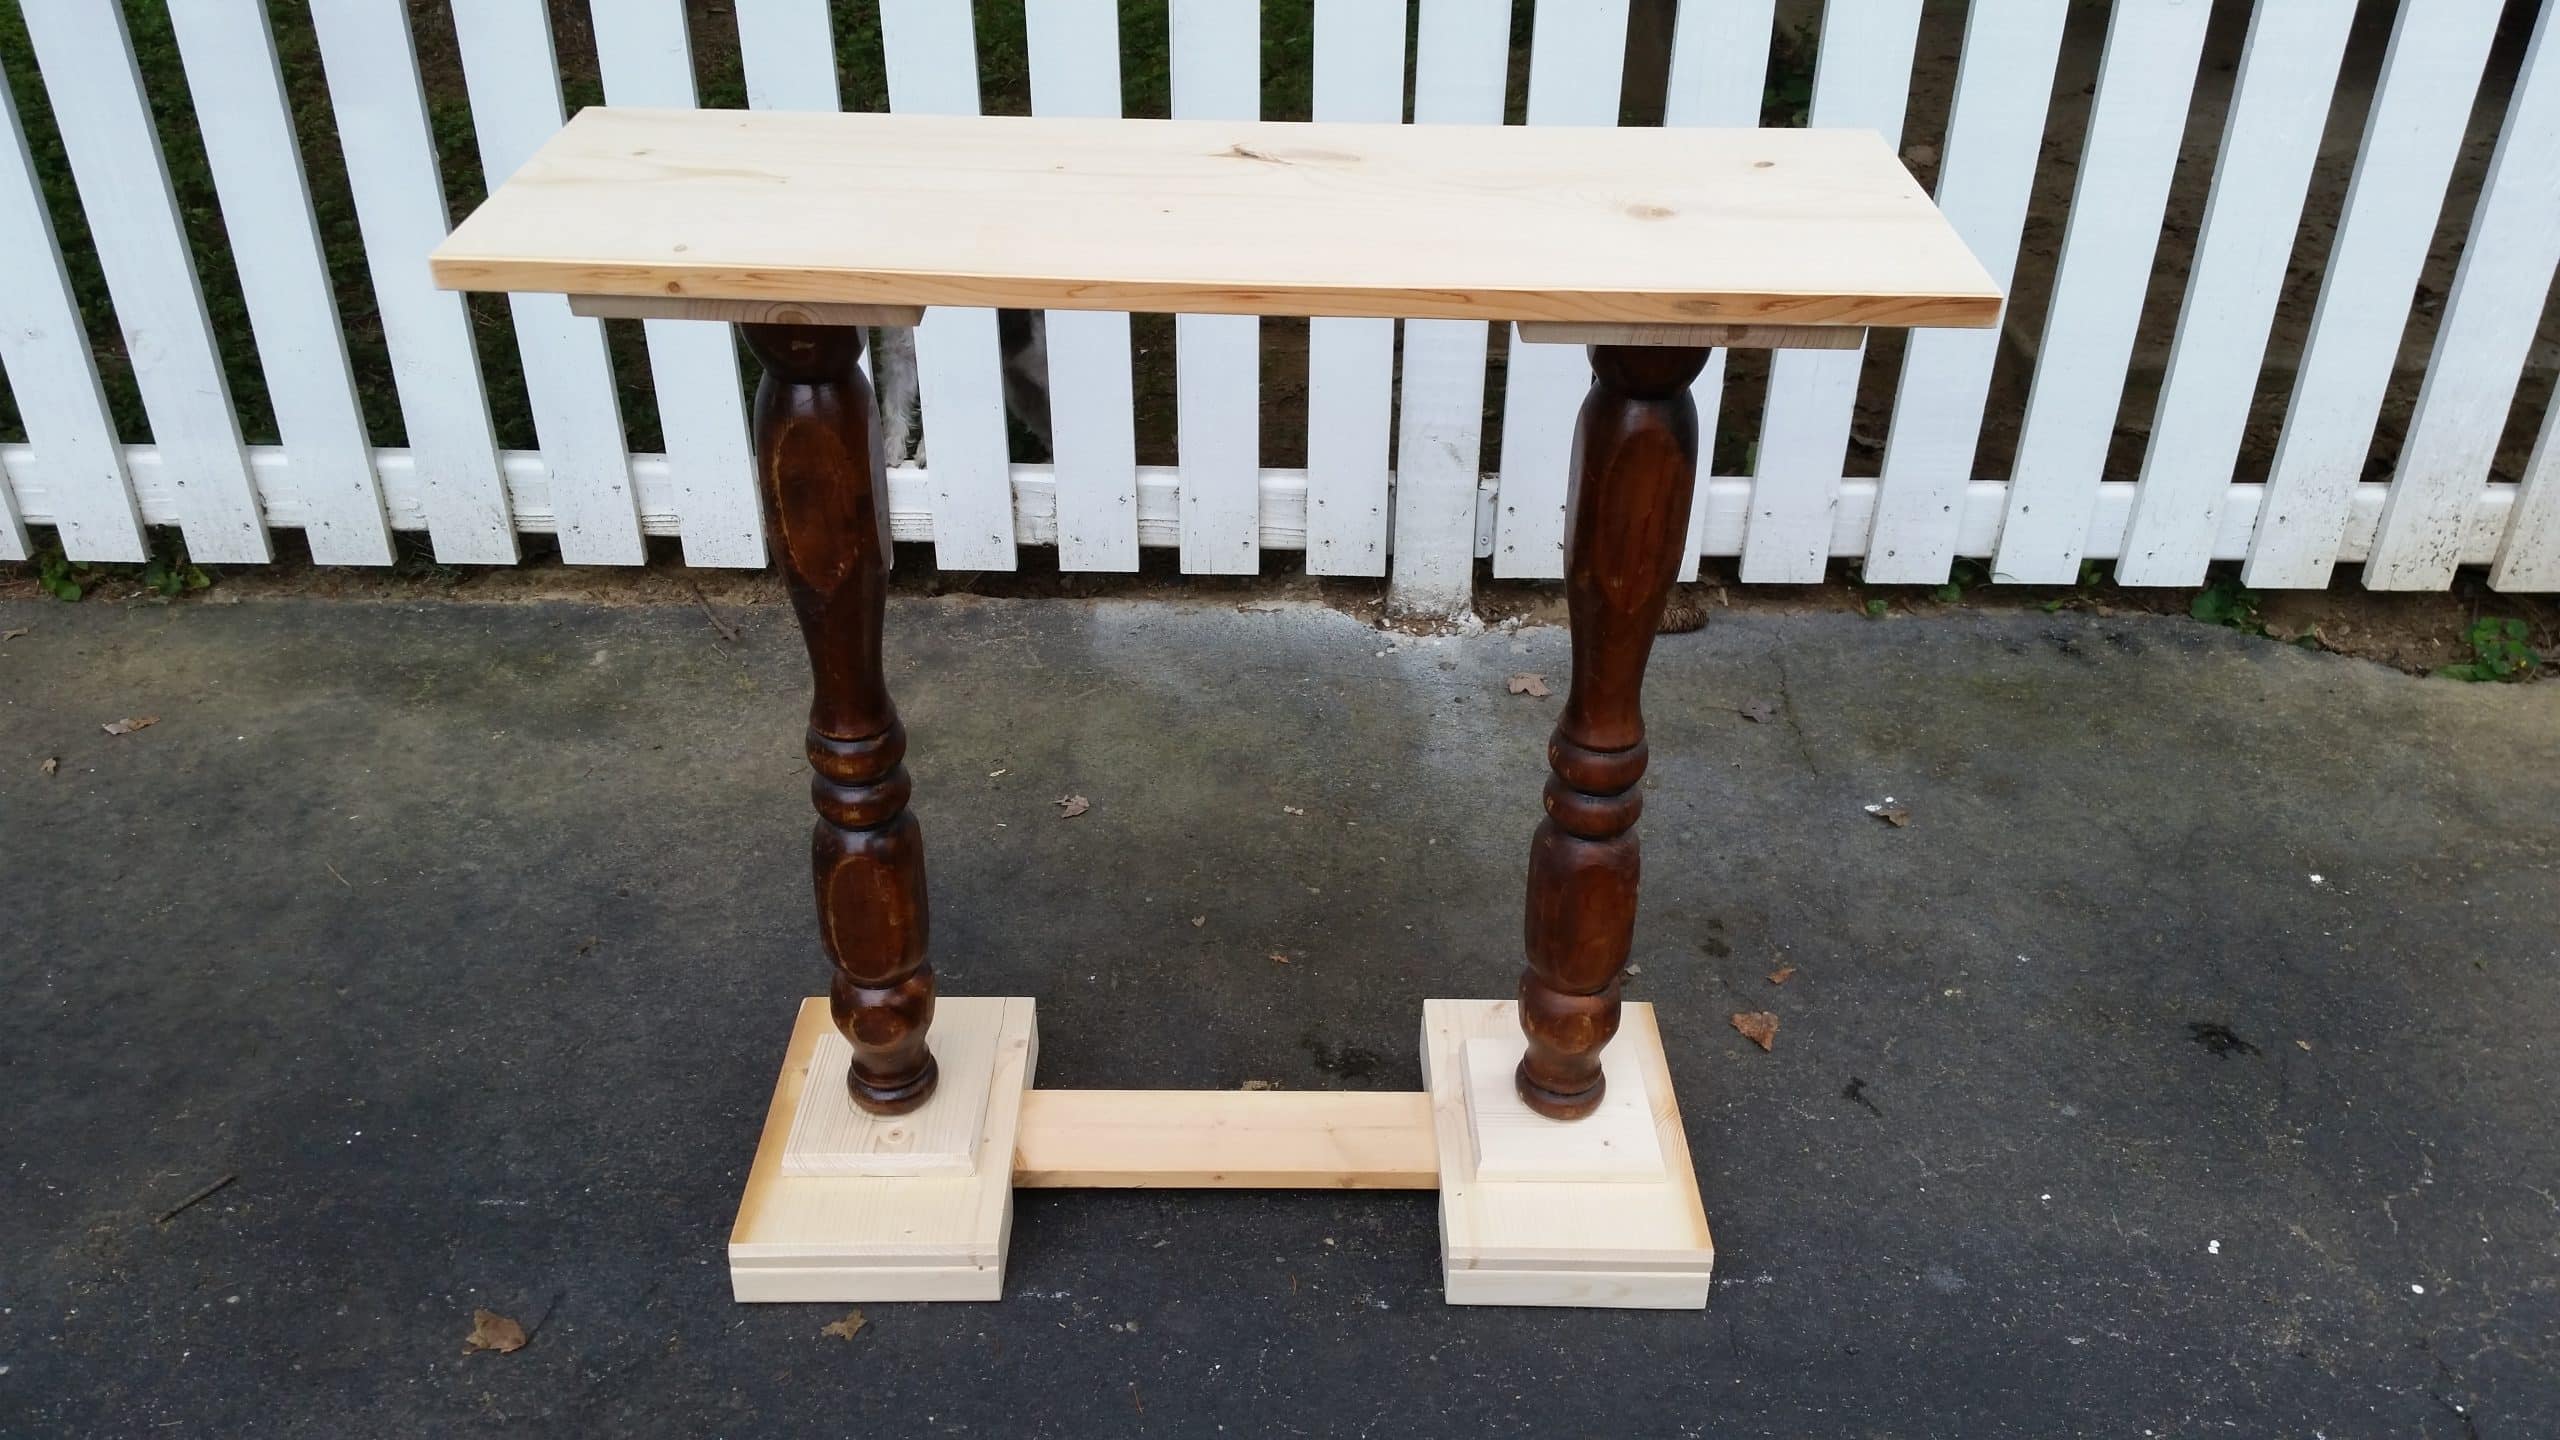
Details of double pedestal table parts
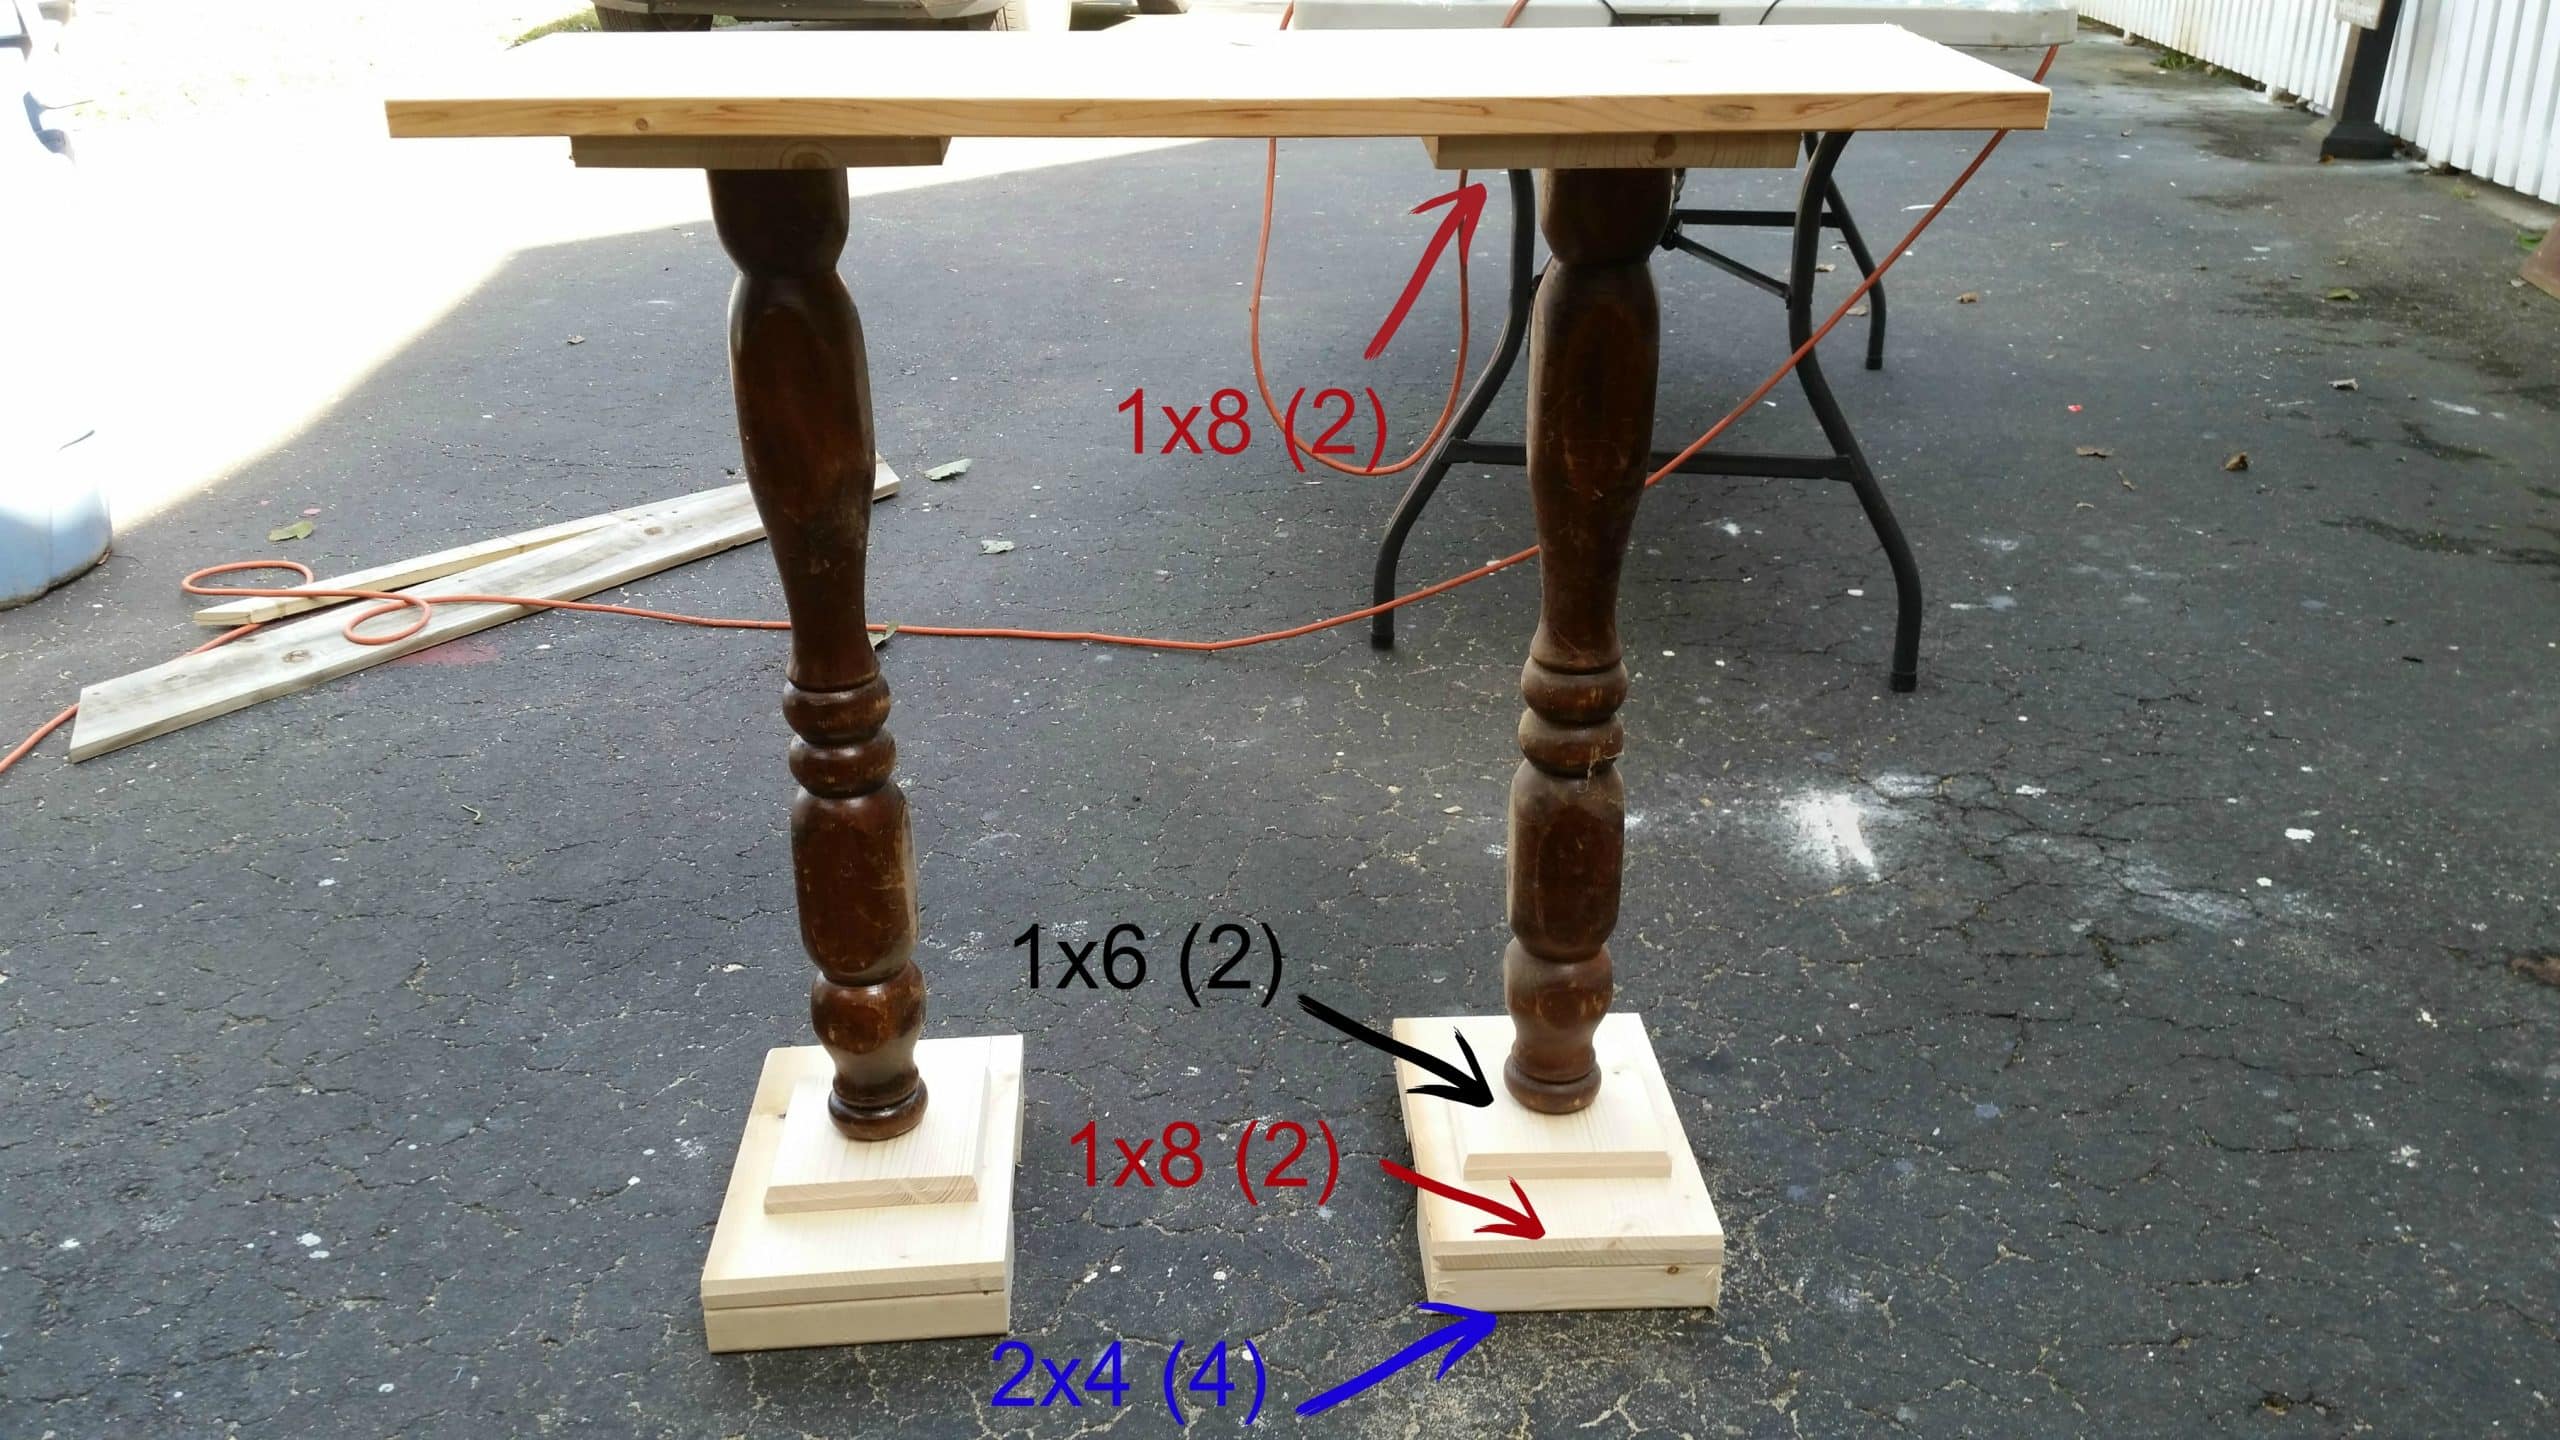
This is the final dry fit. Notice I also beveled the front and back edge of the large 1×8 that sits atop the 2×4’s, all four edges of the square 1×6’s, and the front and back edge of the upper 1x.
How to assemble DIY pedestal table
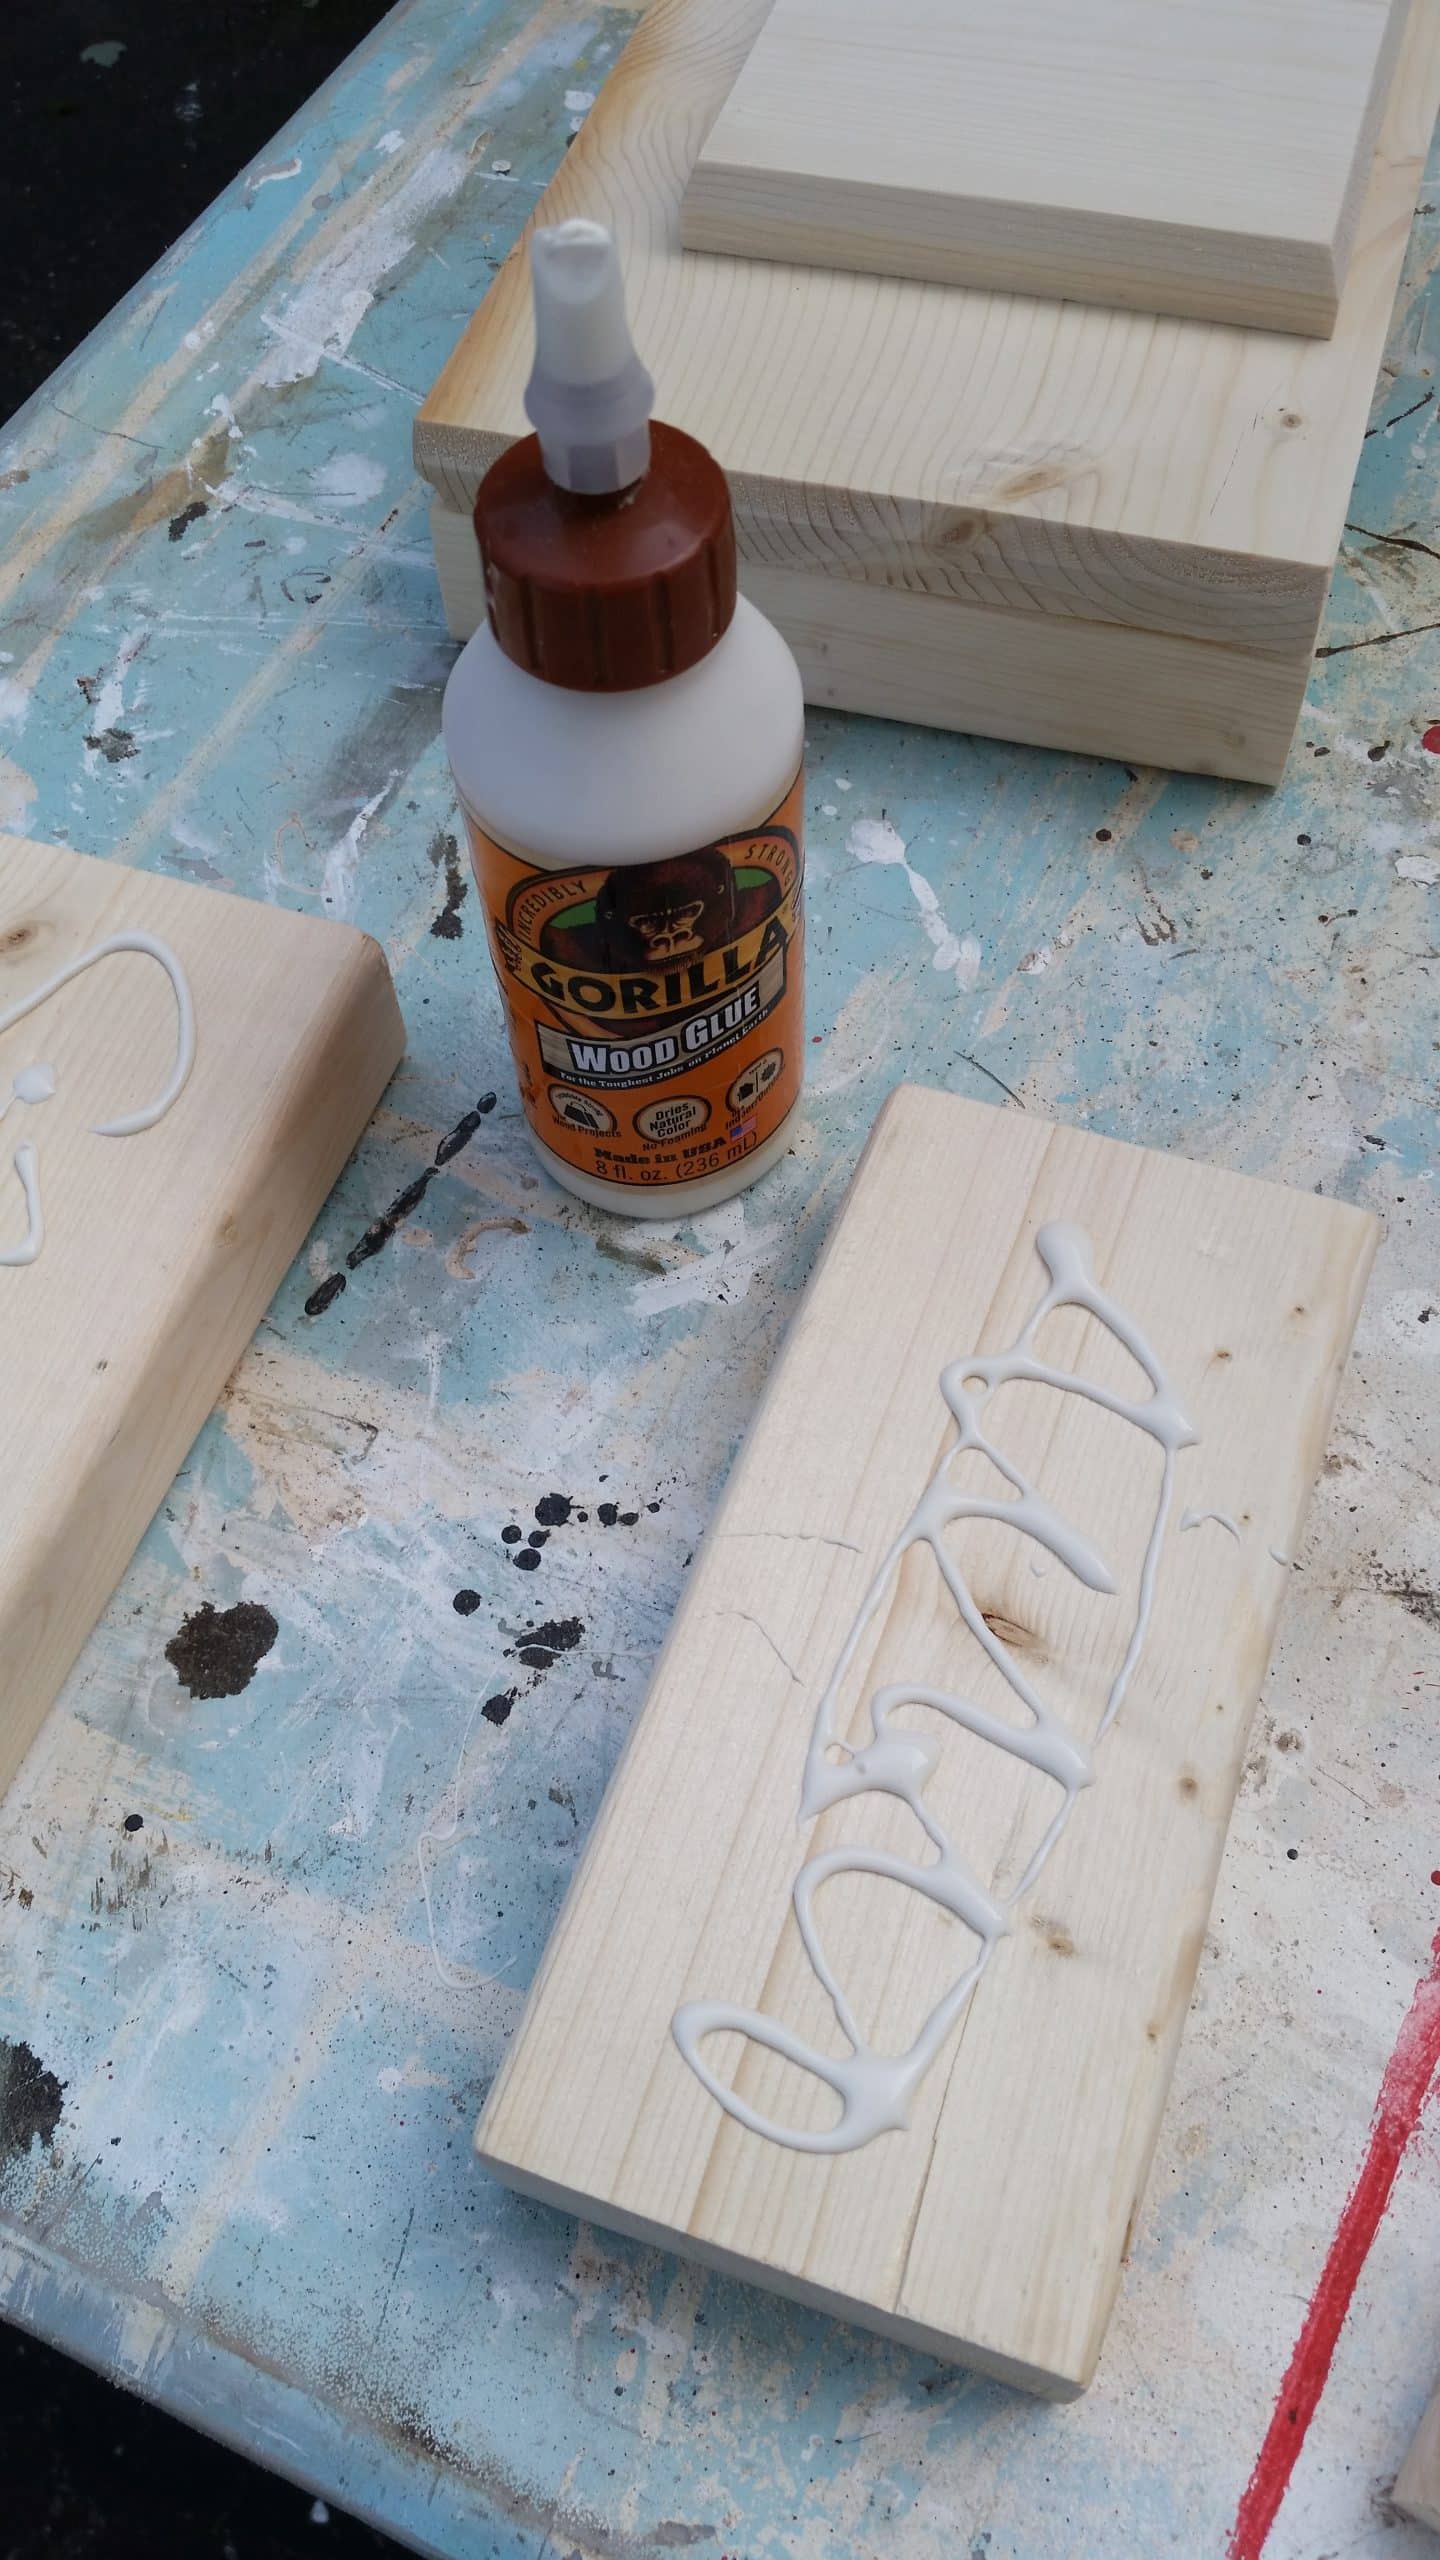
After sanding all of your wood, it’s time to start assembling the pedestal table from the bottom up. Using Gorilla Wood Glue will give you extra strength in your build.

It’s very important that there is no shifting due to the slippery wood glue. To prevent this I like to use my Ryobi Airstrike Stapler to “clamp” the wood as the glue sets up.

I used the Kreg Multi-Mark to make sure all of my pieces were equidistant for this project. (yeah, I know it’s backwards, but I don’t use it for measuring, just to make sure everything matches)
Assemble with wood glue and wood screws
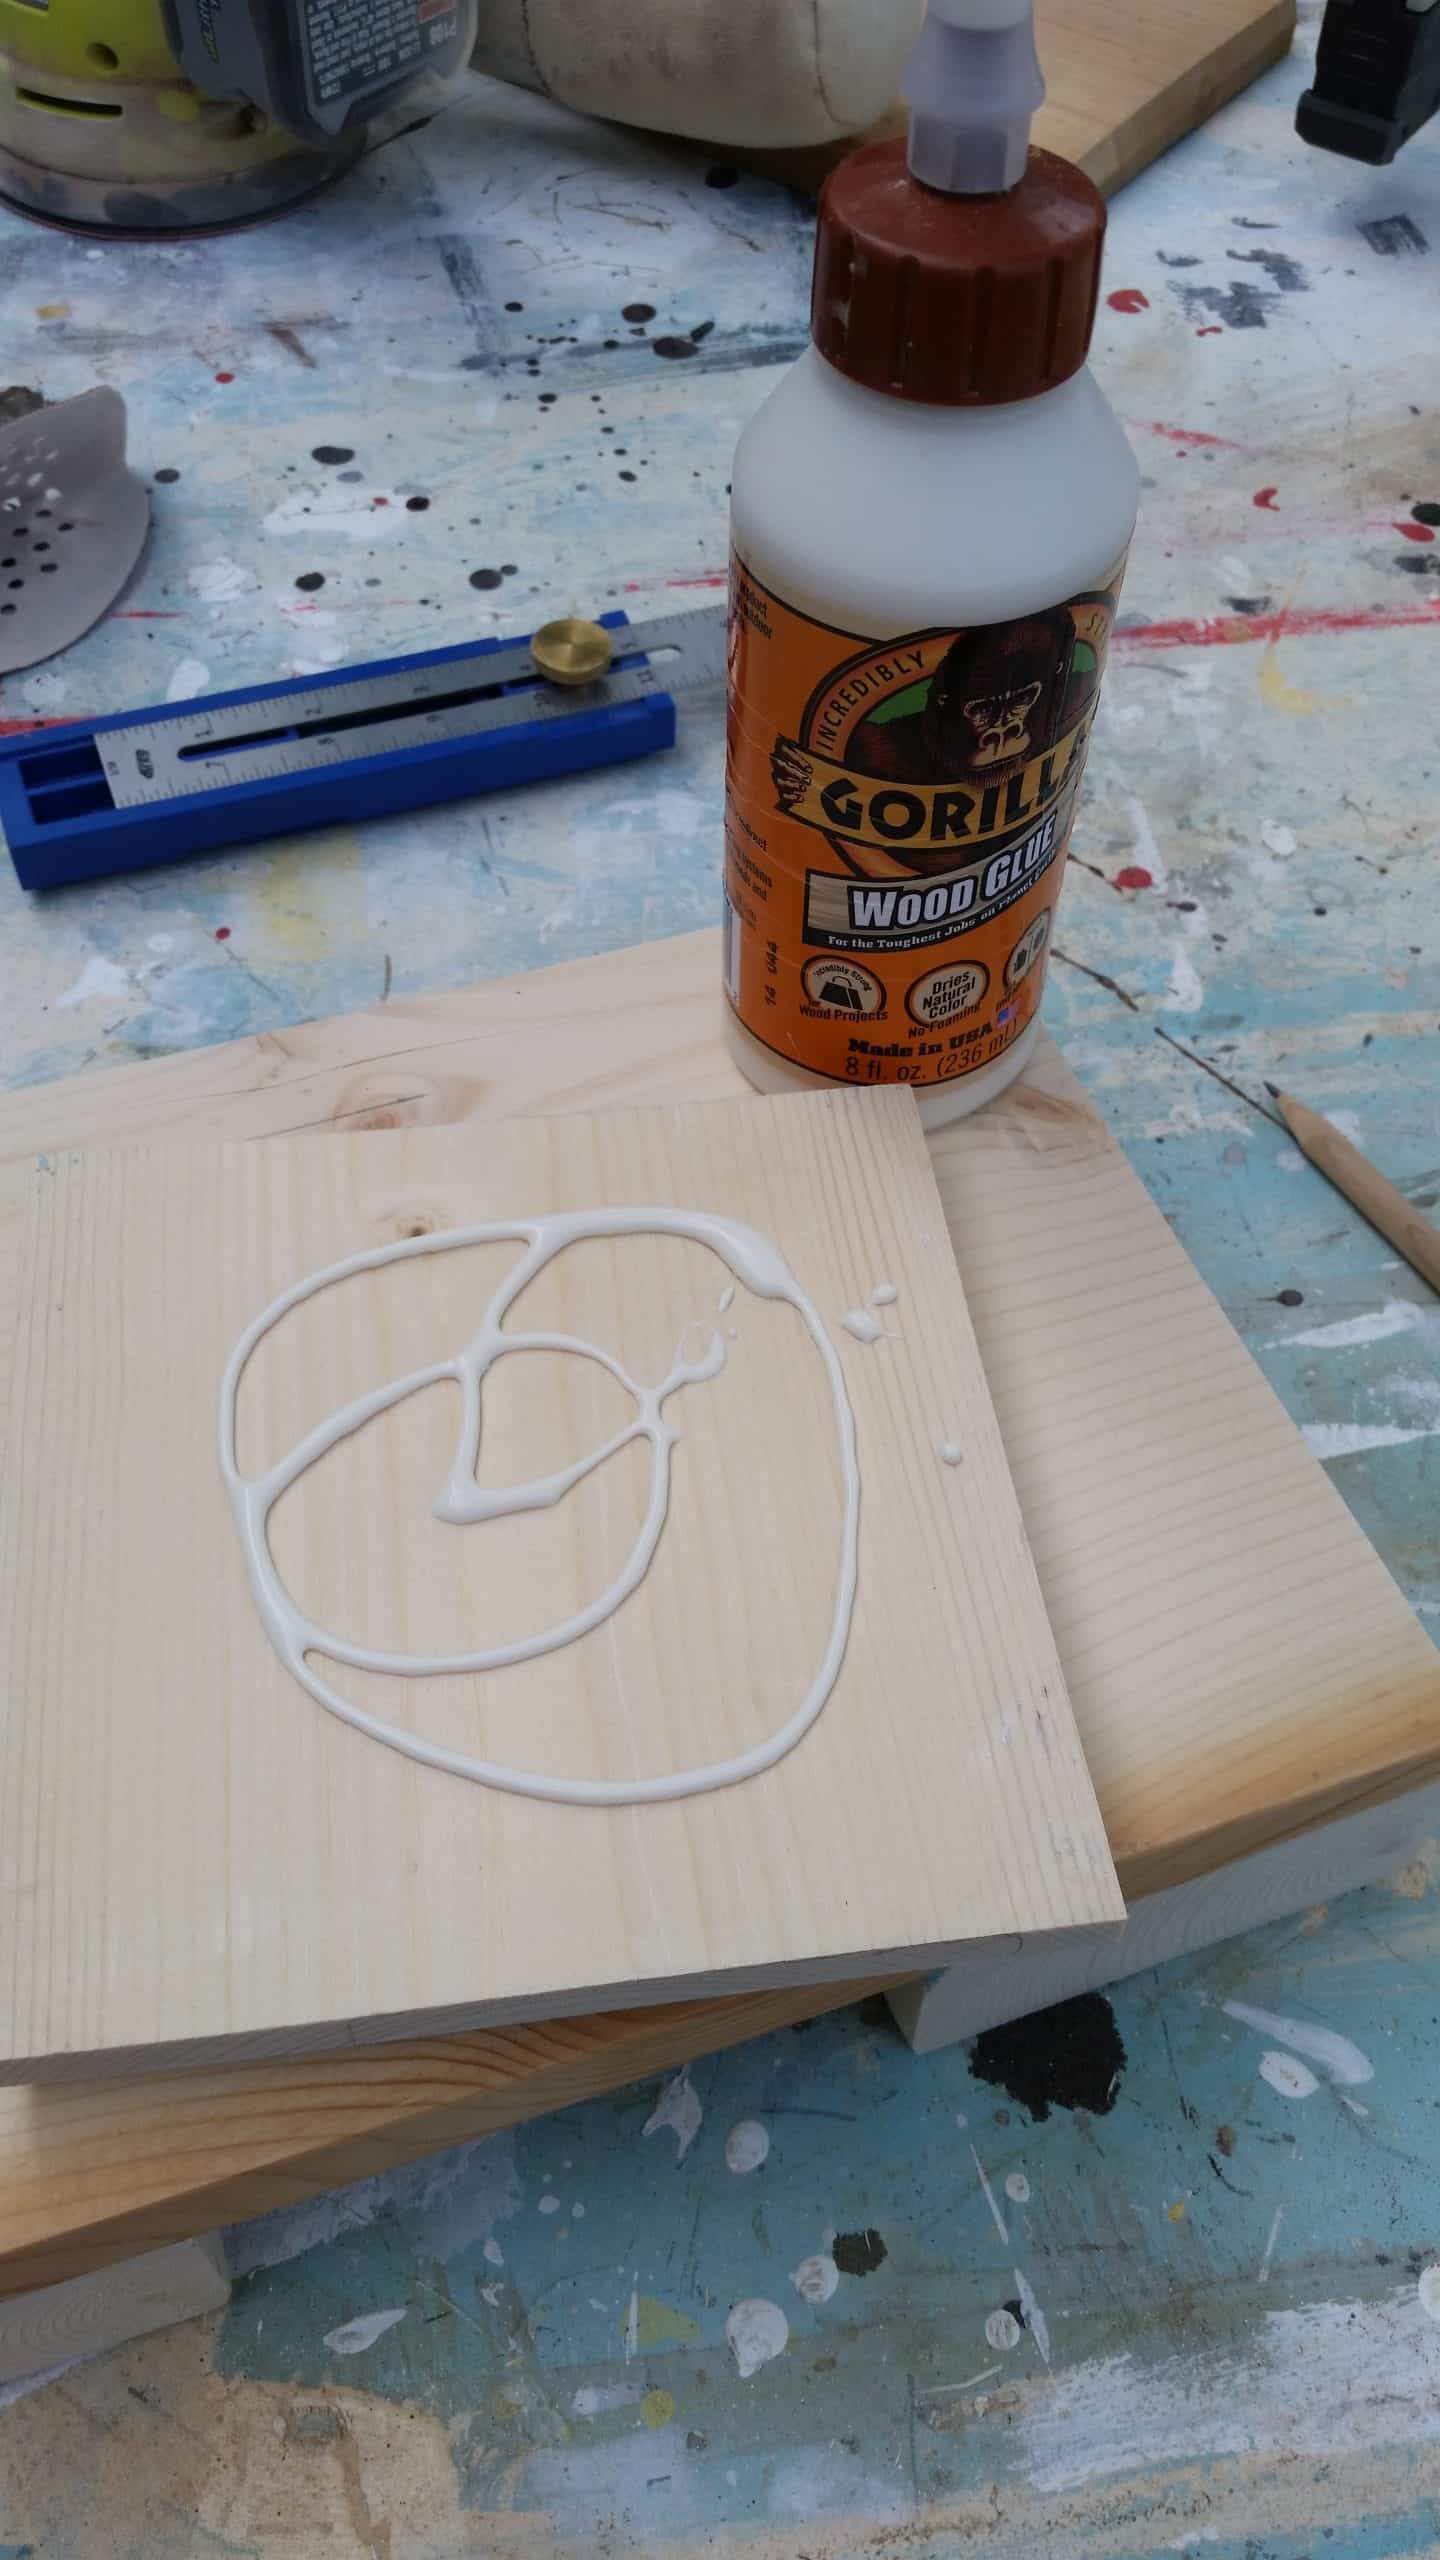
More wood glue to secure the square pieces atop the 1×8’s.
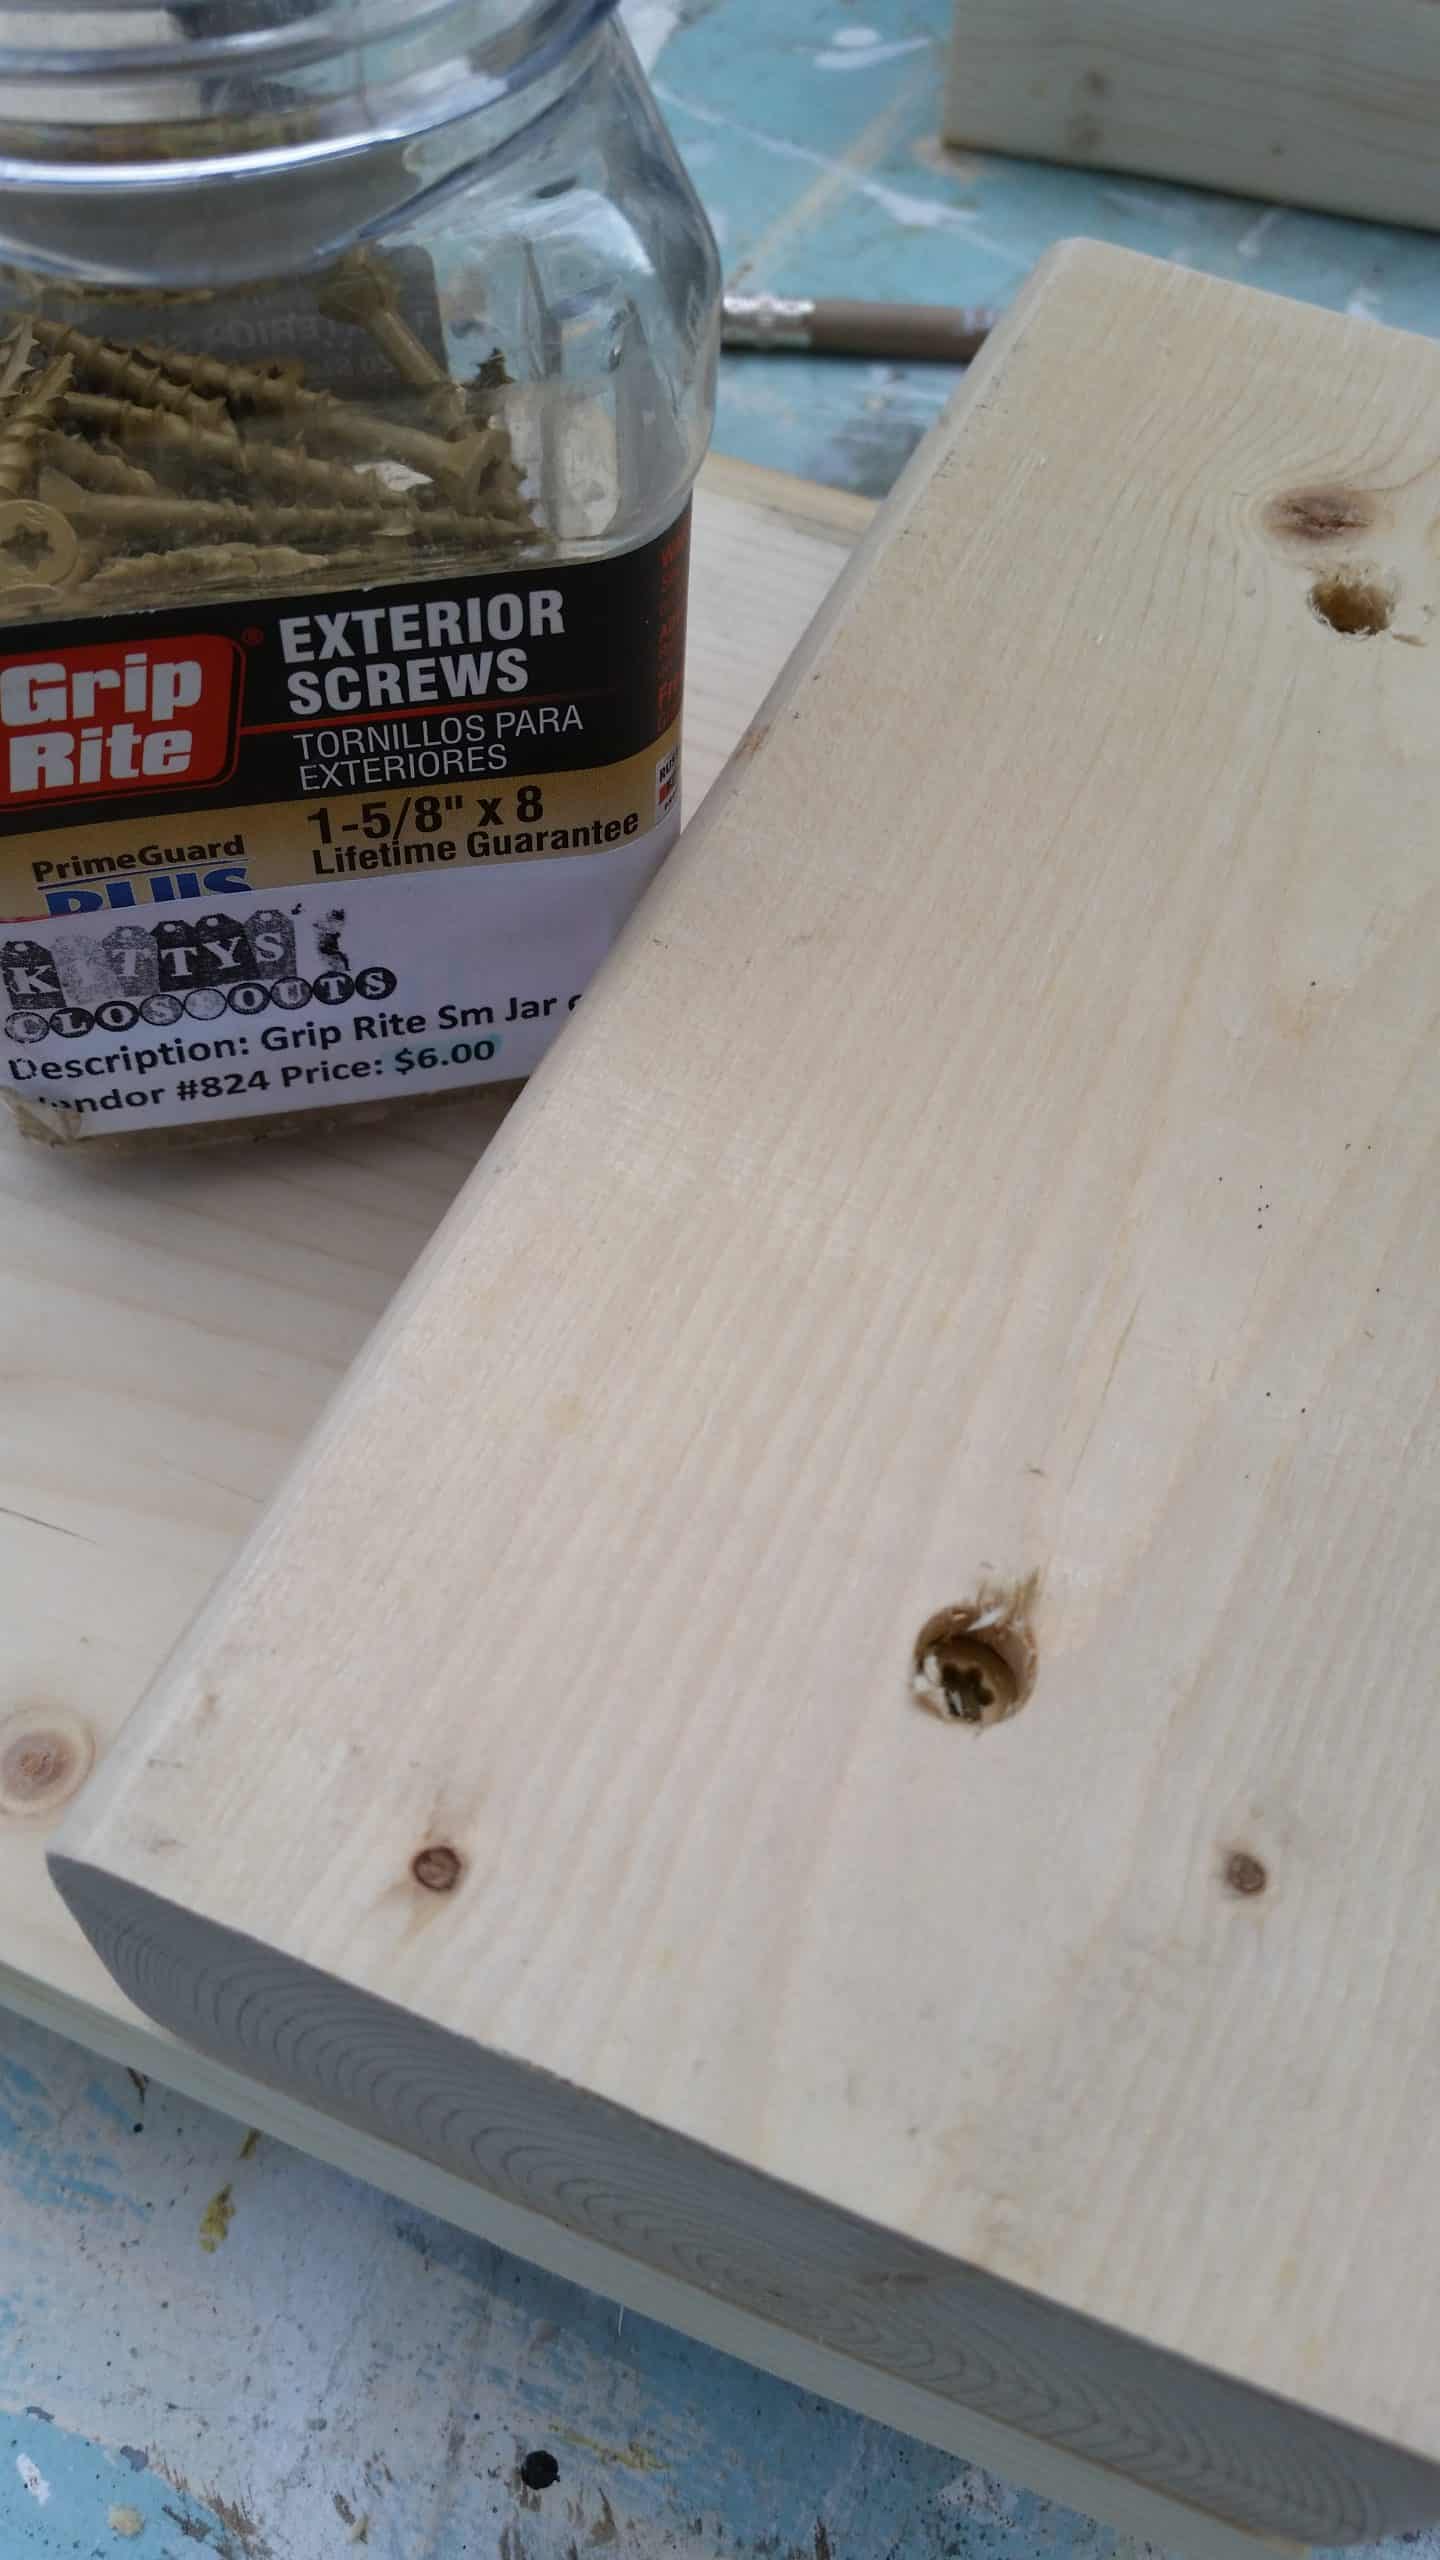
Because a 2×4 is one and a half inches thick, I had to countersink the 1 5/8” screws to make sure they “bite”.
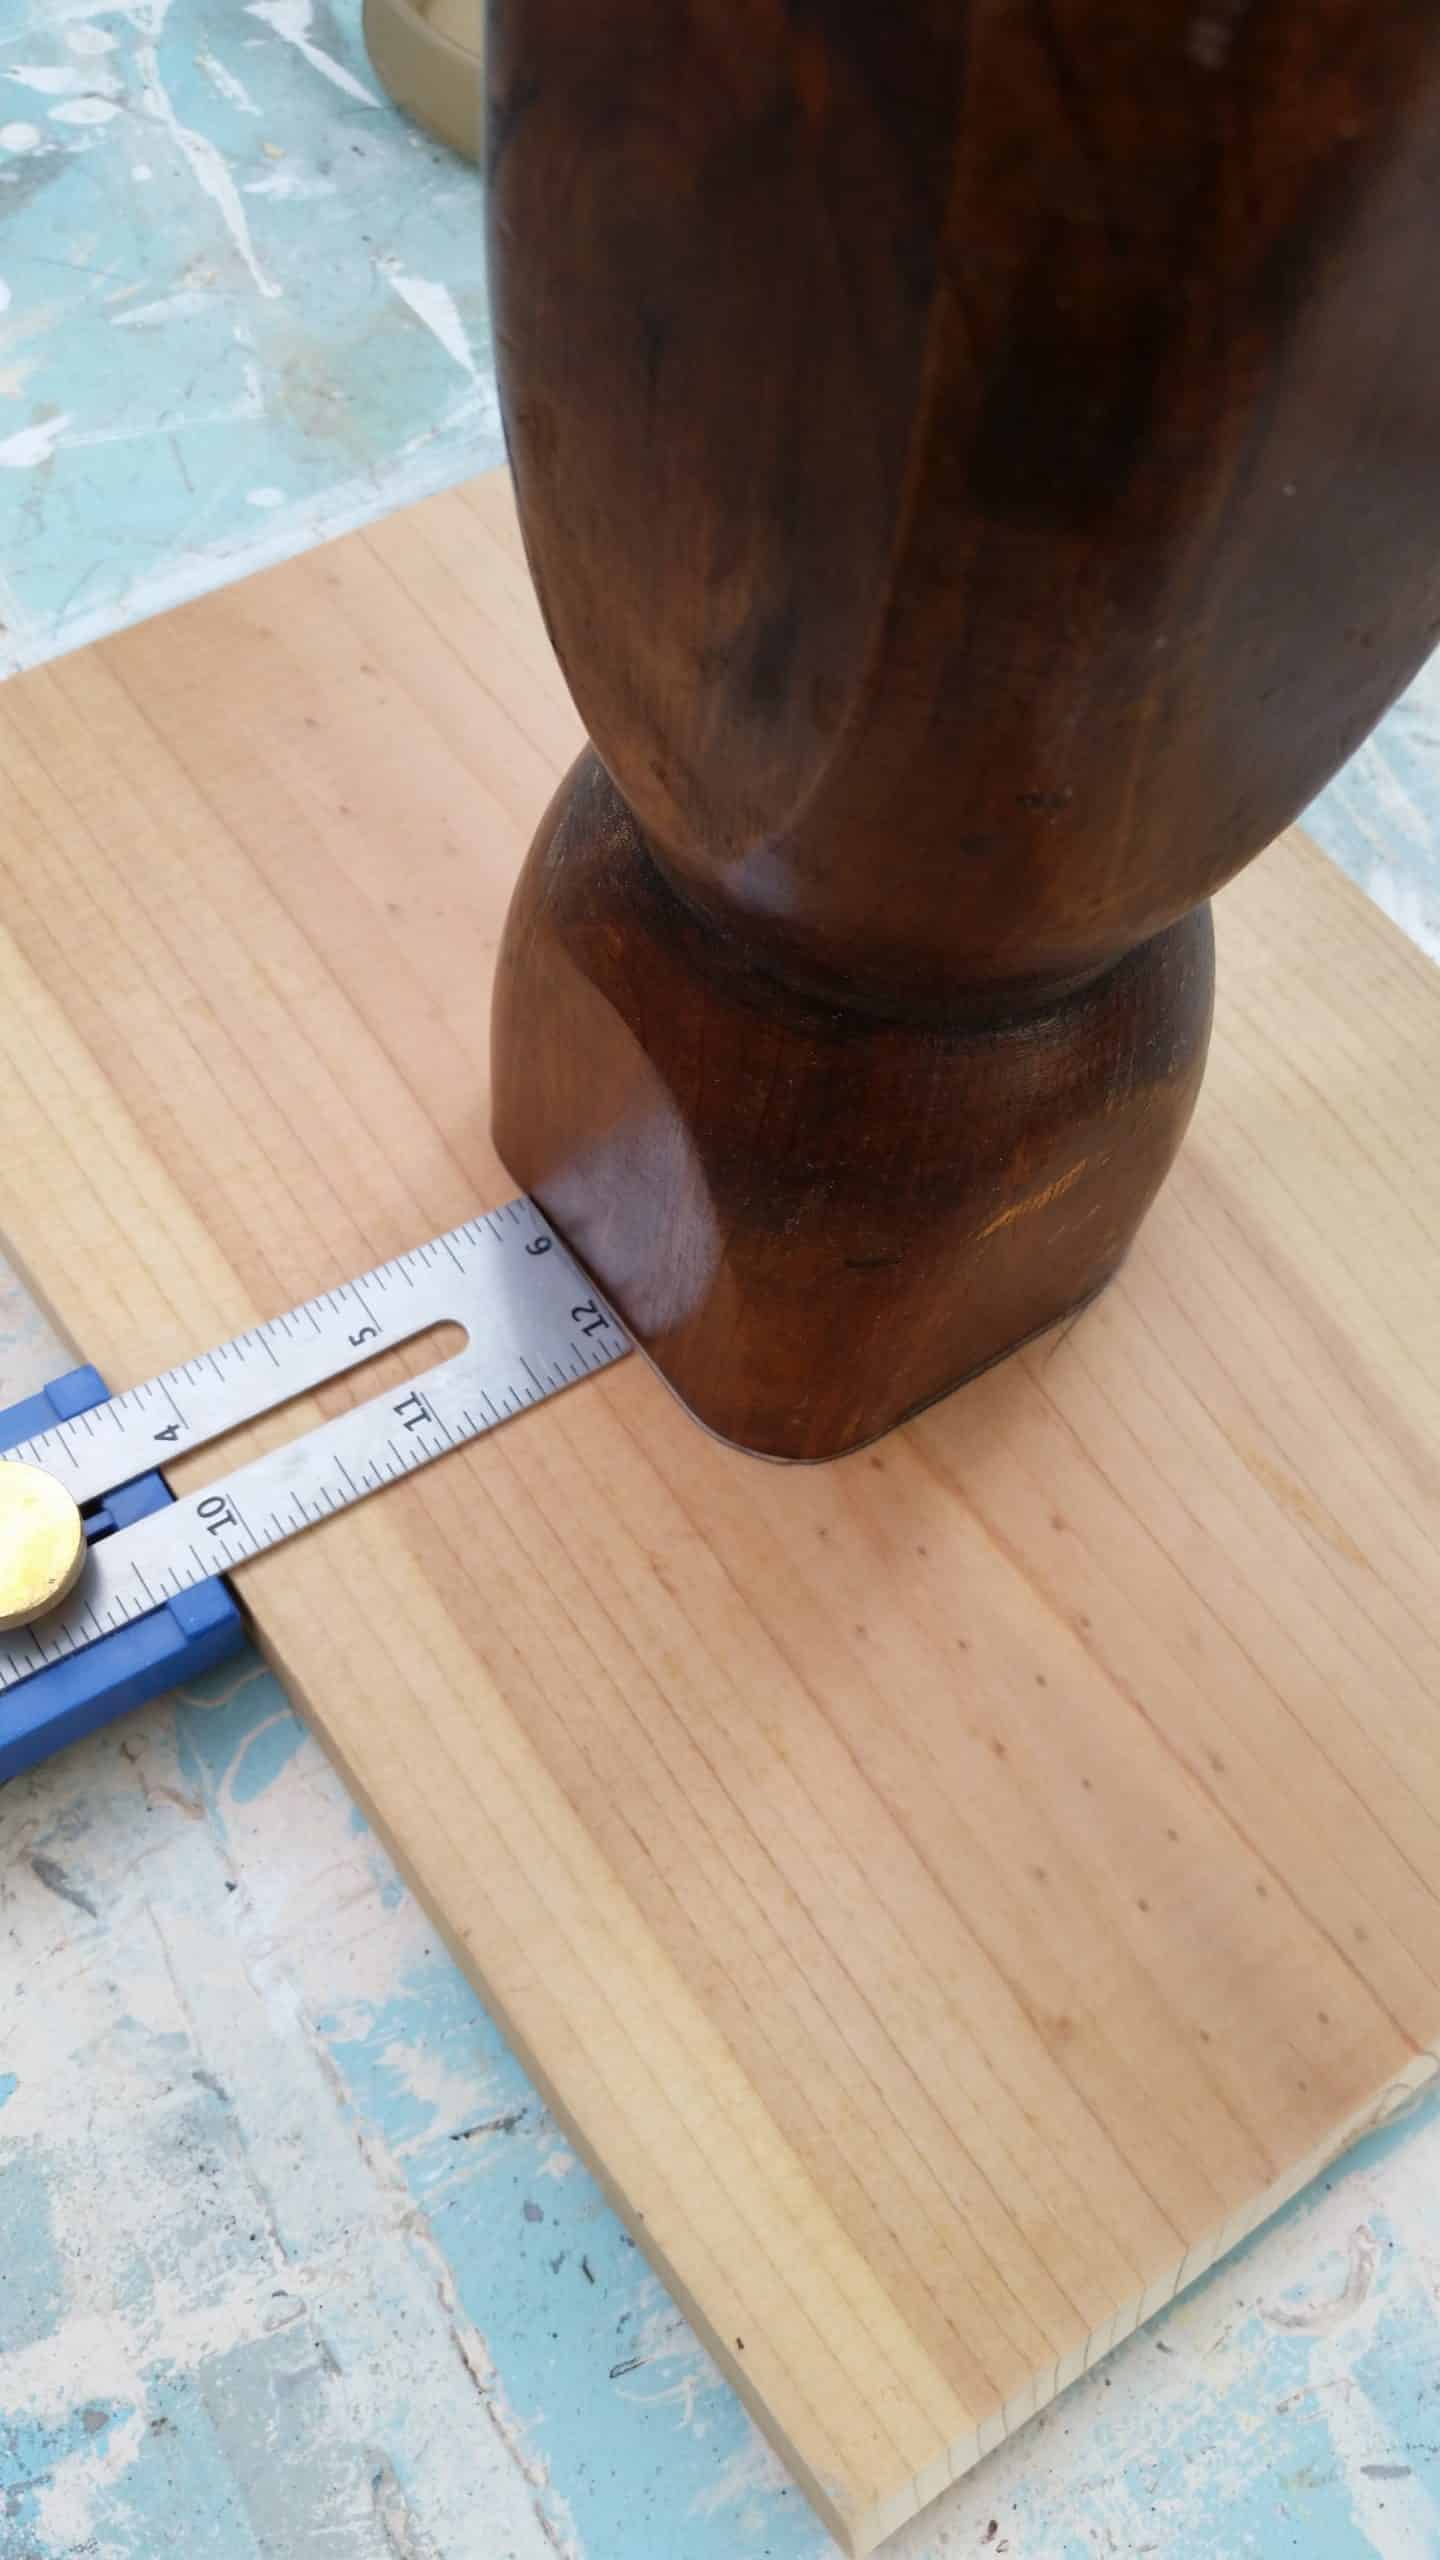
How to attach pedestal legs
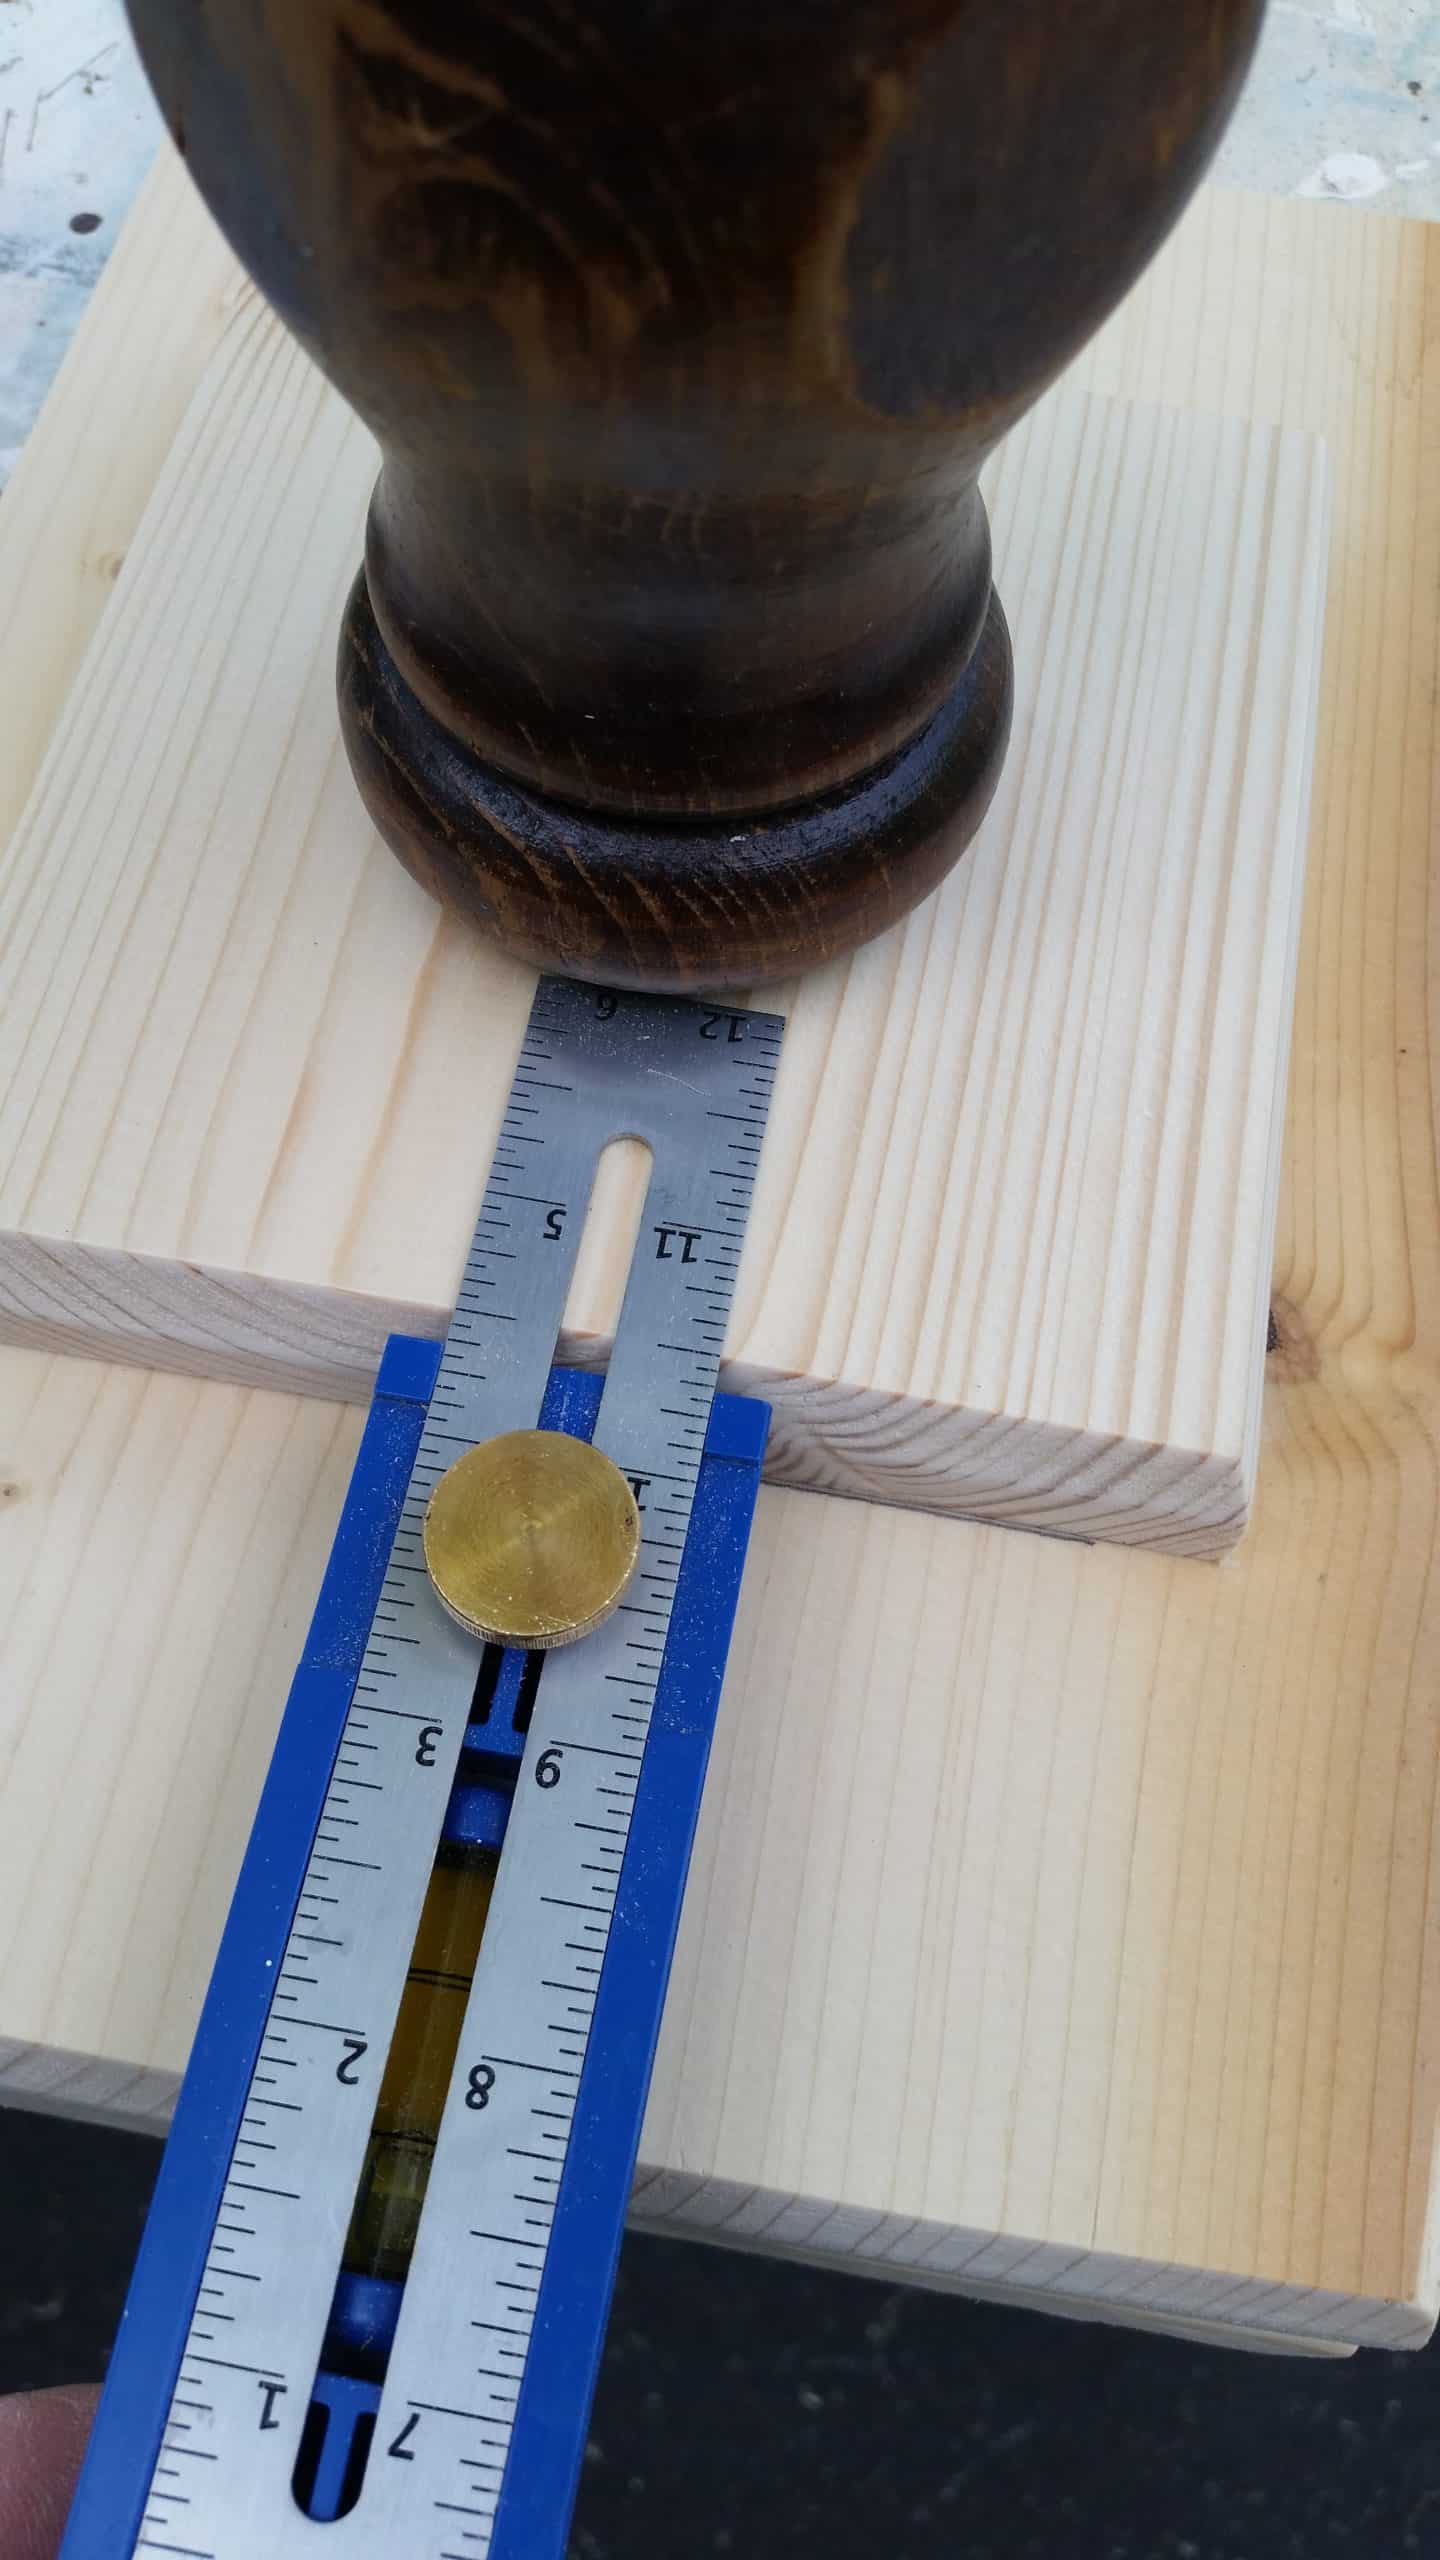
I used the multi-mark all around to make sure the pedestal was centered on the square.
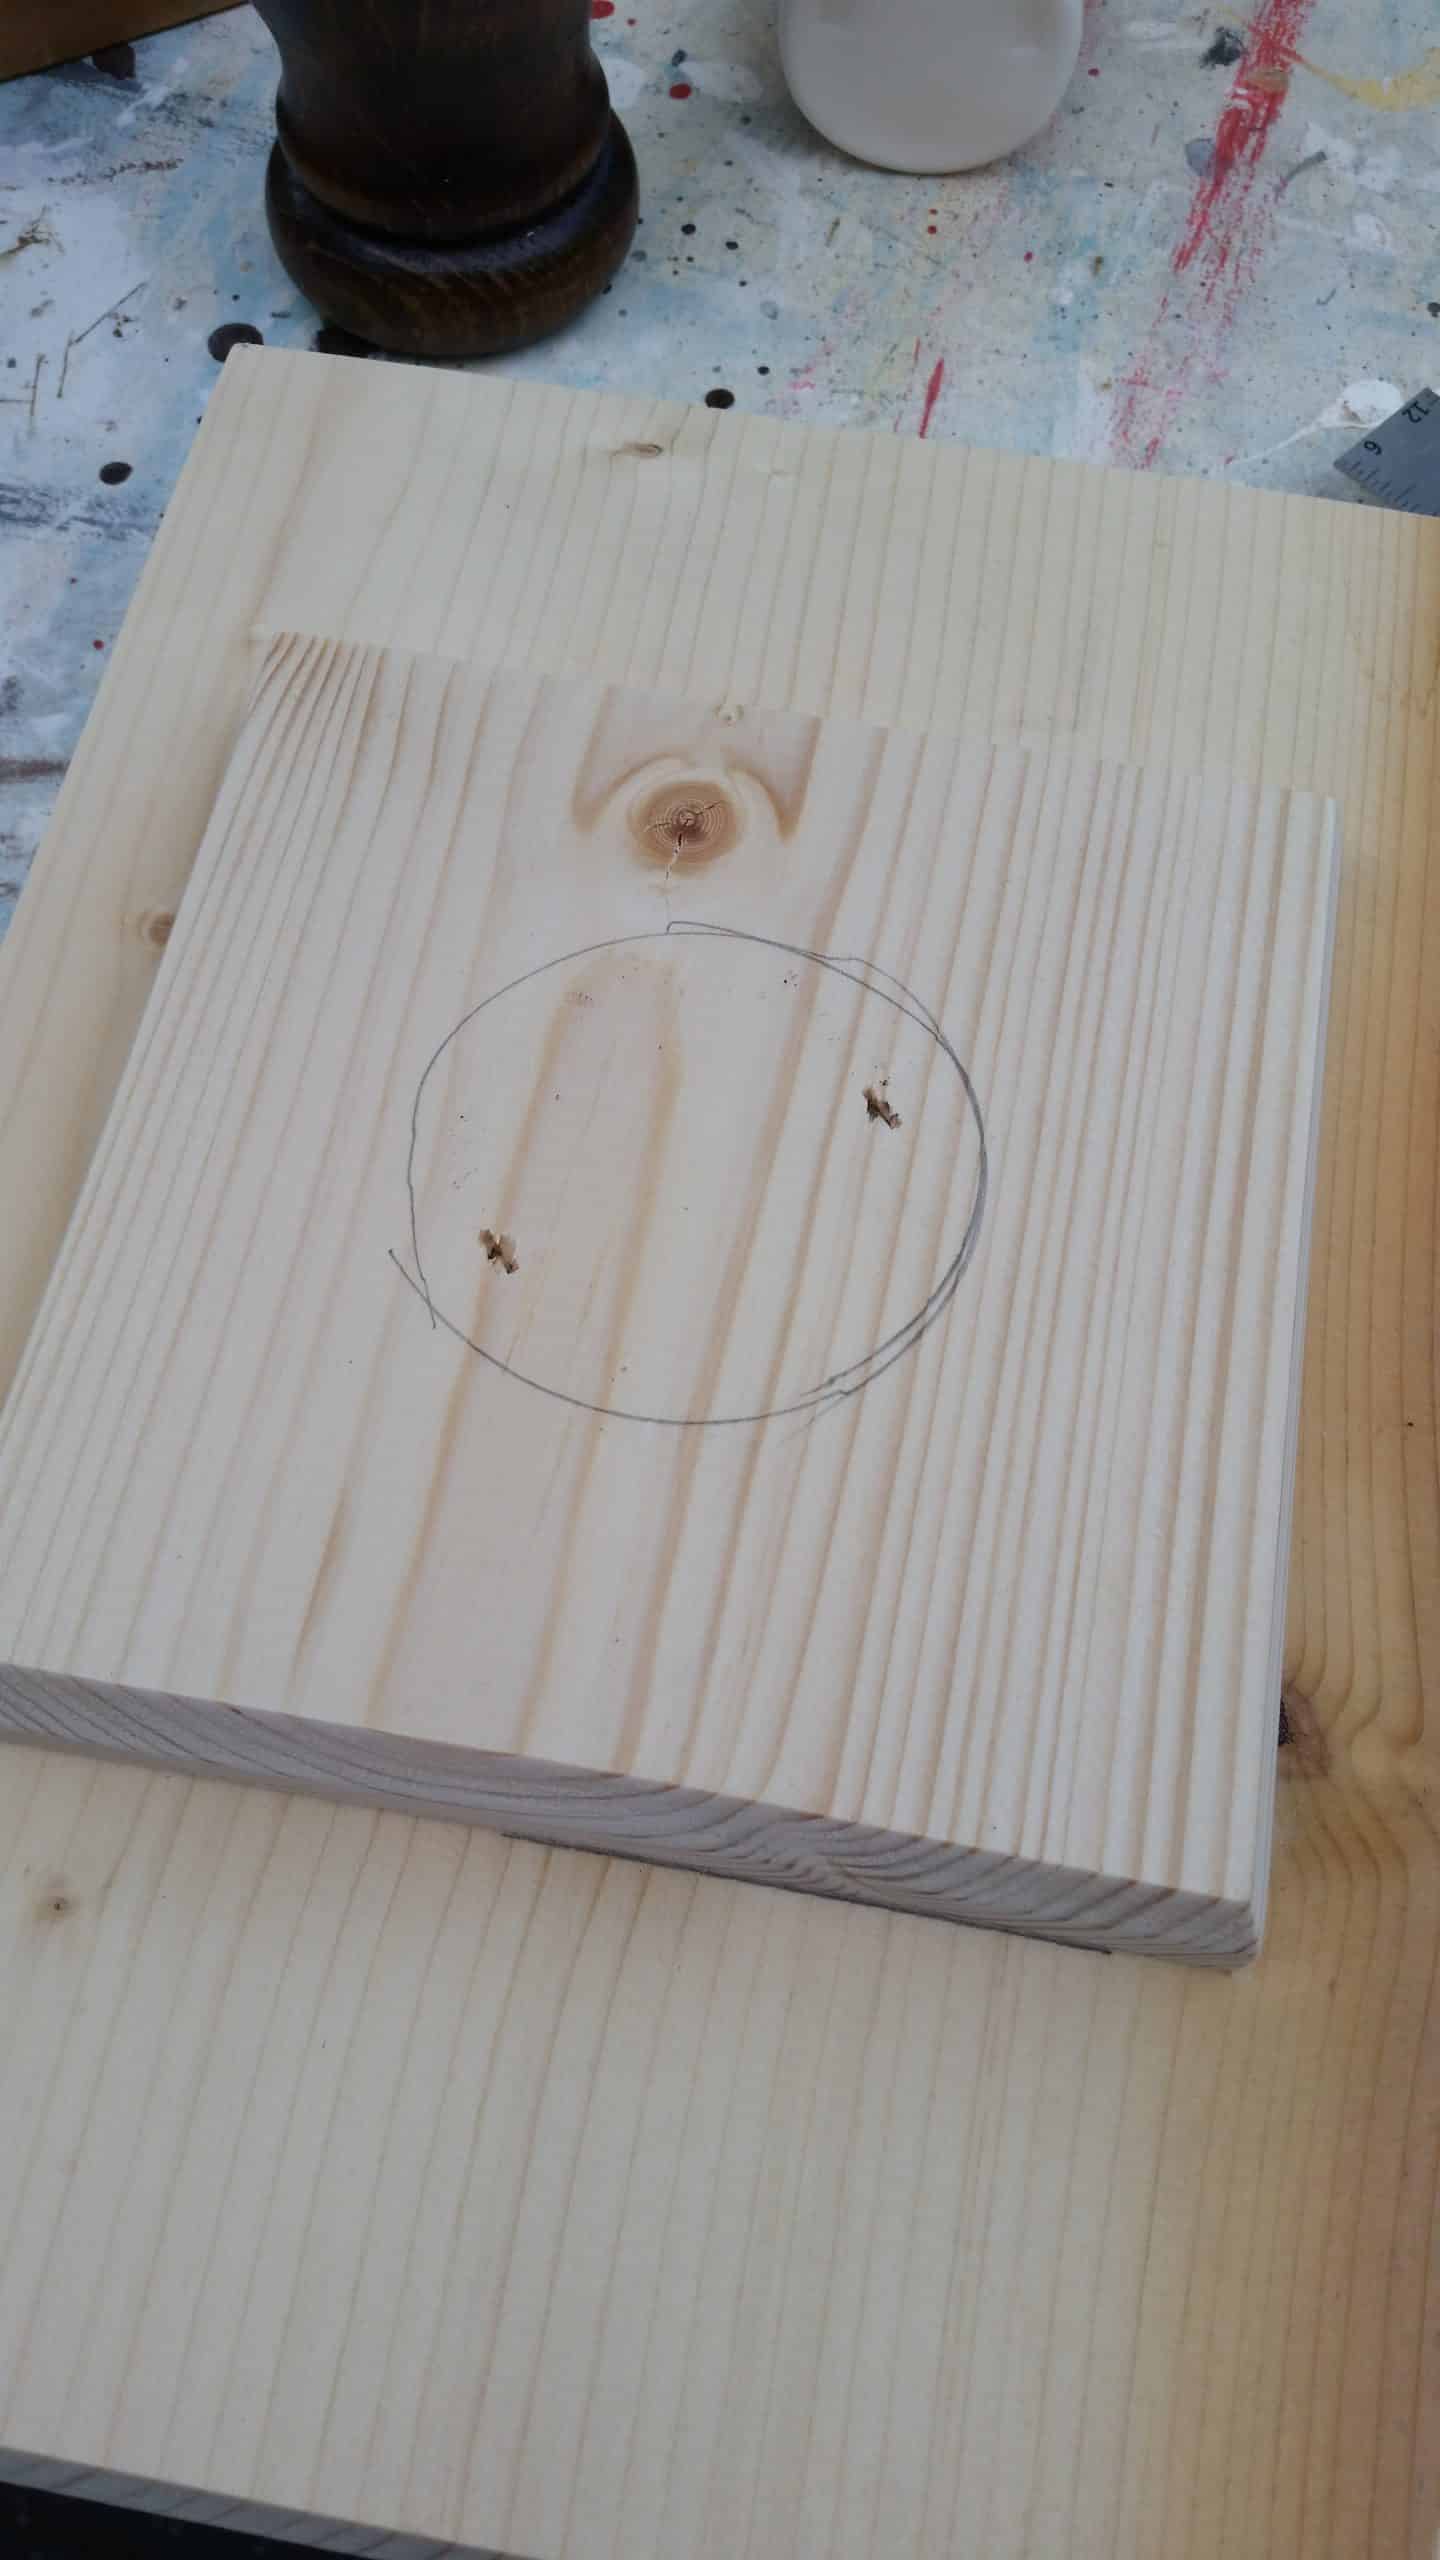
In this photo you can see that I “clamped” the square with some staples until I can get the screws in that will hold the leg in place. To do that I placed the leg on the square and traced around it.

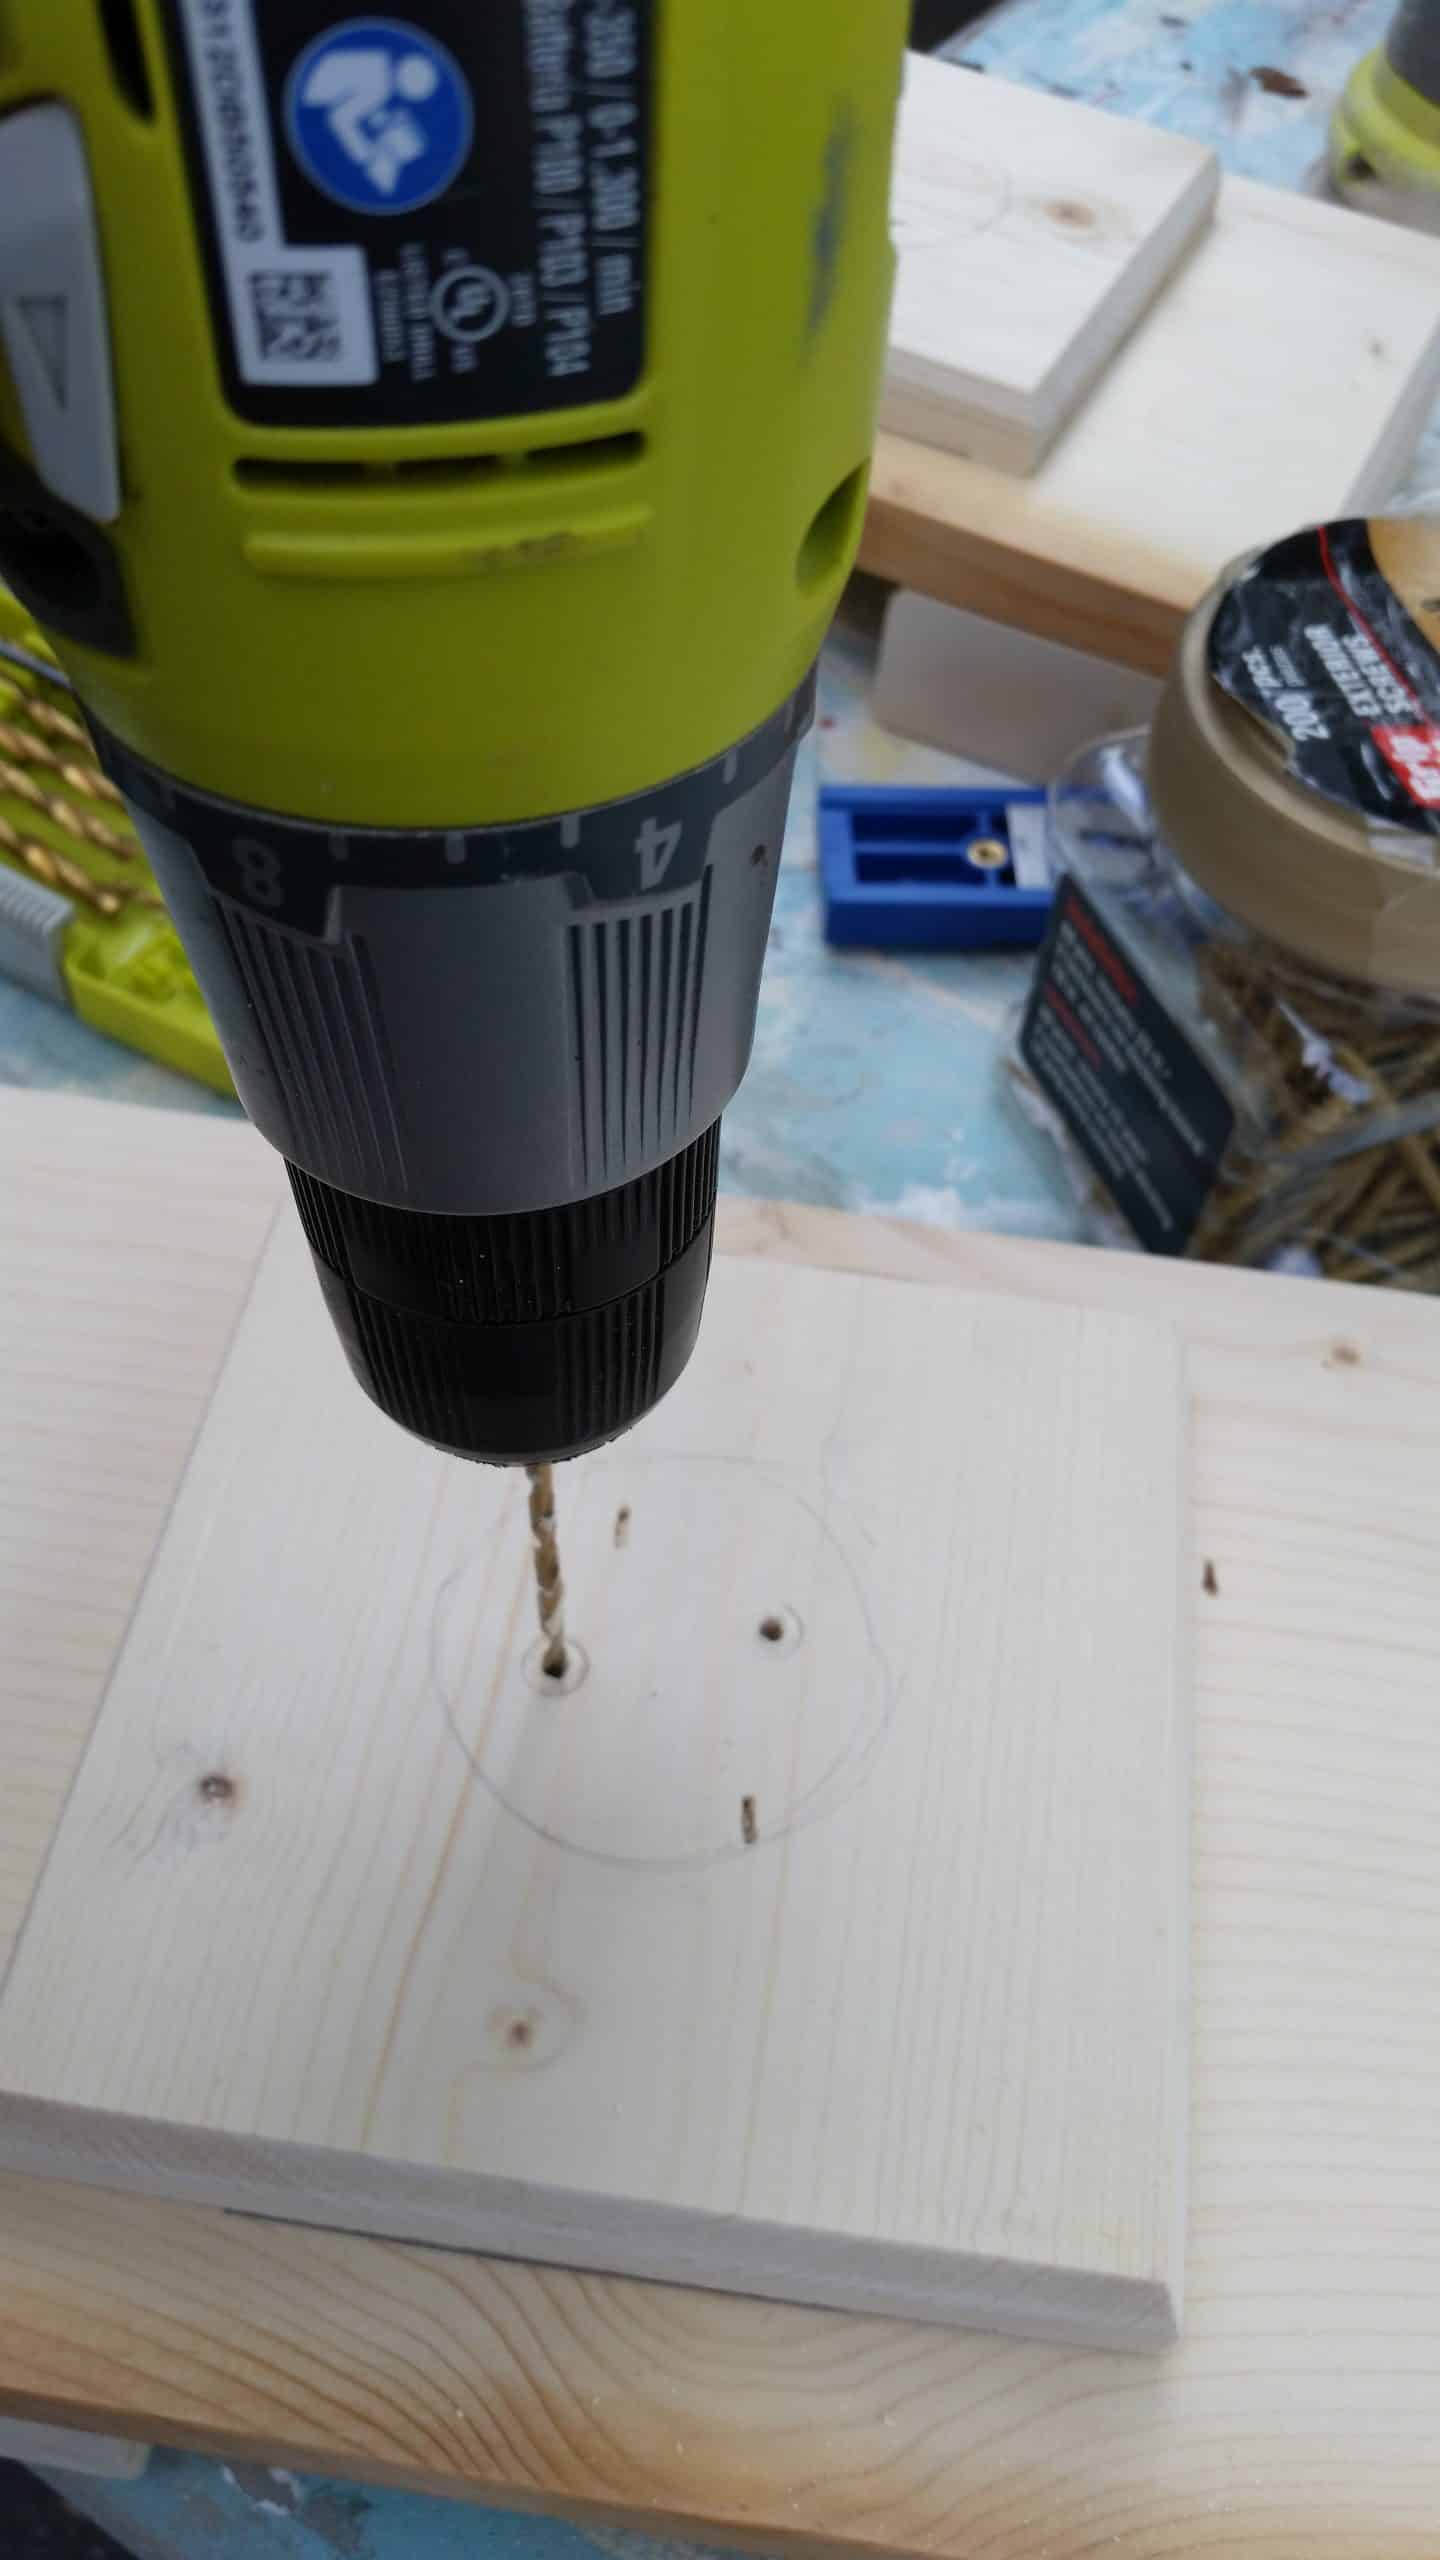
By drilling from the top through to the bottom, I will know exactly where to insert the screws that will hold the square in place and secure the table as well.
This is where patience comes in to play. I put the pieces on a level surface and allowed the glue to set up while I took a break. This would make certain that there is no shifting when I secure the pedestal.
Because of the pilot holes, it’s a no-brainer where to put the screws. I secured one screw, then checked the other side to make sure the pedestal hadn’t shifted.
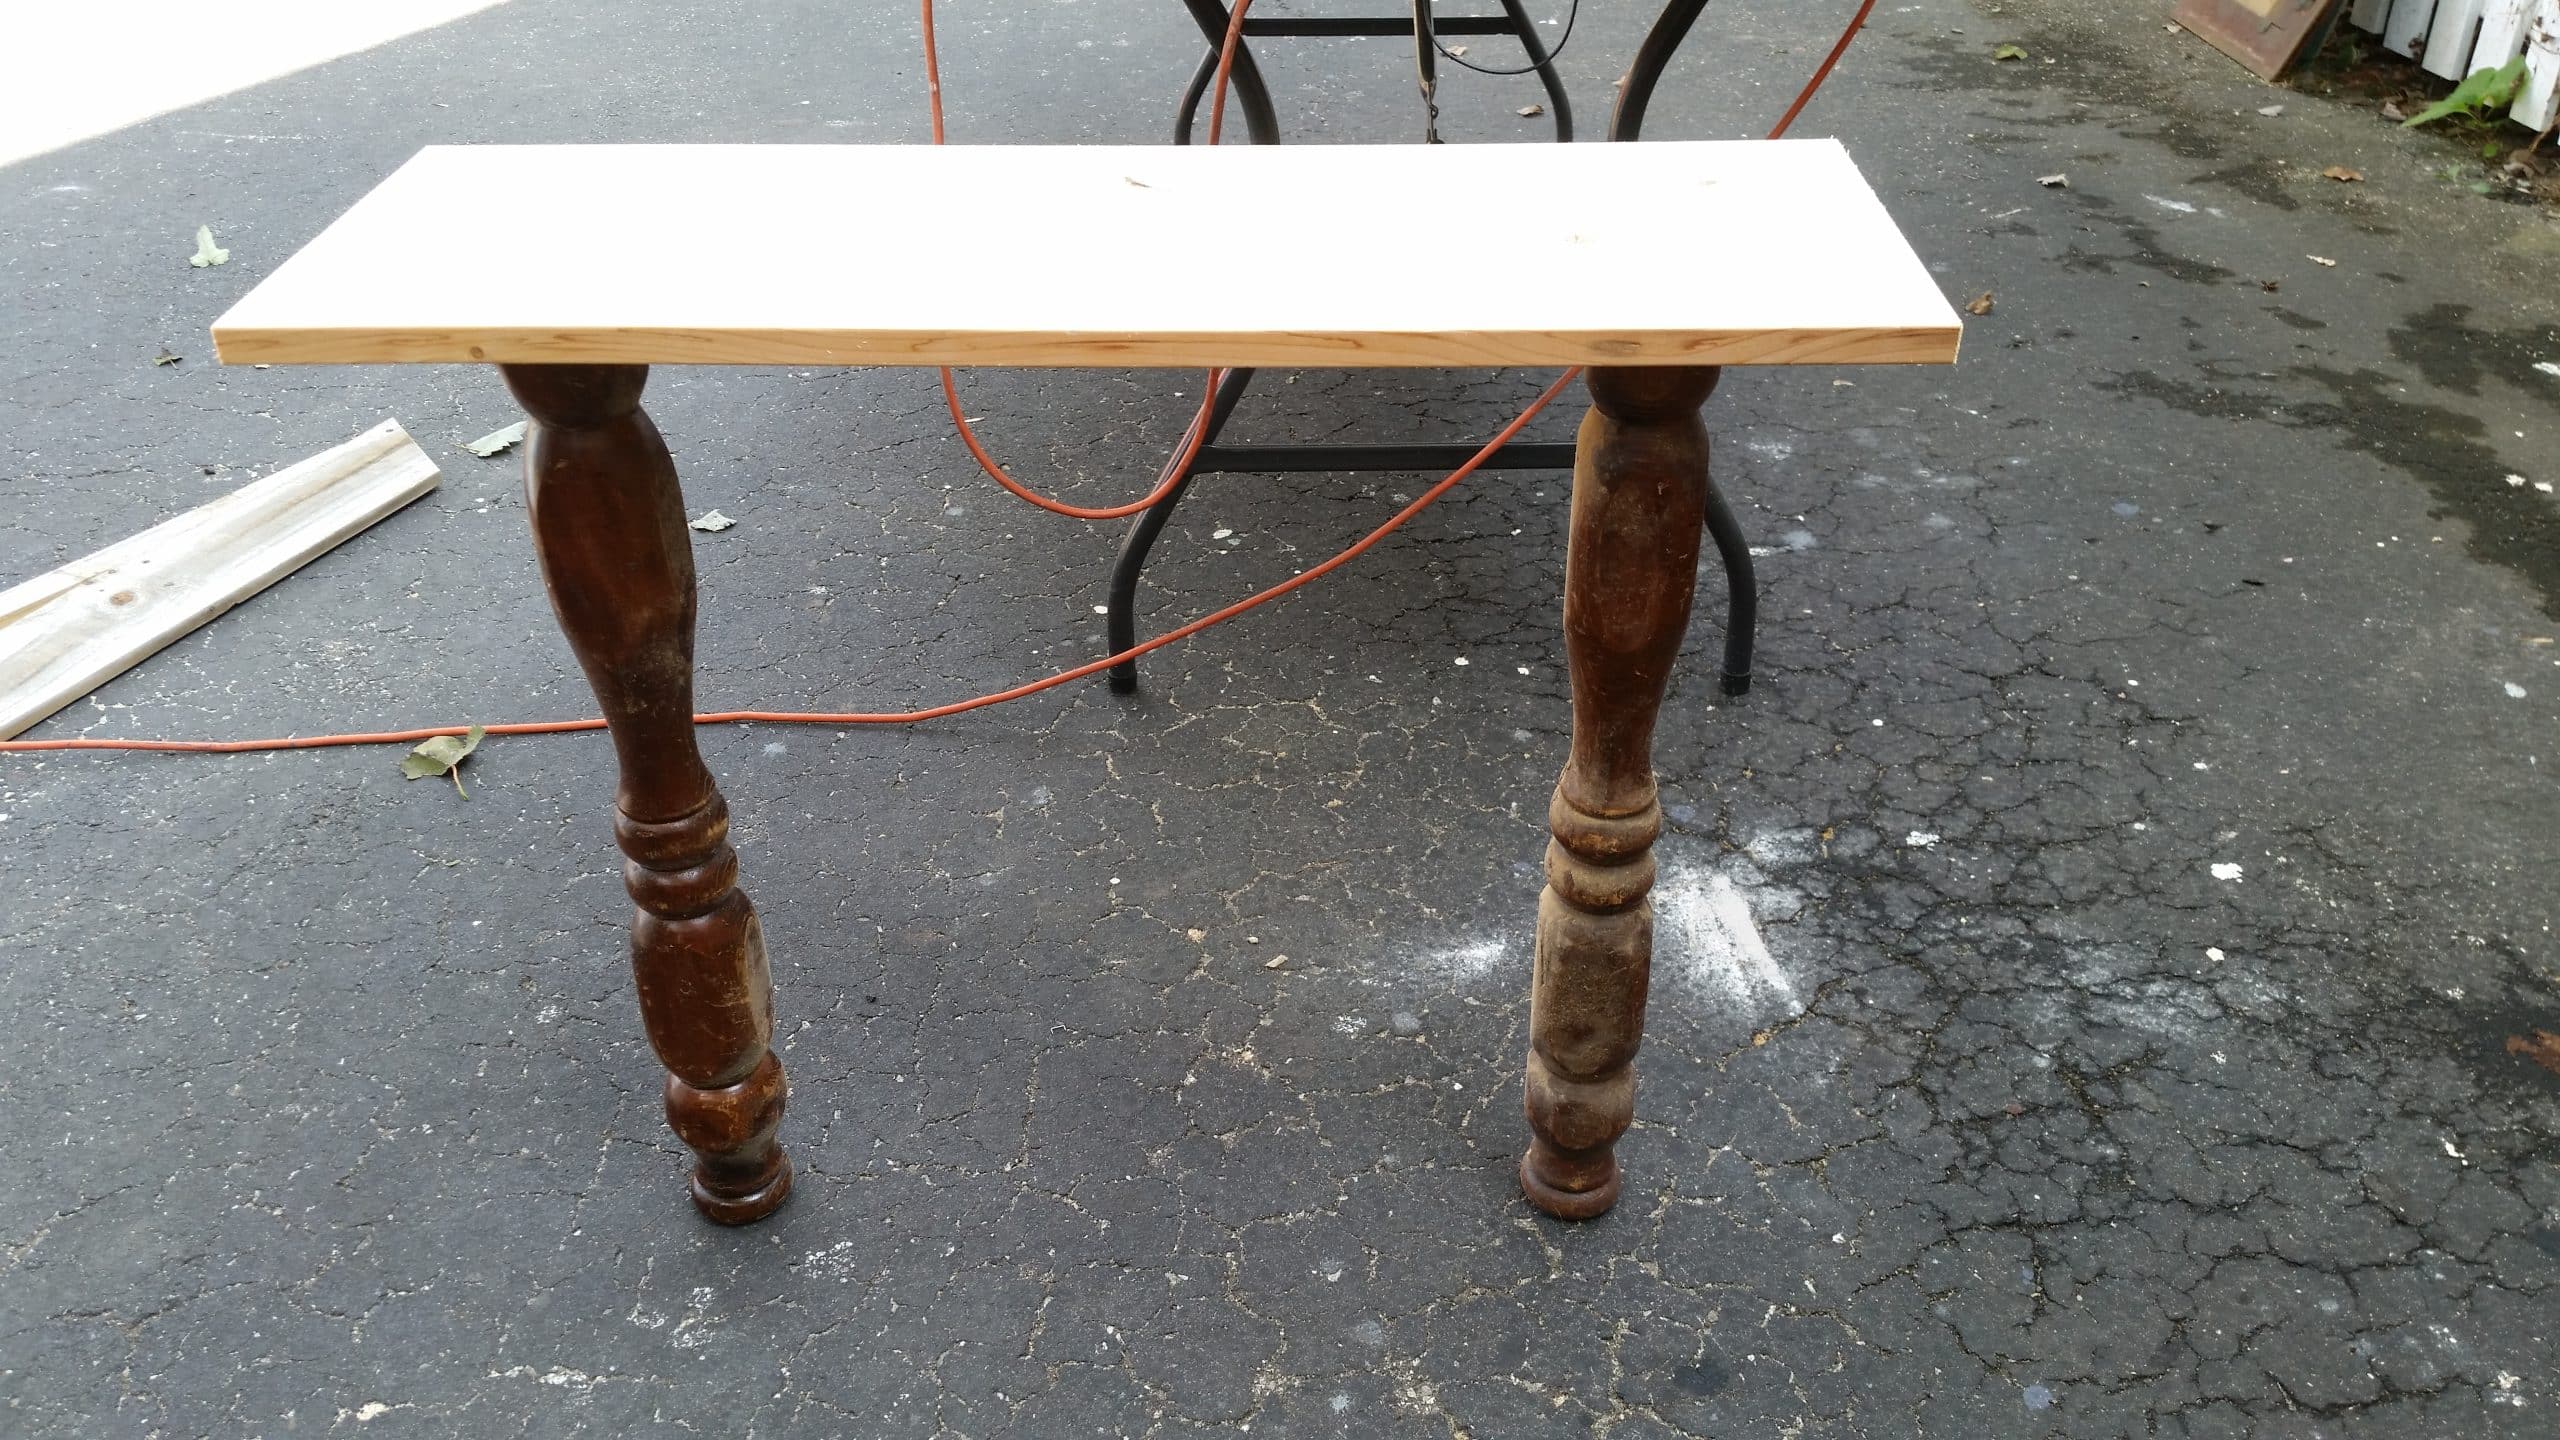
Attach table top
This is the top of the same pedestal, centering it on the large upper brace. I used the same method using the multi-mark tool and tracing around the pedestal.
Again, pilot holes are a must to know where to put the screws on the other side of the brace.
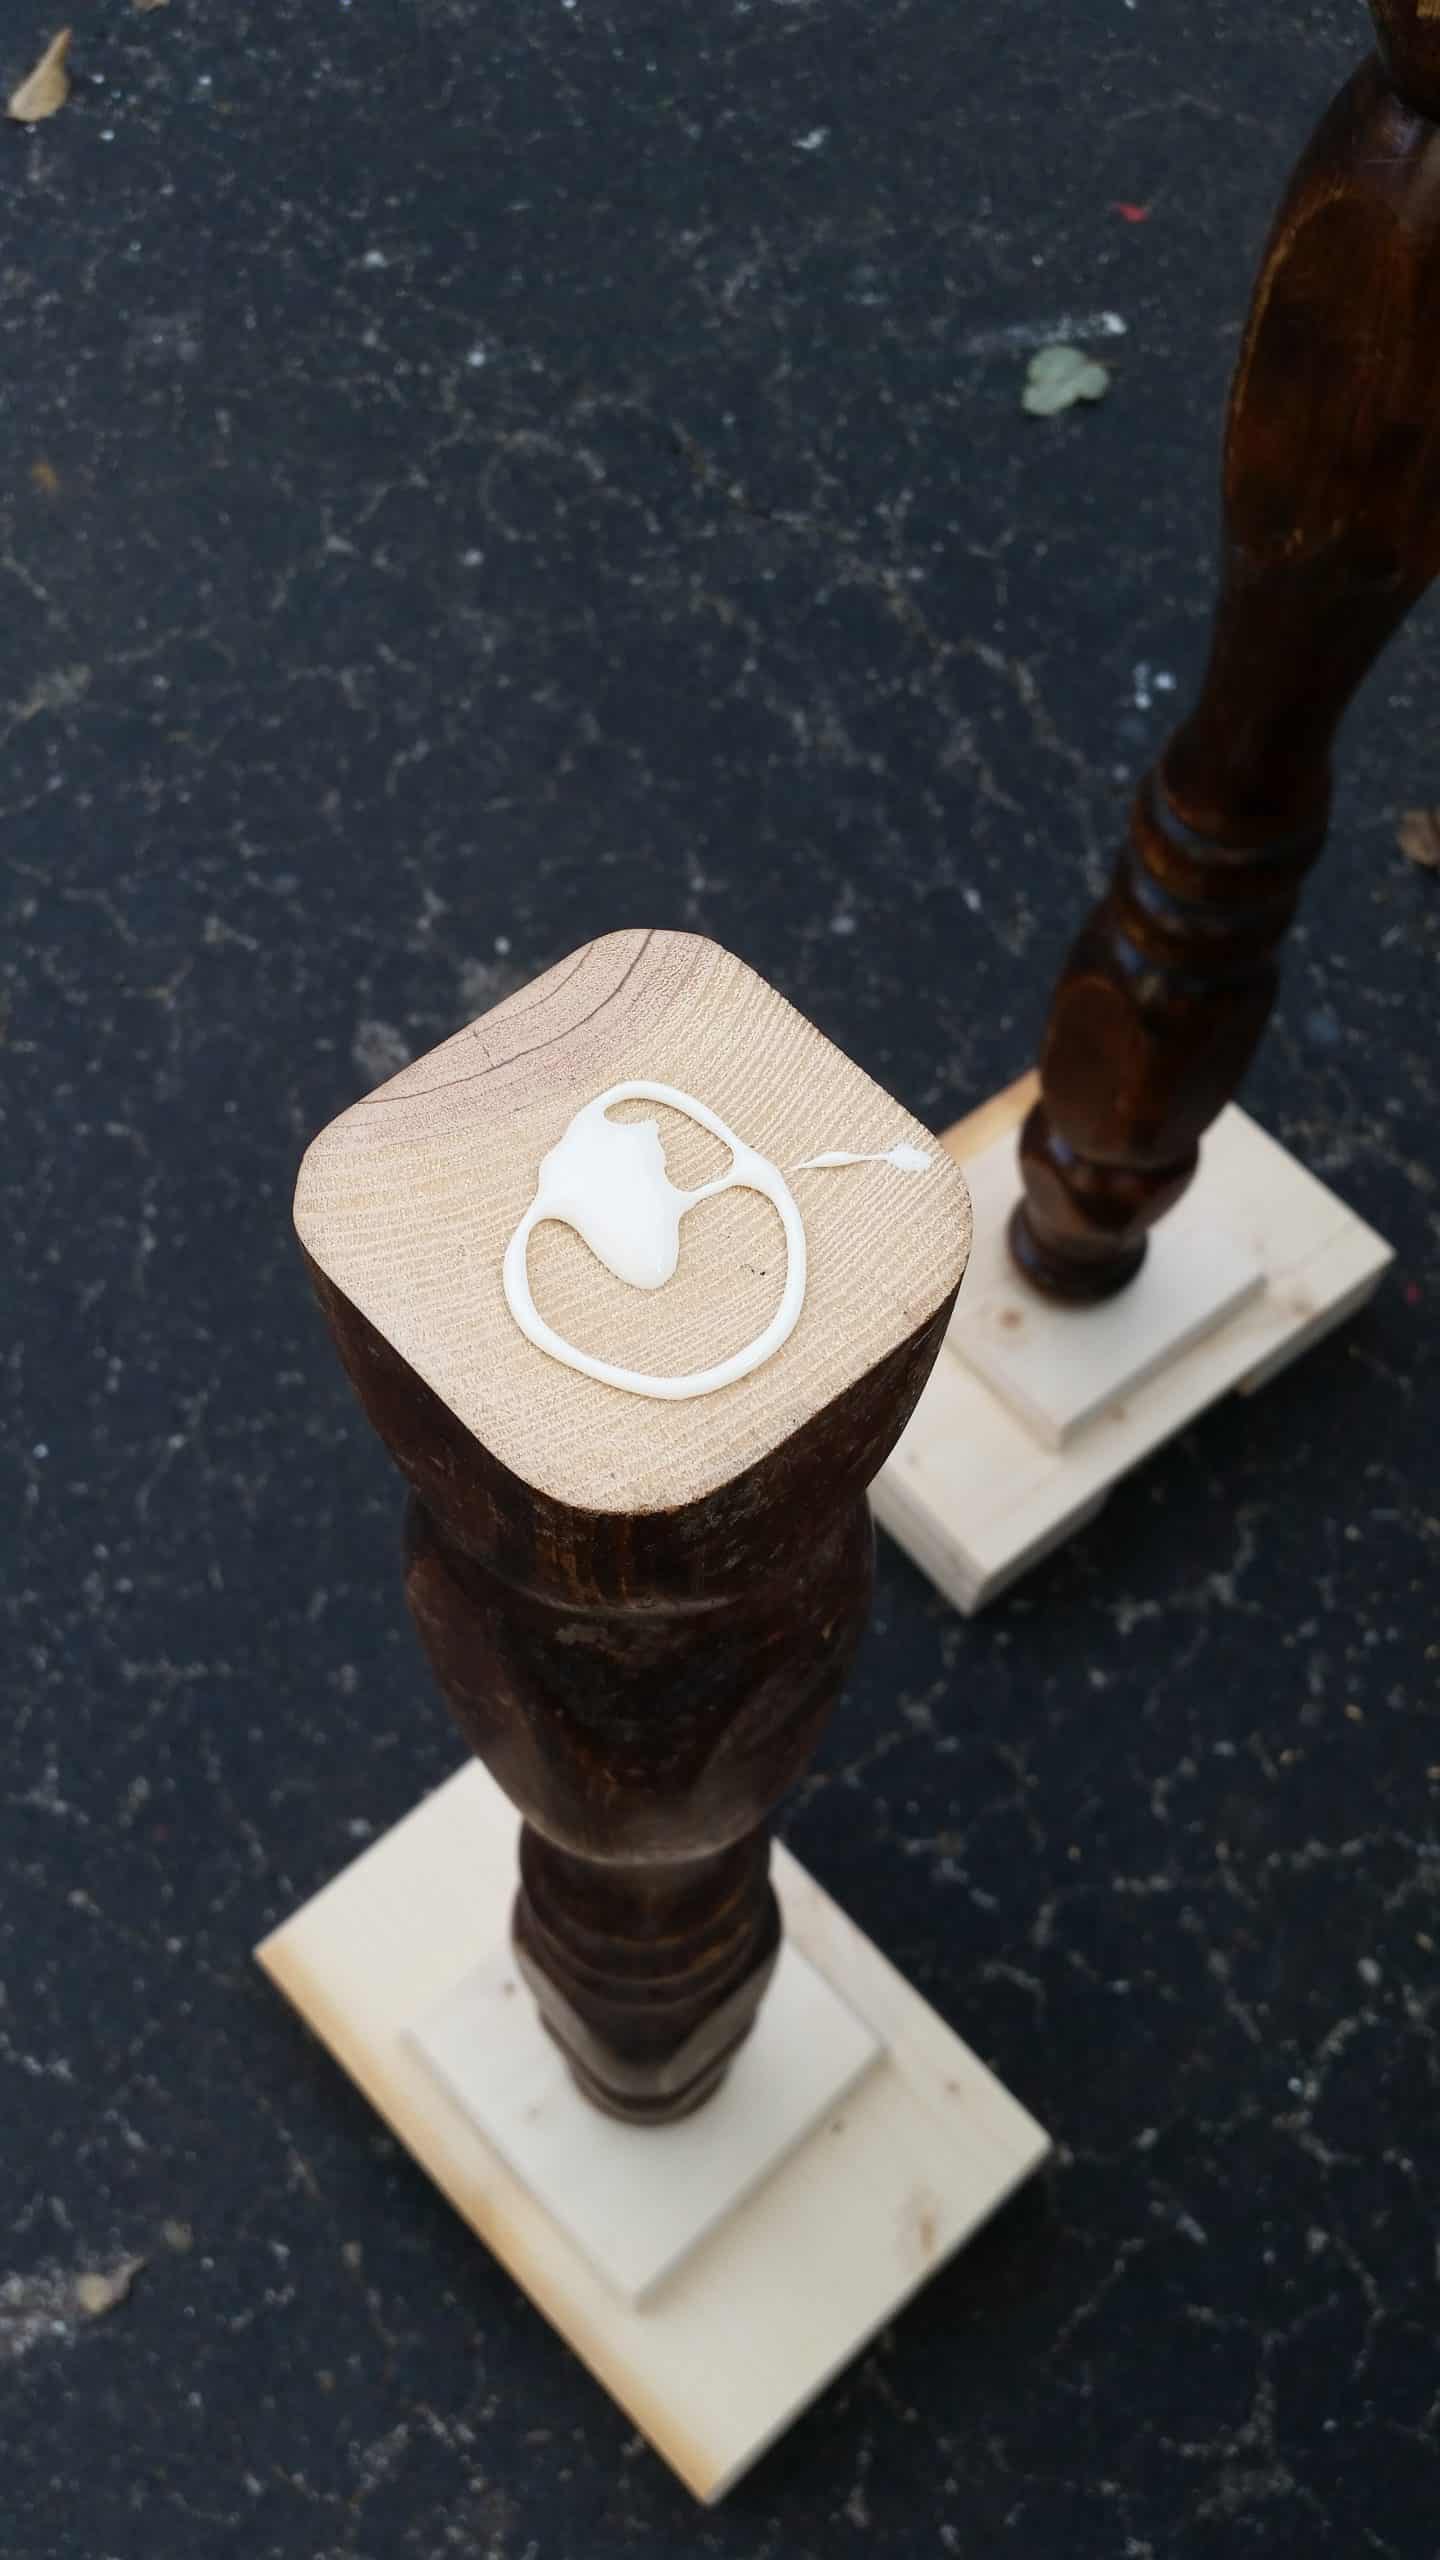
After applying Gorilla wood glue, I place the top brace in place, check to make sure it lines up with the mark, and secure it with the longer screws used above.

Still more wood glue as I prepare to place the top brace.
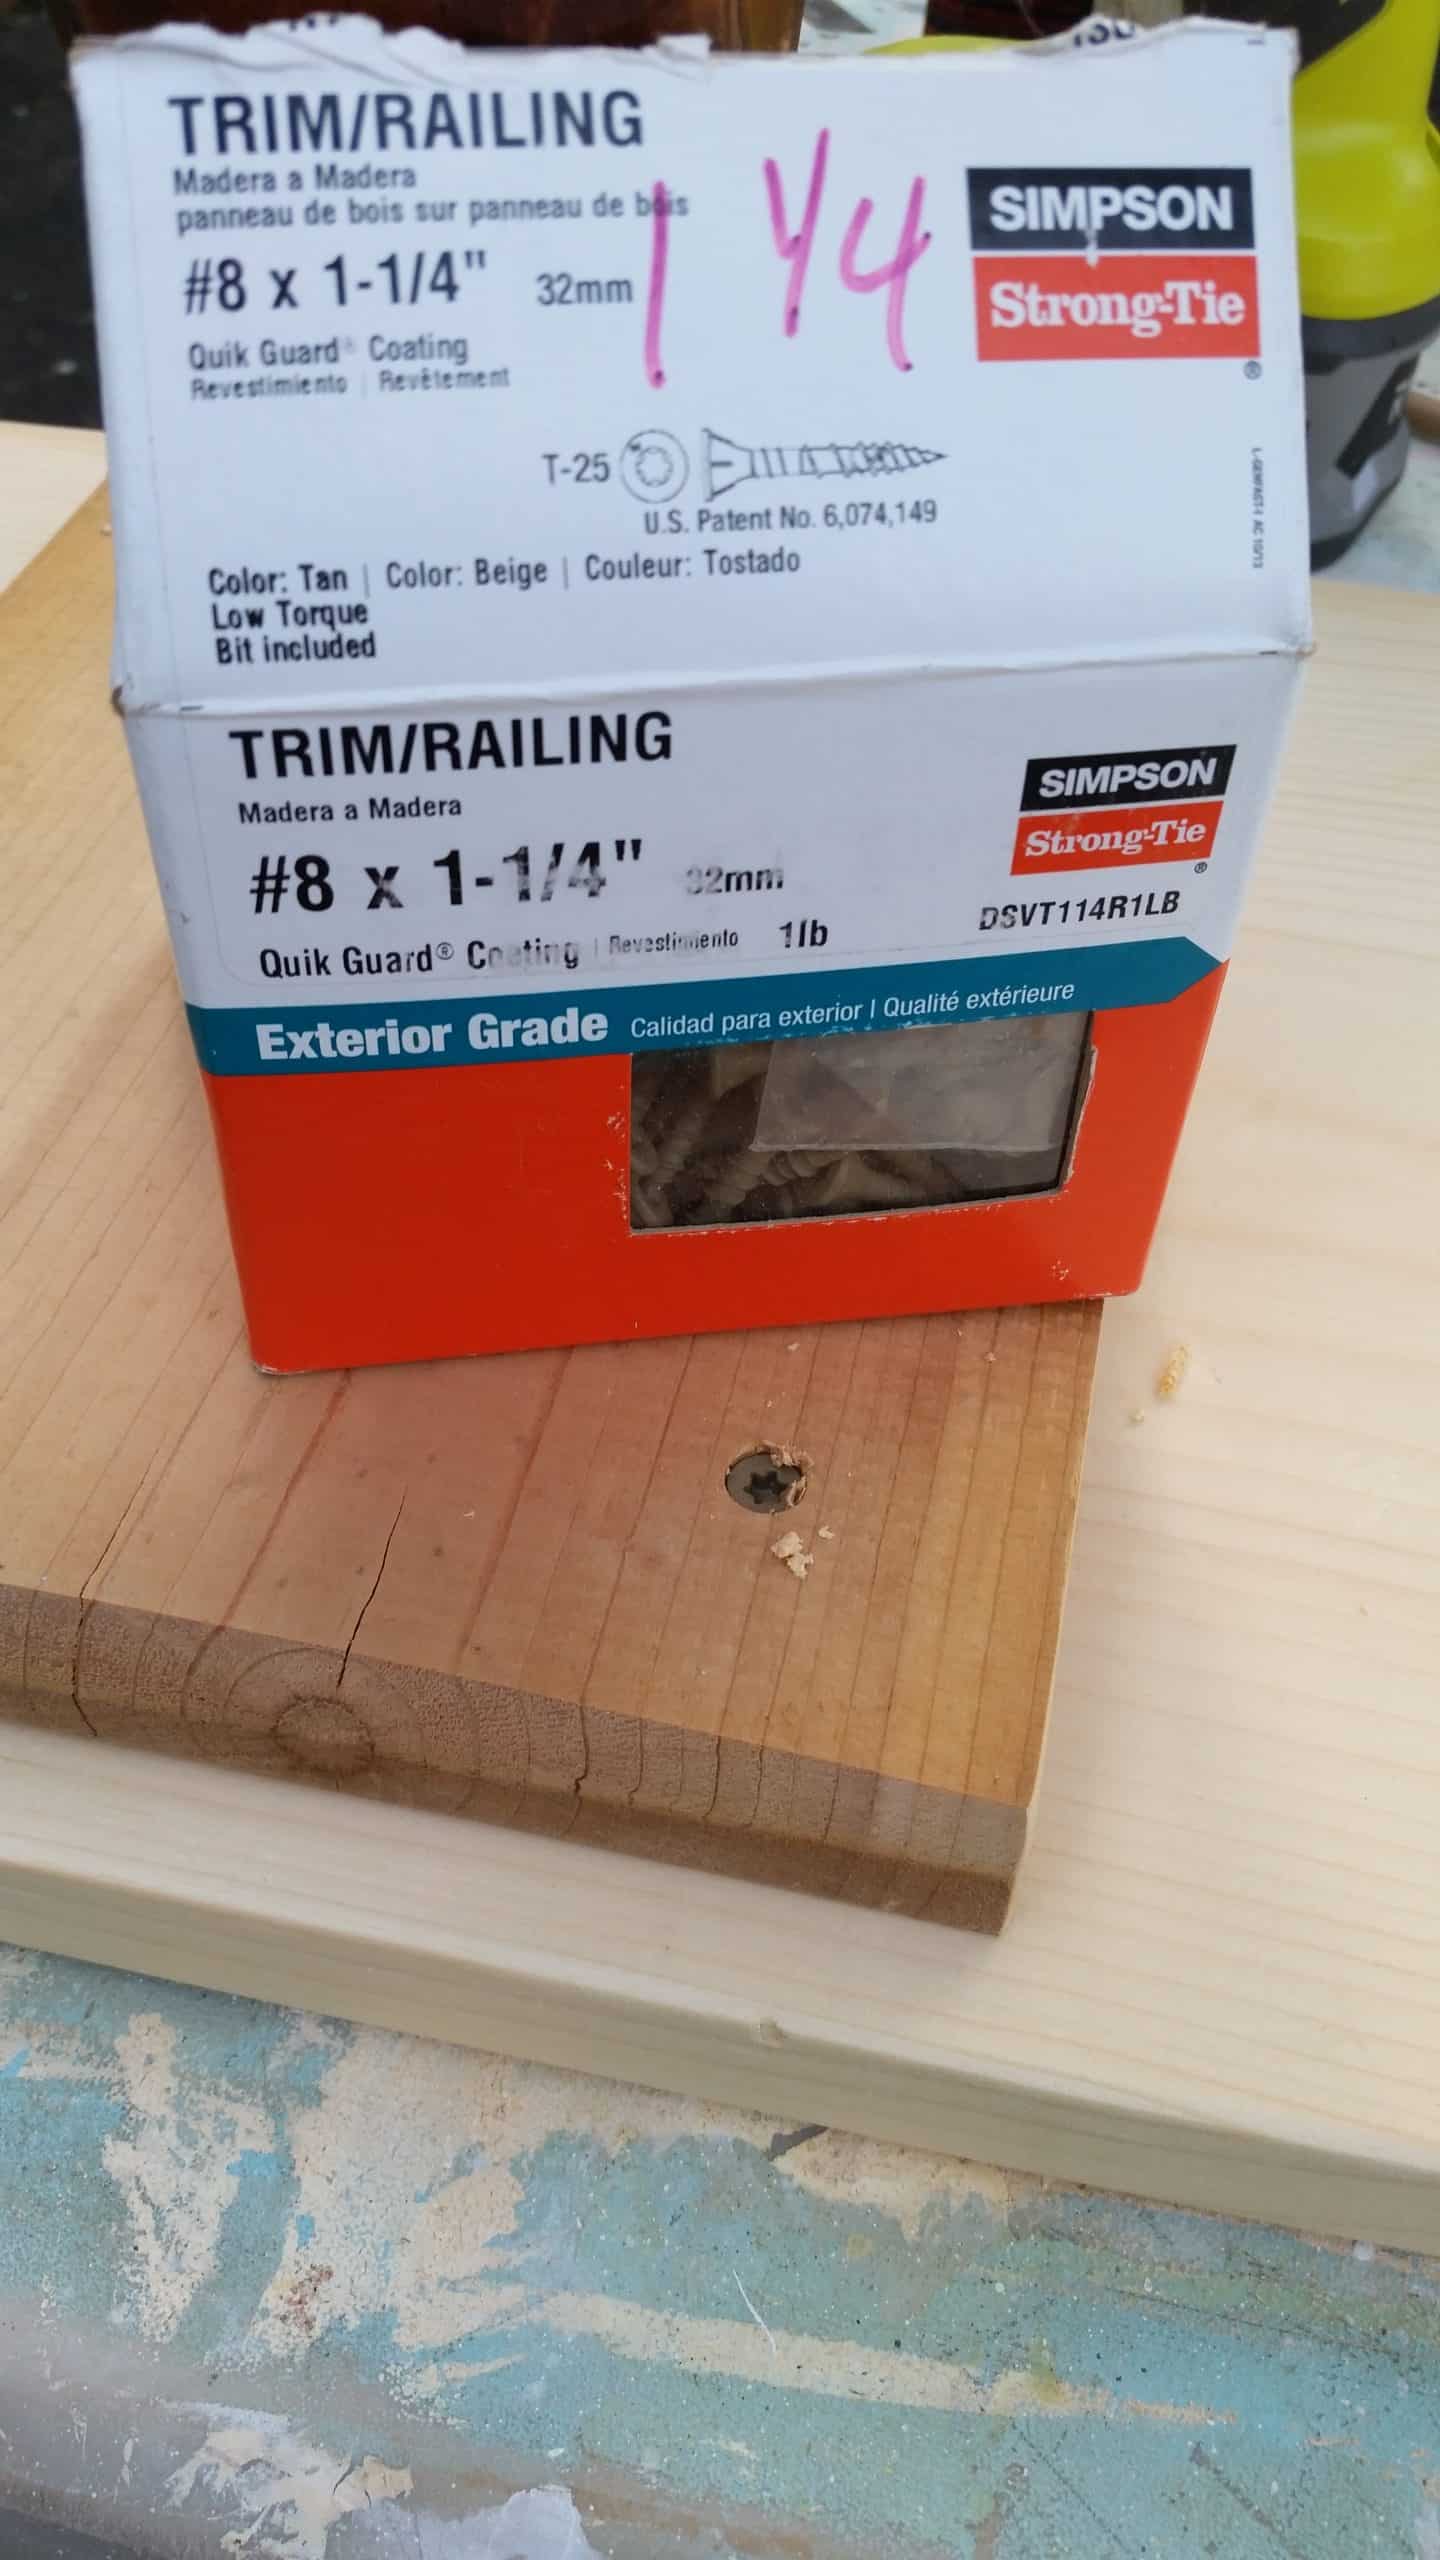
I drilled 4 pilot holes around the brace and used shorter 1 1/4” screws to hold the upper brace to the table top.
Double pedestal table bottom brace
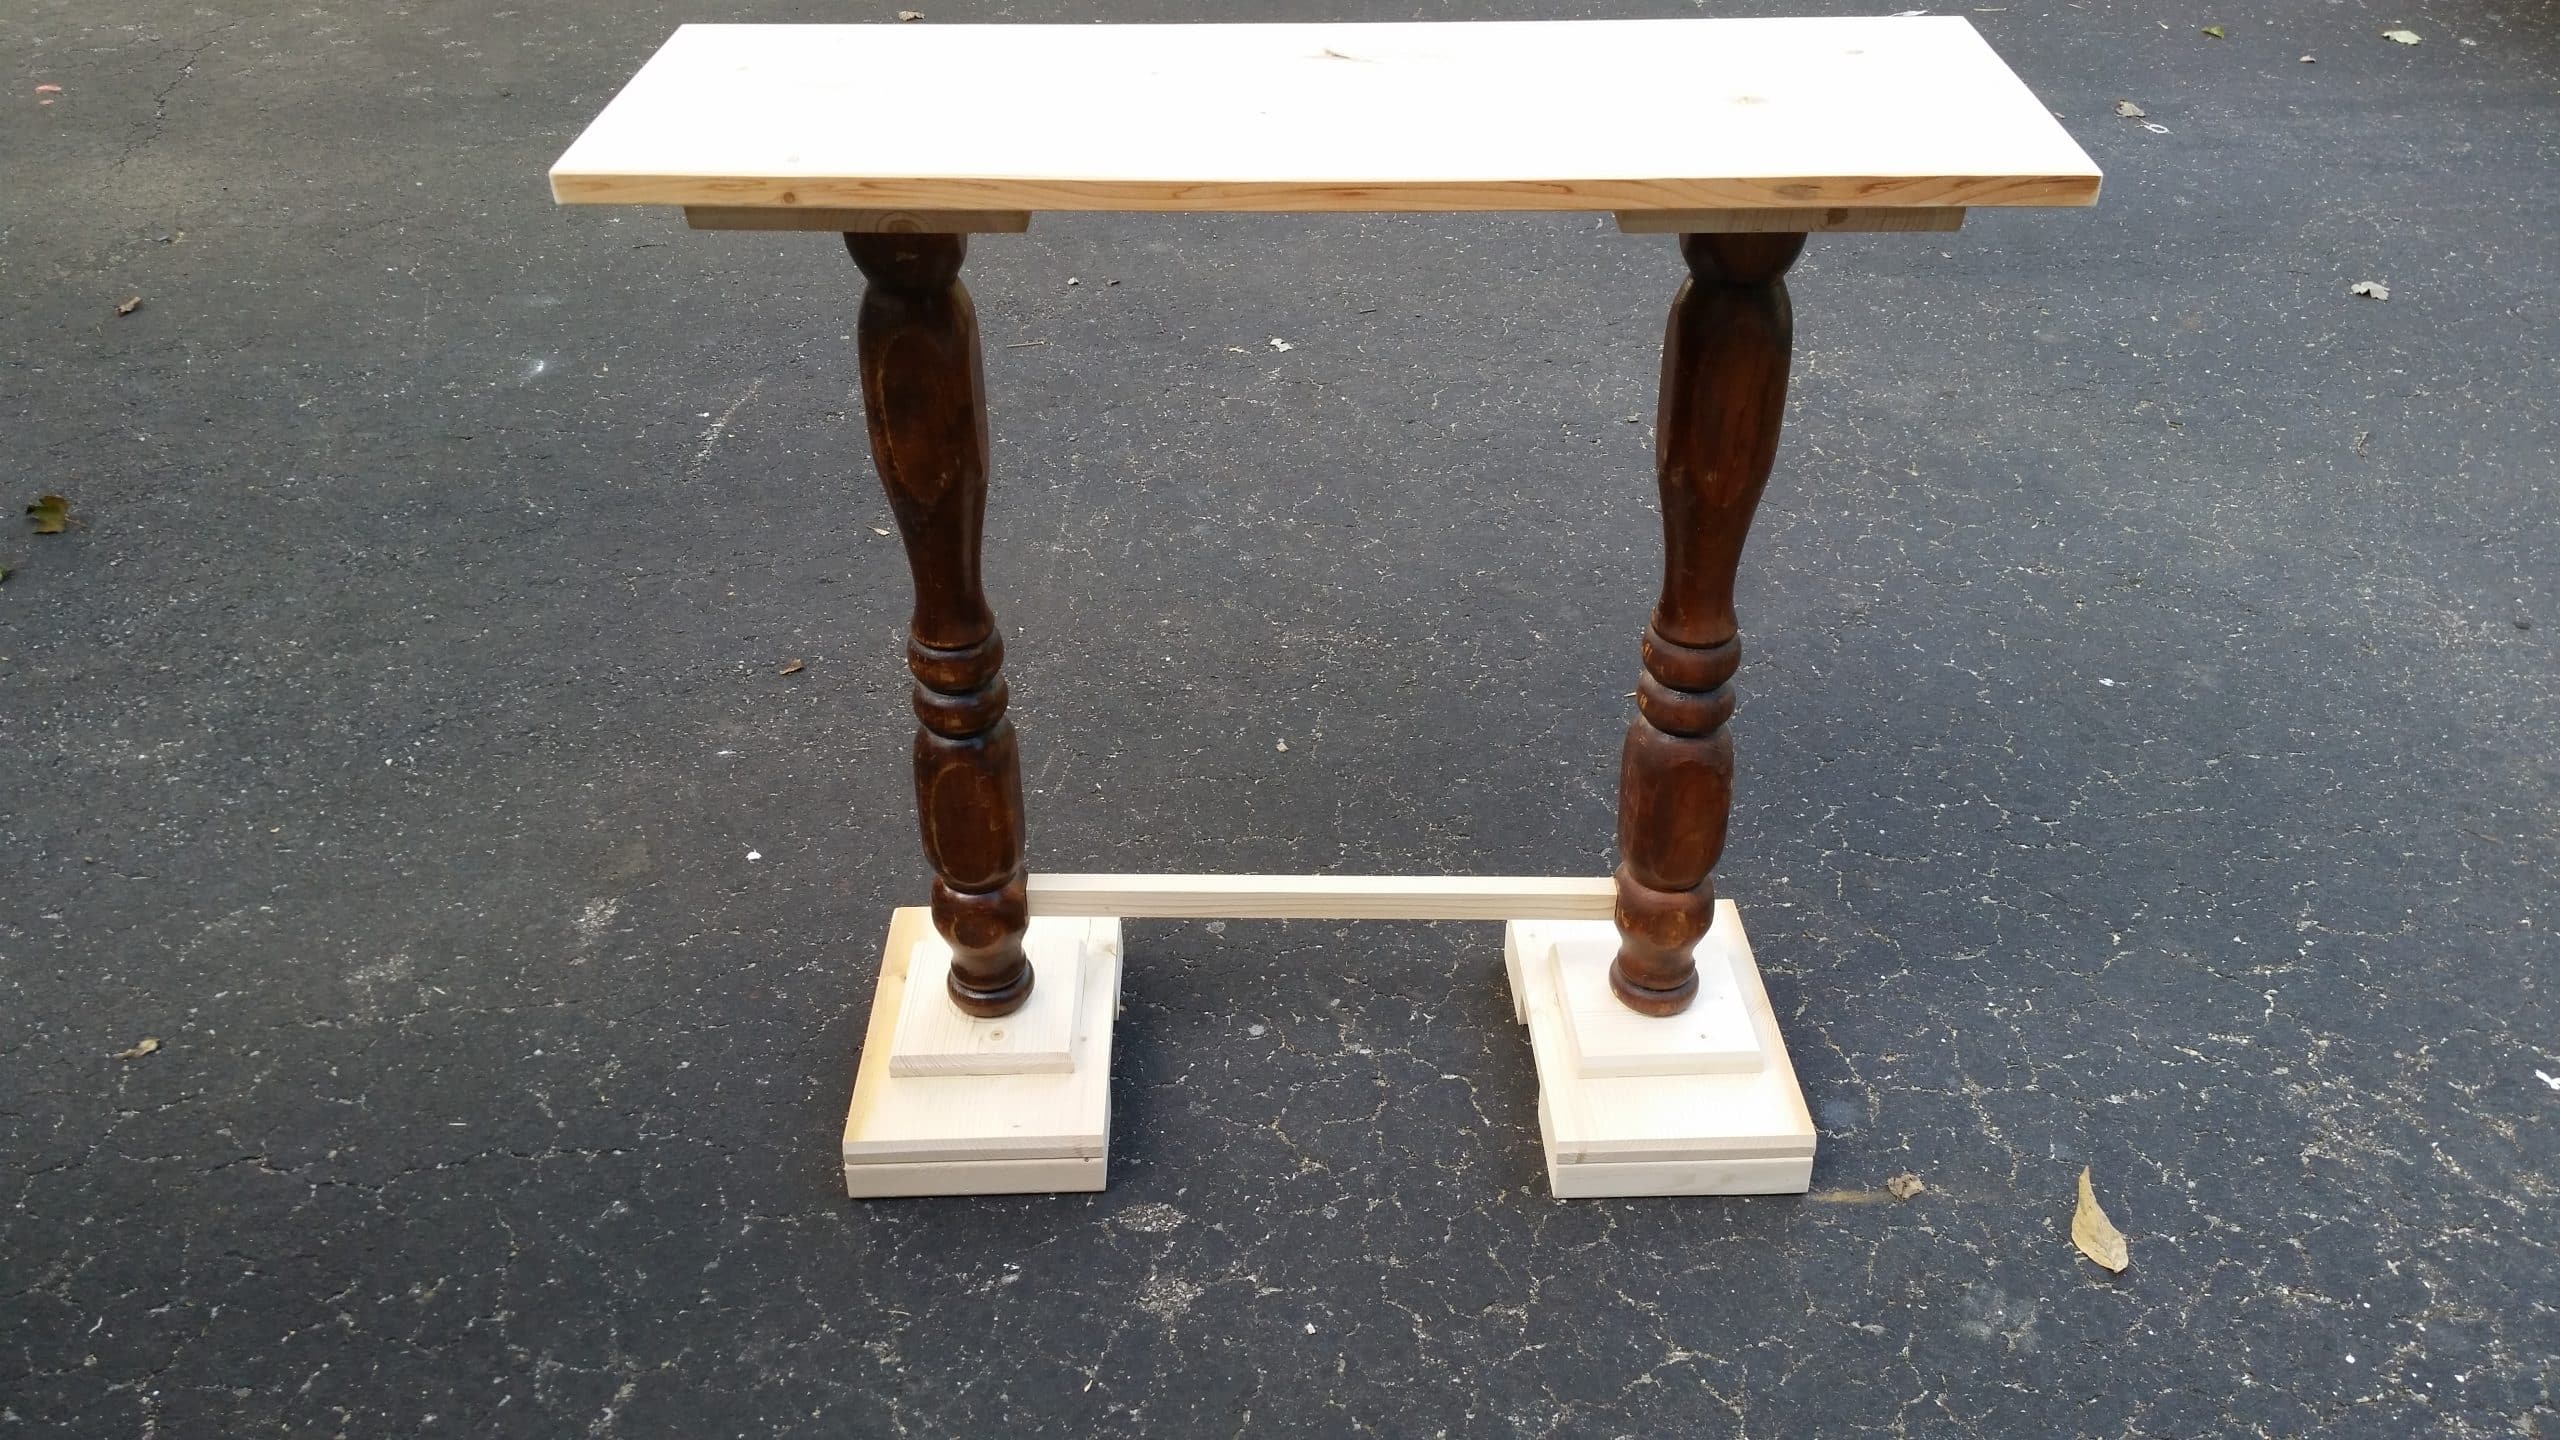
I knew there should be a bottom brace, so I picked up this little ripped piece from yet another scrap pile, but something’s not right.
While taking another little break to search double pedestal sofa table on Pinterest and saw that all the braces were at the very bottom.
Plan B
Can you figure out where the bottom middle brace came from? Yep, the scrap pile. I trimmed a couple of inches off and secured it in place with more glue and wood screws.
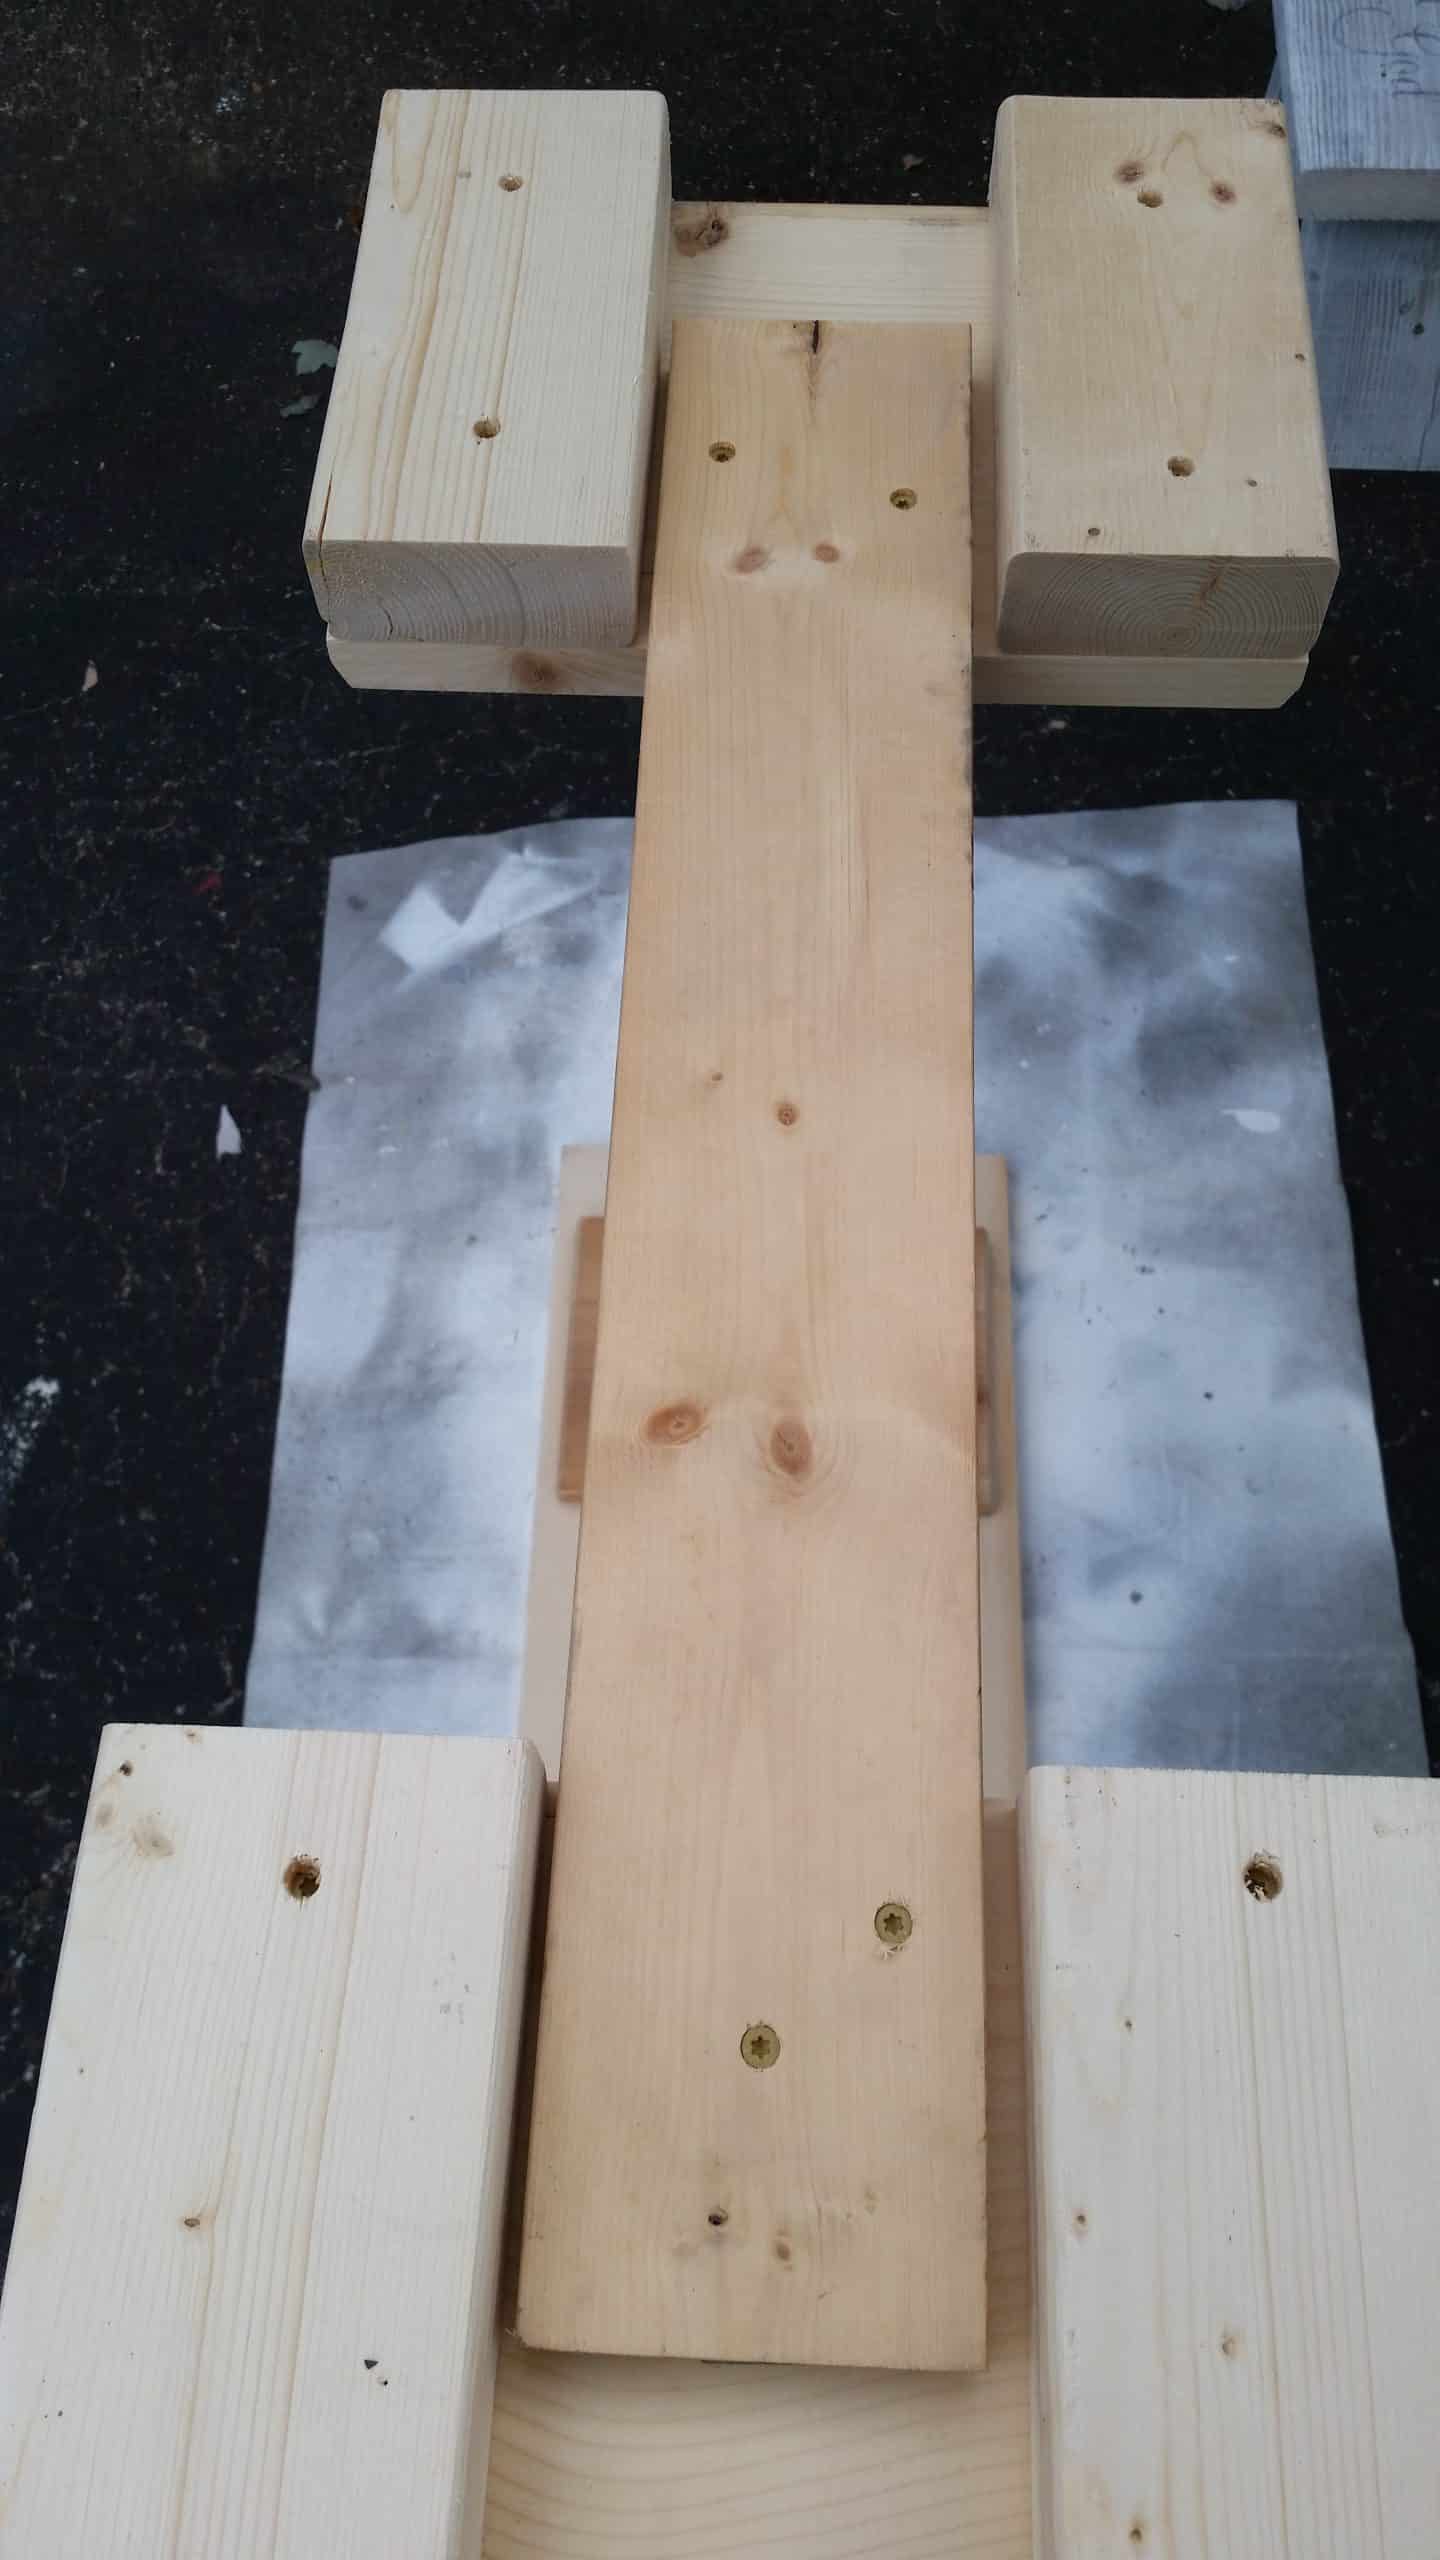
This is how the bottom brace was installed.
Time to paint

As usual, I mixed up some diy chalky paint primer with plaster of paris to use in my Homeright Finish Max using flat black Beluga.
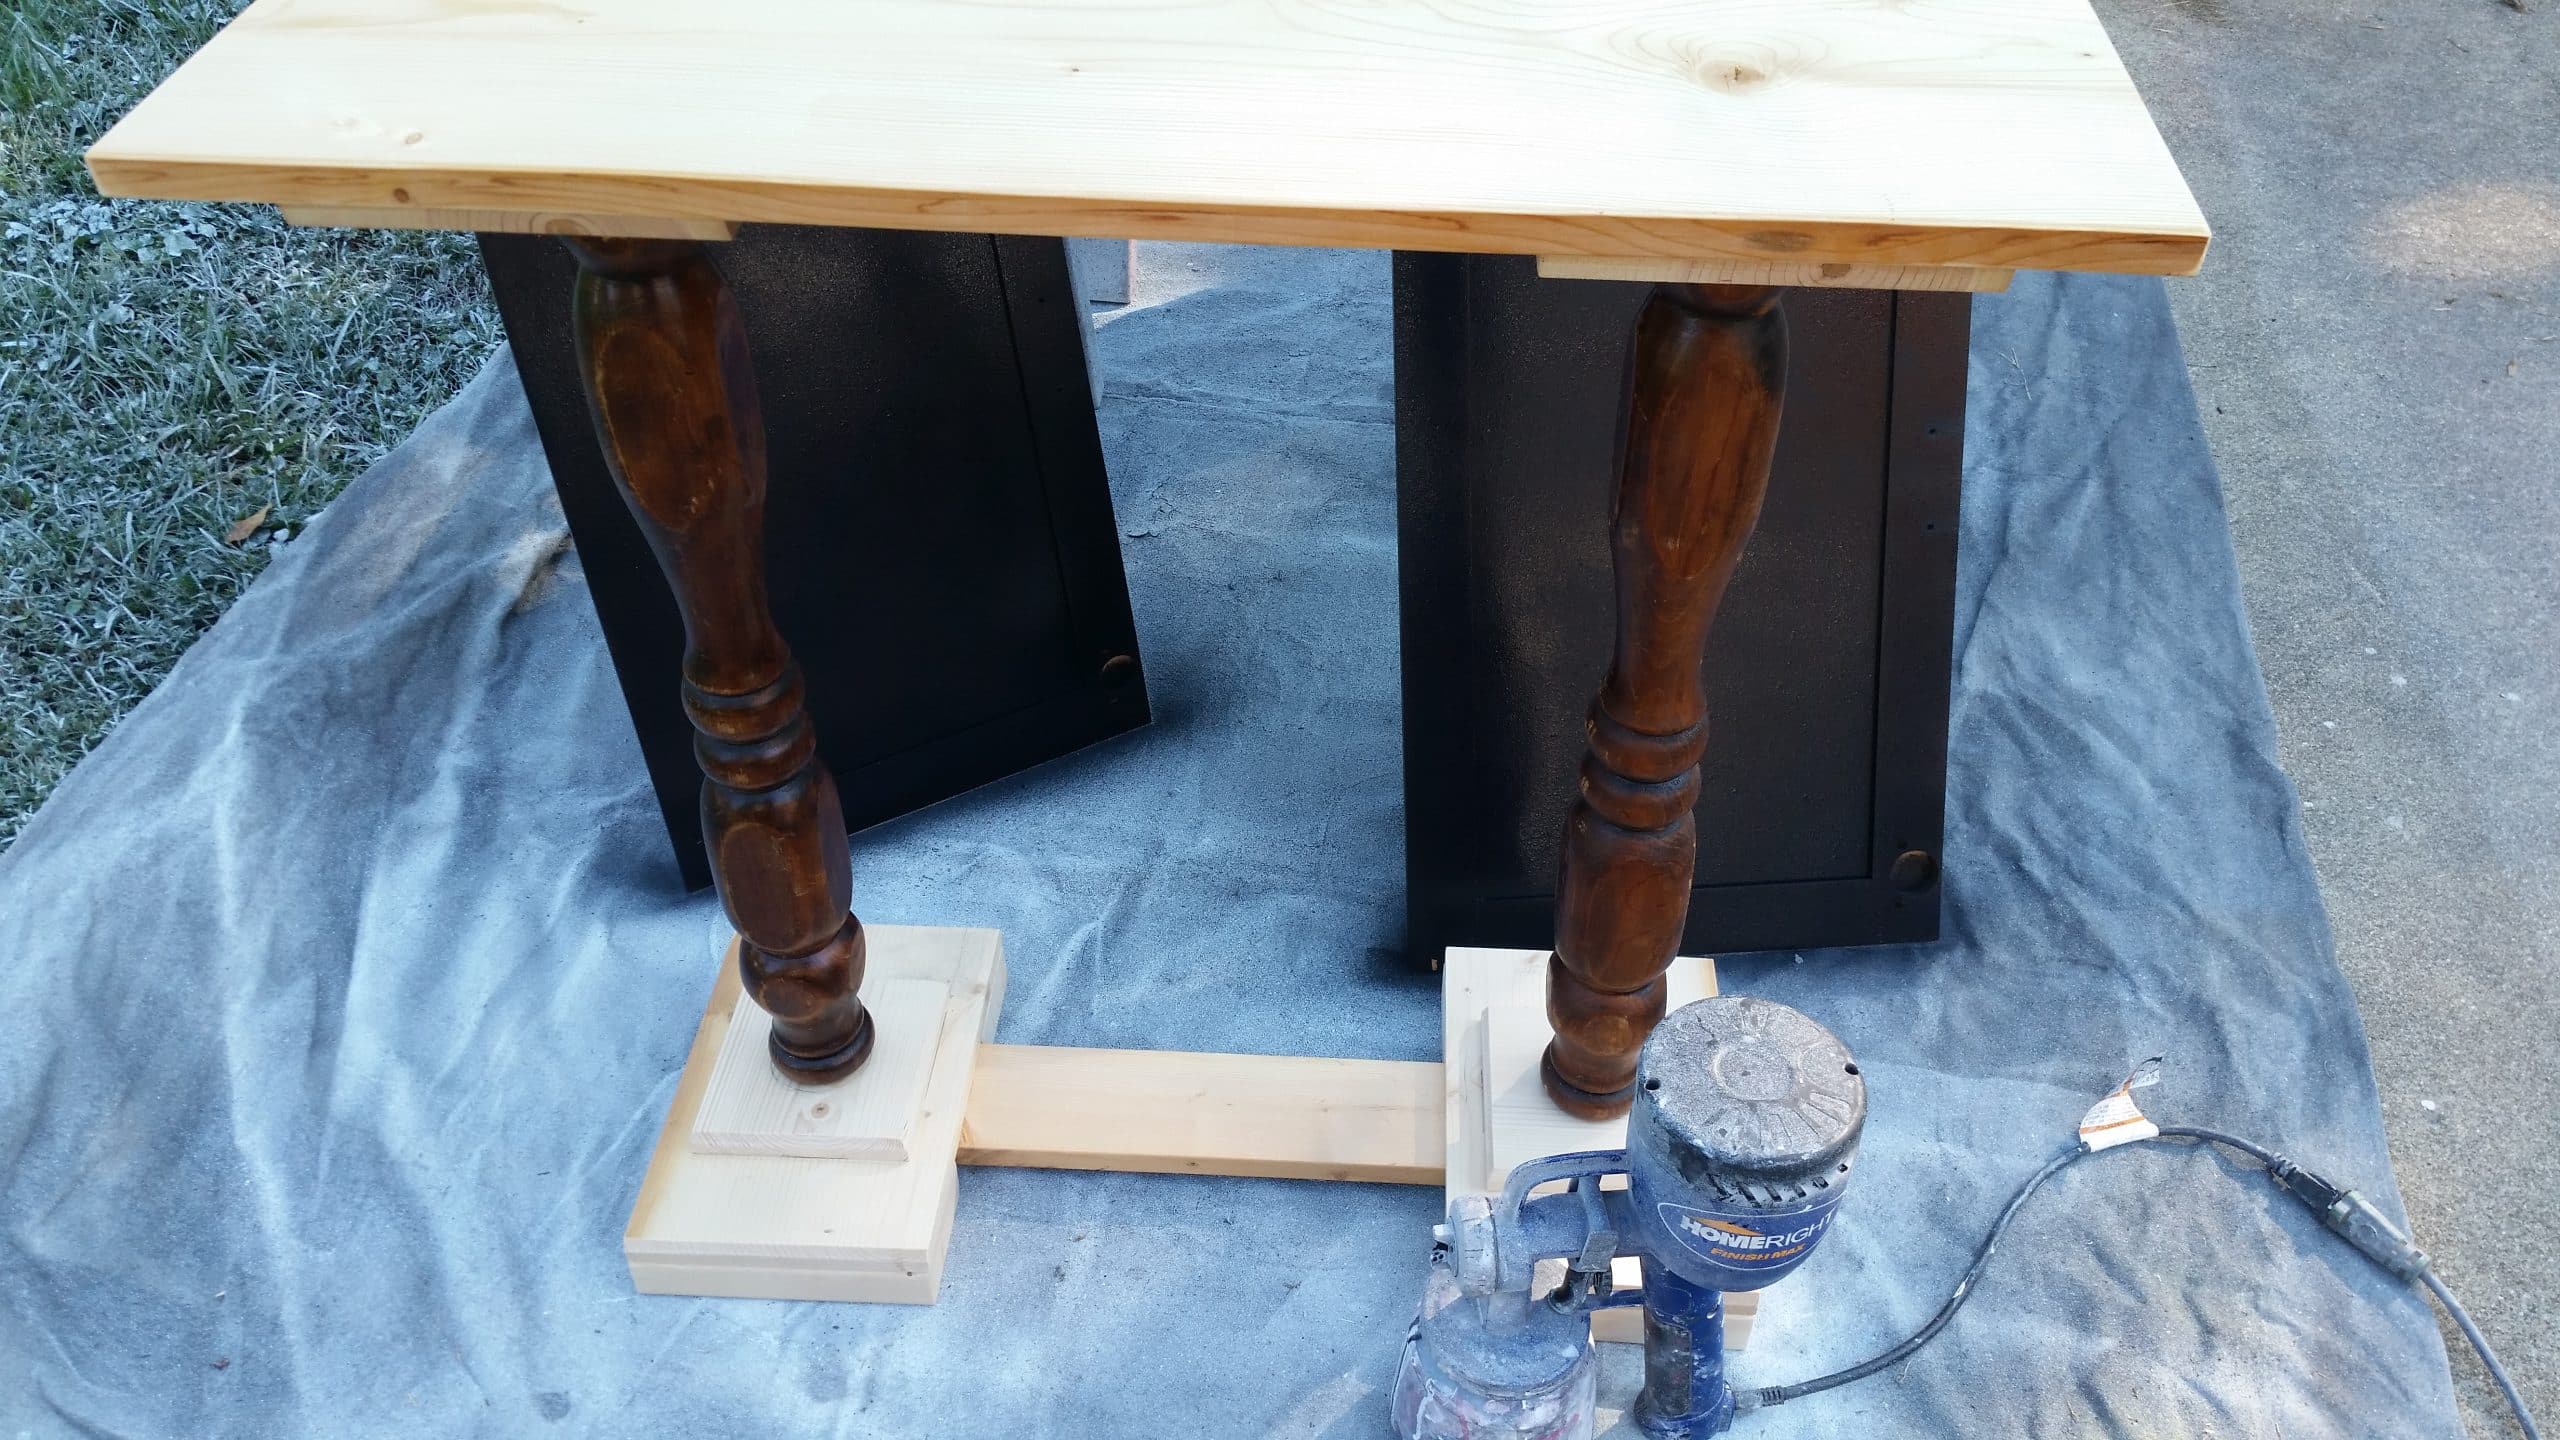
While I had the paint in the sprayer I tackled several black projects including the double pedestal sofa table.
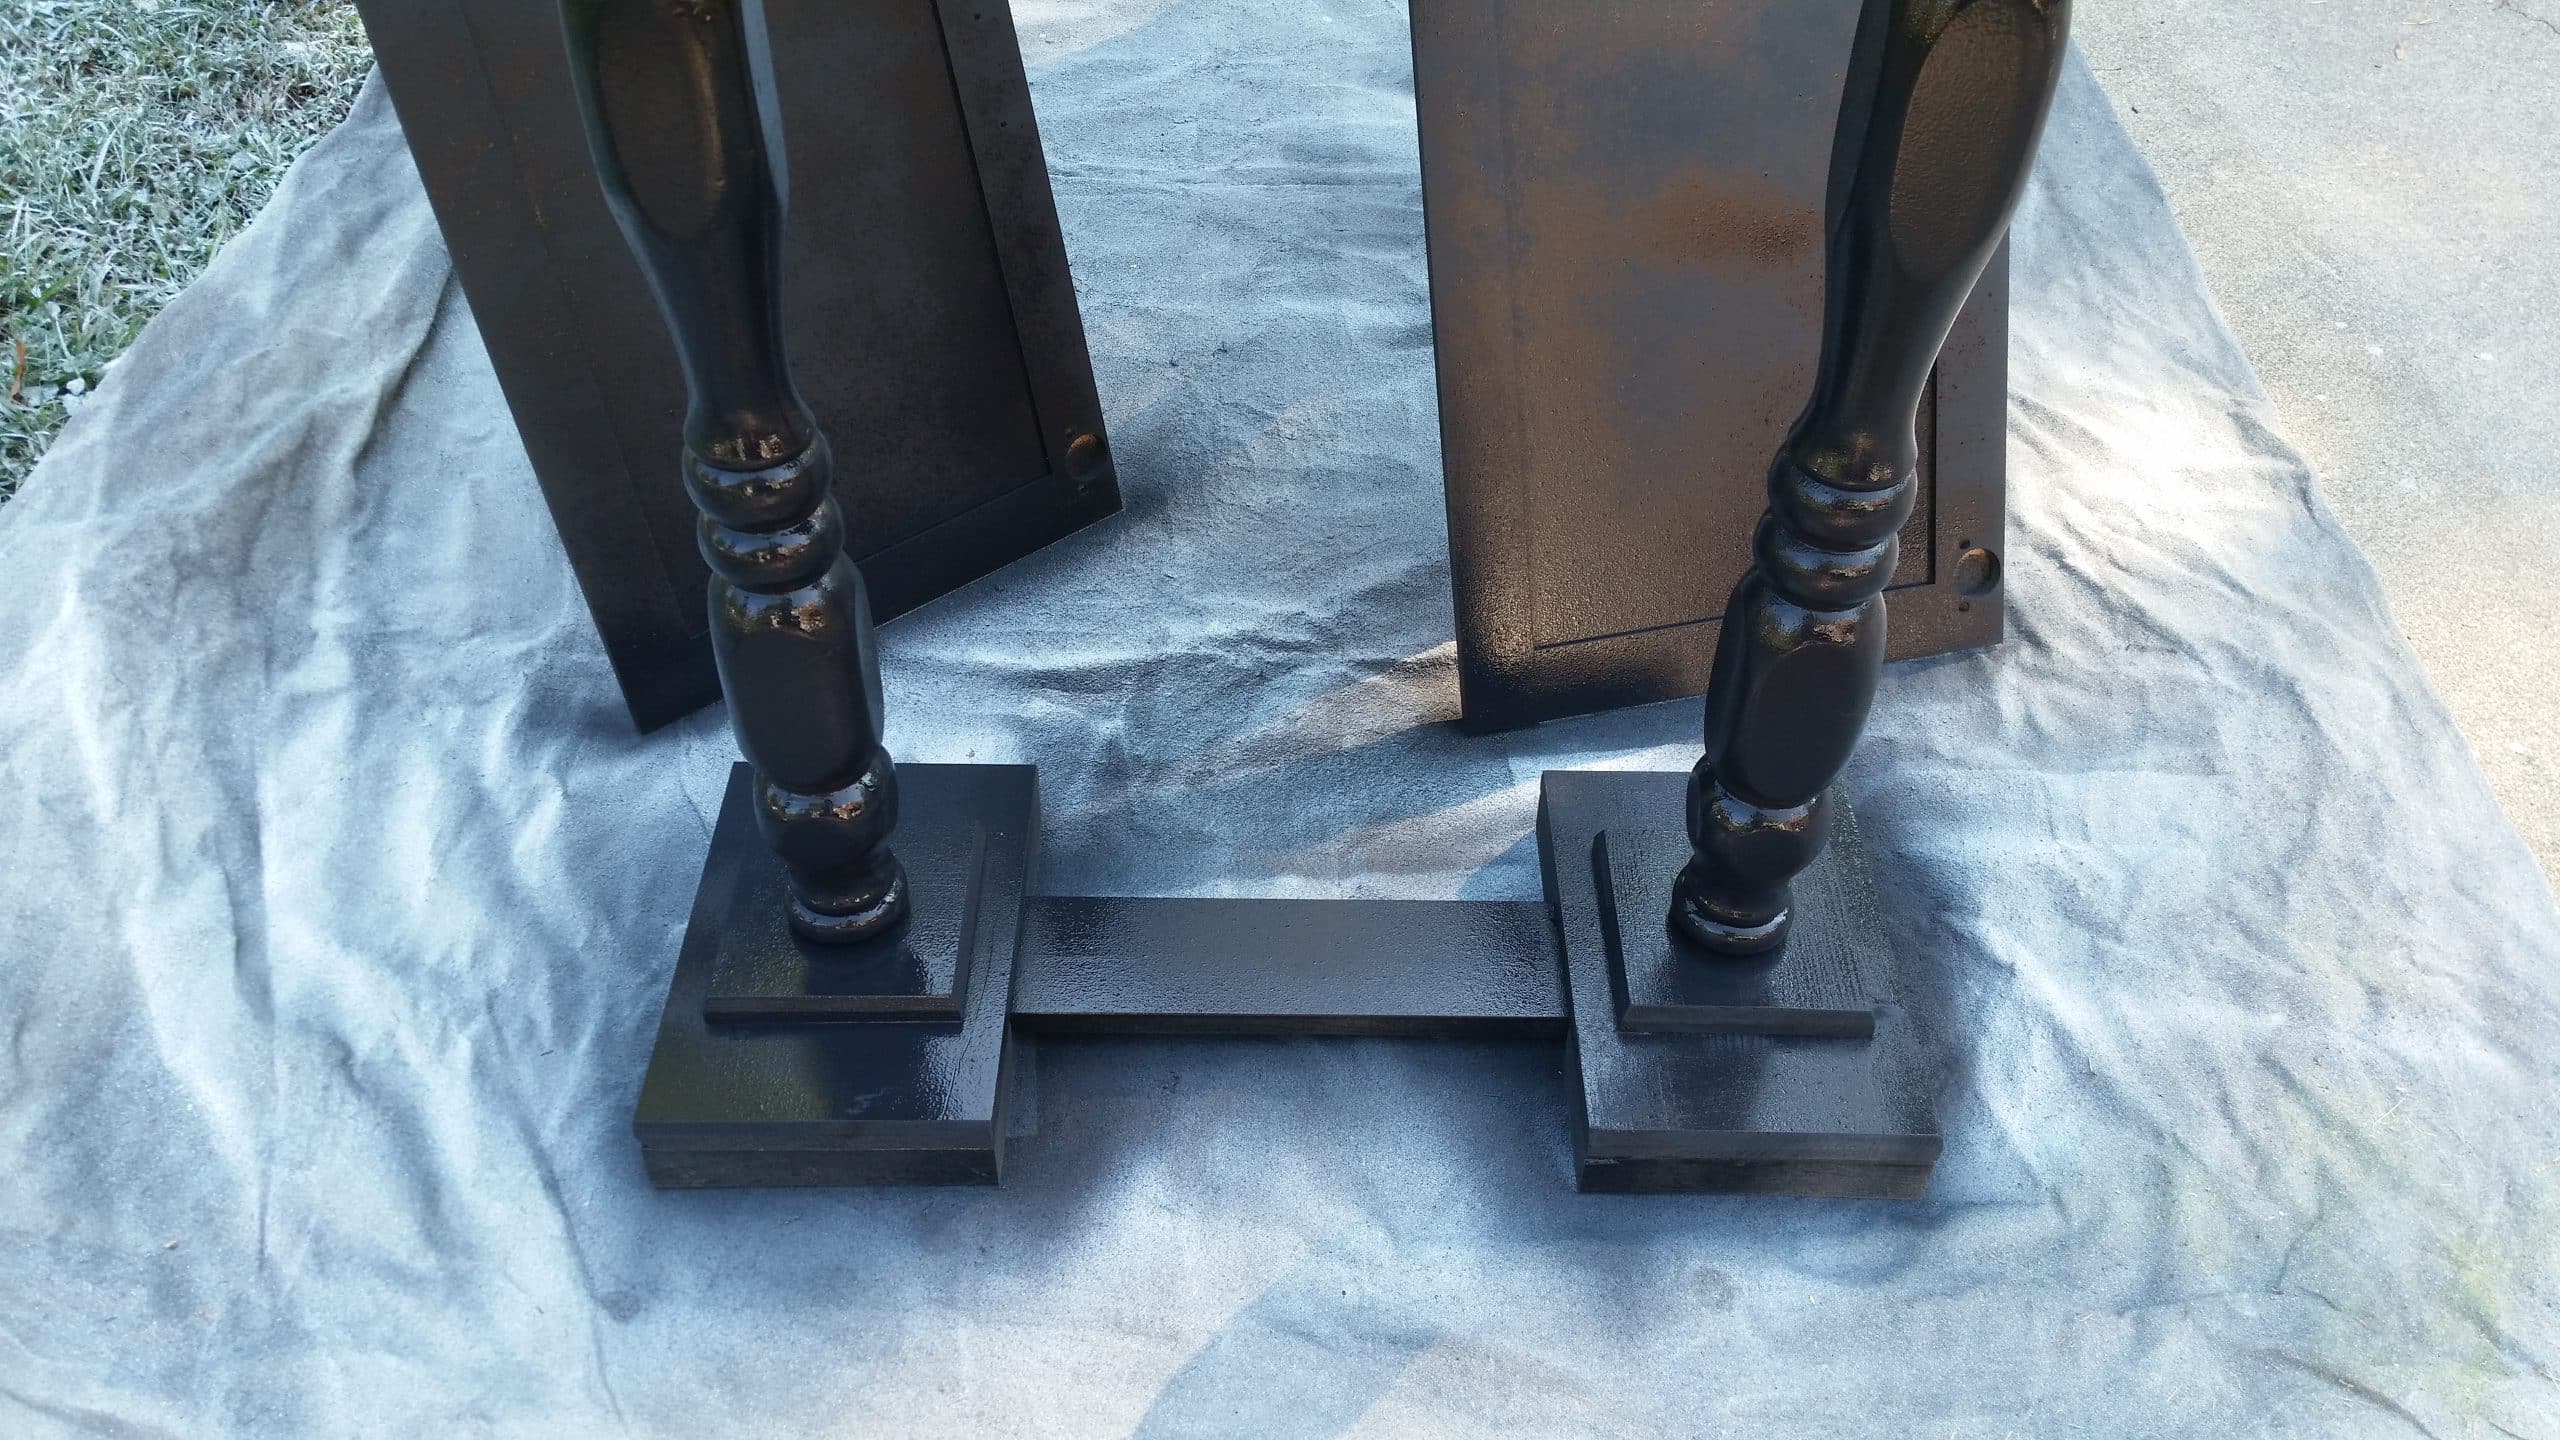
Two light coats of primer.
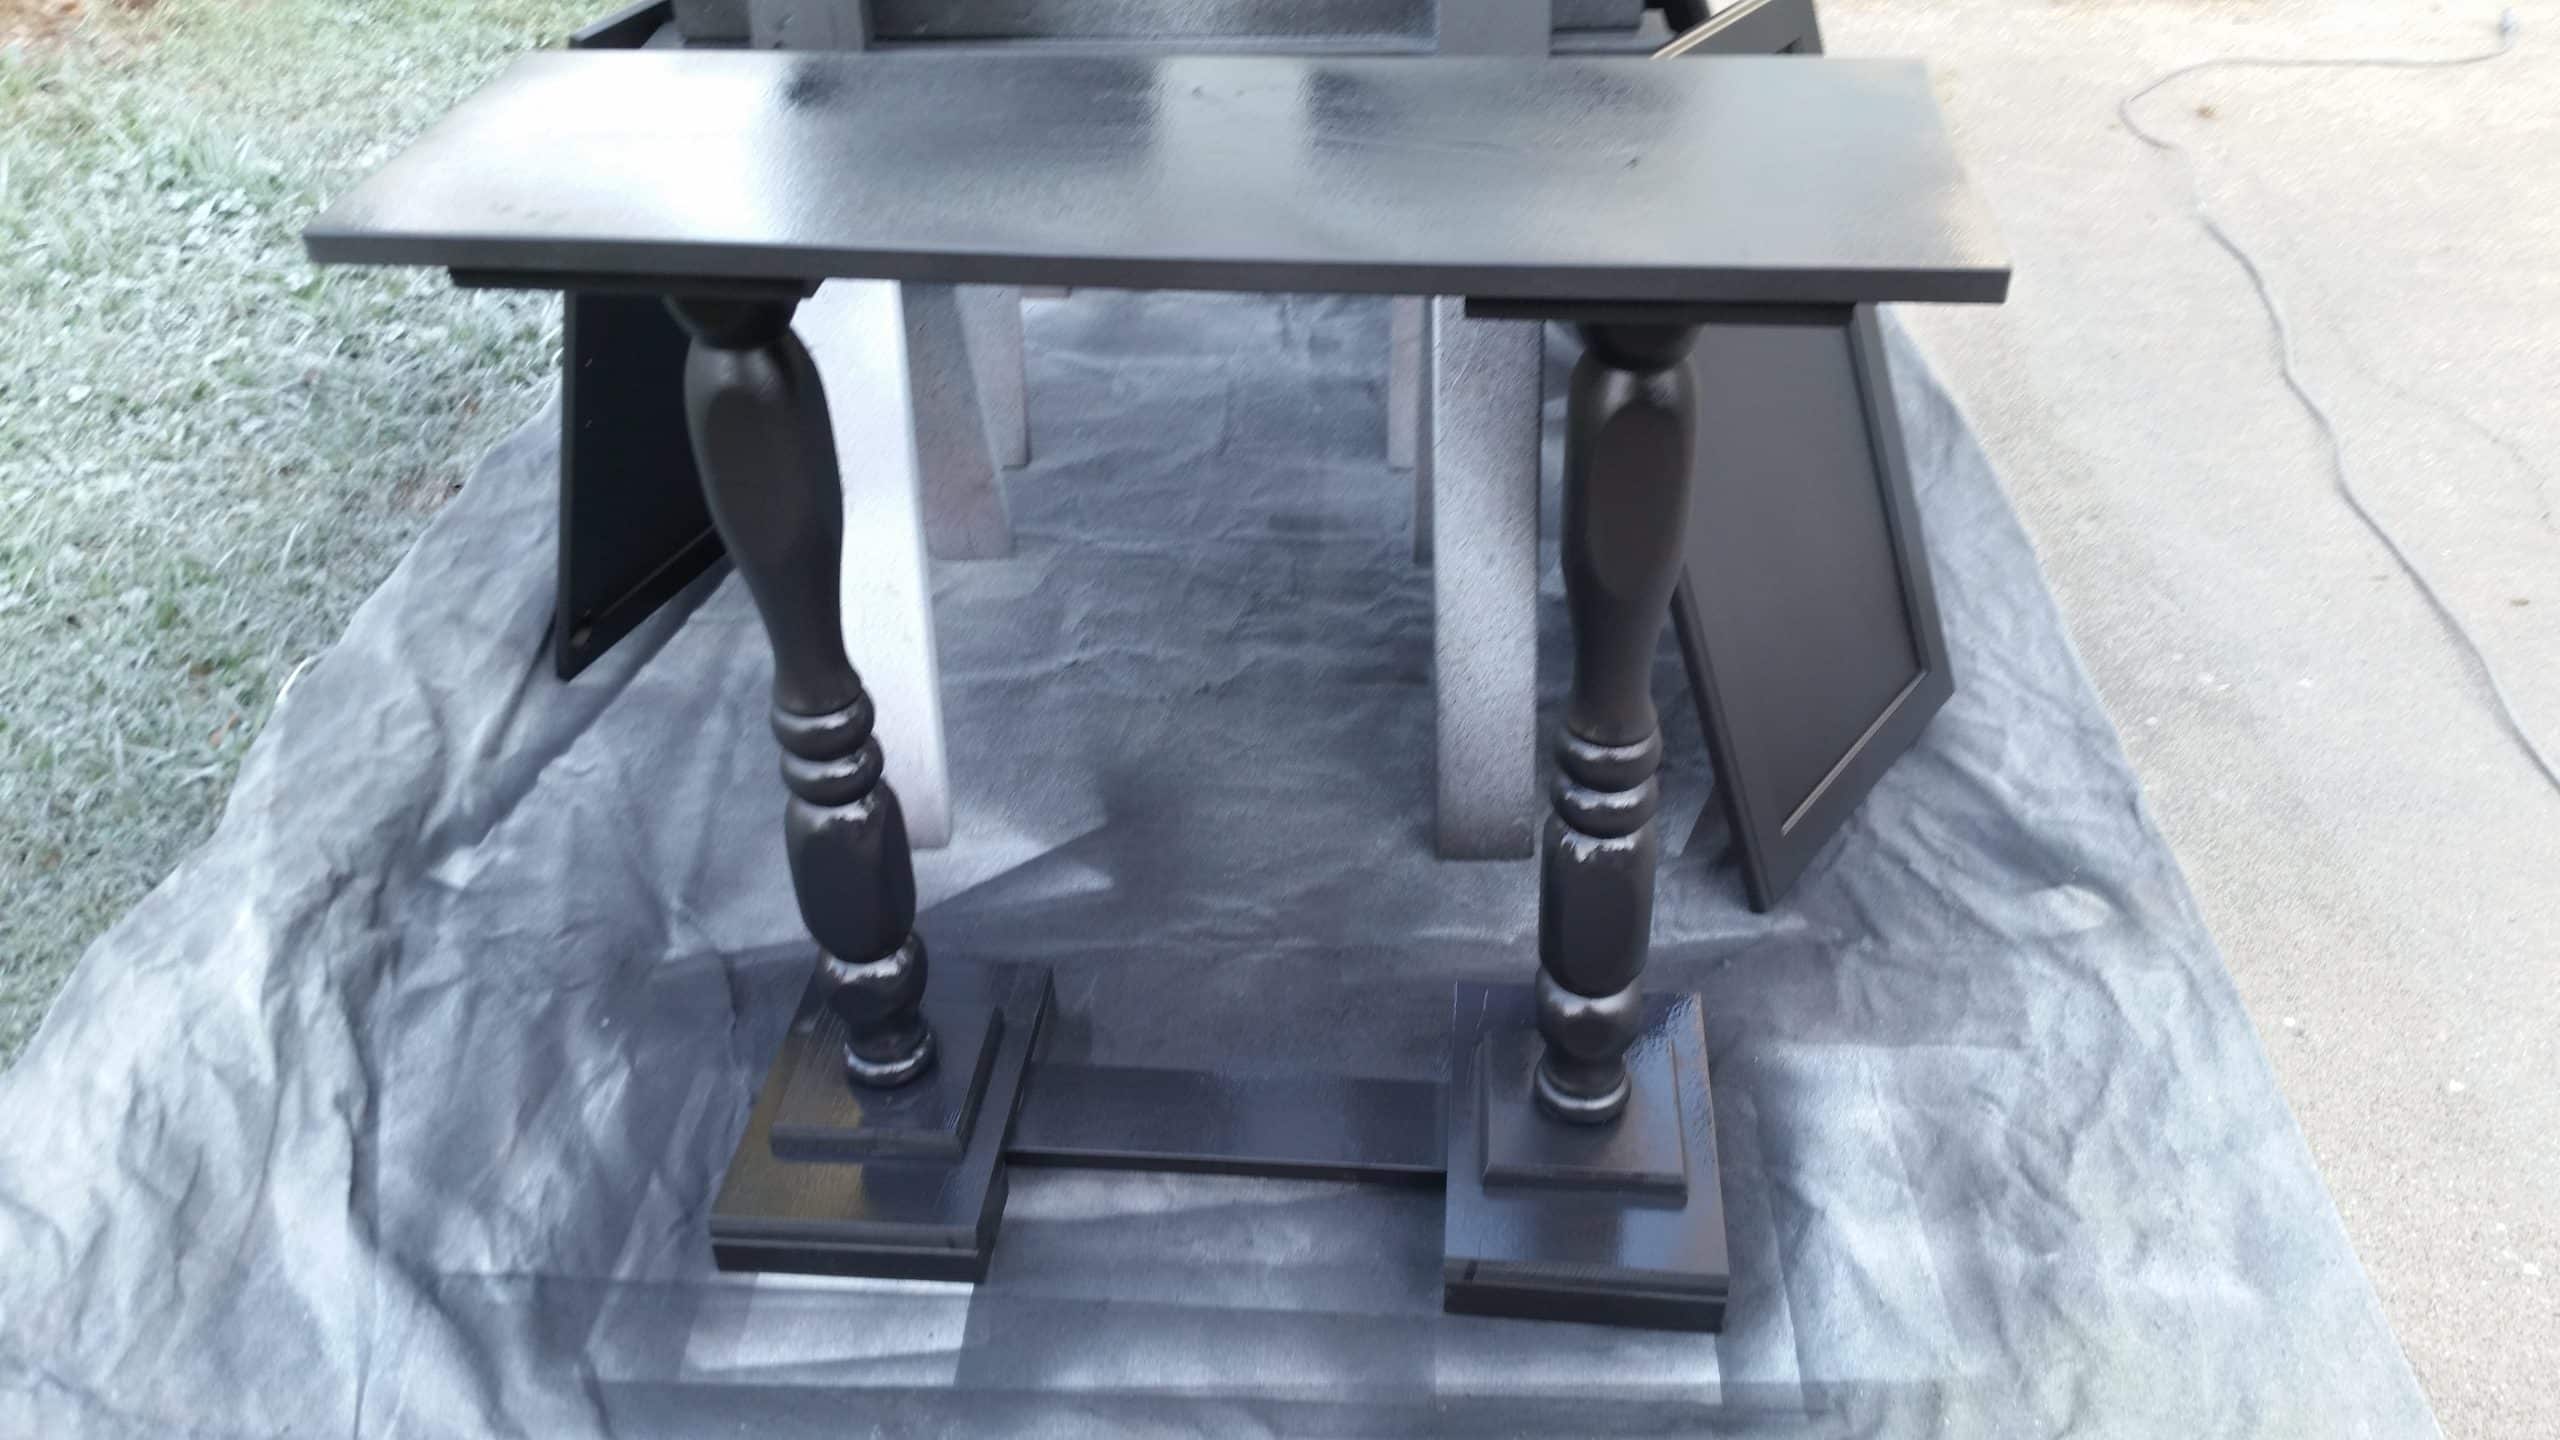
This is after two light coats of primer and one light coat of Beluga Satin.
I was inspired by this table on Facebook.
Black double pedestal table

 This project was taken to Glendale 2016, however, it wasn’t sold, so it came home with these projects.
If you love it, please PIN IT.
 Here is the table, currently for sale in my booth at Vendors’ Village.
Breakdown of my cost:
- Table top: FREE
- Pedestal: FREE
- Pieces for the base: FREE (scraps)
- 2×4 for feet: new lumber on hand $2.42 and I only used about 2 feet
TOTAL .60
More great DIY projects
Now, check out what my friends have done.
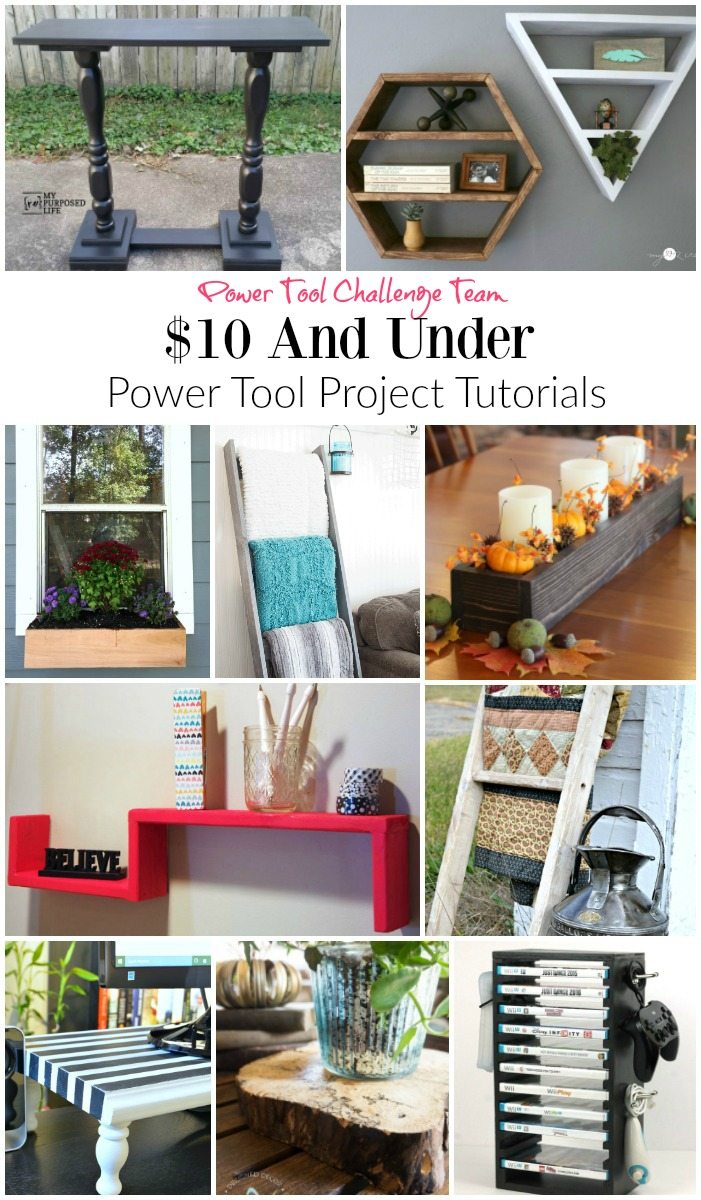
Double Pedestal Scrap Wood Table by My Repurposed Life
Hexagon and Triangle Shelves by My Love 2 Create
Window Box by Dogs Don’t Eat Pizza
Blanket Ladder by Domestically Speaking
DIY Wood Centerpiece Box by Virginia Sweet Pea
Easy DIY Shelves by Create and Babble
Vintage Peg Blanket Ladder by H2OBungalow
Computer Monitor Stand by Interior Frugalista
Wood Slice Plant Stand by Designed Decor
DIY Video Game Organization Station Holder by Kim Six Fix
gail
Teresa,
Actually the challenge is happening currently. You can see all the details here: https://www.myrepurposedlife.com/twin-bed-bench/
gail
Teresa,
Actually the challenge is happening currently. You can see all the details here: https://www.myrepurposedlife.com/twin-bed-bench/
gail
Teresa,
Actually the challenge is happening currently. You can see all the details here: https://www.myrepurposedlife.com/twin-bed-bench/
gail
Teresa,
Actually the challenge is happening currently. You can see all the details here: https://www.myrepurposedlife.com/twin-bed-bench/
gail
Teresa,
Actually the challenge is happening currently. You can see all the details here: https://www.myrepurposedlife.com/twin-bed-bench/
gail
Teresa,
Actually the challenge is happening currently. You can see all the details here: https://www.myrepurposedlife.com/twin-bed-bench/
gail
Teresa,
Actually the challenge is happening currently. You can see all the details here: https://www.myrepurposedlife.com/twin-bed-bench/
gail
Teresa,
Actually the challenge is happening currently. You can see all the details here: https://www.myrepurposedlife.com/twin-bed-bench/
gail
Teresa,
Actually the challenge is happening currently. You can see all the details here: https://www.myrepurposedlife.com/twin-bed-bench/
gail
Teresa,
Actually the challenge is happening currently. You can see all the details here: https://www.myrepurposedlife.com/twin-bed-bench/
gail
Teresa,
Actually the challenge is happening currently. You can see all the details here: https://www.myrepurposedlife.com/twin-bed-bench/
gail
Teresa,
Actually the challenge is happening currently. You can see all the details here: https://www.myrepurposedlife.com/twin-bed-bench/
gail
Teresa,
Actually the challenge is happening currently. You can see all the details here: https://www.myrepurposedlife.com/twin-bed-bench/
gail
Teresa,
Actually the challenge is happening currently. You can see all the details here: https://www.myrepurposedlife.com/twin-bed-bench/
gail
Teresa,
Actually the challenge is happening currently. You can see all the details here: https://www.myrepurposedlife.com/twin-bed-bench/
gail
Teresa,
Actually the challenge is happening currently. You can see all the details here: https://www.myrepurposedlife.com/twin-bed-bench/
gail
Teresa,
Actually the challenge is happening currently. You can see all the details here: https://www.myrepurposedlife.com/twin-bed-bench/
gail
Teresa,
Actually the challenge is happening currently. You can see all the details here: https://www.myrepurposedlife.com/twin-bed-bench/
gail
Teresa,
Actually the challenge is happening currently. You can see all the details here: https://www.myrepurposedlife.com/twin-bed-bench/
gail
Teresa,
Actually the challenge is happening currently. You can see all the details here: https://www.myrepurposedlife.com/twin-bed-bench/
gail
Teresa,
Actually the challenge is happening currently. You can see all the details here: https://www.myrepurposedlife.com/twin-bed-bench/
gail
Teresa,
Actually the challenge is happening currently. You can see all the details here: https://www.myrepurposedlife.com/twin-bed-bench/
gail