Home » Repurposed Furniture » Two Recycled Chairs Make a Double Chair Bench

Two Recycled Chairs Make a Double Chair Bench

As an Amazon Associate, I earn from qualifying purchases.

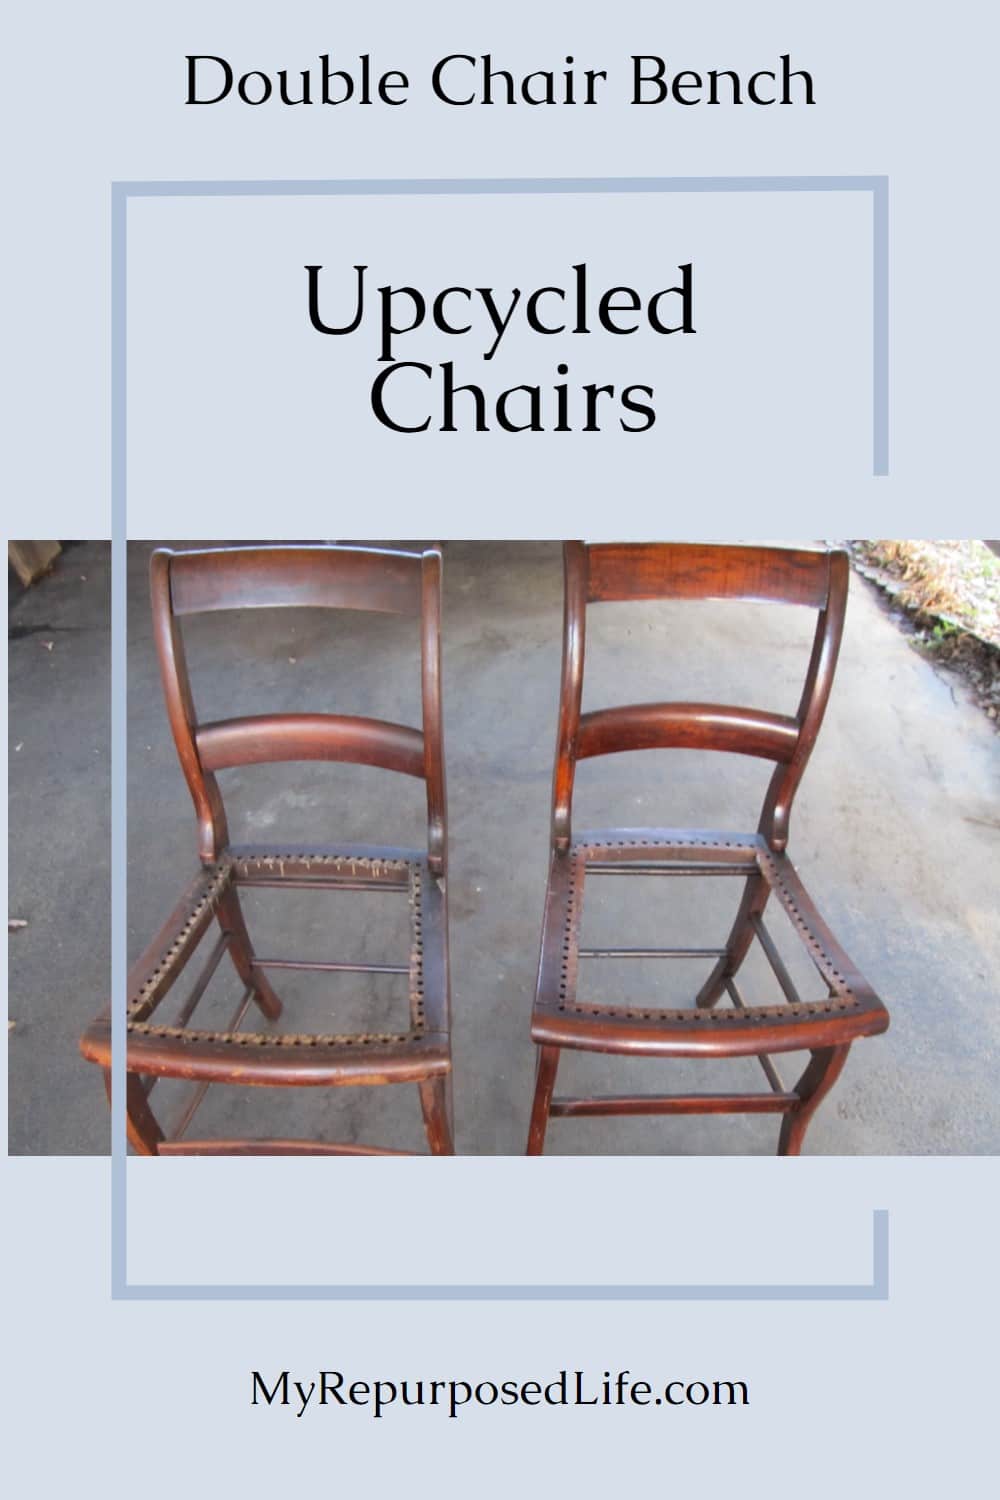
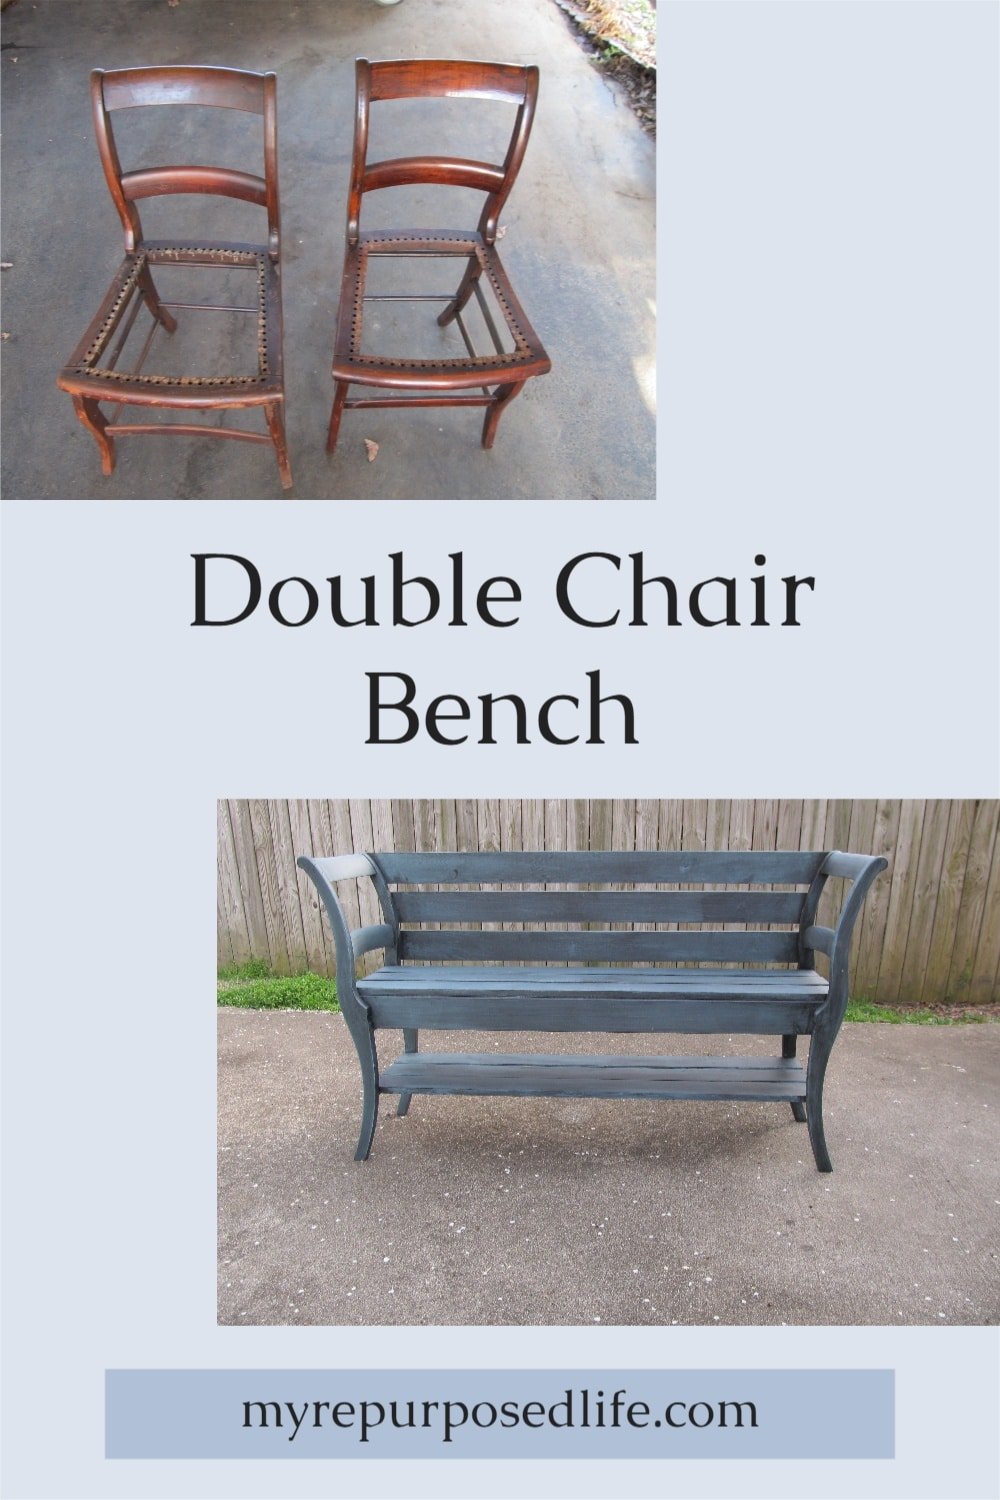
I will show you how to make a double chair bench with repurposed chairs. Or maybe how NOT to make a double chair bench.

Have you ever had a repurposed furniture project fail? I do. I never really have a plan when I jump into a project. Because I always wing it. Most of the time, that works out okay, sometimes not so much. This recycled chair bench would be one of those projects.

Vintage Chairs Without Seats

I picked up these two chairs at Tickled Pink a few months ago.

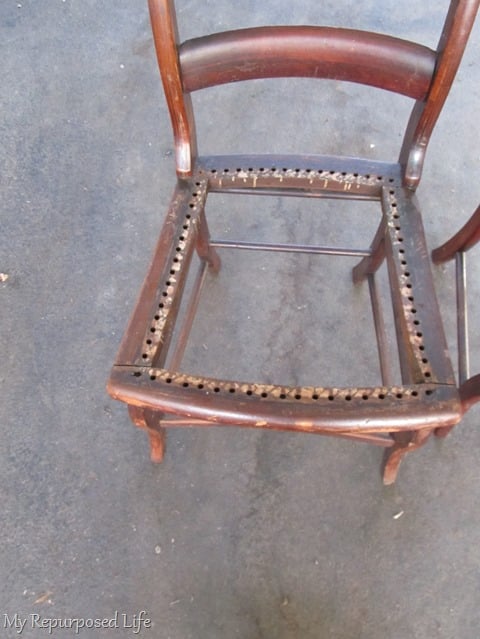
It didn’t bother me that they were missing their seats.

See more Chair Projects & Benches HERE.

The Design Stage of a Chair Bench

Repurposed chairs for bench

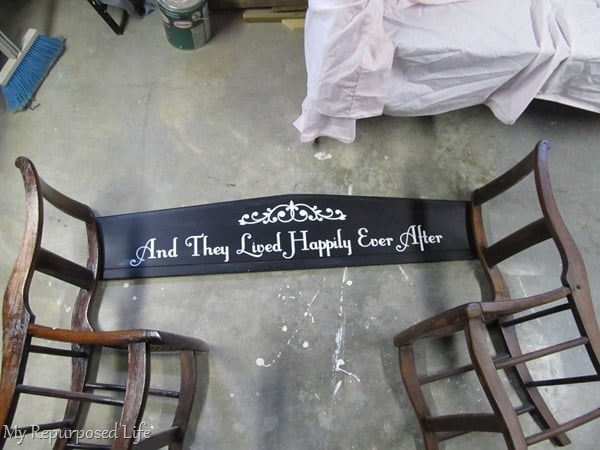
I decided to make a double chair bench out of the chairs. Then, I wished I had a back and realized I could use this sign that hadn’t sold yet.

Dismantling Recycled Chairs For a New Project

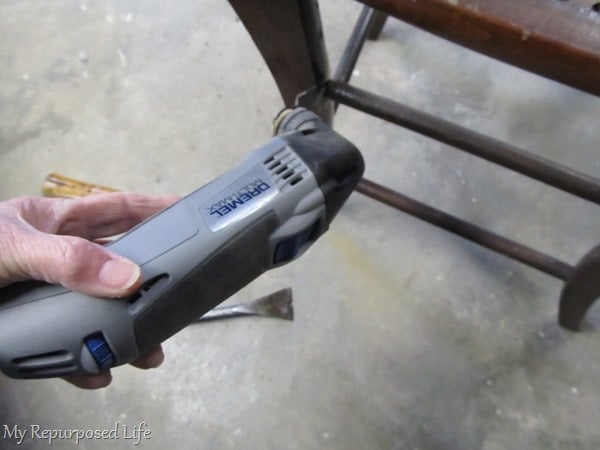
I needed to dismantle the front rungs of the chairs. The Dremel Multi-Max  ]does a great “flush” cut.

Dismantle chairs for double chair bench

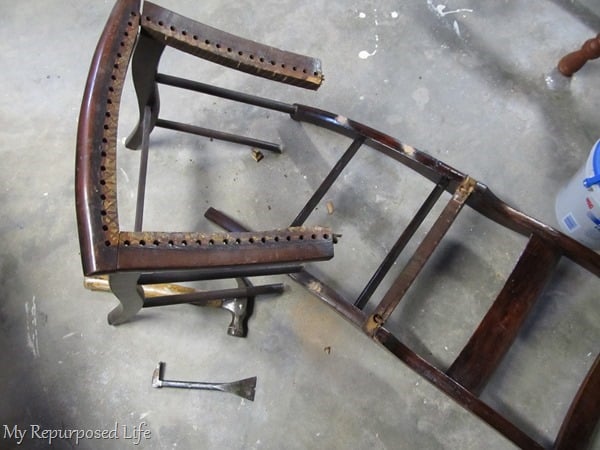
I also had to use a hammer and a small pry bar because the back of the chair had several nails in it.

These would be said nails.

More Trial And Error Designing

Designing double chair bench

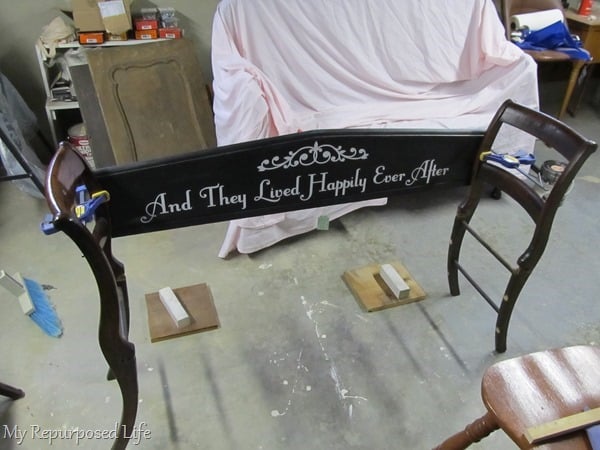
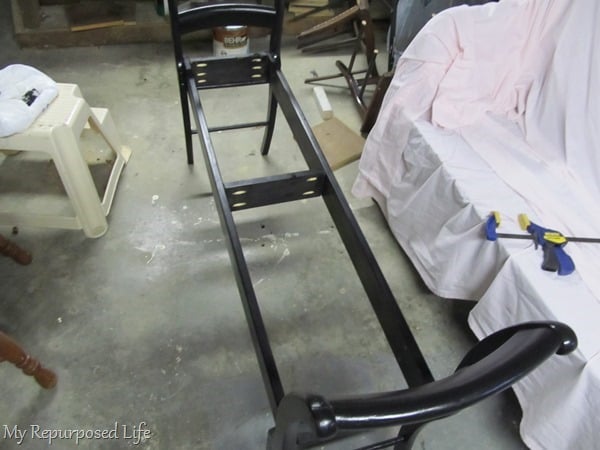
This image shows a dry fit of the repurposed chairs. Clamps held everything in place to see if things would work.

For this project, I used some old scrap 1x’s. Some were from a local lumber store that closed about 30 years ago.

At this point, things go wrong. (but I didn’t know it at the time)

Adding a seat to repurposed chairs bench

I made a box for the top boards to rest upon.

Time to Paint

You can see that I used my Kreg Jig® K4  to make pocket holes to assemble the box. I painted the repurposed chair bench and the slats separately.

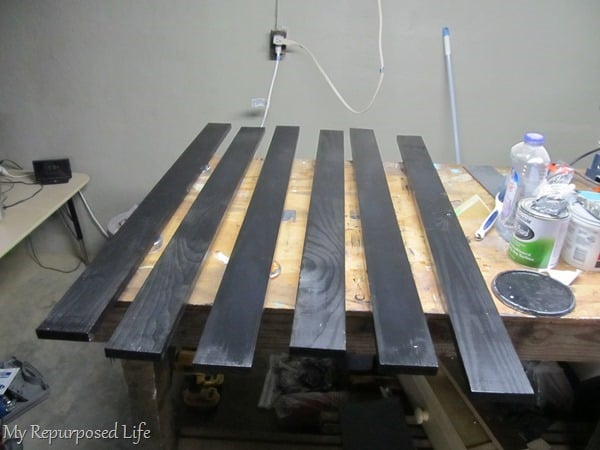
I did so because I wanted to be able to get in between the slatted boards.

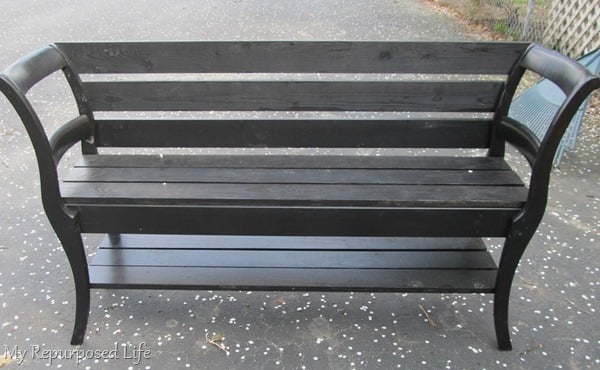
After all that, I put the headboard (sign) back on and realized it was about this much too short.

Is It a Project Failure?

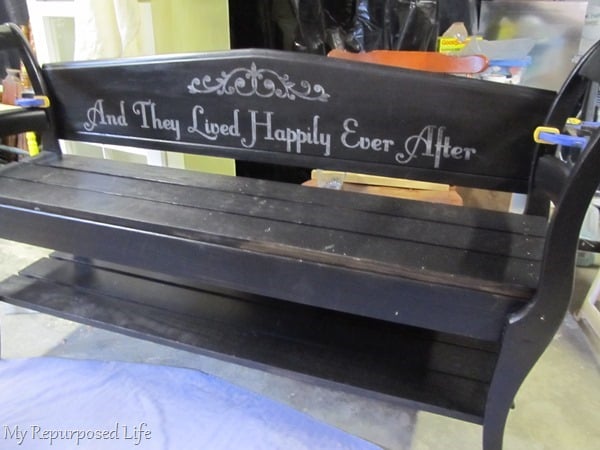
Major project fail! What I don’t like about this piece is

  • It’s too long
  • I have to figure out a new back IF I decide to move forward
  • I wouldn’t say I like it black

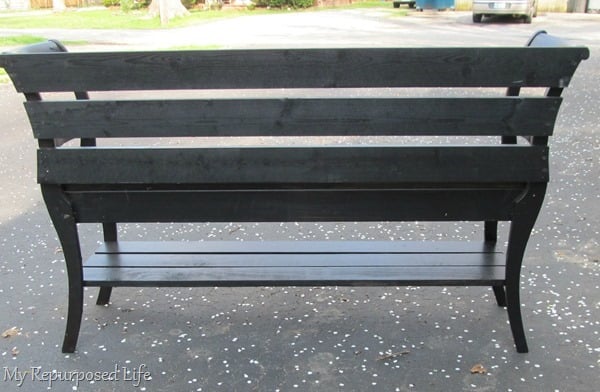
Maybe I’ll paint the repurposed chair bench another color; I may or may not put a back on it. It may end up in a burn pile somewhere! (I don’t have one)  I could put it at the curb to see if anyone wants to pick it up.

Want to hear something funny? This recycled chair bench is not my first double bench project fail. I made another one several years ago. Aren’t we supposed to learn from our mistakes?

We Should Learn From Our DIY Mistakes

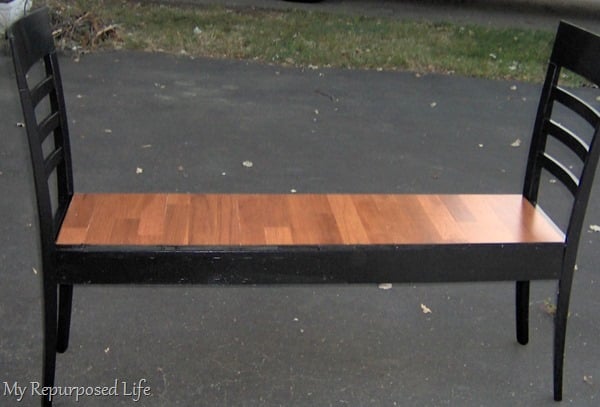
This is the original project fail-double chair bench.

You can probably tell I’ve never had a bench for the end of the bed. The good news is this repurposed chair bench did sell at one of my yard sales. Oh, how I wish I had learned from my mistake.

So, please leave a comment below and tell me I am not the only one with project failures! What was your biggest or your last project failure?

gail

UPDATE:   I changed up this bench for the better. I hope you love it as much as I do.

So, I purchased 3 new boards to create the back for the repurposed chairs.

I clamped the boards onto the bench and drew a line, then used my jigsaw to curve the boards to match the curve of the original chairs.

Painting And a Dark Wash

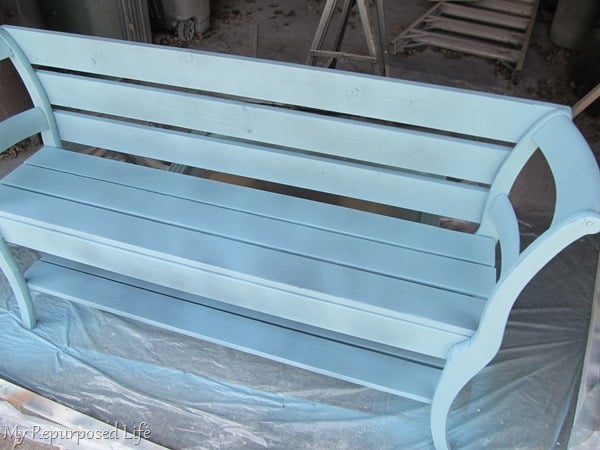
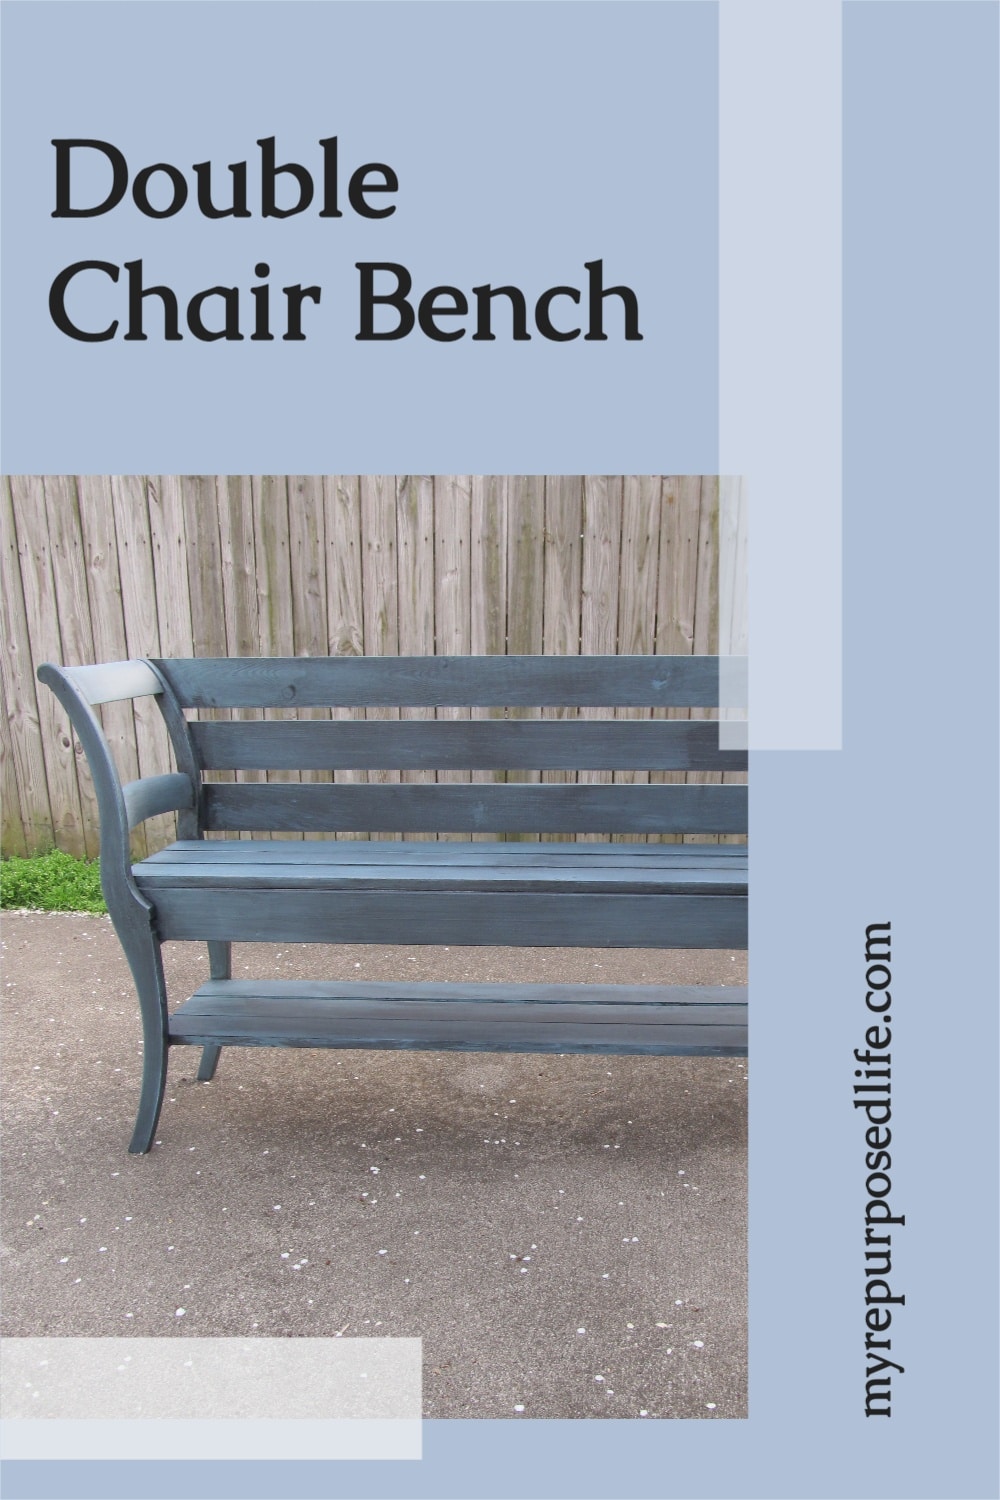
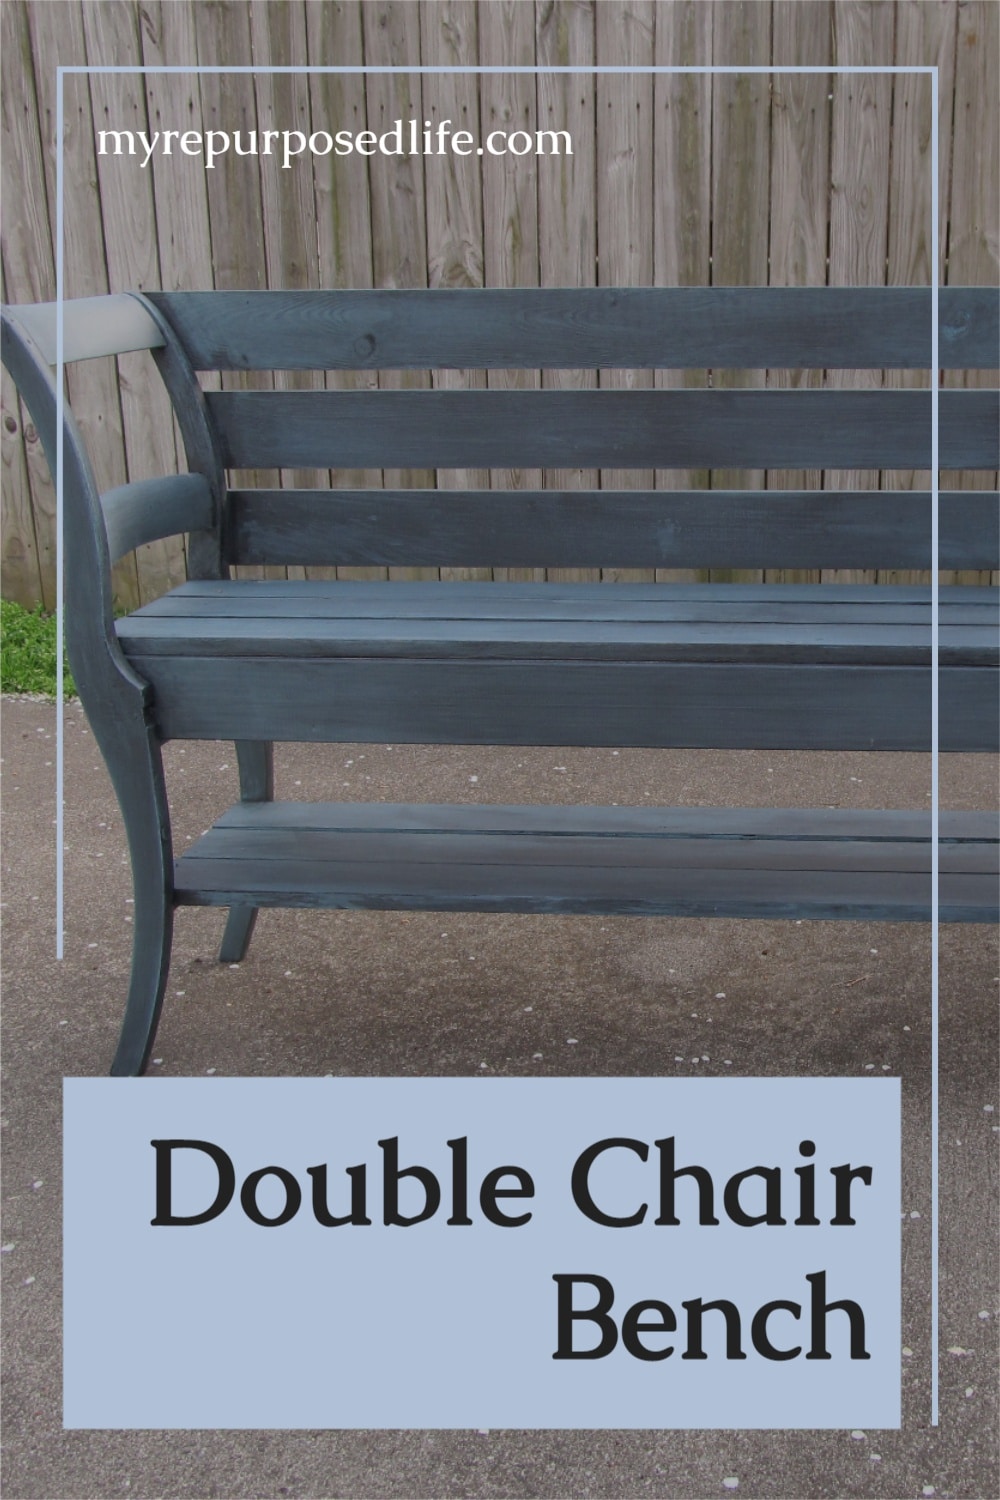
Using a light turquoise, I sprayed the double chair bench with my HomeRight Finish Max Fine Finish Sprayer.

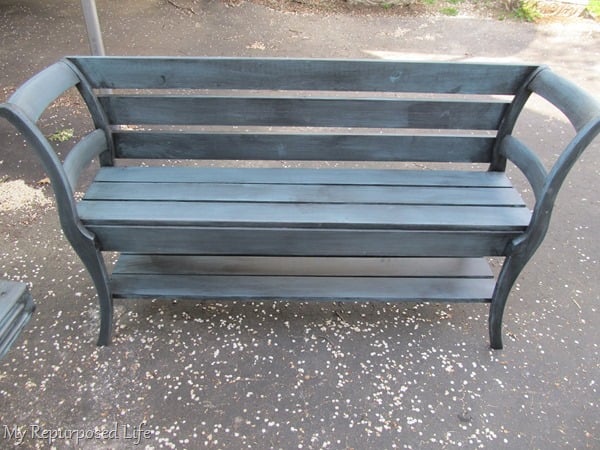
Then I gave the chair bench a black “wash’ with some watered-down black paint.

Related Content: Navy Blue Furniture Projects

My Repurposed Life How to make a repurposed furniture Chair Bench

I’m glad I didn’t give up on this project’s failure with repurposed chairs! I think this is a very versatile piece and can be used in many different ways.

If you love this project but maybe you think it’s a little too difficult, here’s the easiest chair bench ever:

repurposed furniture triple chair bench MyRepurposedLife.com

See how to make the easiest bench made from chairs.

End of Bed Bench

You can see more bench projects here

see more chair projects here

110 Comments

  1. I don’t usually care for “chair” benches but this is one I wouldn’t mind having. Excellent design on the save – thanks for sharing.
    Sheila

  2. That came our great! I’ve seen many of these chair to bench projects and they have been horrible. By having the chair and bench backs at the same height, you made it work. Now I know that’s the key!

  3. That “fail” turned out to be such a beautiful WIN!!! Looks great and I love the turquoise color with black wash. Thanks for sharing!

  4. I was so inspired by your bench that I had to try my hand at it. I had some chairs that were going to the trash so decided to make two benches. Sized them to some settee cushions I found. I cut the second one wrong so I think it’s destined to become a coffee table but the bench is awesome! It is nearly done and I’m so proud of it I can’t wait to show it off. Thanks for the great idea and tutorial.

    1. Toni,

      I’m so excited for you! Thank you so much for letting me know I inspired you. I hope you share with me on Facebook or via email. I can’t wait to see it.

      gail

    1. Thanks for stopping by and taking the time to leave a comment Angie! I truly appreciate it. This is still one of my long time favs.

      gail

  5. I am a repurposer myself…… and I have a plan in my head, but truely am a wing-it type of person too….. I just finished making a bench out of an old dresser someone was going to throw away… as for me I look at the wood and not the item.. if the wood is still sound you can use it for anything….. I love the 2 chair bench idea… less cost in material, but still get a great look and style…. I am also all about comfort……. I would have lowered the sides just slightly so your arms rested comfortably…… I also love your original idea with the sign… I wish you would have kept that or made another sign that would have worked…. Remember… ” to try and fail is really success if you learned from your mistakes…!”

    1. Thanks for stopping by and checking out this project from the archives. We all learn from each project. Were I to do this project today, it would be different. However, I wouldn’t lower the chair back heights because this isn’t a “sitting” bench for reading a book. It’s a resting place to kick off your boots, or set your handbag while you put on your scarf. 🙂
      I hope you check out some more of my repurposed items someday soon!
      gail

  6. Hi! Thank you for posting your project fail. I am beginning my journey into the repurposed world and its nice to know even those who have been here for a while still have “uh- oh” moments lol.
    This bench turned out great! I really like how the boards for the back go with the curve of the chairs.
    I love your blog. You have given me so many ideas. Looking forward to future projects.

    1. Cristi,

      Thank you very much for your comment. Oh… we all have our fails. Especially when you do as many projects as I do. 🙂 I’m so happy you love My Repurposed Life! I do so love what I do!

      gail

  7. I absolutely LOVE LOVE LOVE the way that this “fail” turned out. If only half of my fails would eventually turn into something this beautiful- then I would be very happy. You are most definitely not the only person with pinterest project fails… Or up cycle project fails. I have had many. ????????. But I continue to try and try again, and have had some great successes in there as well. Have a wonderful day- and keep up the great work.

    1. Thank you Bridget for your kind comment. No, I’m not the only one with fails, but sometimes people may get the wrong idea about diy bloggers thinking we always get it right. Sometimes we get it right only after we “don’t give up”.

      Don’t be a stranger, I’d love for you to stop by again sometime soon.

      gail

  8. I’ve seen the headboard bench ideas, but never a chair to bench!
    LOVE the look of this! Will have to try it myself. Thanks for your post!

  9. Gail, i really think it was a happy accident. Not that the headboard wasnt cute too but the slatted back on the finished bench had a classic style. I wish i had been your buyer! Keep up the good work. KUDOS

    1. I believe you did a beautiful job and truly believe you thought of the wieght of the people who would be sitting on it. I make a lot of projects and tutus and always make sure of the weight or fitting first before I make it. Awesome job!

  10. Wow! I’m SO glad you stuck with it! The bench is fantastic! Almost every thing I build is a fail, but I stick with it; I take a break and rethink of a way to fix what I messed up, because there is always a solution. And after every project I remind myself how much I hate construction, and I say I will NEVER make anything ever again……until the next project 😉

    1. thank you Heather!

      I’m so glad I stuck with it as well.

      Building and designing is my very favorite part of the process. Granted, some are more challenging than others! Since I never do sketches or drawings, I’m always flying by the seat of my pants! 🙂

      This bench found a new home with a lady that loves it. It’s a win/win for me.

      gail

  11. Gorgeous Job! I love the black wash you added at the very end. It really makes this project jump from great to wow! that’s one fab project.
    Oh! and yes I have lots of fails, that’s what makes the ones that turn out right feel so great don’t you think!
    Marie

    1. It’s been a while, and I tend to forget these things… but if you look at double chair bench (13) (hover over the picture for the name) you can see that there are rungs on the bottom of the chair that allowed the shelf boards to rest.

      gail

    1. Linda,

      I would try turning them over, gluing with Gorilla Wood Glue, and clamping them tightly. (Not so tightly that all of the glue oozes out)

      If you don’t have clamps, you can try belts, rope, or some other means. You could use a Kreg jig to give a tighter repair (google My Repurposed Life Kreg Jig)
      You could also (along with gluing) use some mending plates (found at your local hardware store)

      While you’re visiting your hardware store, talk to the employees, they may have additional ideas.

      good luck,
      gail

  12. Your finished piece is lovely, but I have a question/comment. There is very little left of the original chairs. Was it worth it, or would you have been just as well off building a bench from scratch? I too have two seatless chairs (impulse purchase) that I’m trying to figure out what to do with. My husband doesn’t like them period and says to just ditch them. I hate to admit a project fail before I even start, but I hate to get sucked into a bigger project than I originally had in mind. Been there, done that. My current thinking is to turn them into planters. I’m a better gardener than woodworker. lol. Anyway, thanks for sharing your project. It’s nice hear about the fails amid the overwhelming Pinterest perfection.

    1. It was so totally worth it. I love a good challenge. 🙂 I don’t really like making stuff from scratch. I’d much rather repurpose something. I also love using old chairs in the garden. Good luck with whatever you decide. have fun!
      gail

  13. I love all your ideas. So glad to hear of someone else who just jumps in and figures it out as she’s going along 🙂 The benches are beautiful and have inspired me to explore further. Thanks!

  14. Thank you so much for this very nice bench.
    The final project is, on my point of view, much better than the initial one.
    The proof that a mistake can be a positive point !
    We already bought some old chairs, and we are going to try to make one.
    We will send you a picture of it as soon as it’s finished.

  15. I love love love all of your benches and the many permutations shown. They are not fails but “Adventures in bench upcycle diversity” ! I’d be glad to have any of them in and around my home. You are phenomenal!

  16. I’m glad you didn’t give up!! I love the look of the final bench. I must run now and rummage for some chairs. Thank you for sharing your creativity.

  17. I love this chair. Thanks for posting your error so we can learn from YOUR mistakes 🙂 This is what I was looking for and did not realize it yet. I have a 40’s dining/kitchen and this would make a great bench for that period size table, so I do not have to worry about a corner nook this will do it. I want red.
    I have two chairs for the opposite side, now I have to start a search all over for the bench part. This is going to be fun.

    I love my Kreg jigs (I have three) it makes furniture making so easy. It’s simply perfect, you do fine work, mistakes and all.
    Thank you for this..

    1. Thank you very much Rosemarie for taking the time to leave a comment on this post. I really appreciate it. I’m happy you are inspired by this post to solve your diy problem 🙂
      I too love the Kreg jigs, I have 3 also. hahahah

      have fun, I’d love for you to share your finished project with me.

      Happy New Year!
      gail

  18. It turned out great in the end!! I wouldn’t feel down, i’ve had a few project fails…. my finest was a two drawer end table that I had I picked up with a french provincial lingerie chest for 15$!!! I didn’t want the end table, but figured i could do something with it… Pinterest always makes everything look so glamorous.. My big plan was to take out the top drawer, take off the top and put a back on to make it into a cute little reading seat for my two year old… I tried to get fancy with the back… i traced the design along the bottom of the endtable…. but when it was flipped the other way on the back it just looked like boobies:P i STILL tried to save it by getting out my dremel and etching the boobies into a heart shape… it all turned up looking so wrong lol… junk pile for that one.

  19. I love your benches made from such apparently hopeless pieces, this one looks great in your final design. I will never look at a couple of seatless old chairs in the same way, thank you !

  20. Planning to attempt my first bench, but I know the headboard I have is not solid wood. In the weather the layer are going to curl. Has any of yours been out of similar material? Will putting a sealer help or just delay the inevitable?

  21. I really like the bench – you can send it to me if you don’t want it :). I also like the black even though I normally don’t like black furniture. The white lettering really stands out on it.

  22. Well, if you don’t want this bench can I have it? I love it!
    I have project fails all the time. Recently I wanted to sew a pattern as a new type of art (using just the pattern itself, not material), it failed miserably and I wasted so much time on it. I am unable to throw it out, but don’t want to look at it!

  23. I don’t think that looks like a “fail” at all.
    But I know how you feel. I have a really cool chair that I transformed and CANNOT GET BACK TOGETHER. It’s been sitting in the garage, mocking me, for about a year.
    David

  24. Ummm-Yes, I have many fails. I am like you, not always going in with a clear plan. I like working that way, but it also means I have some major oops.

    I just had one yesterday. I am planning on sharing it today, or tomorrow, or whenever I get around to posting. Like you I have been super busy.

  25. Those chair benches from curved backs can be tricky. When I did my last one I had a terrible time with the seat box. It was so difficult to get the correct angle of the backs once the front of the chair was removed. I had to rework that thing several times before I got it right, and the back never made it onto the bench…same problem as you’re having: despite all the measuring and cutting it still didn’t fit right! If you recall, my triple chair bench sat in the garage a full year because I got stumped at one point and set it aside. When I finally got back to it I had no problems at all! Must be I was just having a bad day way back when I started. I like the black on the bench, but then again black is my go to color. Have you considered making cut outs in the seat and using the bench as a planter? Or even turning the seat box upside down so it makes a box to hold pots. It’s really cute and I can see it on a porch filled with flowers….
    The sign (back) does need to go higher like you had it in the first picture. How about adding a piece of wood to each end of the sign to get the right length again? Your kreg will do the job easily!
    Not a fail, just a challenge. 😉

  26. I never learn, that is why me and the seam ripper are such good friends when I sew, and why I always buy extra paint when paint. The first, second and even third time are usually a fail for me, but I just take it in stride, but I never learn. Maybe it is our age, we do get forgetful sometimes…well at least I do! I think it is the scale of it that is throwing you off. The curves aren’t meeting the back in the right spot. Oh well, just come back to it another day and it will come to you.

  27. Gail–funny girl! NOT a failed project, you just need to make a “simple” revision! I’ll guide you through it if you want–but please don’t throw it on any burn piles!
    Catherine

  28. Oh gosh Gail… if you only knew!
    The latest one was the door shelves I made… I really needed clamps… I really simply needed more time to work on them.

    Just before I left for far northern NV to see the kids and to work on the door shelves… I have a twin sized head board bench I’ve been working on for MONTHS! I refuse to give up! I messed it up and now have to re-do. Grrr…

    Do you remember the Beaded Baseball Card I was doing for my husband? Well… it’s been nearly a year and it sits in the unfinished state… I’m now feeling guilty about not working on it… but I was so disheartened it was (is) hard to go back to it.

    My mother used to tell me, “A mistake is not a bad thing as long as we learn from them.” You, like me, have to do them a couple of times to actually learn anything! How soon we forget! It’s like God is slapping us along side the head… “see… you didn’t listen the first time did you?” LOL

    If all of us bloggers blogged about all of our fails I think there would be a LOT of fails out there!

    I’m sure you want to get back into the shop, but at the same time it’s good for you to have a break. All work and no play makes Gail a dull lady. 🙂

    ((hugs))

  29. What a bummer…it was such a cute idea. I can’t even count my project “fails”…it would be too depressing. I know you though…you will get right back on the horse and make something work!

  30. I think you might be too harsh of a critic. I like the bench very much would build a simple back to match the seat. Guess this is one of those time the old adage comes into play. “Measure twice, cut once”.

  31. I hate it when that happens!! When you see something in your head and then the thing in front of you doesn’t look like what’s in your head. I think there might be some type of time warp thing that happens cause then it’s like my brain shorts out and it’s “to the burn pile with you!!!” Saying that like the Red Queen says “Off with his head!” in Alice in Wonderland 🙂
    For the record I rather liked your bench although black isn’t my decorating color either. Obviously you want to make a bench with chair backs and you’re on your way to getting exactly what you vision. 🙂
    Good luck!!

  32. Geez, I wish I could fail that good! I adore all your projects, wishing mightily that I had the guts to do them myself. Fail? You? Not! Only YOU can turn it into a Happy Accident! Think, backwards, upside down and inside out- you’ll get it!

  33. This doesn’t look too bad for a fail! It’s got potential even if it didn’t turn out like you wanted. I see it being used as a plant table on a porch. Or it still would make an excellent bench on a porch or patio. Just set it against the wall and there’s your back. Even though it is low some one could use it as a potting bench. Just sit down and pot your flowers to your hearts content. OR Add a top to the chairs and make it a slightly higher potting bench. Ok I’ll stop there. Hey if I lived close by I definitely would buy it from you.

  34. You didn’t ask, but here’s what I think. What if you cut the backs of the chair down to that first slat, and put a board across the back at the same height? Then paint it a color you like. It would have a lower profile, but that’s not a bad thing. Honestly, I don’t think it looks too long, and I like the black. I think this could totally be salvaged.

    DId I ever tell you about the time I was going to make my own wire birdcage? It turned out like some weird instrument of torture. That never saw the light of day on my blog!

  35. Honestly, I like it. Its not a fail to everyone. If you dont want to keep it or work on it anymore I suggest listing it on Craigslist for at least $100 with pictures. I bet you will get tons of interest!

  36. I don’t think this bench is a fail–I think an easy fix would be to remove the sides and cut bottom of the legs off a few inches and reattach–for me I think they are too high for the “arms” of the bench. I like the black and the sentiment a lot. Just a thought…

  37. I agree not really a “fail”! You’re being too hard on yourself! I think most people usually are though.

    I found an old ladder a couple of months ago. It was covered in paint, so I sanded and sanded and sanded, took it apart, and stained it a very dark brown. I had intended on hanging it horizontal on the wall and using it as a makeshift shelf. However, it is not flush with the wall, so my other half said it couldn’t stay. He says it will damage our walls. So it’s new home is propped against a wall to hang our living room blankets on.

  38. What if you just scoot the sign down so there is no gap in the back? Seems to me the curve of the chair backs would mean they are closer together nearer the seat. I love it, black and all, and would have it in my house!

  39. Gail-you are being WAY to tough on yourself!! It is pretty cool–I would paint it gray-distress it a bit and put it on a porch with some pillows or in the yard with some flower pots on either side…and yes–i am excited for you to get back in your shop…LOVE your projects!!
    chris

  40. Gail-you are being WAY to tough on yourself!! It is pretty cool–I would paint it gray-distress it a bit and put it on a porch with some pillows or in the yard with some flower pots on either side…and yes–i am excited for you to get back in your shop…LOVE your projects!!
    chris

  41. I know you see this as a fail, but I don’t. It may not be what you want but that doesn’t mean fail, at least not in my book. I think because you wanted to use that sign as the back is maybe why it’s a fail. And I certainly don’t think it’s too long. Why don’t you make a different back and paint the whole thing a different color. More of a Gail color! Black benches are my thing! HA! Fail would be if you made it and can’t sit on it…then maybe you could call it a fail.

    Holly

  42. Sniff.Sniff. I loved those chairs before you dismantled them. I’m more of a chair, than bench person since we never have enough chairs around here.

    I always marvel at how inventive and confident you are with wood.

  43. I think you’re being too hard on yourself I love this bench. Maybe add a cross bar a little higher to attach the back too.

    If this is a fail I don’t think I’ll ever post my projects as your fail looks better than a lot of my non-fails…lol!

    You are my inspiration to try re-purposing, keep up the wonderful work!

  44. Oh, don’t you hate that?? You see it in your head & it is perfect… then the finish?? not so much… Happens to me all the time.
    I think you can save it though… I like it so far.. set it aside for a while & then come back to it.. you may be inspired to finish it differently : )

  45. I think it looks fine. I can totally see that bench sitting in my garden.

    I wasn’t sure how that would turn out from the first pictures. But wow. You give me so many ideas.

    I need to go find two chairs for my headboard still sitting here waiting for the right stuff to come along.

    Sharon

  46. Yeah, I think the sign is a little too narrow/short to be with arms that tall.

    I have project fails all the time! I’m in the middle of one right now: I tried to paint the inside of a vase, and there are some definite naked spots. Whoops! It’s hard to get the brush in there at the correct angle.

  47. I say it looks not too bad, I would put it on sale,I reckon,there is always someone who will love what we don’t. In a bedroom piled up with cushions maybe.
    I don’t do huge projects,but do have things not work out with my sewing projects. I always say to myself, it’s never a mistake, it’s an opportunity to be creative. So many mistakes have turned into something special.

  48. There isn’t anything wrong with the bench. Anyone that didn’t know your plan would not even notice what you “think” is wrong with it. I think it is beautiful just the way it is! 🙂

  49. i think it’s really cool. the only suggestion i would have to help you with the things YOU don’t like about it is: maybe dry brush some vertical stripes on the seat part to fool the eye. instead of the eye following the horizonatal slats, it will break up the length and make it appear shorter. just a suggestion…..but i would buy it. i think she’s a beauty.

  50. I always have fails, most times not a real fail, just me being too hard on myself!

    This would be a great bench if the back had been the right size!

    How about making a smaller bench, find / make a different back, the chair backs look wonderful as the arms of the bench.

Leave a Reply

Your email address will not be published. Required fields are marked *

This site uses Akismet to reduce spam. Learn how your comment data is processed.