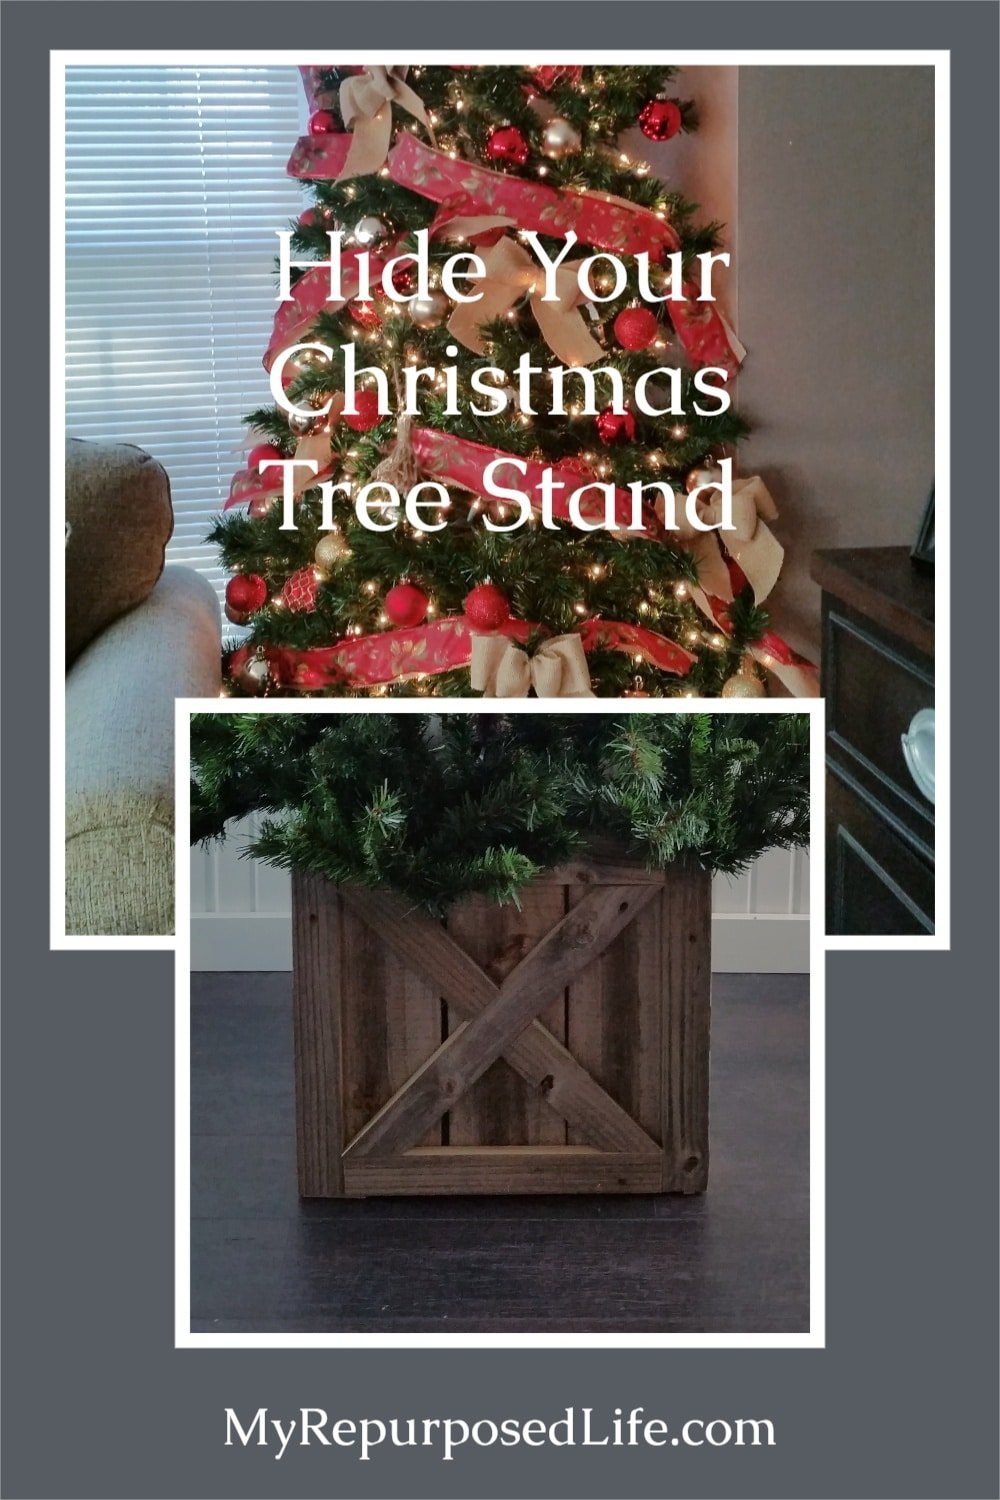
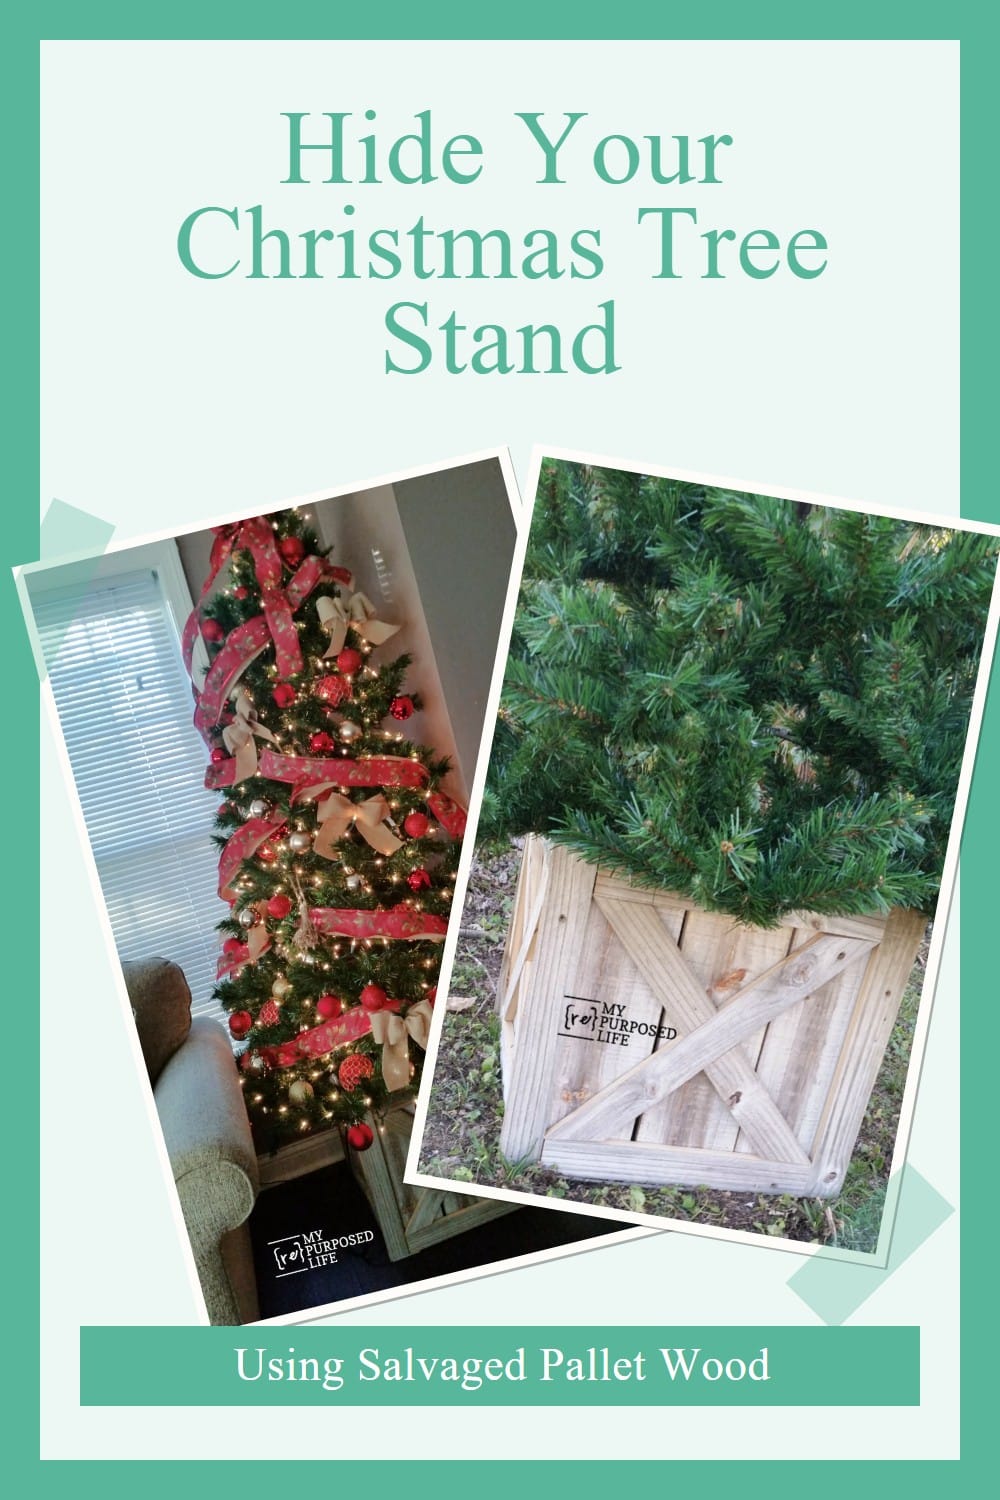
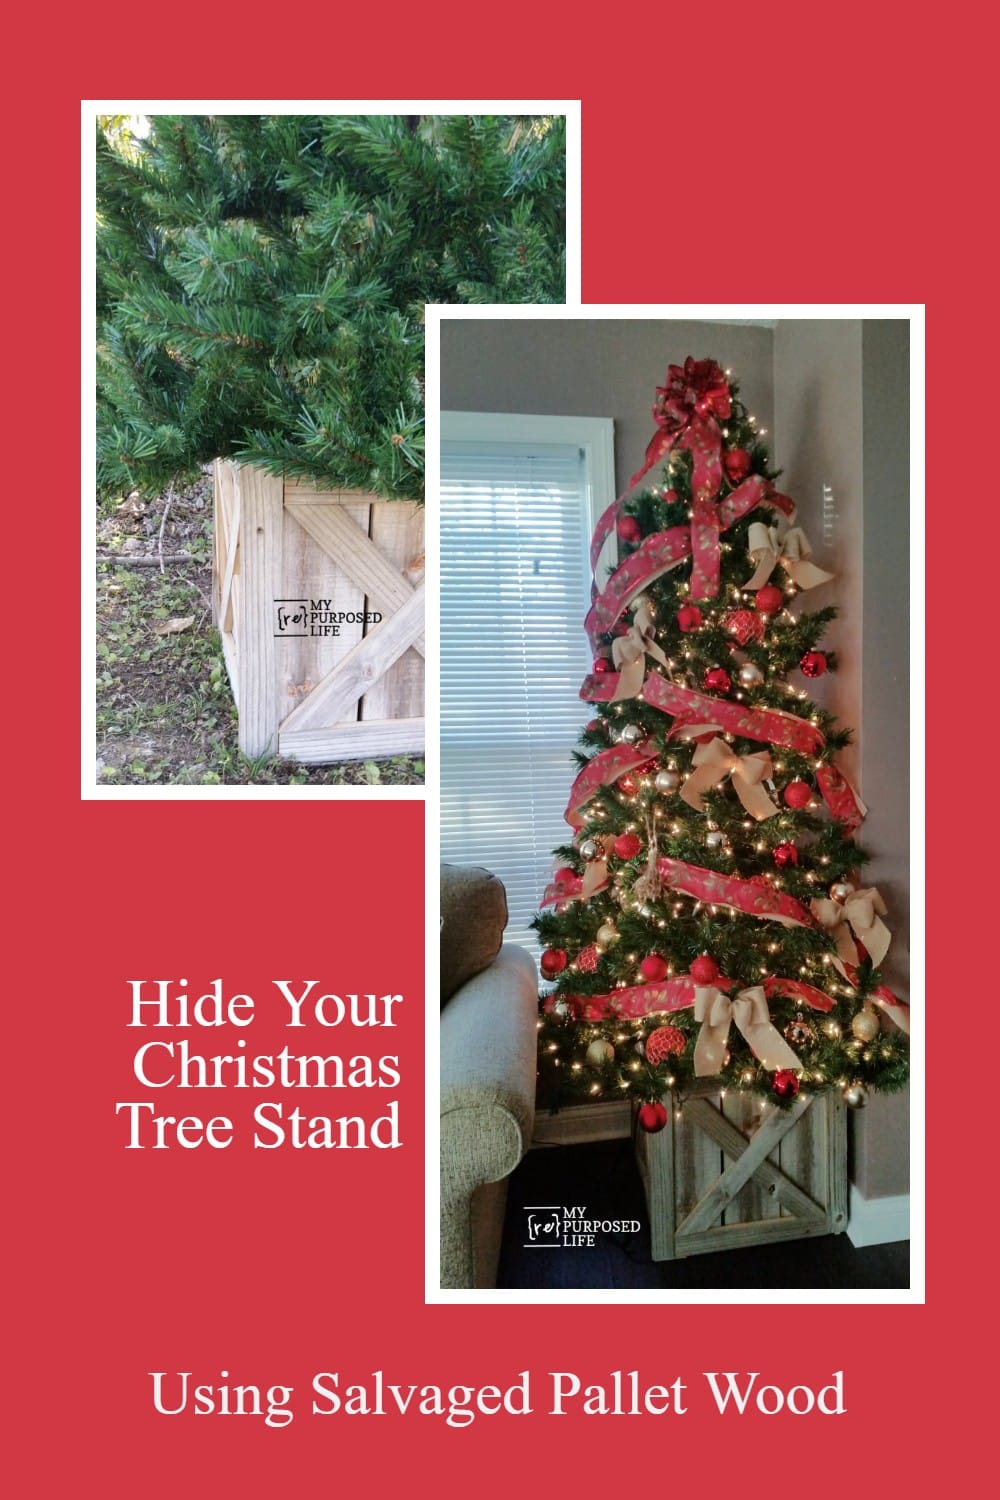
Christmas Tree Stand Box | Folds Flat for Storage
As an Amazon Associate, I earn from qualifying purchases.
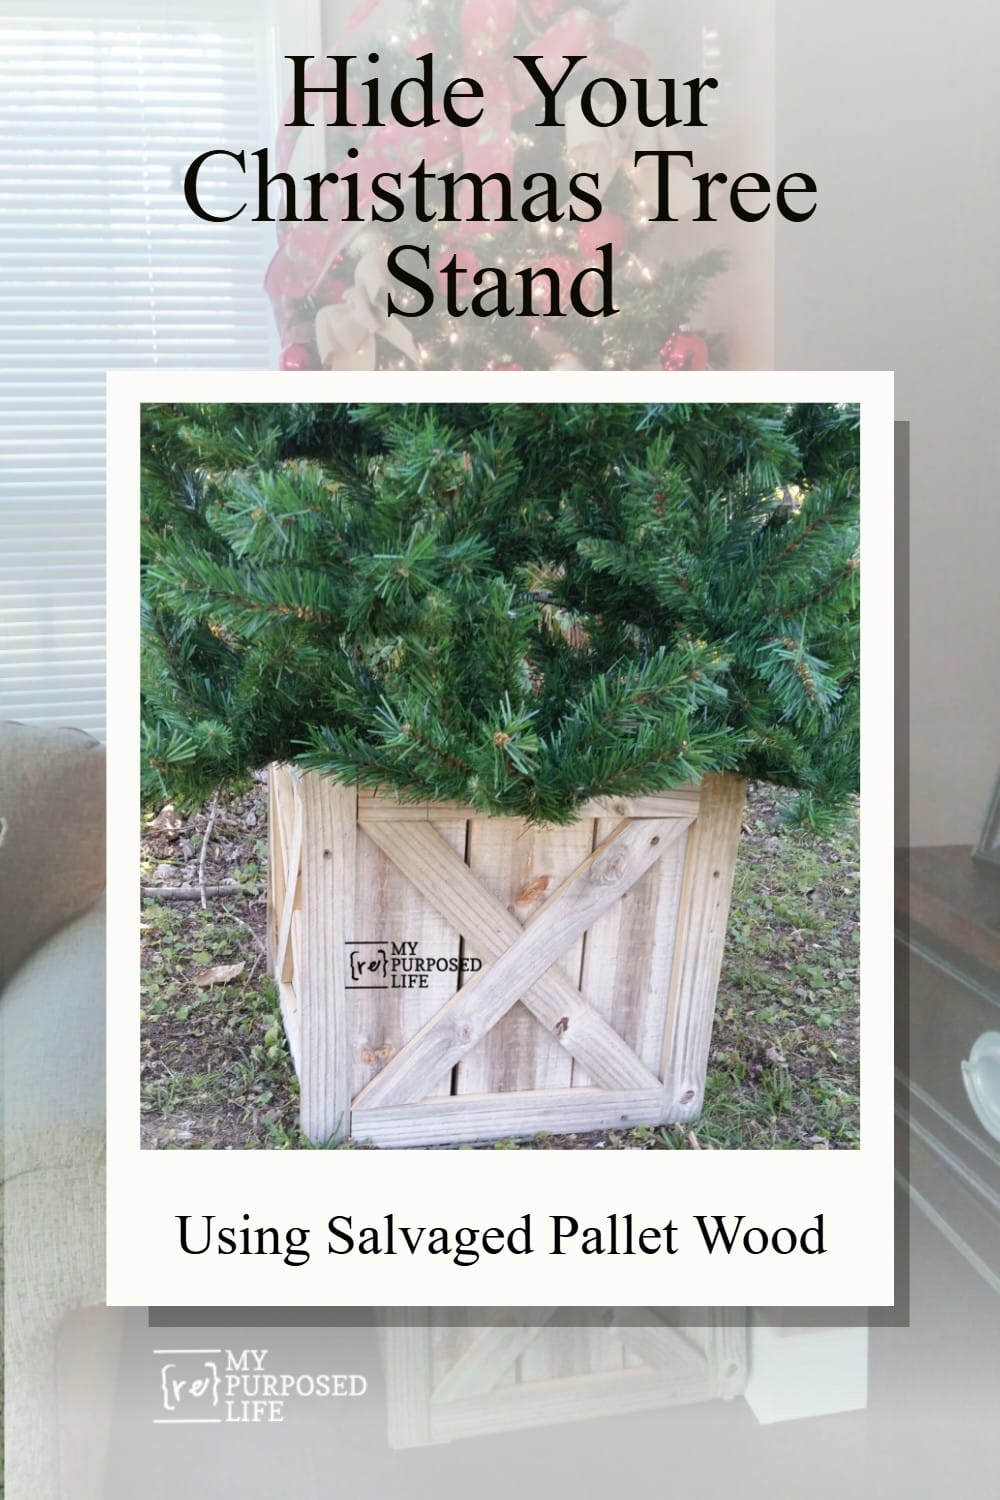

Tired of staring at that bare metal Christmas tree stand or fighting with a rumpled tree skirt every time you vacuum? A simple wooden Christmas tree stand box provides the tree with a sturdy, rustic base and conceals the hardware in plain sight. This version is built from reclaimed fence boards and features clever hinge placement, so it resembles a chunky crate during the holidays and folds flat when the season is over. It is an easy project to customize to your own stand size and decorating style.
Have you ever heard of a Christmas Tree Stand Box? What is it? It’s sort of like a tree collar.
I’ve wanted to make one since I saw the Scrap Wood Crate Christmas Tree Stand my friend Kim made a few years ago. I recently shared her project on my Facebook page, which inspired me to tackle an alternative to a Christmas tree skirt project! Oh, and there’s a bonus feature of my Christmas Tree Box! It folds FLAT for storage. All the details ahead. . .
How to Hide Your Metal Christmas Tree Stand
Let’s see how this all comes together!
Cut Boards to Fit the Christmas Tree Stand
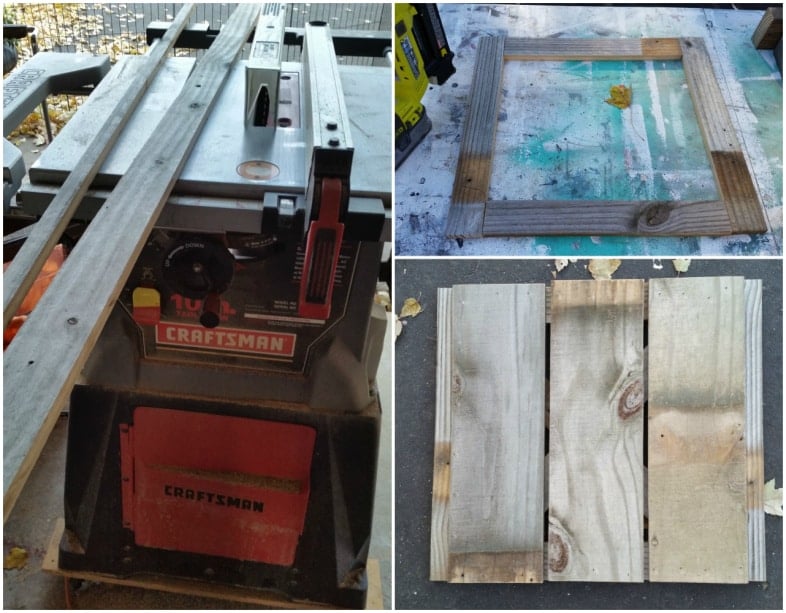
My design is straightforward. I used reclaimed fence wood, but you could easily buy new wood planks for this project. The planks were ripped on the table saw to make four “frames.” I laid out the frames and set three fence planks on each of them. Then, I used my nail gun to “tack” the three boards to the frame. So easy! You could even go old school and use a hammer and nails.
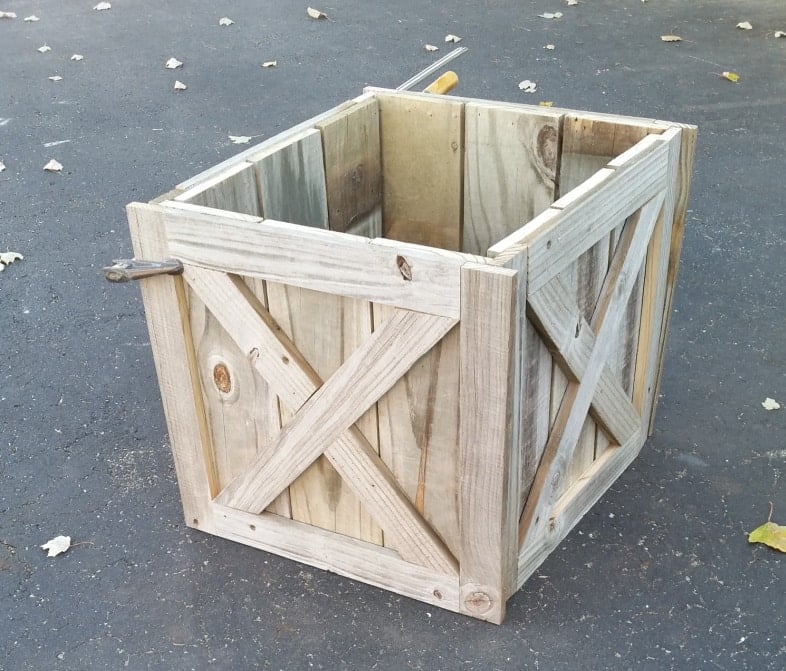
Four Equal Sides Make Up The Christmas Tree Stand Box
Easy peasy! Four sides make a box. I could have stopped there, but I wanted to give it more detail. I made mine a few days after I saw Kim’s and didn’t realize I was practically copying her style. You know what they say about “imitation and flattery.”
If you know someone who loves a good DIY, please pin this project or share it on Facebook. Your share helps me keep teaching these ideas for free.
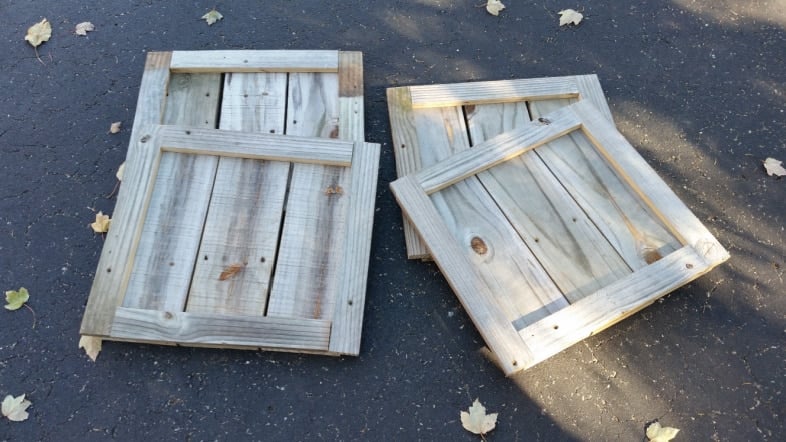
Mark Your Diagonal Cuts
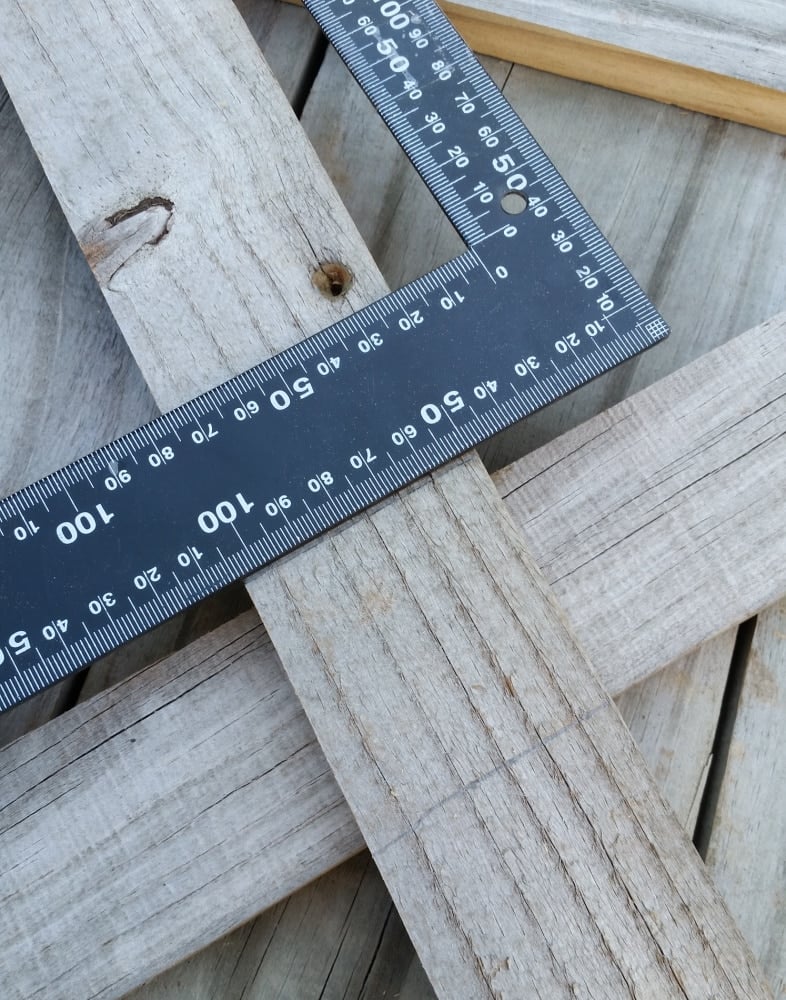
My X pieces are different since I wasn’t following Kim’s tutorial. Looking back at her post as I write this, I wish I had done it her way. After comparing our two projects, you can determine how to proceed with yours. I cut one large crossboard at 45° on each end. After placing that from the top right to the bottom left, I used another piece and marked it with a carpenter’s square. I then cut it on the miter saw by locking the saw at the proper angle.
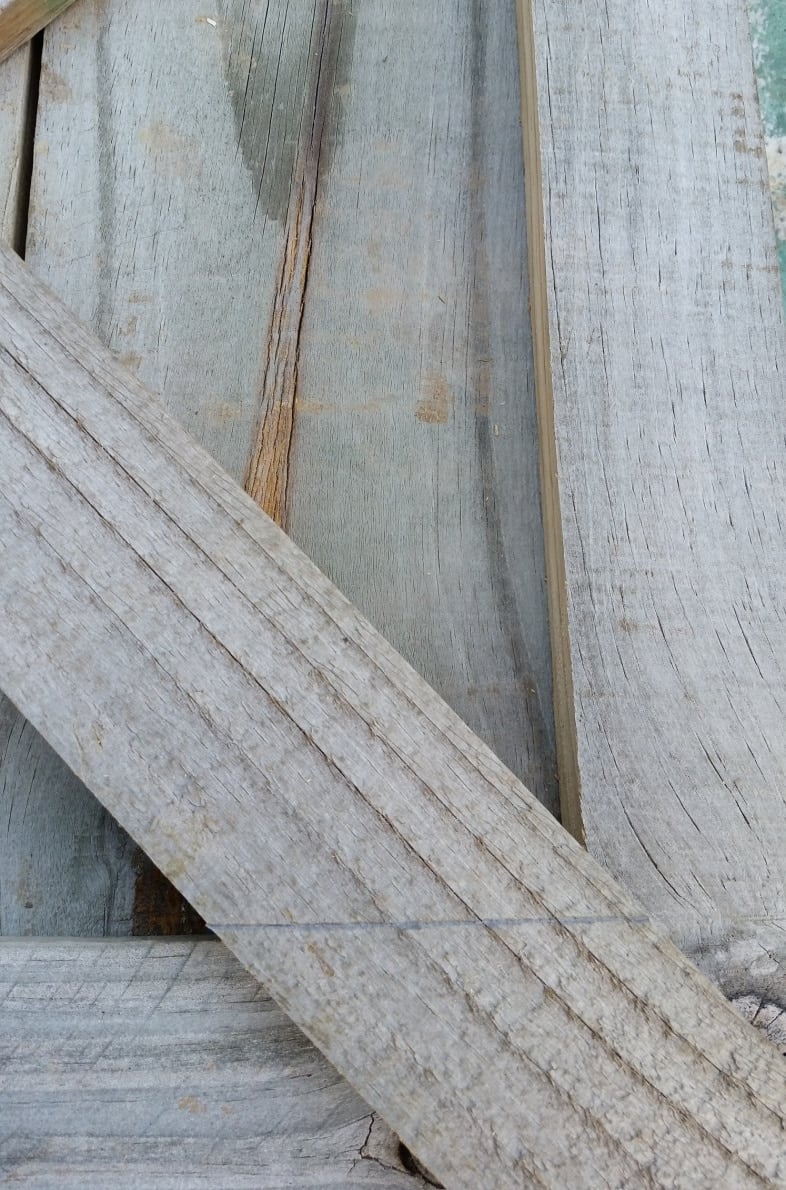
I did the same for the bottom board. The crosspieces were tacked in place with the nail gun.
Dry Fit Your Pieces By Clamping
I clamped the four sides of the Christmas tree stand together to ensure everything was coming together okay. As you may recall from the earlier image, my plank boards don’t extend to the edge of the frame. That was pure laziness on my part because I didn’t want to have to rip the plank boards. It worked to my advantage when putting the decorative Christmas tree box together.
This is where my Christmas tree box differs slightly. I wanted it to be collapsible and store flat 11 months out of the year.
Door Hinges Make Box Fold Flat for Storage
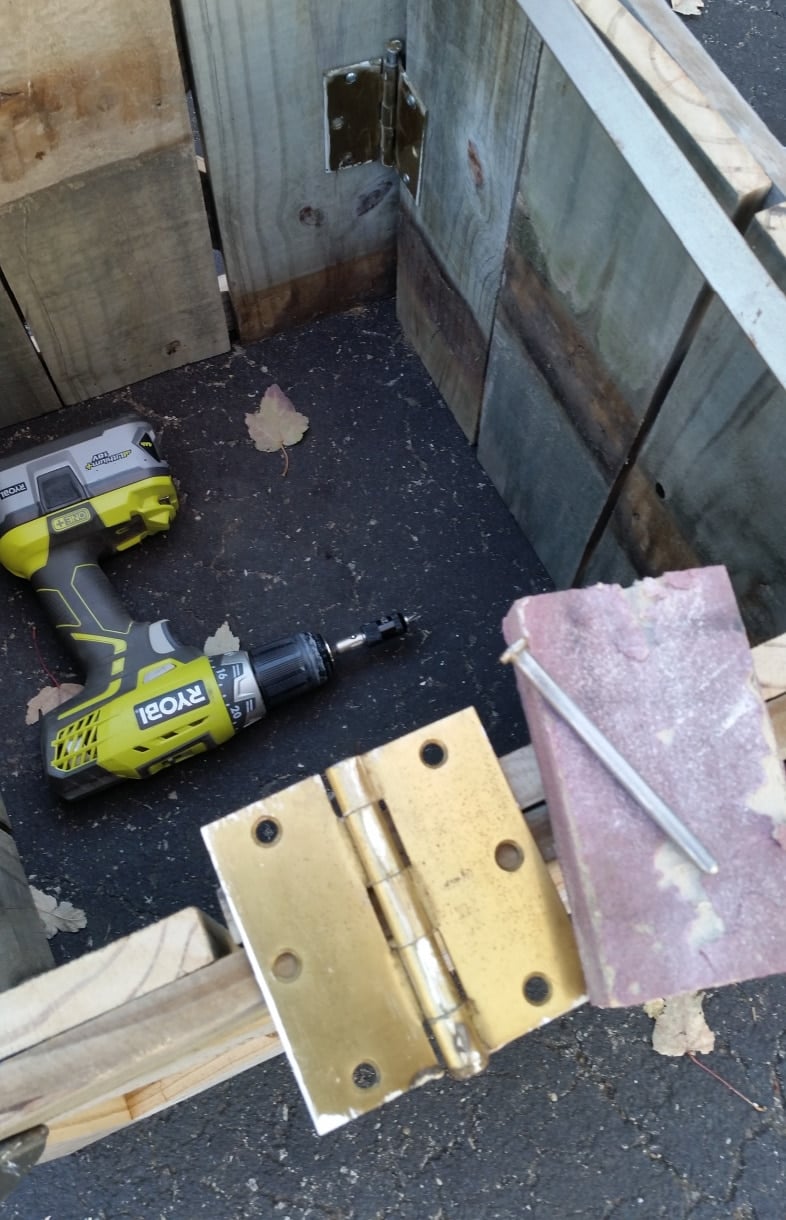
I dug in my stash and found four door hinges that matched. I removed the pins from each hinge and cleaned them using a sanding sponge to ensure they slid freely in and out of the hinges. You can see in the background that I have one hinge installed with the pin raised slightly, making it easier to remove.
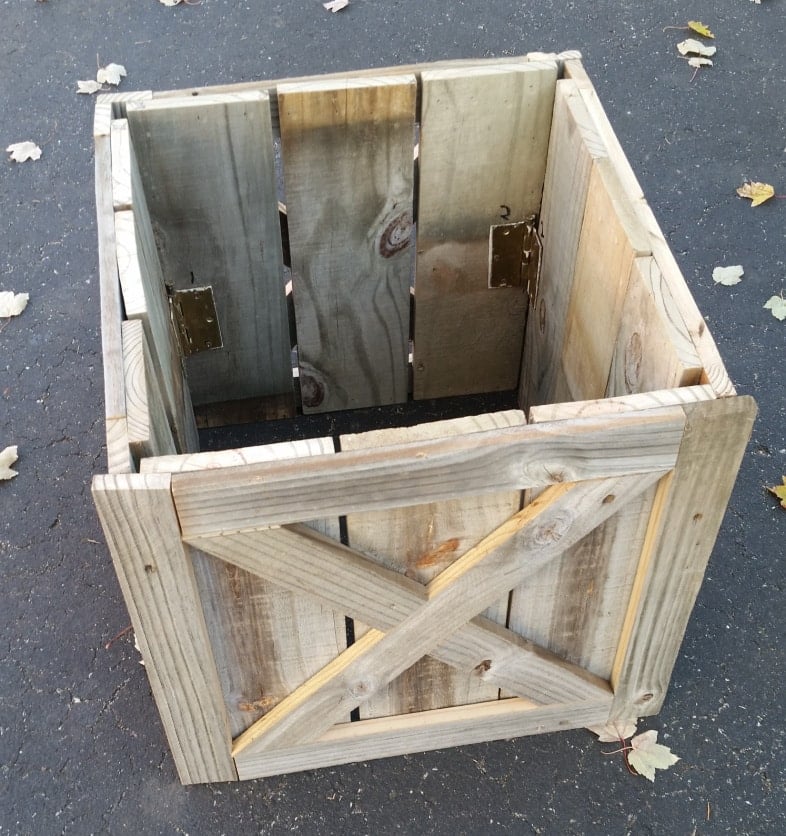
I numbered each of the four sides so that when I dismantle the Christmas tree stand box, I’ll know how to reassemble it.

How Do I Clean My Artificial Tree?

While I had the Christmas tree outside, I took the time to hose it off. Oh my gosh, what a difference it made in the sheen. The branches looked better and didn’t irritate my skin as much as they usually do when I decorate them. I’m so glad I washed the artificial tree!

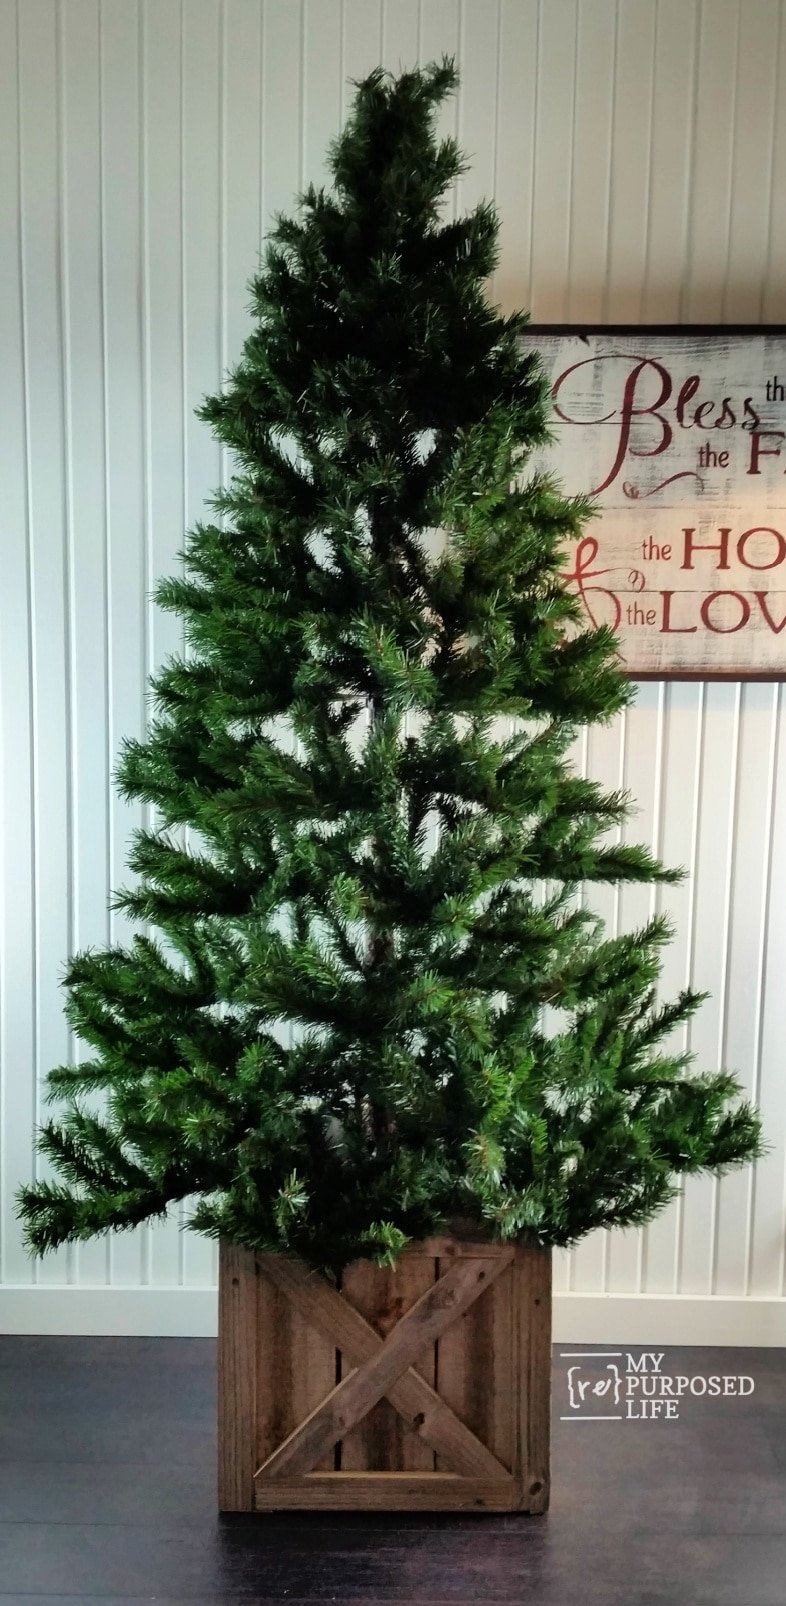
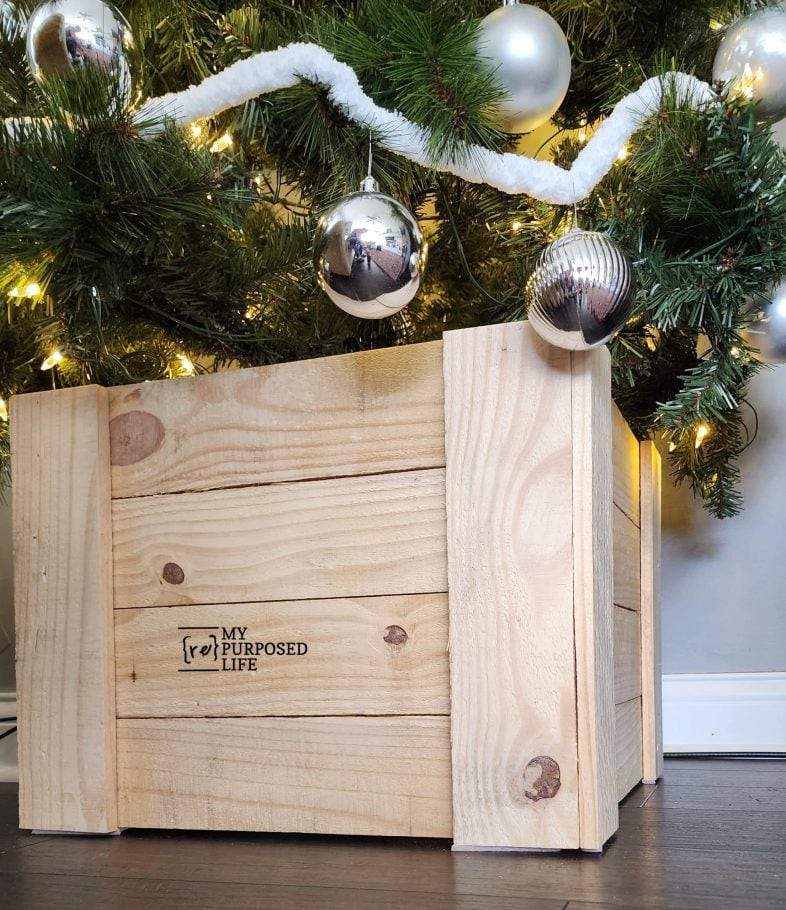
You can see that the tree stand fits snugly in the box, covering it up. I don’t have much space in my living room and didn’t want to make the box larger than necessary. Because my space is small, I made my full-sized Christmas tree into a corner tree. After setting it up this year, I realized it’s not as much of a corner tree as a Half Tree. A well-known company sells half trees, but they are costly.

I seriously love how the box covers up my Christmas tree stand. For a long time, I debated whether to stain, seal, or whitewash the Christmas Tree Box. In the end (for now), I decided to leave it as is.
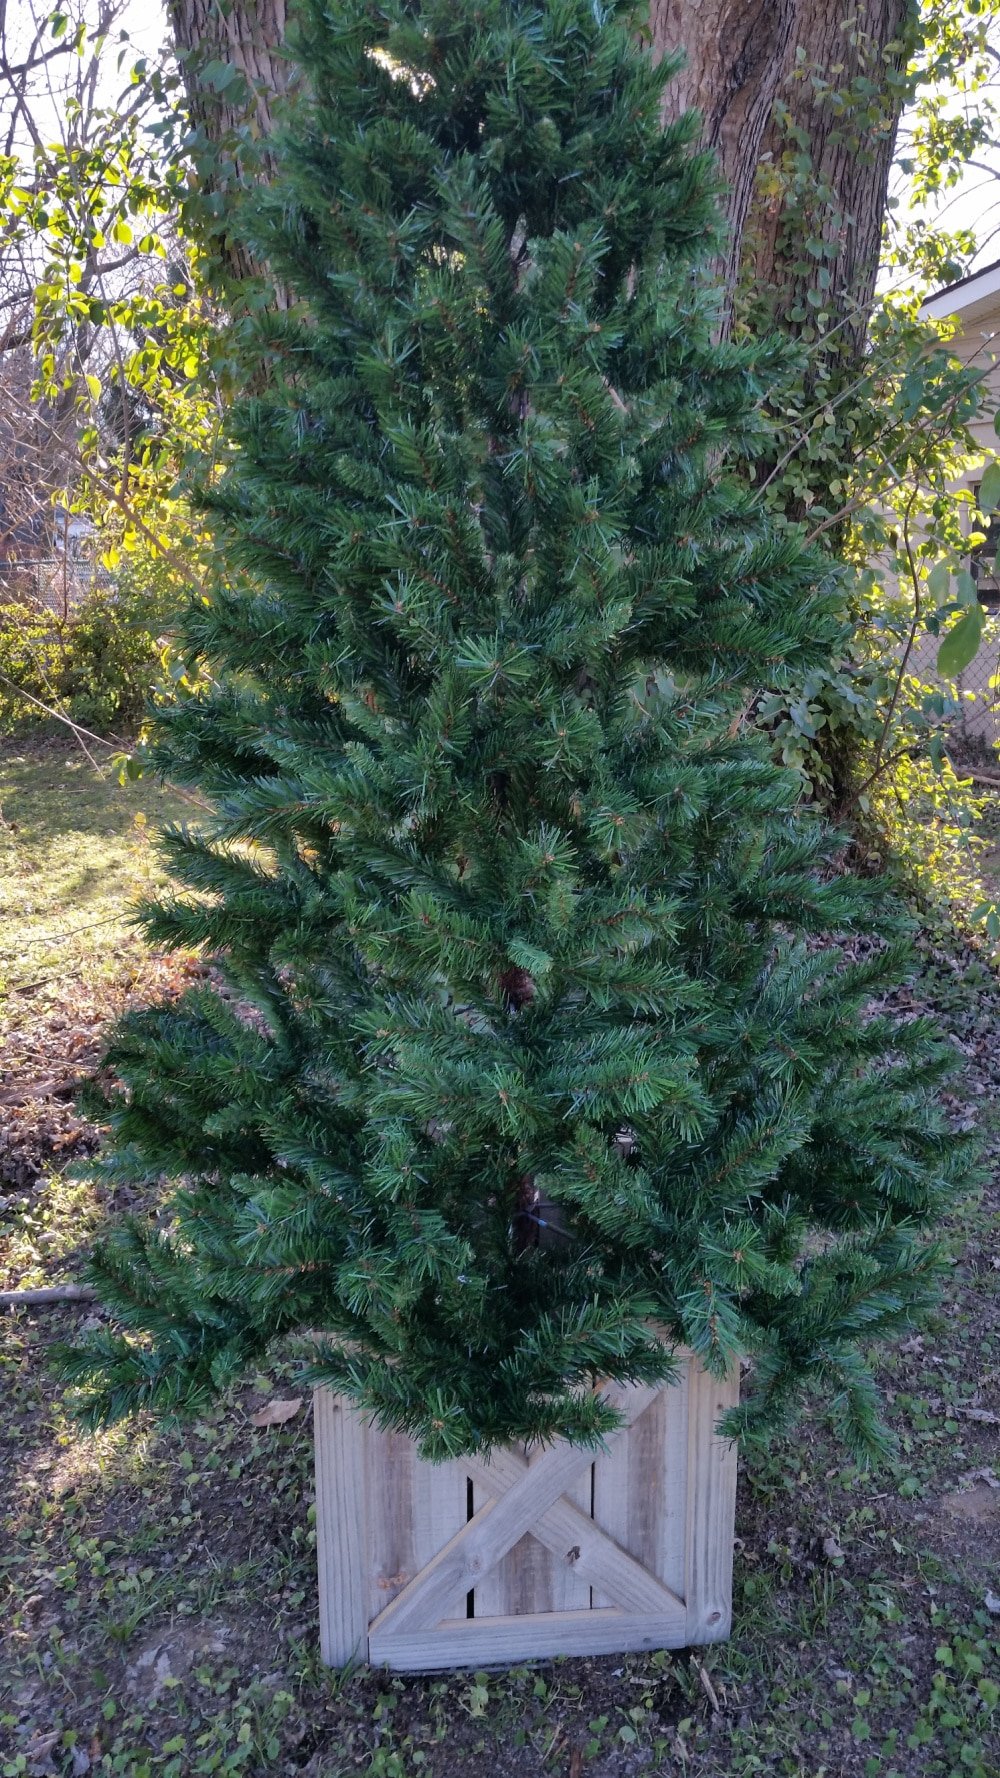
I staged the wooden box and Christmas tree in the backyard. It makes the artificial Christmas tree look more authentic! This is a lovely tree, especially now that I washed it!
Do you love my new Diy Christmas tree stand box? I do. I’ve never enjoyed Christmas tree skirts because all the packages mess them up. However, I do love the new Christmas tree collars, but I much prefer this rustic box.
Granted, the Christmas tree box may not be as visible when all the packages are placed under the tree, but I’m so glad I did this project. I wonder if the TV and the tree will fit in the living room corner. I should have re-read Kim’s post and followed her lead with the BUCKET idea instead of my original Christmas tree stand! Then, I could have made the box slightly smaller.
You can see how I created the ‘Bless The Food’ sign by clicking that link.

A Christmas tree stand box is a small change that makes the whole tree look more finished, especially in a tight living room where every inch counts. This collapsible version tucks flat behind a cabinet or on a shelf once the ornaments are packed away, so it doesn’t occupy storage space all year. Use these steps as a guide, adjust the measurements to your own stand, and create a box that fits your tree and your home. How will you hide your Christmas tree stand this year?
Pallet Wood Tree Collar
This pallet wood tree collar is a simpler build if you’re looking for something quick and easy to create. I made it from pallet wood; however, you could buy new lumber to get the same look.
How do you disguise your Christmas tree stand?
I had my husband make this a couple of years ago and I love it! My husband added piano hinges so it all stays together but still fold flat for storage. Thanks for sharing this awesome idea!
Pamela,
Thanks for letting me know your husband made one! I have a smaller tree now, thinking about making a new one this year. I’m trying to wrap my brain around how a piano hinge works to make it still fold flat for storage. 🙂
gail
What was the size of your box?
I’m not sure the size of the box. I made it to fit my tree stand. No bigger, no smaller…. it fits exactly into the box as it is.
Sorry I can’t be of any more help.
gail
Thank you so much Gail. I Can’t wait to make mine.
I really want to make this. Do you have any plans with measurements?
Thanks Jessica for asking about the measurements. I made this to fit MY Christmas tree stand exactly, with no room to spare. The panels measure approximately 17.5 tall 19.25 wide. Your measurements would depend on the size of your stand. If you use the “bucket method” putting the bottom of your tree stand in a 5 gallon bucket you can try this size. However, a five gallon bucket is typically about 17.5 inches tall, so you may need to find one not so tall or make your panels slightly taller than I did. 🙂
I just got my panels out last night and put them together. Since I numbered them when I made them, this was soooo simple!
Good luck!
gail
Hi! It’s awesome! Thanks for sharing the plans!! When you fold it up, do those pins need to come out? I’m confused how the wood will lay flat. Thanks so much!!
Yes, the pins come out and store away with the flat sections of panels.
gail
Gail this looks so beautiful. Love your idea of 1/2 a tree. What a brilliant idea!
Adorable as usual. I too make some crate type things that come apart to lay flat, mine are three sided for big trees so they can just be slid under, but they could be four sided too and lay flat. I love them, I have given them as personalized gifts.
Awesome Ideas Bliss. Wishing you a very Merry Christmas!
gail
This is what I need for my Charlie Brown tree. Lol. It’s a horrible little tree that has at least a good foot between the stand and where the branches start! You did a nice job, and bonus points for the fact that it folds!
It sounds like this is just what you need Serena! I love using reclaimed wood for quick and easy (free) projects!
gail
I love it!!
Thank you Doris! I appreciate you stopping by!
gail