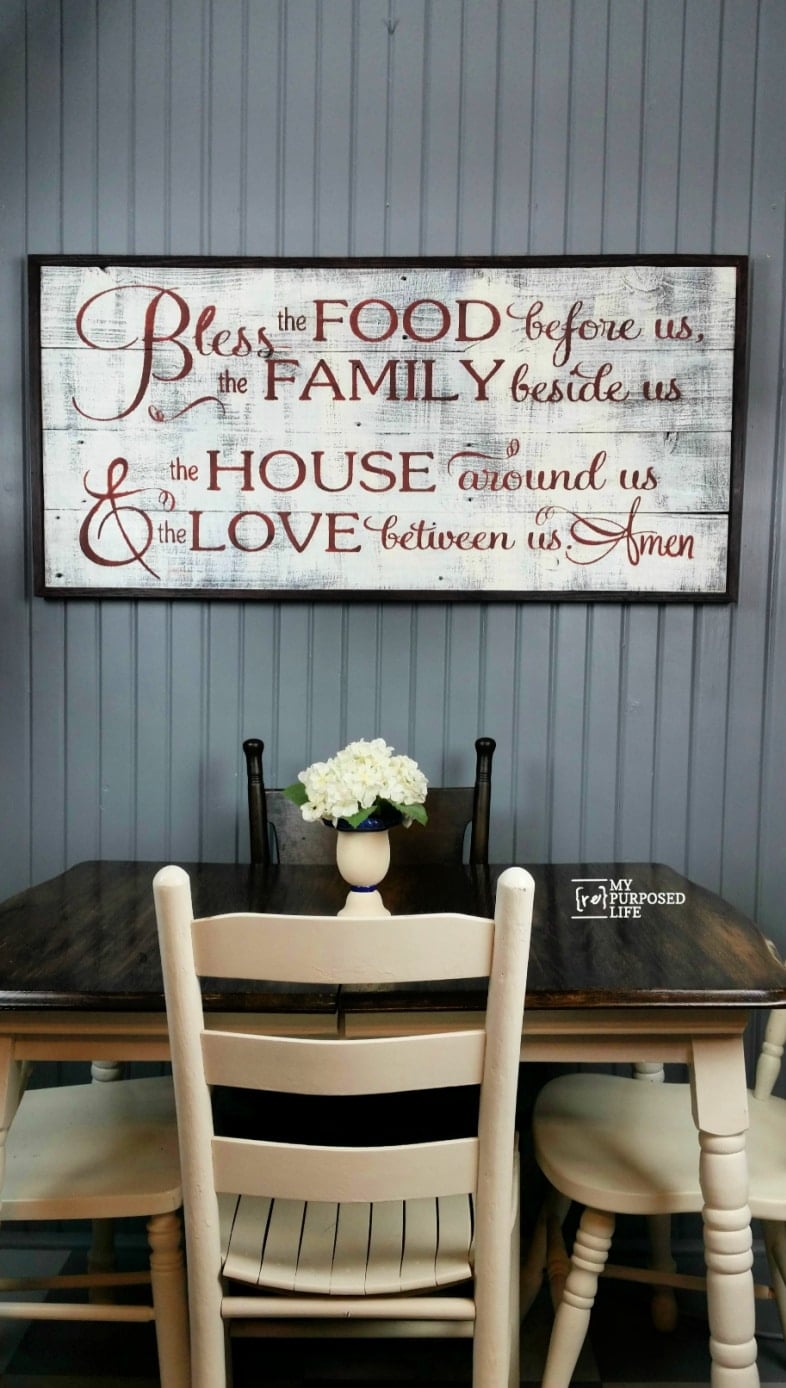
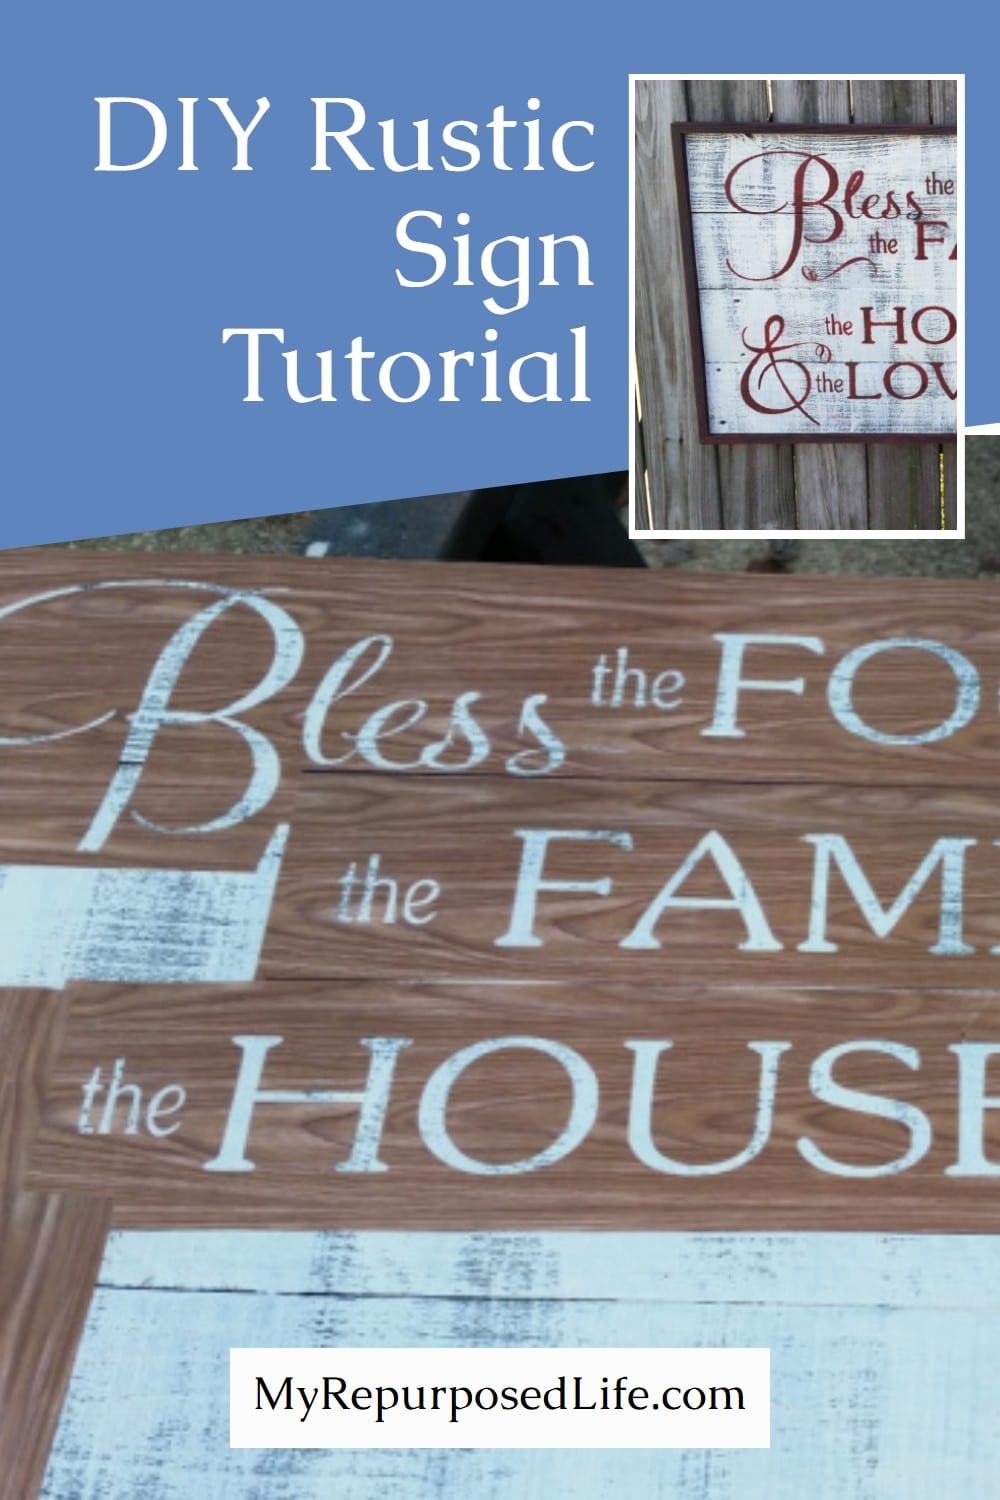
Rustic Sign | Bless The Food Before Us
As an Amazon Associate, I earn from qualifying purchases.
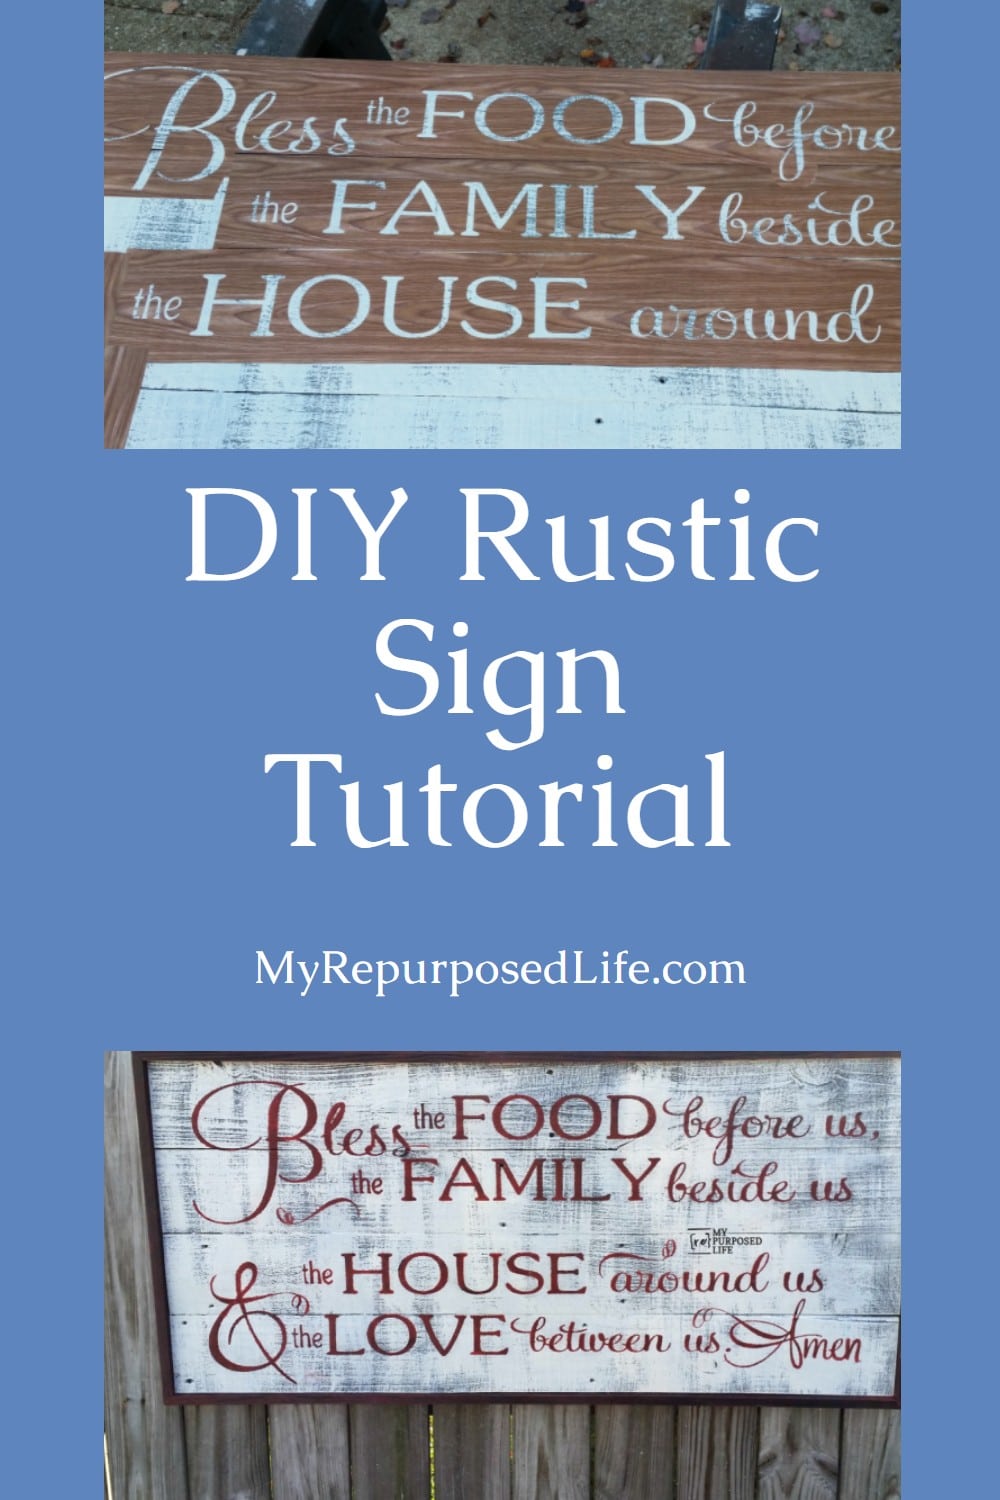
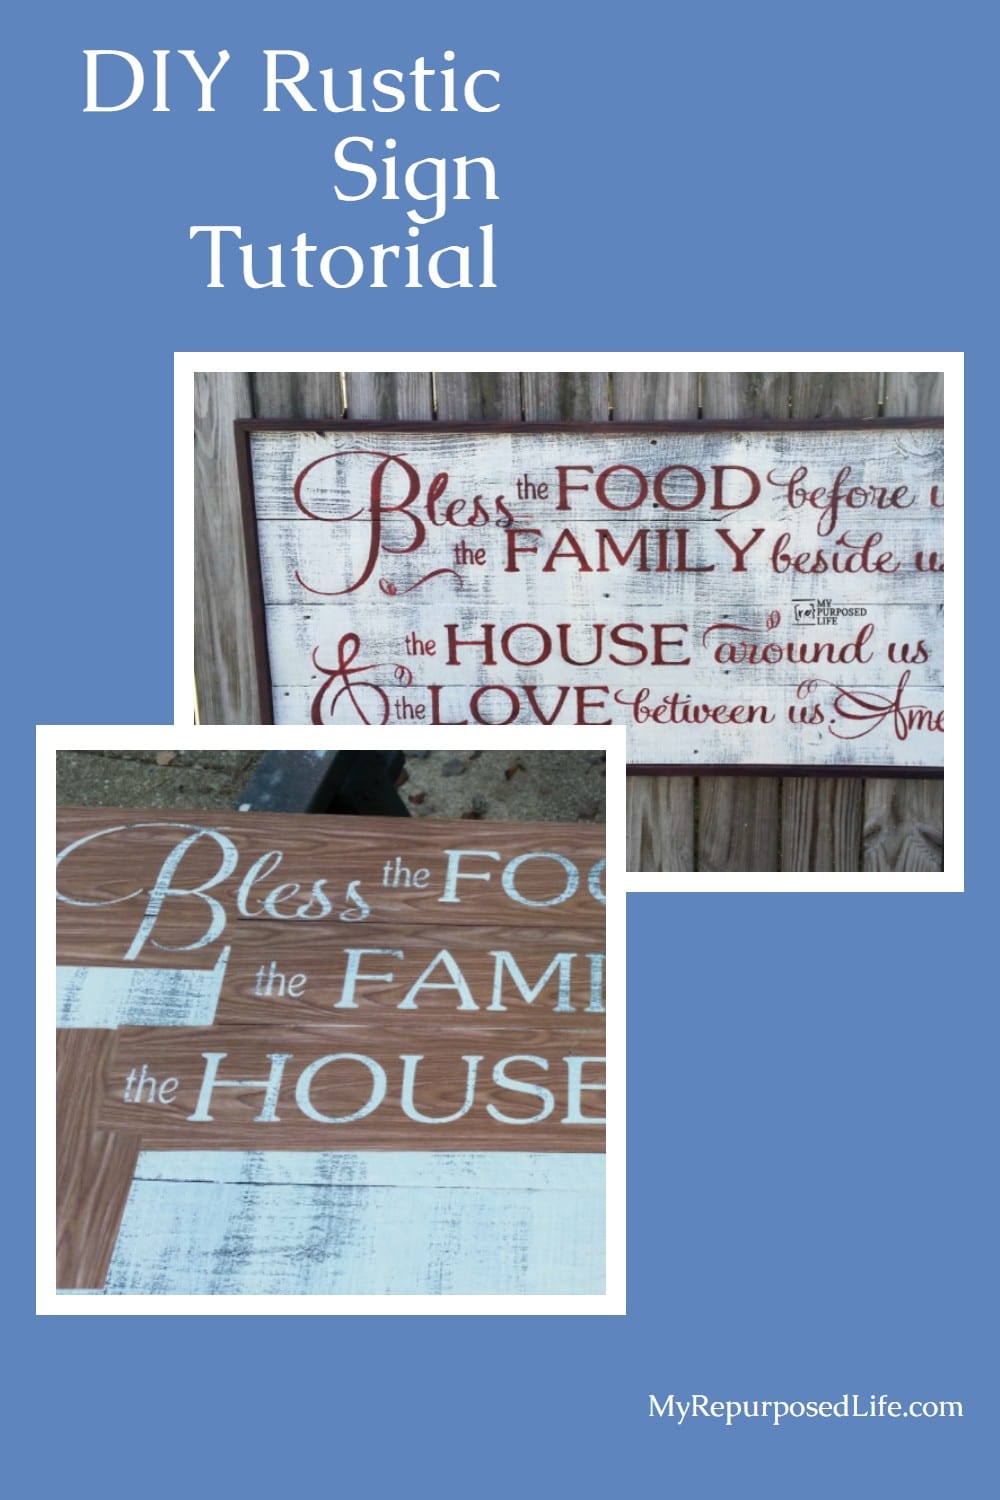
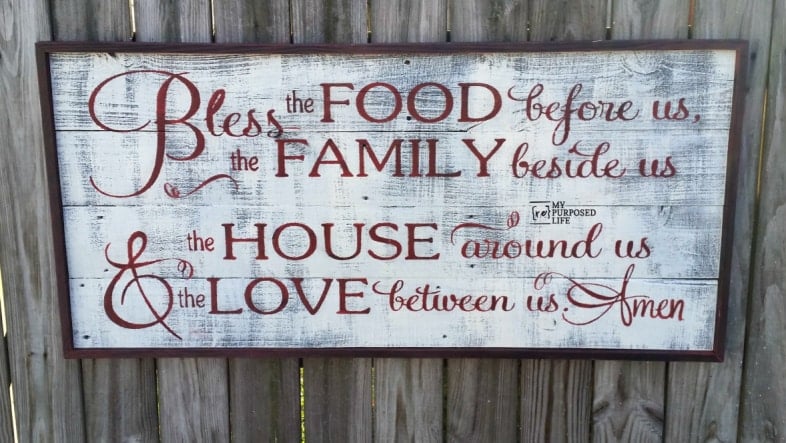
This rustic “Bless the Food Before Us” sign was one of my earliest reclaimed wood projects, and it is still one of my favorites. It combines simple materials, meaningful words, and a farmhouse style that never goes out of fashion. If you love decorating with heartfelt quotes and repurposed wood, this is a project you can easily recreate with supplies you may already have on hand.
I made a Christmas Trees For Sale Sign and I love the way it turned out. That got me thinking that I would like to make a new Bless the Food Before Us rustic sign for my kitchen to replace my Piano Front. Earlier in the week, I chatted with my friend Tanya from My Funky Farmhouse about designing a large sign for me. Yeah, I could type something up and cut it on my Portrait, but Tanya’s designs are so pretty!
Later, I’ll give you ideas to make this sign if you don’t have a Silhouette or Cricut electronic cutting machine.
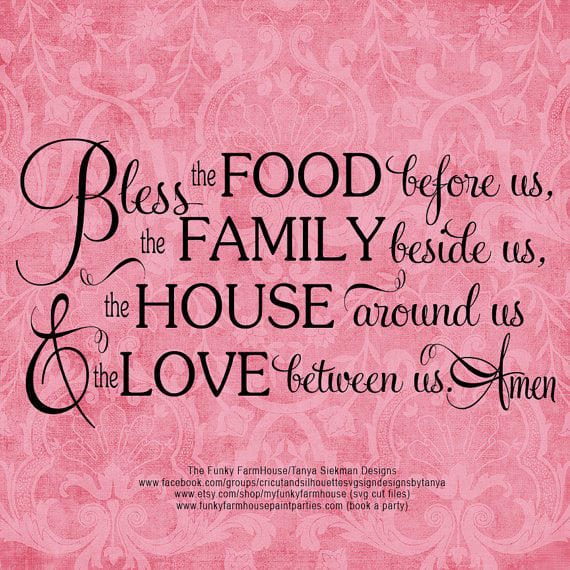
This is now available in Tanya’s My Funky Farmhouse Etsy Store. You get instant downloads for use with your Silhouette Portrait, CAMEO, or Cricut machines.
Related Content: I Love You a Bushel and a Peck Coffee Sign/Mug Holder
Ready to make your own rustic sign? Scroll through the full tutorial below and save this project to Pinterest so you can come back to it when you are ready to build.
How to Make a Rustic Sign From Reclaimed Wood
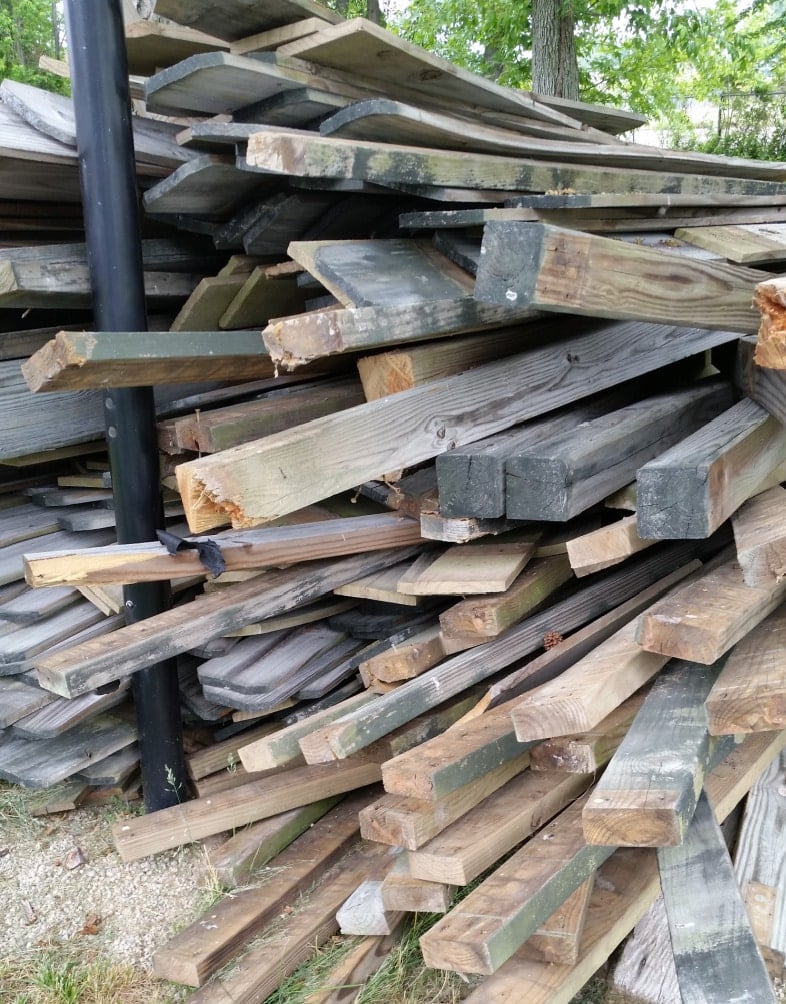
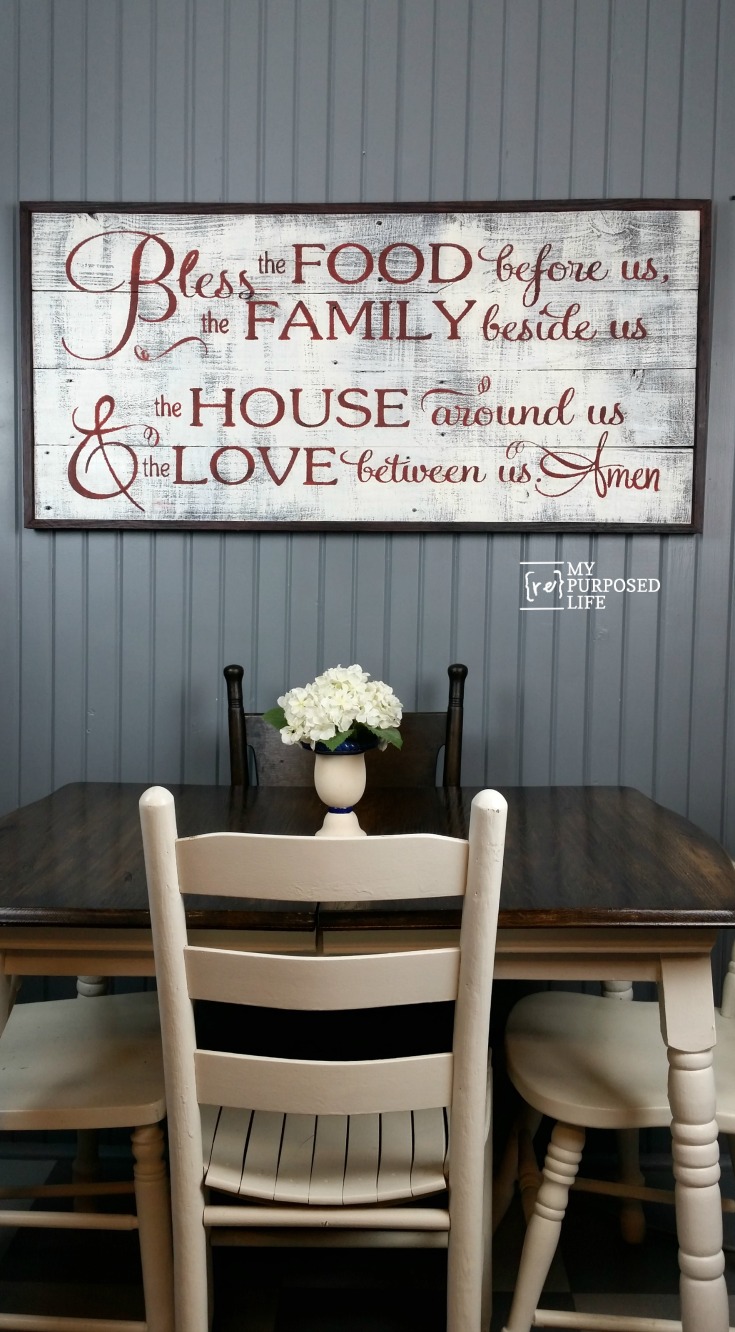
I still have quite a bit of this free, weathered fence stored in a wood shed, so I grabbed a few dog-eared fence boards to cut for my new sign. The piano front is a whopping 58” long, so I asked Tanya to make the design 48 x 22. That would mean I could use four 4 ft boards as the sign.
So, you don’t have reclaimed fence boards? Single fence boards at the hardware store are really inexpensive! Once they’re painted, you’ll never know the difference.
Cut Reclaimed Fence Boards 4 ft Long
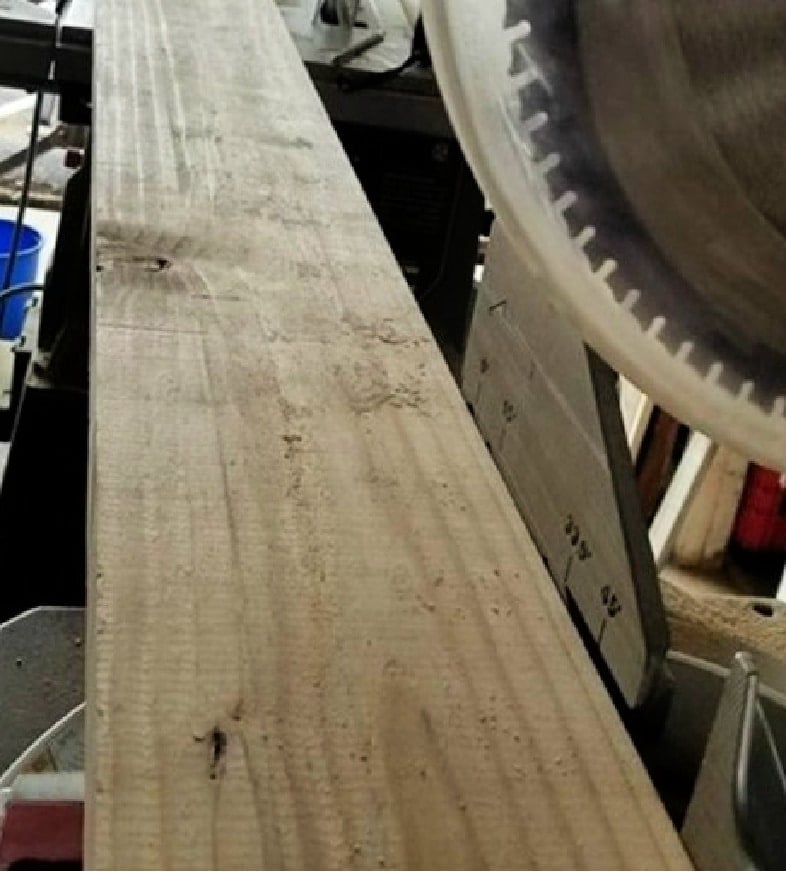
I cut my boards on a miter saw. You can use a circular saw or a jigsaw to achieve the same result.
Attach Small Brace Boards to Construct Rustic Sign
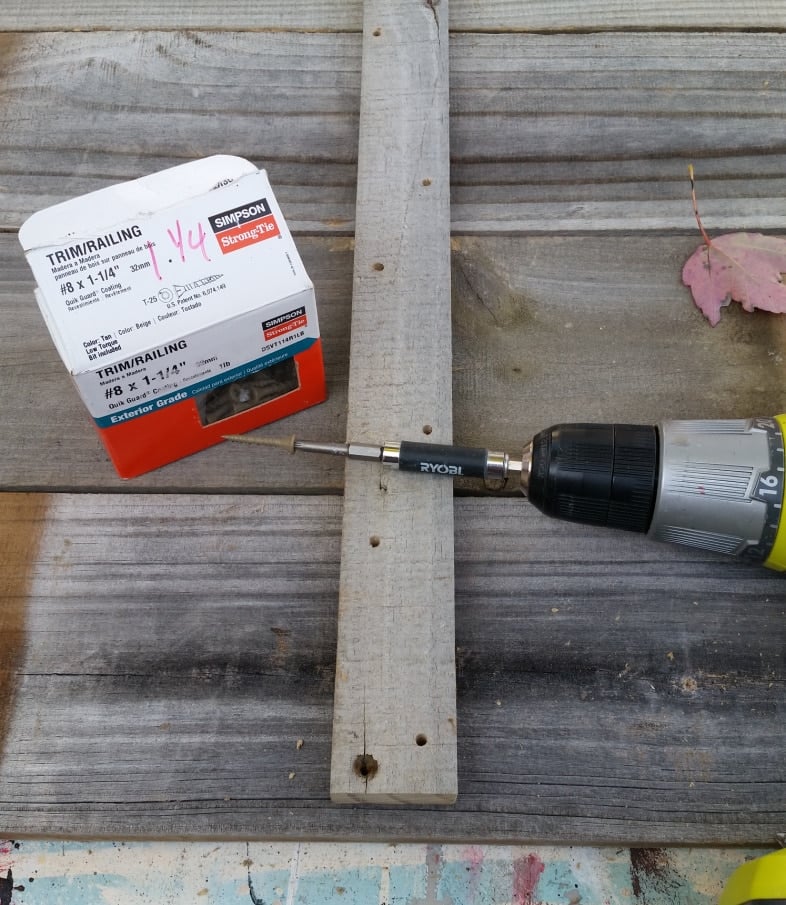
I used these Simpson 1 1/4” wood screws to assemble my sign. I rarely use drywall screws anymore.
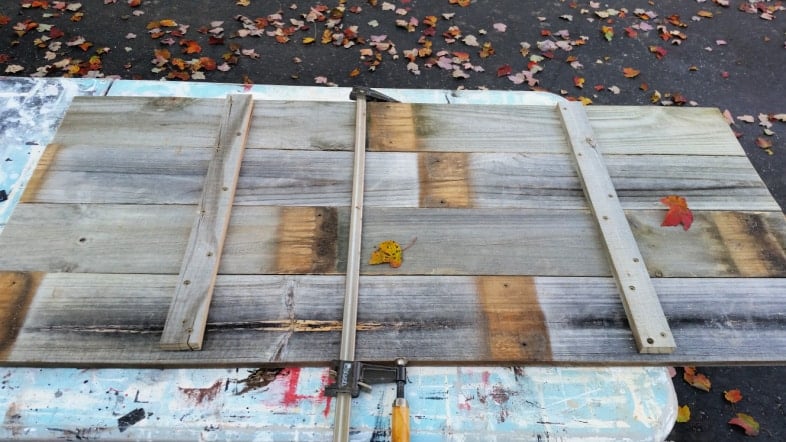
In this photo, you can see how I assembled my rustic sign using four 48” fence boards and two ripped pieces of fencing as brackets. Because my rustic fence has the original screw holes, I sort of worked it where they wouldn’t be “stacked” on top of one another when the boards were flipped over.
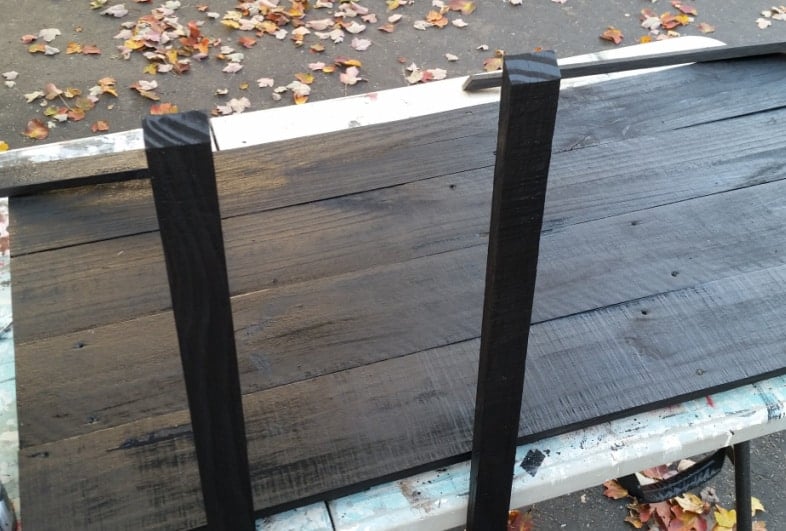
Frame Wooden Sign
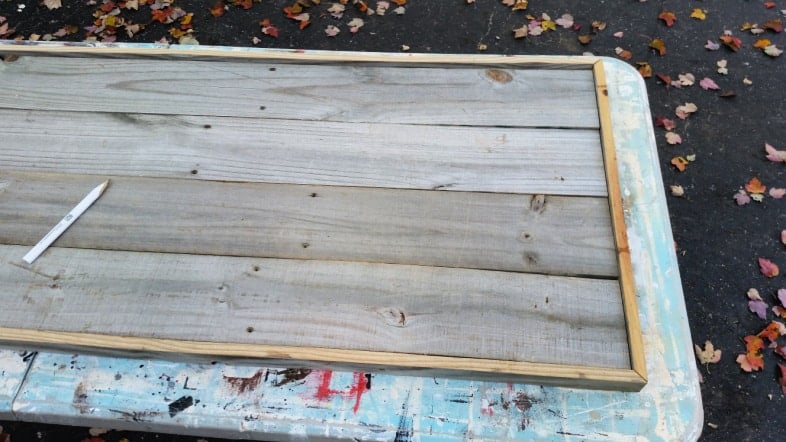
Because I’ve made a lot of wedding signs for my Etsy Store, I had lots of stakes. I used two long ones and two short stakes to make a frame for my new rustic sign. Instead of doing butt cuts, I mitered the pieces on my compound miter saw.
Paint Bless The Food Before Us Sign
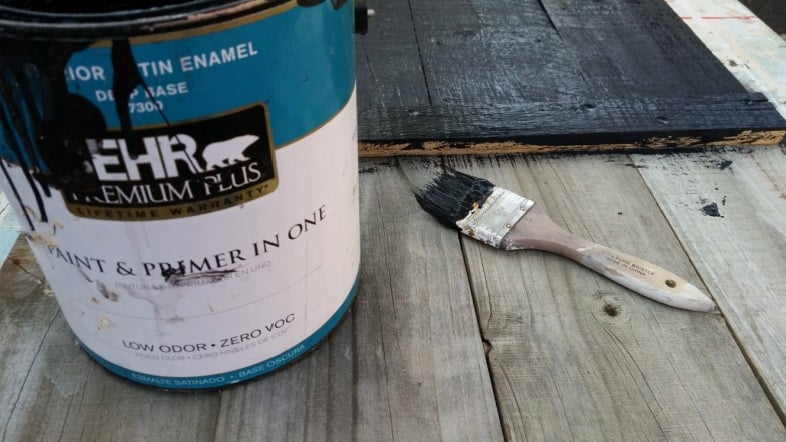
I did a quick coat of Beluga (Behr Satin) with a cheap chip brush. I LOVE using the brushes over and over again. The more they’re used, the better they are. Why do I love them so much? Because cleanup is a breeze, and I don’t waste much paint when I clean them.
Use Paint Pyramids when Painting Large Rustic Sign
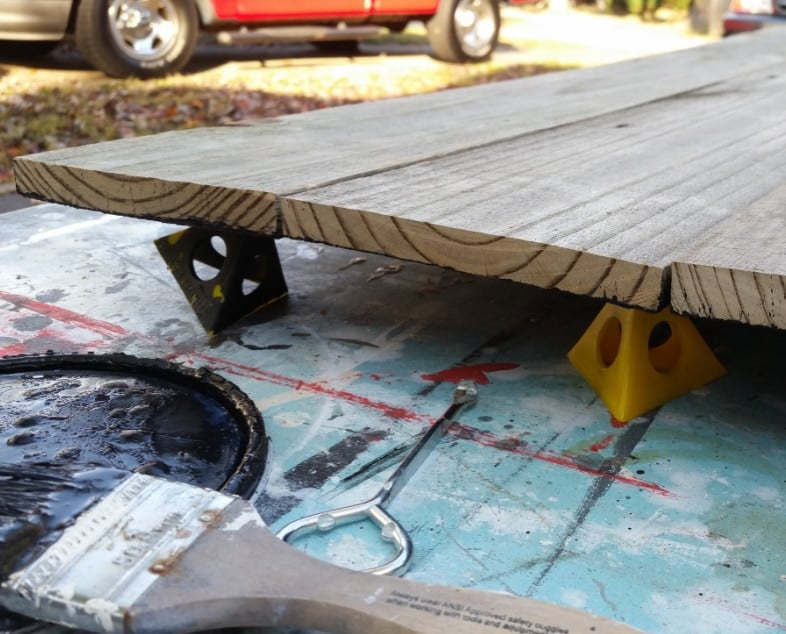
Do you have any of these handy paint pyramids? They are really good for quick paint jobs. I always paint the back of my pieces first; that way, if there is a mishap, it won’t be noticeable on the front.
Here are the sign and the frame pieces, all dressed up in a fresh coat of black paint.
Dry Brush Red Over Black
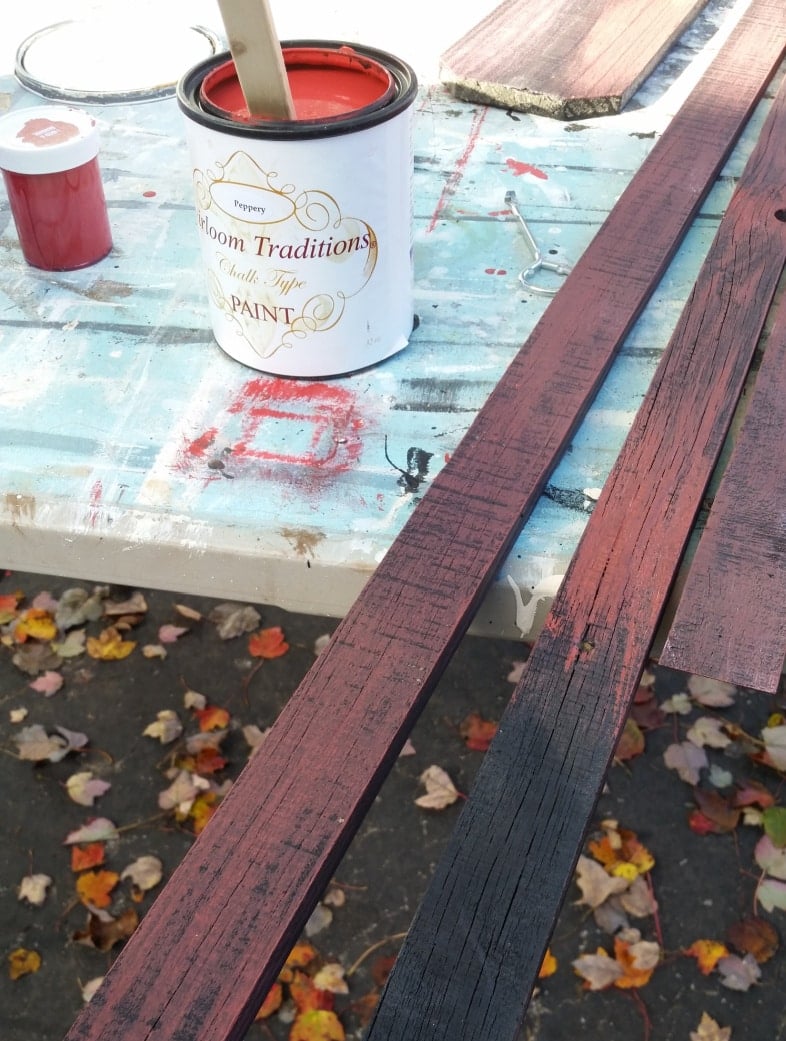
Because the piano front was a glazed red, I really knew I wanted this sign to have red tones to take its place. I used Heirloom Traditions Peppery to dry brush over the black frame pieces.
uh oh! I forgot to take pictures while I was adding a light coat of white to the boards.
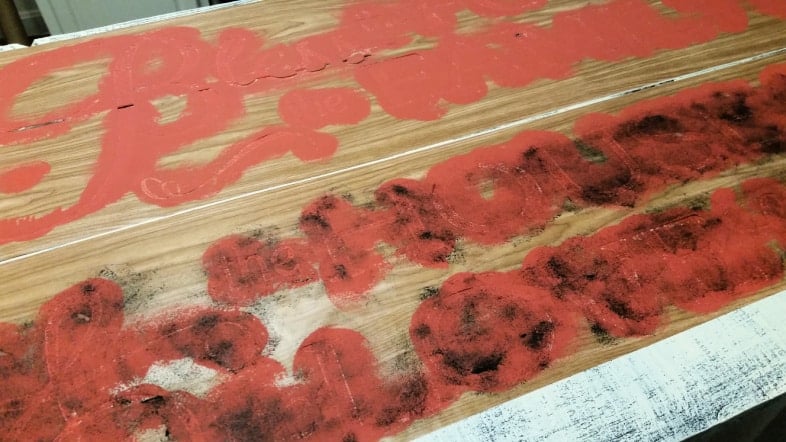
Apply Contact Paper Stencils | Bless The Food Sign
I cut out a contact paper stencil with my Silhouette Portrait. After spending a couple of hours putting the stencil on and weeding out the letters, I wasn’t happy.
Working with a large stencil can be challenging. The stencil was not cooperating with me on the rustic sign. I was trying to be oh-so-careful, but it just wasn’t right.
I ripped it all off, so I could do a new stencil on my Silhouette CAMEO making it in two sections instead of the four I made on my Portrait. The problem I experienced on my pieces cut with the Portrait were definitely operator error. I always put “boxes” around my text, but didn’t put them close enough to the letters. I had to trim them to get them placed on the sign. Just talking about it stresses me out because I worked so hard on it. Of course, I could have left all of this information out (as though it never happened) but I want you to know that as much as I do this stuff, it’s still not perfect 100% of the time. ![]()
Design & Cut Bless The Food Sign Stencil
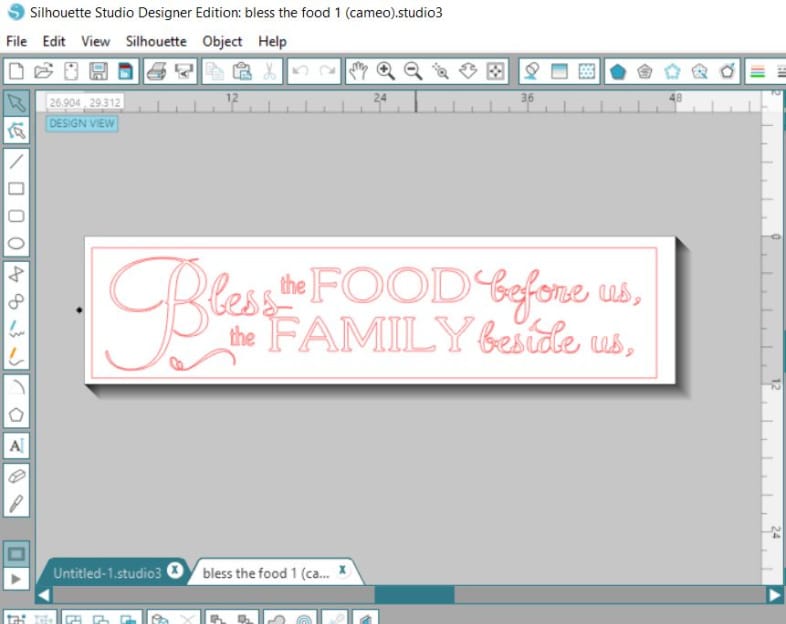
After downloading the design from Tanya, I had to use the TRACE function to get the letters to cut. In this snapshot, you can see that I have the box very close to the letters. DID YOU KNOW? That when you put such a long, long piece of vinyl or contact paper in your machine, it MUST be cut perfectly straight and fed in with extreme caution. A four-foot piece of media can get very askew if it’s not fed in properly. (voice of experience, but this job was flawless)
So, here on the sign, I have two pieces of contact paper stencil. I will tell you, in all honesty, I had a tough time getting this contact paper stencil onto the sign. I don’t use my CAMEO very often, and I actually had the blade set a little too deep. When I do my Etsy signs on my Portrait, I literally pull the entire stencil off the backing and weed it on the board. For this project, I used transfer paper for the stencil. (not shown)
Related Content: There Is Always Something to be Thankful For
Stencil With Foam Pouncers
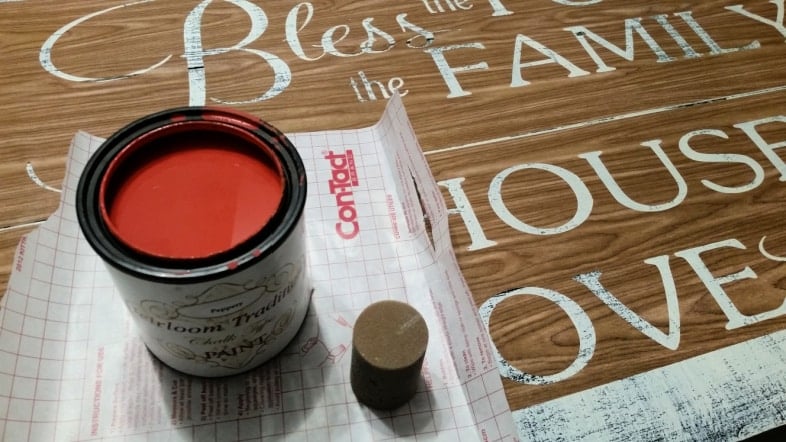
I used the Peppery and a foam pouncer to complete the stencil.
I think less is more when it comes to stenciling these rustic fence boards. Because I’m impatient, I used the hairdryer with a diffuser to speed up drying.
Apply Black Wax to Stenciled Letters
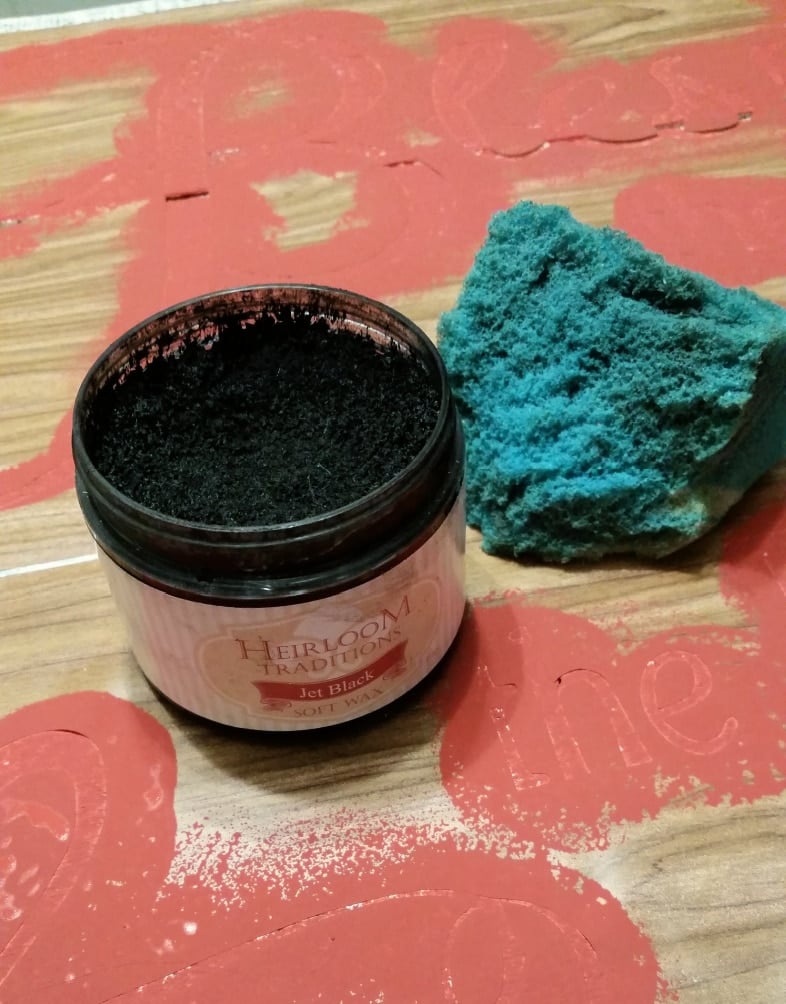
This is the plan—to apply Heirloom Traditions Black wax with a sponge right over the stenciled letters. Remember, I like glazed red the best.
I dabbed on the wax over all the letters, then used the small sponge to spread it around when I was done. The black wax definitely gave the red paint more definition.
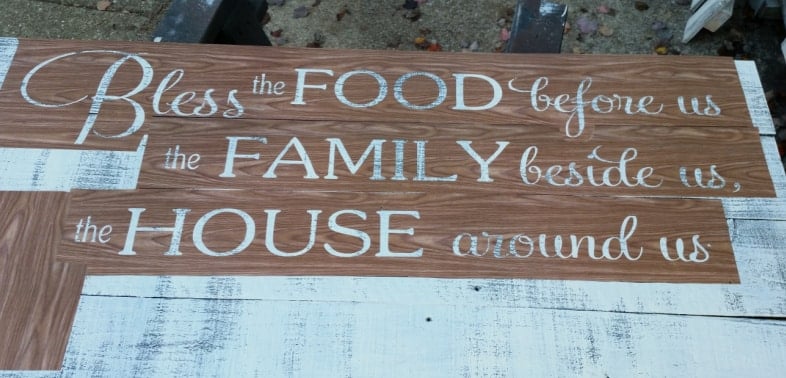
When I removed the stencil, I was in love with the way the letters looked! UNTIL I realized that I should have left less space between line #2 and line #3.
It is what it is, and it was so late!

Here’s the sign before I added the frame. Maybe you like it like this?
Attach Painted Frame to Rustic Wood Sign
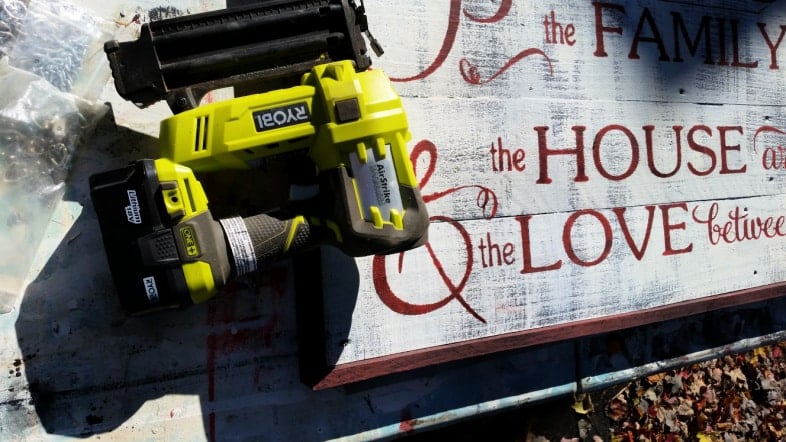
I attached the frame pieces with my Ryobi Air Strike.
Install D-rings for Hanging Rustic Sign
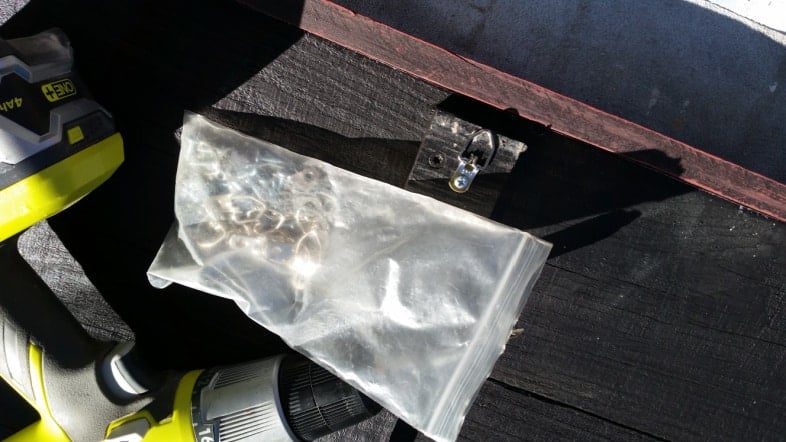
I use these d-rings for all my hanging projects.
It’s difficult to tell, but the frame isn’t “dark” enough to suit me. It looks a little too Mauve for me.
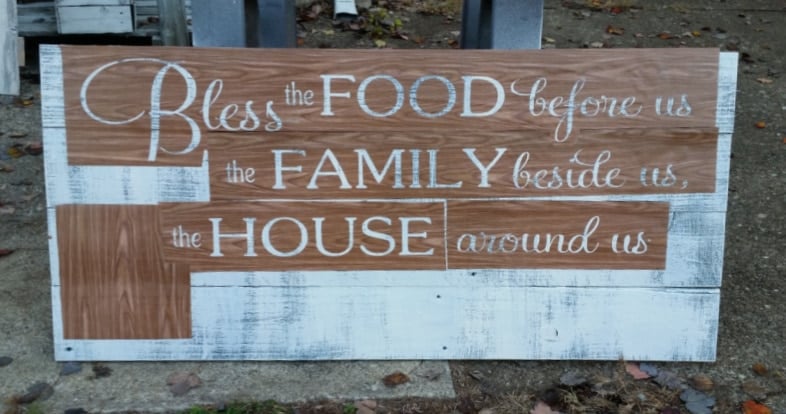
Enhance the Color of the Frame With Dark Wax
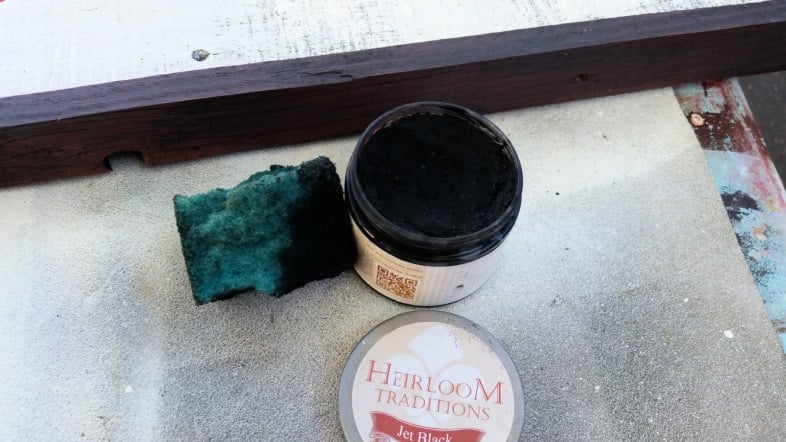
I applied some black wax with the small sponge all around the frame to darken it, and I’m so glad I did. I love the new, darker look.
This sort of gives you a better idea of how large it is.
No Cutting Machine? Try These Stencil Options
If you do not have an electronic cutting machine, there are several easy ways to create a stencil for this sign.
1. Store-Bought Letter Stencils
Craft stores carry reusable alphabet stencil sets in many sizes. You can tape them in place and work one line at a time. I found suitable designs on Amazon.
2. Printed Paper Templates
Print your wording from your computer, tape it to the board, and trace the letters with a pencil. Then paint inside the lines with a small brush.
3. Carbon Paper Transfer
Place carbon paper between your printed text and the wood. Trace over the letters and paint the transferred outline.
4. Chalk Transfer Method
Color the back of your printed text with chalk, tape it to the wood, and trace the letters. The chalk leaves a soft guide for painting.
5. Hand Lettering
If you enjoy freehand lettering, lightly sketch your wording first, then paint over your lines.
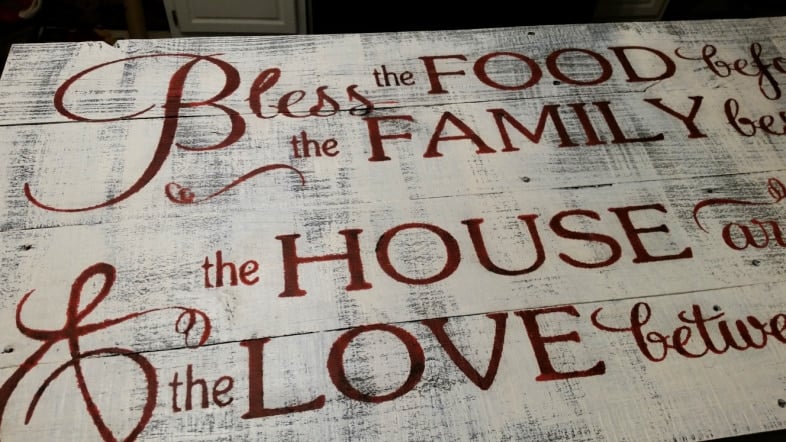
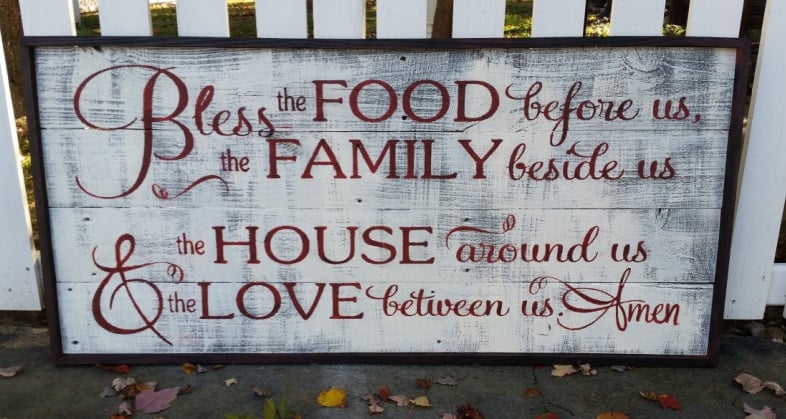
My new sign in the kitchen! It was a lot of work, but I love how it looks. It’s not perfect, but it’s handmade by little ole me!
Be sure to visit Tanya, and check out her Facebook Page.
Related Content: I Love You a Bushel and a Peck Coffee Sign/Mug Holder
gail
I love it!
me too! thanks for stopping by and taking the time to leave a comment! It makes me smile.
gail
I love the sign, it is perfect. I don’t see anything wrong with. You did a great job on it!
Thank you Terri!
I love, love, love it in my kitchen. Every time I sit down to eat, I can’t help but smile when I look up to see it.
gail
Beautiful! You don’t by chance make these to sell do you? If you ever consider, please keep me in mind I would def buy!
Amy,
Thank you! I would make you one, but probably not this large! Especially if it needs to be shipped. Contact me after the holidays if you’re truly wanting one and we’ll discuss the details.
gail
Thank you so much sounds like a plan. Yes I would love one and I will reach out to you after the Holidays.
Hi Gail, I am still interested in this sign if you are available and have the time. Do you have an idea of what it will cost? That is not a problem at all for shipping purposes for it to be smaller in size than your original one. Do you by chance have an Etsy shop?
Thank you,
Amy McGreggor
Amy,
I do have an Etsy shop, but generally only have small items there (easy to ship) I will work on getting a price for you and contacting you via e-mail. Now that I’m working on cleaning up the basement shop I should be able to make this even we’re in the dead of winter. 🙂
gail
I absolutely love this sign. I have the perfect place in our new little house.
Gail, I LOVE your sign and hanging over your table it looks perfect. I would never have noticed the gap between lines if you had not pointed it out. And though it looked fabulous without a frame… it really looks more finished as wall art with your beautiful table and chairs.
I purchased a used Portrait from another blogger for $40 and haven’t used it yet. I’m glad to know that I can use inexpensive contact paper for creating stencils. A few years ago I was able to use a brand new Cameo a few times. Managed a few cut outs for Christmas but really didn’t know what I was doing. It seems like there are lots of user tips to pick up for success with these machines. I guess I just need to get Googling to get started… looking forward to using it for projects like yours. Not looking forward to the learning curve.
Thanks for the inspiration!!
I”m so glad you’re a new owner of a portrait. If you check out YouTube, there are tons of videos. That’s where I go when I have an issue I need to solve whether it be a power tool or a Silhouette. There may not be too many details about the contact paper. My suggestion is to use Contact brand, not a version from the dollar store. (I’ve never gotten that to work successfully)
I’m here if you have any questions.
Thank you for your sweet comment about my sign. This is the first time I’ve done the little “frame” around the outside. I always mean to do it, but then never really get around to it.
gail
Absolutely LOVE this sign and it is exactly what I was looking for!!!! Thanks so much for sharing this project and can’t wait to tackle this one myself!!!
I’m so happy I gave you just what you were looking for June! Be sure to share your project on MRL’s facebook page.
gail
I love the sign. I love your new truck too. I have one suggestion about that. When my husband and I got our new truck from a radio contest that we won we decided to get the interior of the truck bed coated with a professionally spray coated armor type of protective surface. Ours was from Viper. It will protect your truck bed from being dented or rusted. It’s not a slip in liner that will scratch the paint or allow water underneath that promotes rust. It’s permanent and it is worth the additional cost, especially since you plan to use your truck to constantly haul large heavy, bulky, pokey objects. We’ve had our truck since 2004 and the bed still looks brand new! Do it now before you dent it, I promise you won’t regret it.
Eileen,
I’ve already committed to the plastic bed liner that everyone gets. I didn’t know it allows water to get under it. I appreciate your input.
You’re right, I will be hauling a lot in my truck. I’ve already put it to work. 🙂
gail
although you didn’t mean to leave the space, it does look like you meant to because it is a natural place to put it, congrats on your new big girl truck, you are gonna have to wear your cowboy hat and boots to make you look bigger, you are so tiny next to it xx
Love the lay out of this sign. I have seen many versions on Pinterest, but YOURs is my favorite.
You are a great inspiration.
Absolutely GORGEOUS!!!! Thanks for tutorial!!
Wow.. not only are the words beautiful, the sign you made for them makes it even more so! Love the mitered corners and the edging! I need a scrap wood pile up here for projects too! Pinned!
Thank you very much Wendi! I love using those fence boards for signs. 🙂
stay warm!
thanks for pinning!
gail
Love this! I have gotten into making signs, I need to look into a Cricut or Cameo to make wording easier!?! I create them on my computer and use tracing paper then hand paint! My question is, you mentioned you use garden stakes for the trim around the signs? What kind of stakes are you using?
Thanks!!! Lisa
Lisa,
I make wedding signs out of the old fence boards. Some of those signs are shipped with stakes so people can stake the sign into the ground. I rip fence boards on my table saw, getting three 6 ft stakes out of each board. I used some of thos stakes to frame the sign. They are about 1 3/4″ wide.
I hope that helps.
gail