Aged Decoupage Milk Can Table
As an Amazon Associate, I earn from qualifying purchases.
Have you ever thought about how to age new decoupage? I found a project on pinterest that really inspired me to make a couple of aged decoupage milk can tables.
Antique Milk Can

I love to decoupage, but I knew that a new project wouldn’t quite look right on my antique milk cans.
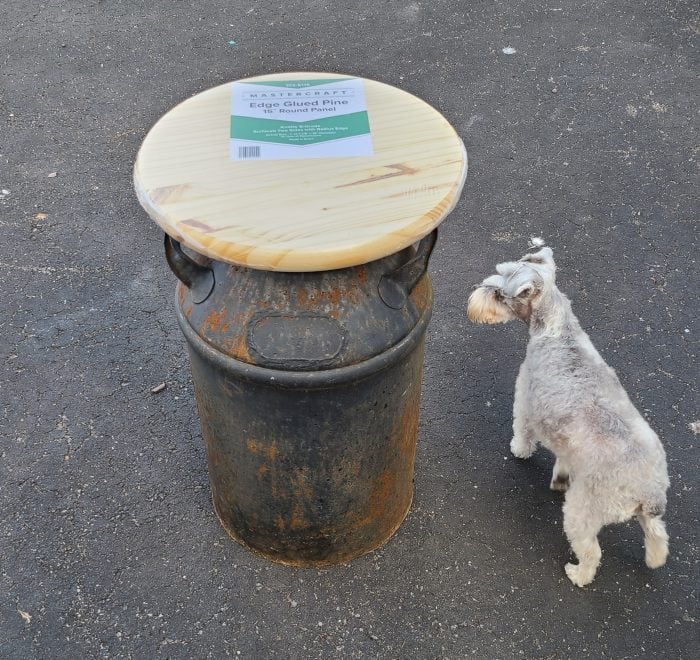
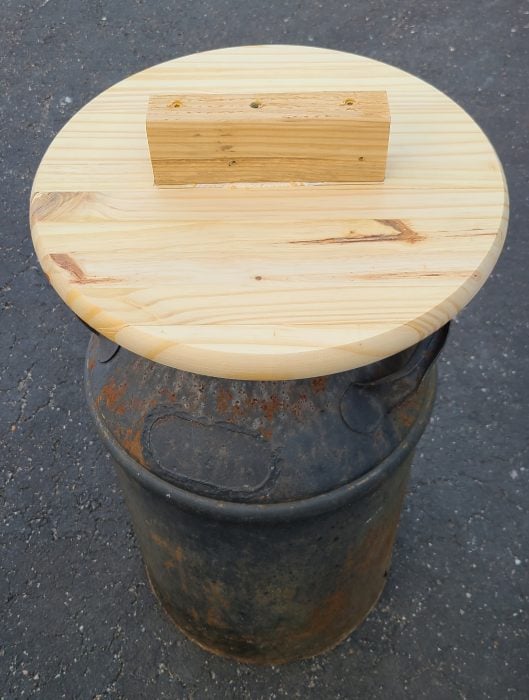
Because, I have 2 antique milk cans in the backyard camper retreat, I picked up two of these 15″ wooden rounds. I just knew they would be perfect for my aged decoupage tables.
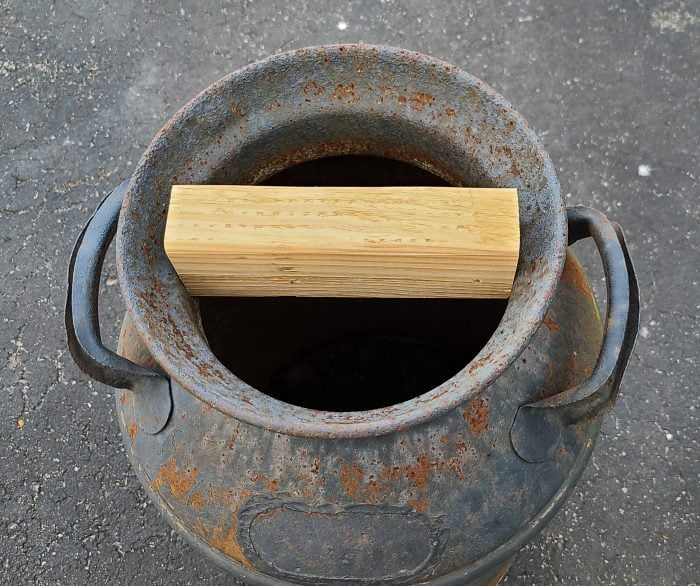
You know, you just can’t slap a wood round atop a vintage milk can and call it a table. Someone is likely to bump it or knock it off. So, I came up with a plan. Digging around in the scrap wood pile I found a board that was long enough to cut two milk can table supports. This board fits very snugly in the top.
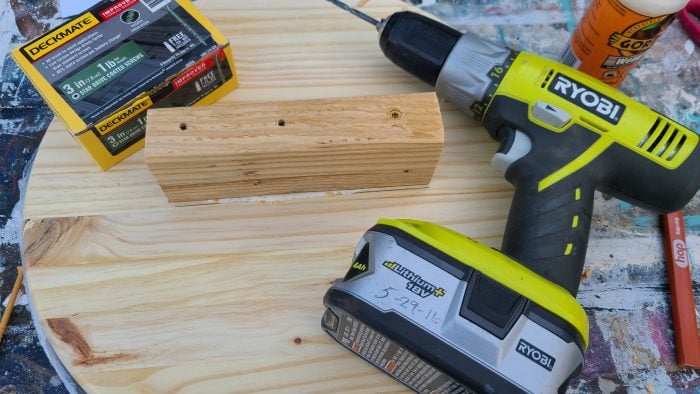
Measuring to find the center, I drew an outline, drilled pilot holes, added Gorilla Wood Glue, & Wood Screws.
I allowed the wood glue to dry on the milk can table top.
Paint
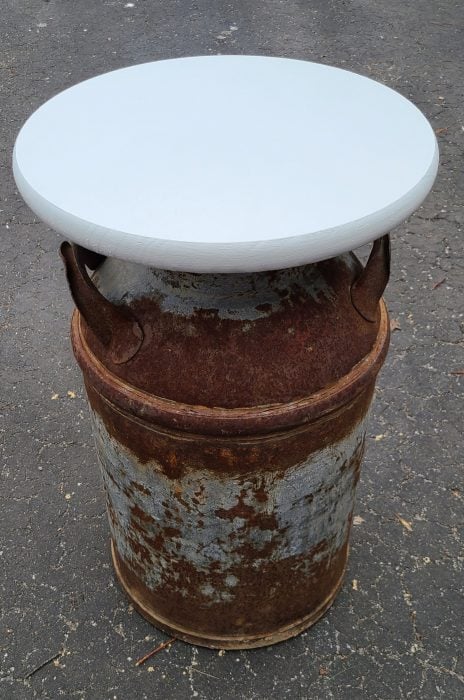
I painted the table top with All In One Paint by Heirloom Traditions (Cobblestone). I had a little leftover from when I painted the countertops. It’s almost ready to do the aged decoupage treatment.
Decoupage
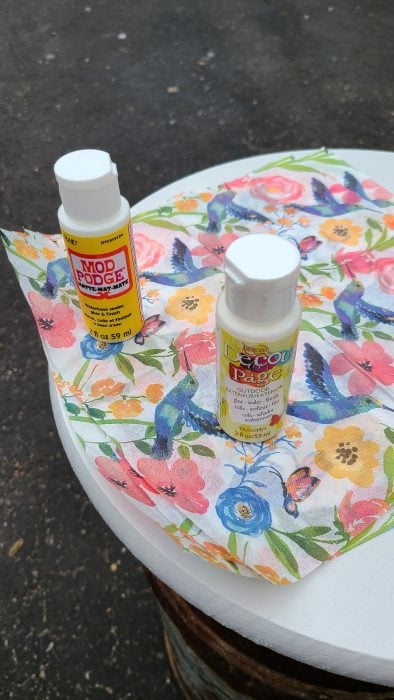
I chose some Dollar Tree napkins and two kinds of decoupage medium. I used a matte for the first application, and an outdoor formula for the topcoat.
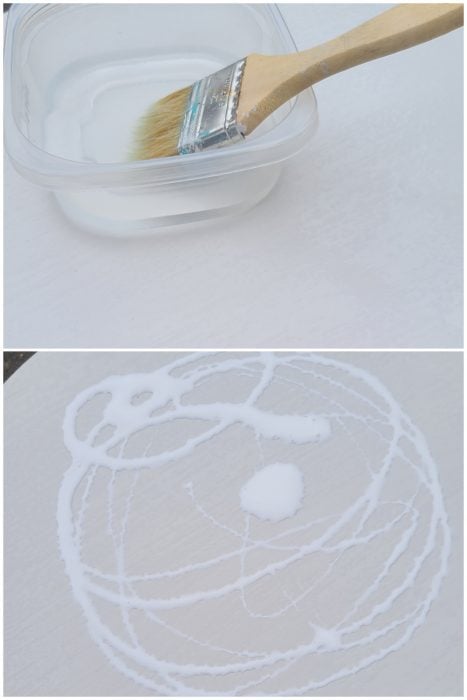
The small plastic container is filled with water. I chose to dampen the entire milk can table top with water, before applying the decoupage medium.
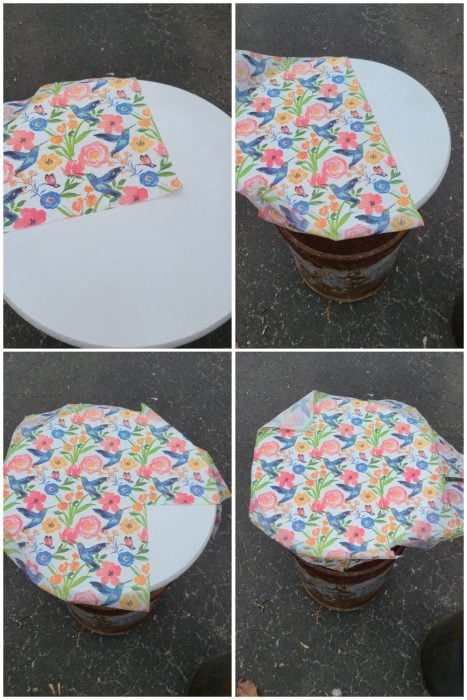
The napkins follow a pattern. After I figured that out, I was able to match each to the next. Being cheap dollar store napkins, they were only 2 ply. So, I did have to remove the white layer, which brought them to one ply.
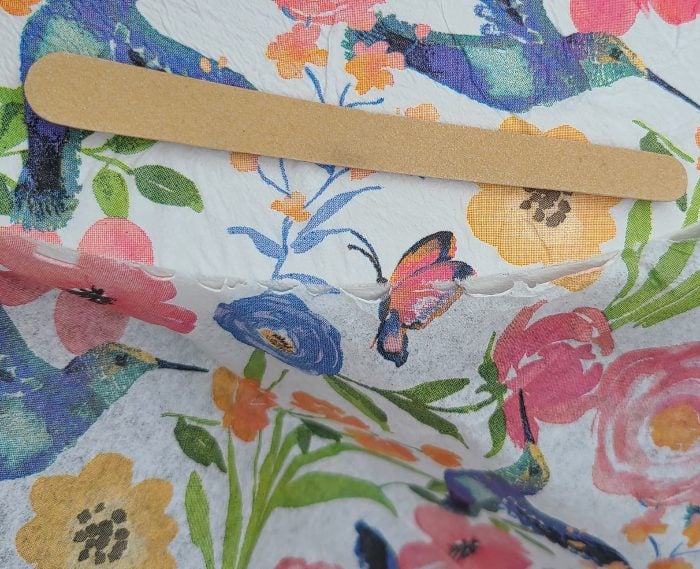
An emery board was used to create a tear line in order to remove excess napkin from the milk can table.
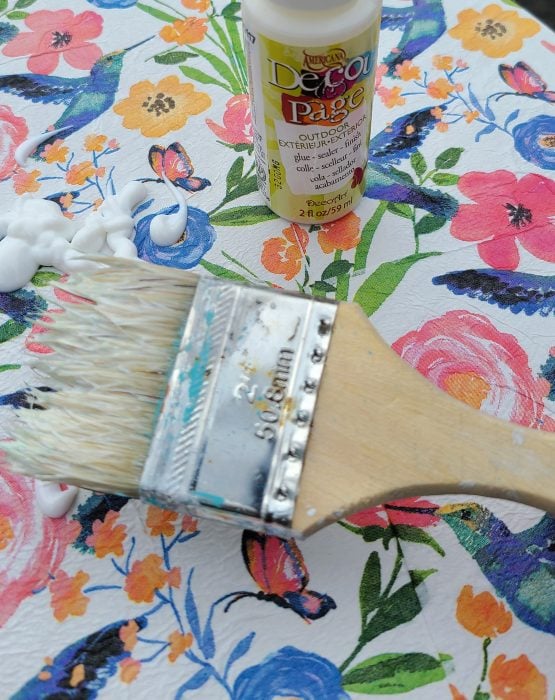
After the decoupage medium dried, I applied the outdoor formula with a chip brush. You’ve probably done all this many times. BUT!
This is Where the Magic Happens
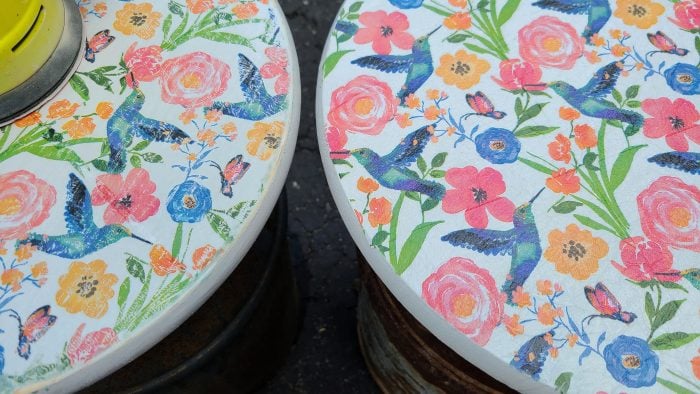
This is the aged decoupage technique is what I was so intrigued with. I sanded the milk can table on the left. Already, I’m in love with the new (old) look. After sanding with 150 grit, the decoupage is smooth, wrinkles are gone, and I love the faded aged look!!
How to: Aged Decoupage Milk Can Table Top
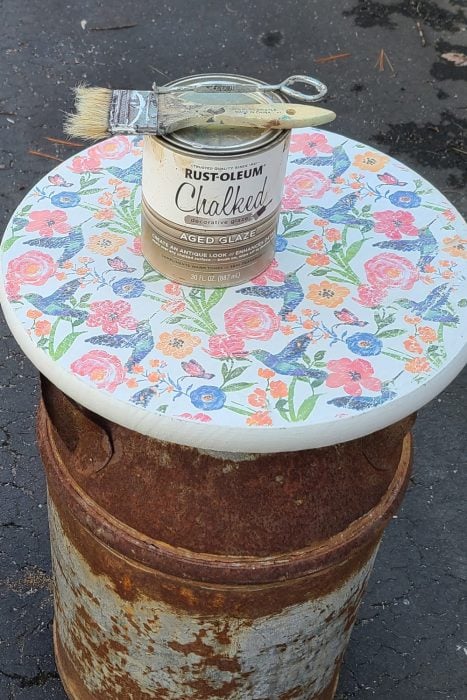
But, here’s the problem. The “new” table top doesn’t really go with that rusty milk can, does it? You know how much I love my Smoked Glaze, but this time I reached for the Aged Glaze. Check out that chip brush–it’s not the same one I used for the decoupage. THIS one is my glazing brush, because the bristles are aged and jagged. That makes it perfect for dry brushing a finish.
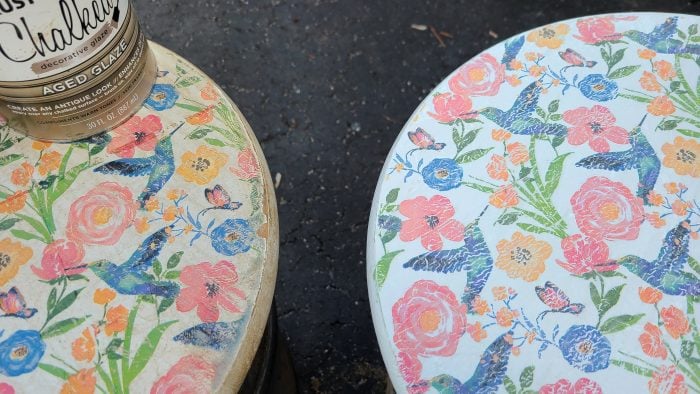
That’s better! Now it matches the old beat up milk can a lot better! However, I do LOVE the one on the right, sanded without the aged glazing too. Maybe a future project for another time?
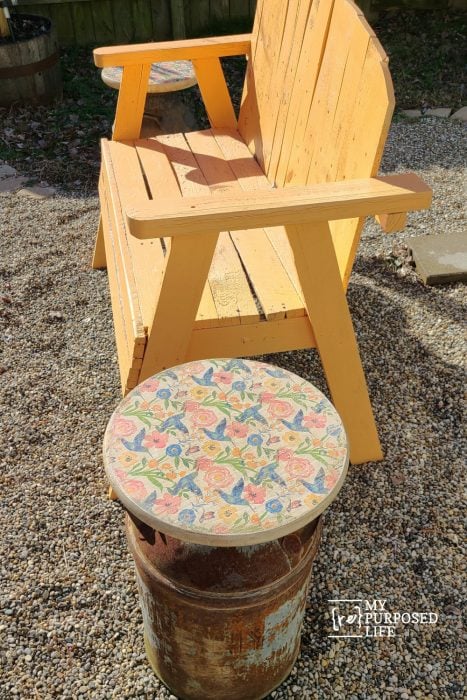
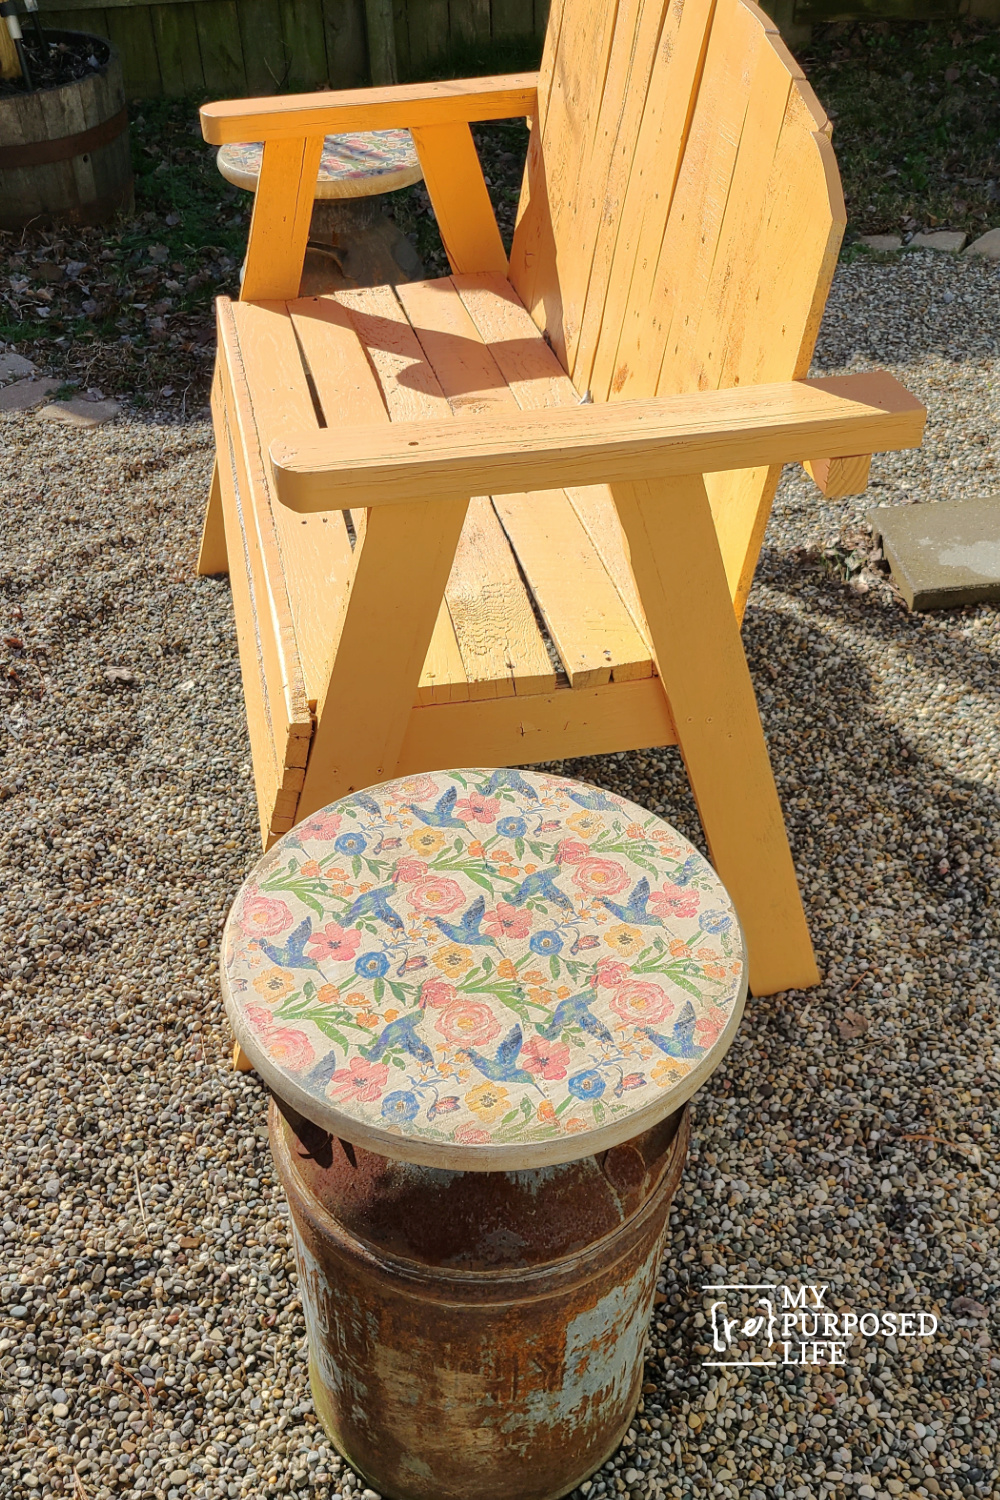
Don’t the aged decoupage milk can tables go great with my pallet love seat?
When we gather in the backyard, there are certain items I grab from the shed each time. So, these milk can table tops will be stored in the shed when not in use. They easily “pop” off of the milk cans.
See more Decoupage Projects here.