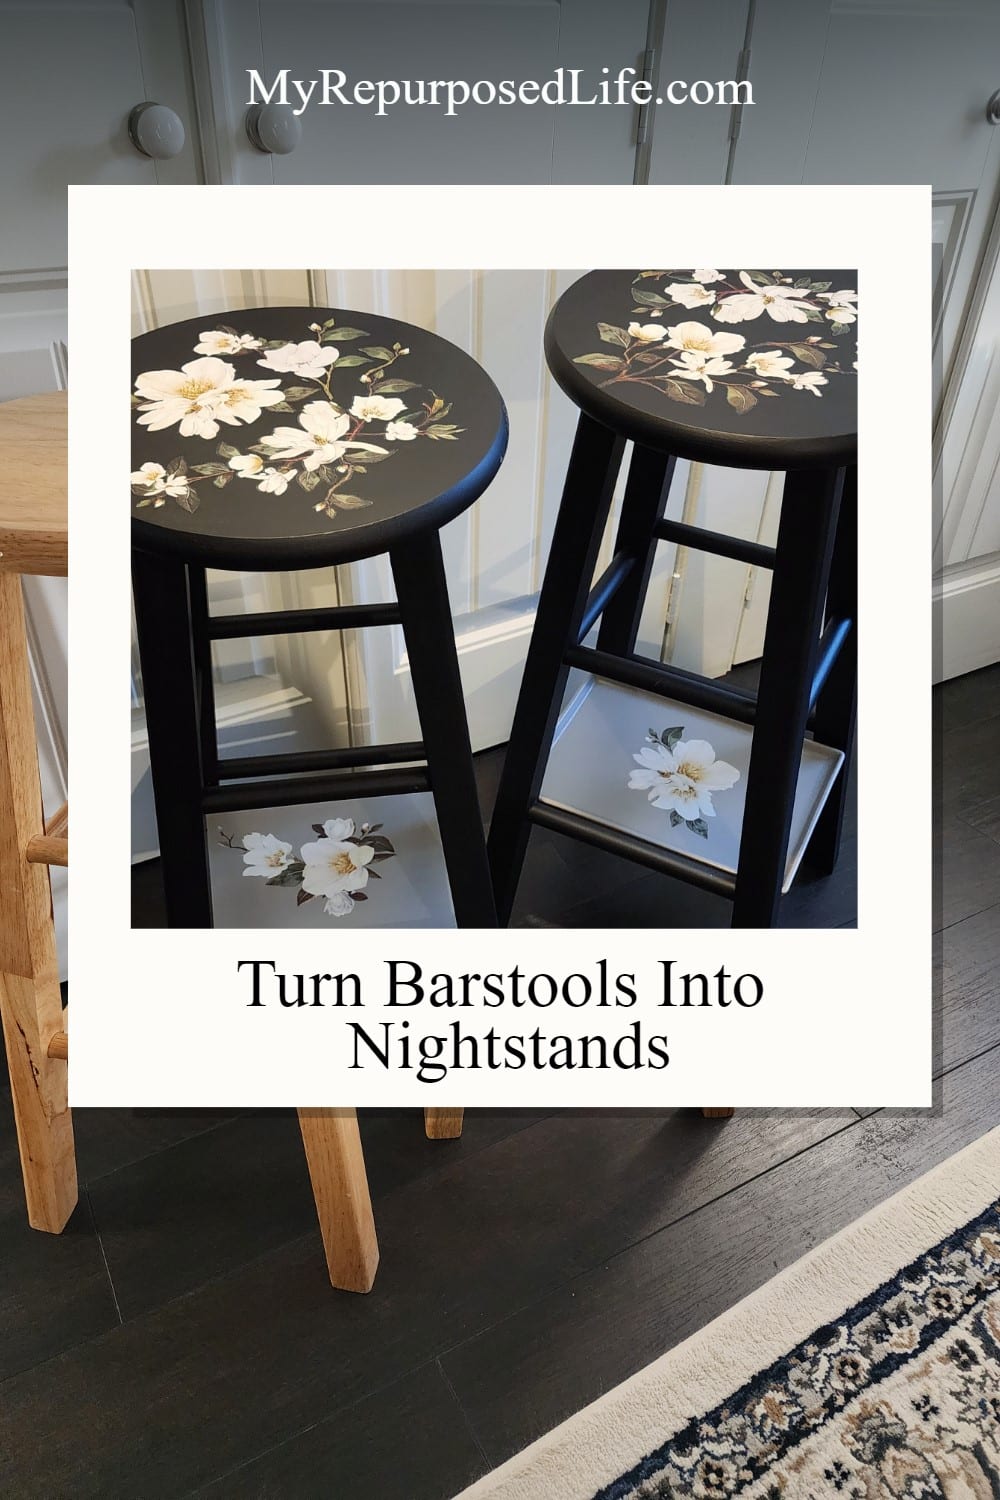
Bar Stools Into Nightstands: The How And Why
As an Amazon Associate, I earn from qualifying purchases.
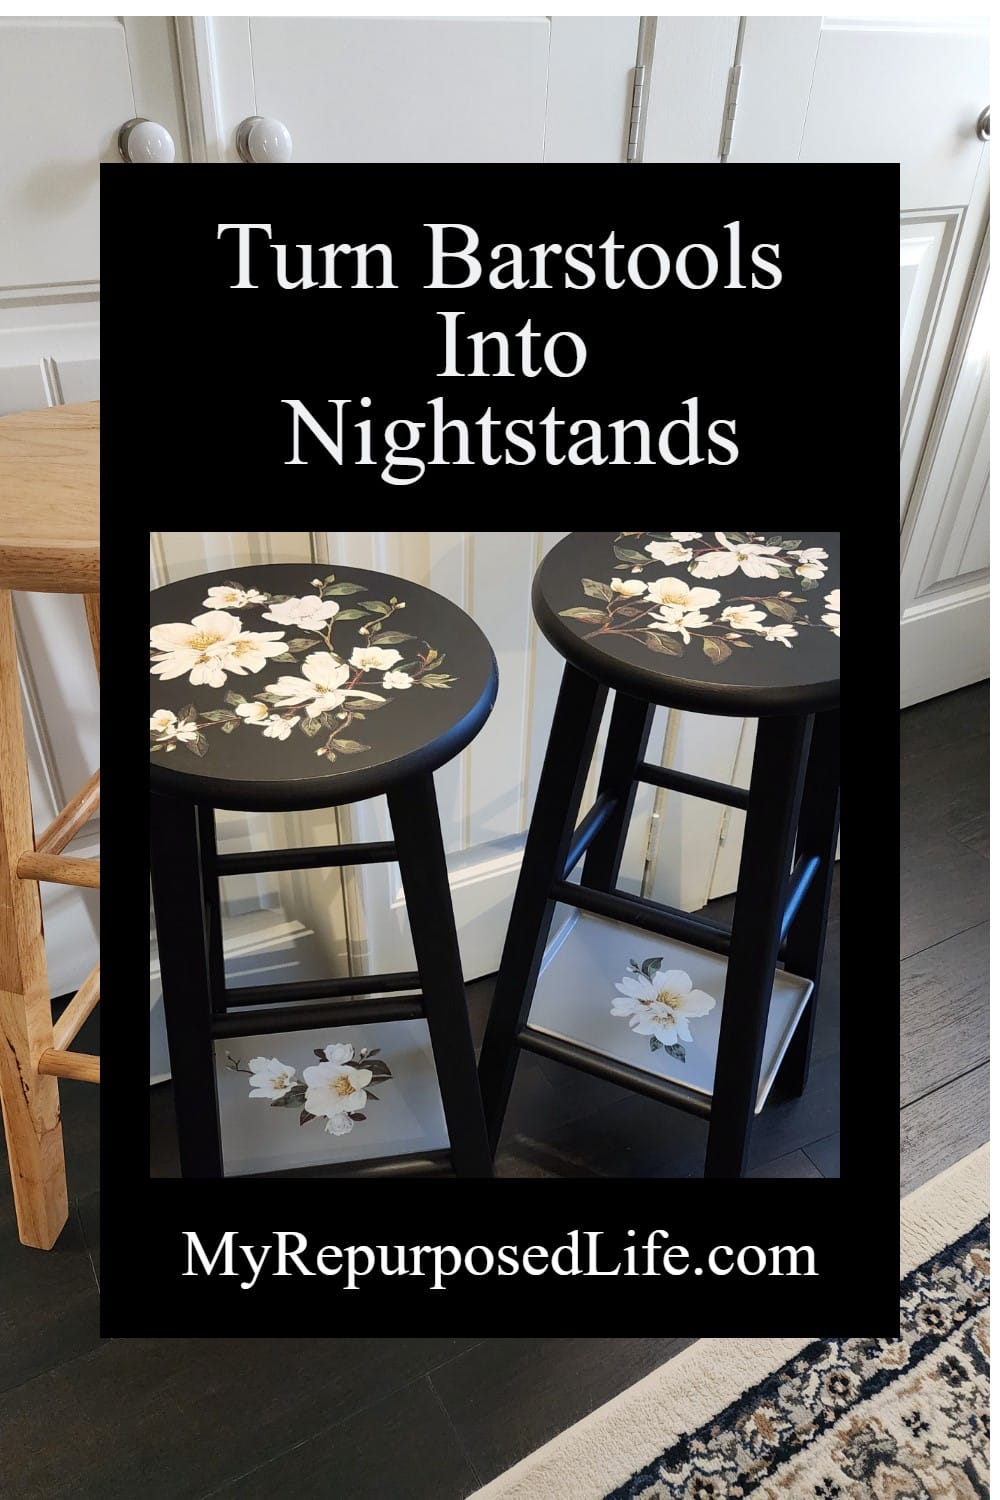
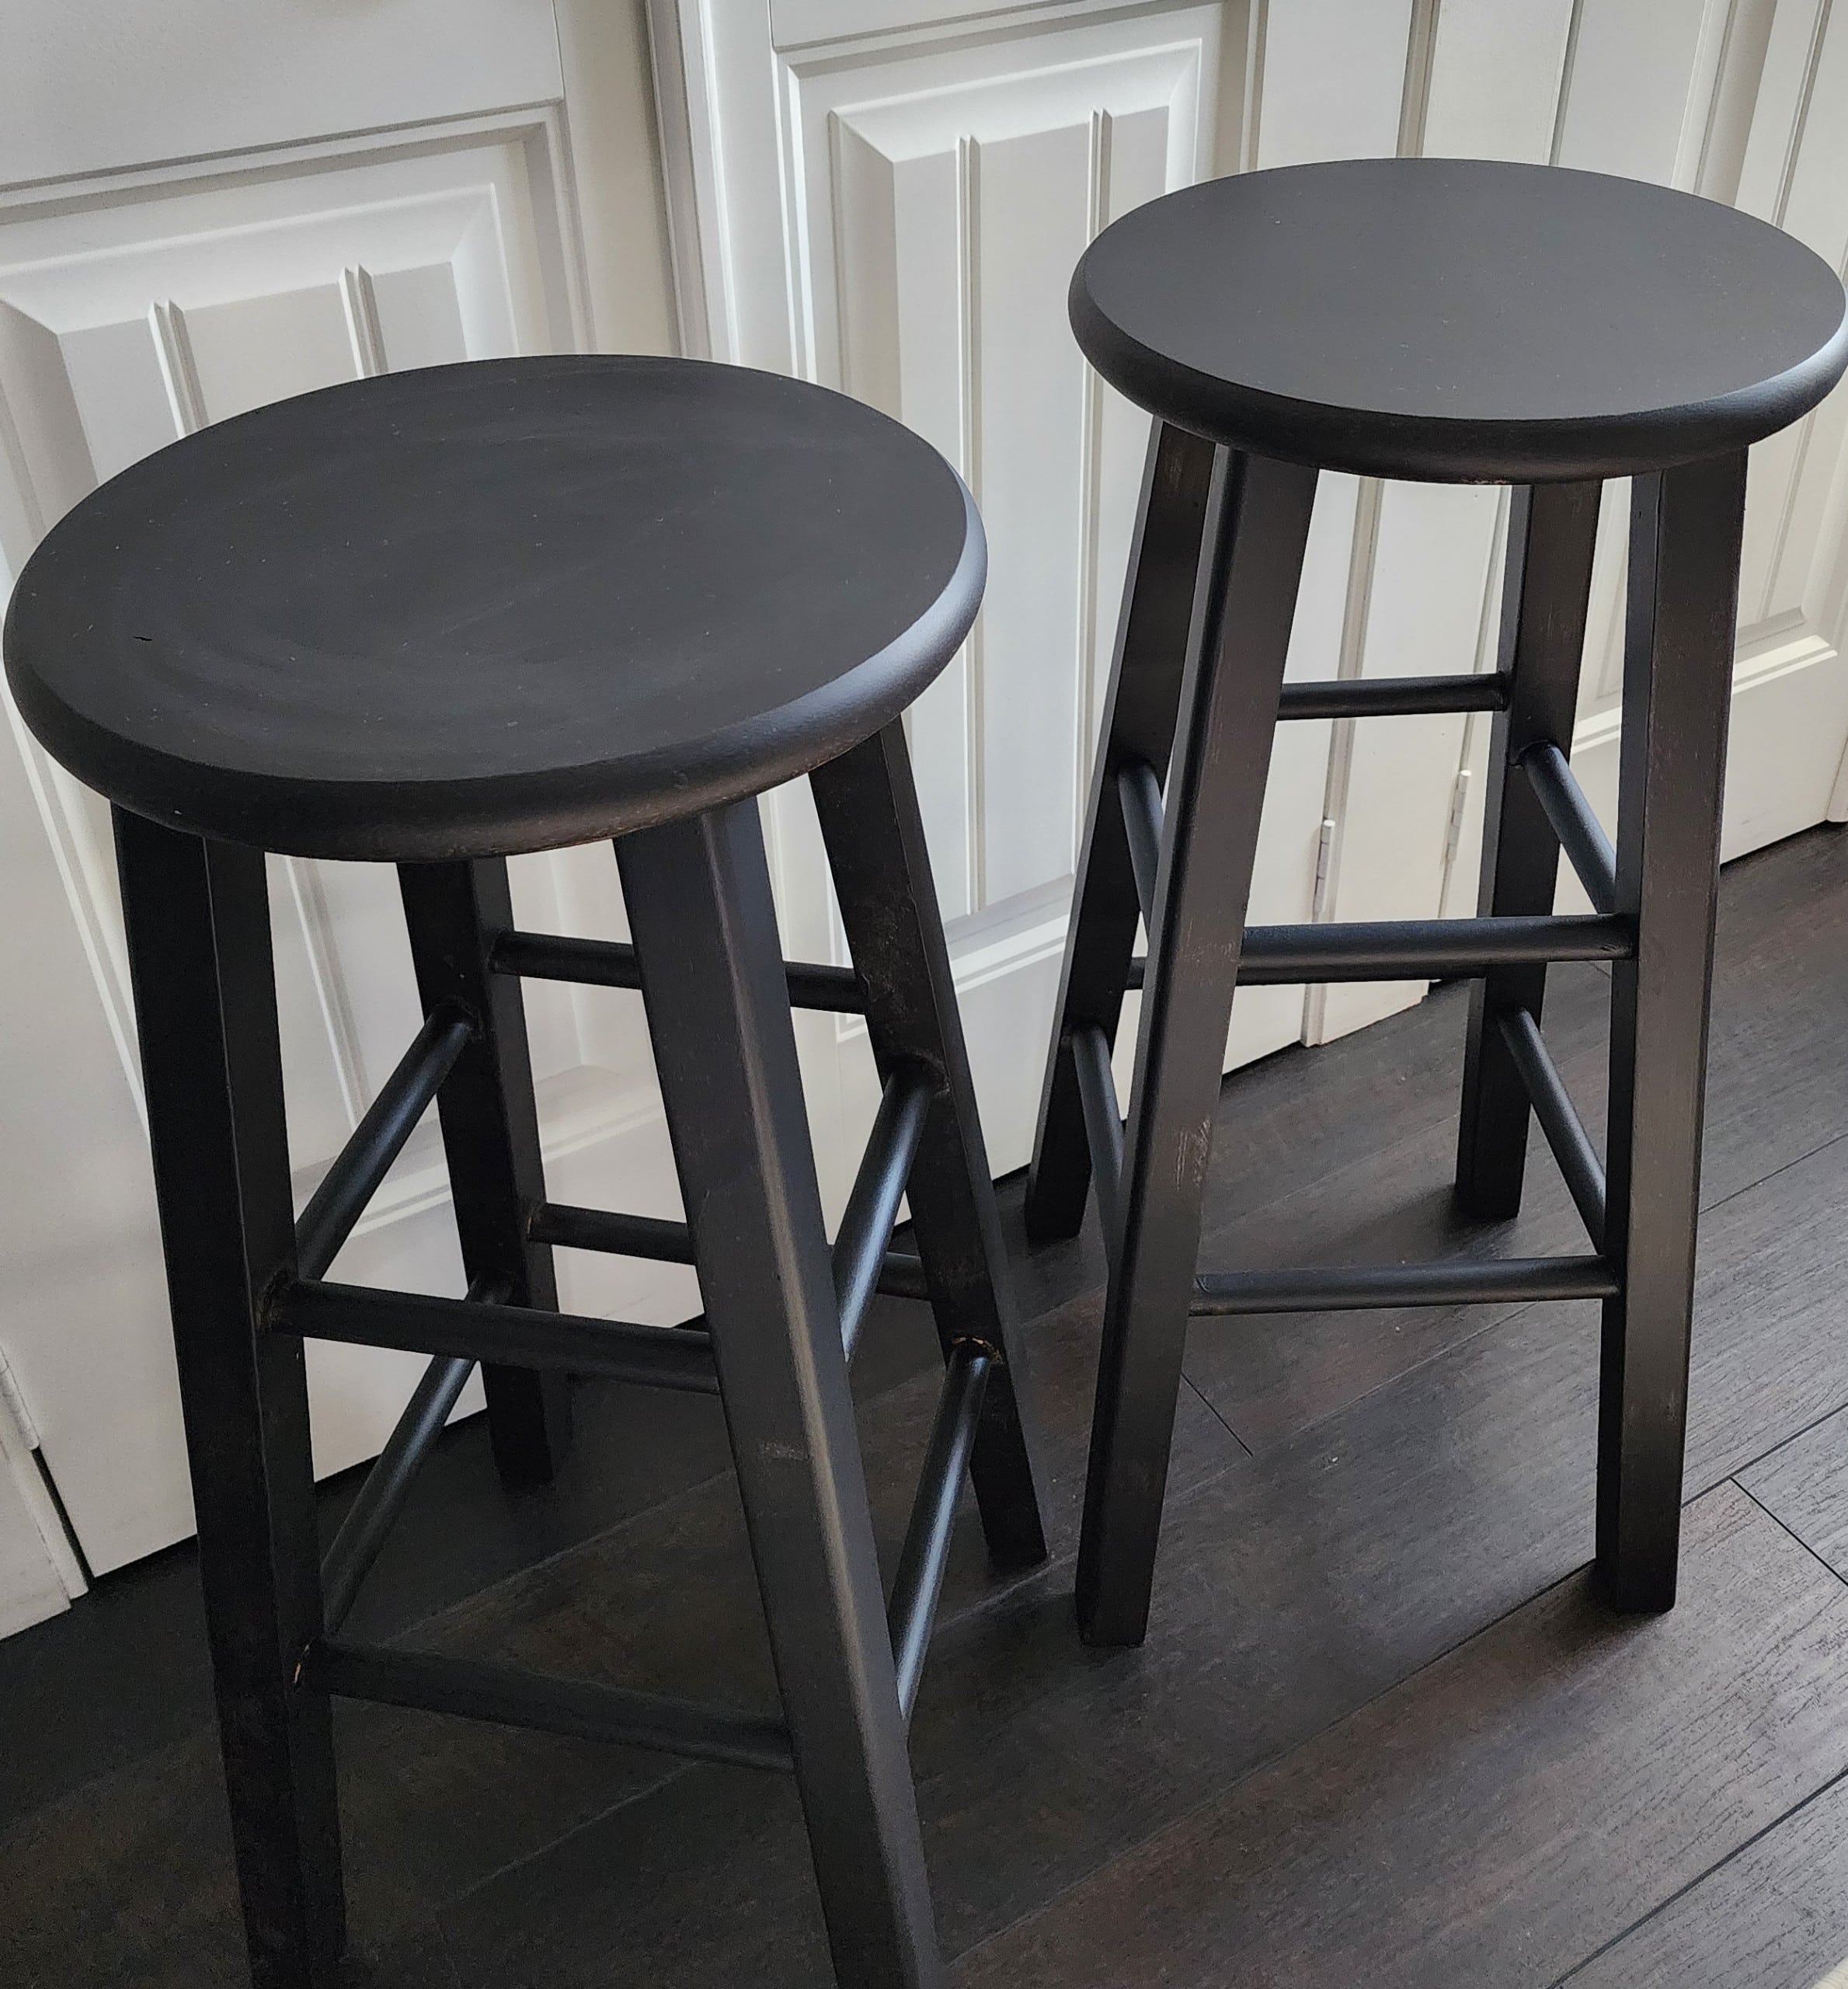
I’ve done several bar stool makeovers in the last year or so, but I haven’t ever turned bar stools into nightstands. That’s my project for this month’s Thrift Store Decor Share.
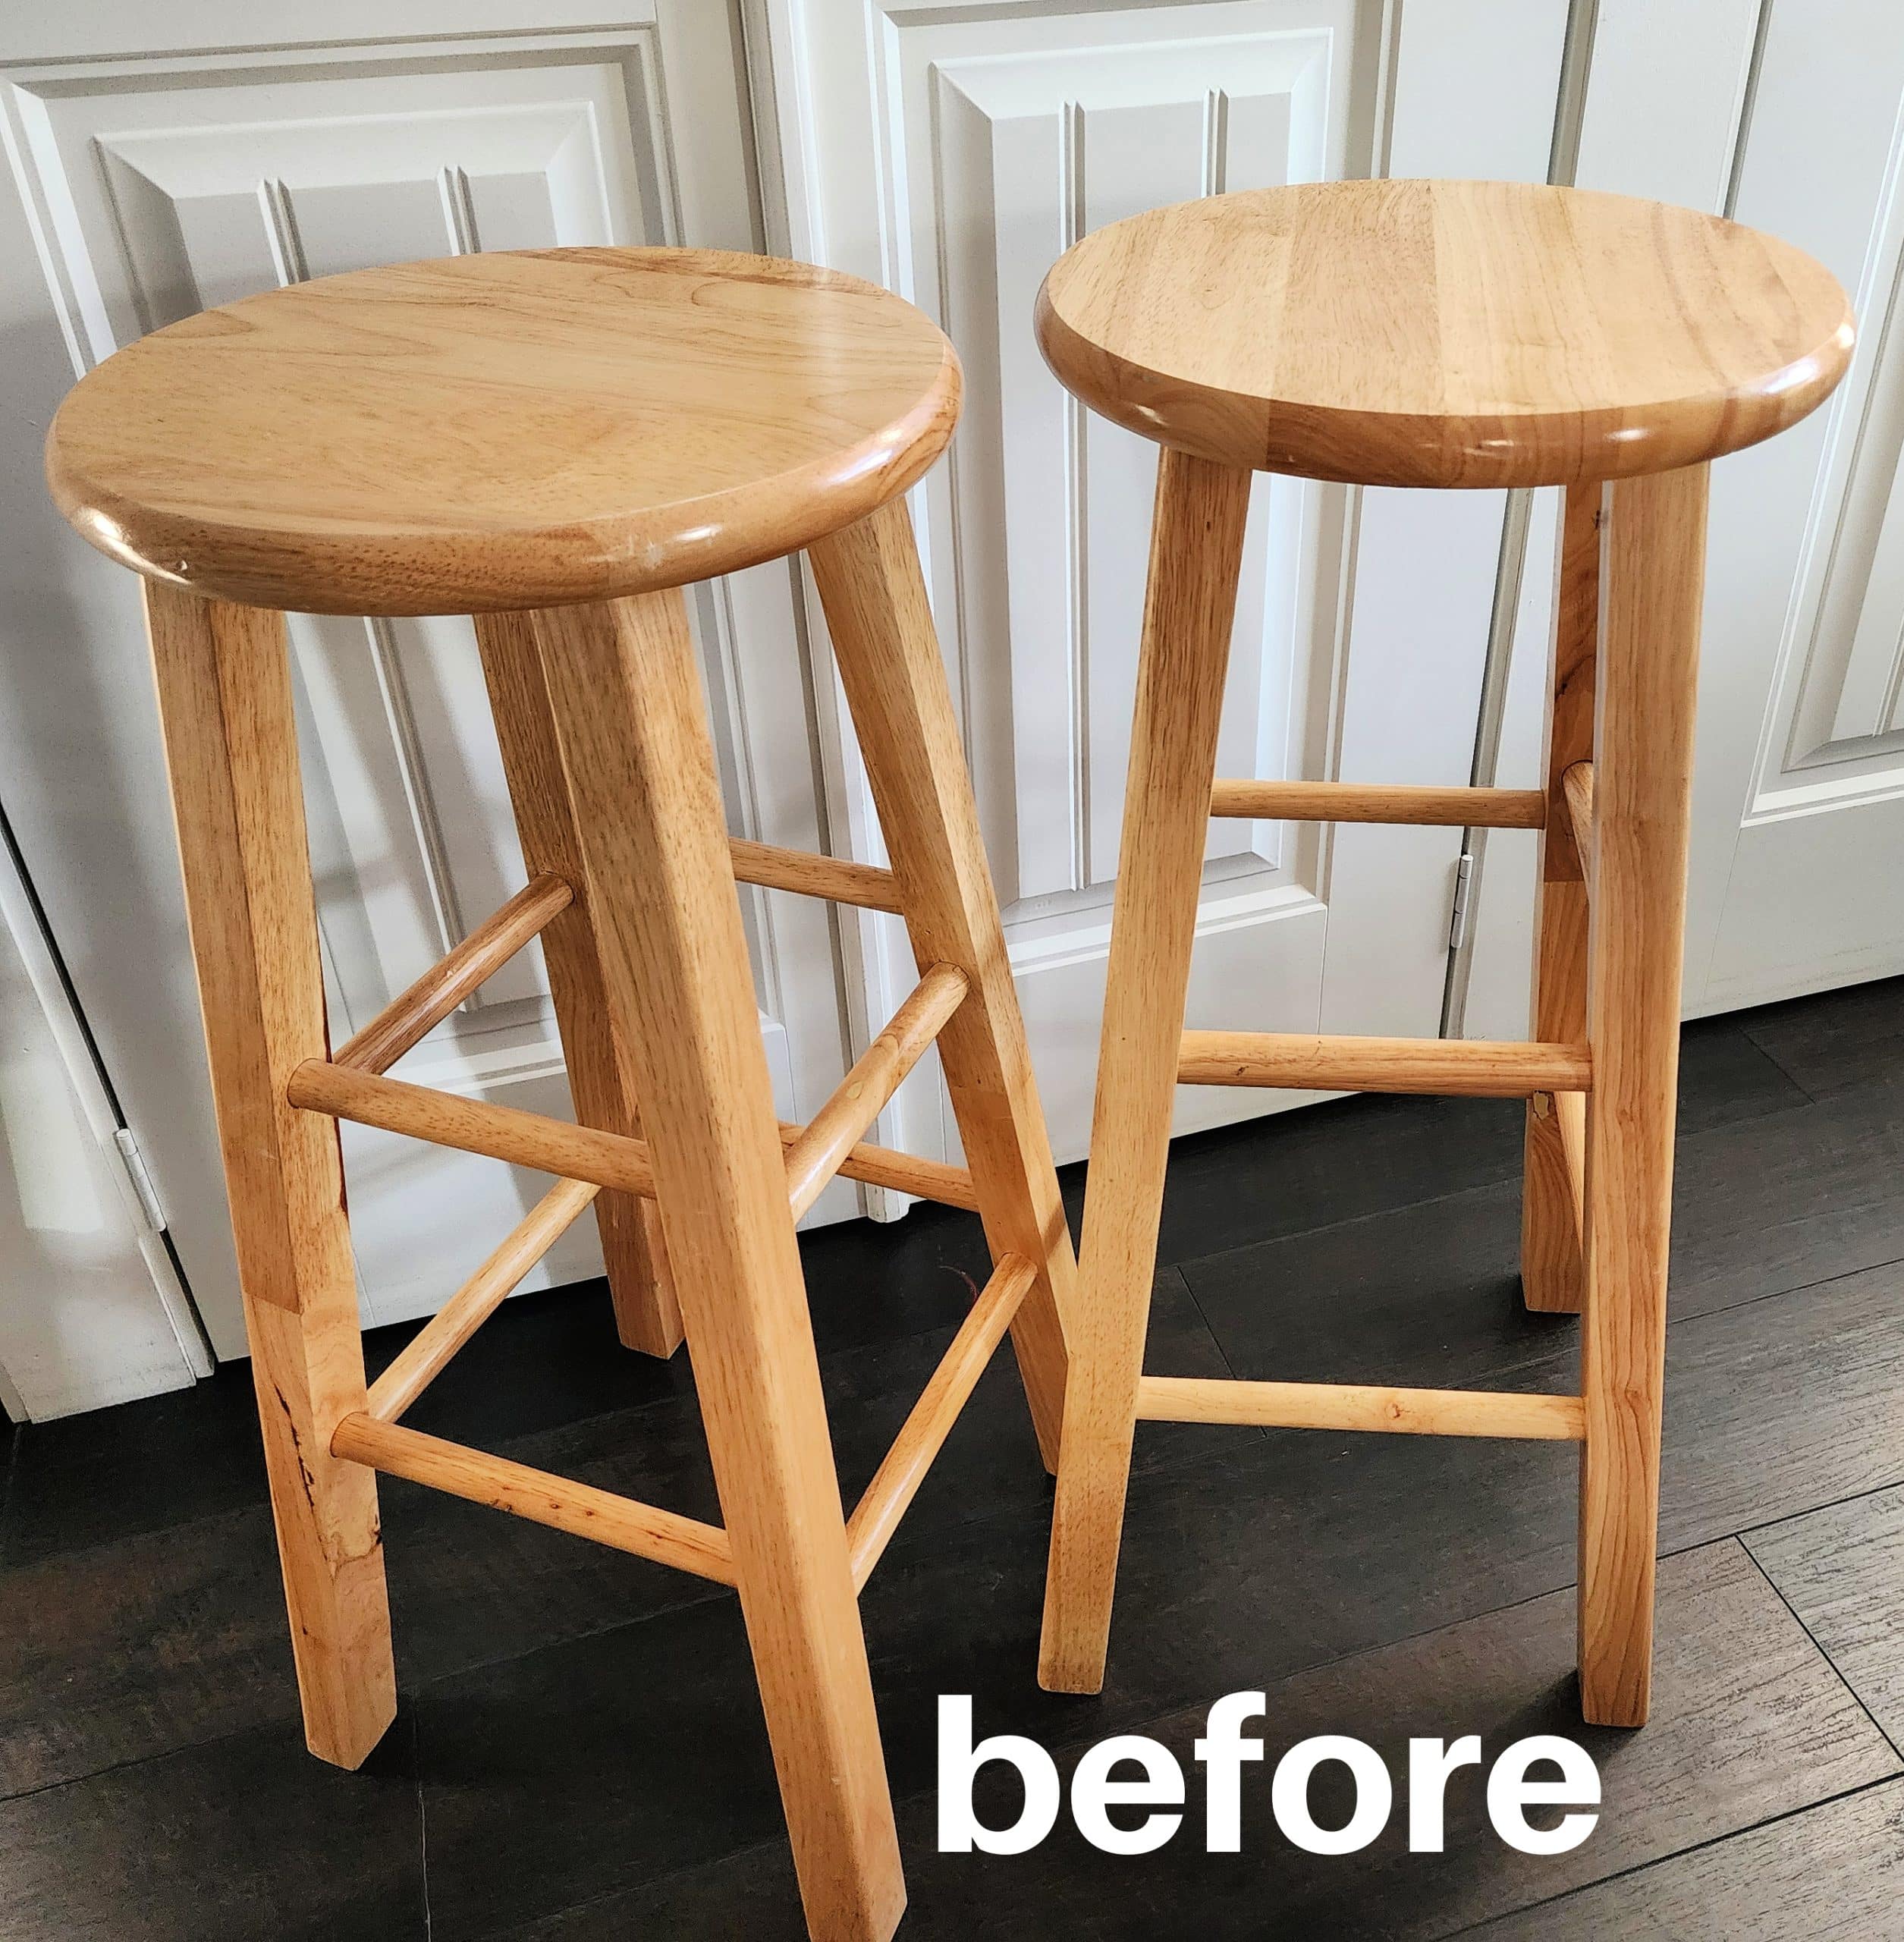
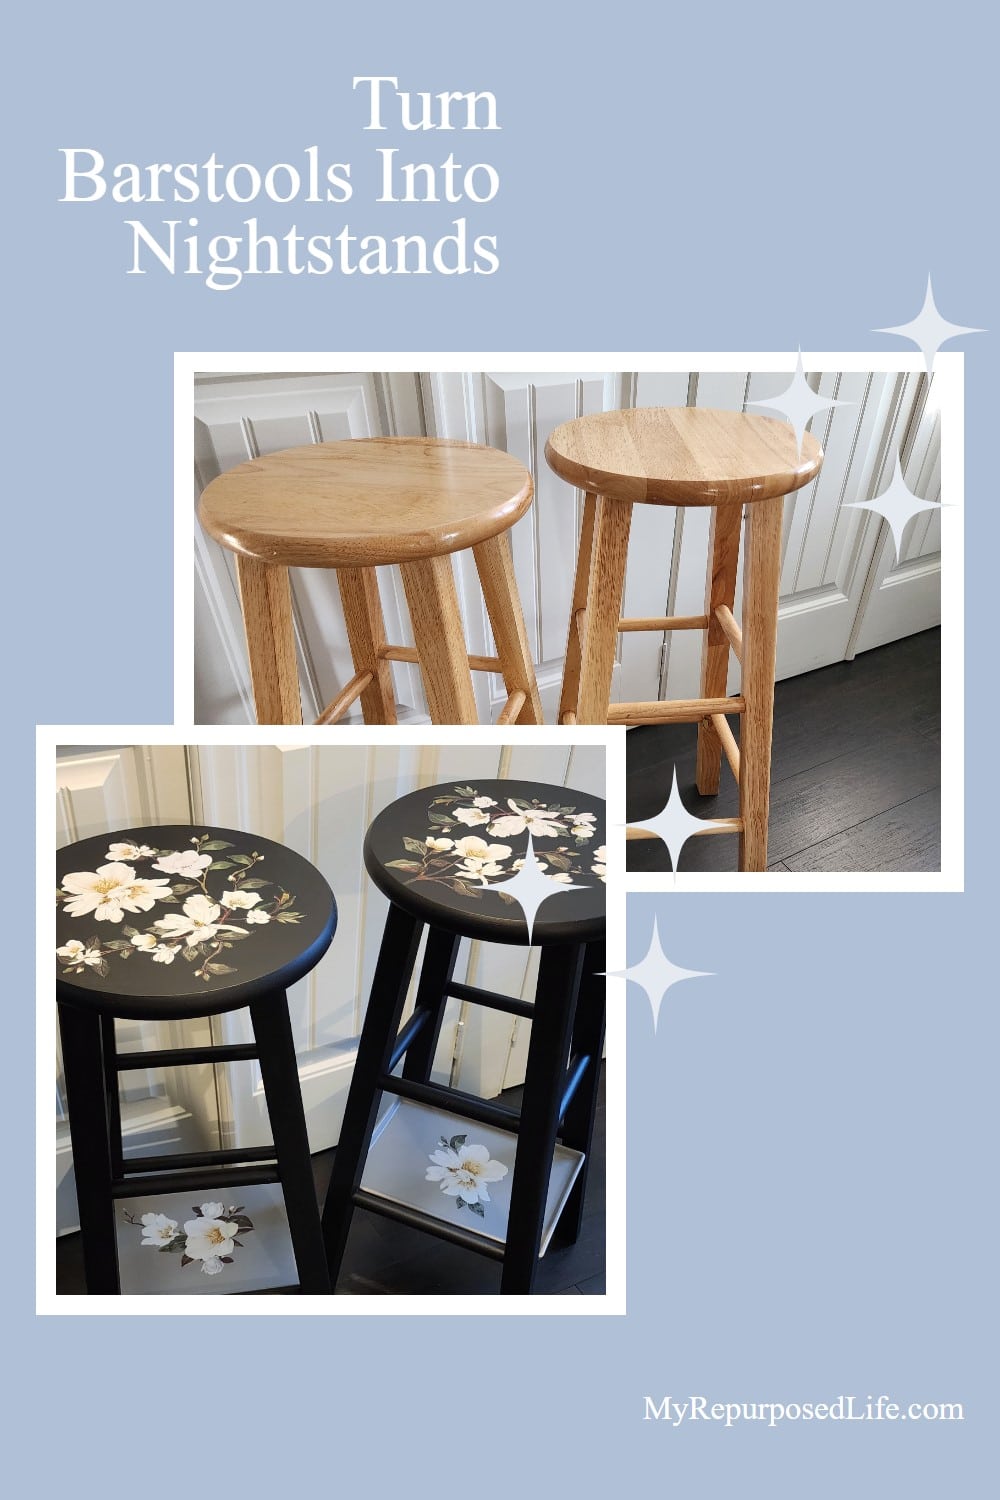
Honestly, these wooden bar stools were not purchased at a thrift store. A family member gave them to me months ago. They have just been hanging out in the storage garage, waiting for a purpose.
So, I’ve been looking for some nightstands in a specific size to use in the master bedroom at my new vacation home. The structure is a very old park model camper from a nearby campground.
The layout was for a queen-sized bed, but I chose a full-sized bed instead. That allows a small space on either side of the bed for nightstands. I need something slim, but I haven’t found any tables. So, it’s time to turn some bar stools into nightstands!

This is our Thrift Store Day. Be sure to check out all the projects below.
Bar Stools Into Nightstands
What makes these barstools nightstands? It’s all in how you use them and their functionality.
Let’s see how it all came together.
Paint Materials
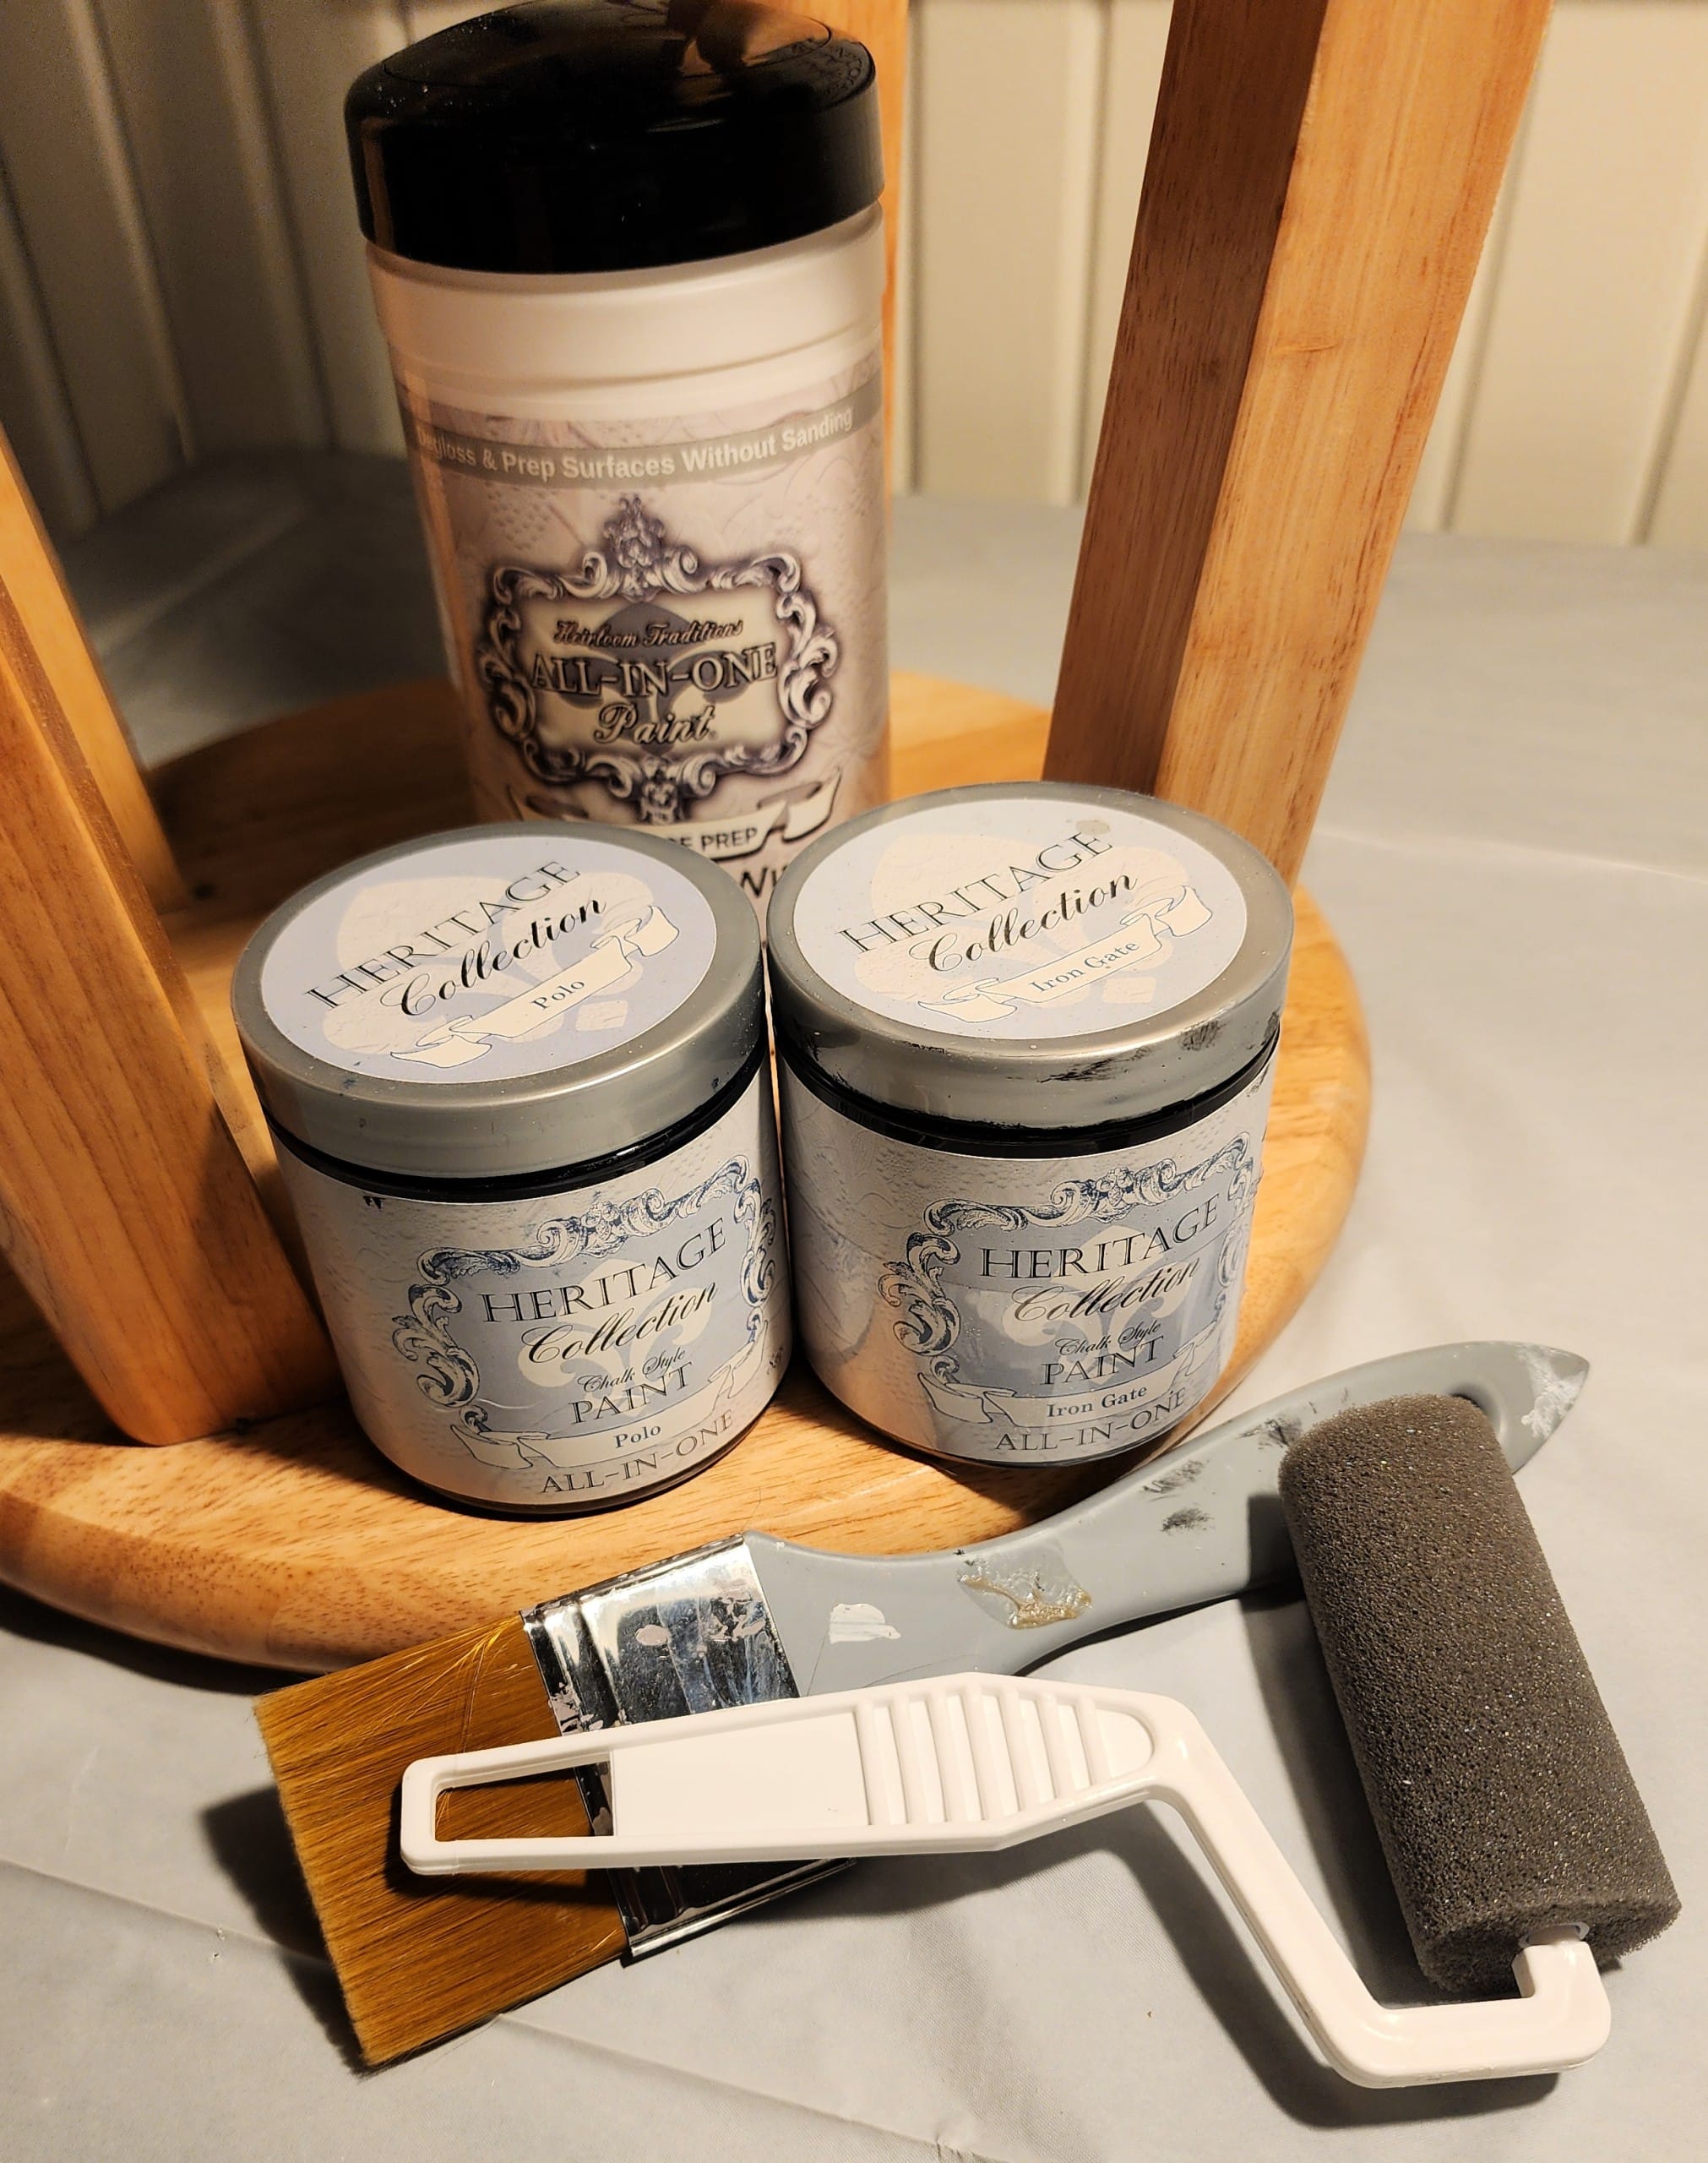
Because the wood is very shiny, and I didn’t want to sand, I opted for the new Cleaning Wipes from HTP. You may remember that I generally use the Surface Prep, but I’ve been thrilled with how easy these wipes are to use. I first used them on the Vintage Headboard that is currently in the master bedroom at the Hideaway.
For the paint color, I chose Polo to match the headboard. However, I was running low, so I used Iron Gate as the base coat. You may remember that I used white on the headboard. Do you ever change your mind while painting projects? Sometimes, I wait for them to “speak” to me.
I did a little experiment on these bar stools into nightstands with my painting tools. I prefer to use the small roller shown in the picture above. It works well, even on large projects. I used the roller on one stool and the brush on the other.
How to Paint Shiny Wood Without Sanding
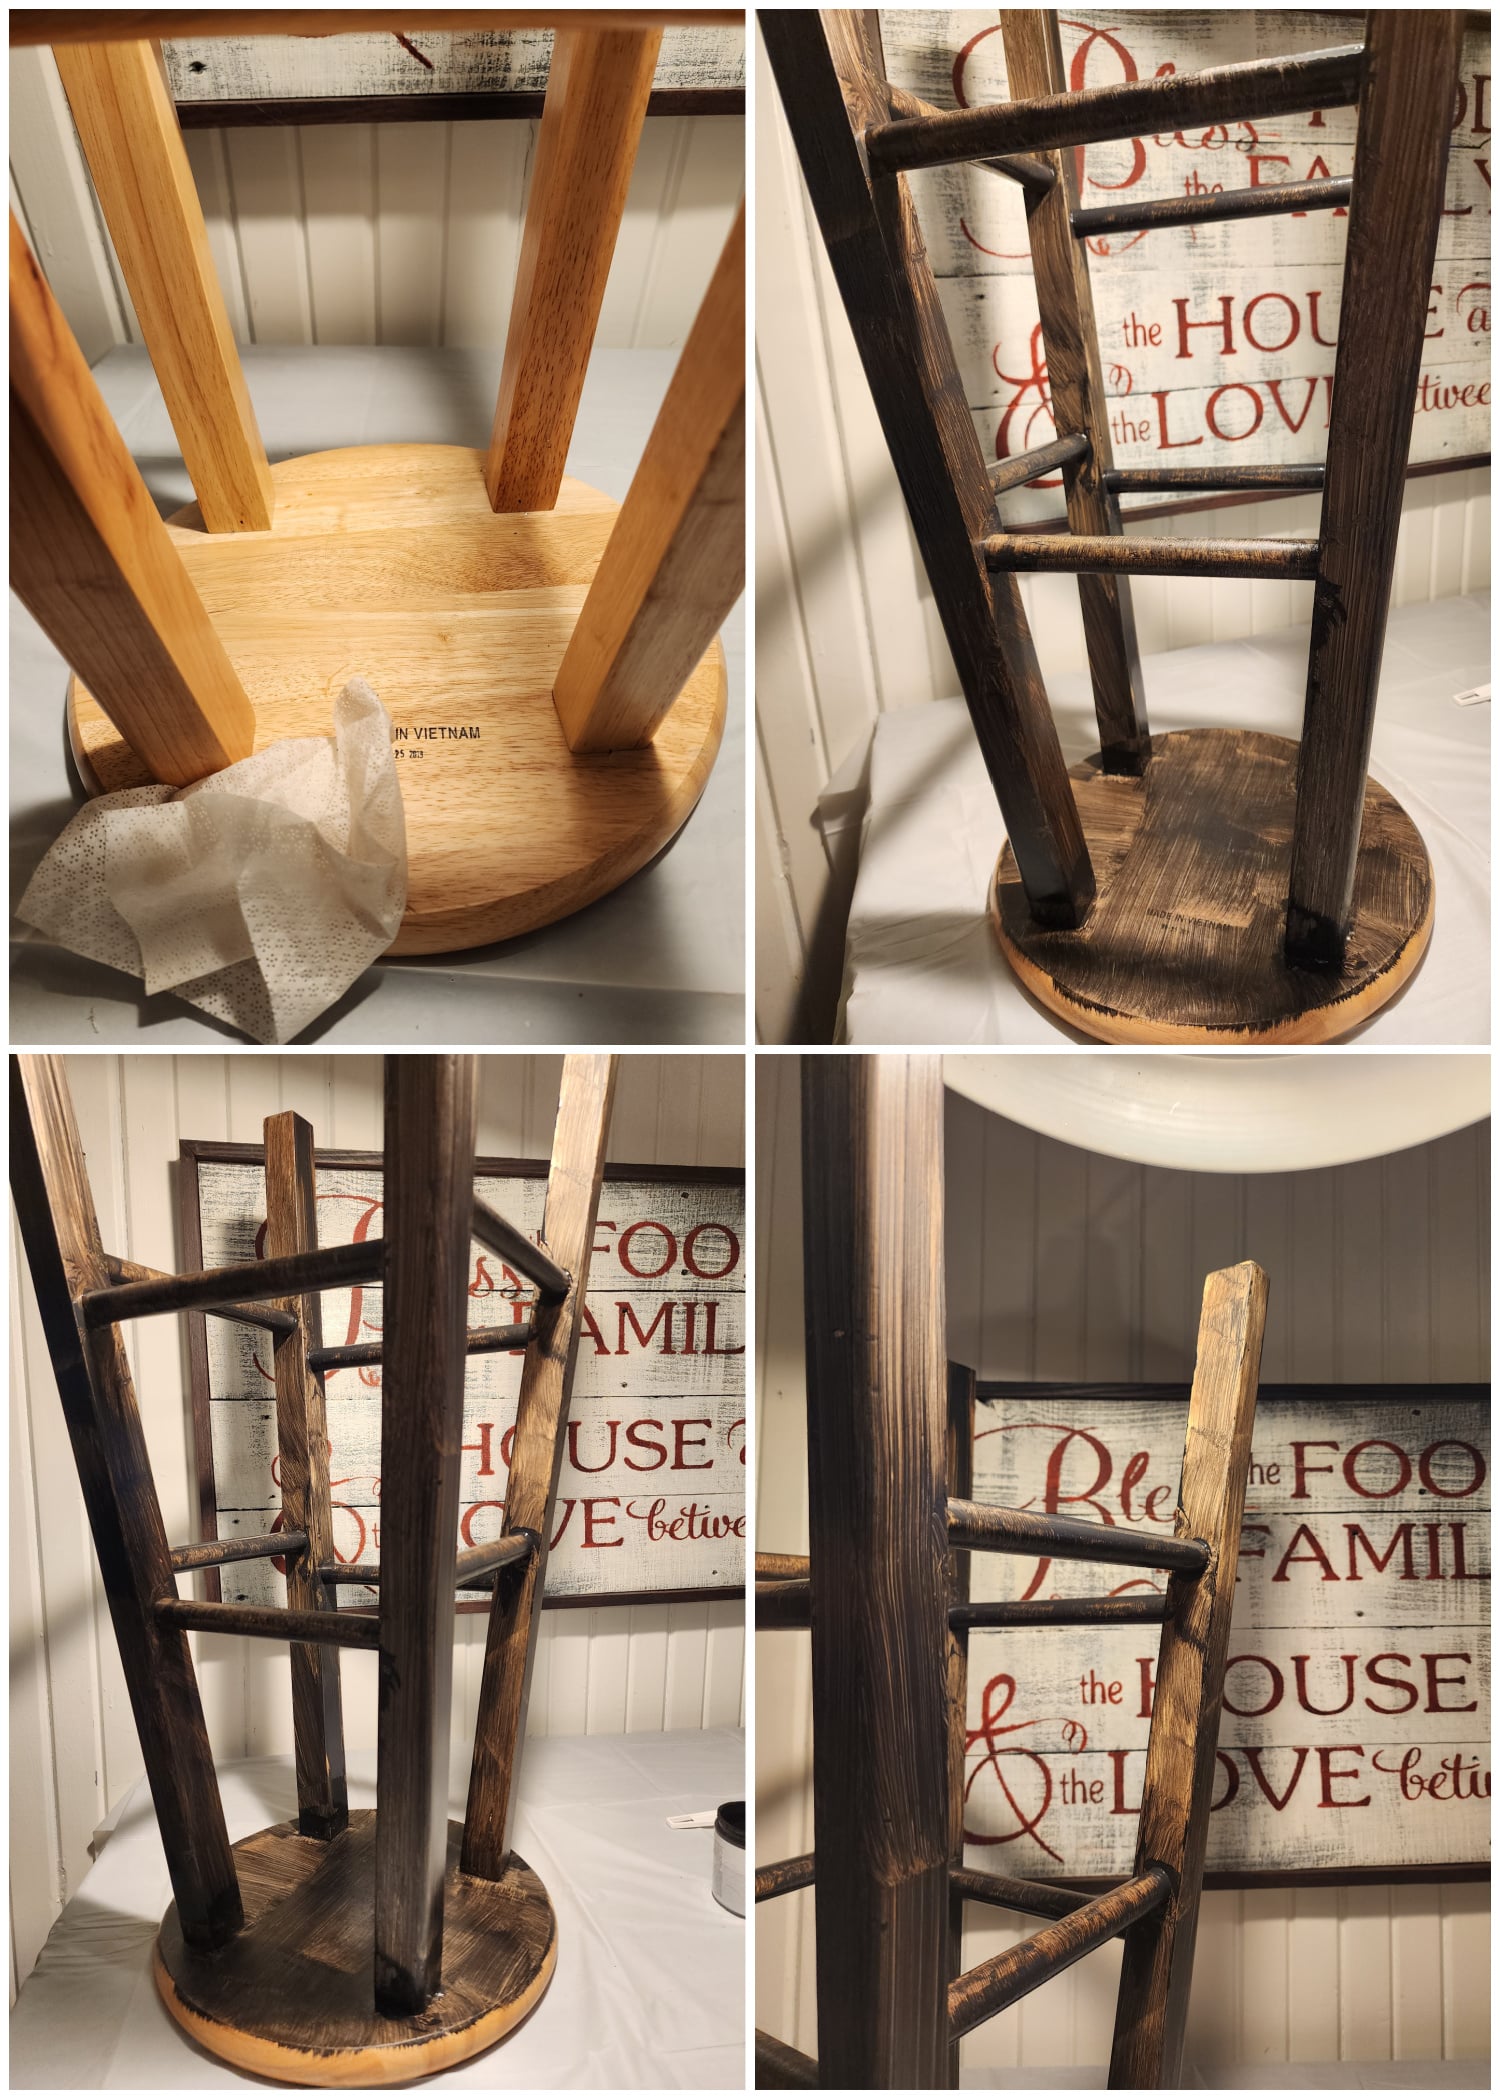
I used two wipes on each bar stool. The first one was to clean and degloss. The wipe got dirty. I used a second wipe, which stayed mostly clean, meaning the shiny wood was ready to accept paint.
The key to properly getting the paint to adhere is using light coats of paint. I used a brush on this stool and a very light “ugly” coat to begin.
Two Coats of Paint
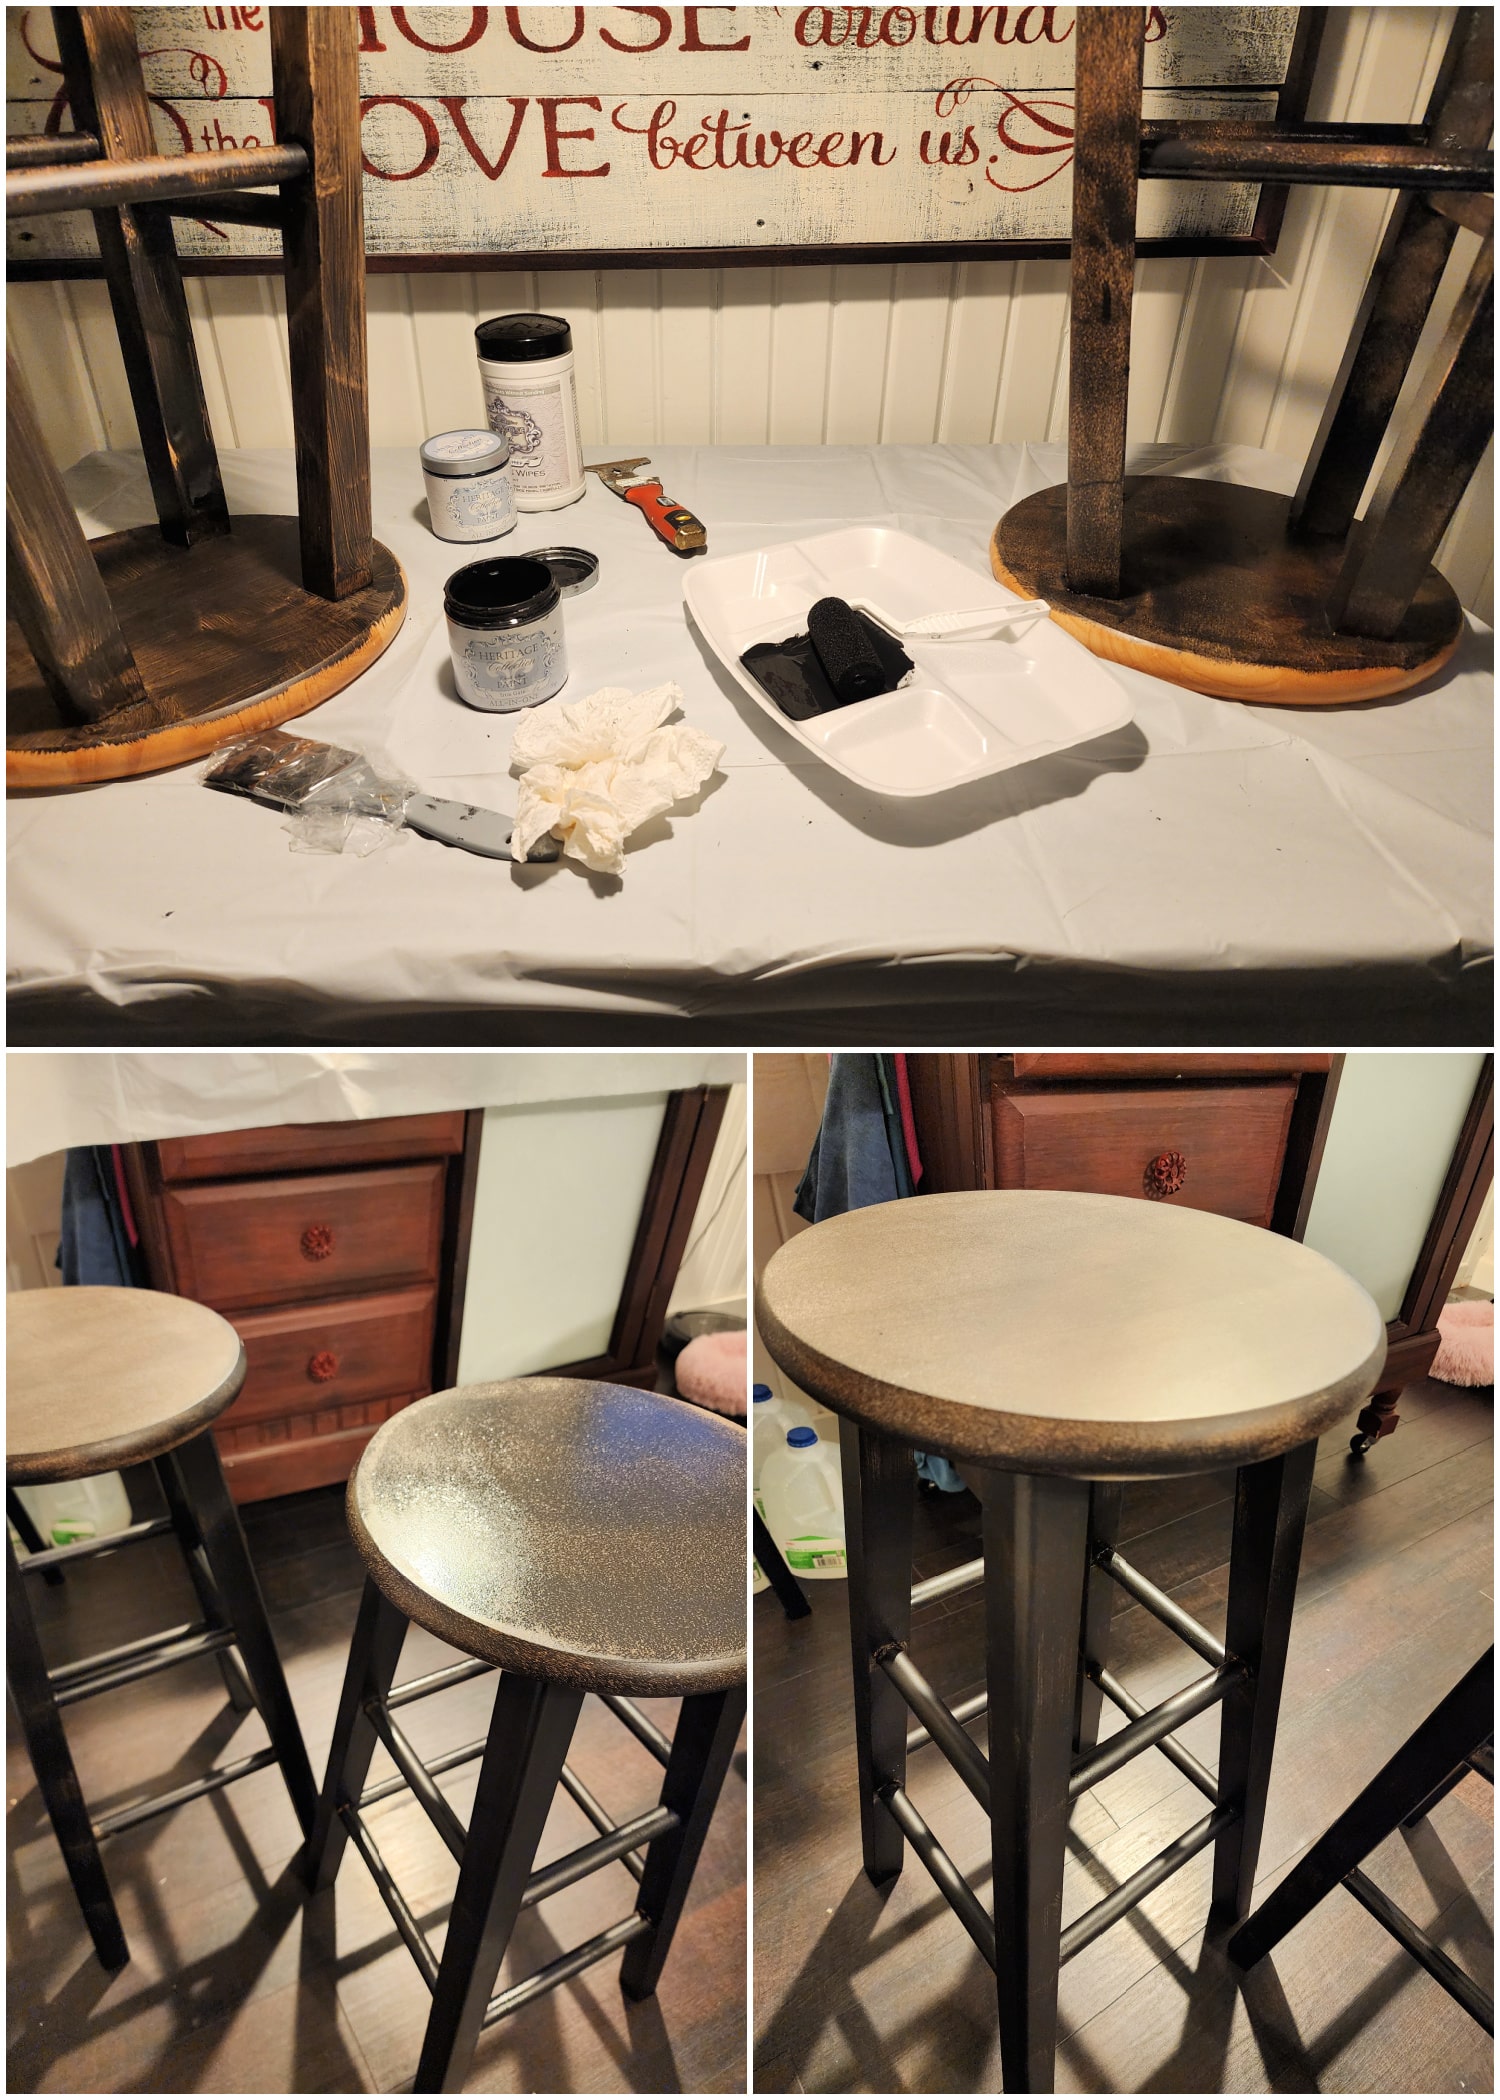
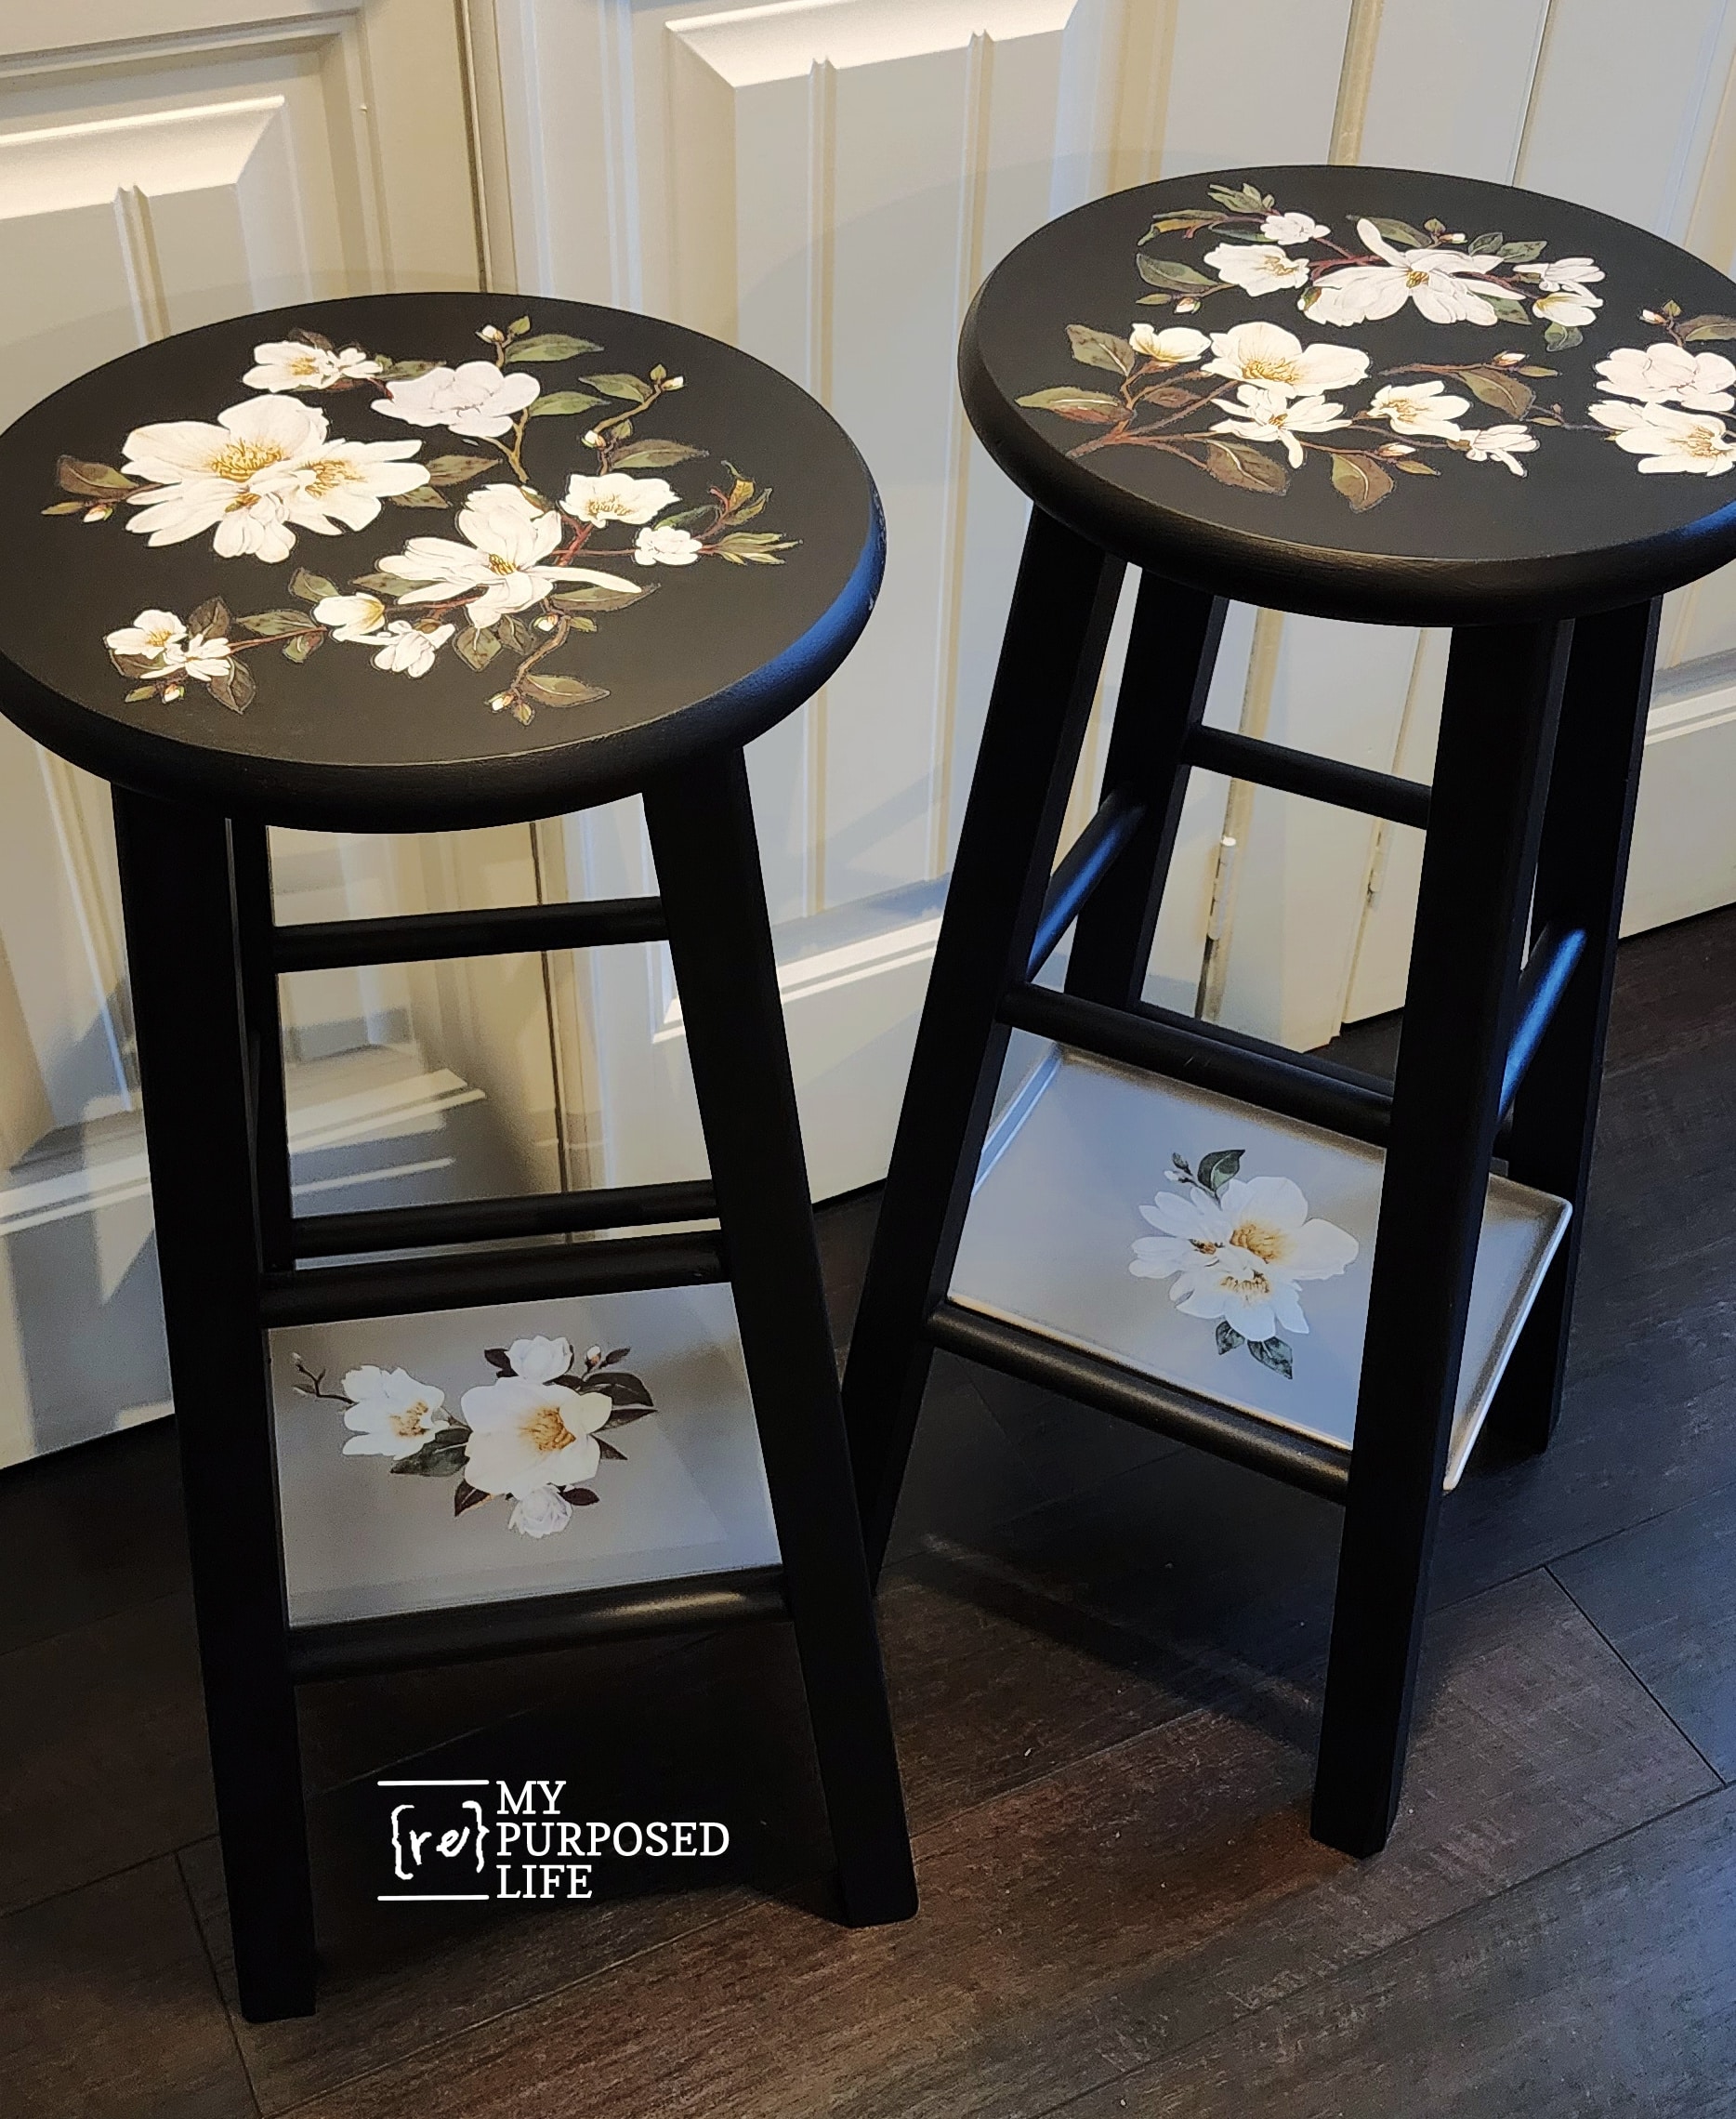
My experiment with using the brush and the roller was inconclusive. I did the second coat on both stools with a smaller paintbrush like the larger one shown in the paint materials image. Both of these coats were Iron Gate (black).
So, here are the bar stools with two light coats of black paint. You may think this is time-consuming, but it’s not because the secret is being quick coats.
Blue Top Coat (Polo)
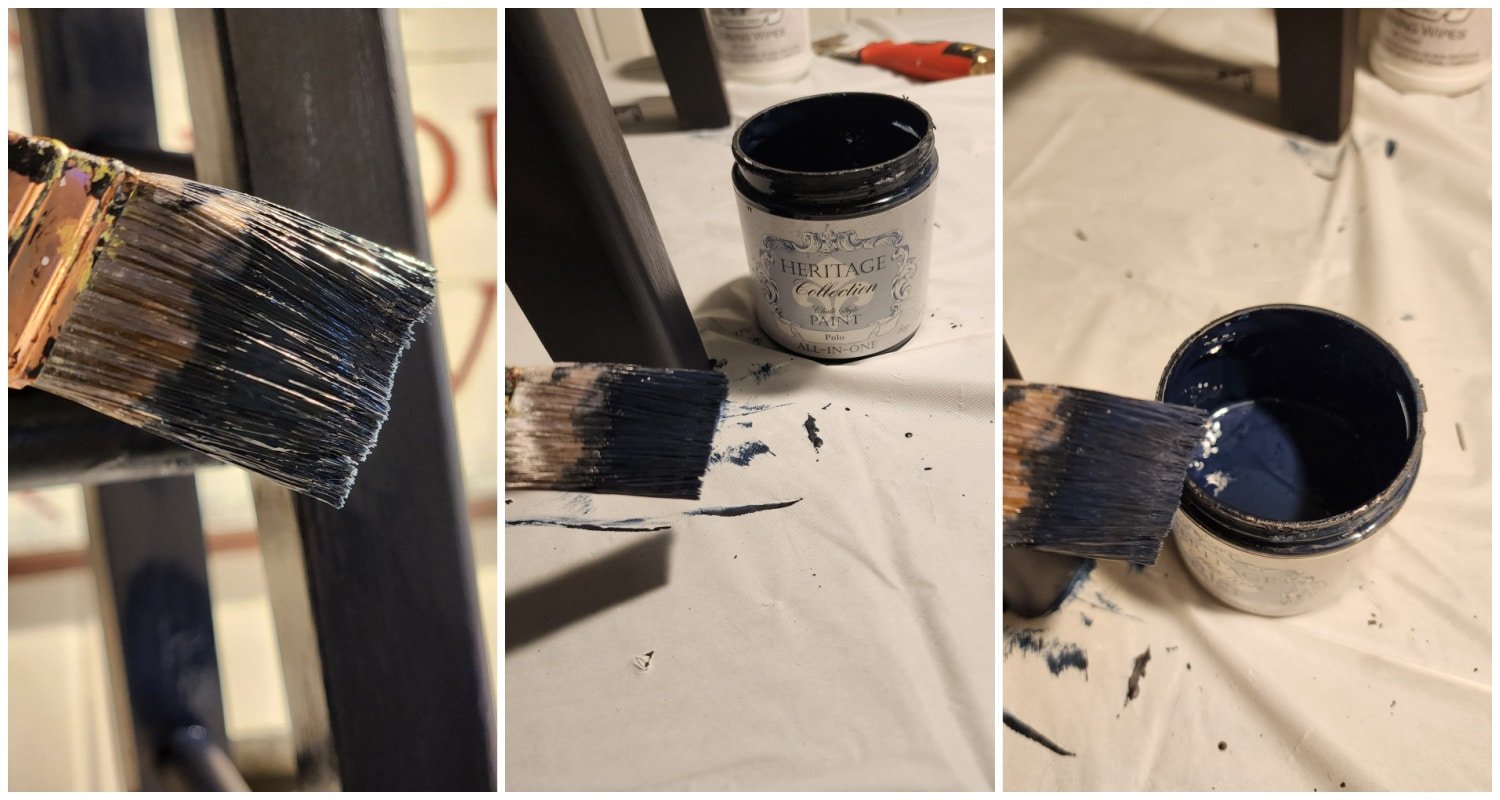
I switched to one of my favorite Purdy brushes for the top coat. I only had half a sample jar of the Polo. Remember, that’s why I did the two base coats of paint with black.
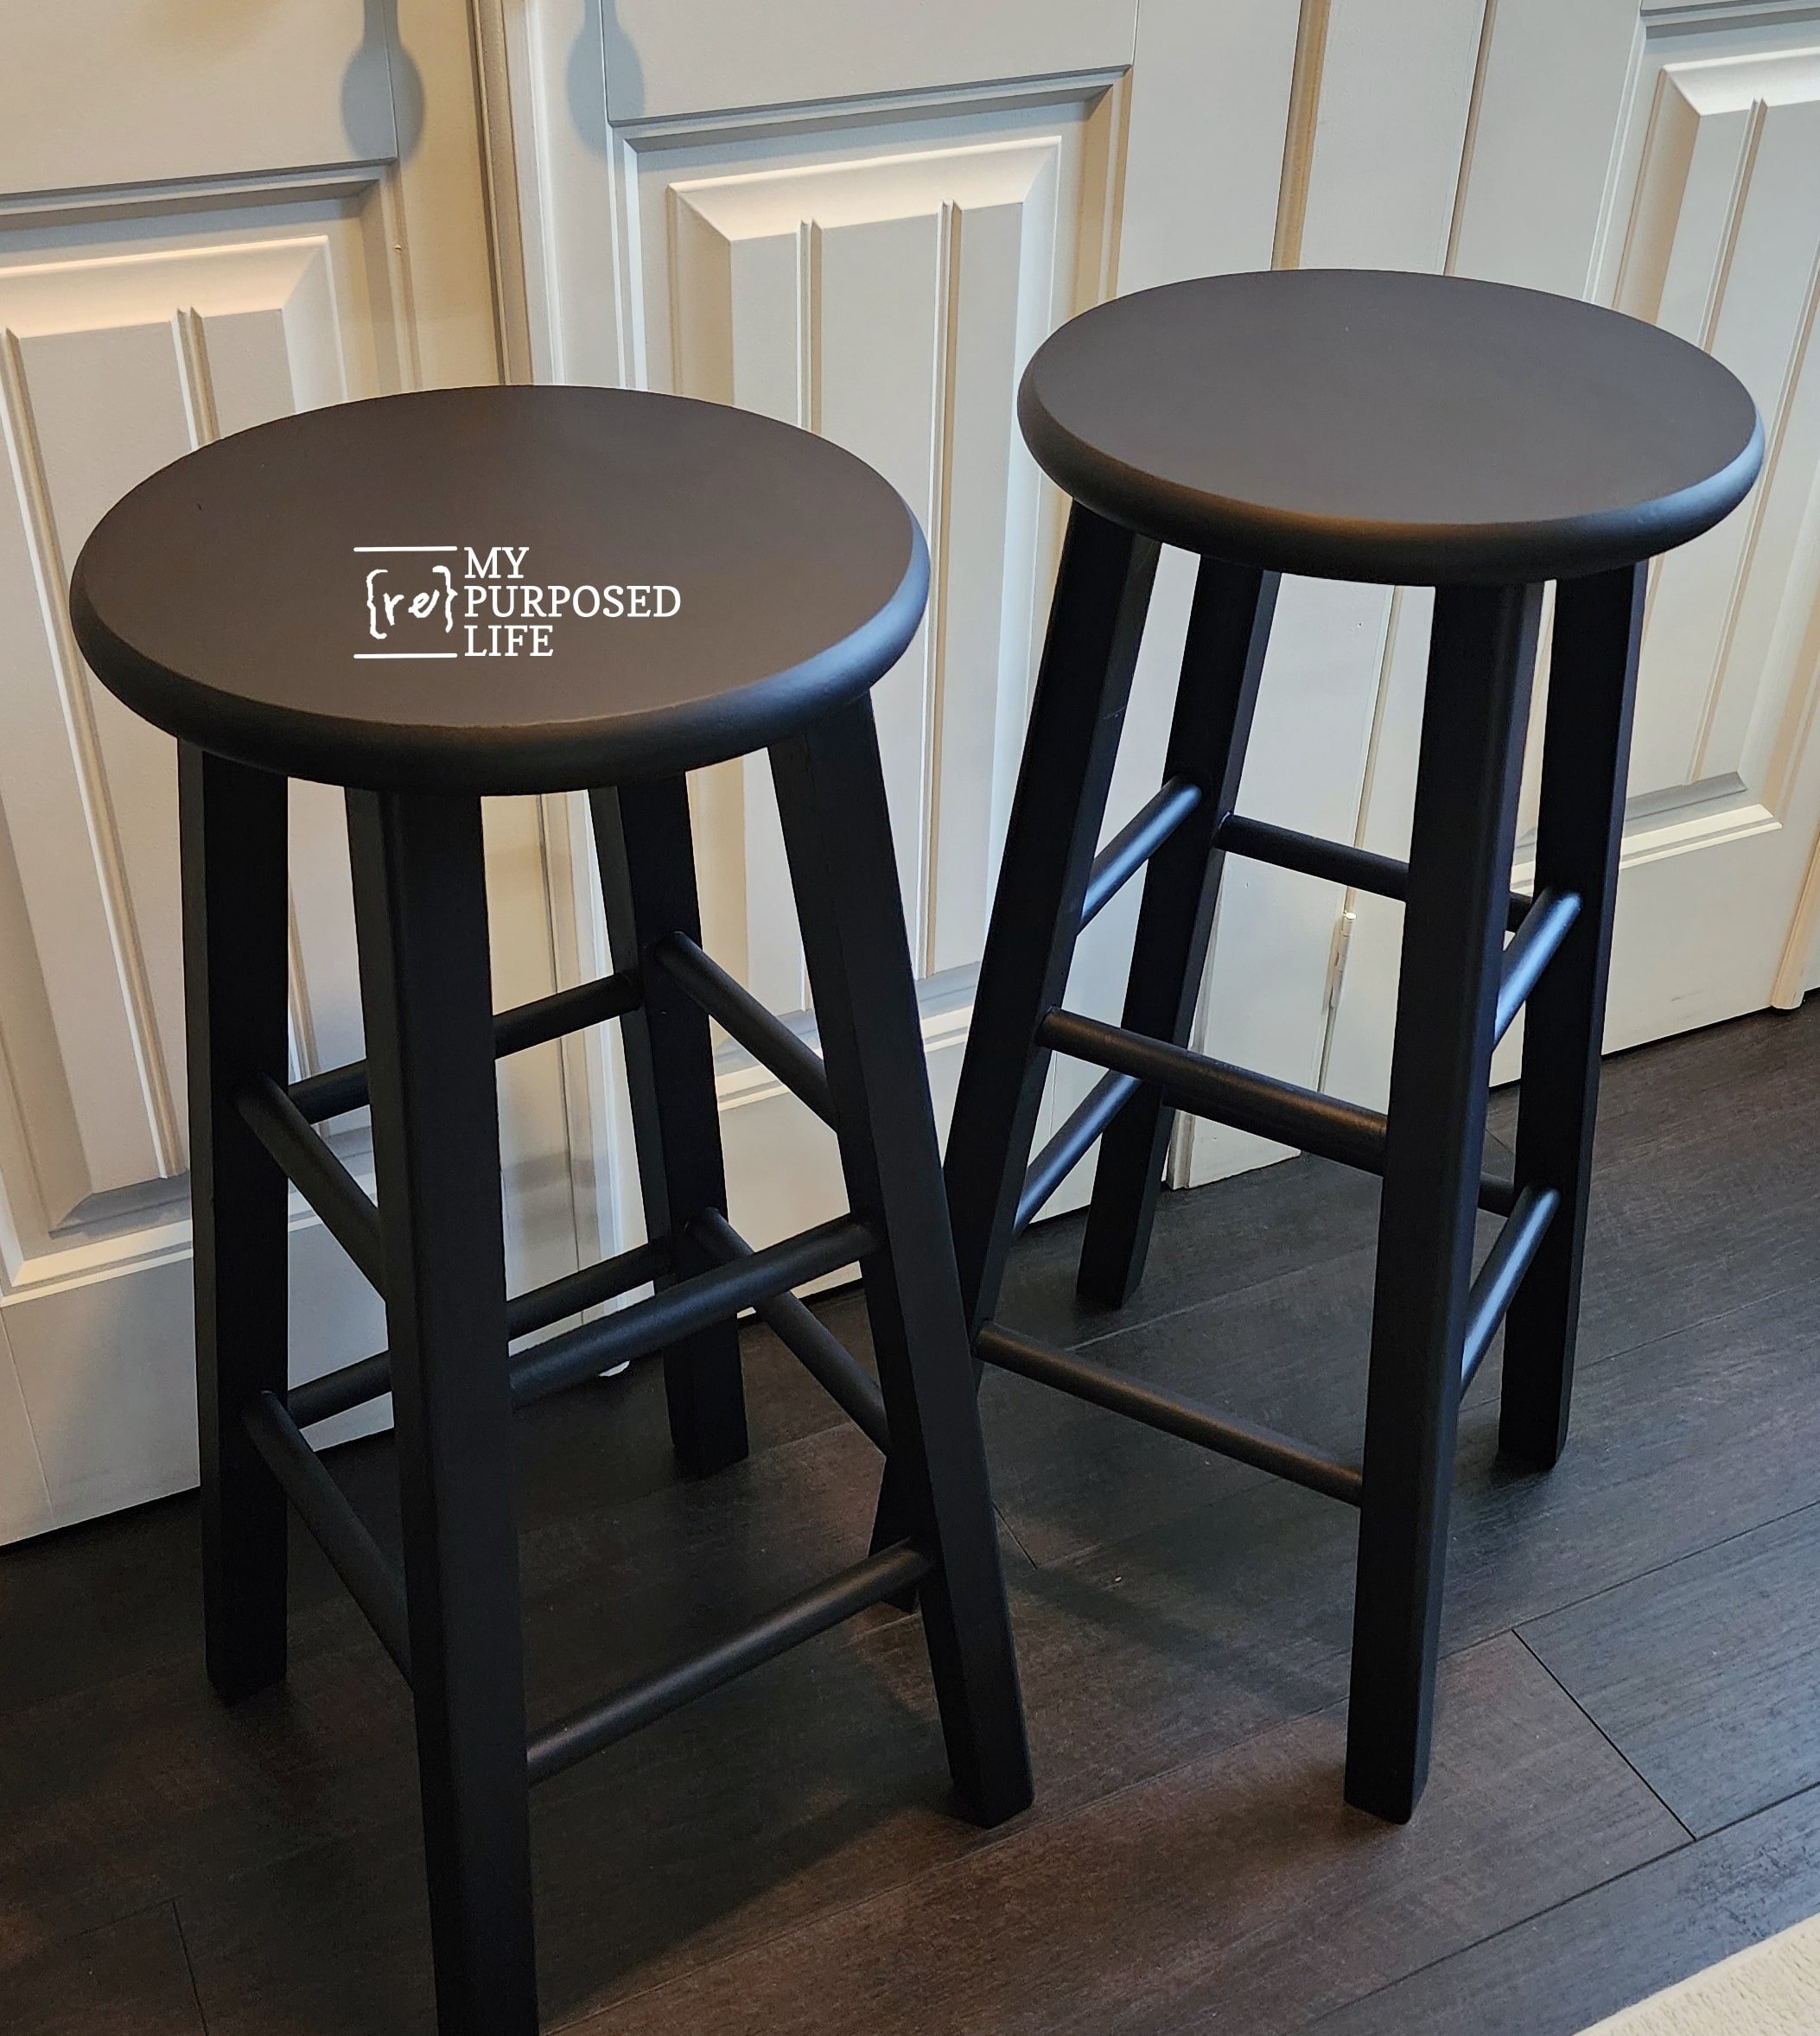
The color of the “bar stools into nightstands” is perfect, much darker than the color of the vintage headboard. I have purchased another quart of Polo to repaint the headboard.
How To Turn Bar Stools Into Nightstands
How do you turn bar stools into nightstands? You use the rungs on the bar stool to make a shelf. Some people have made shelves out of wood. I’ve also seen rope wrapped around the rungs to make shelves. My goal was to find a way that you could replicate this project without having to have DIY skills.
I went shopping at the Dollar Stores. At $$ Tree, I found a metal tray and picture frames. Then, I went to Dollar General and found two gray ceramic trays.
The tray wasn’t wide enough from side to side, and the picture frames were too wide. The gray ceramic trays fit perfectly.
Embellish Trays With Rub-On Transfer
I had these White Magnolia Transfers left over after using them on another set of wooden stools. Transferring these onto the ceramic trays was so easy. I did end up putting one extra piece of transfer on the tray on the right. Why the plastic spoon? I couldn’t find the wooden paddle that comes with the transfer. The spoon worked great.
Adding White Magnolia Rub-On Transfers to Bar Stools
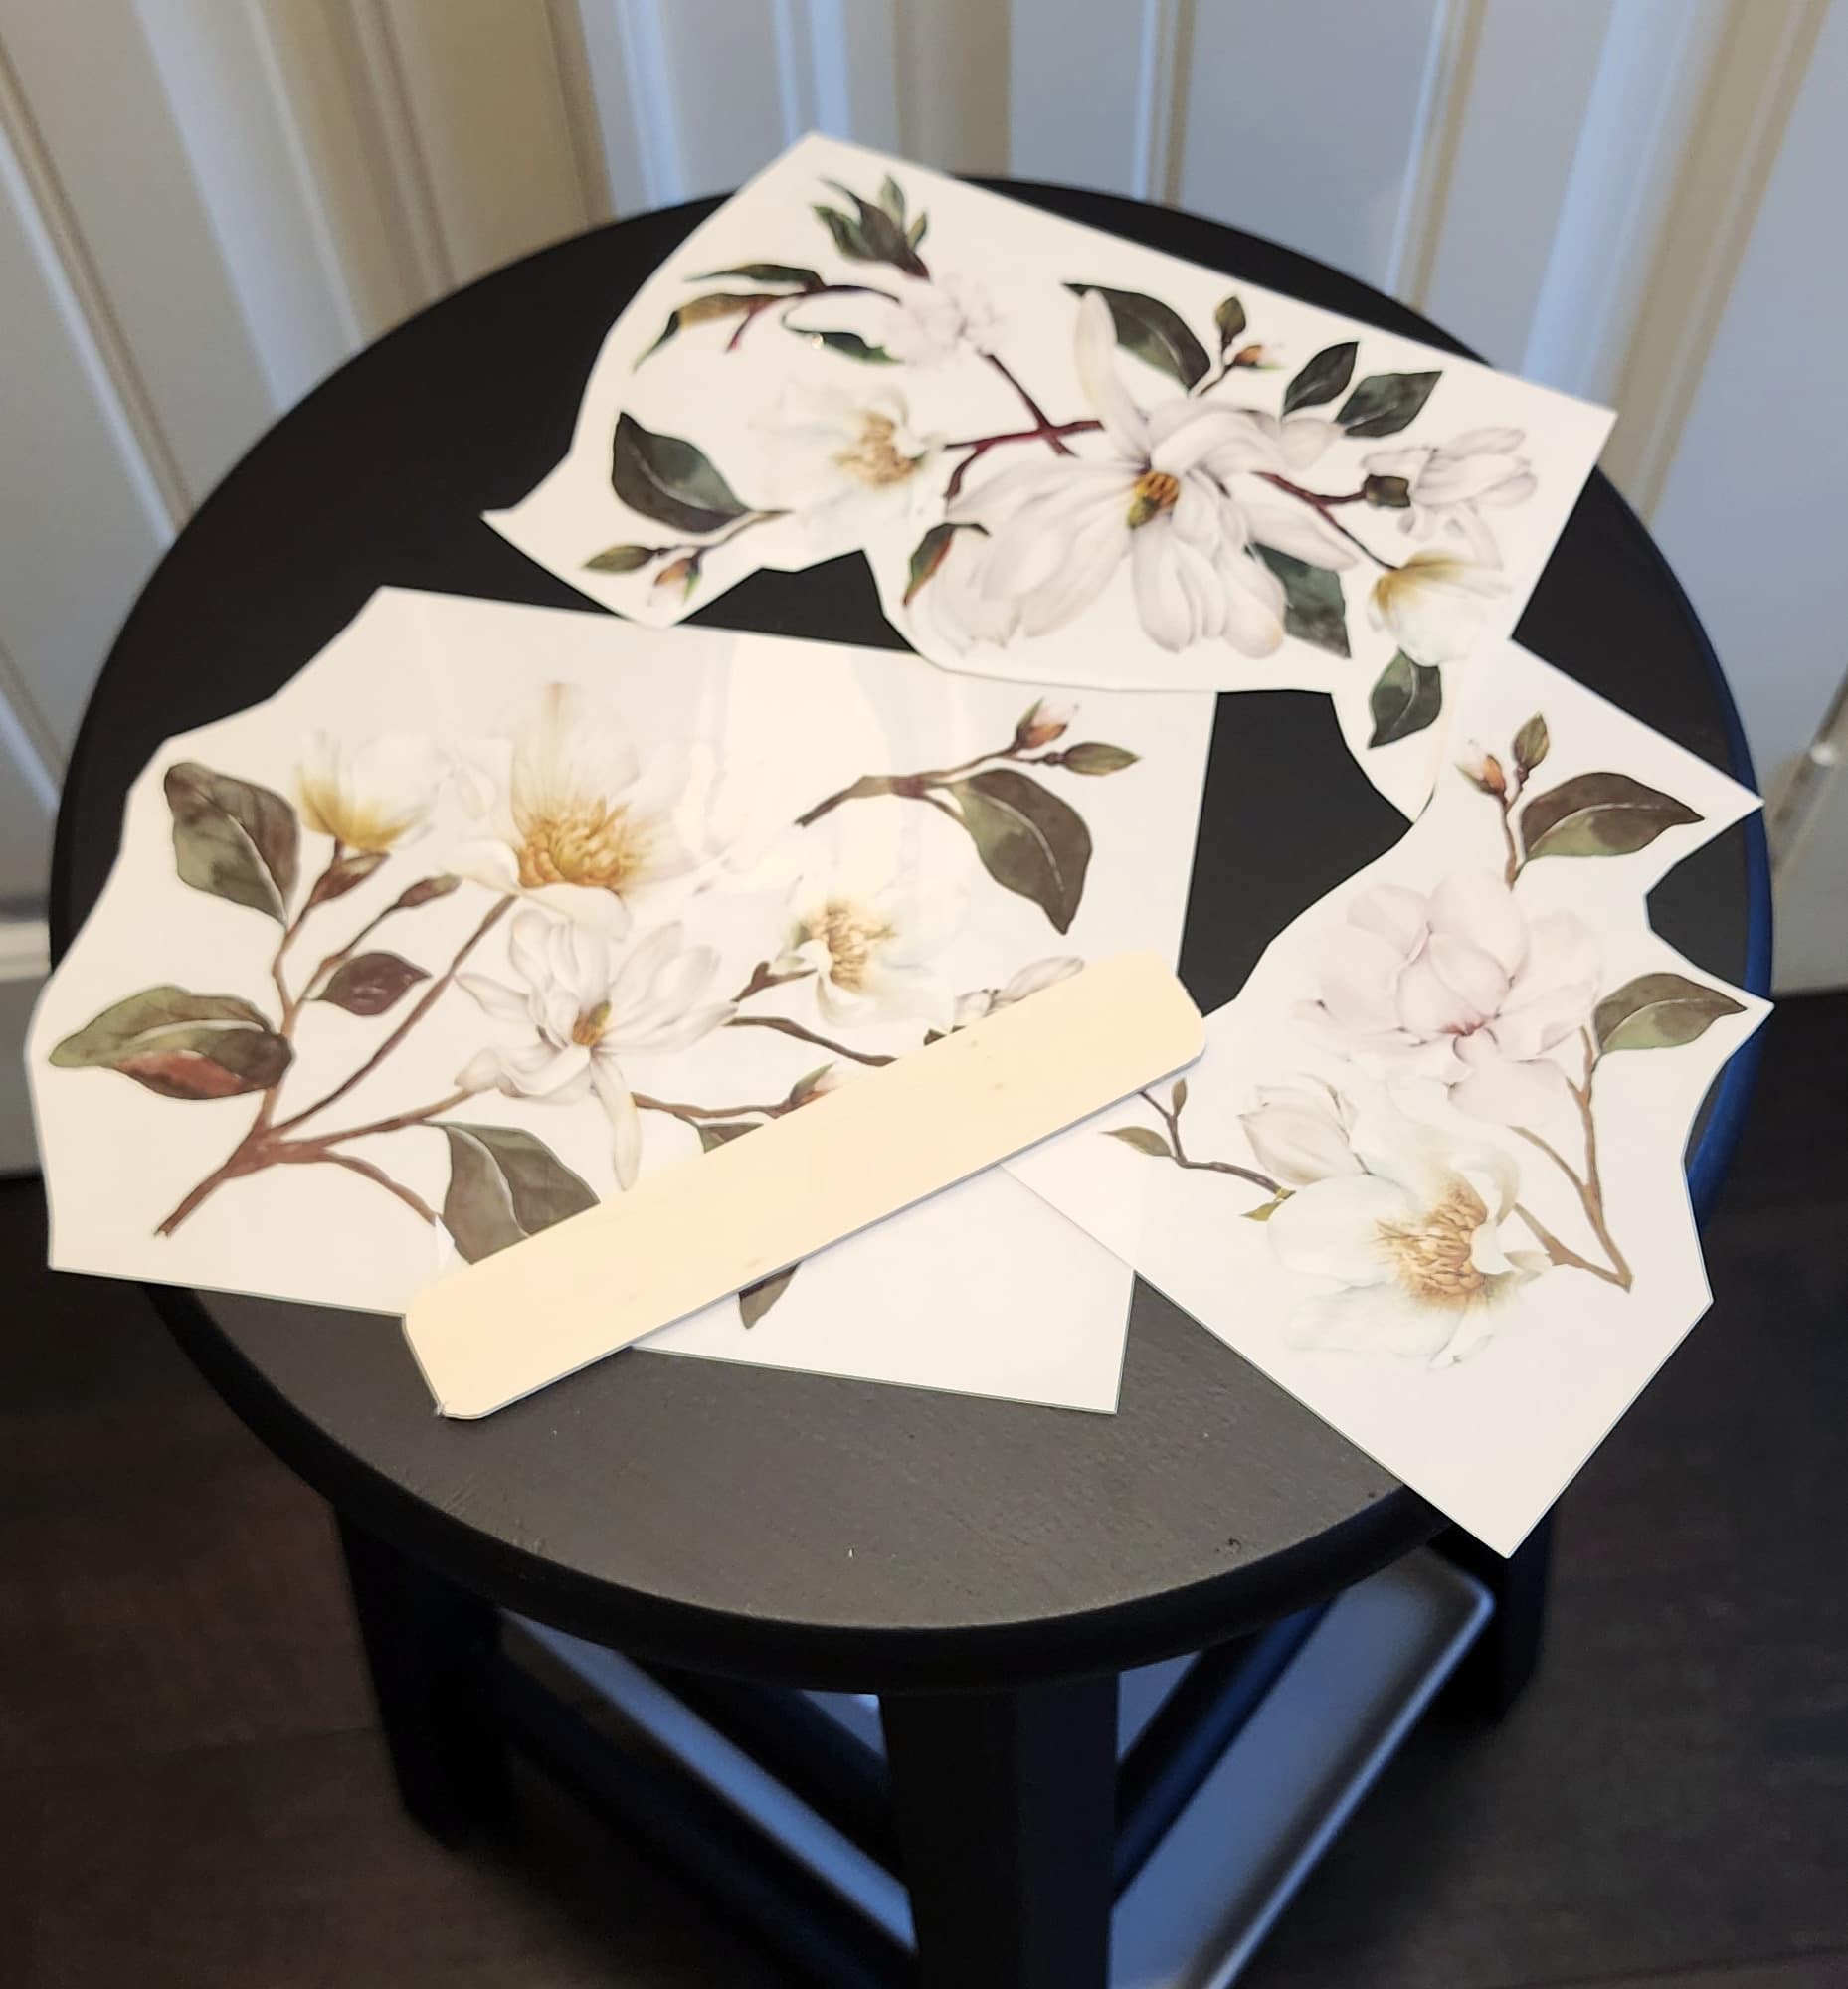
I ordered another set of furniture decals to have enough to do the stools. I cut the pieces apart for the stools and prepared to transfer them to the wooden stools.
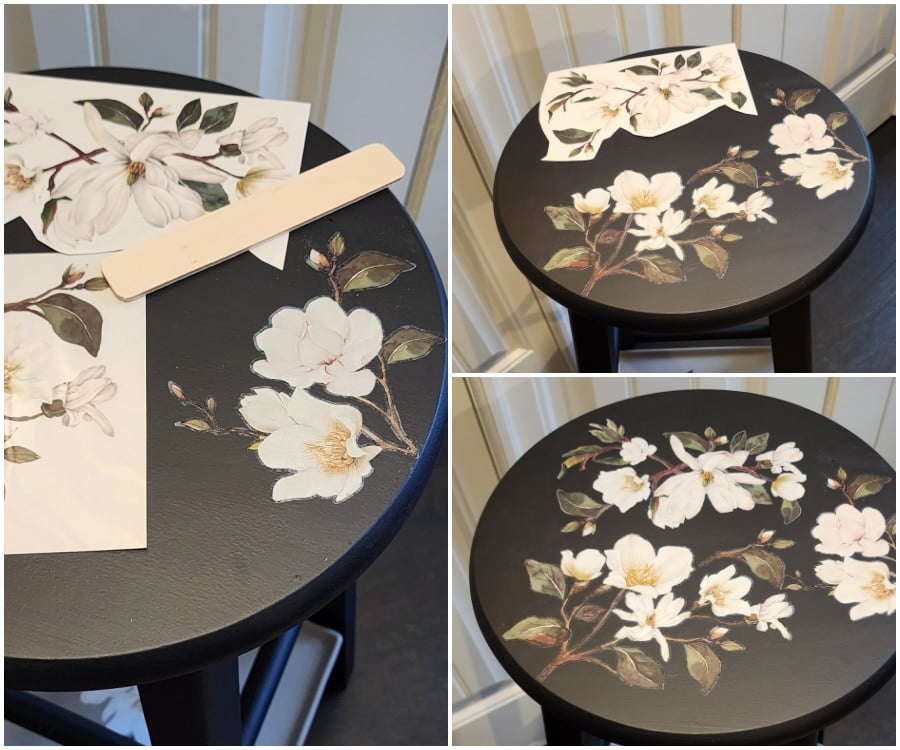
After arranging the pieces, I liked how they looked. I removed one at a time and applied it until they were all transferred to the bar stools into nightstands.
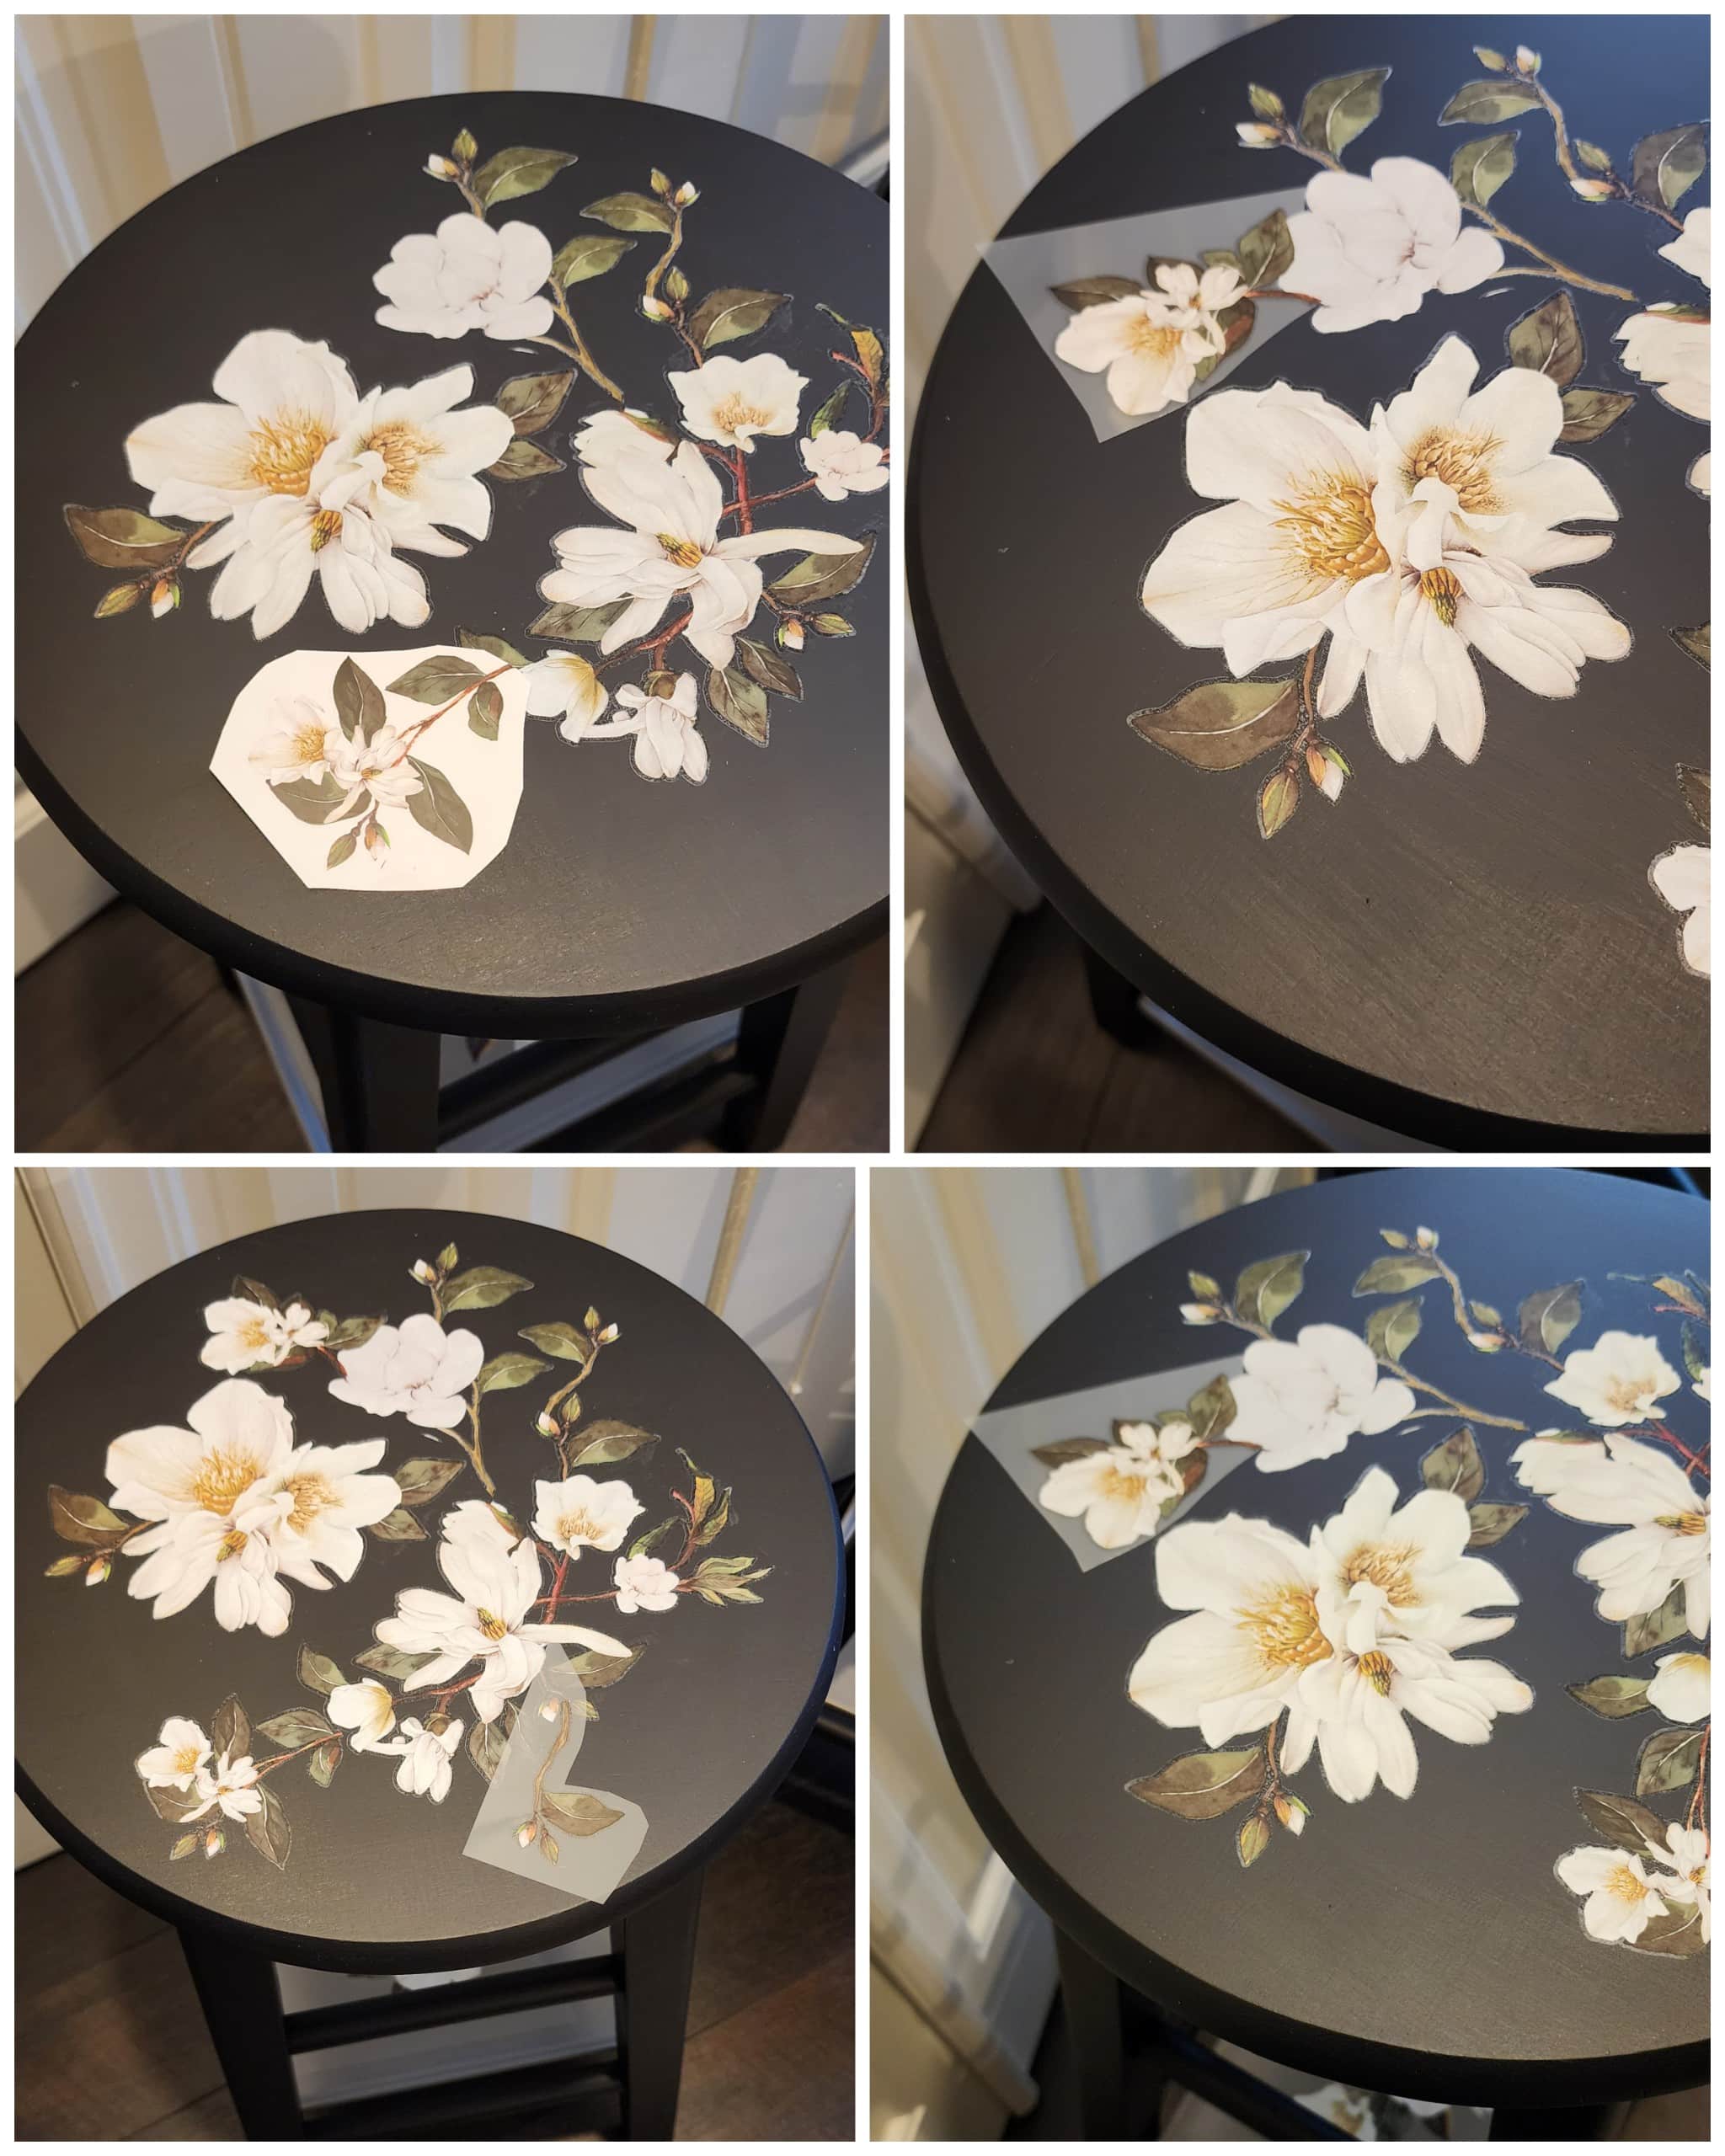
Small pieces were added to complete the look I wanted on the second bar stool.
I have a few thoughts to share with you about rub-on transfers. I prefer the brand Redesign by Prima. For this project, I did shop around recently on Amazon for other options. After reading the reviews, I decided to stick with Redesign. Apparently, the backing on some off-brands is very sticky and peels the paint off your project. While doing this project, I noticed that the transparent film on these rub-ons is not sticky at all. That said, once you place your piece on your project, the rub-on takes hold, and you can’t remove it. I want your projects to turn out so that you feel accomplished, not frustrated, when they’re complete.
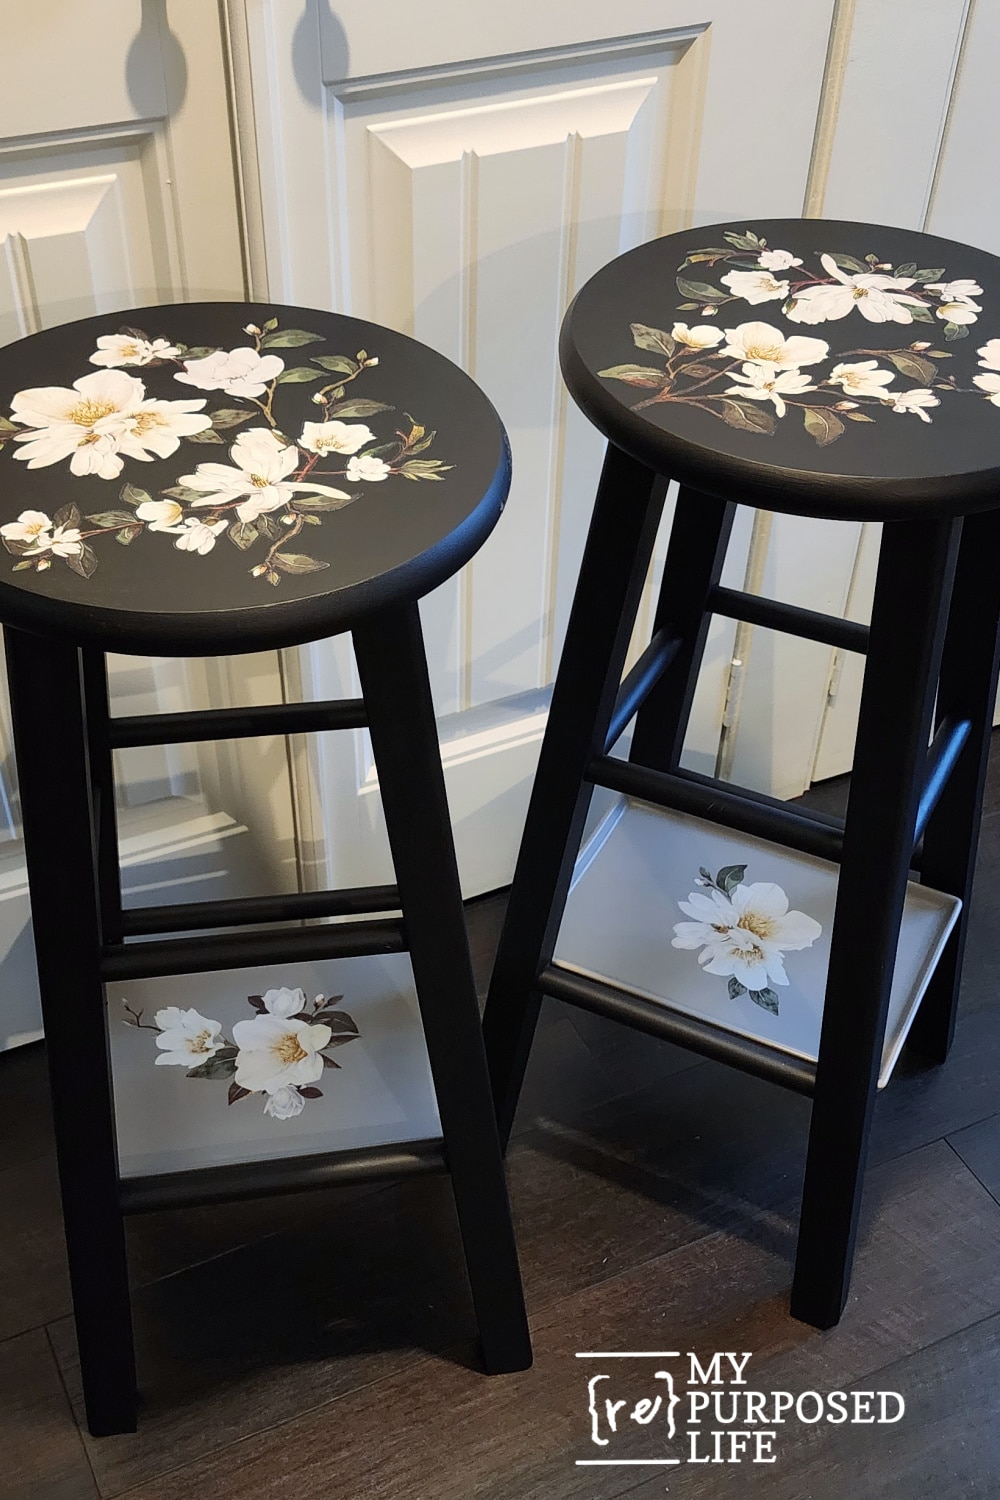
I know these barstools turned into nightstands will be perfect for the small space on either side of the bed in the master bedroom.
Now, let’s see what the rest of the team has been working on.
Thrift Store Makeovers
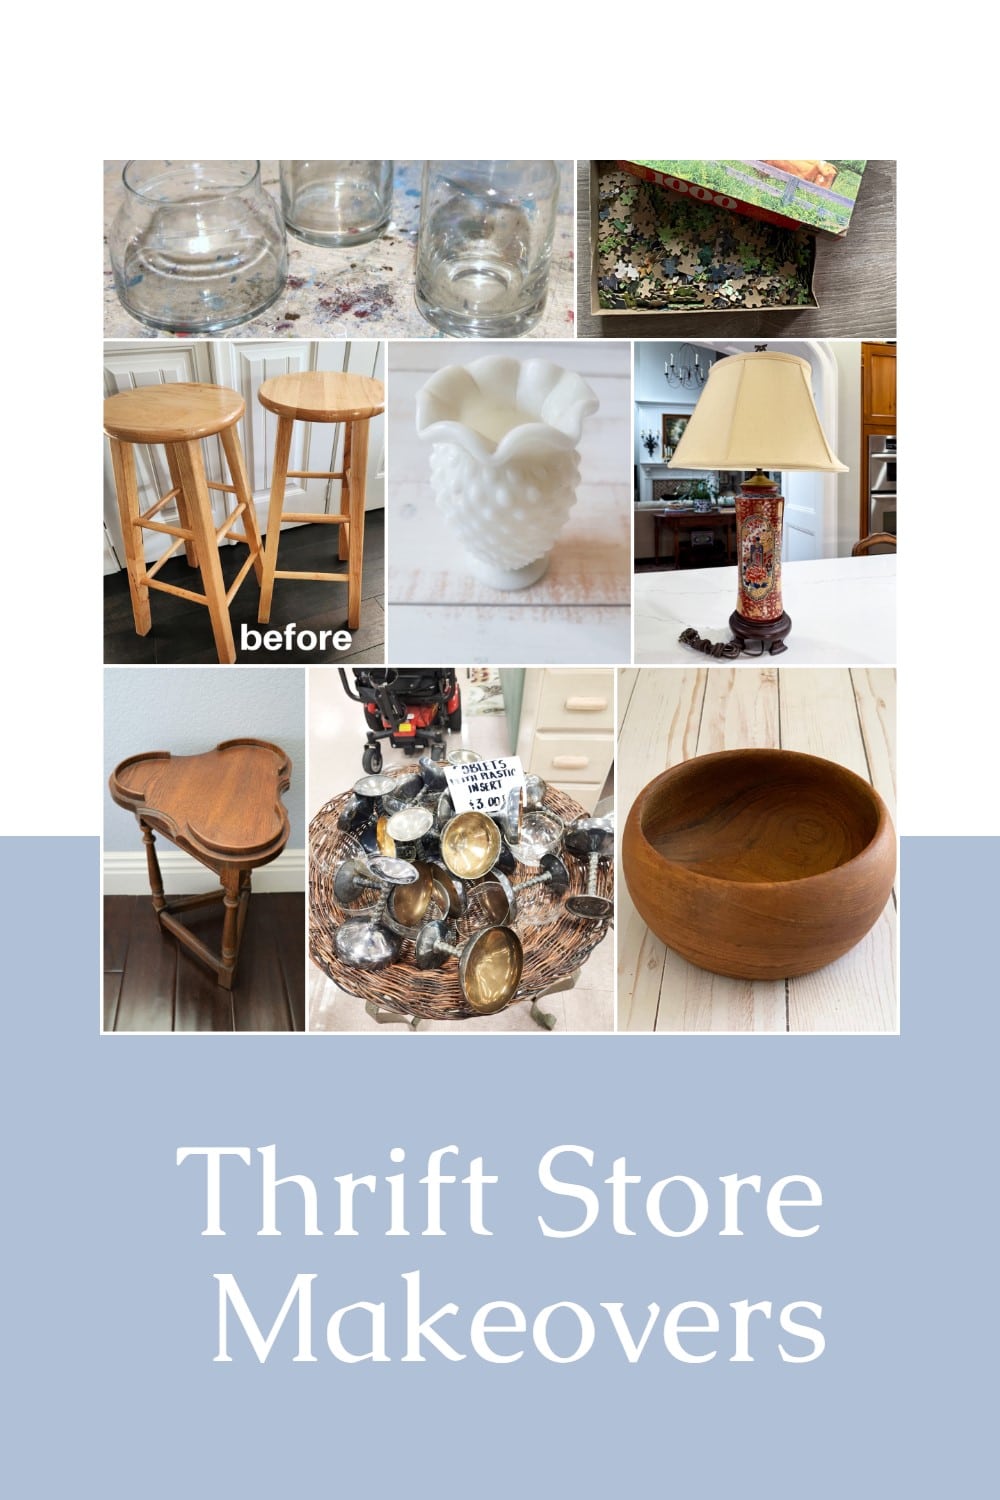
- Metallic Gold and Clear Vases
- Valentine Puzzle Heart Decor
- Bar Stools Into Nightstands (You are here, thank you)
- DIY Hobnail Milk Glass Candle
- Updating a Thrift Store Lamp
- DIY Floral Mosaic Side Table
- Winter Scenes in Silverplate
- Teak Wooden Bowl Makeover
Gail, This is such a clever idea. I have never tried transfers, but these are so pretty. I also need to try this brand of paint. I have a dresser to paint. I just love the final finish!
I love these transfers Christy. I first used rub-on transfers when I first started blogging in 2009. But then I didn’t use them for years. They’re really easy to do on small projects. Large furniture items are a little more tricky.
The paint? It’s all I’ve been using lately. I thought they were more blue than they actually are. It means I’ll have to repaint my headboard with a little Iron Gate to make it match a little better.
gail
This is a brilliant idea for your space, the trays on the bottom are perfect and I love the decals! OK, I need to check out those wipes asap!
Kristin,
I have used the liquid prep for several years. But the wipes are a game changer, especially for smaller projects. I brought the bar stool nightstands to my vacation home, and they are the perfect width and height!
gail
GORGEOUS. Now,I have an idea on how to paint mind.
Thank you Rebecca! They are now at my vacation home and working out perfectly.
gail
I can’t get over the finish on those stools! I guess I’ve missed out on on posts about that particular paint…will go back and look…also can’t wait to try the wipes! They turned out beautiful! Anxious to see the camper finished!
Susan,
I’m not sure my vacation home will ever be finished. The bar stool nightstands are now in place and they are perfect!
gail