Three Chair Bench
As an Amazon Associate, I earn from qualifying purchases.
Finally I’ve been able to complete this three chair bench. Sometimes life just gets in the way, doesn’t it?
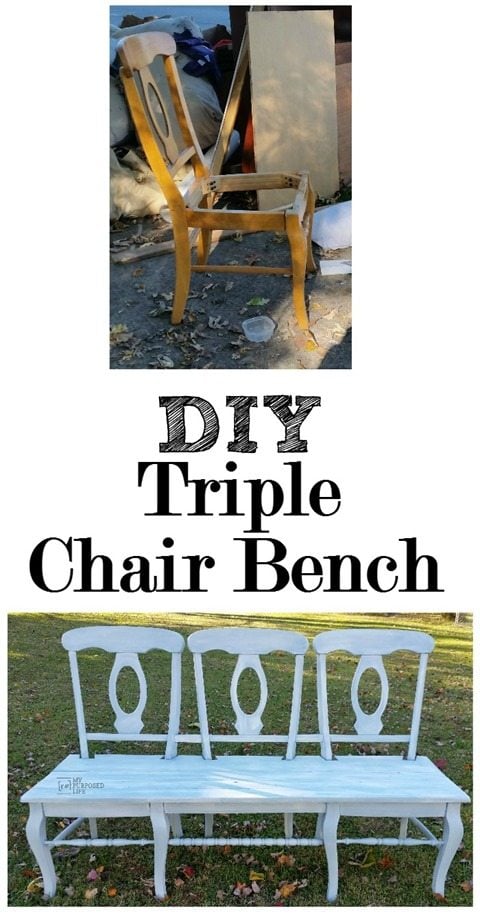
Today’s project was a challenge to say the least. However, if you do as I say and not as I do, this three chair bench project won’t be too difficult for you to replicate if you have the proper chairs.
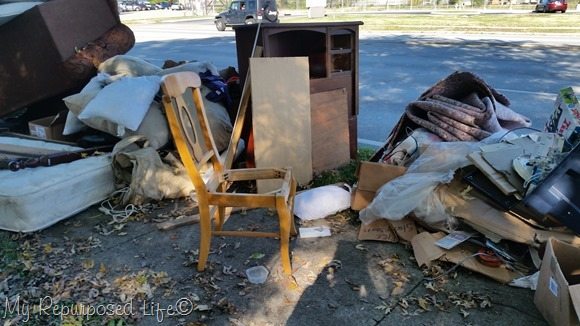 I picked up three free chairs from the side of the road.
Line up chairs to see your vision
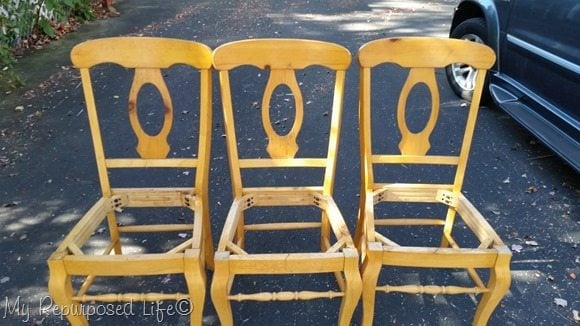
Here’s where I must tell you a few things.
- I have always wanted to make a triple chair bench like my friend Rose did years ago.
- I have made a faux triple chair bench, using two chairs and faking a third (middle) chair.
- These were not the BEST specimens for this project. The backs of these chairs were not flat, the side boards were at an angle. Therefore proving to be somewhat challenging.
- The curvy tops also gave me some issues.
- At one point I wanted to put this project in a burn pile, ANY burn pile.
So, if you see some chairs on the side of the road, take a quick minute to see if they will actually work for three chair bench.
*Amazon Affiliate Links in the Post*
Dismantle part of the middle chair
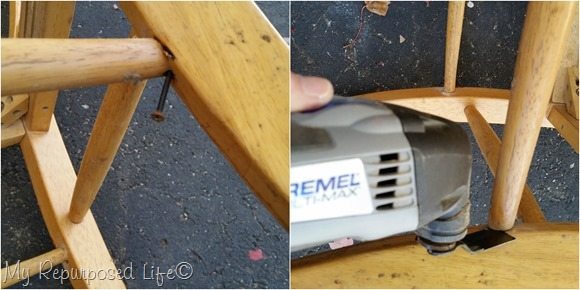 Almost any three chair bench you see online, will use only the back portion of the middle chair. I proceeded to remove the back from the seat. You may wonder why I didn’t use a rubber mallet? That’s because it would have left a hole to fill. I decided to use my Dremel Multi-Max to get a nice flush cut. Note the picture on the left showing that first you need to look for any screws.
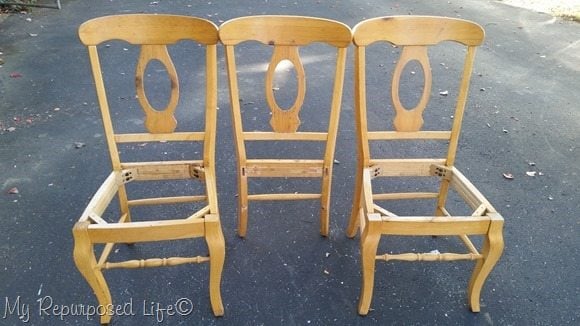 This gives a better look at how the chair will come together.
Test fit of large seat
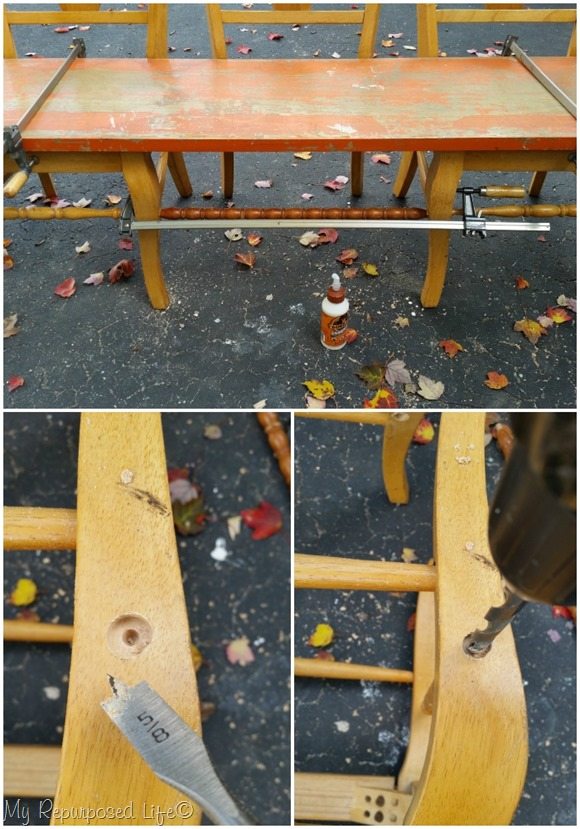 I used a crib spindle to bring the left and right sides together. Clamps were handy to make sure I left the right amount of room in between the left and right sides of the chair seats. A large board was used to help me keep the middle chair back in the right position.
It doesn’t always go as planned
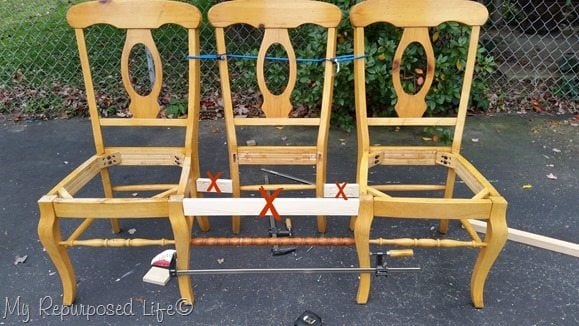 This is where it goes ALL WRONG! I grabbed some soft pine boards out of my scraps to join everything together.
Hard woods are best for construction
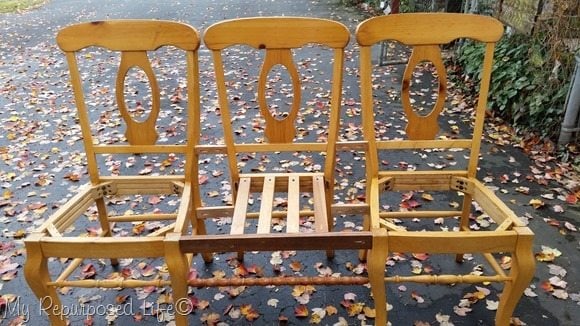 After taking a few days off, and enjoying some fun times in Madison at the Habitat ReStore Artisan workshop, I was back at it and making a lot of changes. I used some hardwoods for all of the joints—YES I totally dismantled the three chair bench and started over. It’s not what I wanted to do, but I knew it was not going to be sturdy enough without the hardwoods.
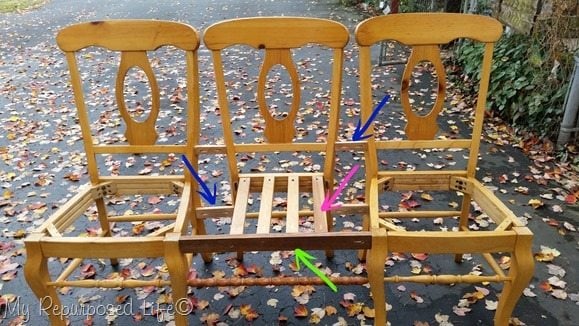
Pocket holes were used for all the joints. I added braces from chair to chair on the top rail and the bottom (BLUE arrows) I had to miter the ends on all of these because of the angles of the backs.
To help secure the middle chair back, I added four braces from the front to the back (PINK arrow)
To get a good sturdy connection, I used a good hardwood for the front skirt from the left to the right. (GREEN arrow)
Notice how all the backs have that stupid angle to them !!!
You must notch the boards to fit the chairs
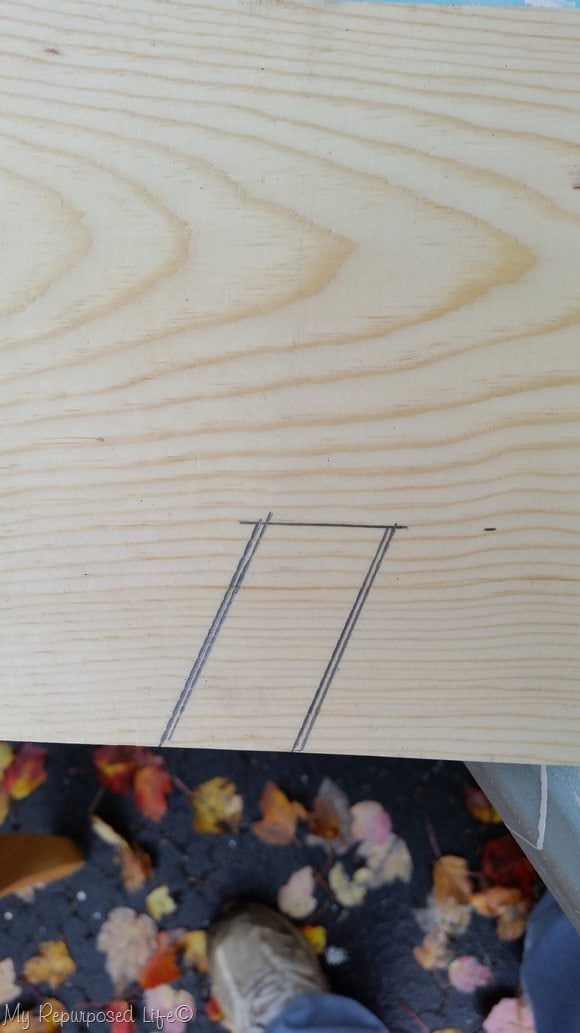 I had to notch the seat. I drew a pattern which seemed like it was the perfectly good way to go.
Three Chair Bench is coming along
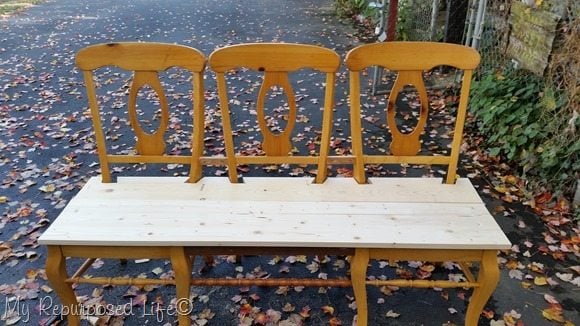 A wide 1×8 was used for the back board, and three 1×4’s for the other three boards to make up the complete seat. It’s not notched very well, but I was hoping after I painted it all, everything would be okay.
ps see the fence in the background? It is NO LONGER there! More to come on that in the next couple of weeks.
Time to paint-always start with underneath side
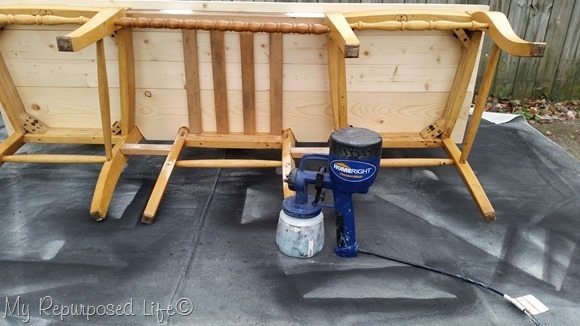 To make it easy on myself, I knew that using my Homeright Finish Max was the way to go to paint this monster.
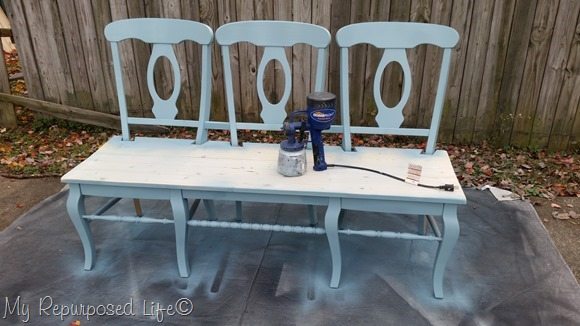 It’s difficult to tell in the picture, but it is a very pretty blue mis-tint paint from Lowe’s. Mindi-this one’s for you! I finally painted something blue!
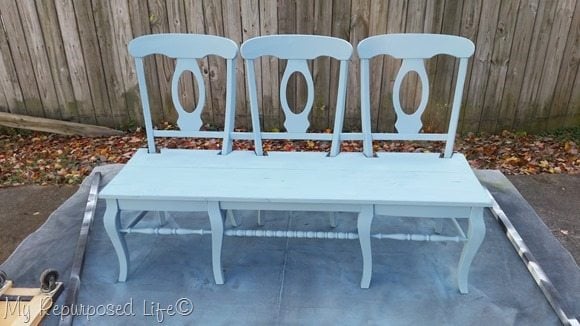 I ended up having to flip it back over to do the underneath side, and then upright again.
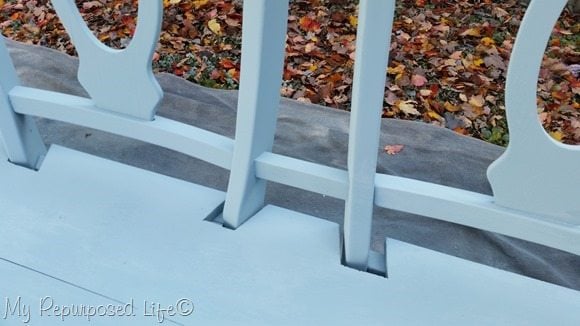
Here’s a close-up of the notched seat. Not real pretty, but it is what it is.
Before and after White wax
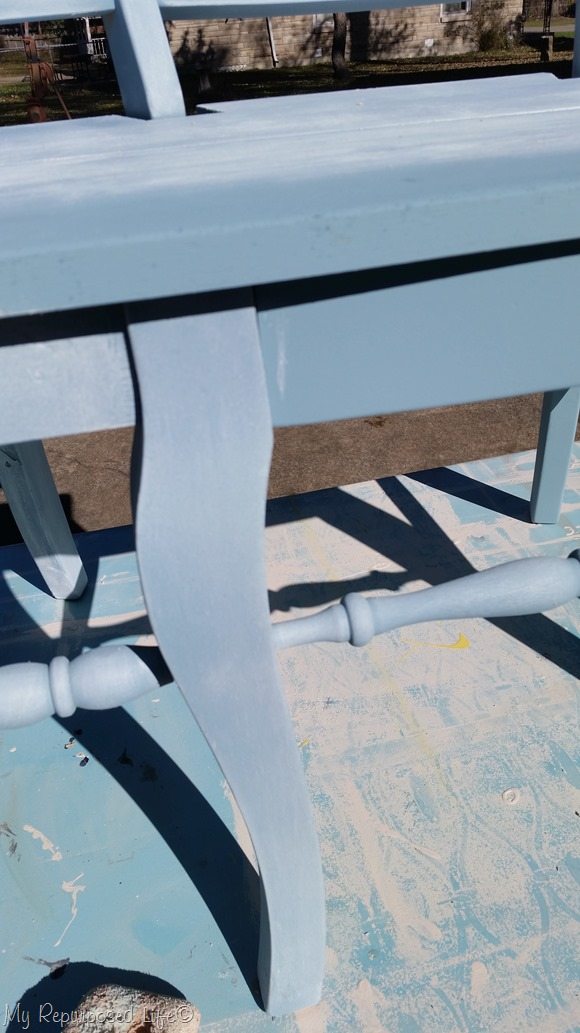 I decided to wax it with Heirloom Traditions White Lime Wax using a sponge! I’ve been taking a virtual paint class with Jennifer Allwood, and she uses these large carwash sponges from Walmart, and I LOVED using it instead of a brush.
You can see the leg has been waxed, and the skirt to the right has not been waxed.
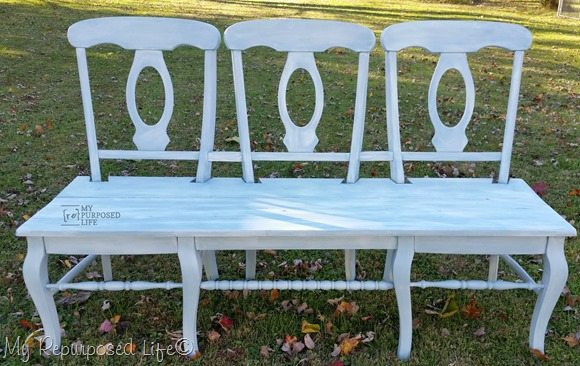 It’s been a crazy week, and I didn’t get good photos of it, but I was anxious to share it with you today. I’m hoping to get some better pictures this week.
Do you love chairs as much as I do? A friend just dropped of FOUR more chairs to me over the weekend…. wooohoo!!
gail
See one of my first, and an all-time favorite chair projects here


It doesn’tlook right. THe chairs would have been bettet upholstered and painted.
Pinned. I will do as you say, not as you do.
Yes!!! A Blue bench!! I LOVE the color Gail, and the wax really is beautiful, I may have to try the sponge effect!! This is an awesome tutorial Gail you are so good at taking us through your creative process, which is why you truly are a great teacher! I am sorry it was such a frustrating project, man I hate those kind, I admire you for sticking to it! I like Julie’s idea to use a paper template, for the notching, I have done that before, it helps but it is still really hard to get them perfect. I think you are amazing and did a super great job!!
i think you did a very well done job….good for you…
Love the color & love the waxing. I think it needs some softness or roundness on the seat part. Other than that, it is beautiful!
I don’t like it, but I don’t know why. Maybe an upholstered padded bench? Looks awkward instead of awesome like they usually do. Sorry to say…..I usually love everything you do!
I hink adding some cushions would make a world of difference
Another honest opinion? I’m not feeling this one. I agree that the seat needs to be rounded, and the spindle between the center chair just doesn’t look right. I like the headboard benches better. Just my honest opinion. :/
I like the chair but I would have put arms on it as well. A couple of pillows and a soft blanket would have finished the look.
I love the color! Way to stick to it until it was done! To me it just looks like all seat. Arms would help as would rounded edges on the seat. You said you were going to take more pictures, when you do, stage it with some soft pieces, a throw, some pillows, maybe hange a small wreath off the back and you’ll see a big difference. I admire you putting it out there and asking for feedback. It takes a strong person to do it when you feel it isn’t exactly right. Unfortunately they don’t all turn out as amazing projects!! Can’t wait to see your next one!!
You did a great job on this bench, Gail. The photos are so well done and really help show what your steps were. I also LOVE the blue! As for the notches, they are fine, you worry too much! What I do when I have an odd shape to cut around or match up to (I’ve done this when putting down flooring as well), is I use scrap cardboard (or paper) and tape pieces together to get the basic size. Then I make a template, cutting the cardboard around all the obstructions and check it before I cut any wood. It takes a bit extra time but usually ends up with accurate cuts.
Good to know Julie. Definitely should have used paper, duh! I have a roll of paper perfect for that on my work bench. Hopefully I’ll remember next time.
thanks!
gail
WOW! I am blown away at what you came up with out of those chairs. This is an awesome project!
You may not like it because you might think it needs something? Three cushions? One long one? I applaud your stick-to-itivness! I love the color! Those side rails are something you wouldn’t have seen on the side of the road… love when things are re-purposed instead of thrown out!
I am going to be honest, I am not loving the bench! I know where you were at with your frustration with this project. I have been there too. I think the seat needs to be more curvy to compliment the lines of the chairs. You could cover the squared off cuts on the seat for the backs with some molding that would compliment the curves. The corners of the seat need to be rounded not straight. The seat just looks like it doesn’t belong. I do love the color. I do thank you for sharing your project as I have three chairs that I thought I was going to make a bench out of and have been putting it off because I just couldn’t figure out how to make them look right together since like yours they have curves and are angled. The vision just wasn’t there and now I have a visual! Might have to create something else with them!
I think the chair/bench came out great I really want to try this myself but between my honey do list and project list it’s going to be a while but definitely on the list. I like you find that if I get frustrated with a job-project if I walk away from it even for just a few minutes it clears my thought process and gets the creative juices flowing and then I can fix or solve the problem. Thank you for another great idea and showing the final results. Looking forward to seeing more.
Gail, this one looks great! I totally would have found that burn pile…but not you. You hung in there and solved the problem with flair! I love the proportions of the 3 chair bench – it makes for a very impressive (and useful) result. White Lime Wax is so yummy, too. Nice choice for this soft blue piece.
I love the color too! I think the seat part is too bulky and square for the design of the chairs. Could you round off the edges of the seat? I think that would blend better than the sharp angular edges. I love the idea too and would love to have the room in my small house to do something like this.