Broyhill Coffee Table | Roadside Rescue
As an Amazon Associate, I earn from qualifying purchases.

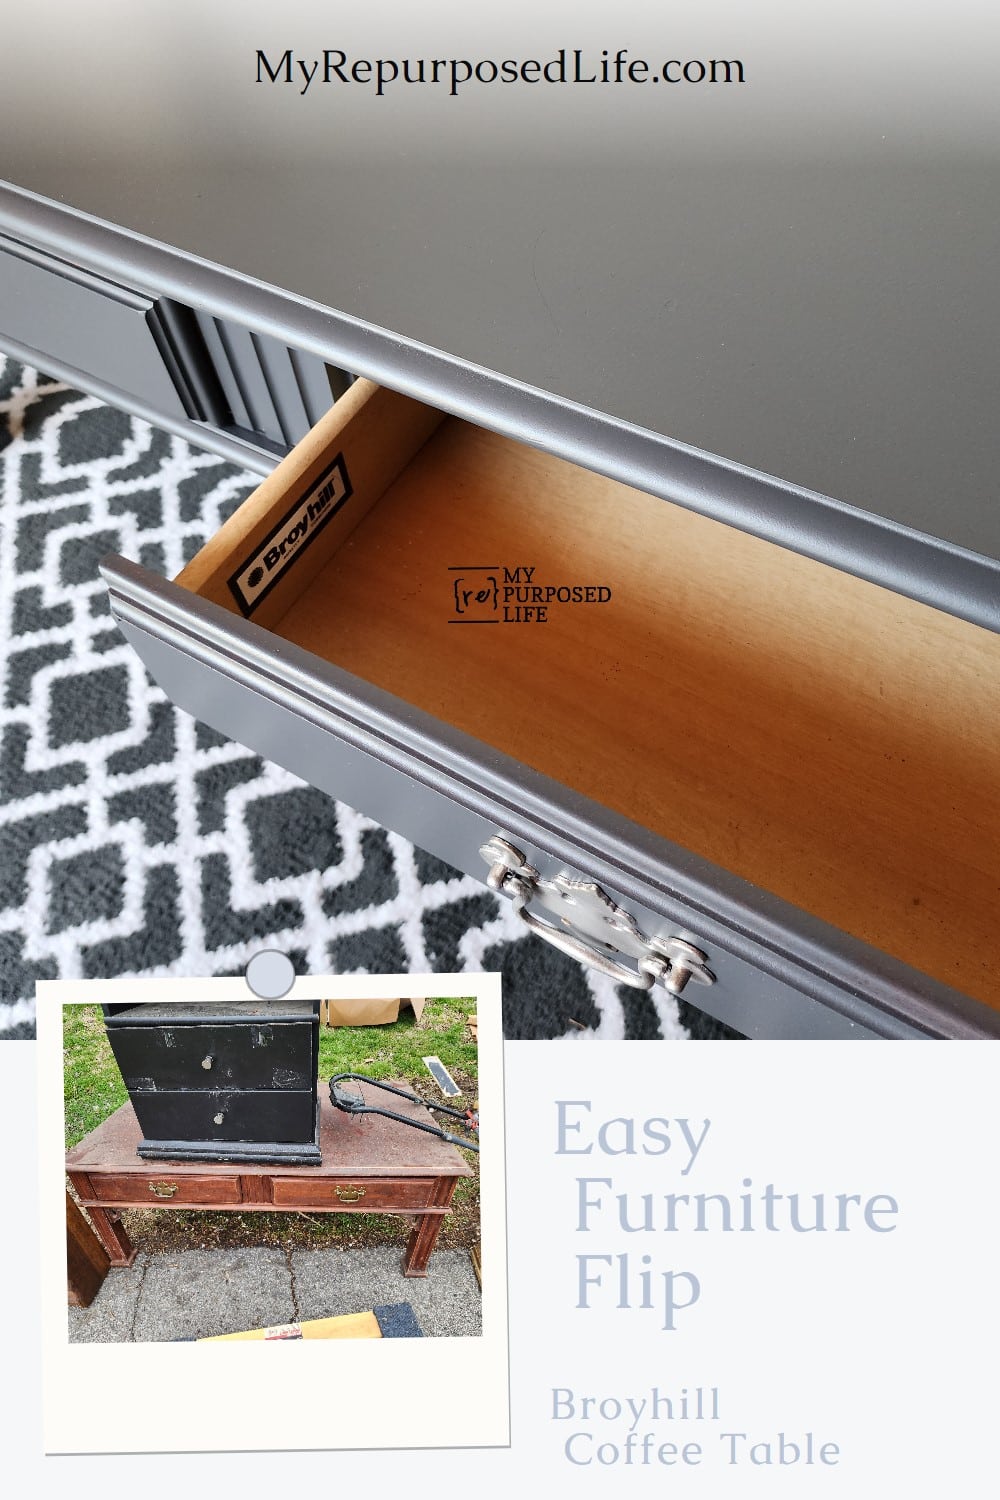
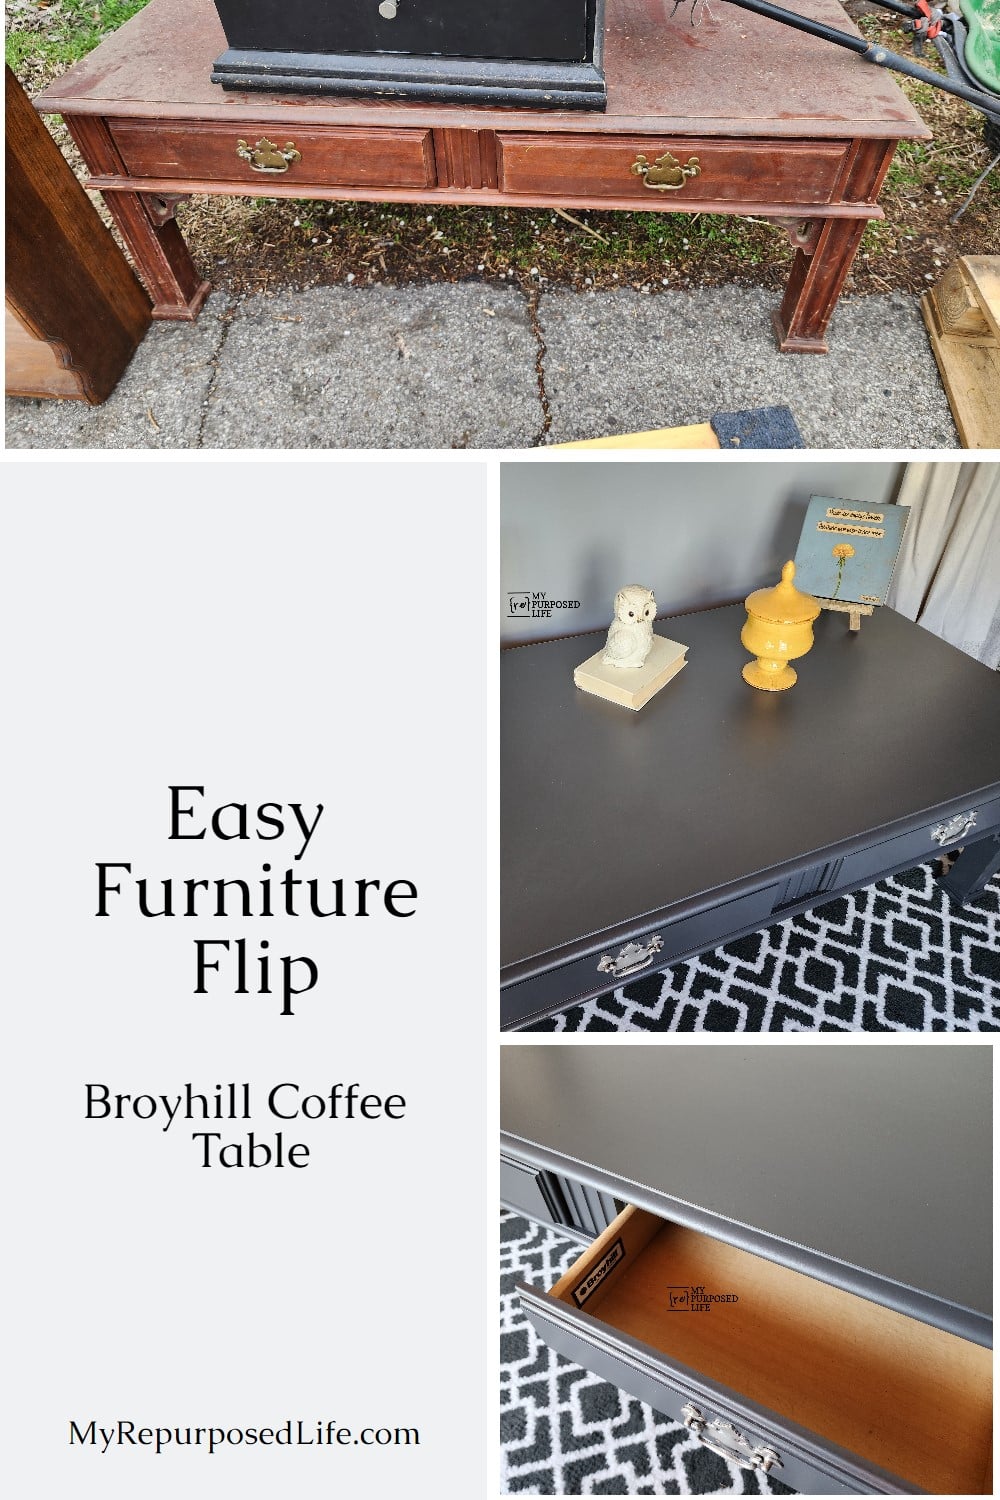
Broyhill Coffee Table Makeover
Finding furniture on the curb is always a gamble, but sometimes it pays off in a big way. This Broyhill coffee table was headed for the landfill when I spotted it during a roadside rescue. With solid lines and great bones, it was exactly the kind of forgotten piece I love bringing back to life. A little cleanup, fresh paint, and some simple updates turned this throwaway table into a practical centerpiece once again.
I’m sharing this Broyhill Coffee Table makeover I found on the side of the road as my Furniture Fixer Upper Project. Seriously, you can’t beat FREE furniture.
Free Curb Finds

I picked several items from a former neighbor’s trash. First, this extra-large Broyhill coffee table, a whatnot shelf (barely visible on the left), four table legs, and three homemade pallets.

So that you know, I won’t drag just any ole thing home. I did pass on this chest of drawers, as I felt it wasn’t well-made. But! Looking at this photo, I wonder why I didn’t grab the knobs! I should have.

Dragging the Furniture Home

Because this find was only a few houses away, I used a large furniture dolly to haul it home. Can you spot the four random legs? Who knows what they will become?
The Furniture Fixer Upper Tour is a monthly furniture makeover series featuring a small team of furniture-painting friends. Each month, we all start with a tired or thrifted piece and share how we clean it up, repair it, and give it a fresh new finish. After you check out this project, be sure to visit the links at the bottom of the post to see what the rest of the Furniture Fixer Upper team did with their finds.
Clean Furniture

This Broyhill coffee table didn’t even make it to storage. I got right to work on it as soon as I dragged it home. First, I used my dust brush to wipe away spider eggs and grossness!

The coffee table needs some love, but I think it has good bones. Dated? Yes, but very sturdy.

As per usual, I started with Heirloom Traditions Paint Surface Prep. Brush it on and scrub it off. It cleans and deglosses, preparing for an easy paint makeover.

Wow! What a difference already!

Did I mention that using the surface prep means I don’t have to sand? Yep, after cleaning, it’s ready for paint.

It’s too bad it has so many dings. If it didn’t, this would be the most effortless furniture flip ever!
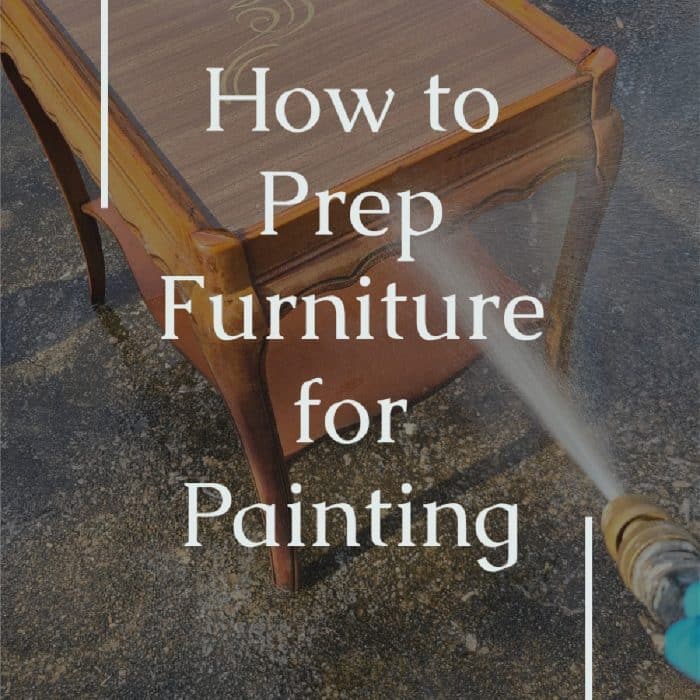
If your furniture is grimy or has excessive amounts of nicotine, be sure to check out the article: How to Prep Furniture for Painting
How to Paint an Easy Furniture Flip

I used my Finish Max and HTP All-in-One Paint (Weathervane) for this furniture flip. I rested the coffee table on my work table and started with the underside.
Visit the My Repurposed Life Amazon Store to shop my favorite items.

When you’re spraying paint, whether it’s spray paint or a paint sprayer, it’s best to paint the top surface horizontally. The color goes on so much better, spraying directly onto the surface, than letting the particles sort of “fall” onto the surface. I hope that makes sense.

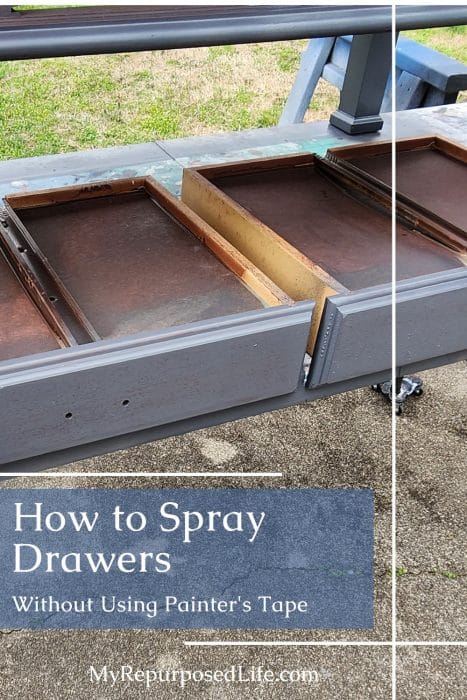
Okay, here’s my best tip for painting drawers. Do you see how they are resting upside down on the work table? Using the Finish Max with the drawers upside down eliminates the need to tape anything off. Of course, you could also leave them in their designated places, but this works best for me.

Notice how little overspray there is on the table. With the drawers upside down, there is no overspray inside. I’ve been painting drawers successfully for years using this method.

Whoa! Check out the Finish Max lying on its side. Do not do this! I don’t even remember it happening.
Moving Heavy Furniture Without Help

I haven’t mentioned yet how hefty this Broyhill coffee table is! There is no way I can move it by myself. However, I could lift one side onto the table and then shove it in place. But! How do I move it? Those handy-dandy tri-wheel furniture dollies. In between coats, when I needed to move the table into the garage, I wheeled it to where I wanted it. But these dollies also move furniture with or without legs/feet.
Metallic Spray Paint for Vintage Hardware

After cleaning the hardware, I roughed it up slightly with some fine-grit sandpaper. Then I wiped it down again, and it was ready for spray paint.

The dated hardware looks better with a fresh coat of paint.
Finishing Touches Make the Difference
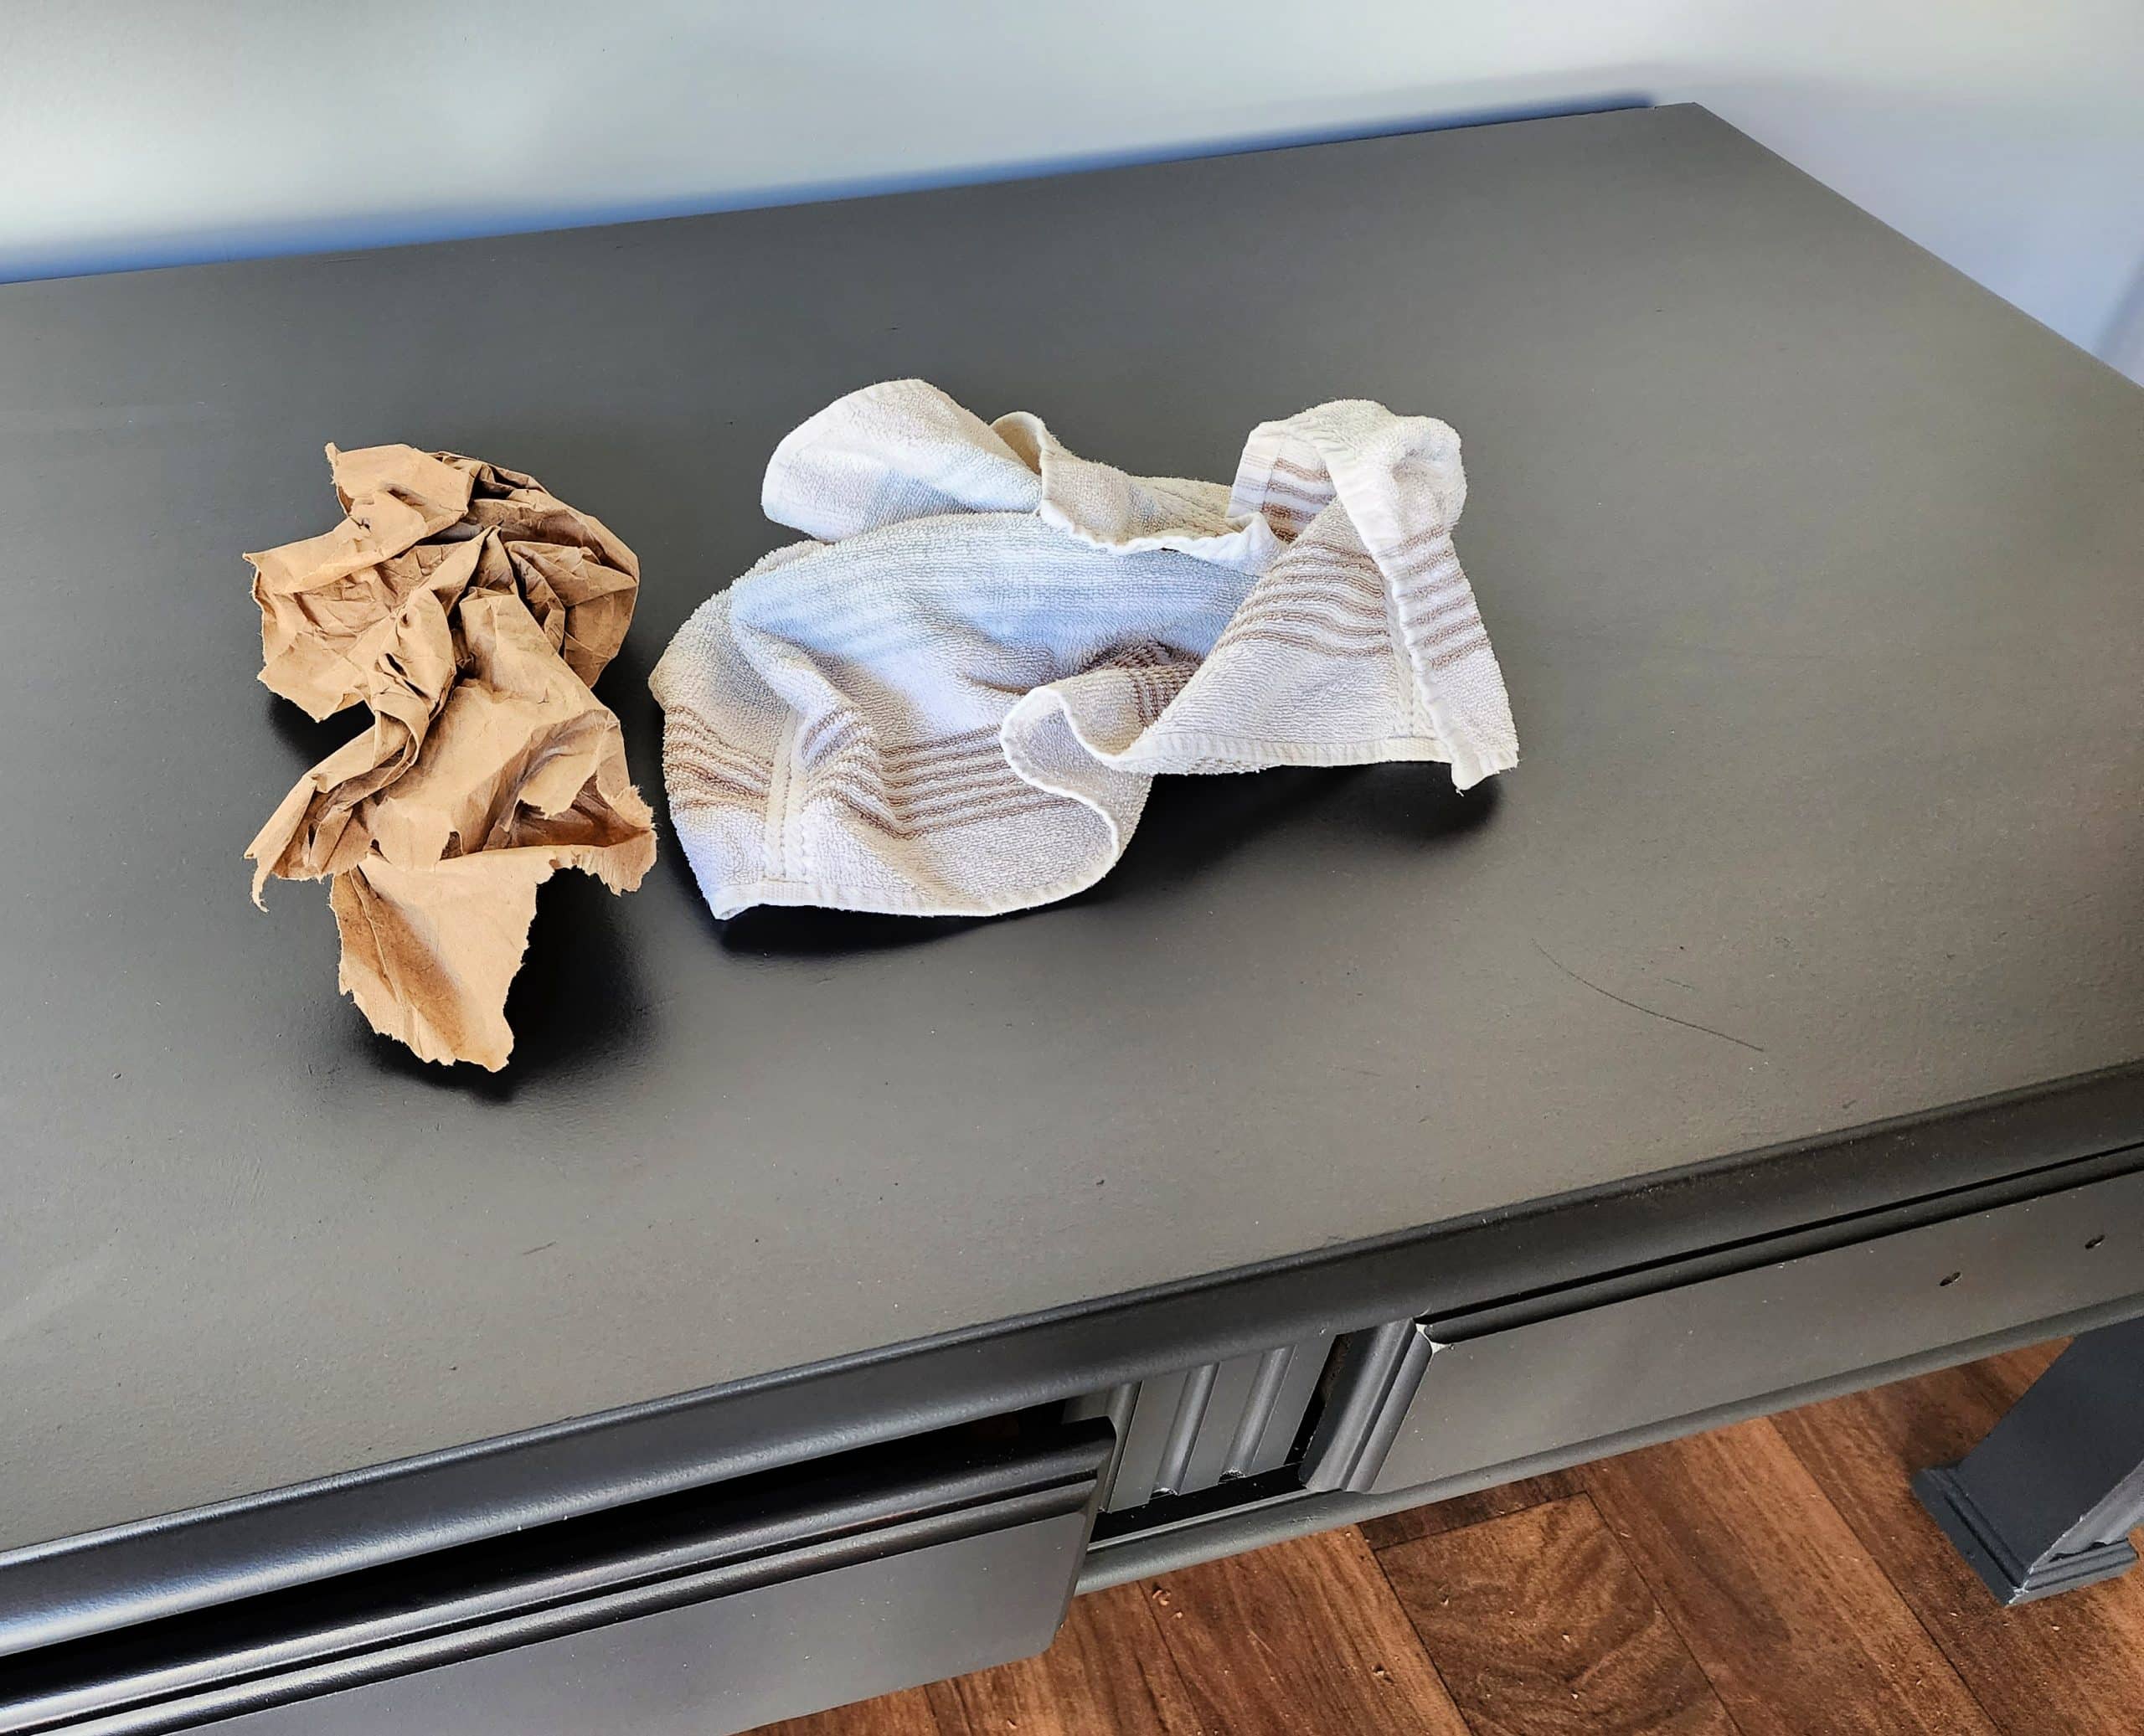
Here’s another tip for you. After letting the paint cure well, I sand (burnish) the top of the coffee table with some brown craft paper. You know, the kind that comes in your Amazon boxes? Lastly, I wipe off the table with a soft cloth.
Broyhill Coffee Table Makeover

This coffee table is huge! No wonder it’s so heavy. Question? Would you have removed the decorative corner pieces?

The drawers were in good shape, so they got a good cleaning, but no paint.

This was a fun and easy makeover. It’s all about having the right paint and tools.
Roadside rescues like this remind me why I rarely pass up “junk” on the curb. With a bit of patience and creativity, even tired furniture can become something useful and beautiful again. If you keep your eyes open, your next favorite piece might be waiting right down the street.
Now, let’s see what the rest of the team has been up to!
Real furniture. Real makeovers. Real second chances.
Today’s project is part of the Furniture Fixer Upper Tour. The collage below shows the starting point for each makeover. Scroll down to see how every piece was reimagined.
More Amazing Furniture Flips

- 80’s Sofa Table Makeover
- How to Paint Vinyl Furniture
- How to Apply Transfers to Furniture
- Clever Ideas for Painting Bookshelves
- Coffee Table Makeover (you are here, thank you)
Furniture Fixer Upper Tour Projects
If you love seeing old furniture get a second chance, be sure to visit more Furniture Fixer Upper Tour makeovers. Each project starts with good bones and ends with a fresh new story.
See more Furniture Fixer Upper makeovers here
You will find everything from small side tables to large statement pieces, all transformed by talented DIY bloggers who believe in saving furniture rather than replacing it.
I think the coffee table turned out perfect. I am glad you kept all the original details….. I like the authenticity of the piece.
Awwww, thank you Kathy for your comment. I’m glad you appreciate what I did with the Broyhill table.
gail
Great find. It looks sweet now !
I love the corner details – they add character.
Thanks friend! I’m happy you like the corners. You can beat free, right?
gail
What a great save with a beautiful new look, Gail!
Thanks Jen, gotta love FREE and EASY, right?
gail
Nice job! I would remove the little side panels as I feel they don’t coordinate with the drawer pulls. From old to new and looking fine. Good job.
Caye,
Thanks for checking out my latest furniture project.
gail
The coffee table turned out really nice. The finish is perfect.
What a great save, Gail! I like the corner pieces personally! XOXO
Christy,
Team corbels, eh? 🙂 I never really considered doing anything with them. I like to work smarter, not harder.
gail
WOW, what a night and day difference Gail! I love the new look and also love that carpet you styled it with… beautiful! Pinned XOXO
Aww, thanks so much Denise. I appreciate you pinning my project.
gail
It’s really gone from ugly to pretty. I’d have gotten rid of the corbels. They date the piece as do the handles. But I like those now that they’re painted silver. On Pinterest I saw that someone redid a coffee table with similar legs like on yours. They filled them flat with Spackel and sanded and painted. I’m wondering how long before that starts to let go and come off.
I like the corbels, I’m glad you didn’t get rid of them. They add a special, unique detail on an otherwise plain piece of furniture. Great job, i would use this in my house.
Thank you Deidre! I appreciate that you like the table as is.
gail
Jennie,
I’ve patched with spackle like that before. Sometimes, it’s just necessary to update a piece of furniture. This table sold very quickly at my booth.
gail