Cubby Shelf Makeover
As an Amazon Associate, I earn from qualifying purchases.
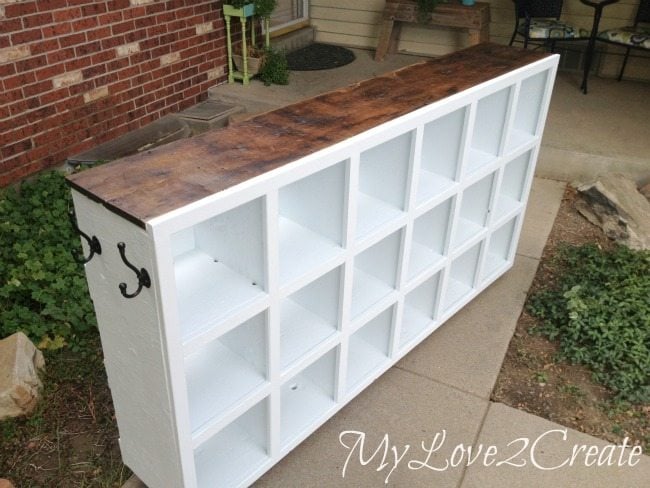
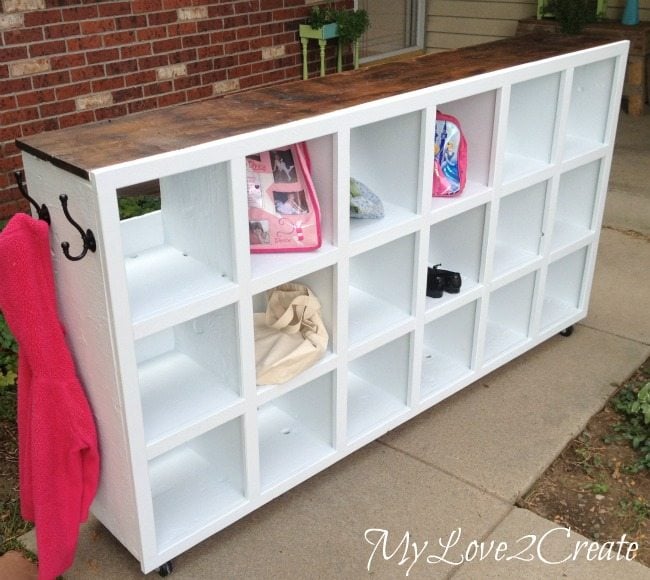
It will start it’s new life at my daughter’s dance studio. Working to hold dance bags, coats and whatever the dancer’s need to store away while they are in class. It is the perfect home for it and although I am sad to part with it, I am happy to give.
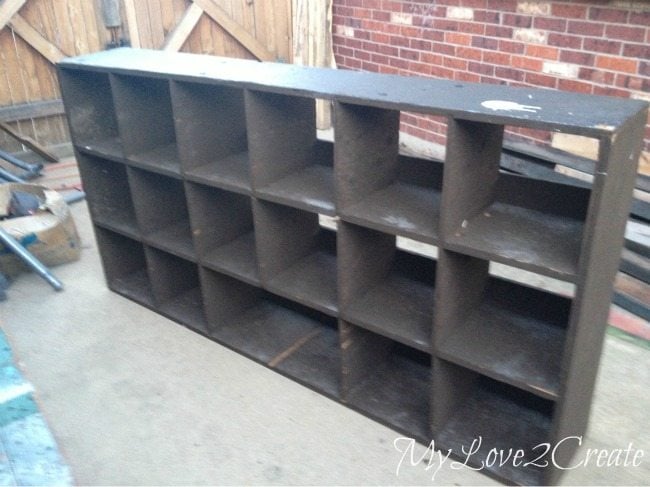
Here is a blurry before shot. The wood was pretty water damaged and very dirty, with globs of, I have no idea what, stuck to it in spots. And there was a divider shelf missing on the bottom.
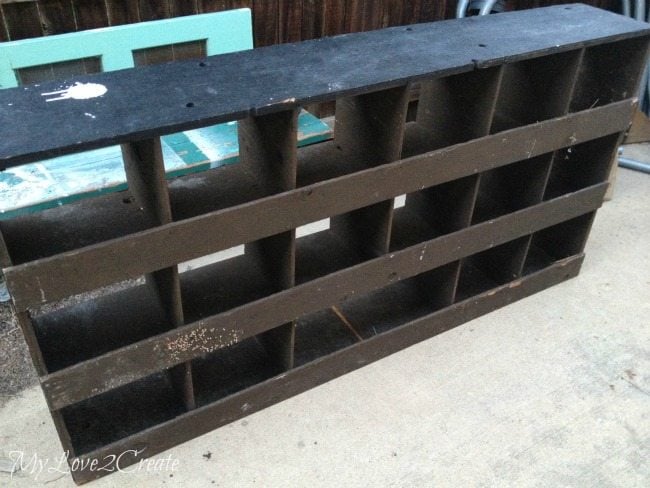
A shot from the back shows the gravel that was stuck to the wood. I did quite of bit of nailing to sturdy it up because it was pretty wobbly. There were random holes drilled in the boards you can see them, I have no idea why they are there but I decided to leave them.

When projects don’t get worked on right away at my house this is what happens. For a few months my kids used it as a huge “doll” house (don’t tell my boys I used the word doll) and they were pretty upset with I said they had to clean it out!
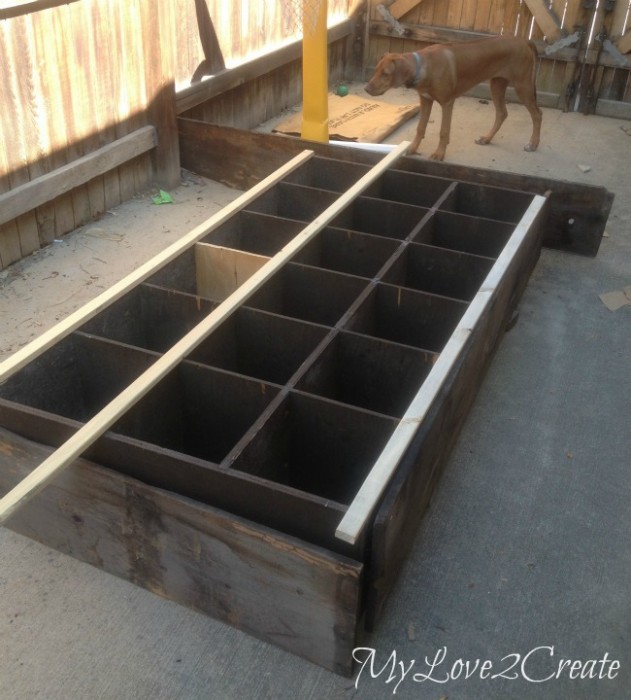
Add boards for strength

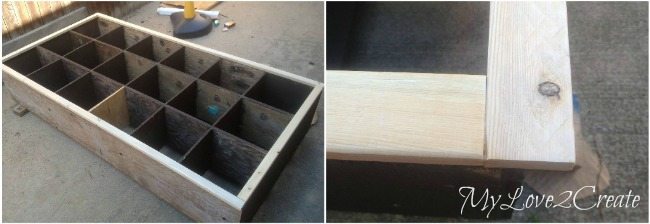
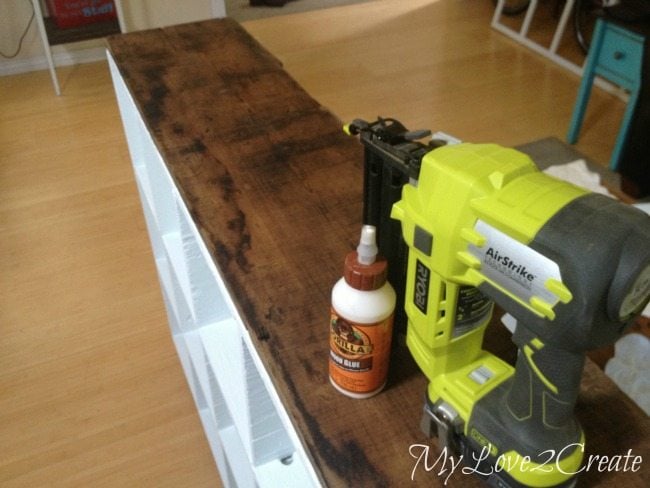
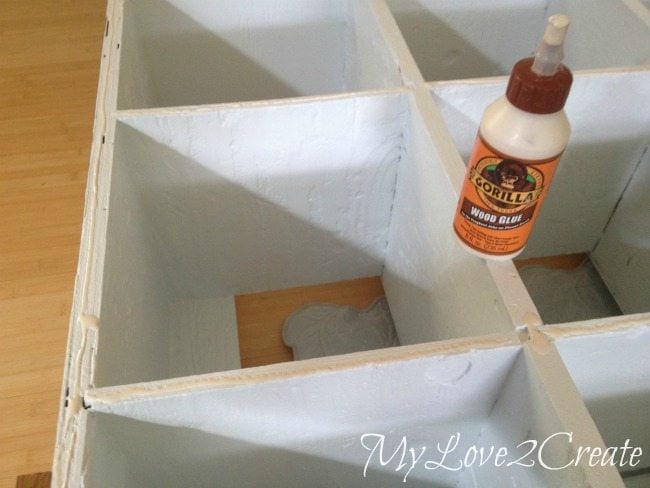
After I had nailed all the boards in place and made it sturdy, I measured and cut a piece of plywood to replace the missing divider. I used Gorilla wood glue and clamped it while it dried. Sunny is always a good helper these days, except when she helps too much. 🙂
TSP for cleaning

While the glue dried I started scraping off the gunk. I am not sure what this was but maybe tar? It was nasty and I had quite a few cubbies to scrape. When I was done I cleaned the whole thing with TSP a great cleaner that I got at HomeDepot. It took care of any residue so I could paint. I was really impressed with it, since this was my first time using it.
How to add a face frame
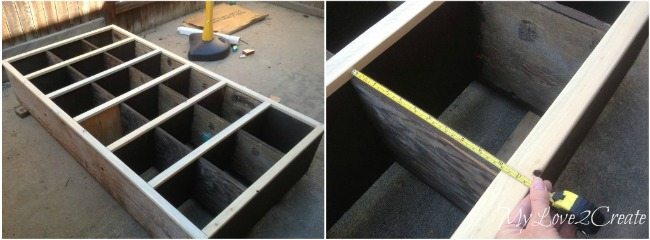
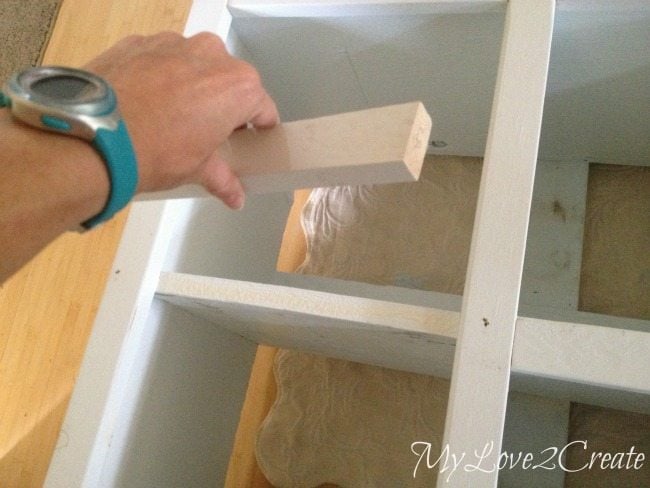
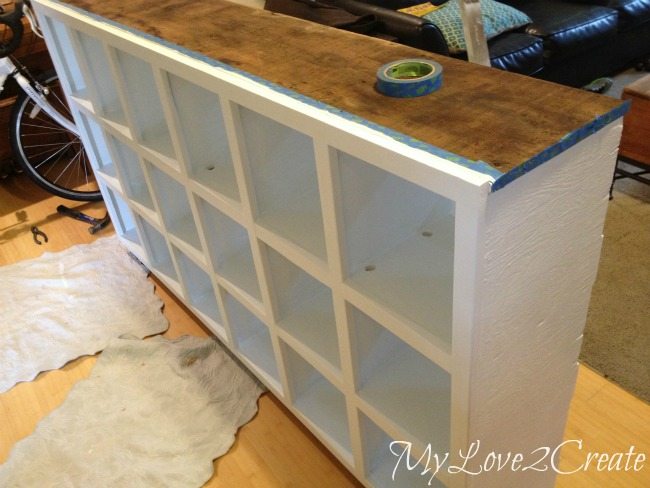
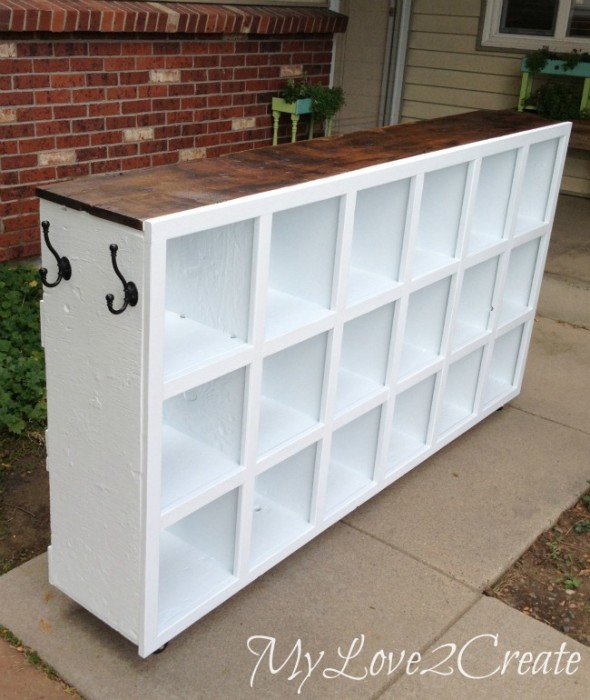
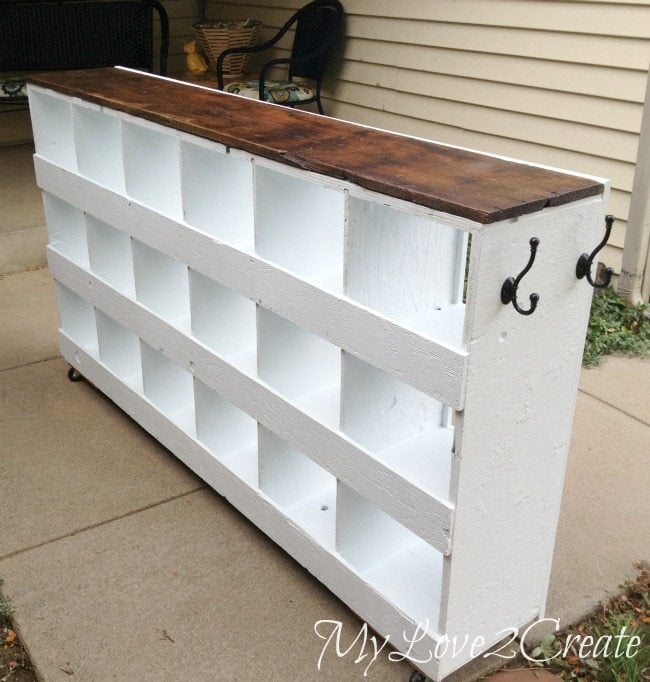
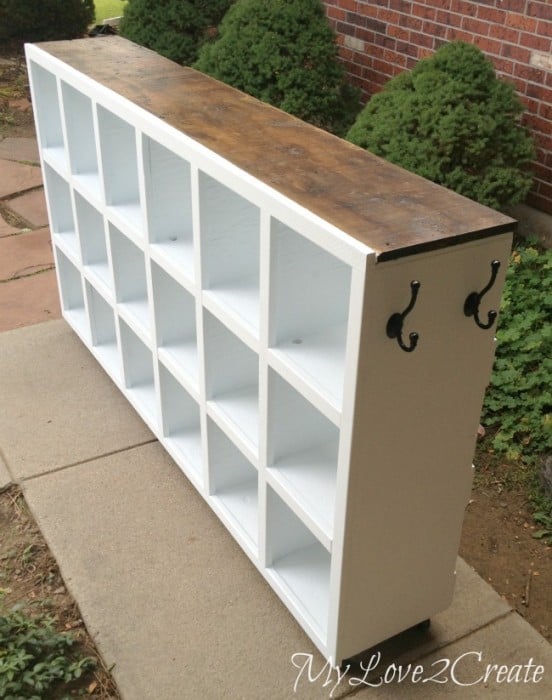
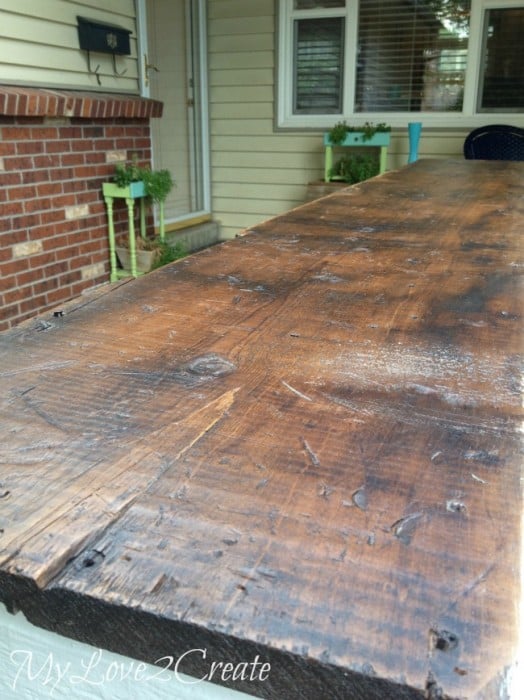
Since it was made out of plywood and water damaged the edges were pretty ugly and rough. So I bought some 1×2’s to make a face frame. I set them to measure where to cut. Then I grabbed some old barn wood that an awesome friend had given me, and dry fitted it on the top and sides. I ended up just using a board for the top, and not the sides.
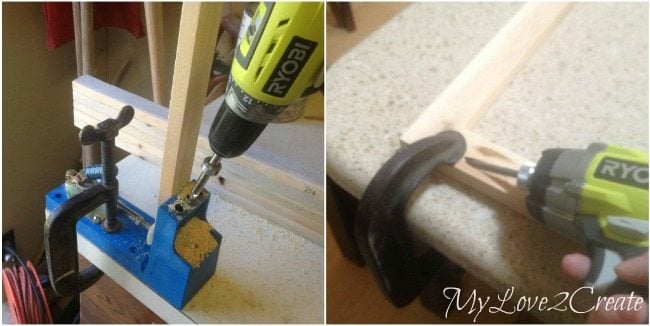
I drilled pocket holes and built an outer frame.
Need more details on using a Kreg Jig? See my article How to use a Kreg Jig Pocket Hole System
I love how pocket holes work and join the boards flush. Once I had it placed on, I measured for the vertical boards and cut them.
I placed them where they needed to go and then measured for the small horizontal boards. After I got all the boards cut I drilled pocket holes in the horizontal boards.

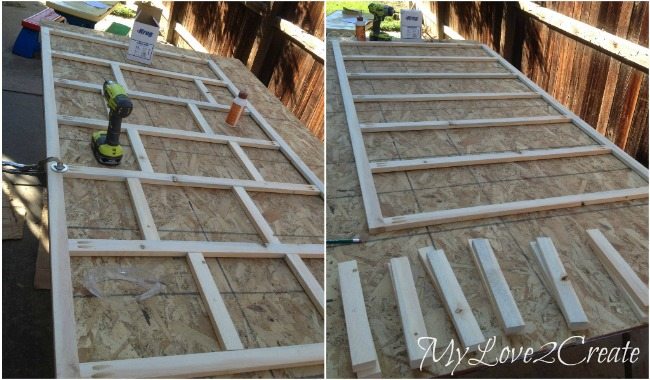
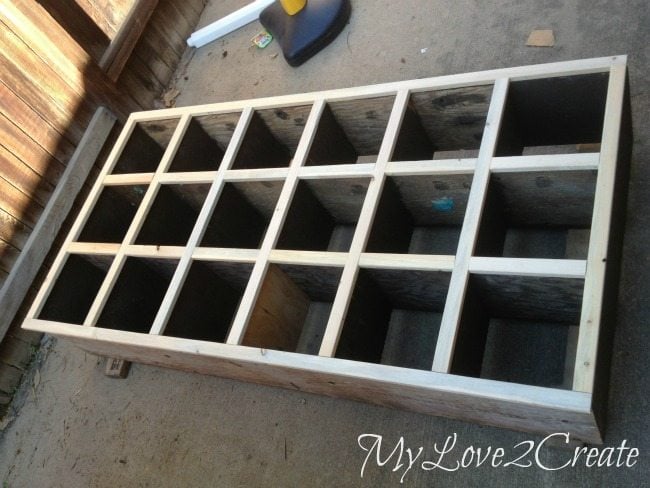
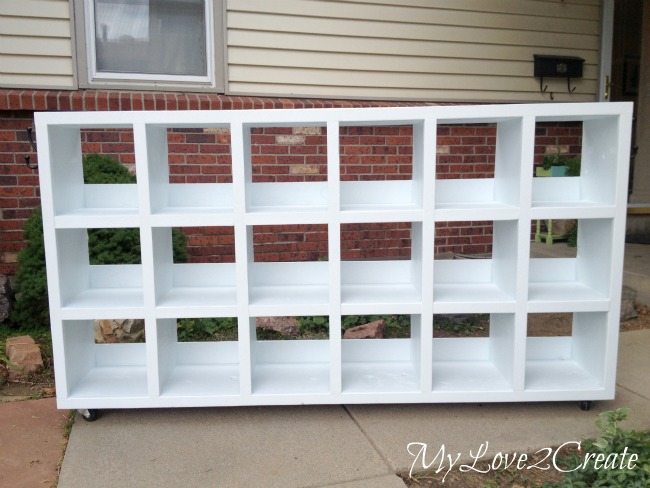
Framed out cubbies
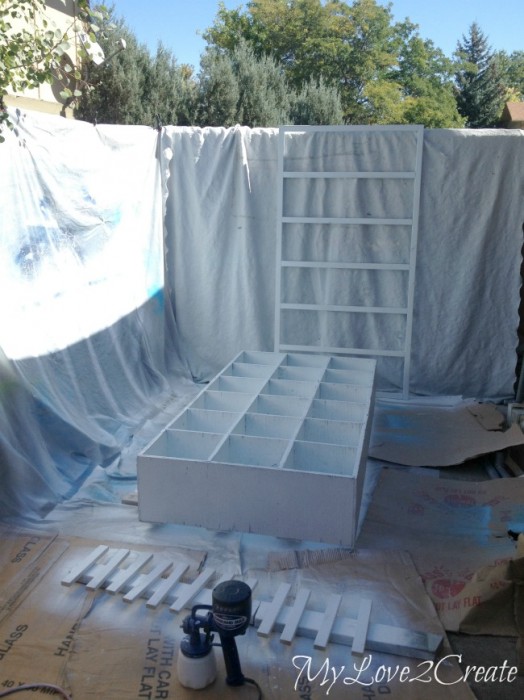
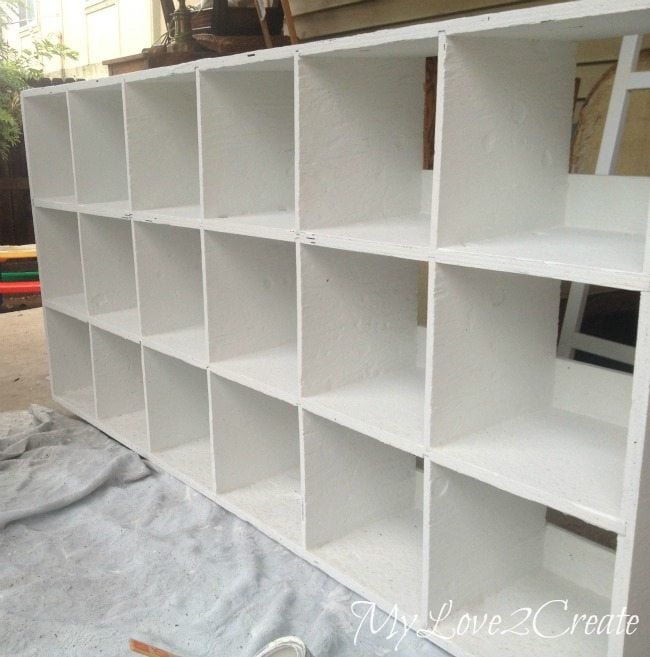
Time to paint
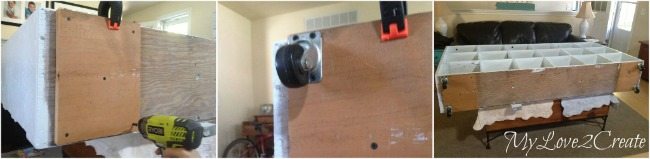
Adding Caster Wheels
The cubby shelf makeover is complete!


Related Content: New Cubby Makeover
)
Great project! Love your Ridgeback puppy, they are wonderful guys.
I still see this project on Pinterest all the time!
gail
ps let me know if you get this comment in your email.
Great job. Lots of storage squares!
OMG- I LOVE big Cubby shelves like this- I had one that was 5 high and 4 wide like yours and I brought it home, cleaned it up and painted it gloss black. OMG- I loved it and it was one of my favorite pieces of furniture to date!!!
Lovely piece you remade!!!!!!