Cutting a Chair Down To Size
As an Amazon Associate, I earn from qualifying purchases.
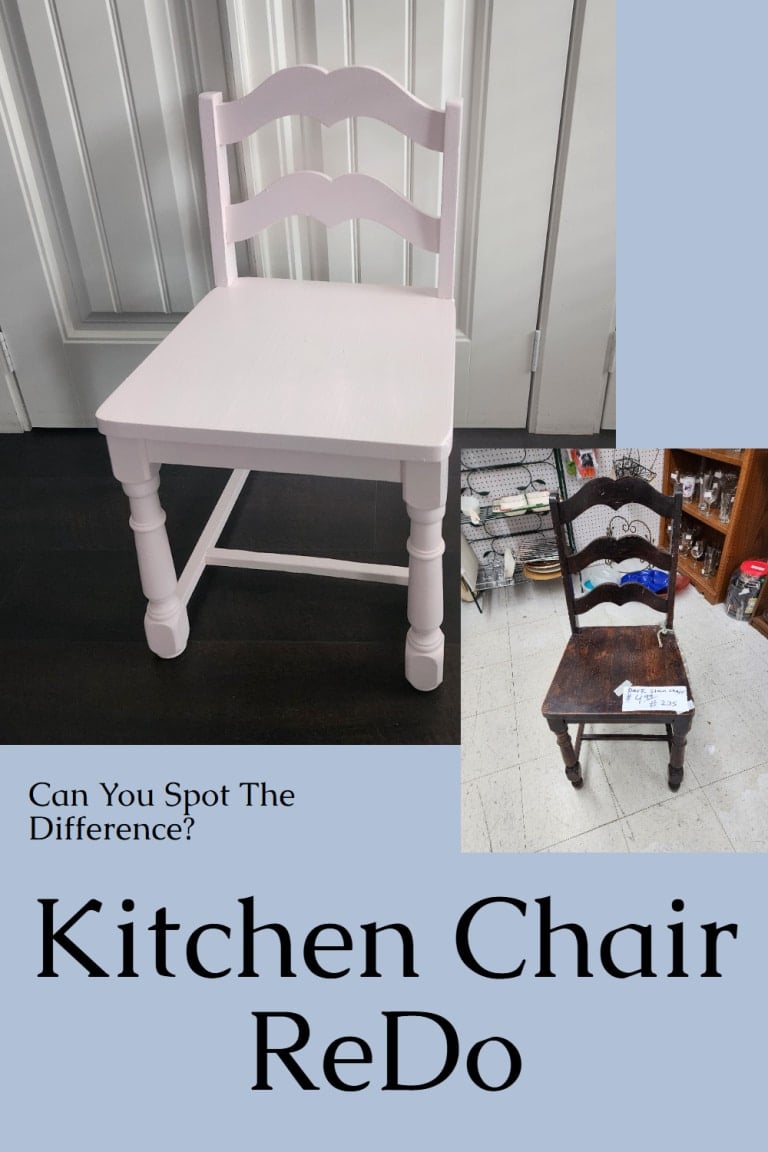

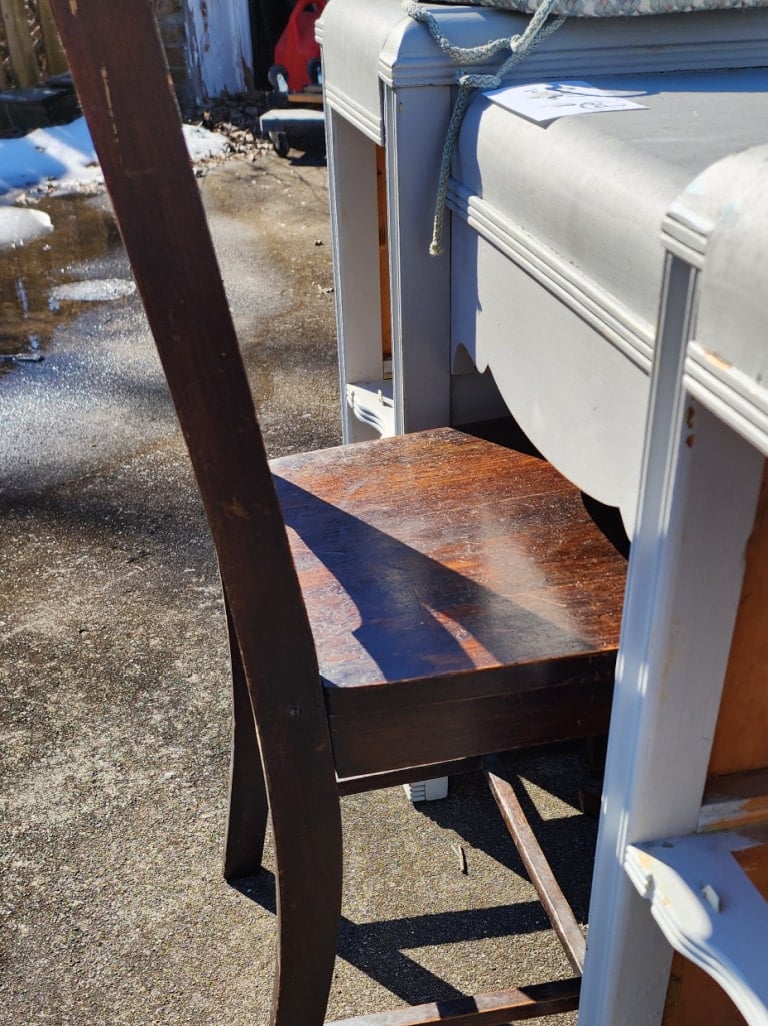
This budget-friendly project, cutting a chair down to size, is my monthly article for the Thrift Store Decor Team. While working on an antique vanity, I searched for a bench, chair, or stool. I couldn’t find anything suitable. So, I decided that I would have to modify a chair for my new project. I enjoy cutting furniture, so why not try cutting a chair down to size to suit my needs?
Five Dollar Kitchen Chair
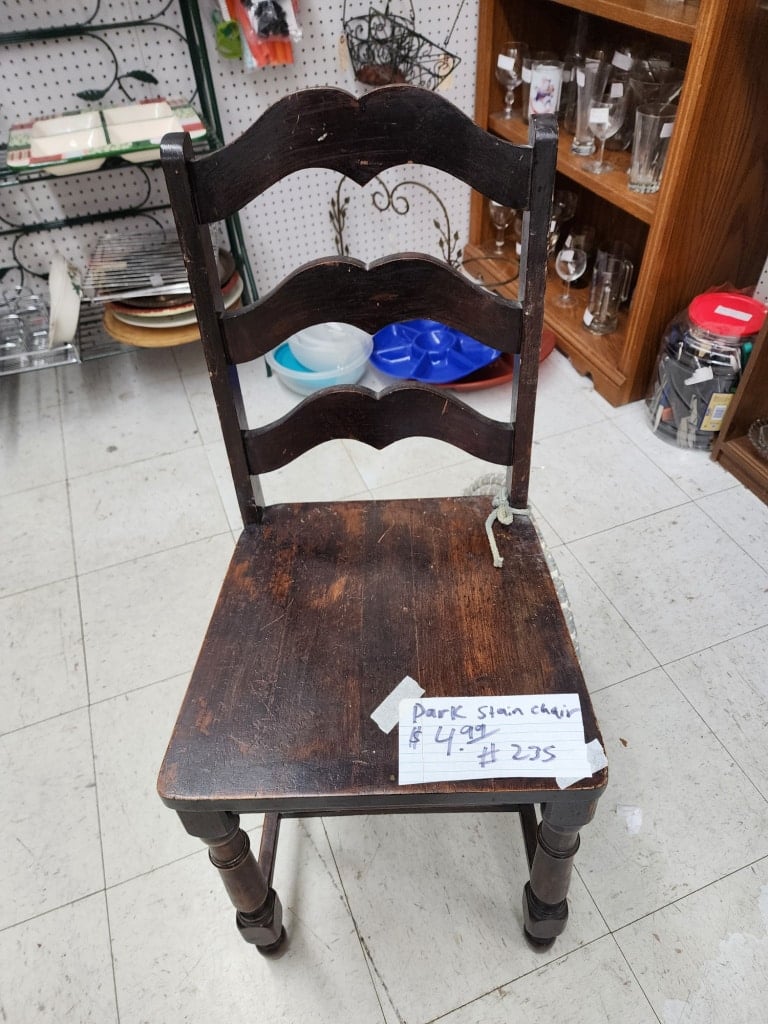
The chair in question is too high off the ground, and the back of the chair is too tall. Nothing that a jigsaw can’t handle.

This is our Thrift Store Day. Be sure to check out all the projects below.
Here is a sneak peek at my Furniture Fixer Upper Project later this month. The chair is too tall and needs to be shortened.
Cutting a Chair Down to Size
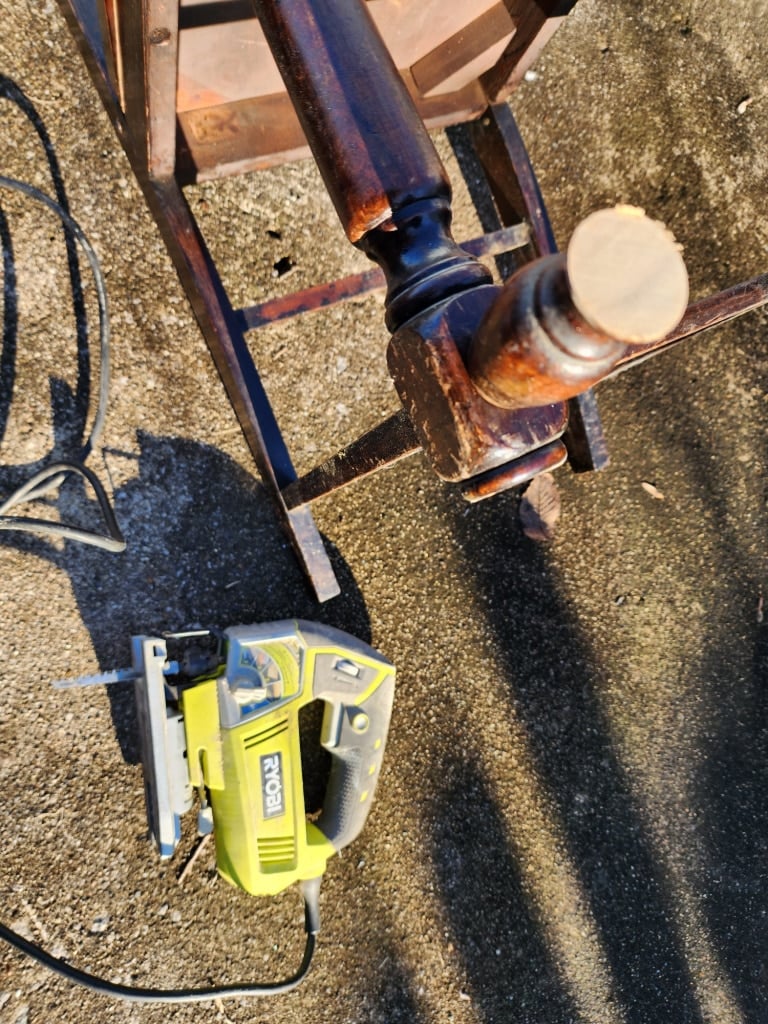
A jigsaw was used to cut the front legs of a too-tall kitchen chair.
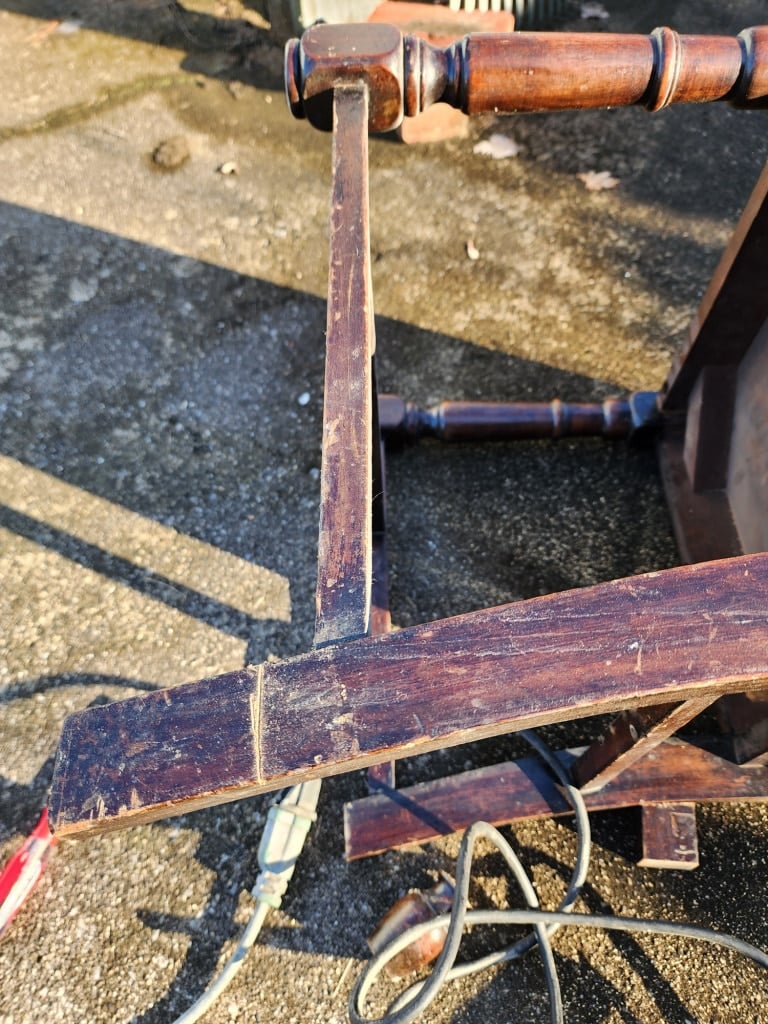
Using the front leg as a guide, I marked where the back leg of the kitchen chair needed to be removed. This cut was also made with a jigsaw. When you’re new to this upcycling game, a power drill and a jigsaw should be your first two purchases.
With the modified kitchen chair made shorter, sitting in it will be more comfortable now that your legs will fit in the desk’s kneehole. But the back of the chair is still too tall.
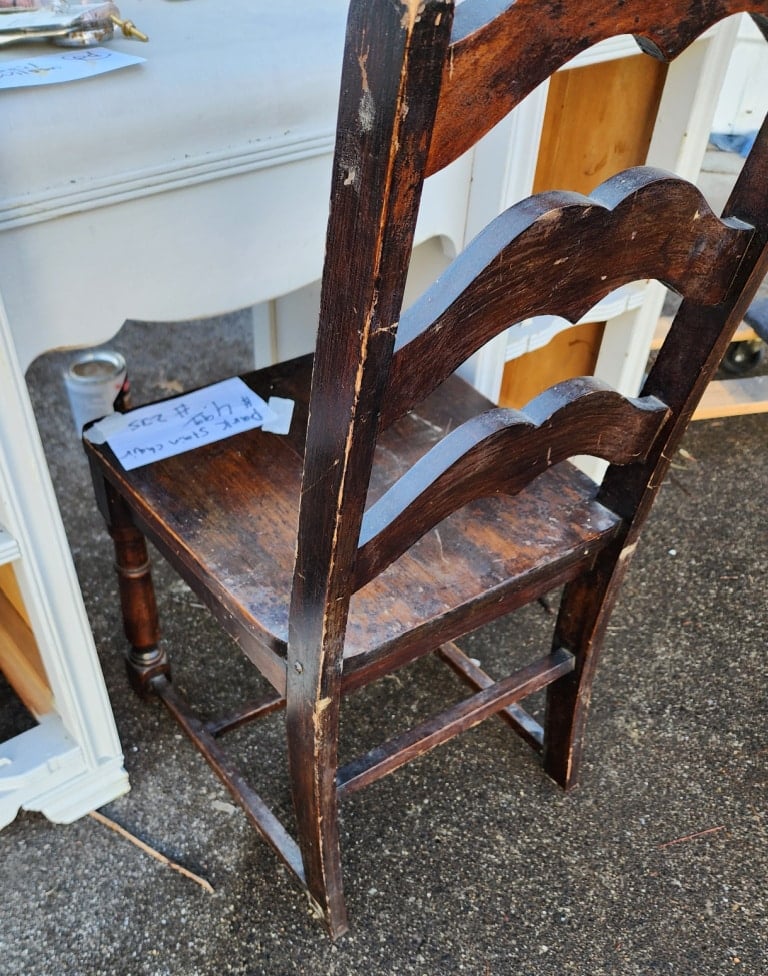
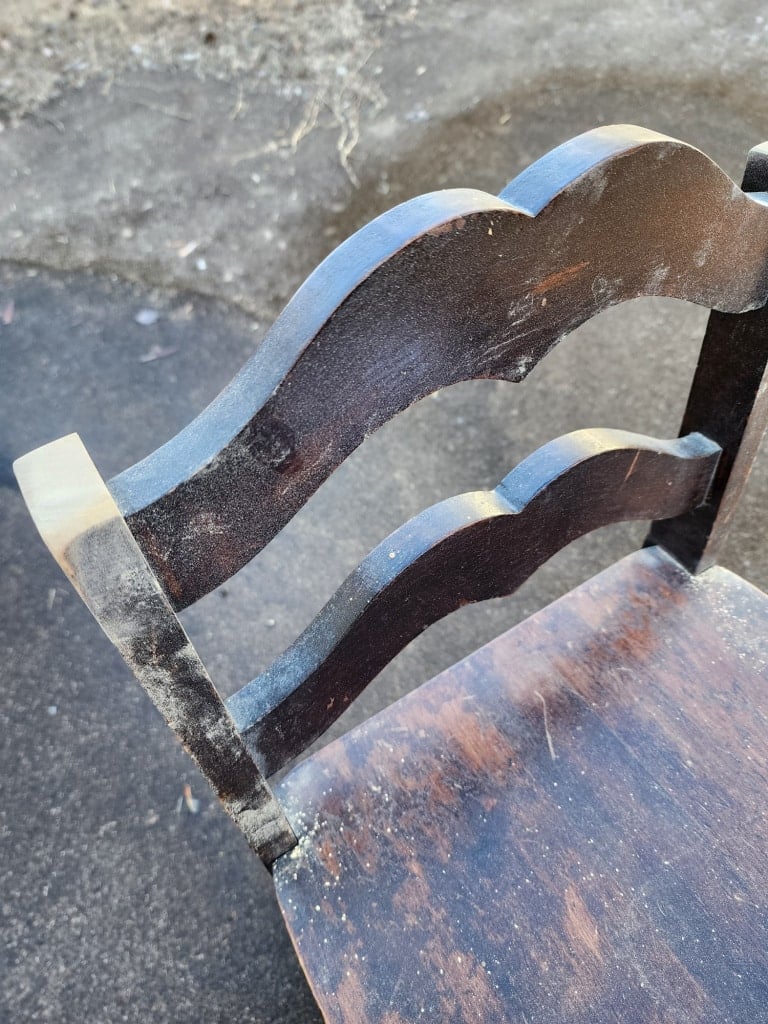
No problem! The jigsaw was used to remove the top section of the chair back. Notice how there is a little “nub” on the original top. I made sure to mimic that same design.
Have you ever seen the art deco waterfall vanities with their small, low back seats? That was my goal since I couldn’t find an original bench or chair. Do you love how the downsized kitchen chair’s lines compliment the vanity’s trim? Who knew cutting a chair down could be so rewarding?
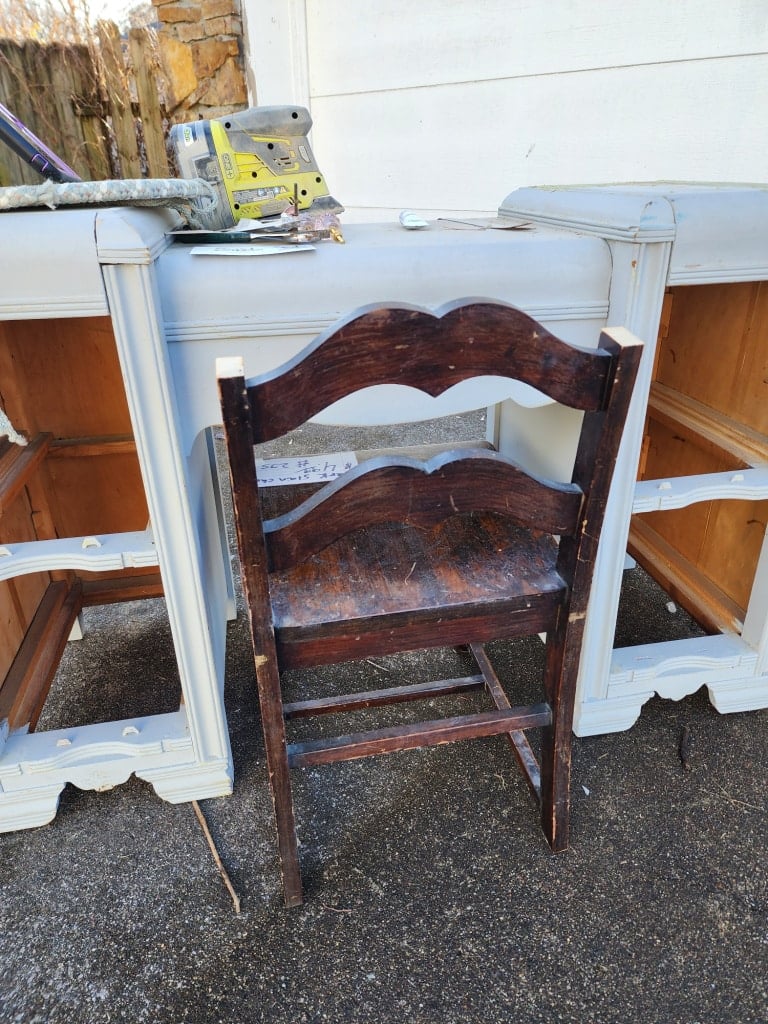
Round Off the Top of The Kitchen Chair Back
An orbital sander was used to round off the square edges left when the upper section was removed.
Make Repairs to a Wobbly Chair
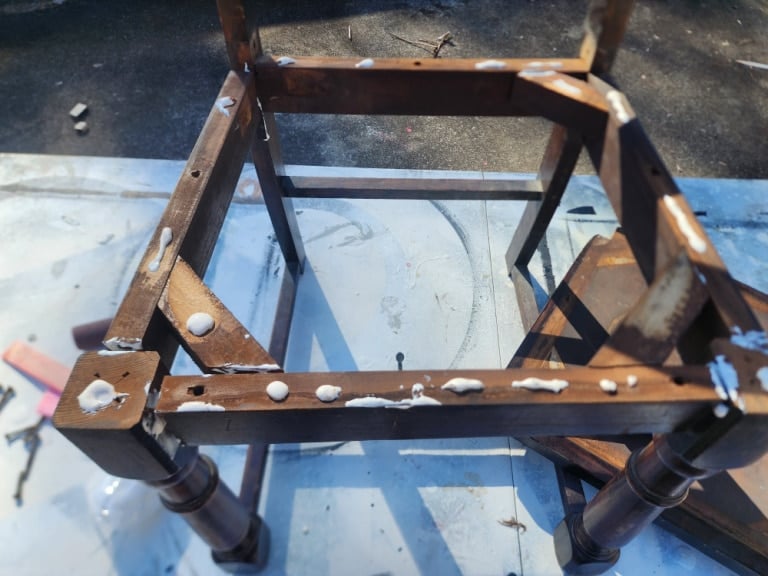
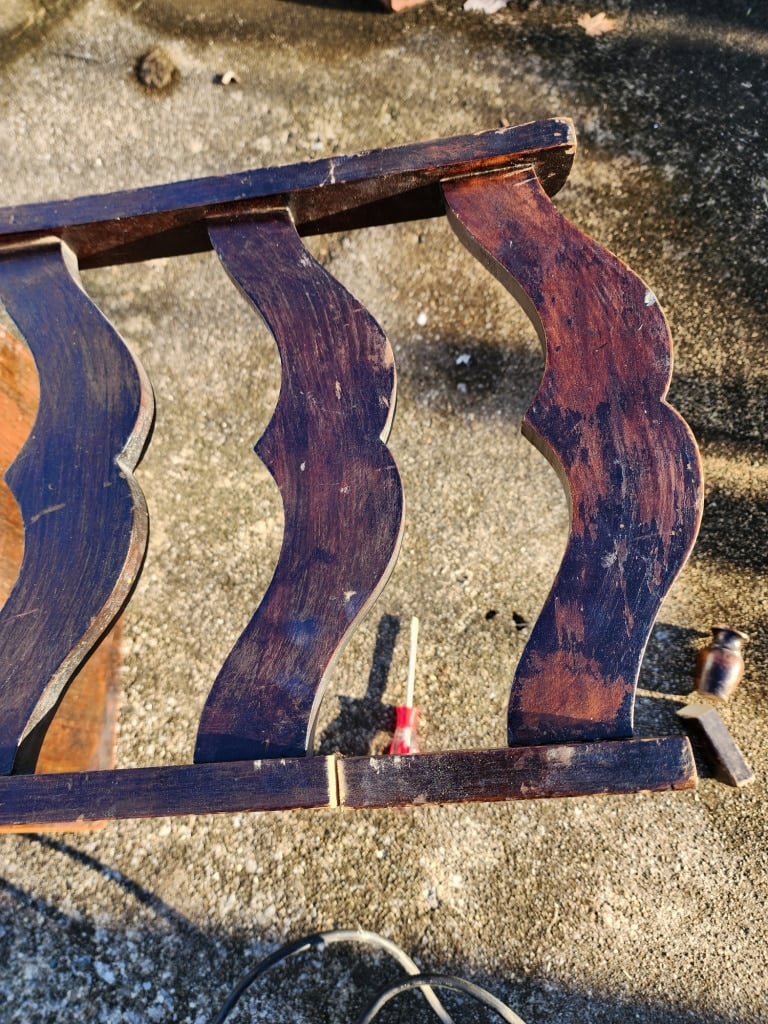
While testing out the chair, I noticed it was a bit wobbly. The best action plan was to remove the seat and separate the joints. Gorilla wood glue was applied on the seat base and where the joints were loose. You may notice that one of the triangle supports is missing on the back left.
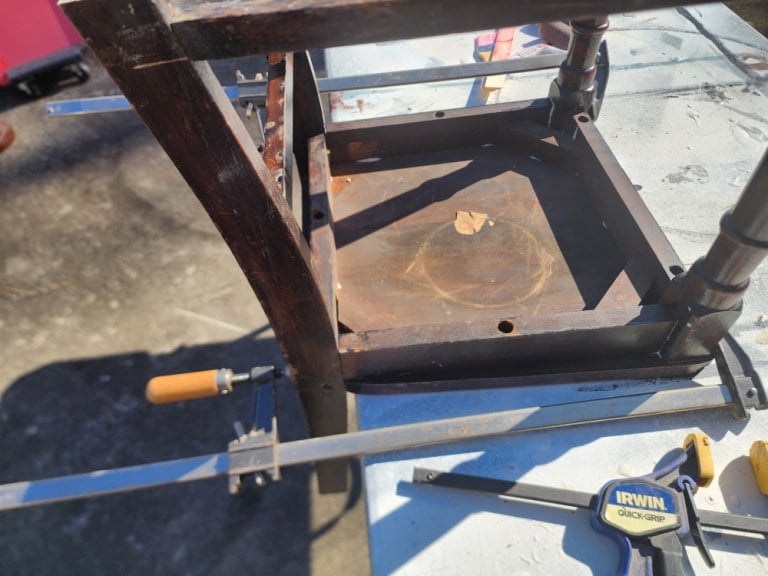
While the clamps held the chair together, all of the screws were replaced. How much glue is enough? How tight should you apply the clamps?
Use a little more glue than you think you should. Tightening the clamps will make some of the glue ooze out. The secret is not to tighten the clamps so much that ALL the glue oozes out.
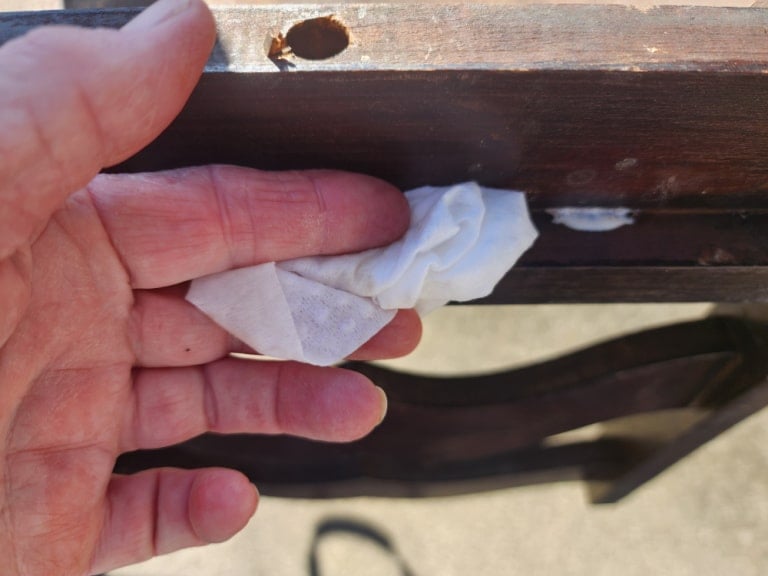
It’s best to wipe away excess wood glue with a baby wipe before it dries.
Prepare the Chair for Painting
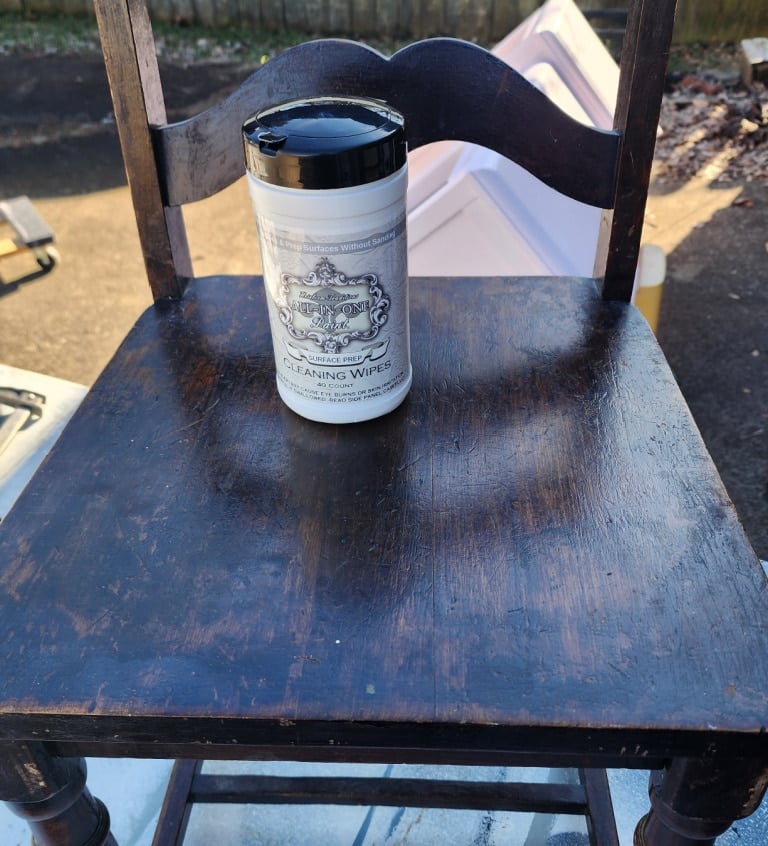
The seat of the chair had something odd going on with the finish. The entire chair needed cleaning. I used All-in-One Surface Prep Wipes.
Not shown: I sanded the seat with my orbital sander to remove all the dimples of shellac.
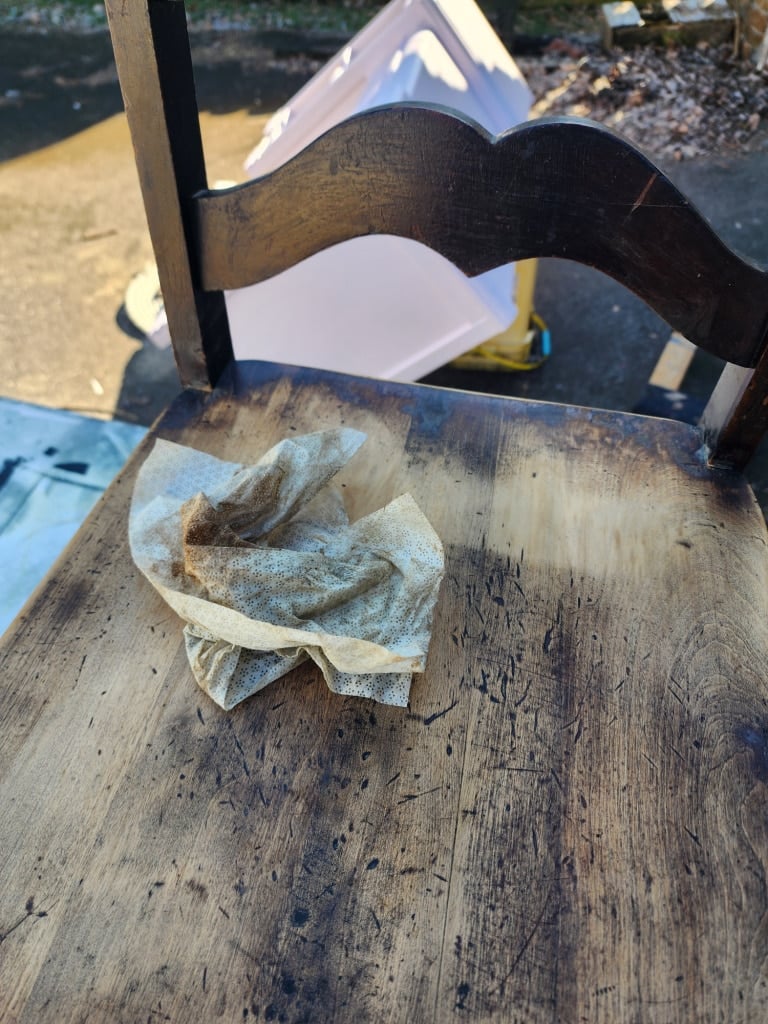
Oh, the stories this chair could tell! Look at all of that history on the seat. You can see that the wipe is dirty with years of kitchen grime.
Paint The Modified Kitchen Chair With Primer
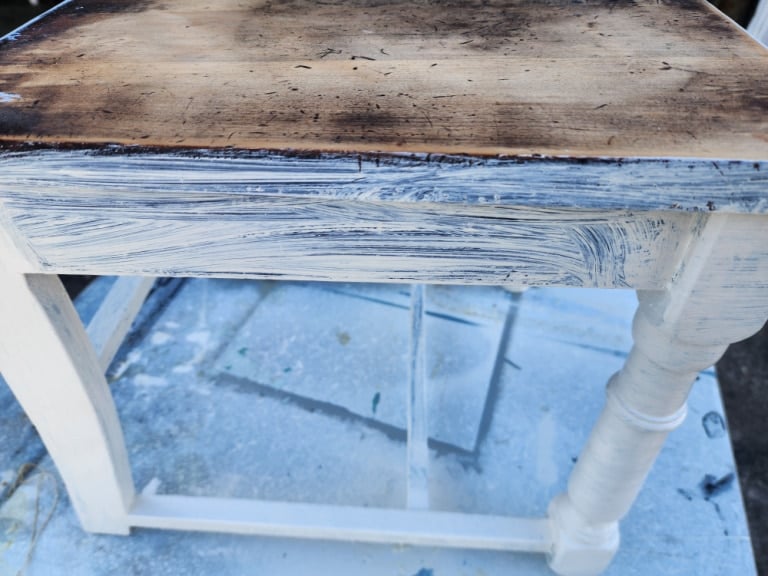
The final color of the reconfigured chair will be Peony from Heirloom Traditions. Because I don’t have a lot of paint left in the can, I chose to do a base coat in the color Bone.
This is the ugly first coat. Resist using a heavy hand; several light coats of paint work best for longevity.
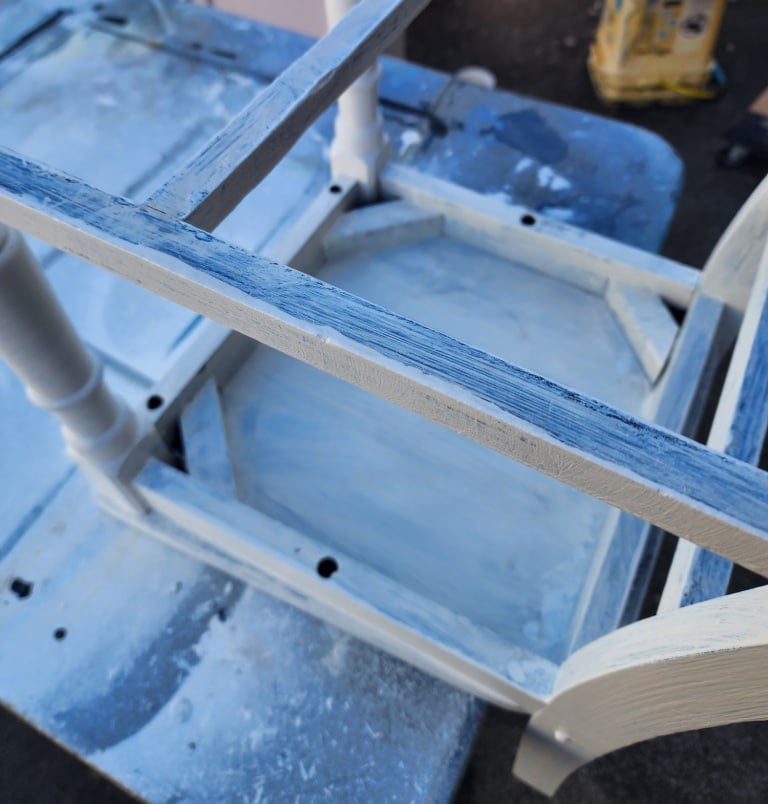
Painting the chair upside down allows me to leave the seat for last to ensure it is nice and smooth.
Painting Furniture With a Small Paint Roller
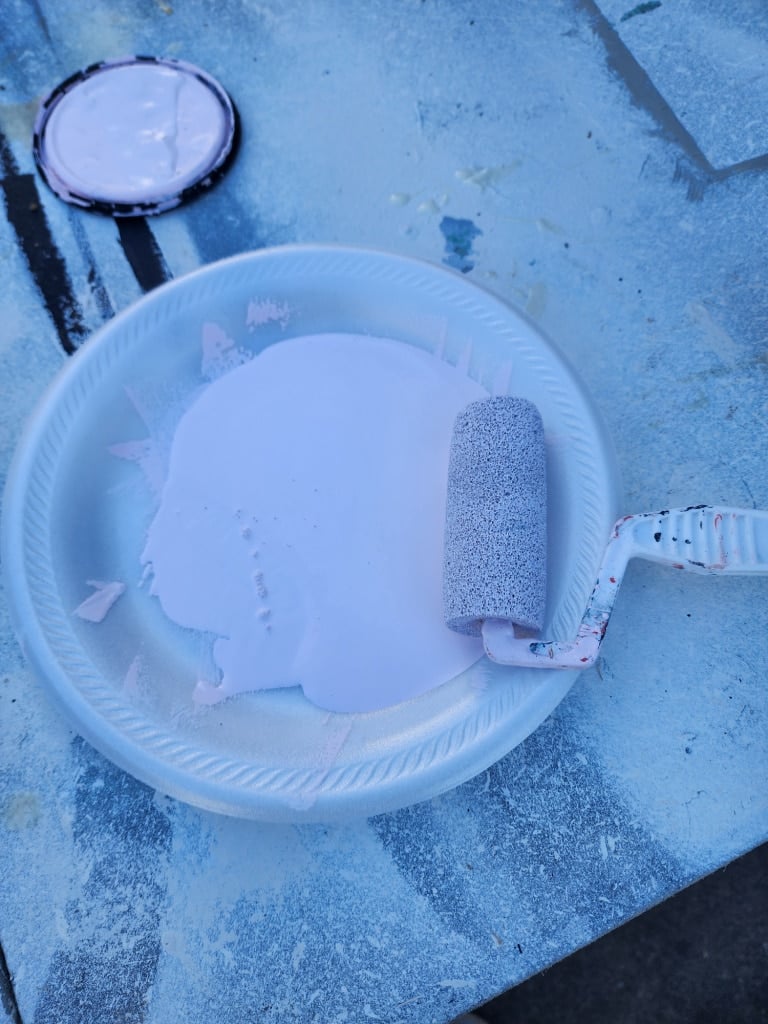
This is my favorite way to paint the final coats. Pour paint (Peony) on a styrofoam plate and apply it with a small foam roller.
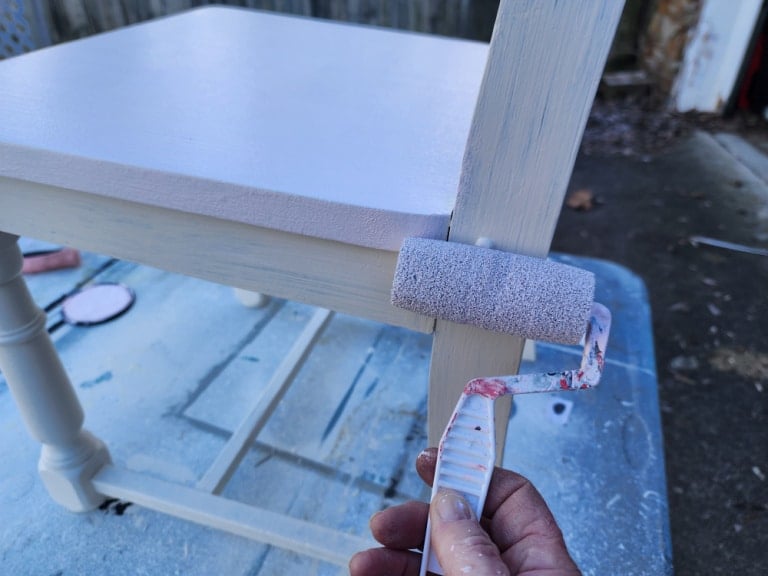
After two light coats with a brush, the topcoat was applied with a roller. The roller was used on the entire former kitchen chair, even the turned front legs.
Have you ever thought of cutting down a chair? If you need to do so in the future, now you know how to modify a kitchen chair for a desk!
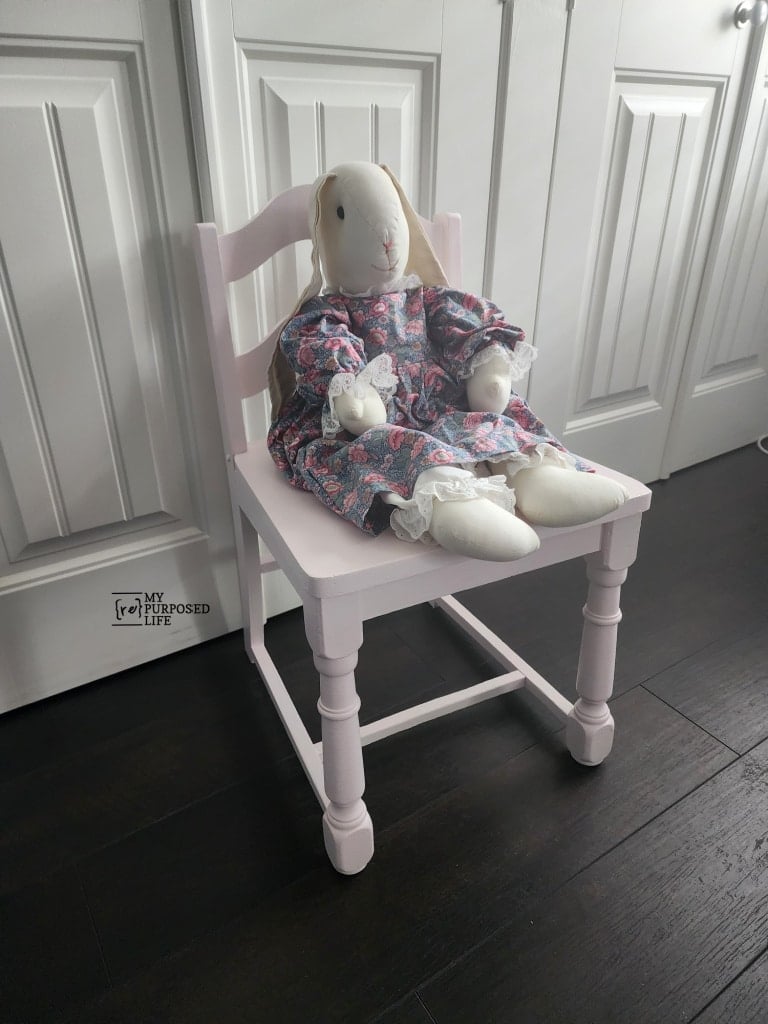
Modified Kitchen Chair Painted Pink (Peony)
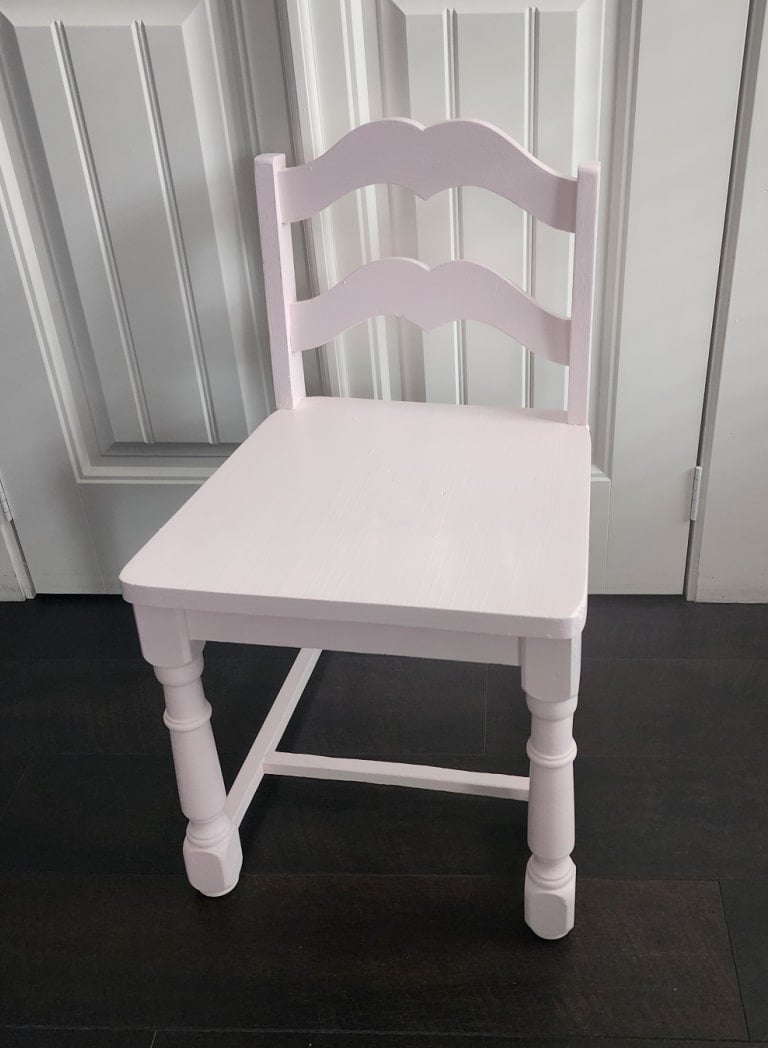
The chair’s back is lower to accommodate the desk I’m working on. Even though the chair’s height is lower, it’s still comfortable and doable for an adult.
It’s barely recognizable after cutting down the chair and painting it pink. The pink is very light, but against the white doors, its color is beautiful.
Related Content: Chair Back Towel Rack Chair Back Wall Shelf

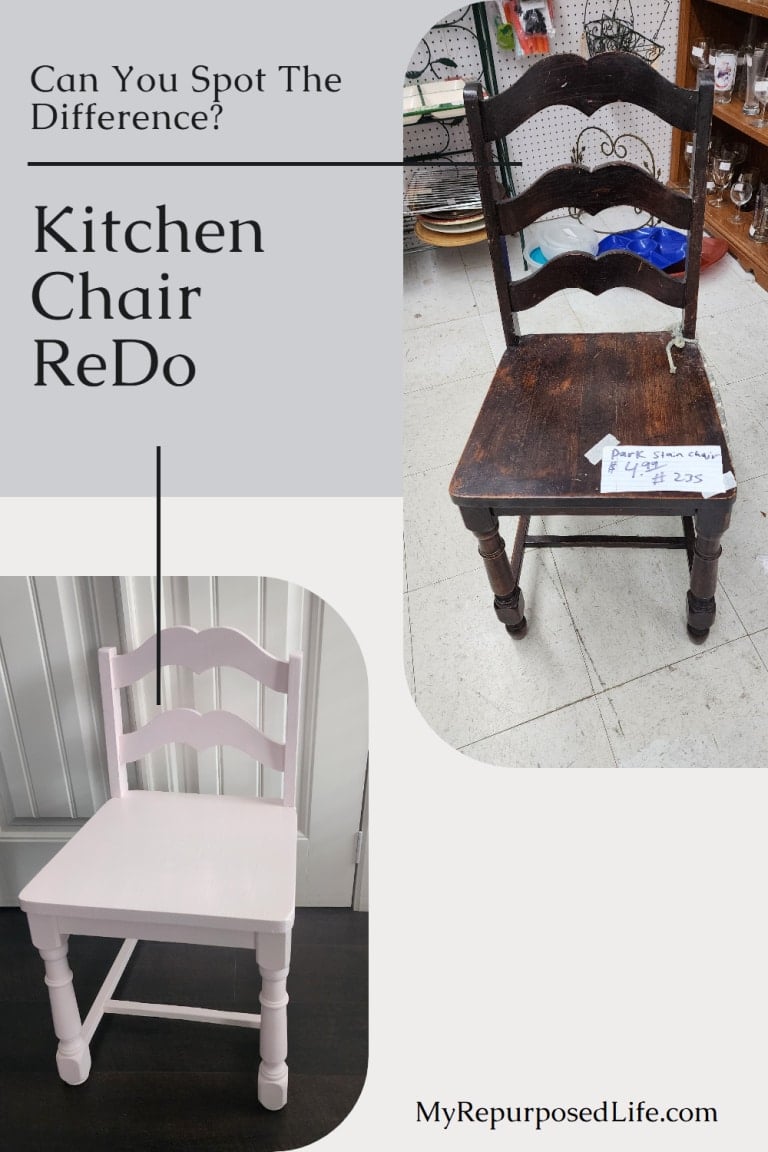
This Pinterest image shows a side-by-side comparison of the before and after photos, which is a good way to show how cutting a chair down to size can make a difference. I can’t wait to finish the desk and share that with you in a couple of weeks.

As promised, here is the sweet Art Deco Vanity | Desk Project
Now it’s time to see what the rest of the team has been working on.

- Thrift Store Lamp Makeover
- Rub-on Transfers for Thrift Store Upcycles
- Kitchen Chair ReDo (You are here)
- Vintage Wooden Box Upcycle
- How To Repurpose Miniature Glass Dishes
- How To Paint Furniture To Look Like Wood
- Fixing a Cracked Marble Tray with Kintsugi
Great detailed tutorial! You always do such a nice job of showing all the steps and tips!
It was so smart to cut the chair down, I feel like my grandfather did this once to a chair. I love the new color as well; it’s a great tutorial.
Sadie, Love this idea! I often bypass low vanities because of seating. As soon as I saw the chair and your comment ‘shorten the legs’, I knew what you were going to do.(Light bulb) I thought you might have lowered the back to just one cross piece but proportionately the two look best! Would you believe my cousin found two low vanity chairs in his neighborhood and gave them to me free! Now, I have to buy more furniture!