Display Vacation Photos and Keepsakes from the beach in a Rustic Shadow Box
As an Amazon Associate, I earn from qualifying purchases.
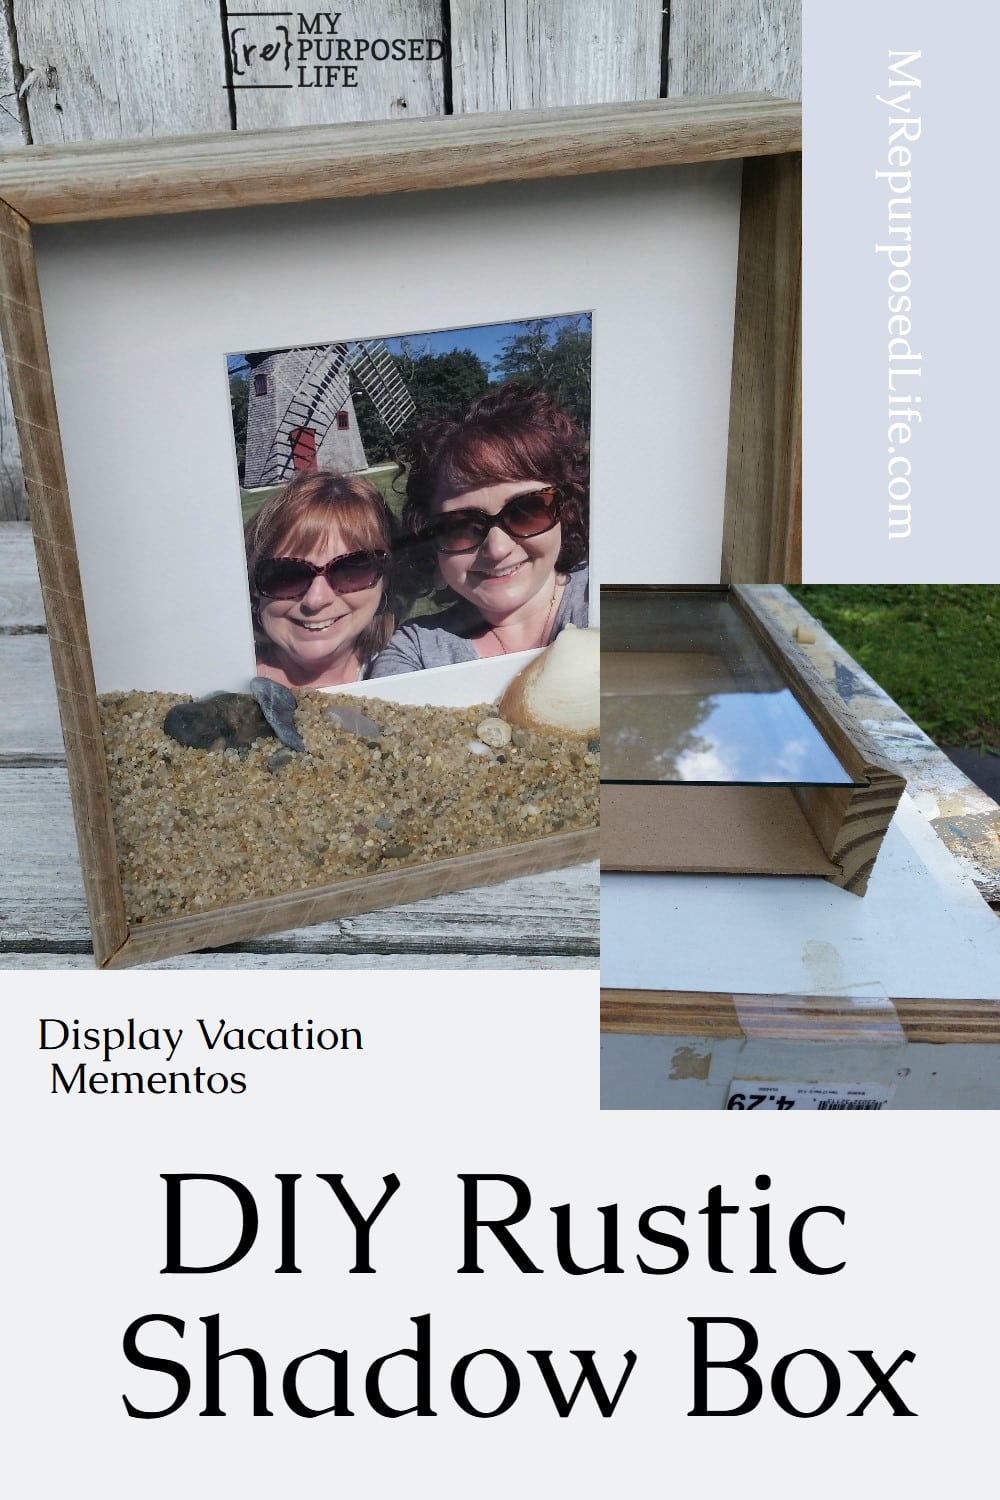
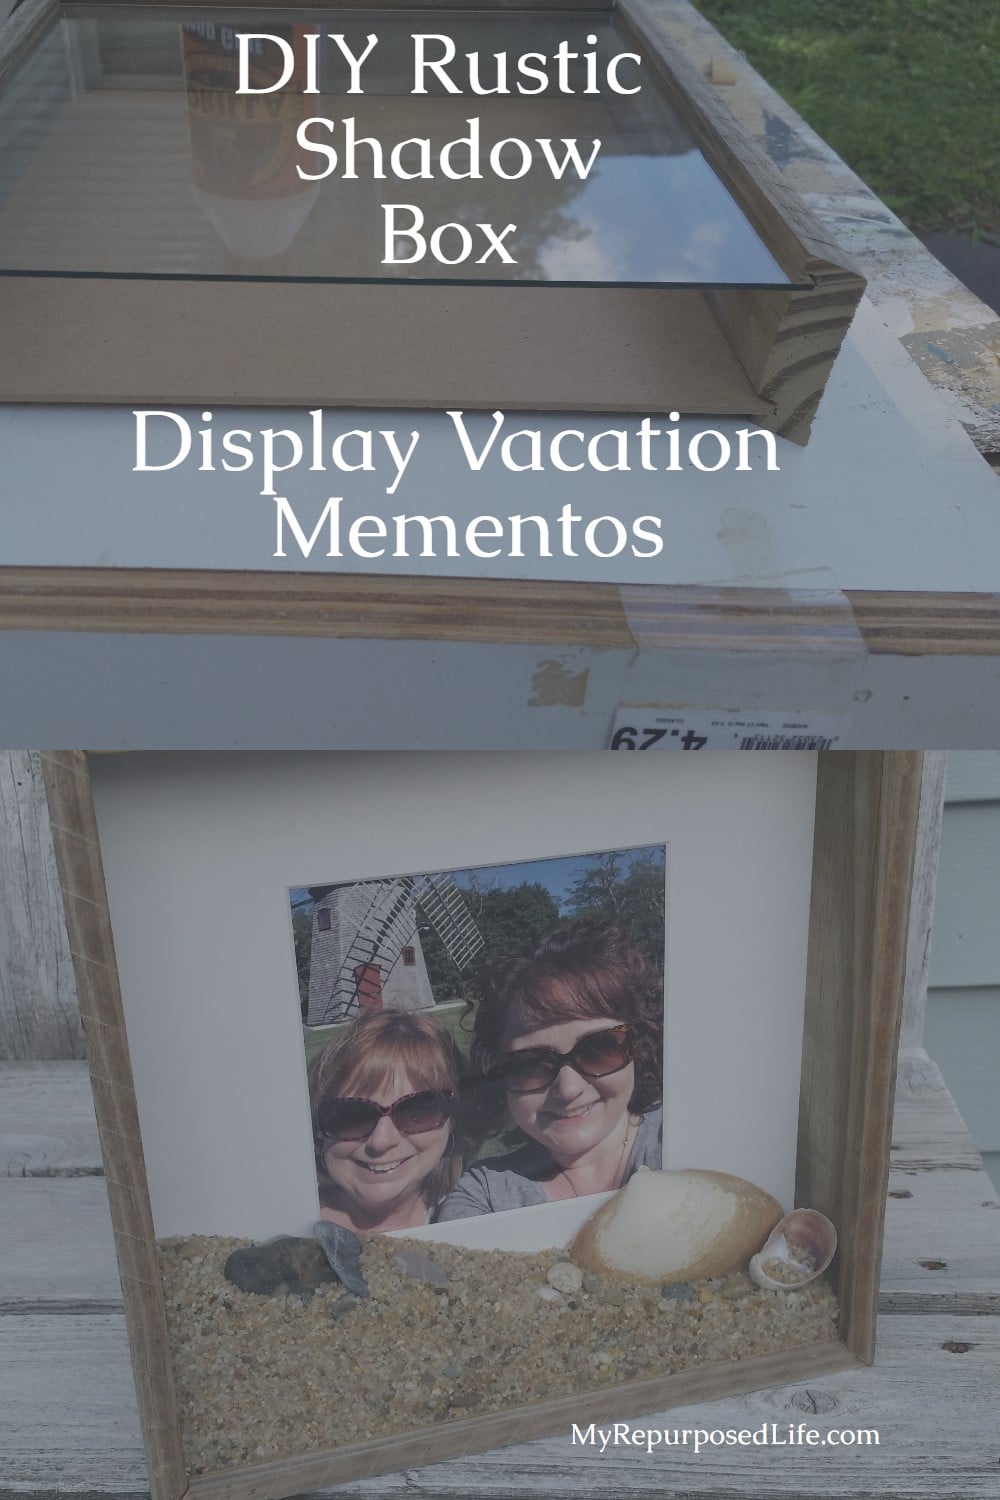

Needing to display vacation photos and keepsakes has never been on my radar. But after a great trip to Cape Cod with my daughter Jamie, I wanted to showcase some seashells, rocks, and a memorable photo from my vacation.
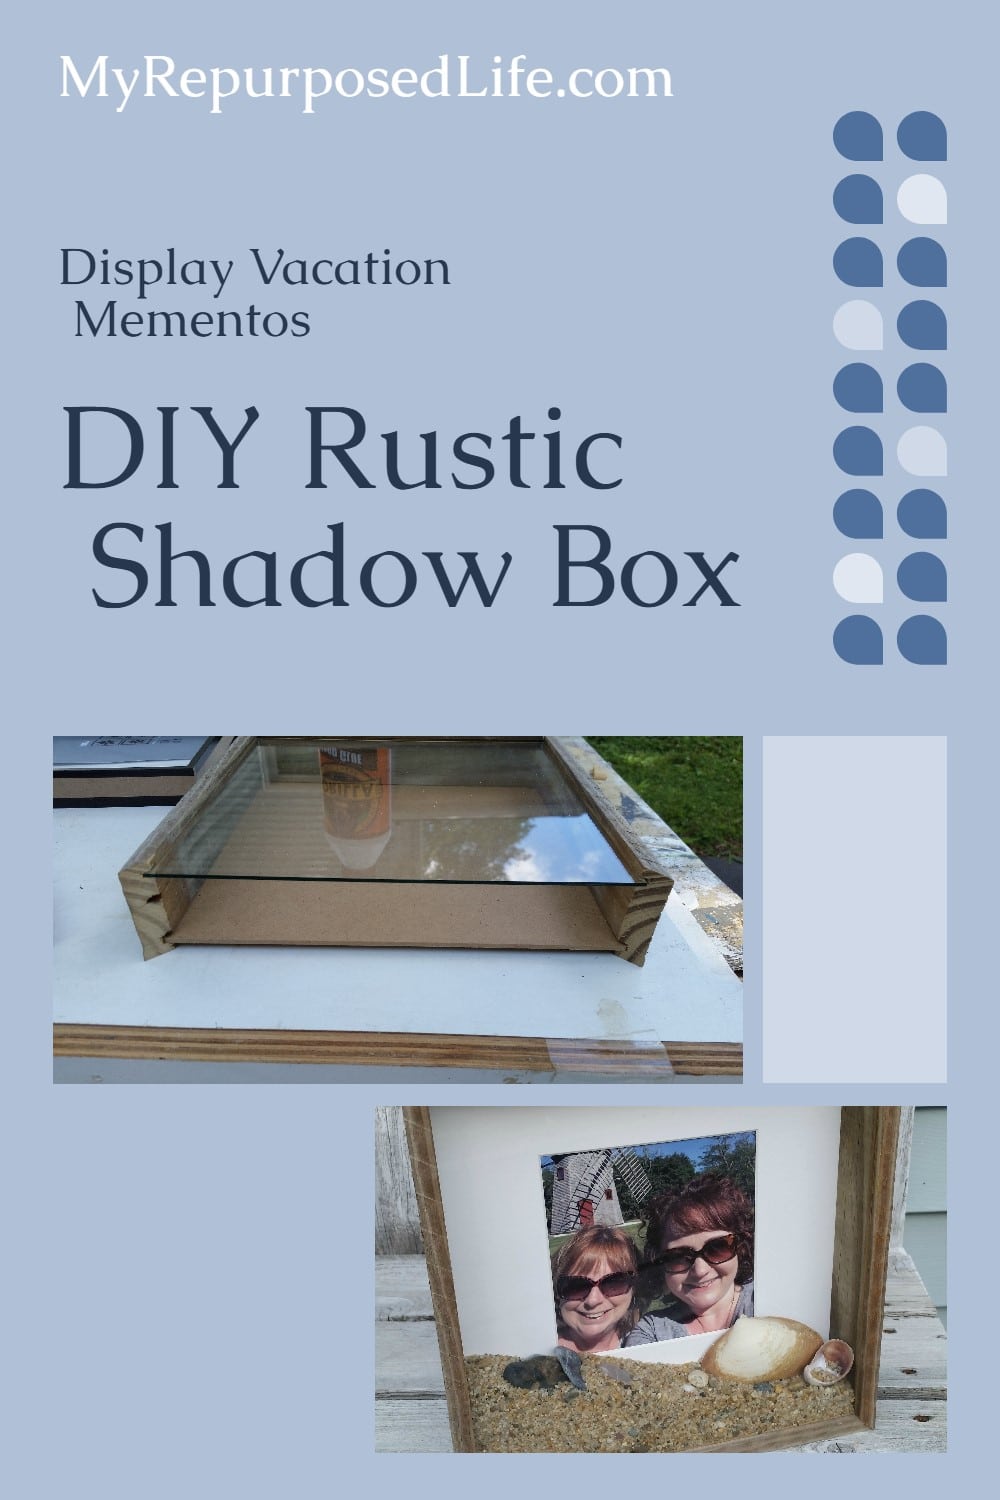
I love how the vacation photo display shadow box turned out. Isn’t it funny that my favorite picture is with a windmill, not on the beach where I collected the rocks and shells? ![]()
 I collected the sand from Long Point, Provincetown, MA, in a water bottle. Of course, it was very wet. When I brought it home, I put a plastic bag over a tray and emptied the sand out to allow it to dry. The sand from this area of Cape Cod is very coarse, with many rocks instead of many shells. I allowed the sand to dry for over a day.
Visit the My Repurposed Life Amazon Store to shop my favorite items.
How to Make a Rustic Frame to Display Vacation Photos

My neighbor Rodney was visiting as I designed the rustic shadow box with reclaimed fence boards. I used the glass, mat, and backing from an IKEA Ribba Shadow Box frame. But the fake wooden (black) frame was too modern to suit me. I chose to use the reclaimed fencing instead. I had the pieces ripped to the size I needed. Rodney was kind enough to run the pieces through the table saw to make the grooves to hold the backing and the glass. Do NOT do this on a table saw.

I used the Micro Jig Gripper to make a similar cut for my Clip Board Stand project. Rodney chose not to use it for this application, but I would always use the gripper for this cut.
Miter the Corners of Your Board

Because my work table isn’t perfectly level, I used a piece of plywood shelving to ensure that my shadow box would be square. You may notice that one of the grooves is a little more pronounced than the other. That’s because the thickness of the backer board and mat board is greater than the thickness of the glass.
Make Sure Your Frame is Square

A small carpenter’s square is a great way to ensure everything is square.
Glue Your DIY Frame

I used Gorilla Wood Glue to secure everything but the top section, which allowed me to add the sand and shells later.
Clamp it!

I like to use Irwin quick clamps to hold everything until the glue sets up.

It was fun playing in the sand after it dried out. Look how many rocks there are in the sand.
Add Glass to the Frame

I put the vacation photo in the mat, and then, to protect the image and mat, I added a scrap piece of paper while I put the sand into place.
Insert Sand and Shells

I made an indentation on the scrap paper so I would know where the photo mat started—you can see the line. See the serrated knife on the right? It’s a very flat, long knife that works perfectly for moving sand and arranging rocks.

Working on the tray helped contain the sand. The spoon and knife were very helpful in making this shadow box, which allows me to display vacation photos and keepsakes in a pretty fashion on my mantel.
I love my new rustic shadow box to display vacation photos from my trip to Cape Cod!

The sand, shells, and rocks can be rearranged at will by shifting the rustic shadow box frame.
While visiting Cape Cod, I bought some original, reclaimed artwork that needed a frame. In my post How To Make A Reclaimed Artwork Rustic Frame, you can see how I made a reclaimed wood frame for that artwork.
After seeing the Ocean View Shadow Box from The Southern Couture, I was inspired to make this project. How do you display vacation photos and keepsakes?
gail
Related Content: Picture Frame Ideas For Home Decor and More
See the latest Small Updates | Big Change
Sharing here: Happiness is Homemade
Hi Gail, question for you. I make large wall clocks and sale them in garage sales and also by word of mouth but wanted to try to sale them in Sir Richard antics they have booth like you sale in. wondering it they would allow me to sale them in there store? I don’t want a rent a booth hoping they would deal with me on one or two pieces a time? any feed that would help? thank you
Raul
I’m guessing they would probably say no, because they would want you to rent a booth. Maybe you could hook up with a dealer that is already in the store and pay them a small commission on each sale. I’d find someone who fits your style and reach out to them. It never hurts to ask. But if you ask the store and they say NO, they may not want you to reach out to a vendor.
Have you tried Craig’s List? Do any stores around you allow sidewalk sales? Some of the stores around me do that. They let people set up on the weekends.
good luck!
gail
Gail this is such a fabulous idea! It turned out so cute, you are so creative! Looks like you had fun!
Nice Gail… glad you had a good time at the beach!
What a great idea! My husband has shells and starfish and fossils he’s saved from his childhood. I’ve never known what to do with them besides toss them in a display basket.
Really nice! I pick my favorite photo for a frame:change them out over time. I still have photo albums for my other fave pictures.
I love this, Gail!