Distressed Chalkboard Headboard Coat Rack
As an Amazon Associate, I earn from qualifying purchases.
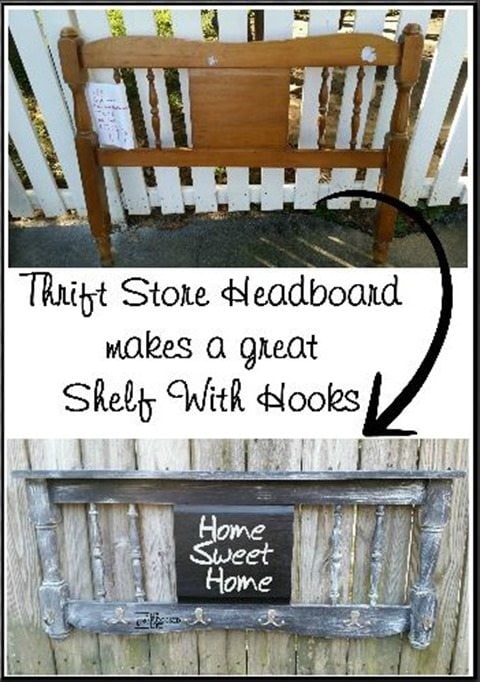
I have another great headboard project for you today, a distressed chalkboard coat rack.
Last week I showed you the small black shelf I made from the leftover bed posts of this headboard.
Repurposed Headboard into Distressed Chalkboard Coat Rack
 This is what the headboard looked like when I got it at Vendors’ Village.
*this post contains affiliate links*
Cut legs off headboard
 Using my Rockwell Jawhorse stand, I was able to easily cut the legs off of this headboard on my compound miter saw. You can also do this with a jigsaw or a circular saw.
Don’t throw spare bed parts away
 If you missed last week’s small black shelf made with these cute little legs, you should click that link and check it out.
Prepare to paint
 I mixed up a batch of my famous diy chalky paint primer with some plaster of paris to use in my paint sprayer.
 I love using my Homeright Finish Max to paint several projects at a time. I’ll have days that I do a white (polished pearl) basecoat, but this day was a Beluga day.
 Here are tandem headboard projects. One for today’s project, and the other was used to make a Chalkboard Coffee Cup Rack.
Attaching a shelf to the distressed headboard coat rack
 I cut a 1×4 to size and used my handy kreg multi-mark to make sure the shelf is centered on top of the headboard.
 I secured the shelf with a wood screw.
 Initially I wasn’t going to add a shelf. But now that I added it, I needed to do a quick coat of flat beluga. Because the pine board is new,it was not necessary to use the chalky paint primer. I love using these cheap chip brushes because they clean up so quick and easy. The older they get the better they work.
 ![]()
How to do a dry brush technique
 I used some whitewash mixture (polished pearl watered down) with a chip brush to do a dry brush technique on the headboard and shelf. Then it was ready for some chalkboard paint.
Attach coat hooks
 These old headboards are very hard wood, and it’s necessary to drill pilot holes in order to secure the screws without breaking.
Bar Soap on Screws
 In addition to drilling pilot holes, I also used some bar soap to coat the threads of the screws to allow me to easily secure the D. Lawless Hardware coat hooks.
Use a handheld screwdriver not a screw gun for coat hooks
 One last tip, don’t use your screw gun—go old school and use a screwdriver to assist in getting the screws in the wood without breaking them.
Attach D rings for hanging
 These d rings are great for all your hanging projects. Buying them on Amazon by the 100’s is a lot cheaper than picking them up at the hardware store.
 This is one of the projects that was part of the “second act” at Glendale 2016 meaning it was left on the truck until I had room to display it, therefore it didn’t sell, so I took it to my booth at Vendors’ Village.
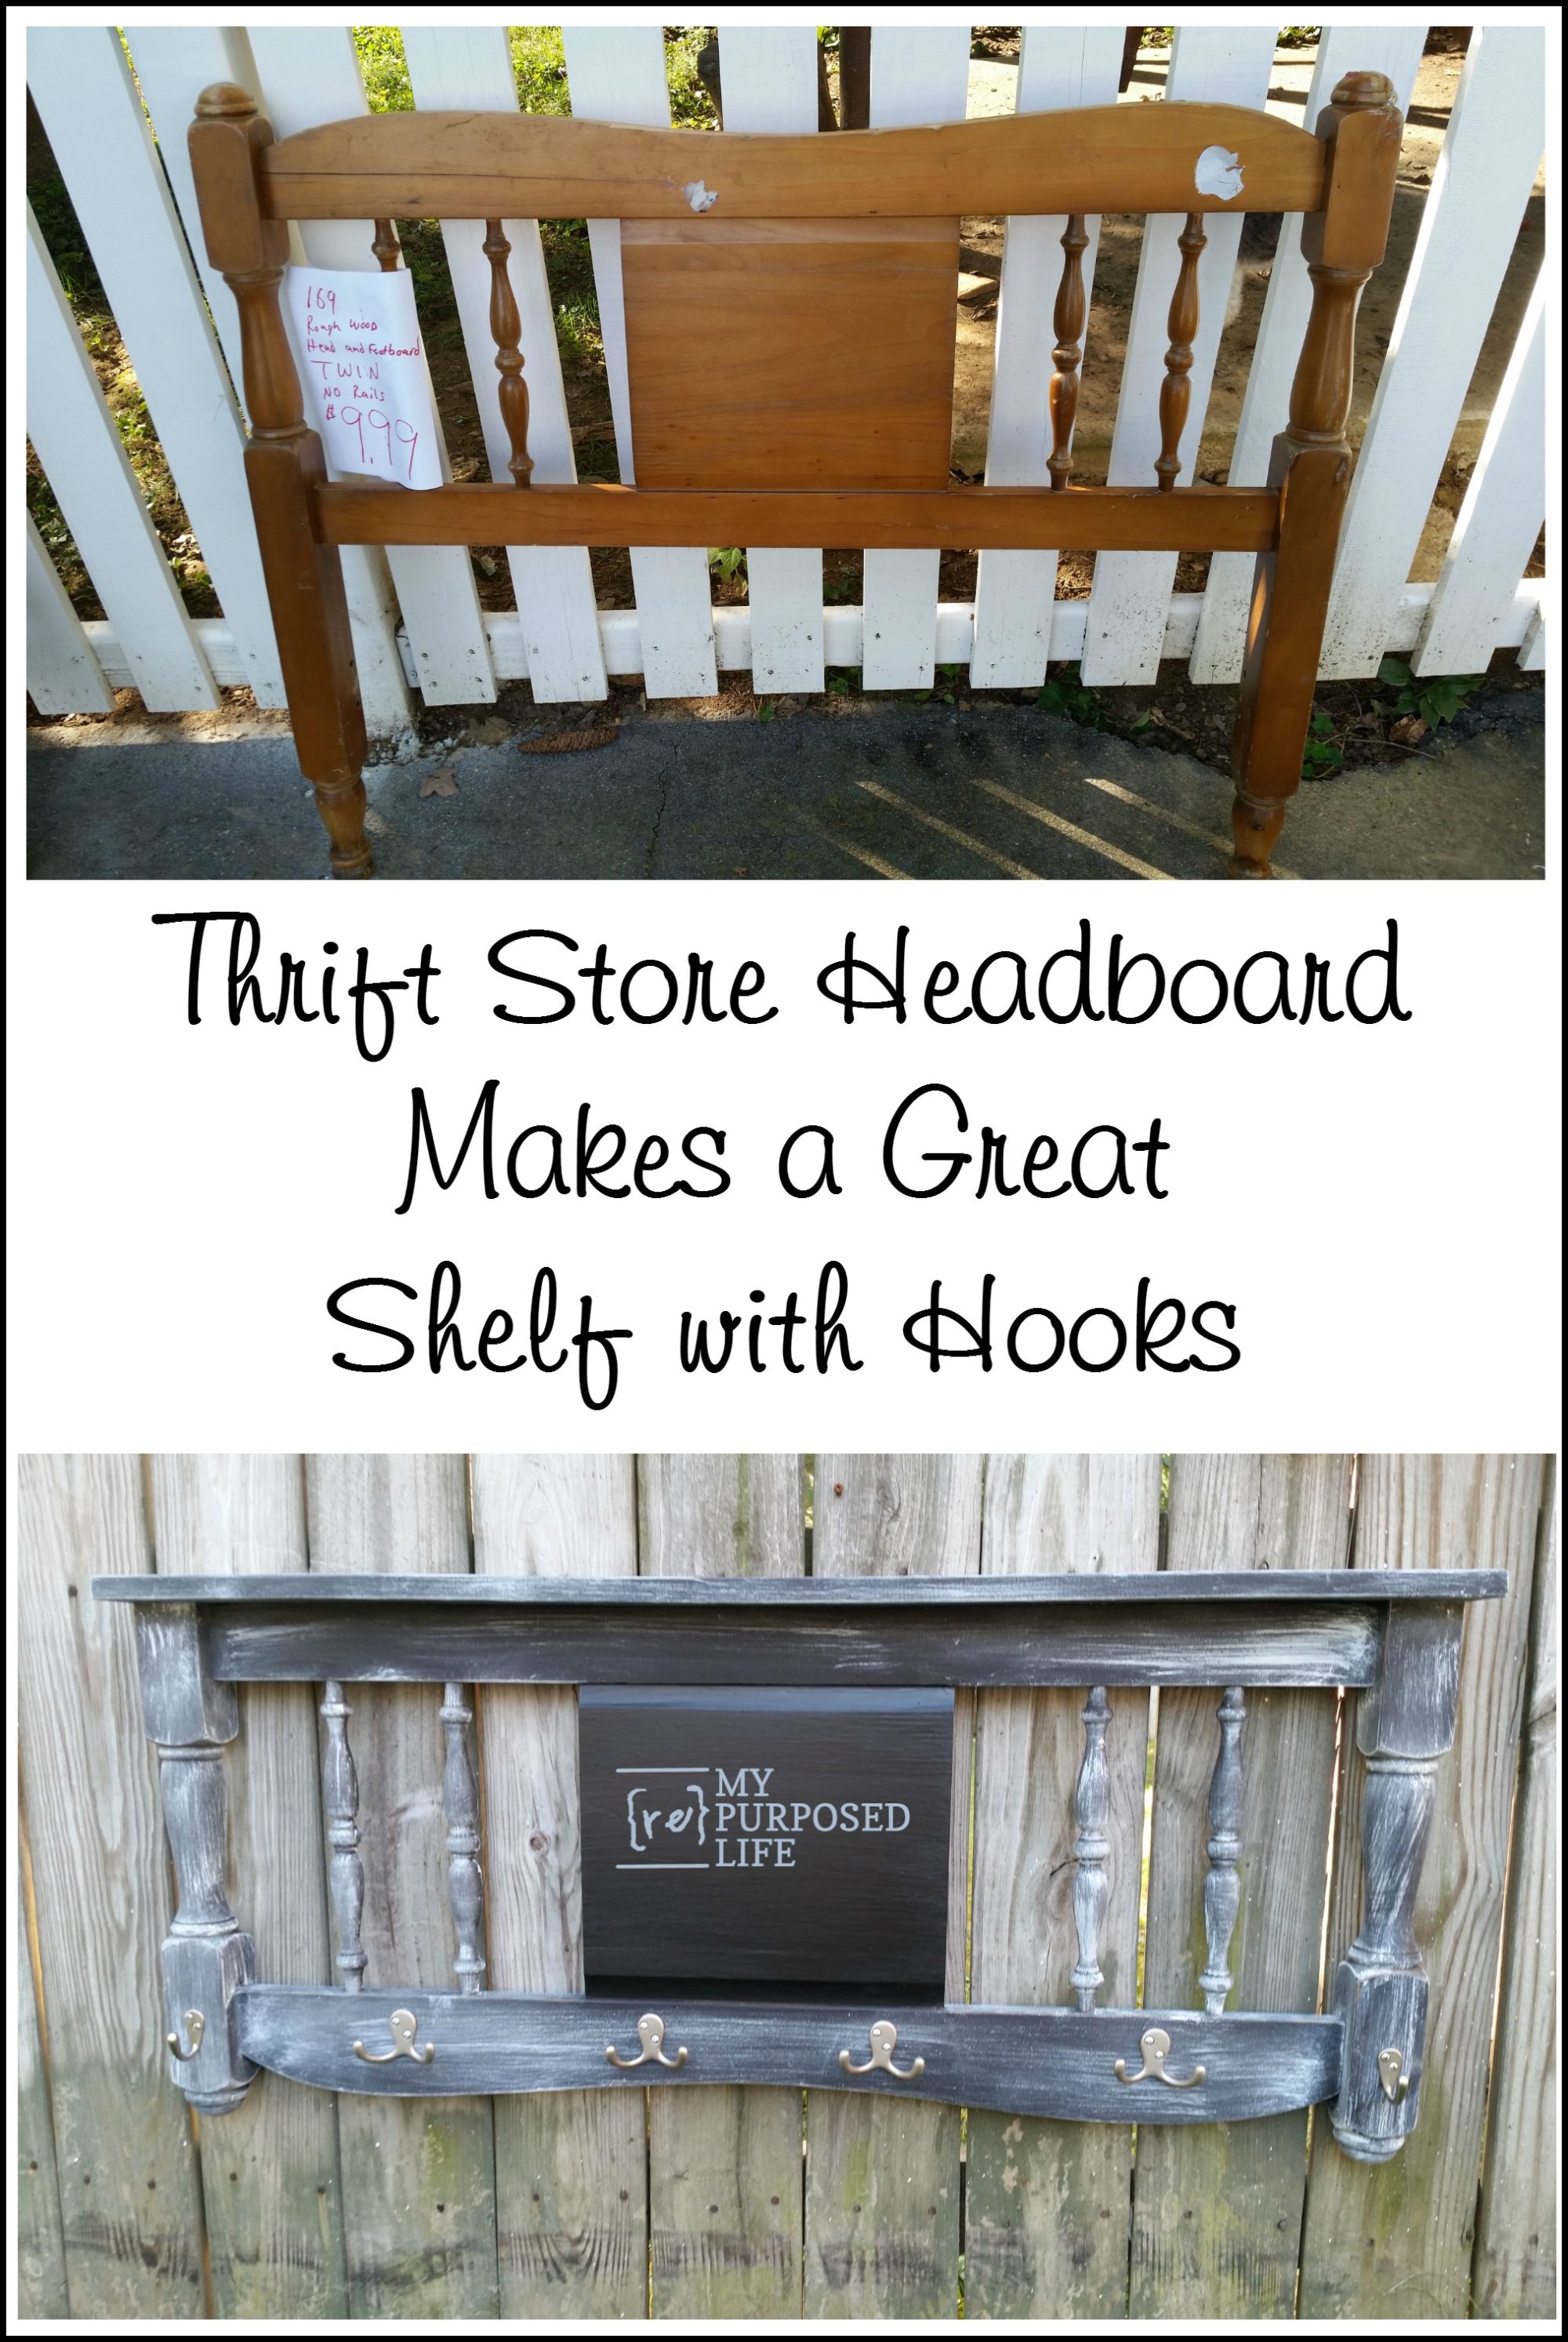
It’s perfect coffee cups in a busy kitchen, or for the family in a mudroom. You could even use it by the back door for those last minute rushes out the door!
gail
Super tips! I bought the Kreg Measuring tool from your link and use it all the time, now I’m adding a bar of soap to my tool stash for hard wood & screws! Love how you reimagined this headboard. I think one like this would be great in the North House! Pinned …of course 😉
Thank you so much for pinning Wendi! It’s truly appreciated so much!
Yes, keep that bar soap handy!
gail
Love it Gail! I have 3 headboards in my basement – I just might have to make something similar! Thanks for the great idea!
Jeanie,
I love making coat racks of all kinds! They’re so handy!
thanks for stopping by,
gail
love it! really like that it can hold 10 items!