Divided Pedestal Serving Tray
As an Amazon Associate, I earn from qualifying purchases.
Hello once again My Repurposed Life fans, it’s Joan from Scavenger Chic. I have a divided pedestal serving tray project to share with you!
A lot of my projects lately seem to be makeovers. But I chose this project to share with MRL readers because it really repurposes several every day household items into something new and fun.
I love pedestal servers:
(1) because they are so easy to make
(2) because they help organize the clutter in my house and
(3) I get to use a bunch of bits and pieces that are just dying to find their way into a project.
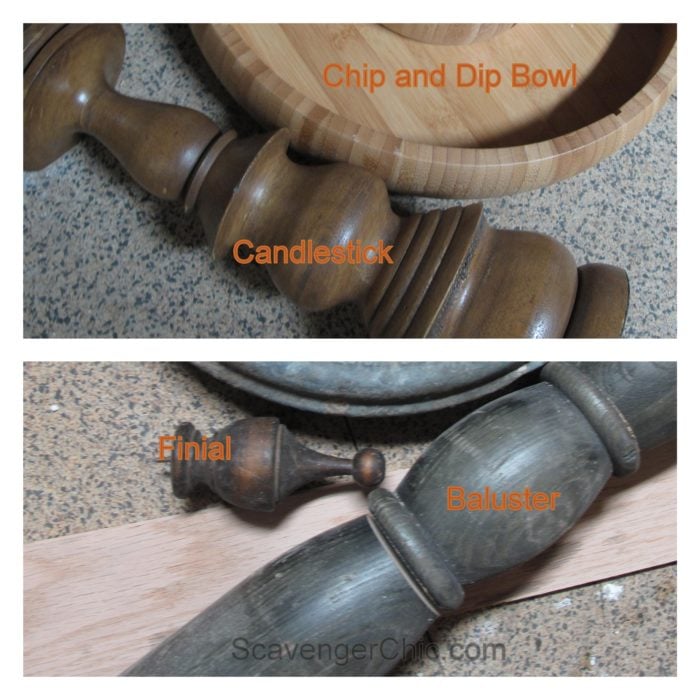
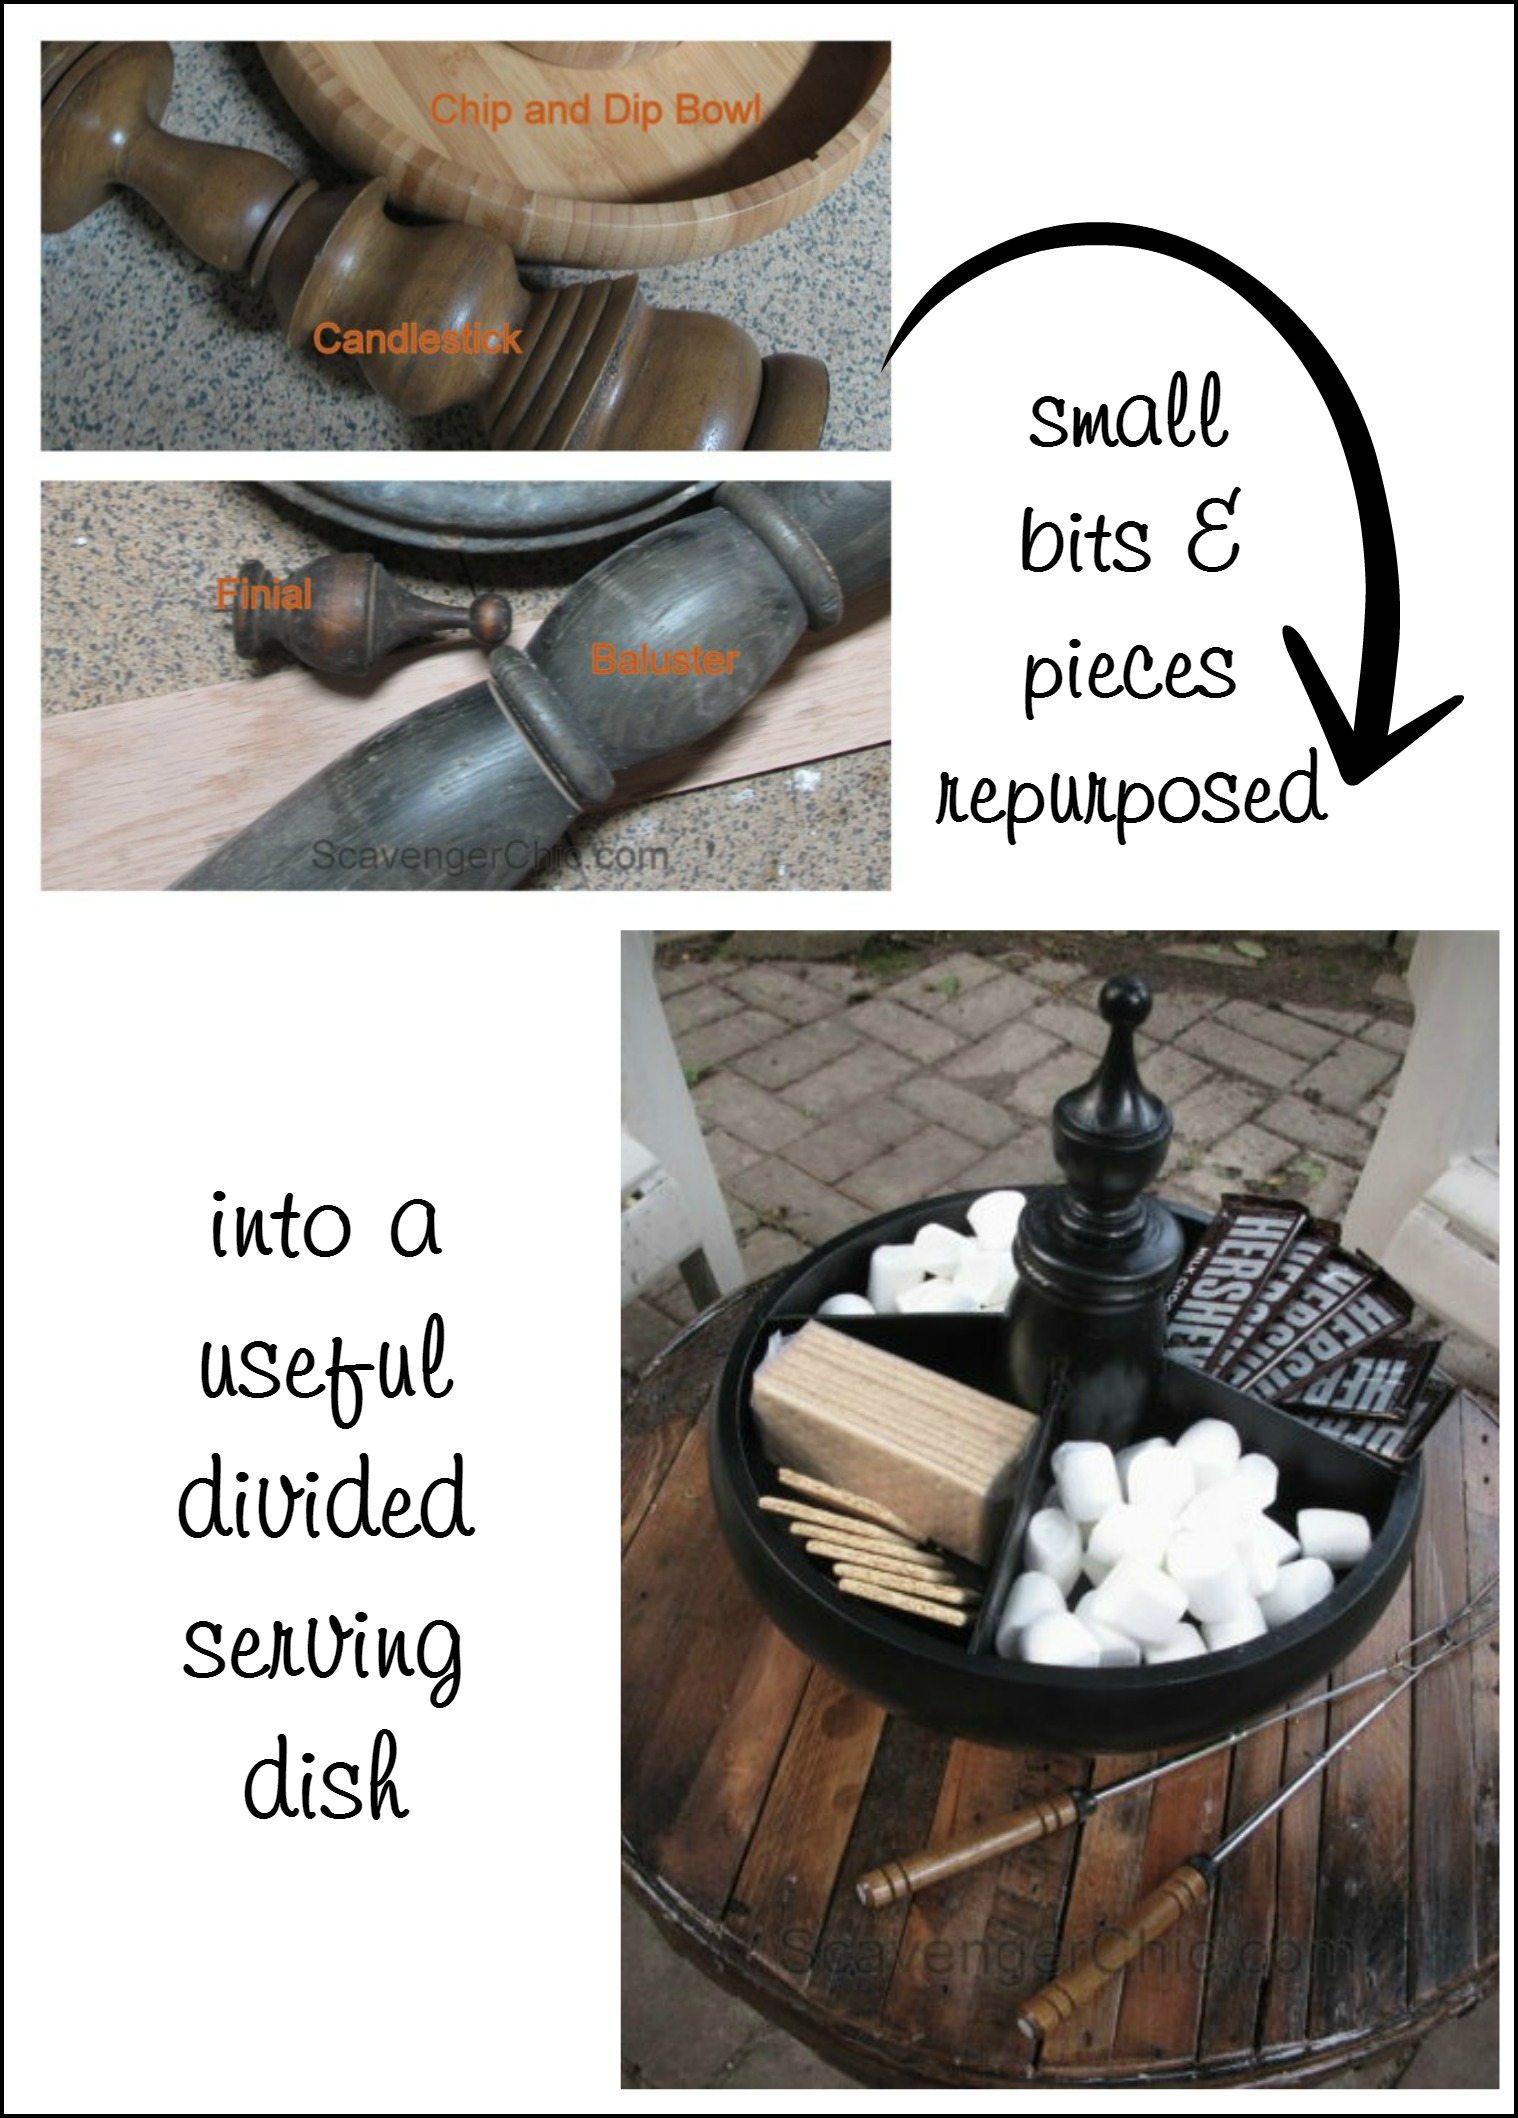
This server uses a chip and dip bowl, a wooden candlestick, a finial, a baluster and a bit of scrap wood. I was going to use a metal trash can lid as the main bowl. However, I could not pound that thing flat. It kept popping back to it’s original shape, so the chip and dip bowl had to make an appearance.
How to make a divided pedestal serving tray

The baluster was cut where there were natural breaks. Holding it in place with a clamp, I cut four evenly spaced grooves with a hand held circular saw around the sides.
Use a wooden candlestick and tray
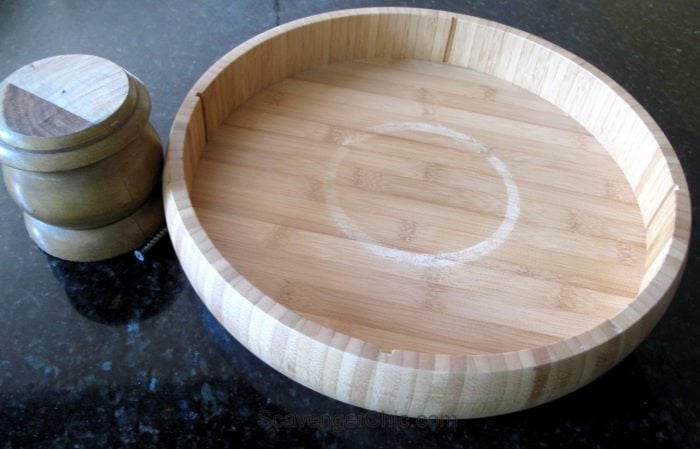
The candlestick was cut to about 4 inches, it too was cut on one of it’s natural breaks. I also removed the inside dip bowl from the wooden tray. I was lucky; it looked like this tray originally had divisions, so there were already grooves cut around the outside of the tray to hold my dividers.
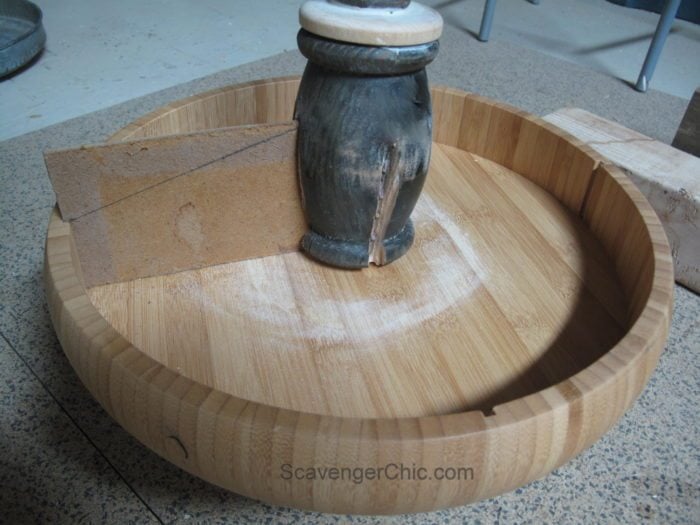
Make dividers
The candlestick was screwed on to the bottom of the tray and the baluster and finial were glued onto the top with heavy duty construction adhesive. To make a softer transition between the finial and baluster piece I added a wooden round between the two.
I used thin scraps of mdf plywood to create the dividers in my pedestal serving tray.
Add finials
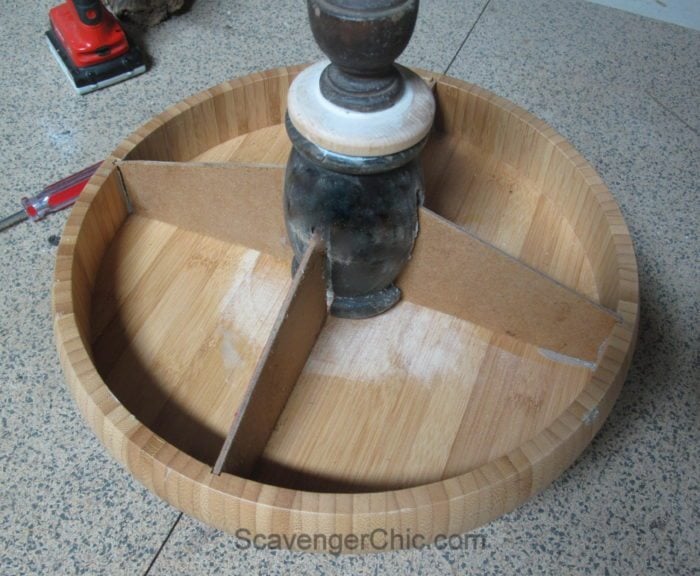
The dividers were also glued into place with construction adhesive.
Before painting, sand your wood and fill in any gaps with a paintable caulk making sure it’s smooth before it gets a chance to dry.
Paint divided pedestal serving tray
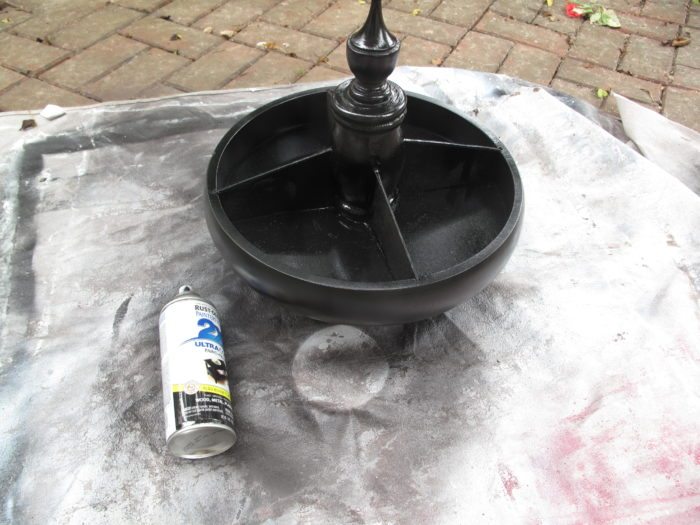
I ended up using 2 coats of a black semi-gloss spray paint. After the first coat, use a fine sandpaper to get rid of any rough spots or ridges then respray.
Since spray paint can chip and flake, using on pieces that will hold food is typically not recommended. There are some paints made for glass and ceramics and they may be safe to use on food serving dishes. Read the manufacturer’s directions carefully. Regardless of the paint you use, always check to see if the product you are using is food safe and/or non-toxic prior to using it. If you can’t tell, be safe and use a doily or some other protection between the painted surface and your food.
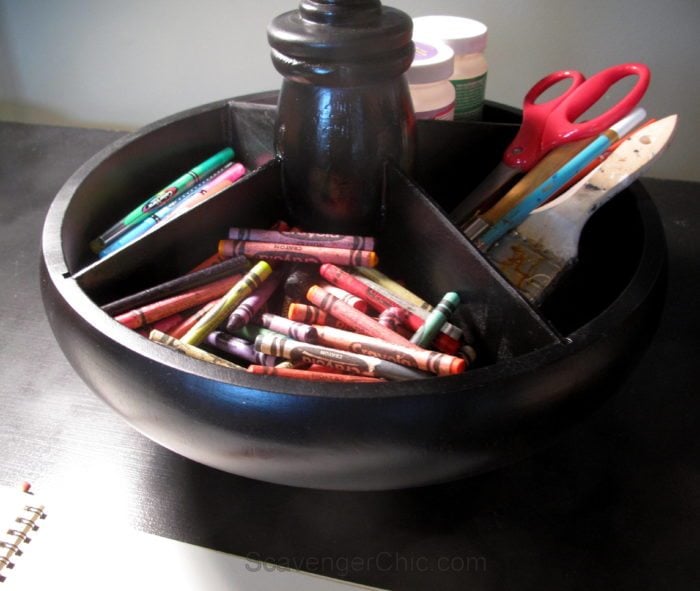
Serve snacks in pedestal tray
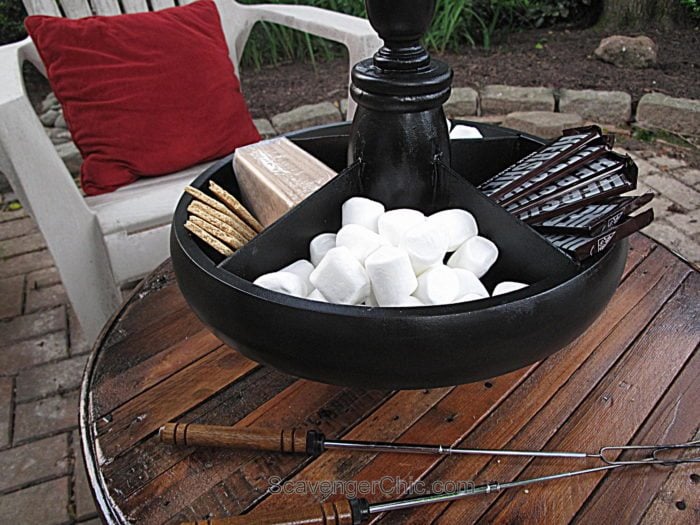
Time to fill the divided pedestal serving tray with your favorite goodies. Tonight it was fixin’s for s’mores.
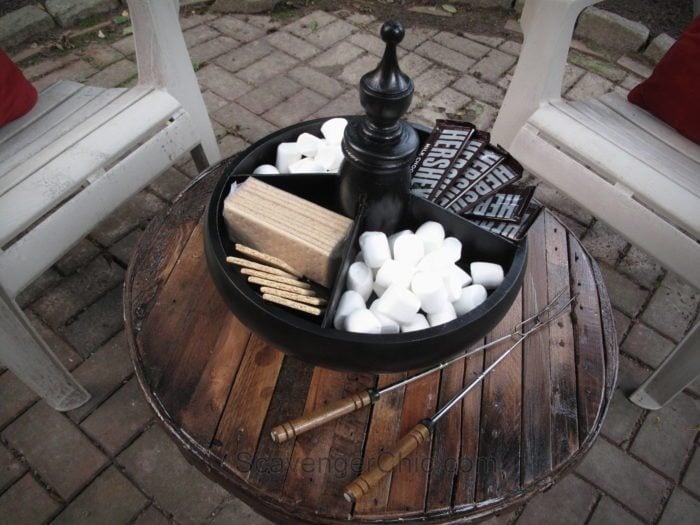
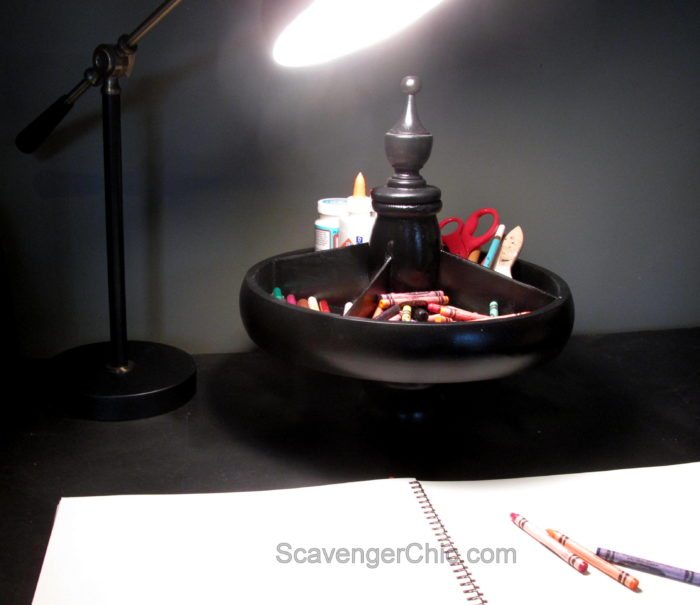
But it could just as easily be used for the kids crafts supplies (or mine).
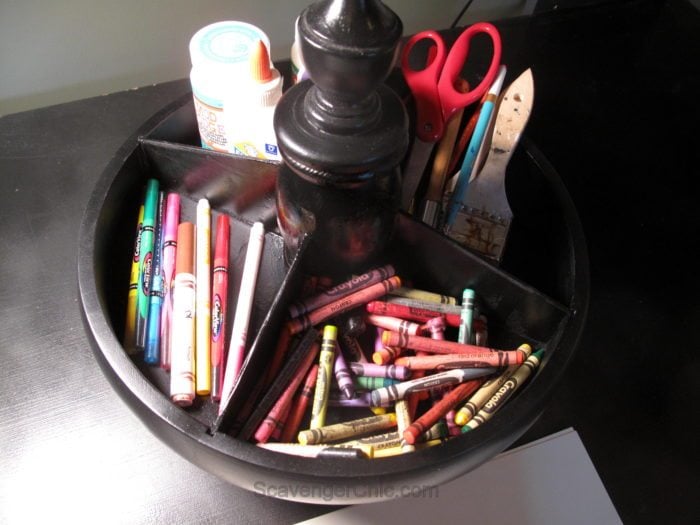
Use your imagination and you’ll be organized in no time.
Joan
Love this project! How creative, using those pieces to make a divided bowl. I needed several to keep my clutter organized!
@ Joan – I’m loving your pedestal serving tray. Helps to tidy up things.