DIY A-Frame Crate
As an Amazon Associate, I earn from qualifying purchases.
Hey MRL Readers!
It is good to be back posting here today, in case you are new, my name is Mindi and I blog over at MyLove2Create. I love contributing for Gail and feel honored to share my projects with you!
It is amazing how fast the summer has gone by, and I realized the other day that I had not made a single crate. What?! I promptly fixed the situation, and I am happy to share my DIY A-Frame Crate with you today…


Isn’t it so fun!? Just so you know, I have an obsession with crates, they make me happy. 🙂
Reclaimed Wood

I have been wanting to make a crate like this for quite a while. With crazy summer life, vacations, and projects like my Farmhouse Storage Bed and Floating Night Stands, I just never had time, until now.
I had some great reclaimed wood that needed some lovin’, an old croquet mallet handle, and some smaller skinny boards that were once part of an old wooden mat (???). I ended up using two of the skinny (close to 1×2 size) boards, the two longer 1/4 x 5 3/4 inch boards, and the croquet mallet handle.
Design A Frame Crate
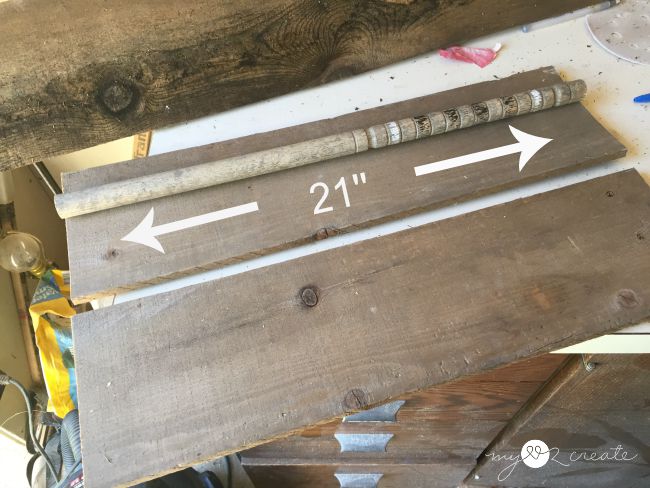
When I build crates I love to just wing it and see where my build takes me. I started with trimming the ends of the croquet handle and then cutting two side boards to the same length. They ended up being 21 inches.
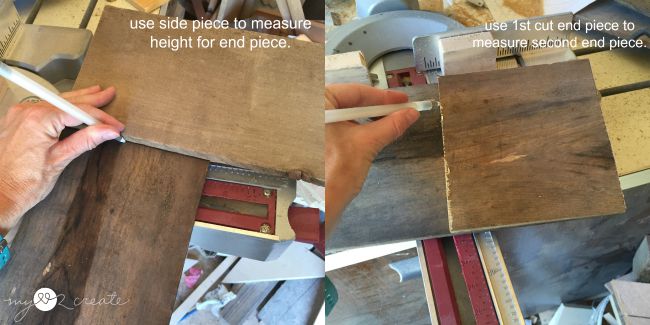
Next, I cut the end pieces. I did this by measuring my side piece on the board needing to be cut, to make sure the ends would be the same height as the side piece. Once I cut the first piece I used it to measure and cut the second end piece.
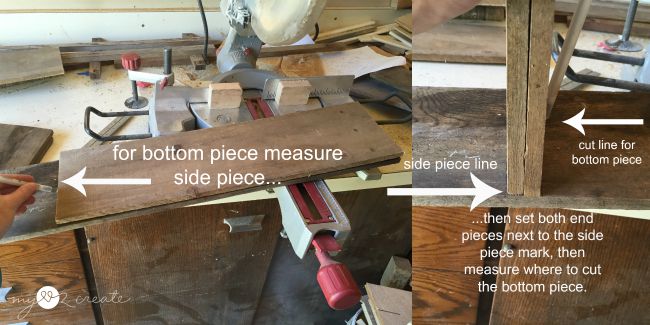
To complete my crate box I needed to cut the bottom piece. Since I wanted my bottom to be inset, I started by measuring and marking my board with a side piece. Then I used my two end pieces by placing them next to my first mark and marking the other side for where I needed to cut.
Hopefully that makes since. This process eliminates measuring, and if you do build this way you can make it any size you want. You can also measure, I just like to use what I have instead.
Assembly
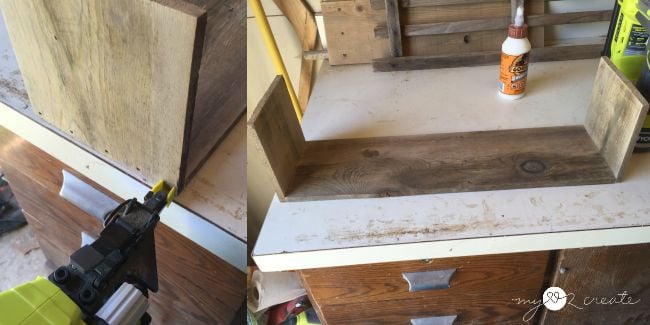
I used glue and finish nails to add the end pieces to the bottom piece.
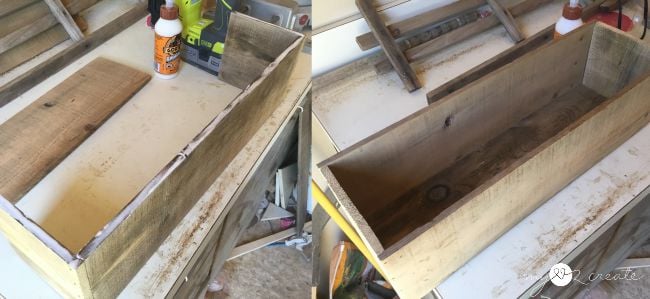
Then I did the same for the two sides. See how easy it is, that is why I love making crates, easy but so satisfying! Now to make it cute…
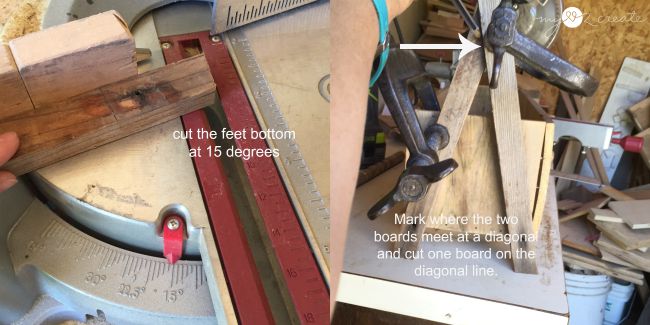
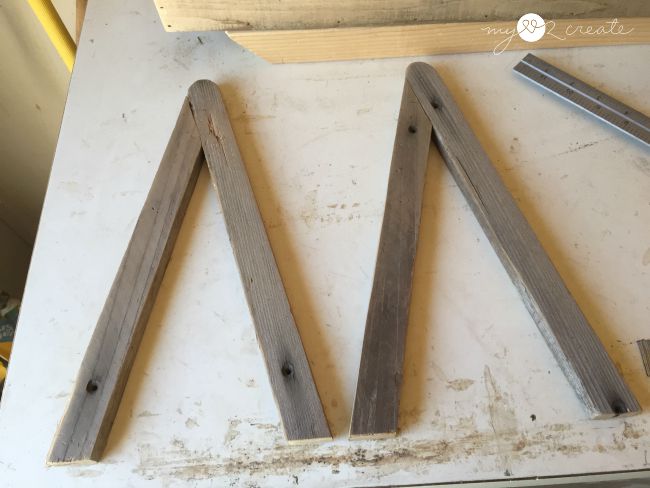
I took my 1×2 ish boards and cut two ends at a 15 degree angle on one side, the bottom of the feet. Next, I propped my crate up on a 2×6 block of wood to give it some height, then I clamped my leg boards to my crate, and each other, and marked where the two boards met at a diagonal, and drew a cut line.
In the top left photo you can see two boards on top of each other with a diagonal cut. When I made my diagonal cut I used both sides of the board by simply flipping the second onto the first and measuring where to cut the 15 degree foot bottom for the second. So basically I got both A-Frame diagonal cut boards out of one cut. I used one on each side of my crate.
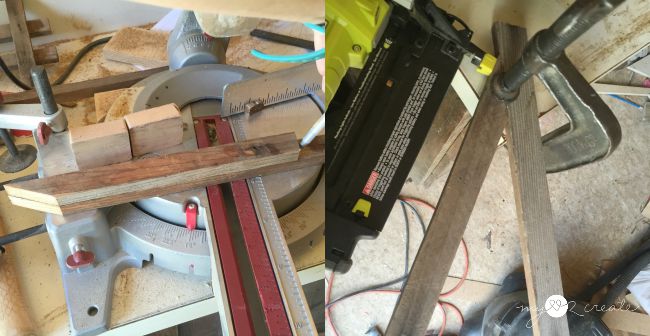
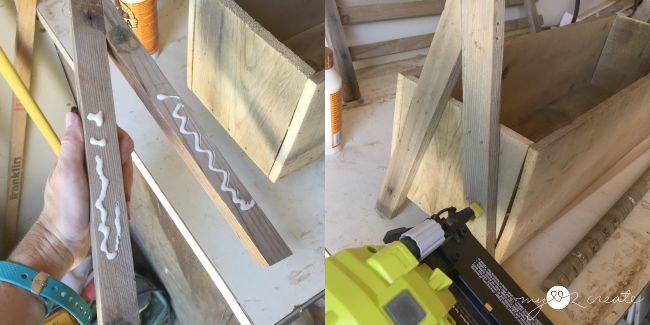
For the other side of the A-Frame I just cut the bottom at 15 degrees and the top a little taller than the diagonal board so I could round it off later. Then I used glue and nails to attach the A-Frame legs together. I nailed in from both sides and used a clamp to keep them together while I nailed the first couple of nails, I removed the clamp to nail in the rest.
Tweak Assembly
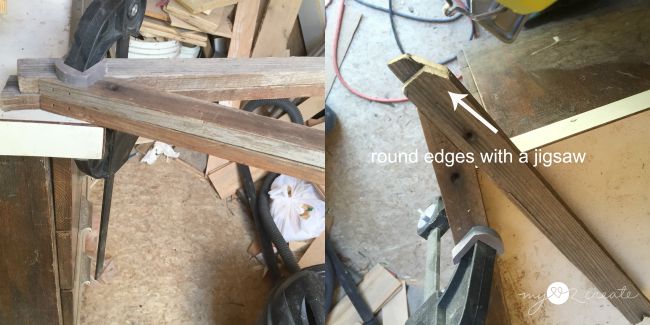
When I nailed the second set of A-frame legs together I matched them up to the first set to make sure they were the same size/height, and then nailed them together (top left). Then I rounded the tops of both sets of legs at the same time with a jigsaw and sanded them smooth.
A perfectly nice set of rustic legs! Please ignore my messy work table top, I guess I need to clean up the dried glue…It always seems to get past me until I look at my in progress photos…
I glued and nailed on my A-frame legs, still using my 2×6 board under my crate to raise it up. I also glued and nailed on my croquet mallet handle to the top of each set of legs, but I forgot to take a photo, oops!
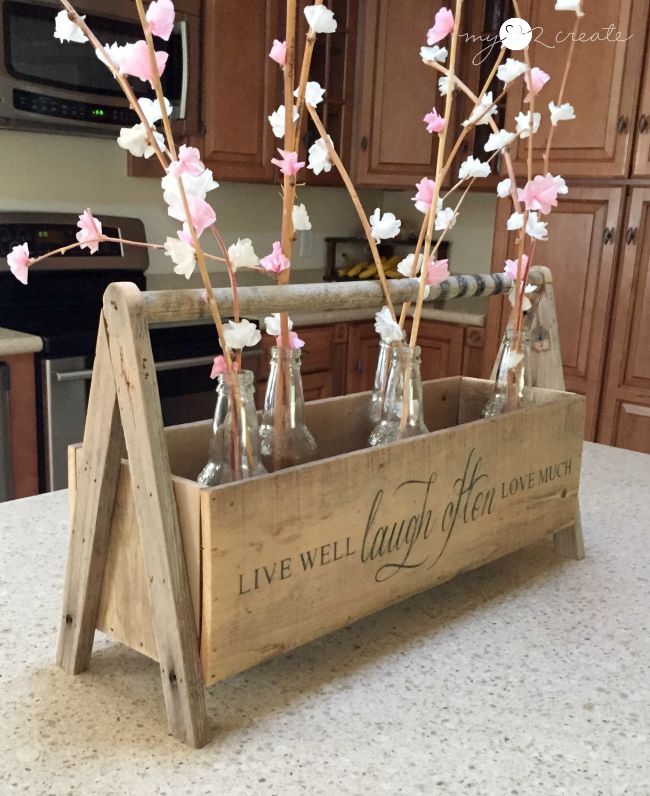
Embellish A Frame Crate with Stencil
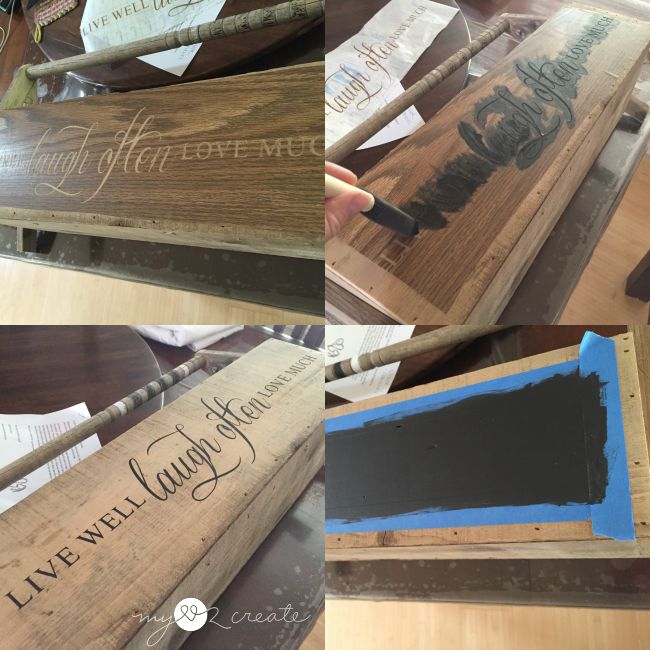
At this point I could have been done, but I love to add a little something extra. I used my Cricut to cut a short phrase out of contact paper, and stenciled it on with some black paint. On the other side of the crate I couldn’t resist adding a chalkboard label…another weakness of mine. I. Love. Chalkboards.
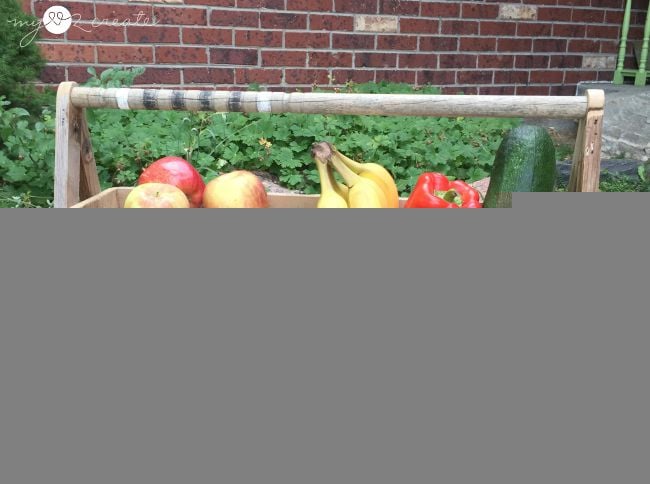
All finished and ready to get to work! It can hold a ton of fruits and veggies, perfect for the kitchen counter.
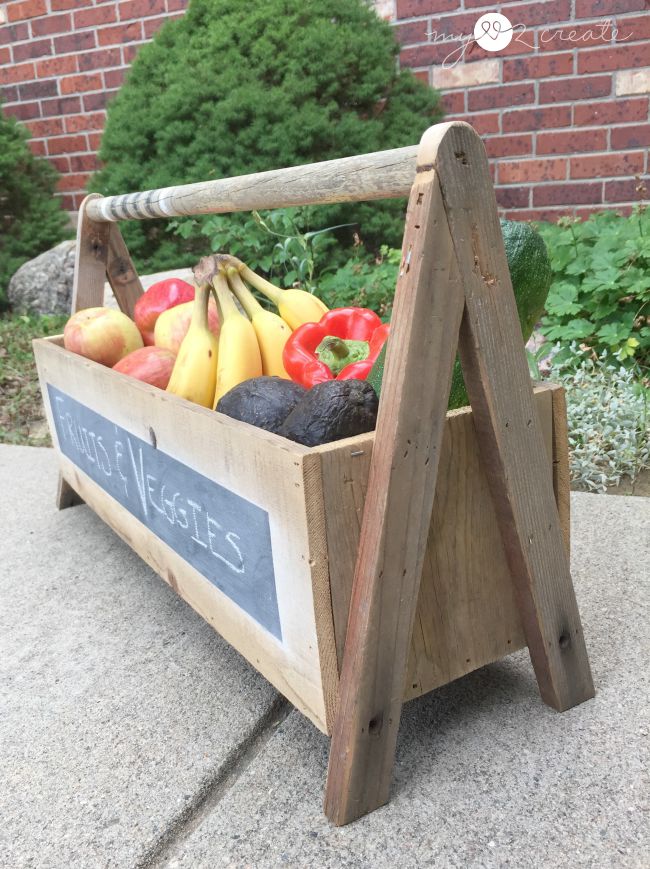
The A-Frame legs are so fun and cute! You can see that I like the rustic look. If you don’t you could easily fill in all the nail holes and paint your crate.
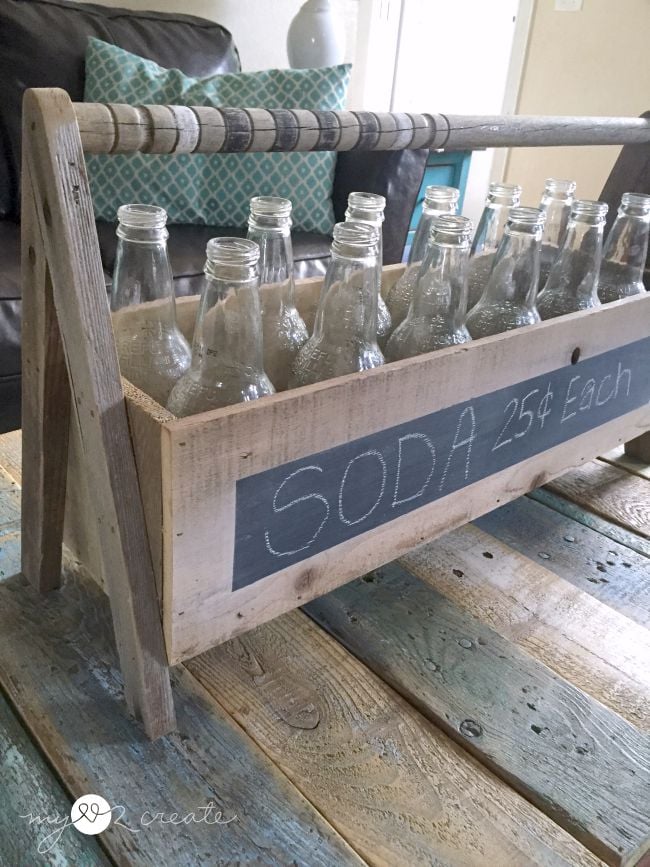
A Soda caddy would also be a fun way to use this crate for parties, or just for home decor.
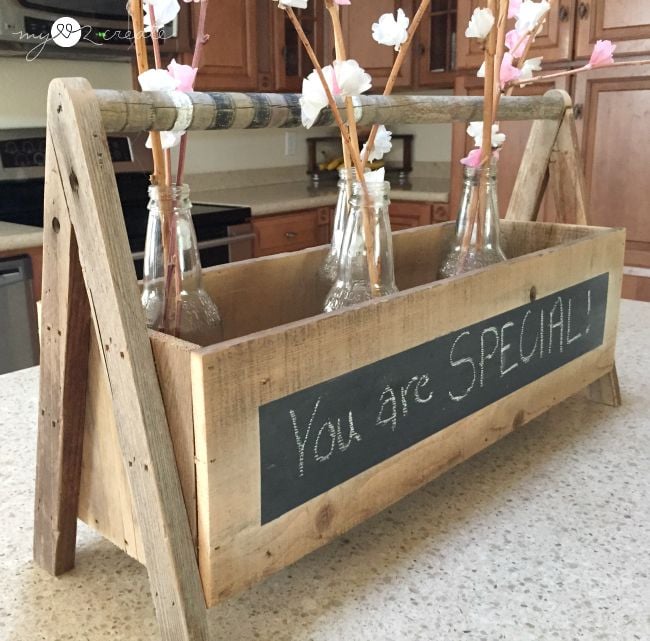
Or fill empty soda bottles with cherry blossoms for a pretty touch. (my cherry blossoms are made out of sticks and tissue paper).
I am planning on using it for decor on my kitchen island, and also using it for condiments at BBQ’s, since we still have some summer left. 🙂
I am feeling much better, I love satisfying my crate fix! Do you like crates? What would you use this one for?
see more of Mindi’s posts on MRL here
Absolutely adorable!
Oh little crate tote how I love thee, let me count the ways……
1. I’ve been passing up croquet games because I didn’t know what to do with them, now I do.
2. The A frame is awesome, gives a new dimension to the usual tote.
3. The chalk board side can be changed up for any occasion.
4. Writing on the other fulfills that urge I have to letter things permanently.
5. I’ve got a tote in the garage to spruce up, I think it needs to be raised up somehow, thanks for that idea too.
Adorable!
How original… don’t think I’ve ever seen an “A Frame” crate before! Looks great.
Amazing Crate! I love the A Frame…. thanks for the great tutorial!
Luv-luv-luv this Mindi!
I want to make one too–
Catherine
You ladies make everything look so easy. Love he caddy. I also like the cherry blossoms. I’d probably be able to make those, haha. Instructions?
This is great! I just received a bunch of reclaimed wood. I may have to create one of these. 🙂 I just love your projects. I feel the same about both yours and Gail’s projects…..affordable and you make me feel like I could tackle them. Thanks!
I’m in love! Chalkboards and crates are awesome and together it’s perfect! Sharing and pinning.
Mindi
Your diy crate is such a fabulous project. It’s the little things you do that make things special. Using a jigsaw to round off the top of the a’s really makes this project shine. Along with the phrase and the chalkboard. Plus you know I love using up odd bits and pieces!
Great job!!
gail