
DIY Gem Mining Sluice
As an Amazon Associate, I earn from qualifying purchases.
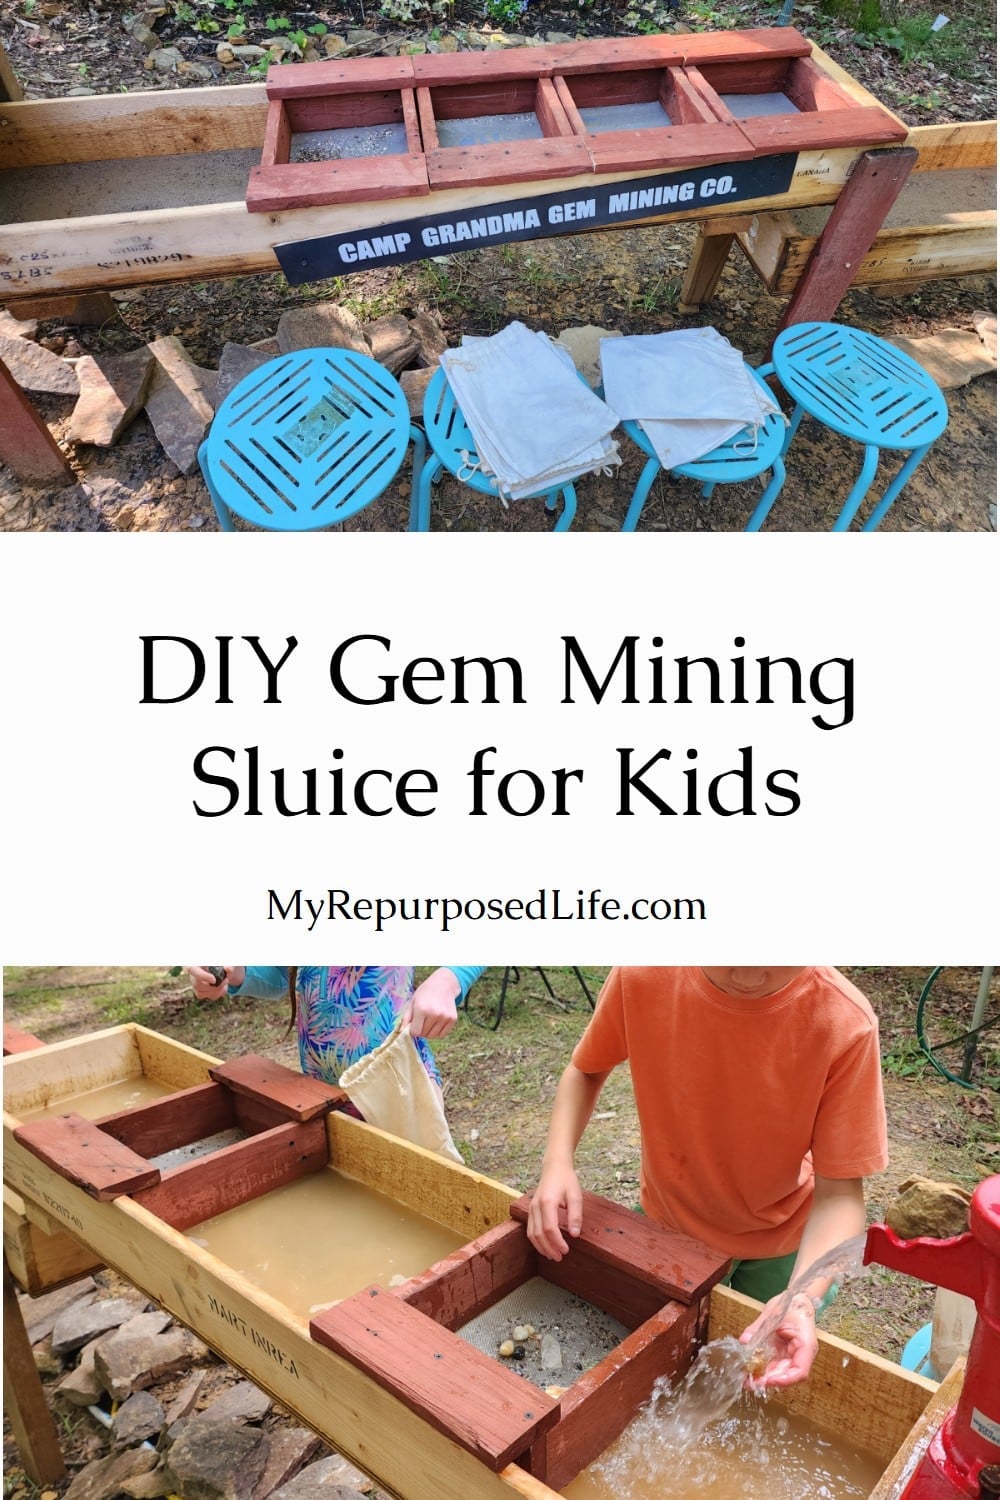
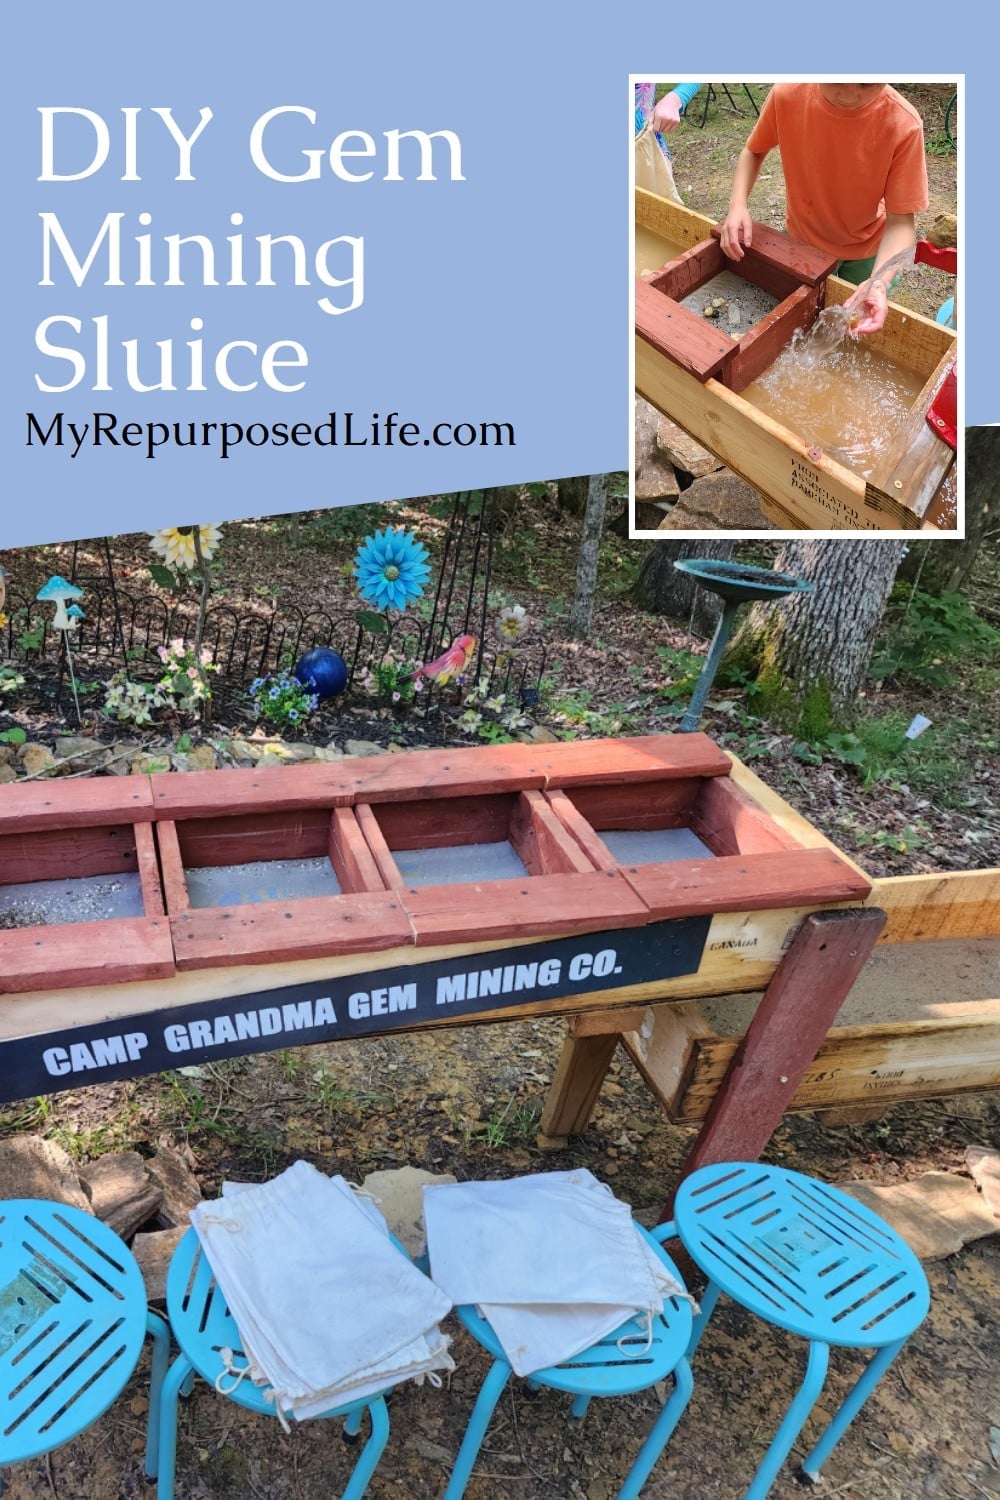
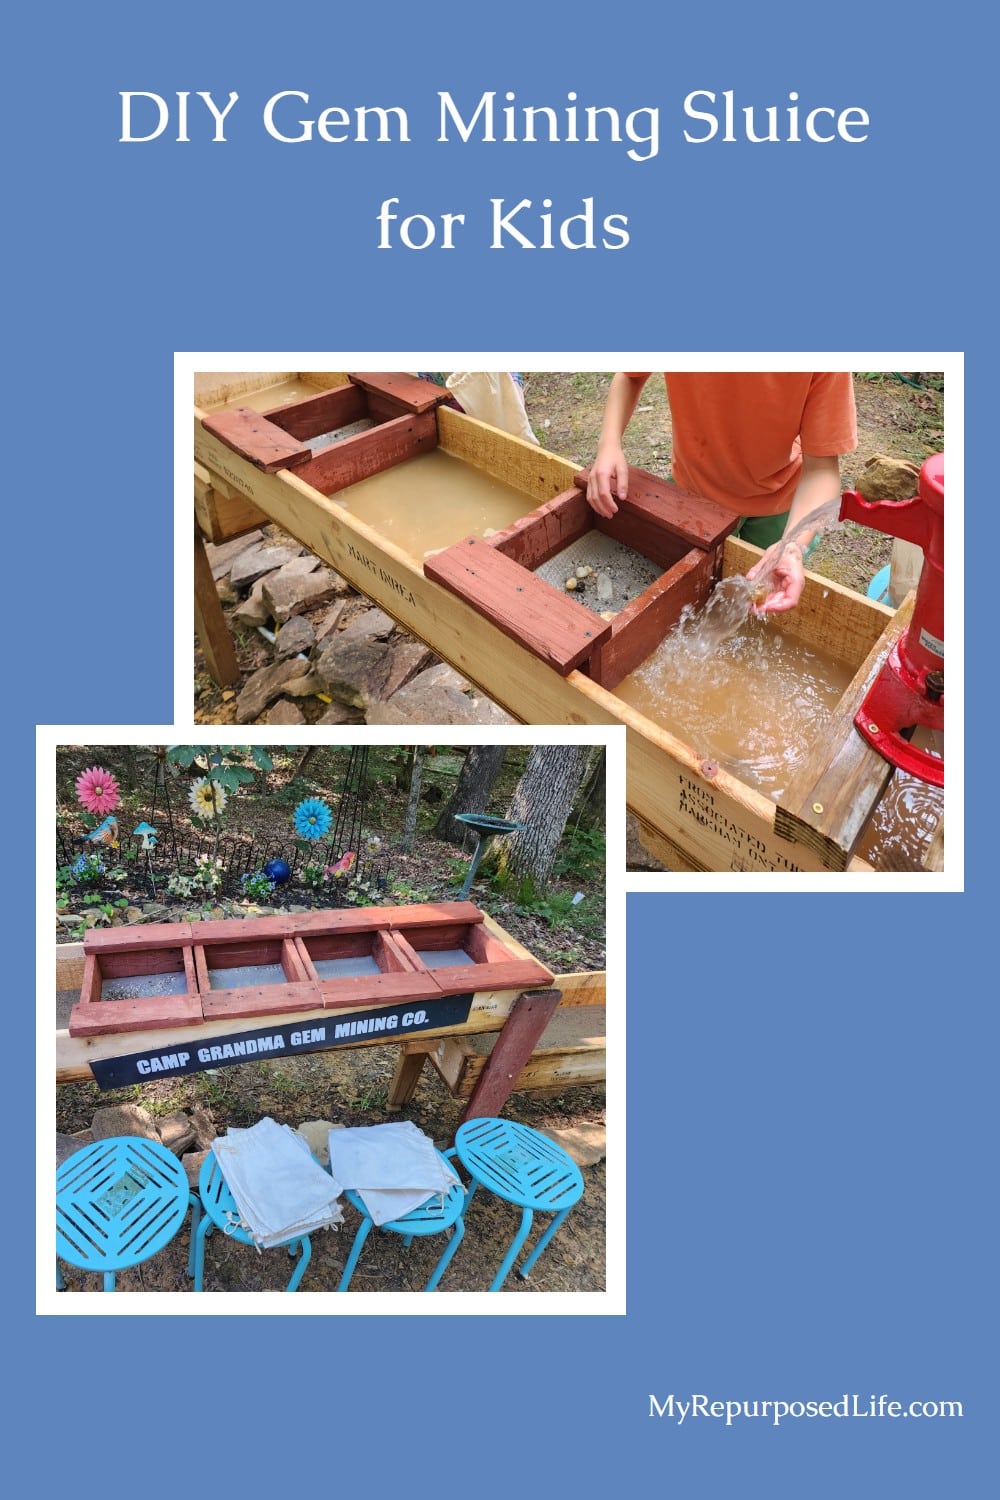
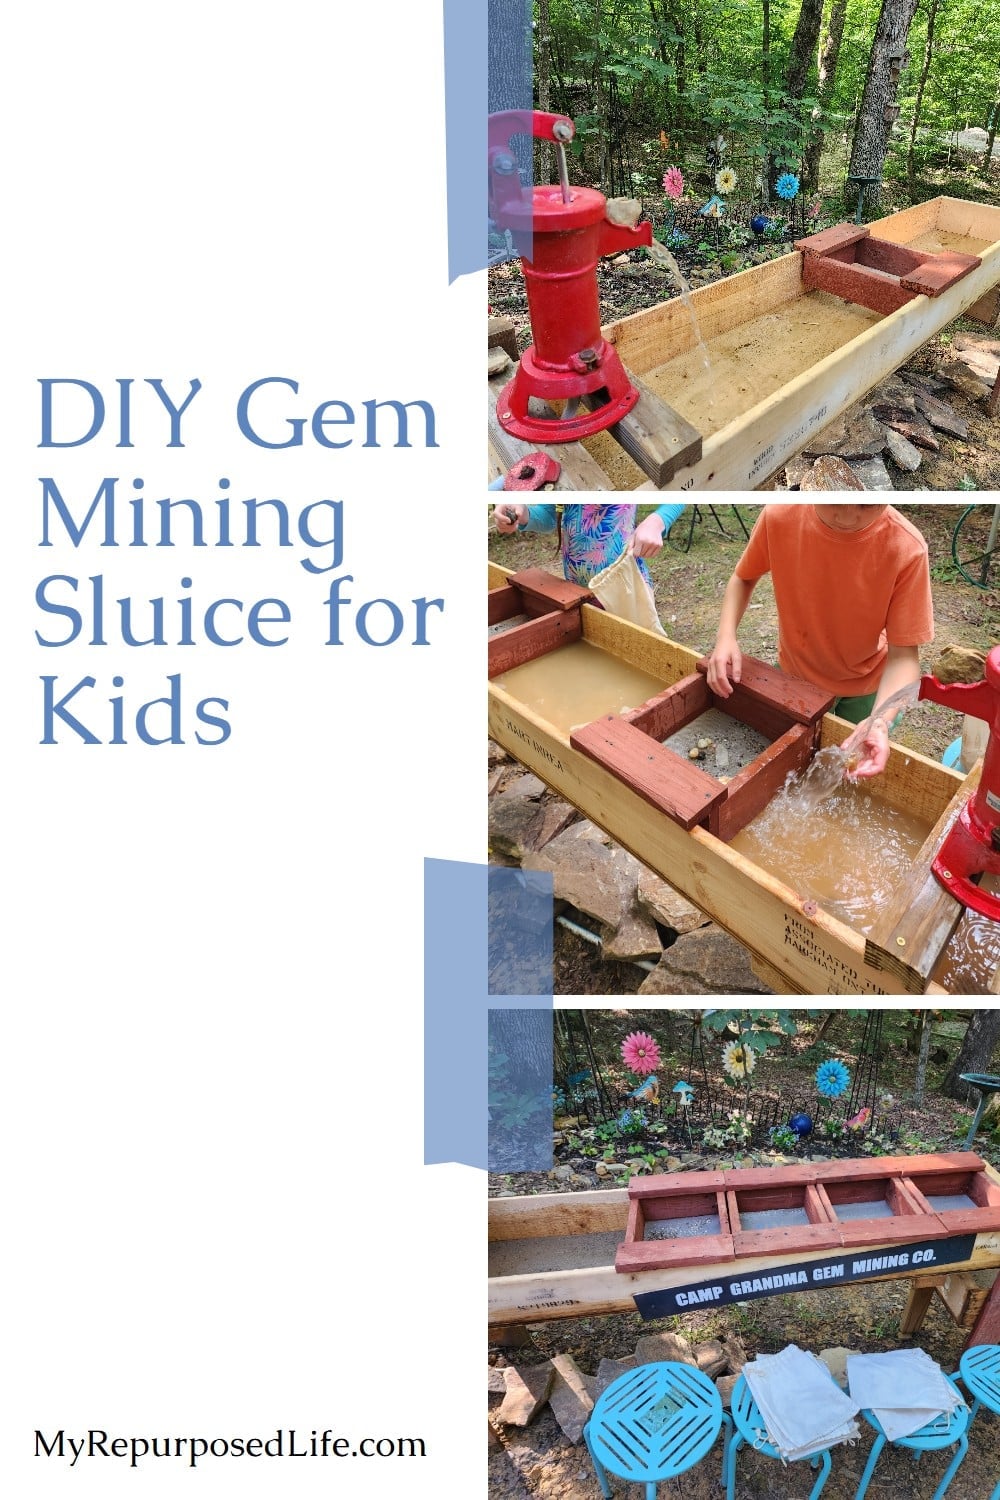
DIY Gem Mining Sluice for Kids
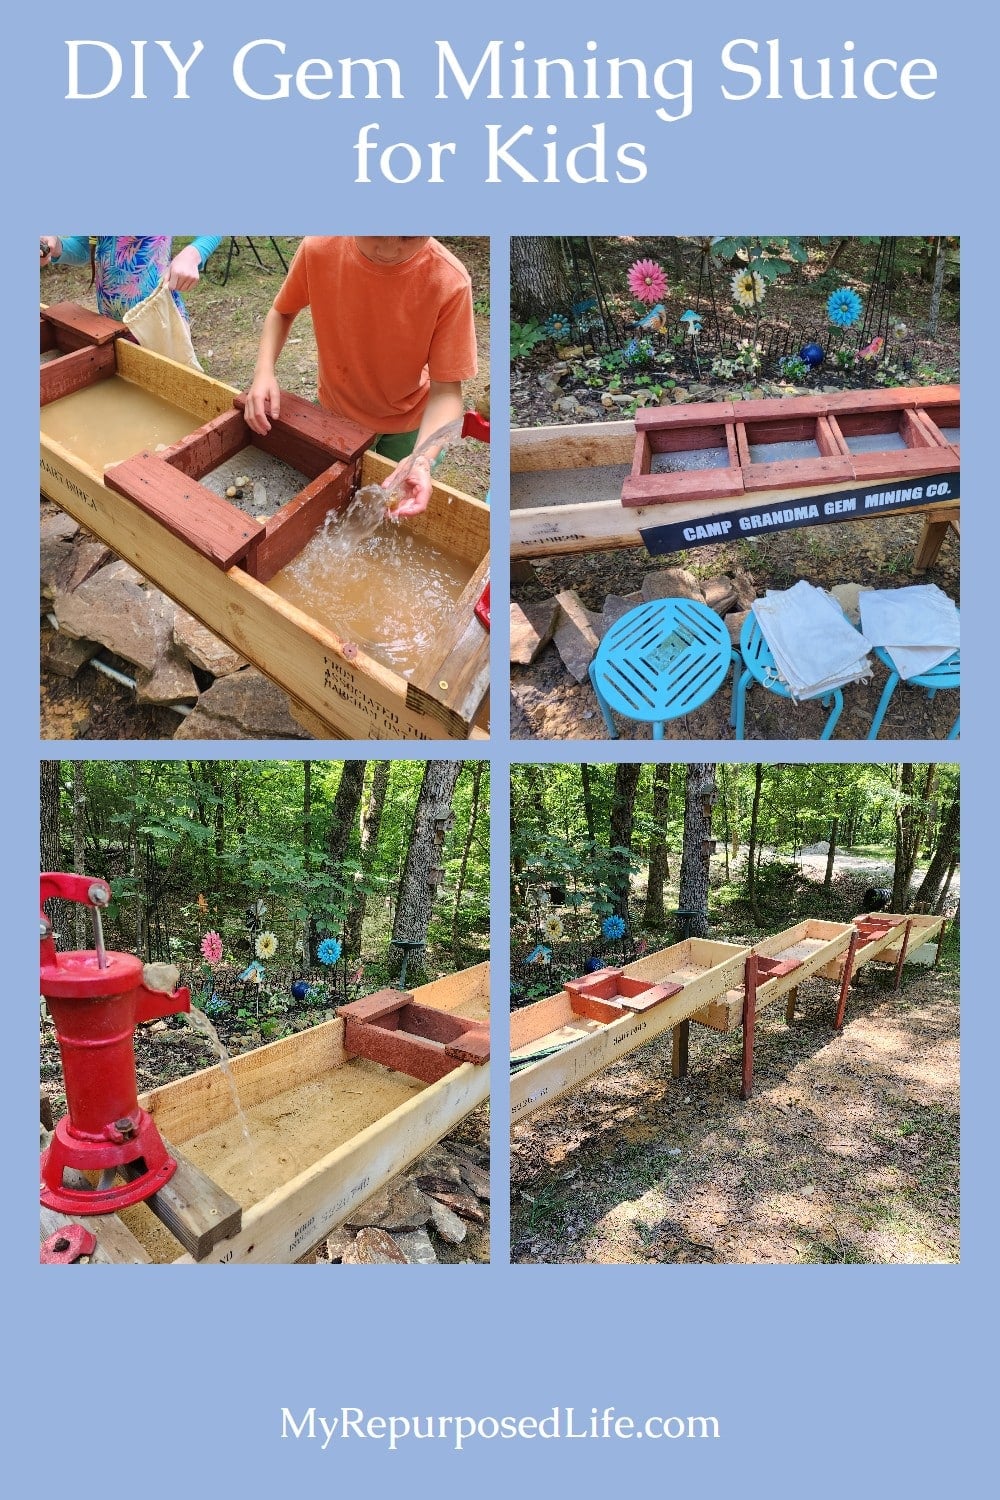
When I started researching how to build a DIY gem mining sluice, I expected to find plenty of detailed tutorials. Instead, I found very little practical information about putting the entire setup together. For Camp Grandma, we needed more than a wooden water trough. We also needed a recirculating water system, kid-friendly sifting screens and canvas mining bags filled with gems and other treasures. After a lot of planning and testing, we created a backyard gem mining station the grandchildren could enjoy together.
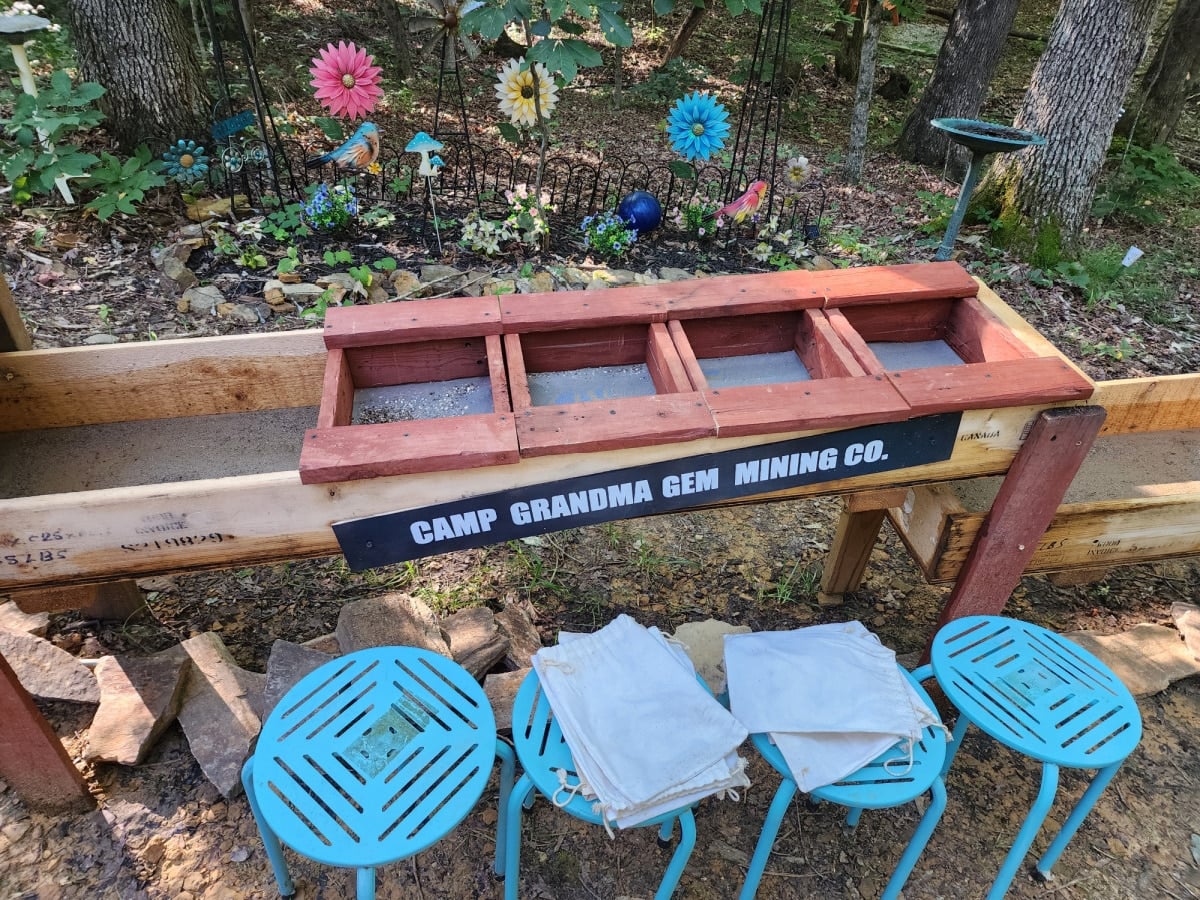
Planning Our Backyard Gem Mining Station
We host Camp Grandma at our vacation homes resting on four wooded acres. The attendees include my grandson, Terry’s granddaughter and grandson, and her great-niece. So, our mining sluice would need to be long enough for all of them to sift and mine their gems at the same time.
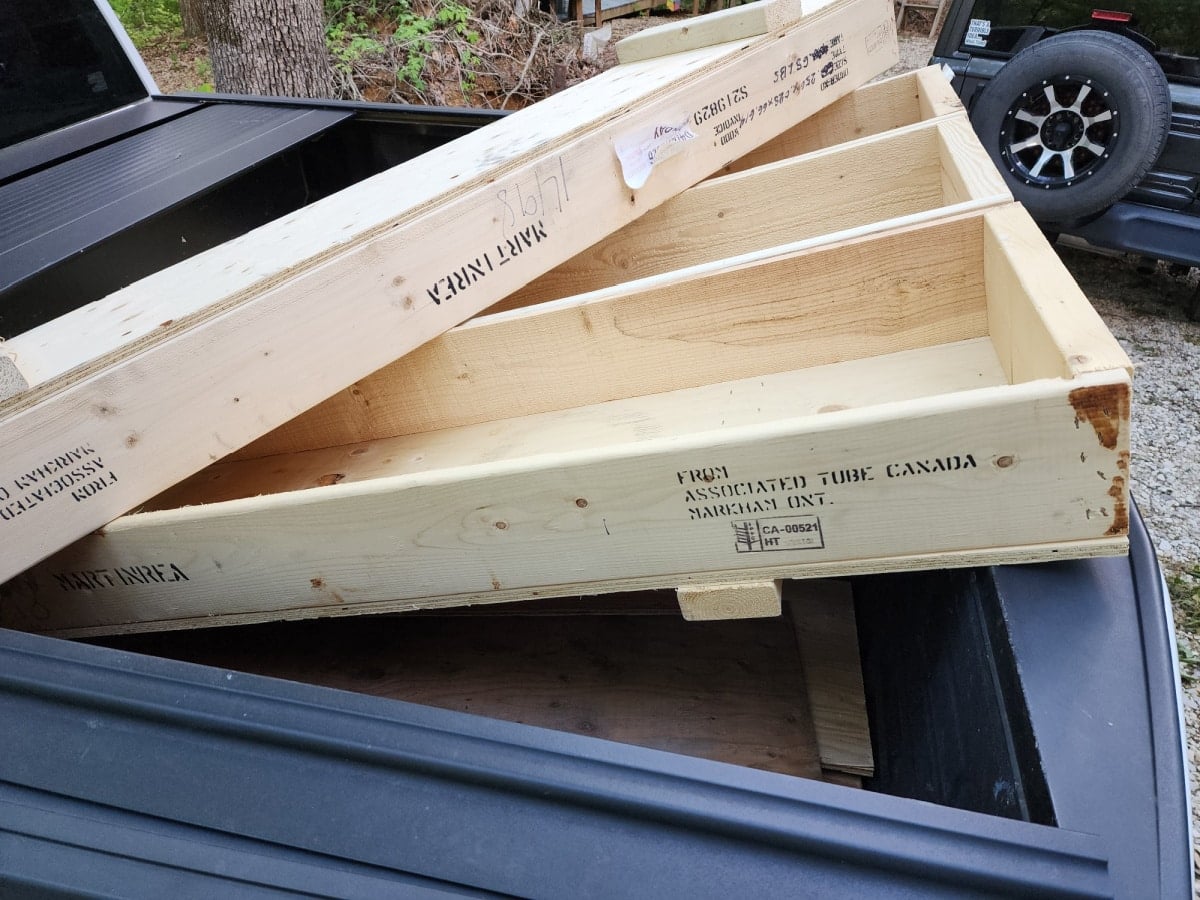
Terry found these wooden crates on Facebook Marketplace for $5 each. Each one is approximately six feet long, 14 inches wide, and about 5.5 inches deep. These large wooden crates were used to transport pipes. Although they weren’t watertight, they had been out in the weather and had standing water in them when we picked them up at the warehouse.
Save This Article on Pinterest
How a Gem Mining Sluice Works
There are many places where kids can go to a professional gem mining location, such as campgrounds or state parks. It’s a big business. My grandson has been to several places over the last few years, and each new gem revealed gets its own oooohhhhh. The gems, and sometimes even arrowheads or shark’s teeth, look especially cool while they’re wet.
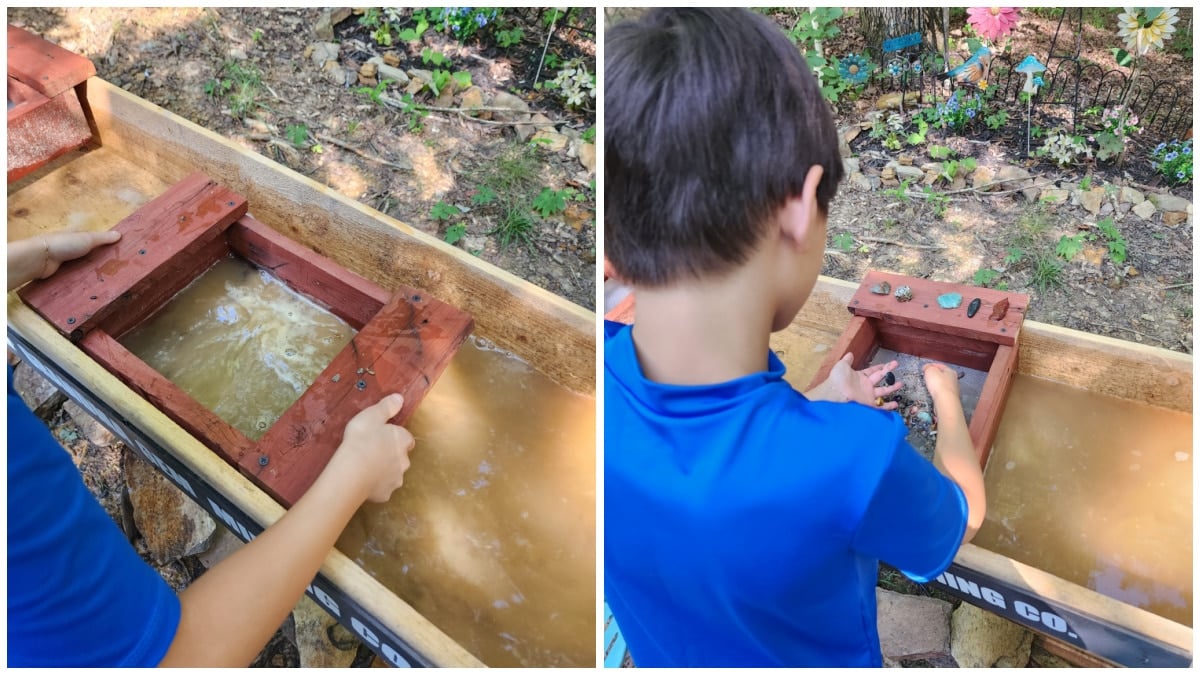
The first step is to pour some of your sand bag into the sifter, and swish it around in the water. Then, you turn your sifter to rest on the side of the sluice to sort out your gems.
Supplies Needed to Build a Gem Mining Sluice For Kids
Of course, your supplies may vary, but this will give you ideas of where to start.
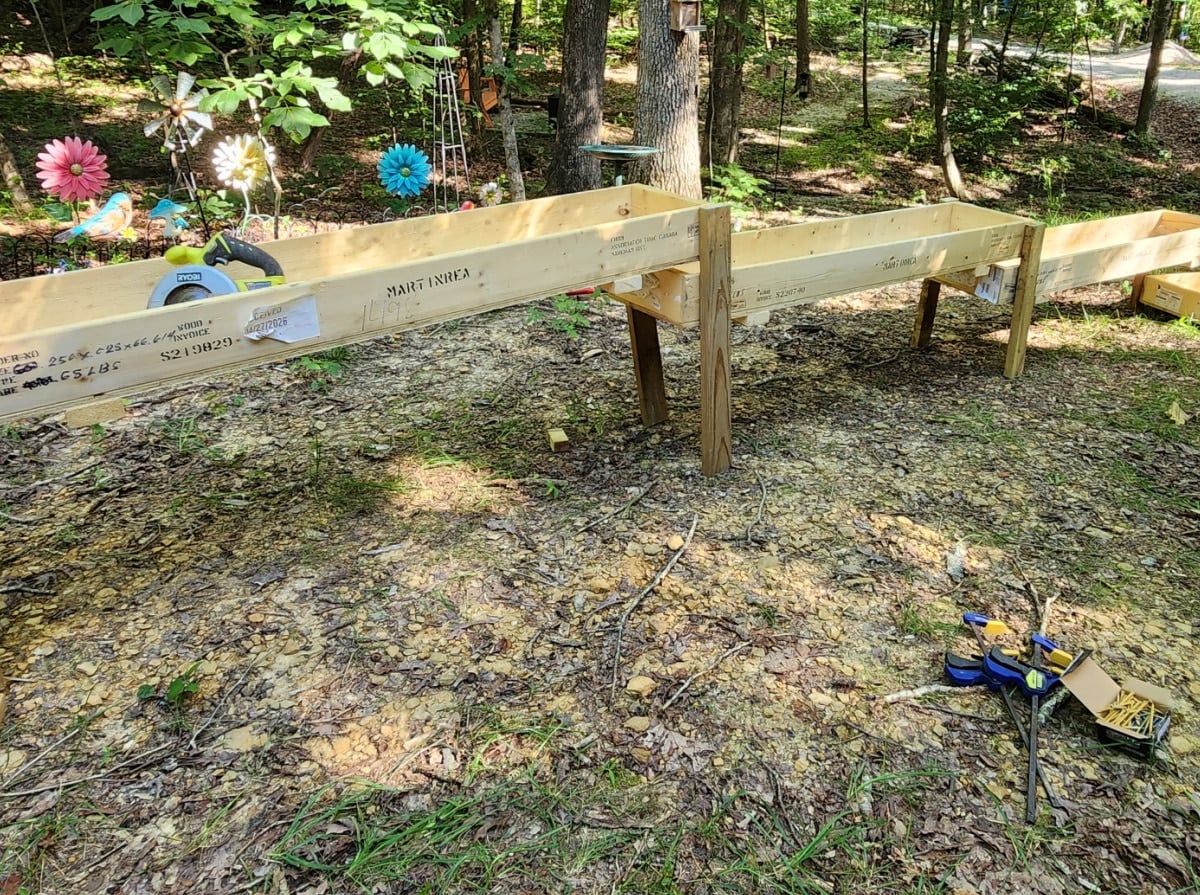
Supplies and Tools for the Sluice
- Lumber (we used the crates)
- 2x4s or something similar for legs
- Deck Screws (2″)
- Saw (we used a battery-operated circular saw)
- Drill
- Hammer
- Clamps
- Tape Measure
- Pencil
- Level
- Something that rolls (we used a bottle)
Supplies for the Water System
This, of course, was trial and error for us because I couldn’t find any information online.
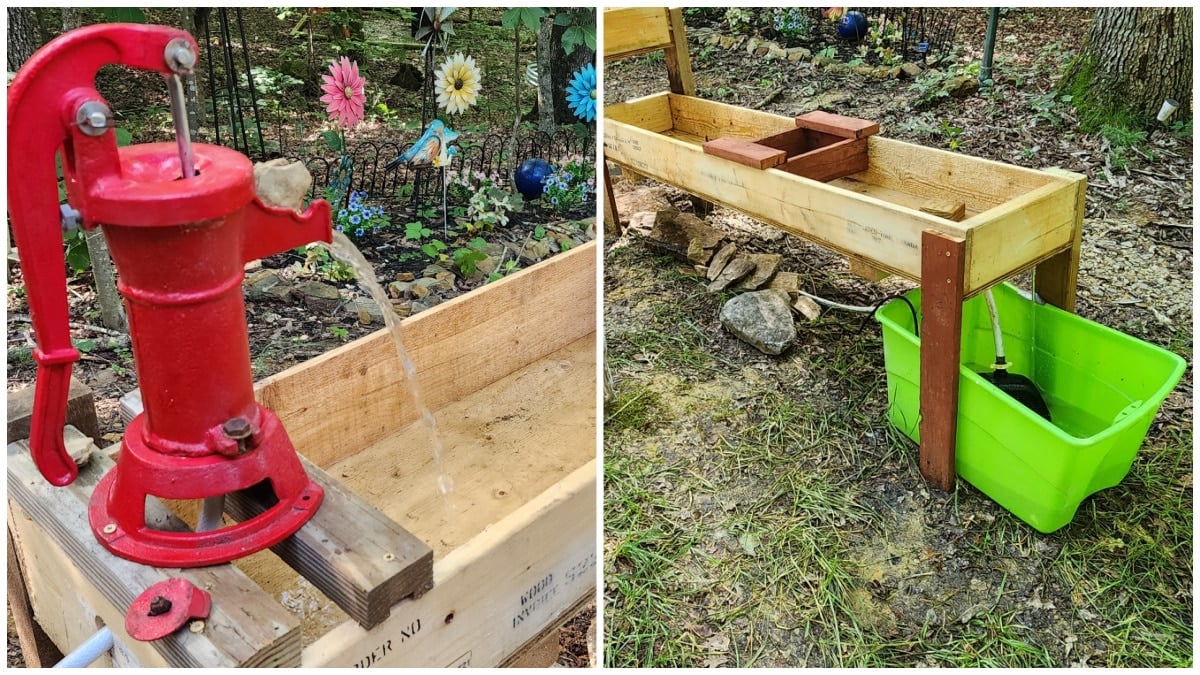
- Extension cord
- Hose
- Electric pond pump
- Decorative water pump
- Plastic tote or similar to catch water and hold the pond pump
- Creek rock, mulch, or something similar to disguise the extension cord and hose coming from the bottom of the sluice going to the top.
Supplies and Tools for the Sifting Screens
This was also made up by me because I couldn’t find any details online. My first prototype was too large, so I had to go to plan B.
- Scrap lumber or reclaimed fence pieces
- Screws
- Drill and bit for pilot holes (the thin wood will split easily)
- Screen (we used metal window screen we had on hand)
- Nail gun
- Staple gun for attaching screen
- Clamps
Supplies for the Mining Bags
When you take your child to a gem mining experience, they can usually purchase a bag or a bucket of sand filled with various gems, arrowheads, teeth, or even petrified wood. It can be an expensive hobby; the largest bucket can be as much as $50.
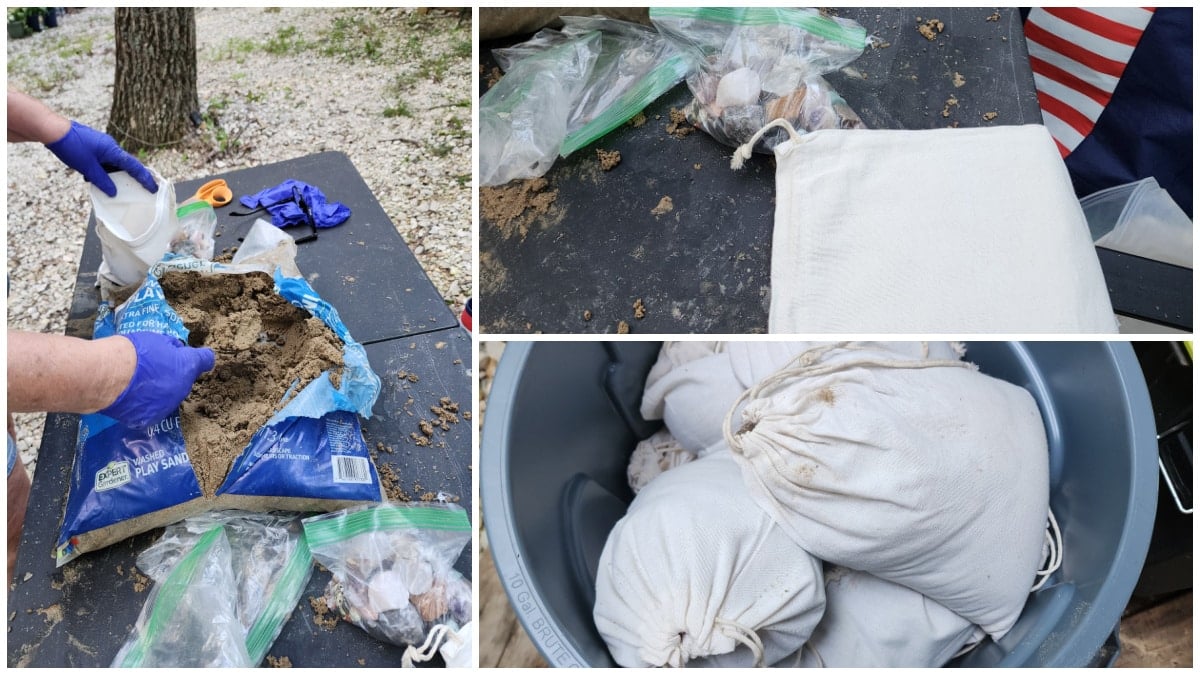
- Canvas Bags on Amazon (8×10 drawstring)
- Assorted Tumbled Gems and More on Amazon; Rough Gems and Chips on Amazon
- Desert Rocks on Etsy
- Play sand (Shop around; I found prices varying from a few dollars to over $20 a bag. I ended up buying mine at Walmart.) Each bag of sand will fill up about four or five of the 8×10 canvas bags.
Choosing the Best Location
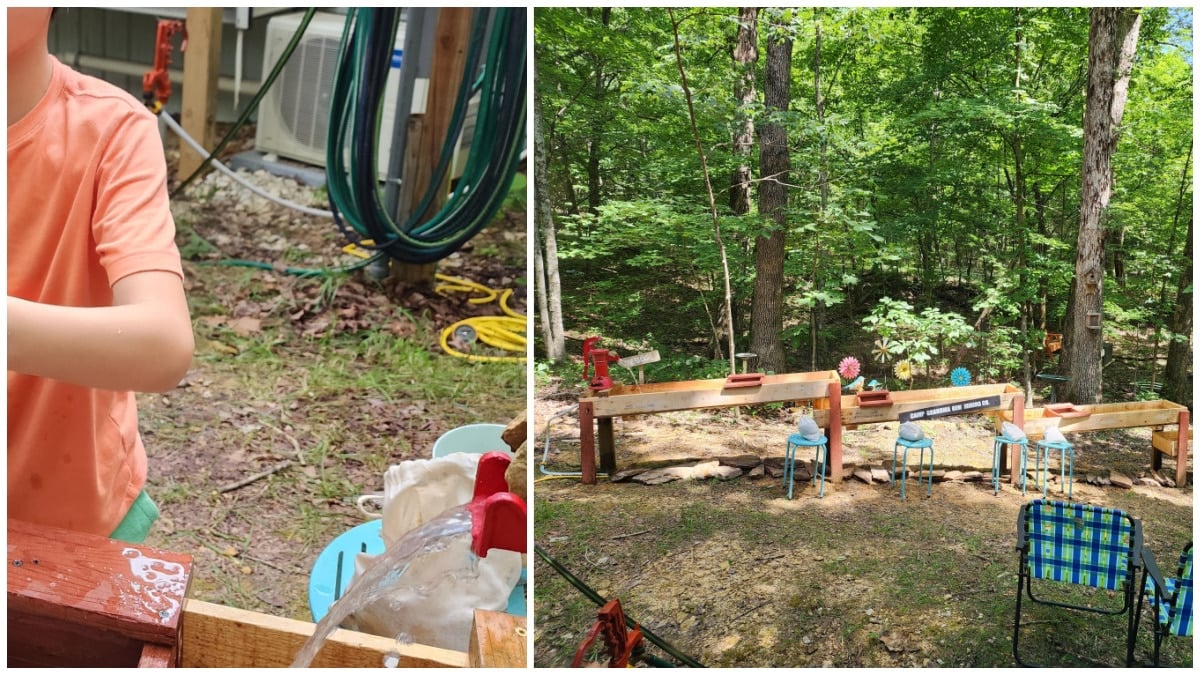
When the sluice is completed, we would need a water source and a pump to recirculate the water. That means we needed electricity and water.
We chose to put it in my backyard, which is gently sloping and has access to water and electricity. It seemed like a good idea at the time (gently sloping) to help the water run downhill. More about that later.
We would also need room around the sluice for several children. In addition, we would need a surface that can get wet and muddy, with shade during warm weather. Lastly, we need a safe route for the extension cord, plus easy access for filling and draining the reservoir.
How We Built the Backyard Gem Mining Sluice
I’m going to be honest: the first attempt at building the sluice was easy. But things went a little whacky, and we had to revisit the build a week later on another trip to the Hideaway. Most of the lumber we were using was from our scrap stash of leftover 2x4s and more.
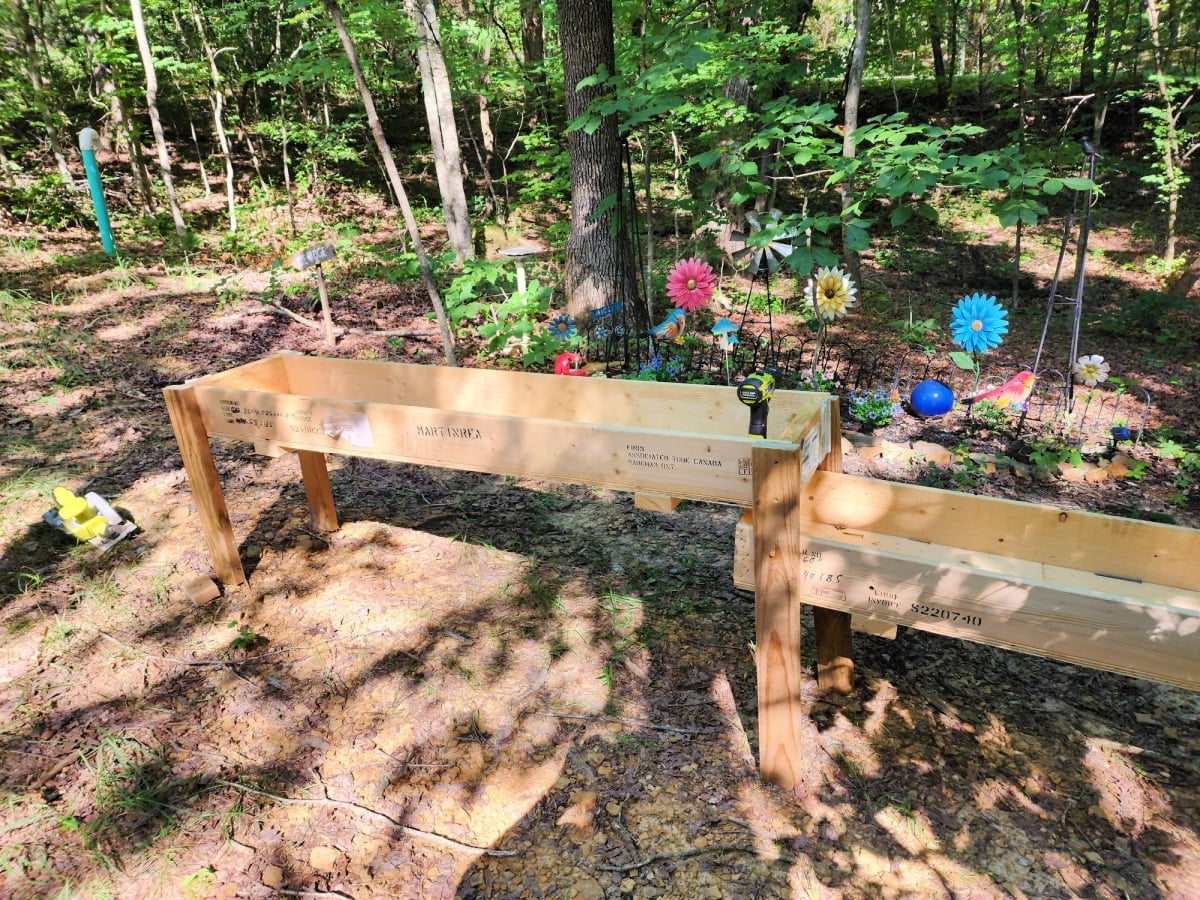
This image shows how we started out, and basically the end product is nearly the same. Because there isn’t a single flat spot on the property, the slope was a little challenging. As I said earlier, we thought the slope would work to our advantage. But when it was all said and done, the water on the sluice doesn’t need to flow downhill. We rolled a small bottle in each crate to make sure that the water would flow.
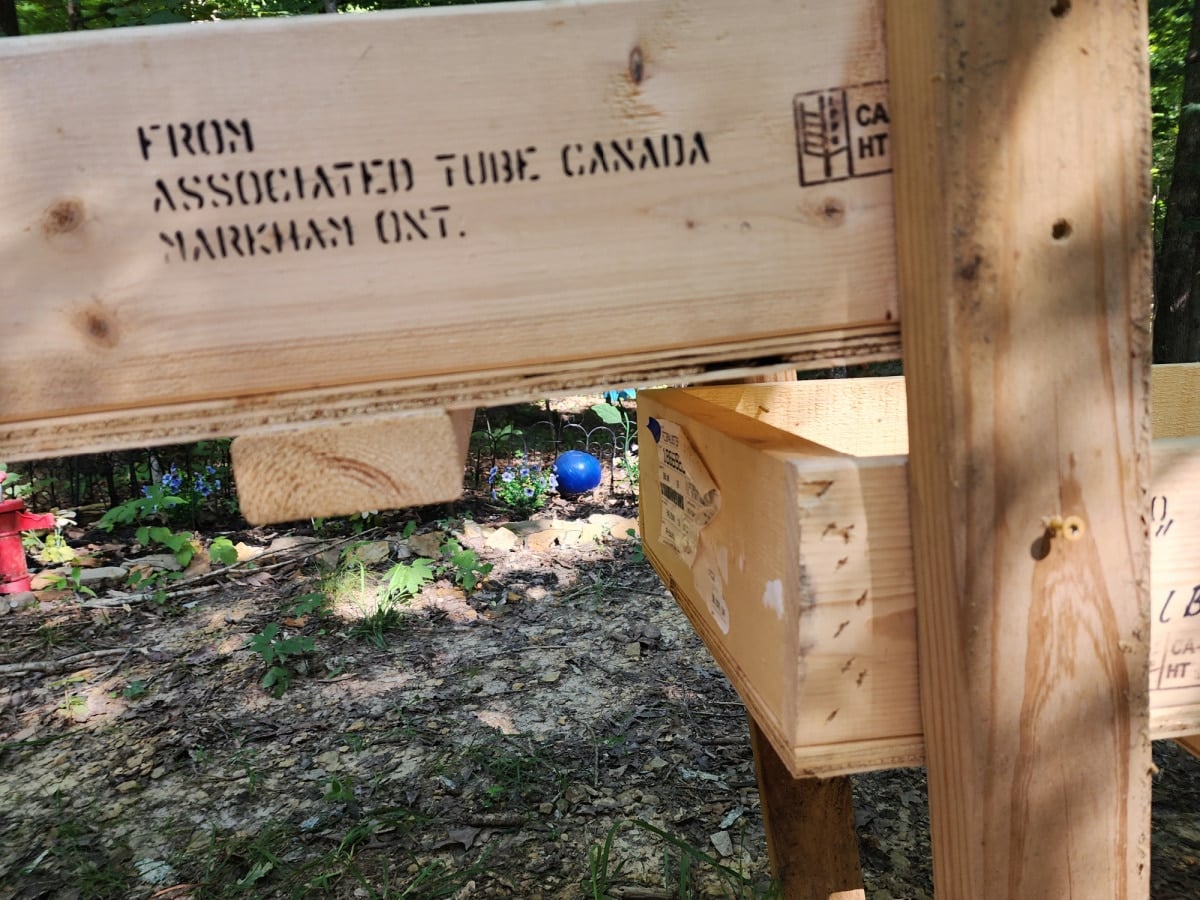
The first screw on top was put in place loosely, allowing the leg to pivot as we used the level to make sure the leg was plumb. Then we secured two more screws to hold both crates in place.
Each crate was placed under the preceding one and back about 5″. More about that later.
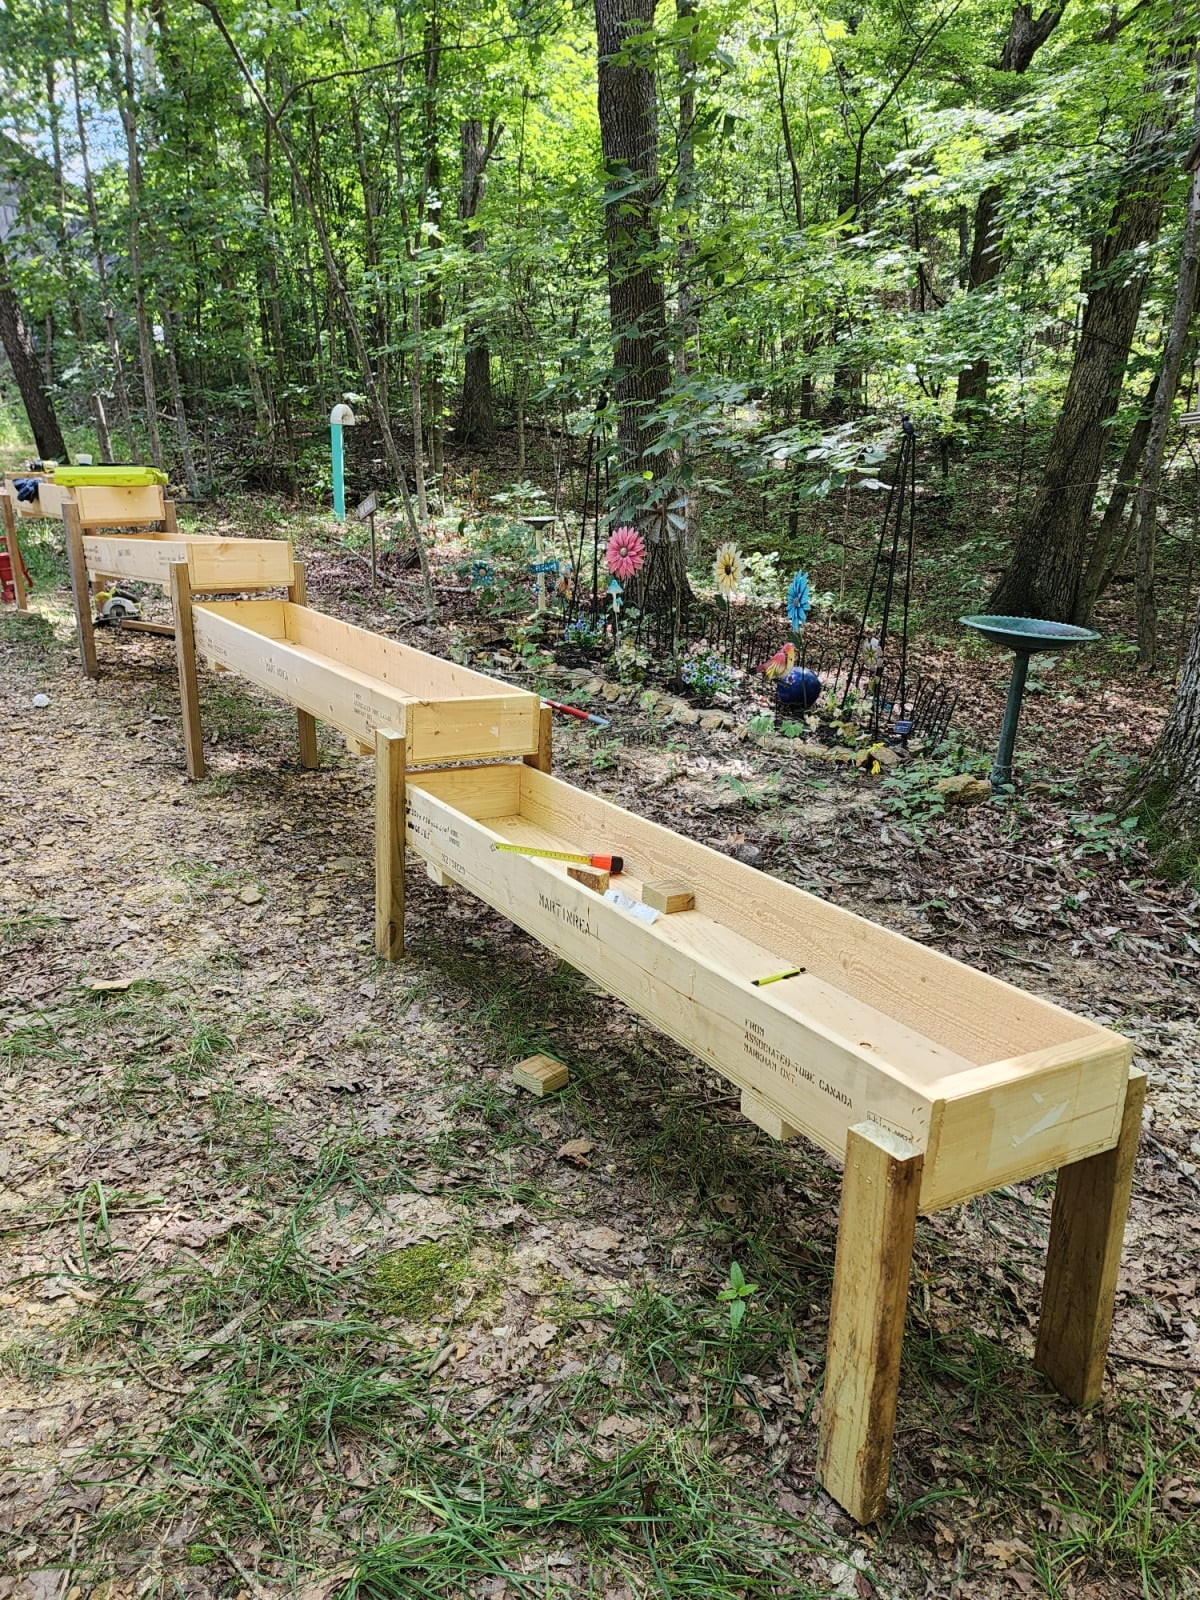
This is our “rough design” on our first attempt. We just weren’t pleased with how the water was running during our test run.
We quickly realized that you want the water to drain slowly because each “trough” needs to have a couple of inches of water at any given time.
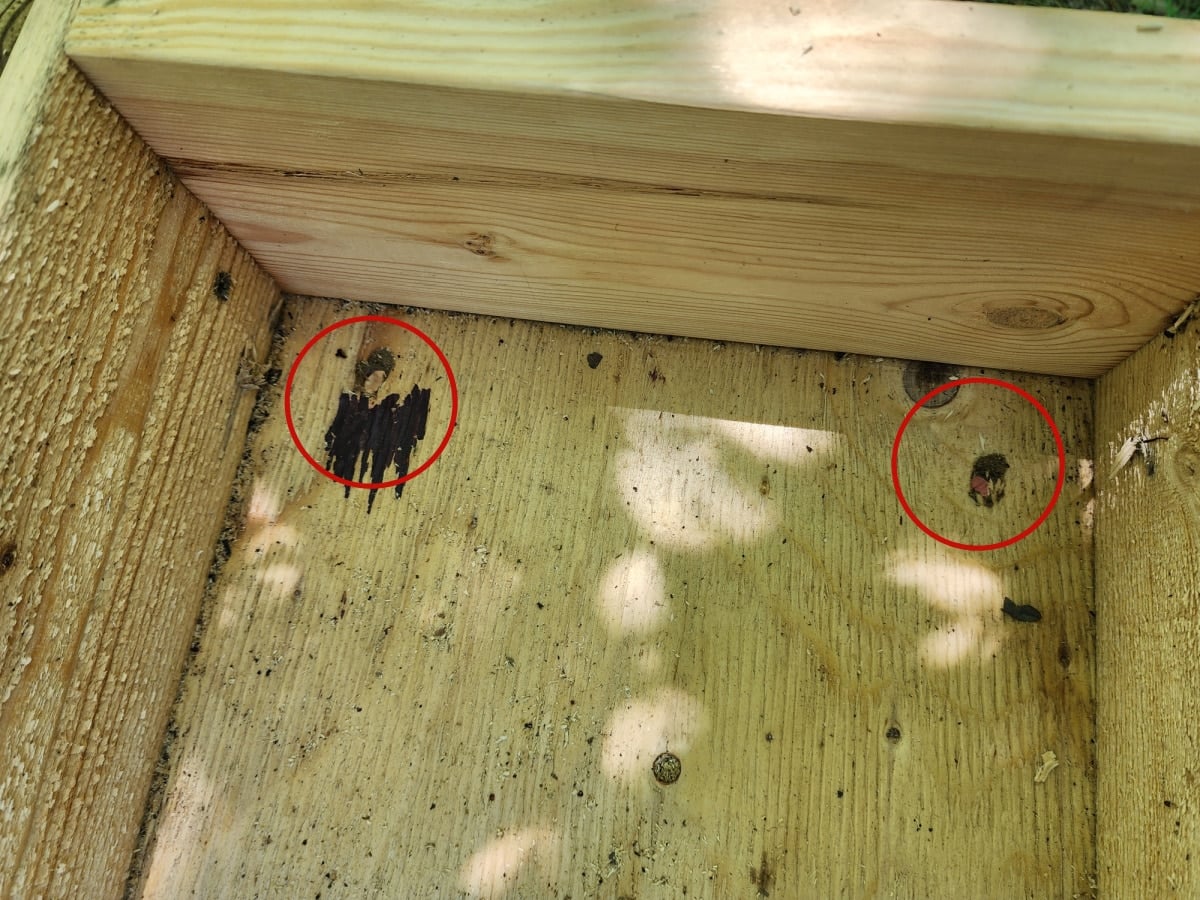
On each of the crates, we drilled two drainage holes 3/4″ in diameter. That allows the water to drain into the lower crate and, finally, into the water reservoir.
Sand will collect in each of the troughs, but it doesn’t impair the flow of the water.
Determine the Sluice Length and Height
Your dimensions will depend on how you construct your sluice.
Our overall length was about 22 feet. To make a crate like ours, follow the cut list below:
- 1×6 lumber cut 6′ for sides (2 for each crate)
- 3/4 inch plywood 14″ x 6′ (bottom, 1 for each crate)
- 2×6 cut 12 1/2 ” (ends, 2 for each crate)
- 2×4 or similar board approximately 34″ (legs: 4 for the first crate, 2 for each crate after that)
If you’re not particular about the position of your legs matching on every crate and you’re on flat ground, each leg can be the same size. Adjust your leg position on the crate to make the sluice barely sloped. As you move to the next section, you will need to cut your legs a little shorter.
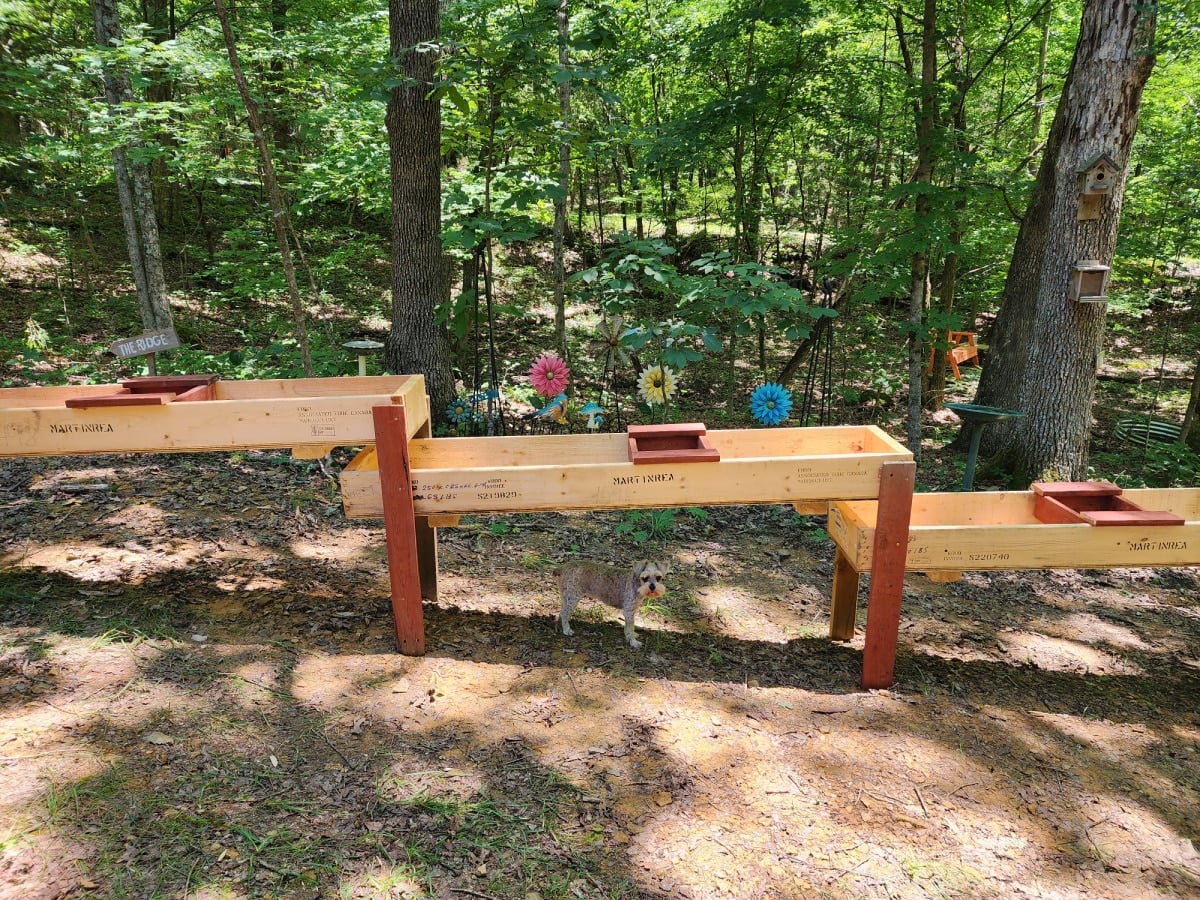
This is our final design, using some reclaimed cedar fence boards for the legs and the sifters. Lulu was hiding from some very loud and annoying red-shouldered hawks. She’s very aware of the danger they present to a small dog. Bonus: she’s in the shade.
Dropping one crate under the next allows for kids of all ages to enjoy your sluice.
How to Make a Recirculating Water System
It would be great if this step looked a little prettier. We were running out of time, and we had to use what we had.
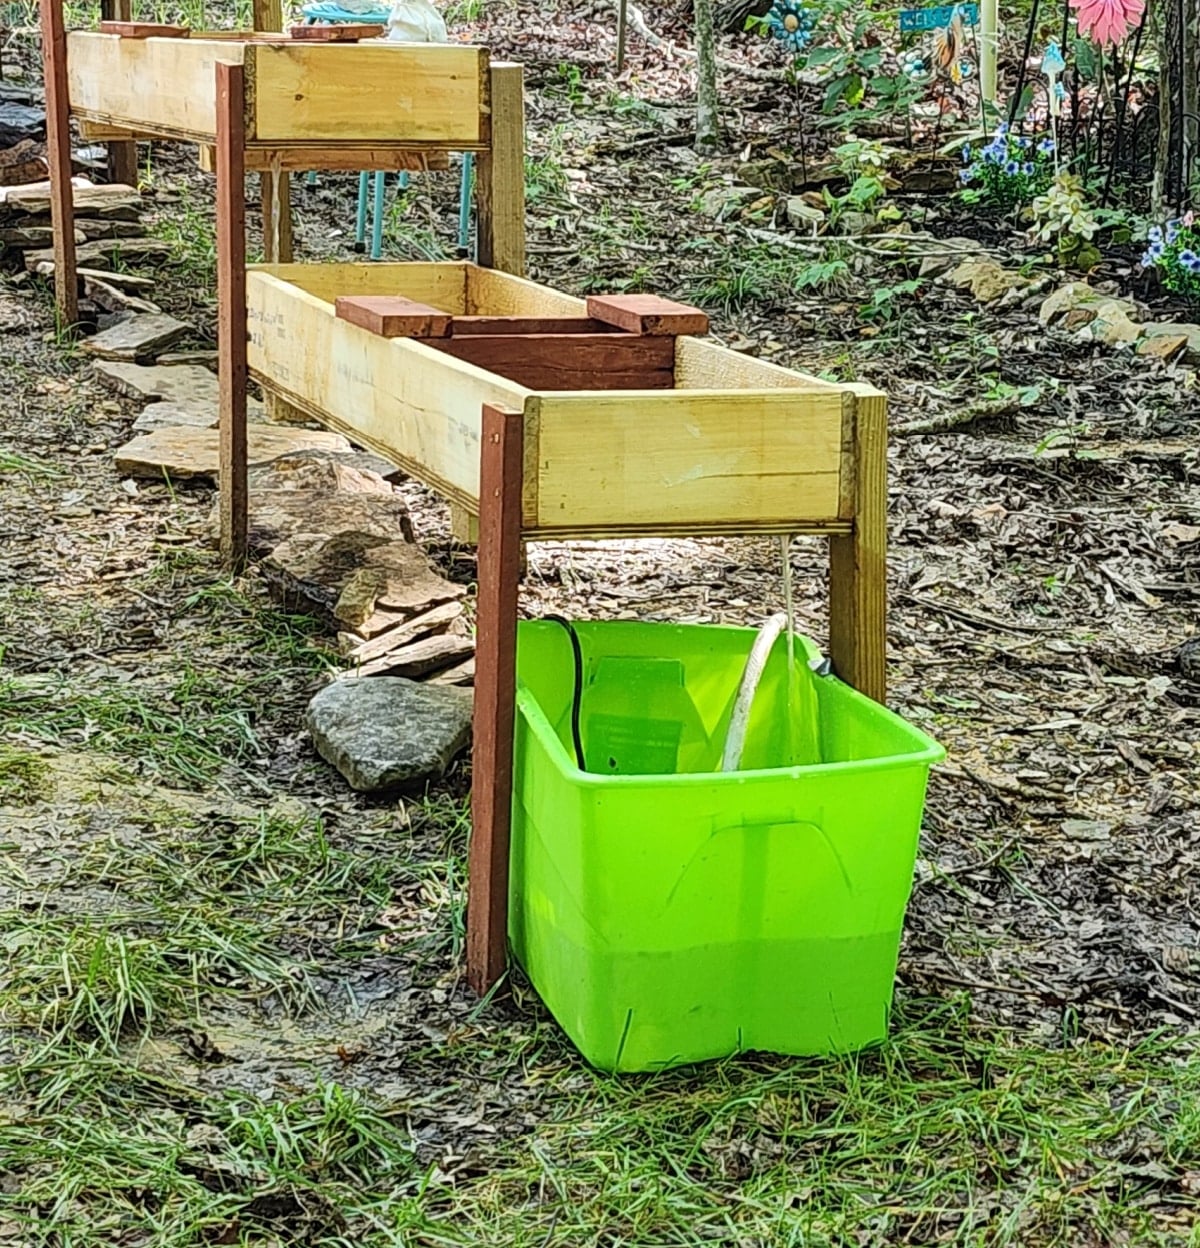
The key takeaway points for keeping your water flowing are listed below:
- The water needs to land in a reservoir in order to be pumped back to the beginning of the sluice. We used a tote that holds approximately 10 gallons of water.
- A common garden hose was connected to the pond pump to return the water to the top approximately 20 feet away. The pump was 550 GPH.
- The heavy-duty extension cord and the garden hose are both hidden under large creek rocks that run the length of the sluice.
- At the top, the water hose is connected to a non-functioning decorative well hand pump. We had to “gut” the pump in order to allow the garden hose to fit inside.
- When you first start your sluice, be prepared to prime the trough with a garden hose connected to a water source in order to get enough water into each crate. If you’re having a party, simply do this before the activity begins. Once there is sufficient water flowing, turn off the garden hose and turn on the pond pump.
- There may be some leaking around the seams. If you’re building one to use over and over, you may want to consider caulking the seams to make them waterproof. We are storing our crates in our barn to use again next year.
- Use a filter in your pond pump and raise it slightly to prevent it from taking in sand.
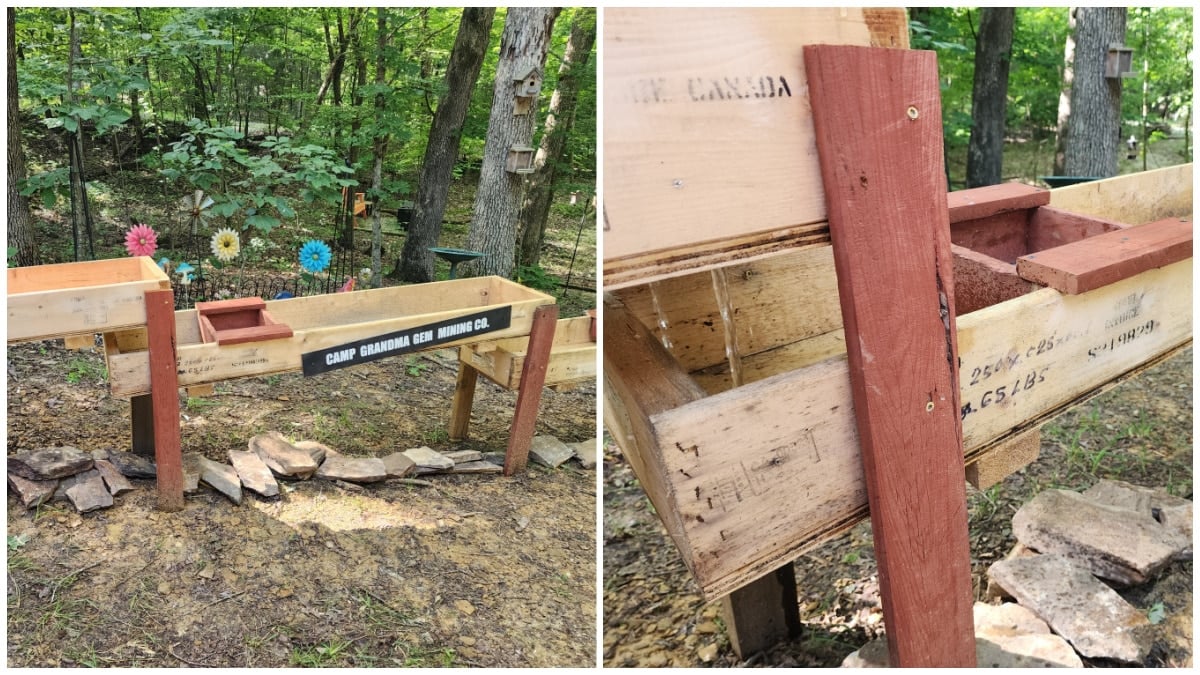
- Note in the image below how the decorative pump was installed using scrap wood on top of the crate.
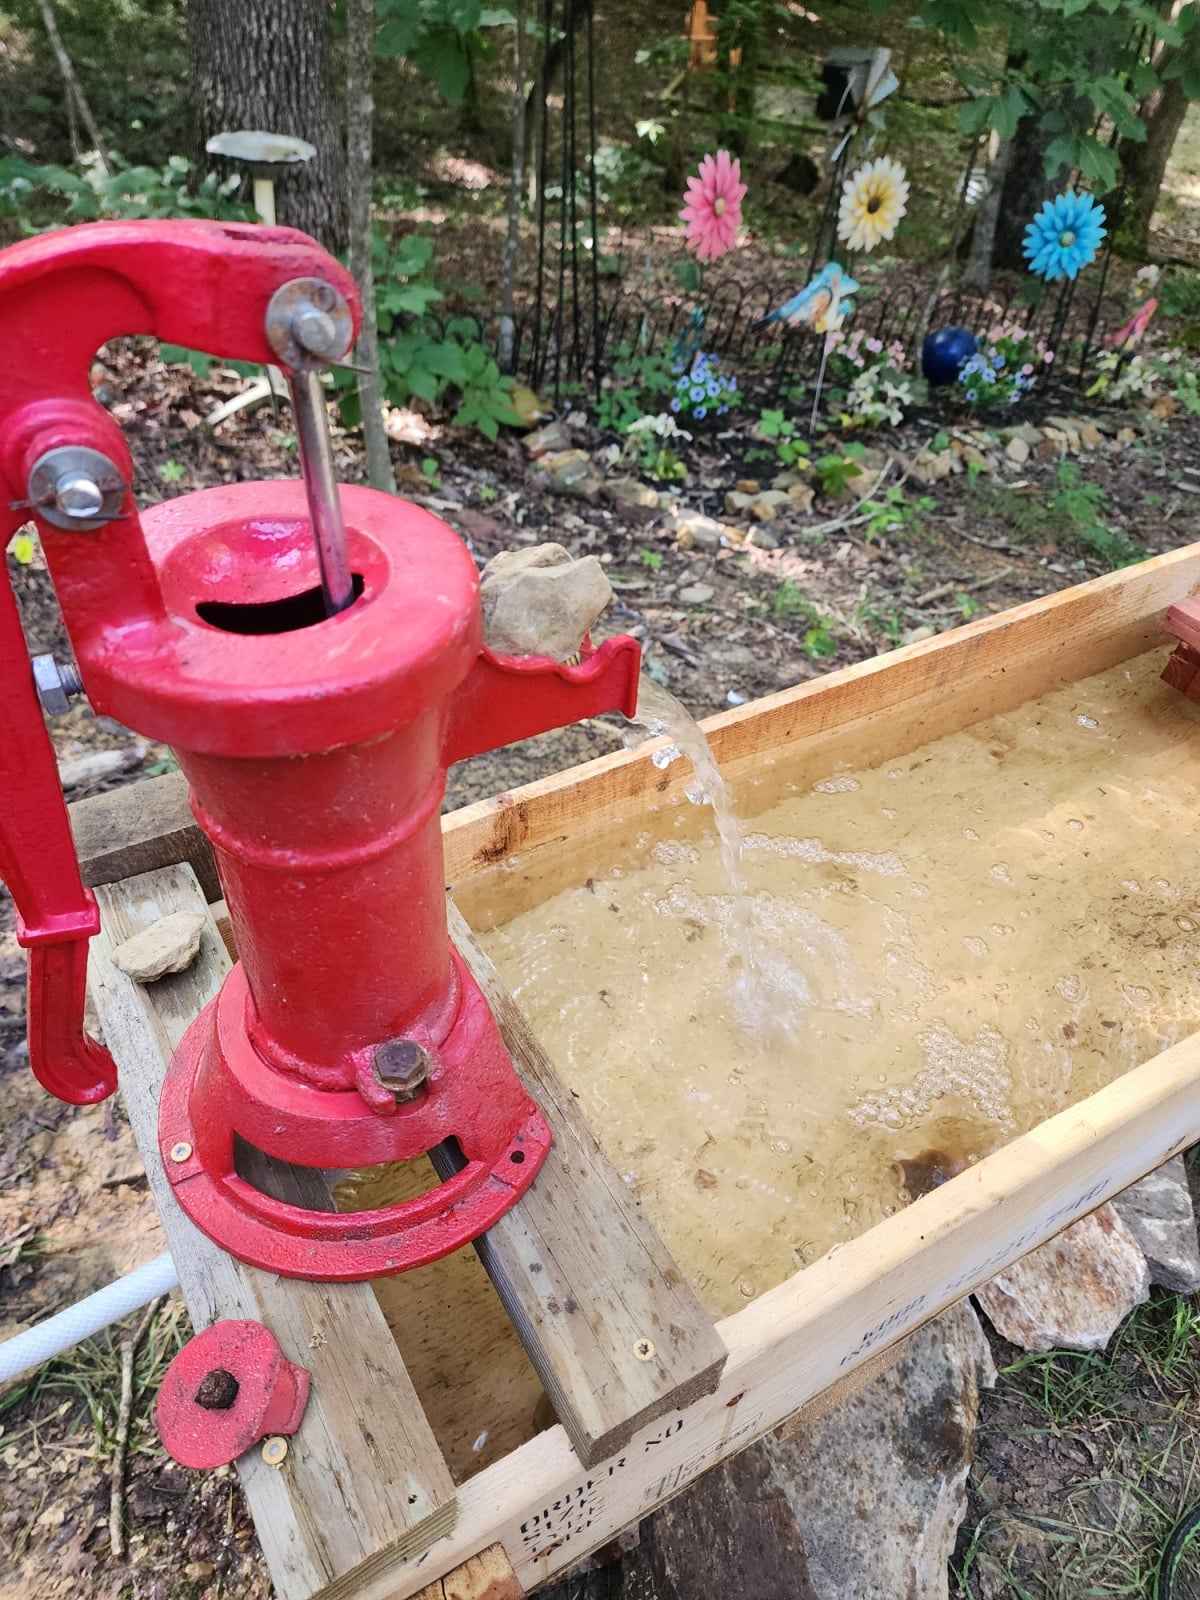
- A hole was drilled into the end of the crate to insert the garden hose that comes up the hill from the water reservoir.
- Two braces were attached to the top of the crate to support the decorative red pump.
- The removed plunger is lying on one of the braces.
- The pump is secured to the wooden braces with screws.
- Not visible, but the garden hose goes into the bottom of the pump and comes out on the small pump ledge (where the rocks are)
- The rocks serve two purposes: one, they hide the hose; two, they snugly fit the area to keep the hose in place.
- This top crate is where you can prime the crates with the extra water before you begin.
How to Make Gem Mining Sifting Screen Boxes
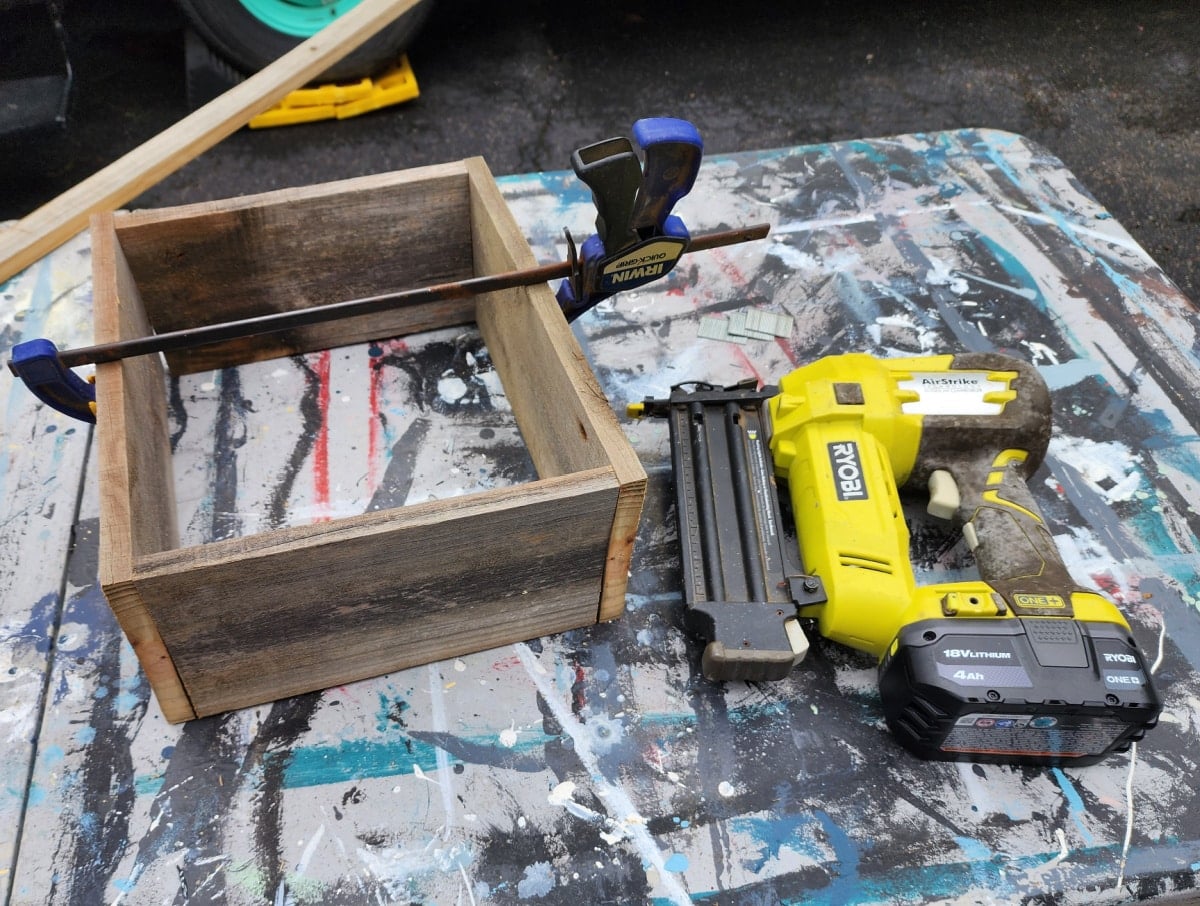
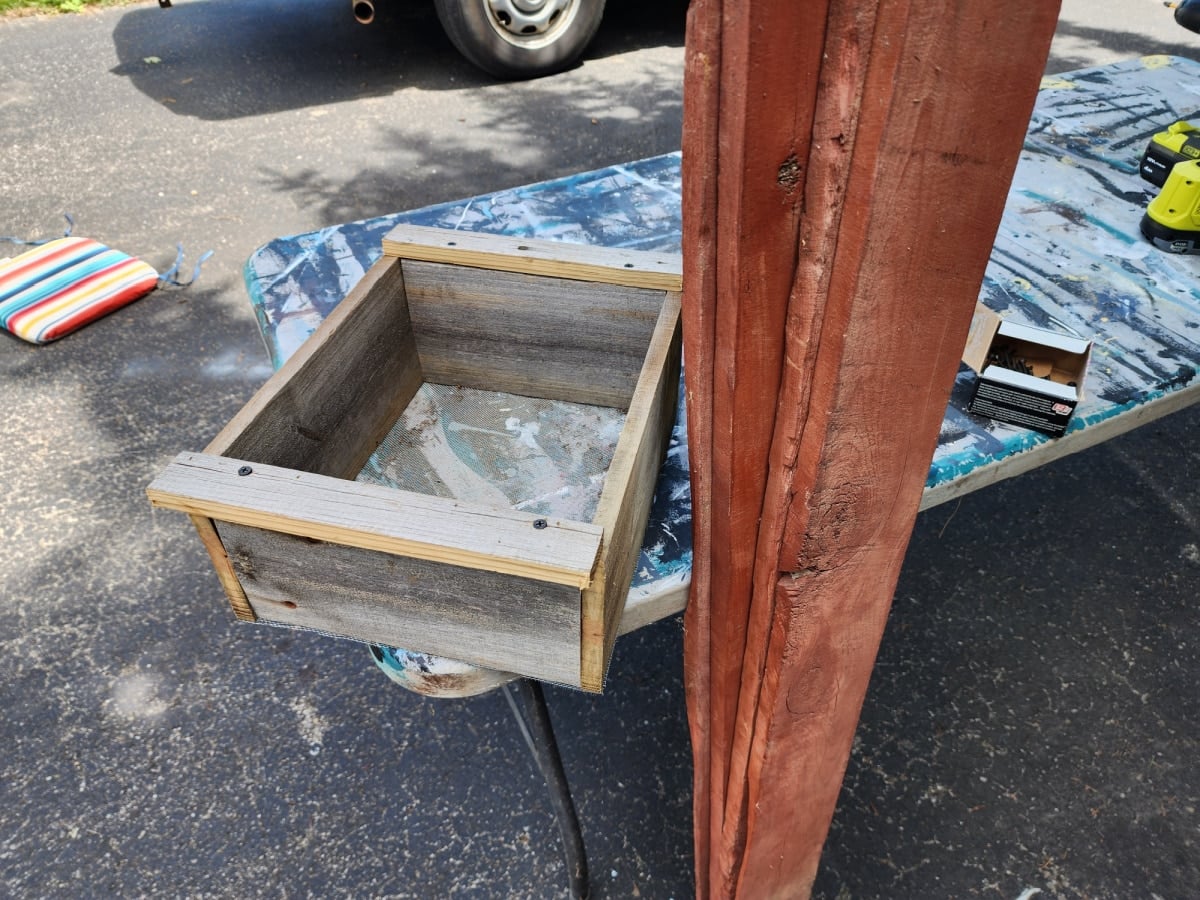
My first attempt at the sifter screen box used reclaimed dog-eared fence boards that are about 5.5 inches wide.
While the clamps held the boards, I used the nail gun to secure all sides. I quickly realized that this sifter box was going to be too deep for the kiddos.
Reclaimed Cedar Fence Boards
While digging around in the wood shed, I found the perfect reclaimed cedar fence boards. They are narrower than the dog-eared fence boards.
Now that the prototype is completed, I have the perfect plan to make the screen sifter box.
Measurements for Making Gem Mining Sifter Box
Cut list for each sifter box:
- 2 boards 13 inches (long side)
- 2 boards 9 inches (short side)
- 2 boards 10 inches (handles, may vary depending on the thickness of your wood.
- Cut a screen approximately 17x 11 (fold over 1/2″ on all sides)
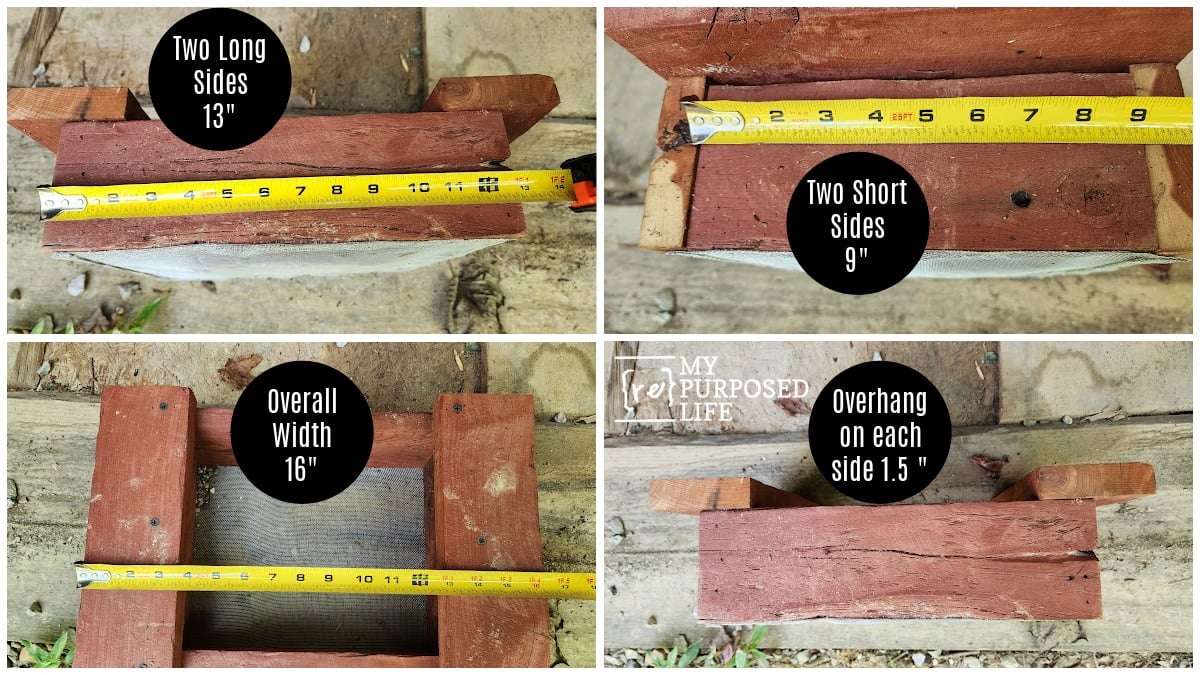
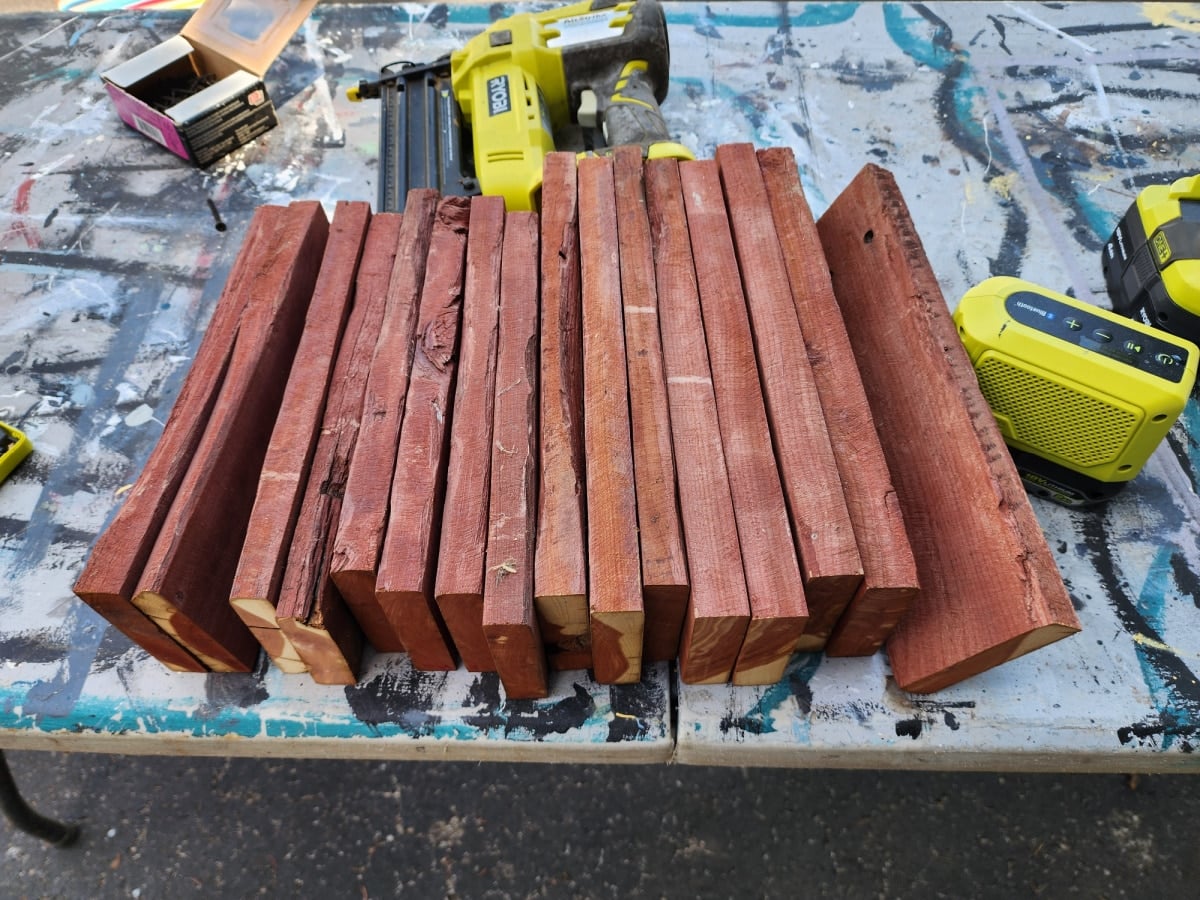
To begin, I cut 16 boards to make four boxes, then I cut 8 more to make the handles after I had the exact measurement.
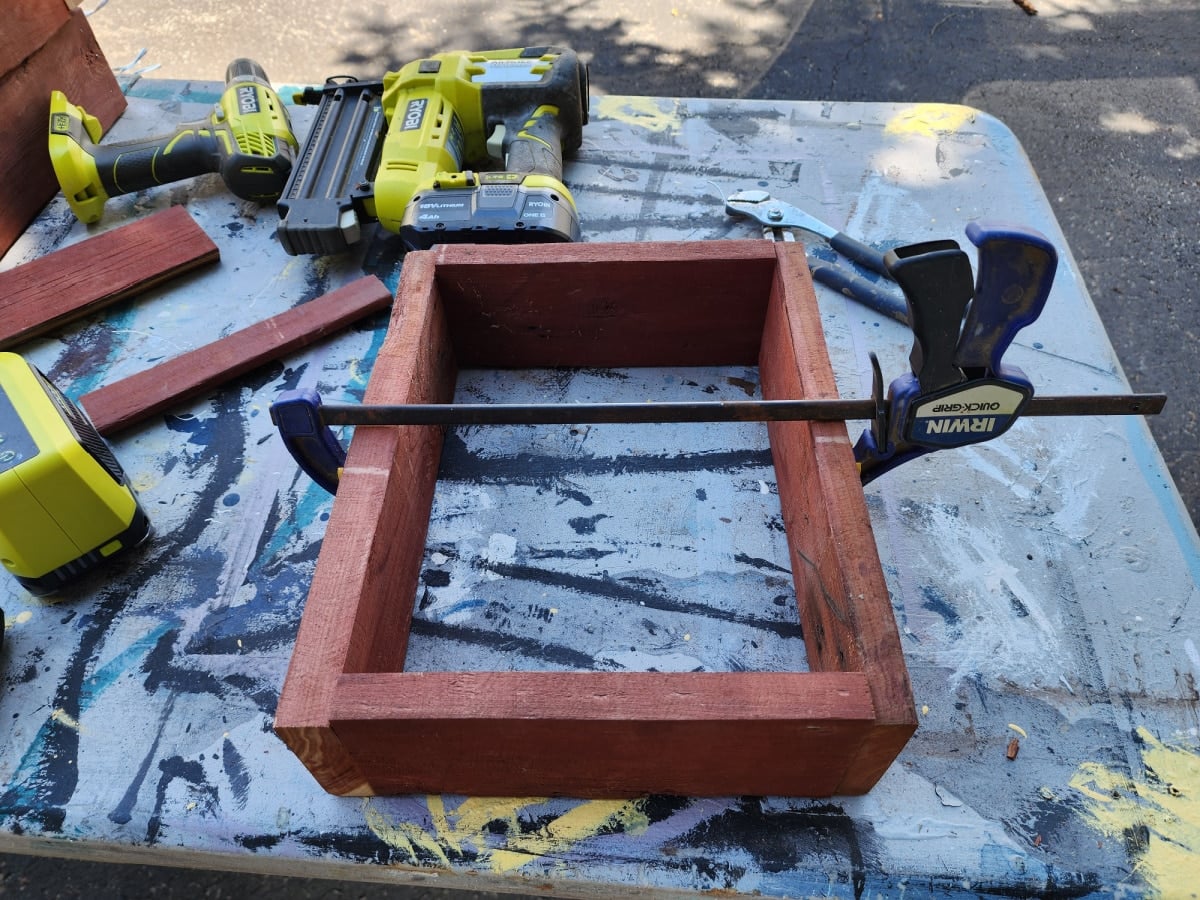
Just like the prototype, I used clamps and the nail gun. The brad nails I used were just long enough to go into the end board.
Clamp your small boards inside the longer side boards. The pressure of the clamp will hold them in place while you tack them into place.
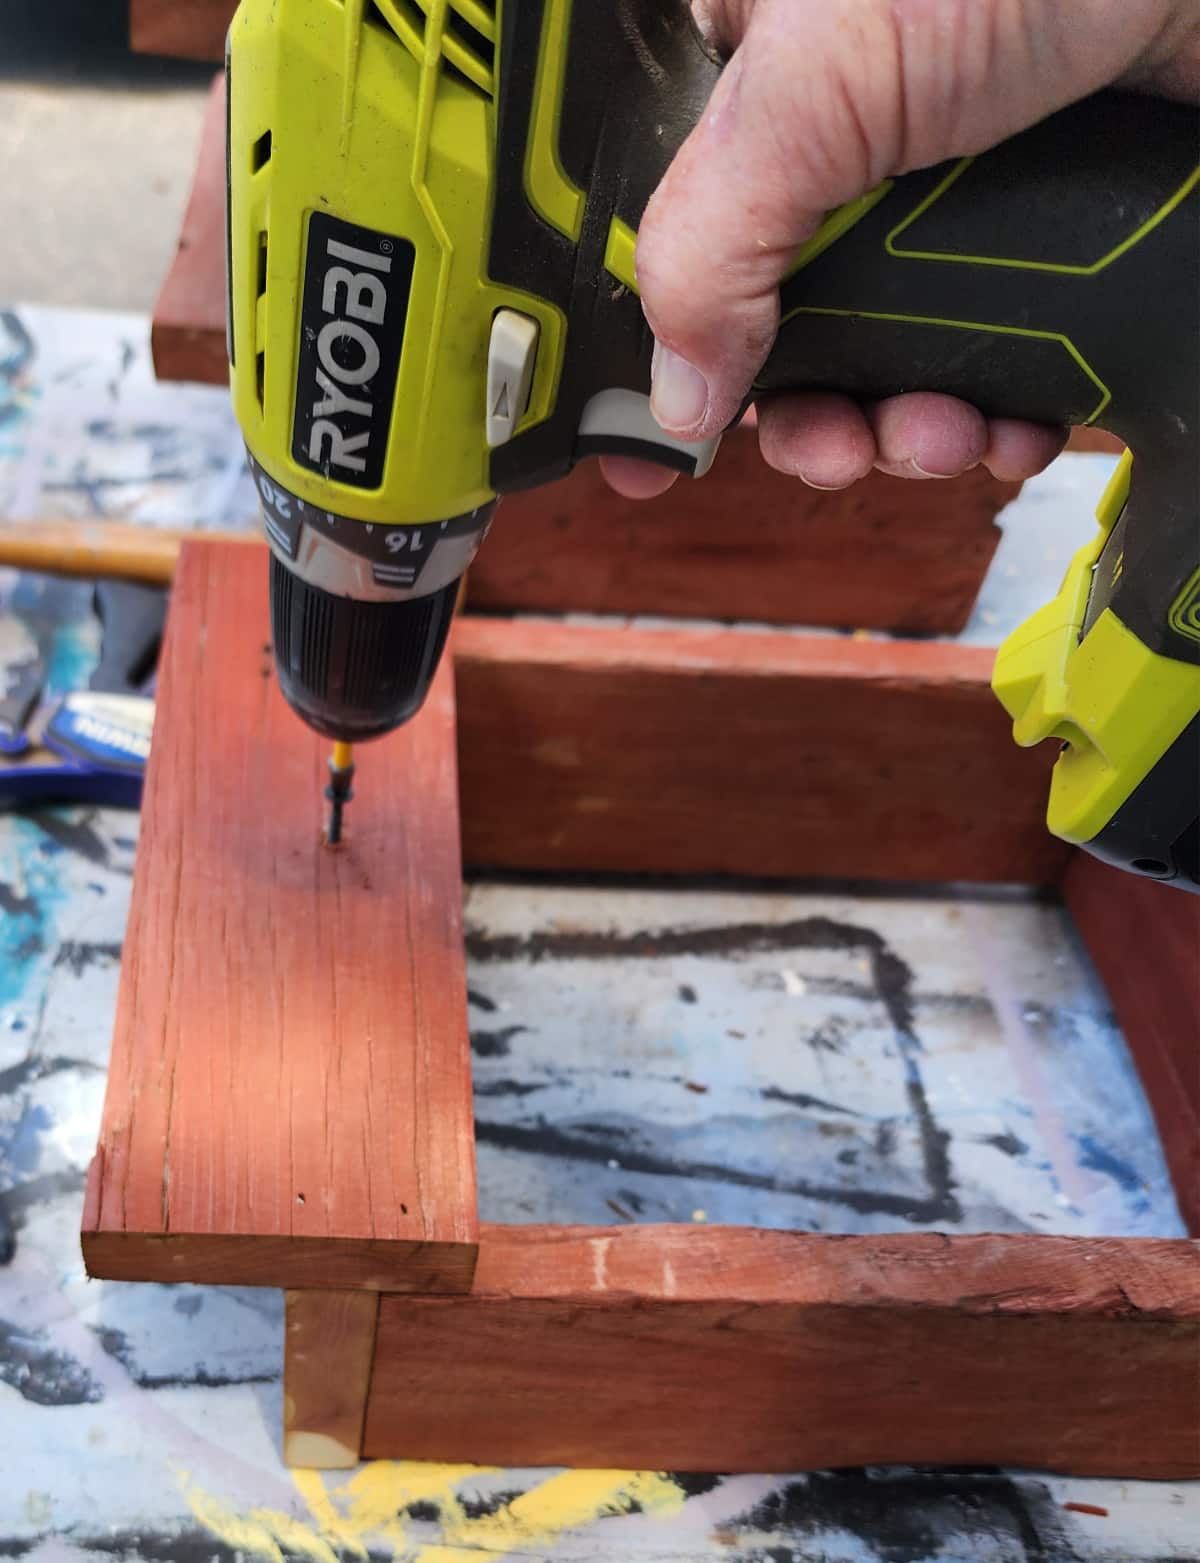
Not shown:
- I tacked the handle in place (note the small holes on the end) with the nail gun.
- Next, I drilled a pilot hole near the center.
- Finally, I secured the handle of the sluice gem mining box with a screw.
- The screws in each handle help make the box surprisingly sturdy.
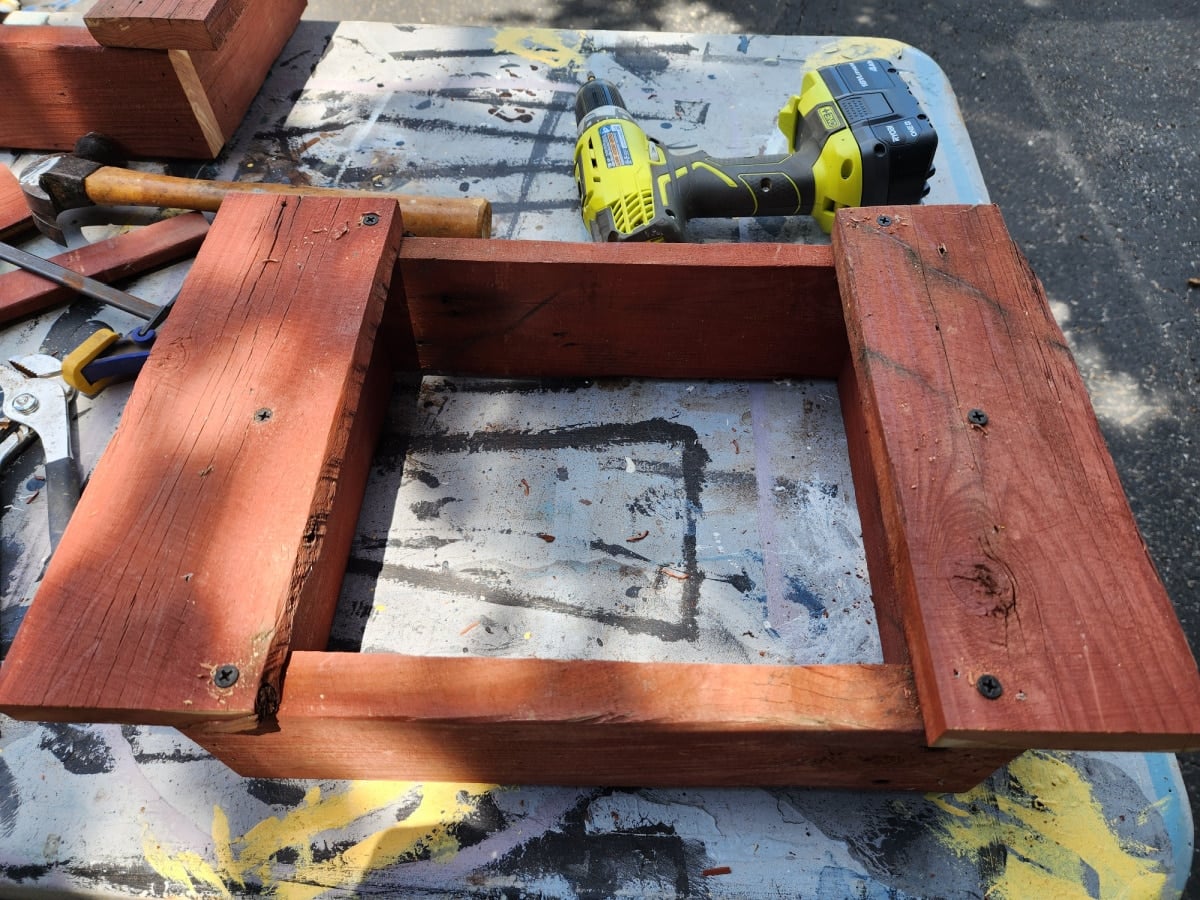
Here, you can see the finished build with additional pilot holes and screws on each side. The brad nails held everything together until I could get these remaining screws in. For this step, I used “fine” 1 1/4″ drywall screws. A deck screw would split this wood too easily.
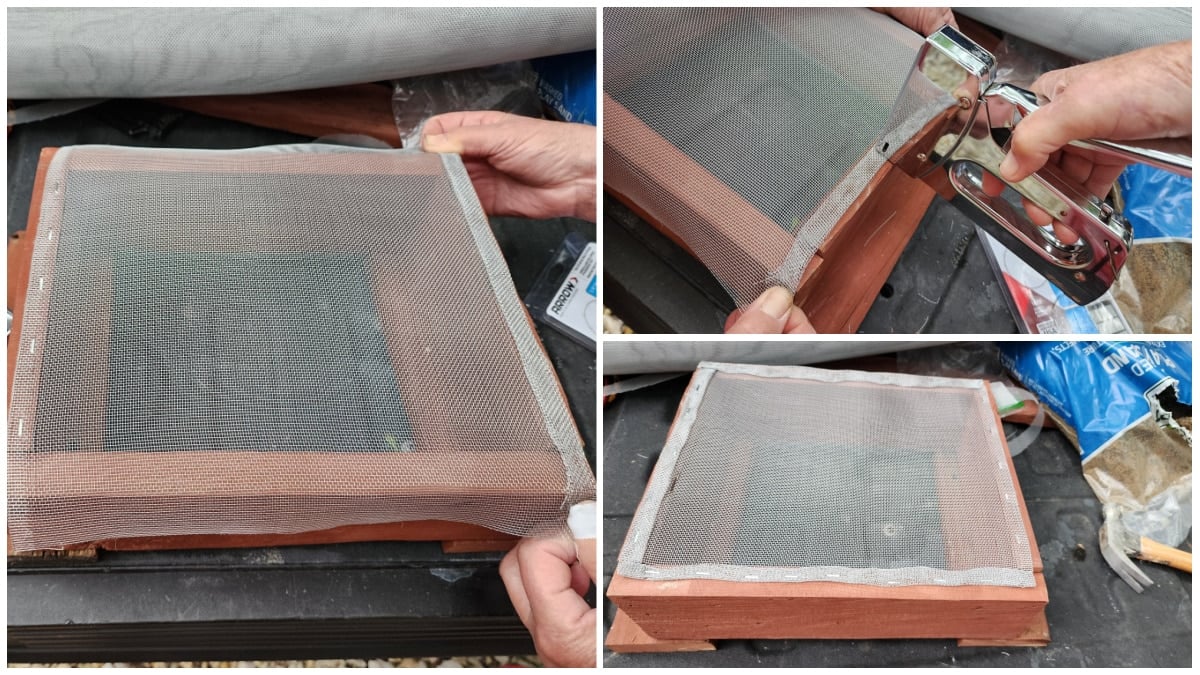
Attaching the window screen to the sifter box is a lot easier with a friend. We cut the screen a little big, and then folded over the edges. I don’t know the size of the screen grid, but it is fine, which worked great for us because we like to save even the smallest chips. The chips look really great in tiny glass bottles (with screw-on lids) from the $$$ Tree.
How to Put Together Canvas Gem Mining Bags
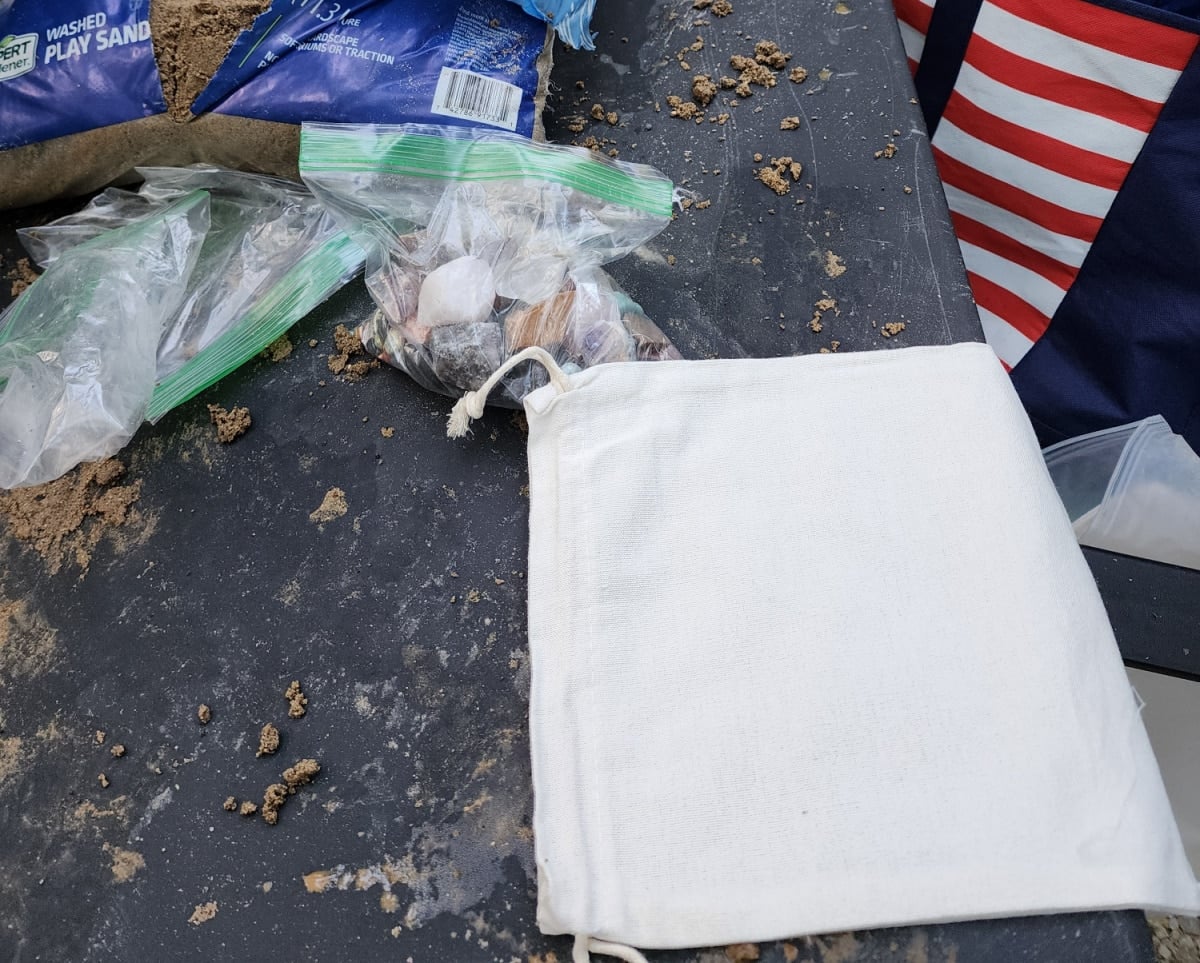
After getting my last shipment of rocks and gems, Terry and I separated all of the rocks into piles, trying to make them as similar as possible. It’s important that we had a fair gem mining experience for the kids. We put each pile into plastic baggies (shown above).
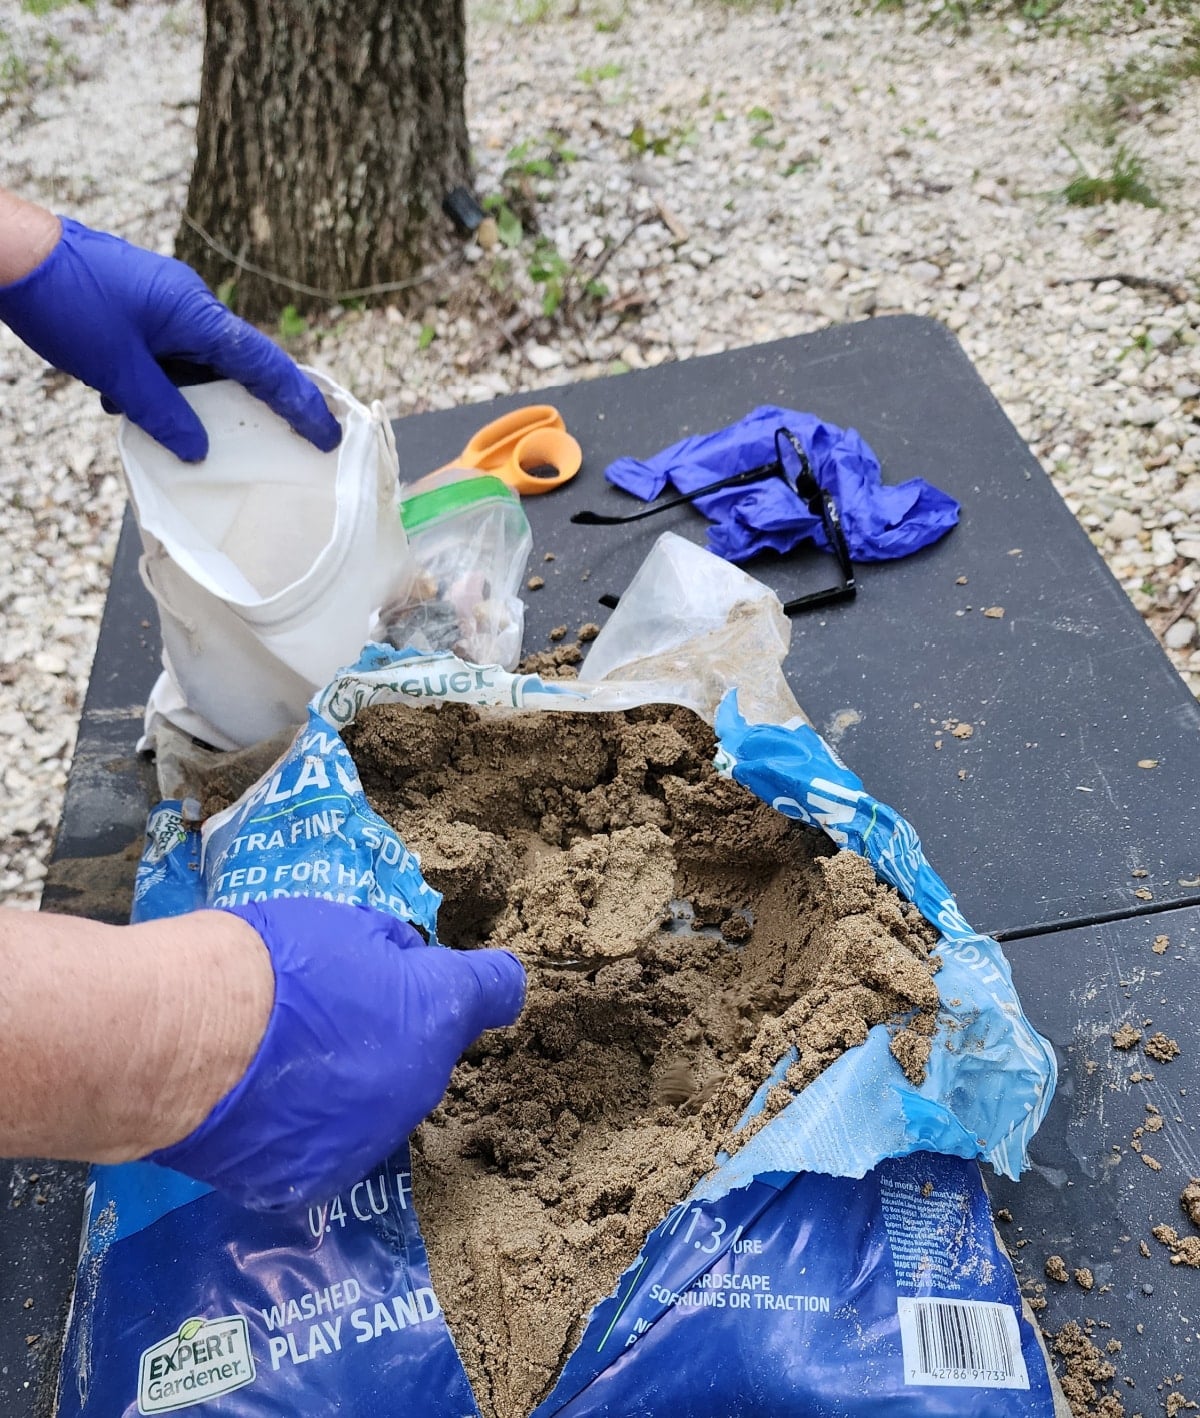
The play sand was wet and heavy. I think the sand being wet is very helpful during the mining process. We added several scoops of sand into the bottom of the canvas bag, then a few of the gems, more sand, more gems, ending with a few more large scoops on top of the last layer of gems. The drawstring canvas bags worked great for this.
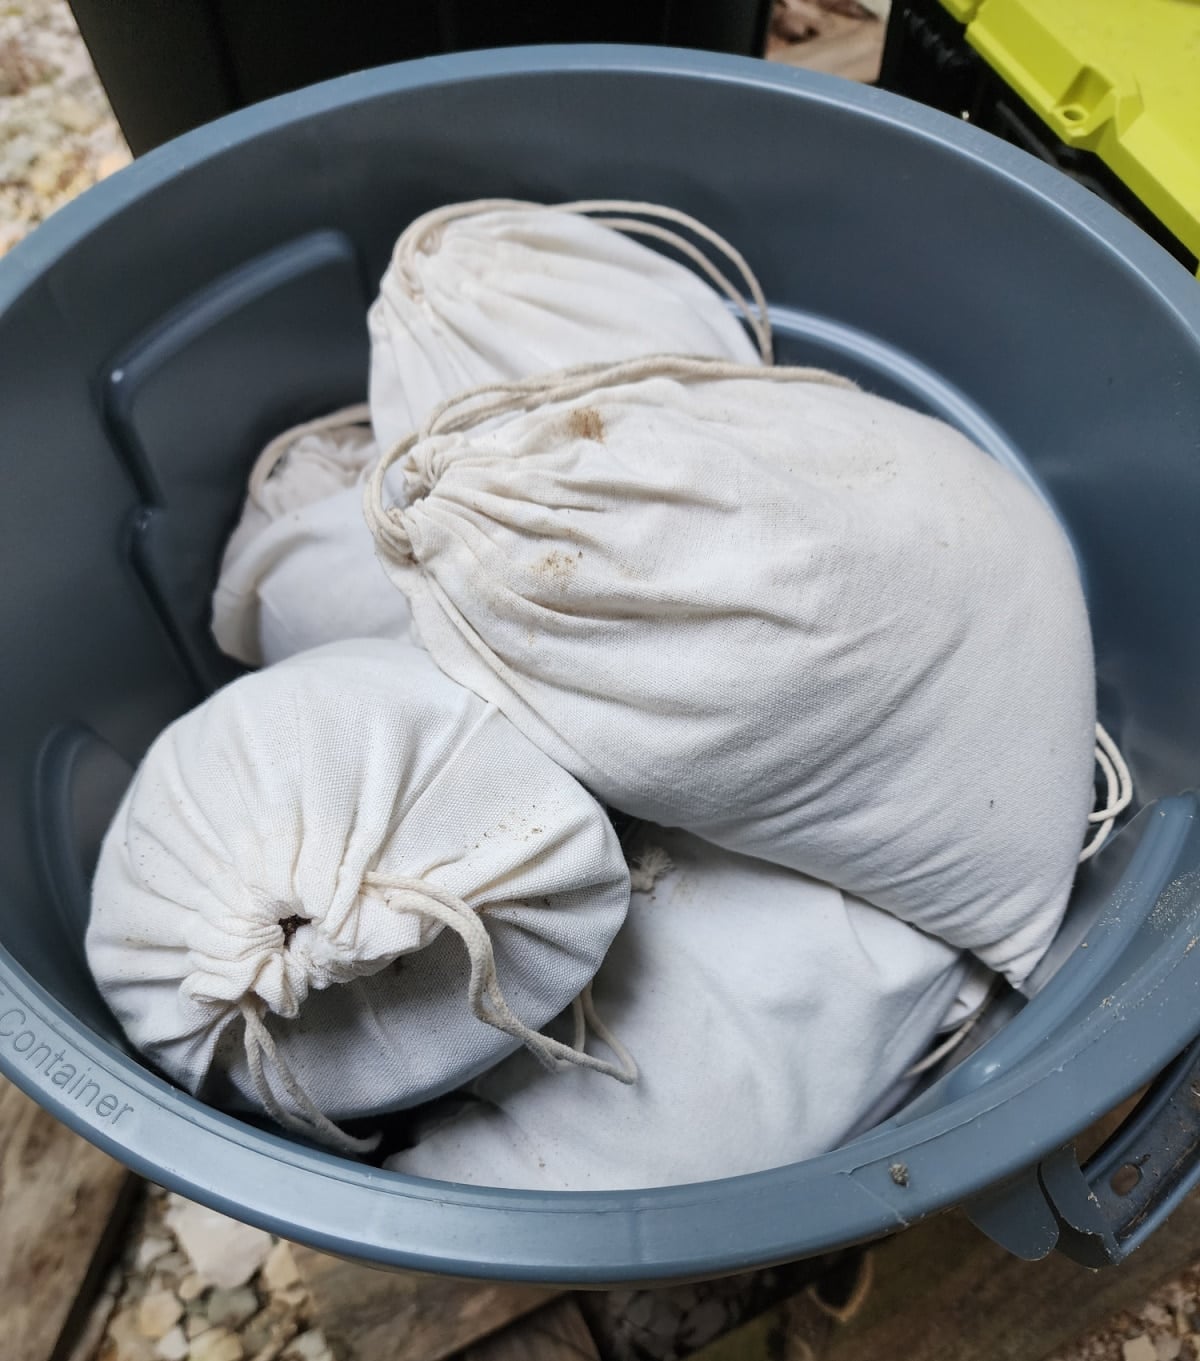
We ended up filling 20 canvas bags for four kids. The plan was to do one gem mining experience each day. After three days, they had more than enough gems to take home. The remaining 8 bags will be saved until our Camp Grandma next year.
I didn’t want the kids to know that there was more than one bag each, so I hid all of the bags in a small garbage can. Who would look in there?
Where to Find Gems and Mining Supplies
This information will probably be the most useful for you. To help you get a visual of what I bought, I’m including screenshots.
I ordered the following items on Amazon:
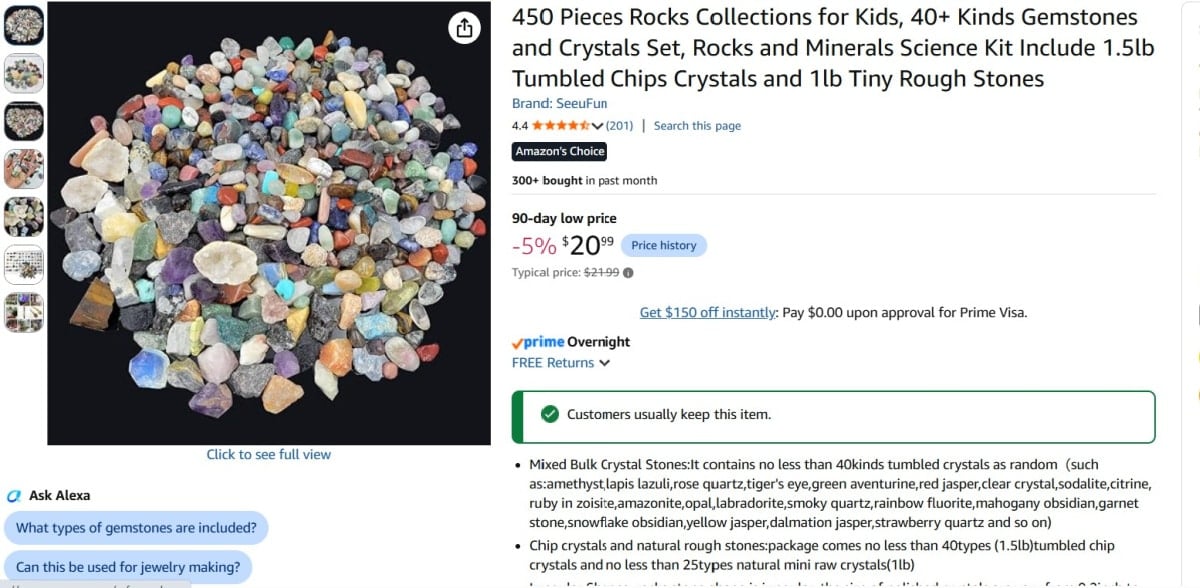
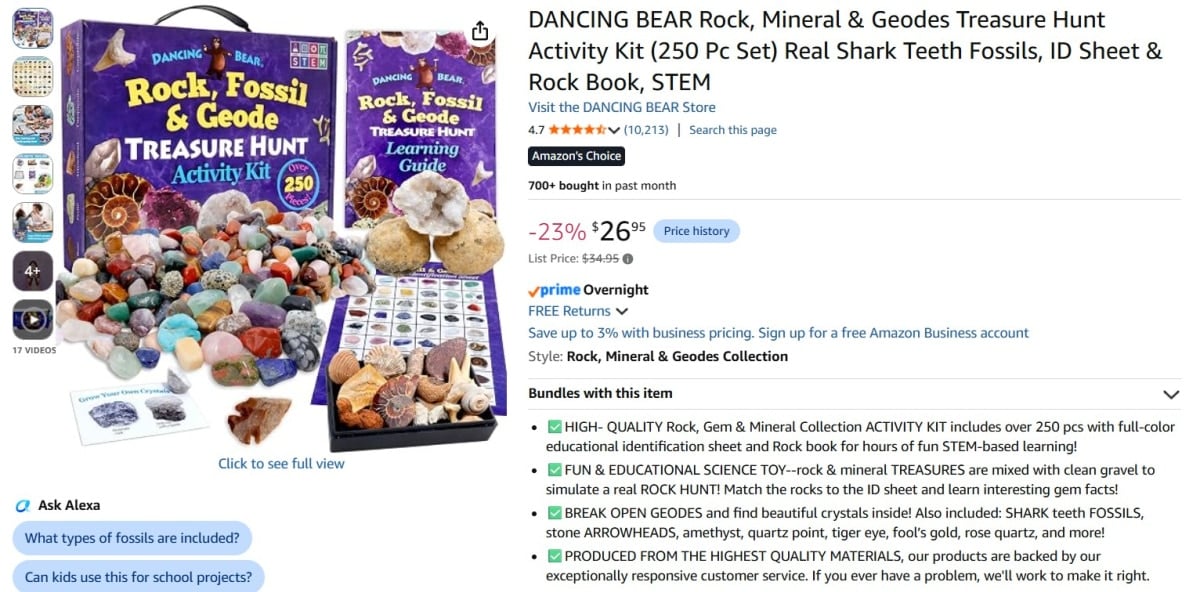
We bought one of each of the two collections above. I wanted to make sure they were what I wanted, so, spacing out my remaining purchases over 8 months, I bought another of each. Buy the Dancing Bear Collection here.
Buy the 450 piece tumbled collection here.
Amethyst Crystals
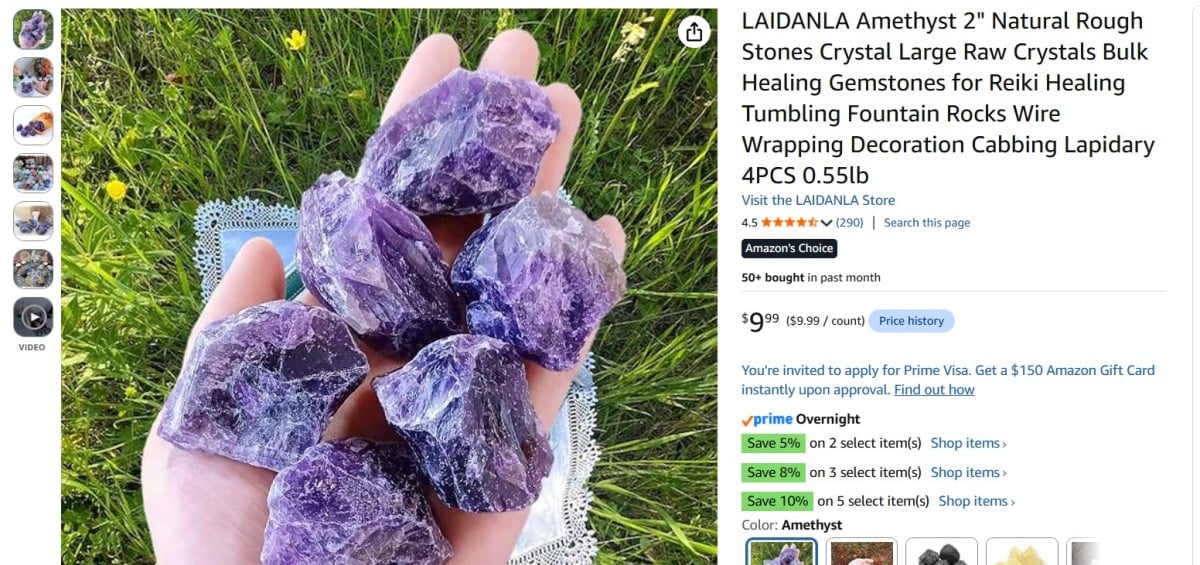
I ordered these Amethyst Crystals, and they are pretty, but I found a better deal on Etsy. I’ll share that below.
Geodes
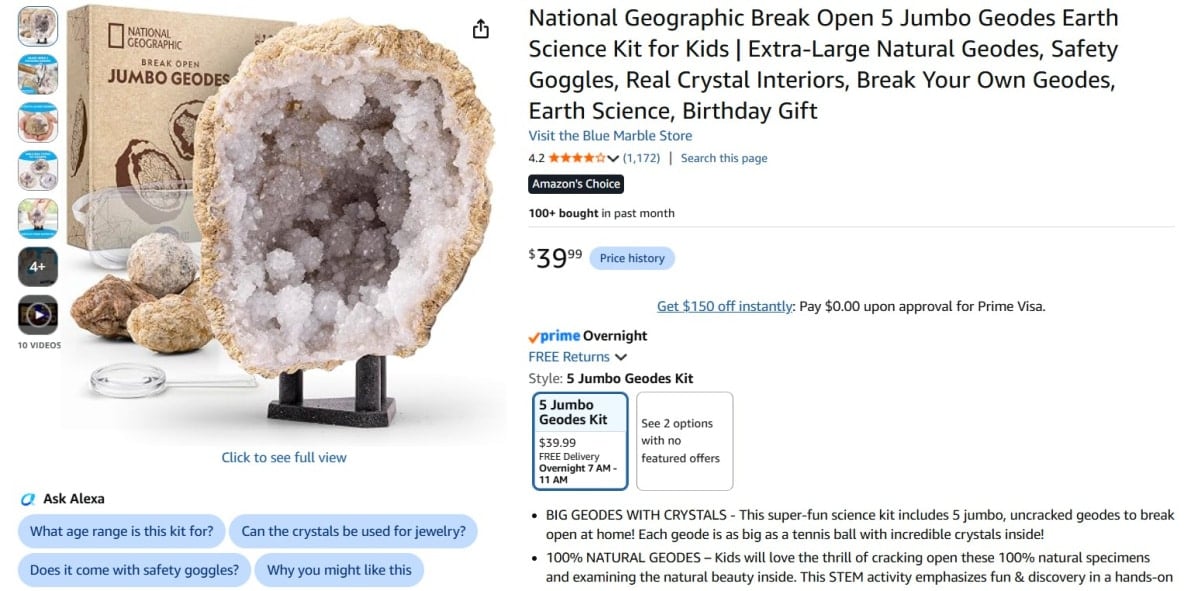
I bought one of these because you can’t have a gem mining experience without finding a geode to break open.
The first collection of 450, 1.5-pound tumbled chips and crystals was mostly for the other three children. My grandson has 2 rock tumblers. I particularly wanted some smooth, pretty gems for the two girls.
Buying Rocks and Gems on Etsy
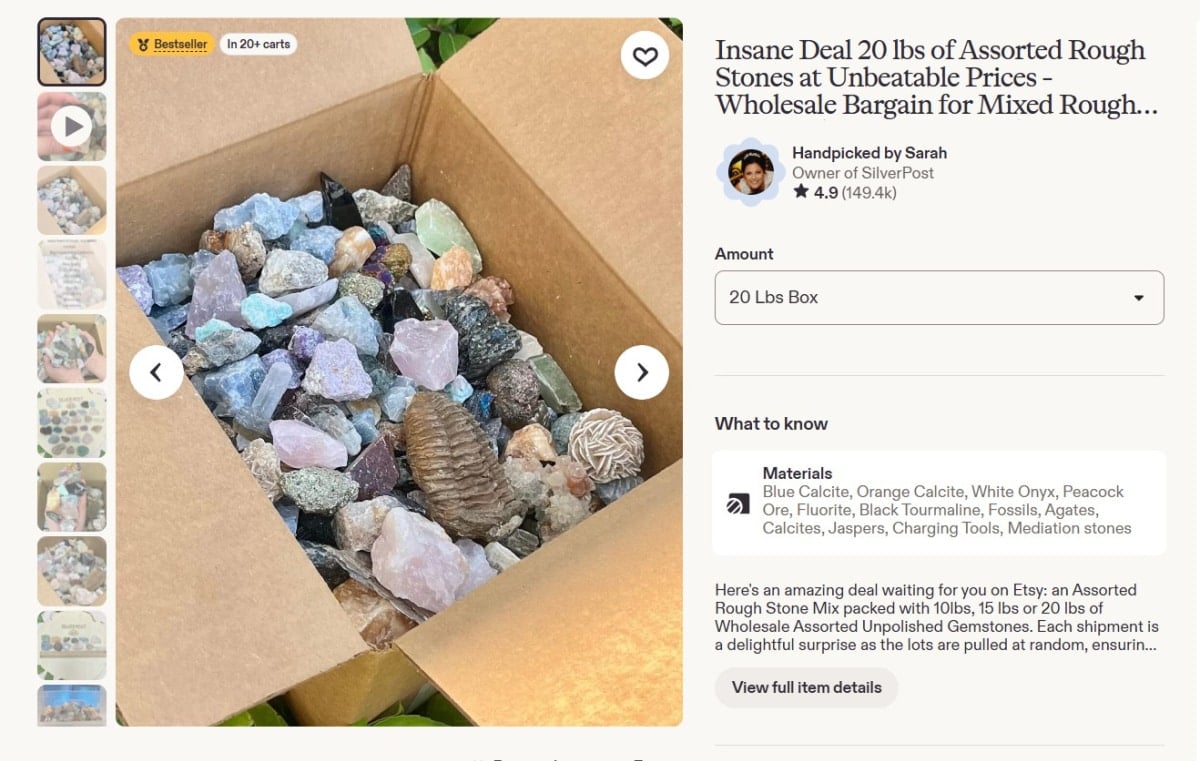
Although this was very expensive, it was a LOT of rocks. When I popped it open to take a screenshot, I saw it was 10% off, plus there was a coupon code of GRATTITUDE. Click the photo or this link: Insane Deal on Rocks. I do not earn a commission on your purchase.
This box had a very nice selection of rocks including lots of amethyst.
In addition, if you live near a gem mining experience, look for local show caves, state parks, family fun centers, and specialized rock shops. Give them a call to see if you can purchase a ready-made bucket or bag.
How to Mine for Gems in the Sluice
I’ll share our pictures and give you a list of suggested ways to mine for gems in your DIY gem mining sluice.
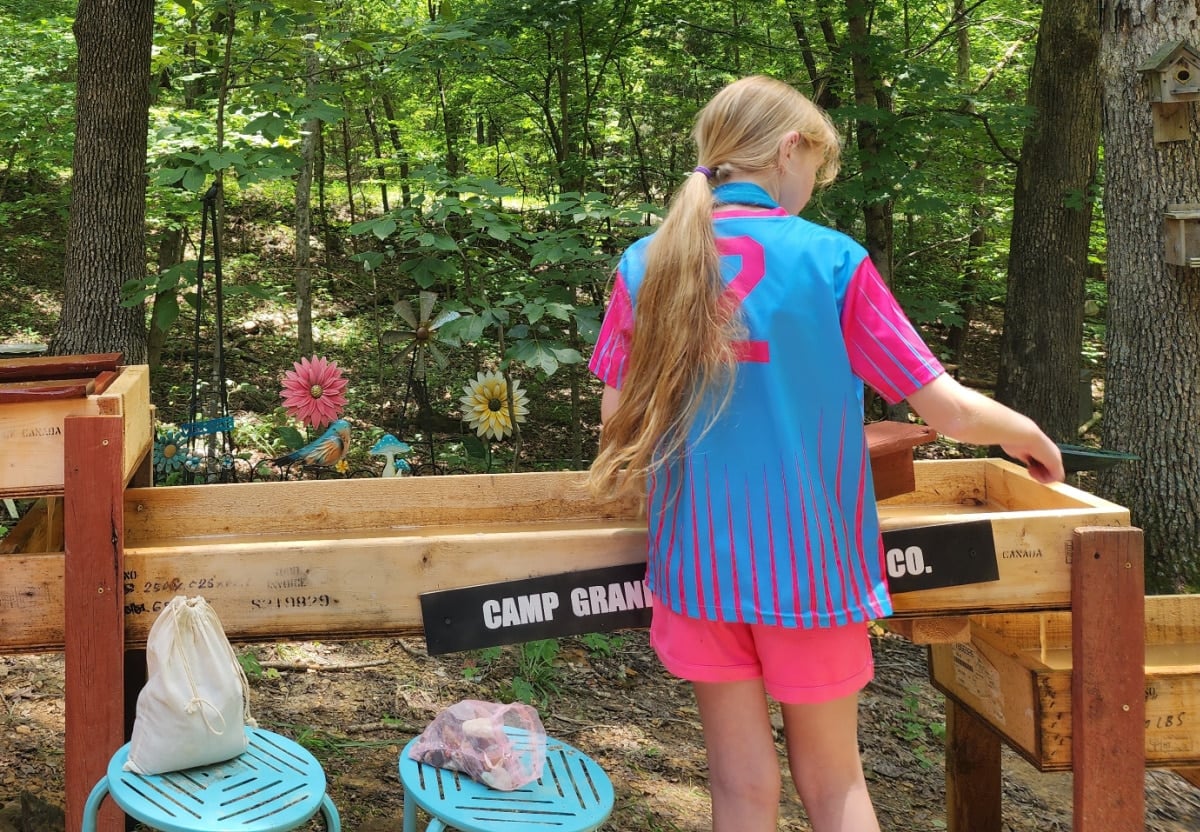
Little “d” gem mining for the first time. She had no idea what it was or what to expect. She clearly fell in love with the process, carefully pouring a small amount from the canvas bag, and slowly examining every single gem.
Helpful Accessories for the Perfect Gem Mining Experience
- Small tables to hold the canvas bags
- Metal bucket to put the gems in after they are washed
- Colorful mesh drawstring bag to save the gems
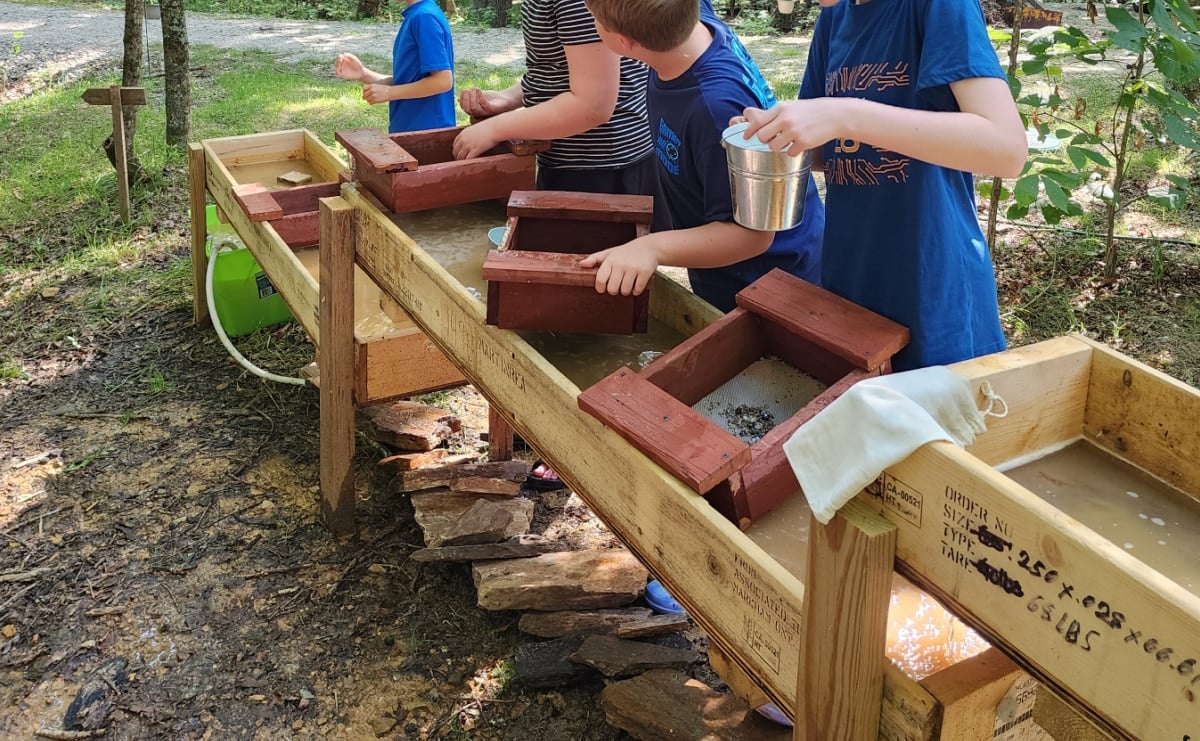
I mentioned how little “d” meticulously sifted slowly through her bag; Terry’s grandson (Mr. P) next to her preferred the “dump” method. Yep, he dumped the whole bag and swished all the loot at once.
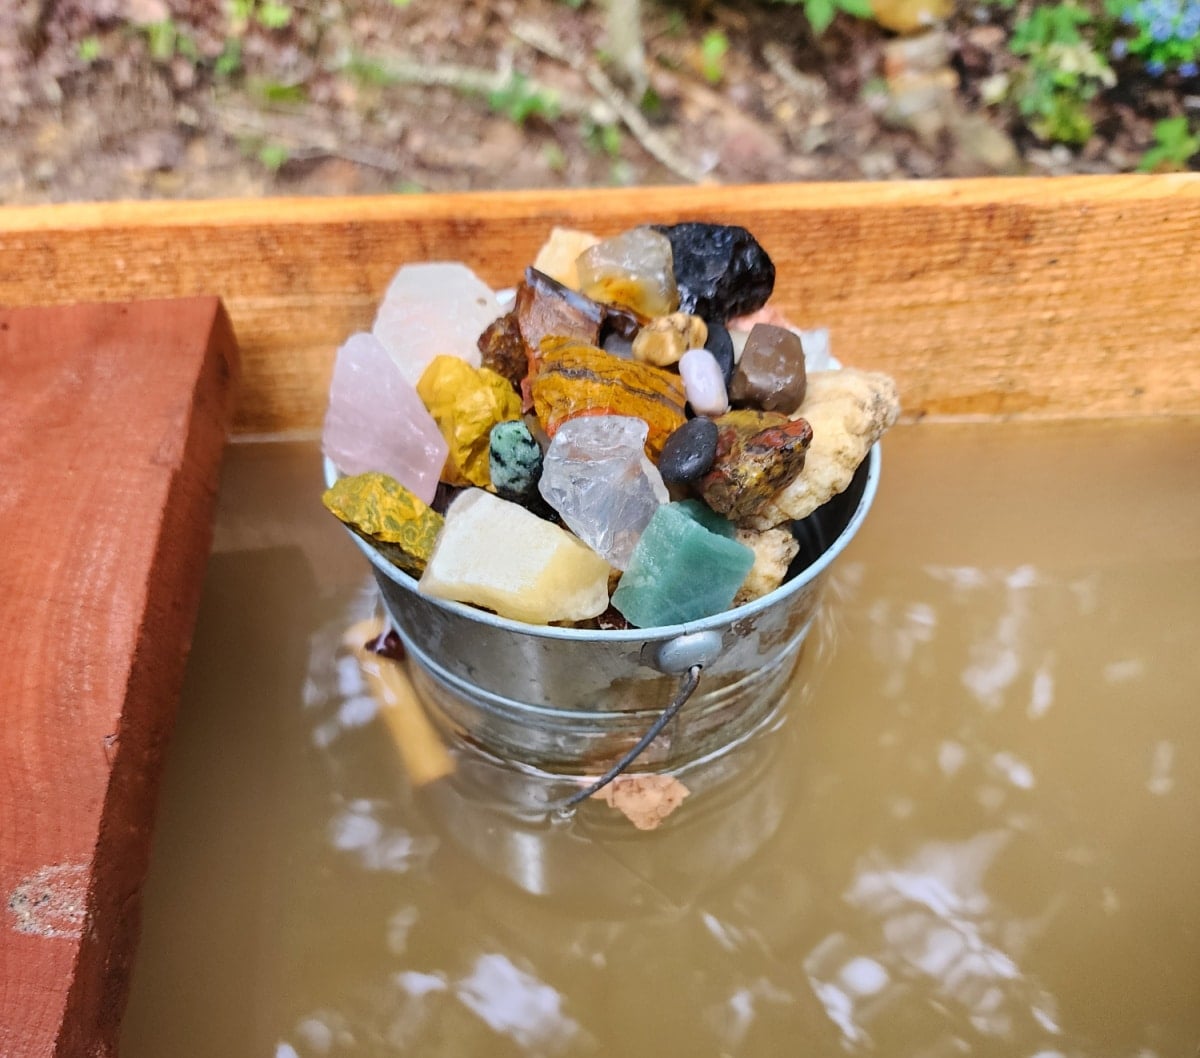
This bucket full of rocks and gems is the haul from three days for Mr. P.
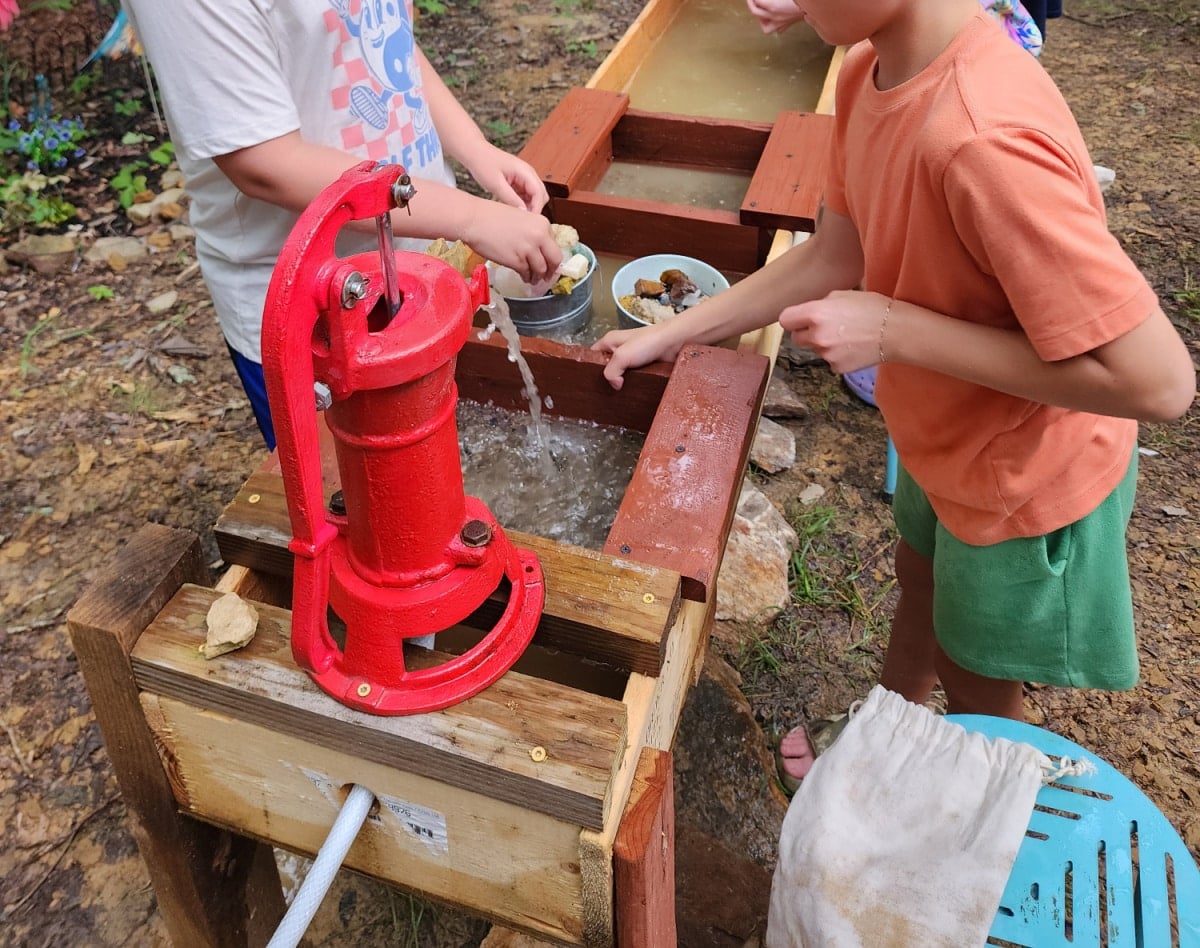
The boys really liked washing their gems under the pump. I’m really happy we had it. It was left in a shed from the previous owner, still in the box. It resides in my small flower bed seen in the sluice pictures.
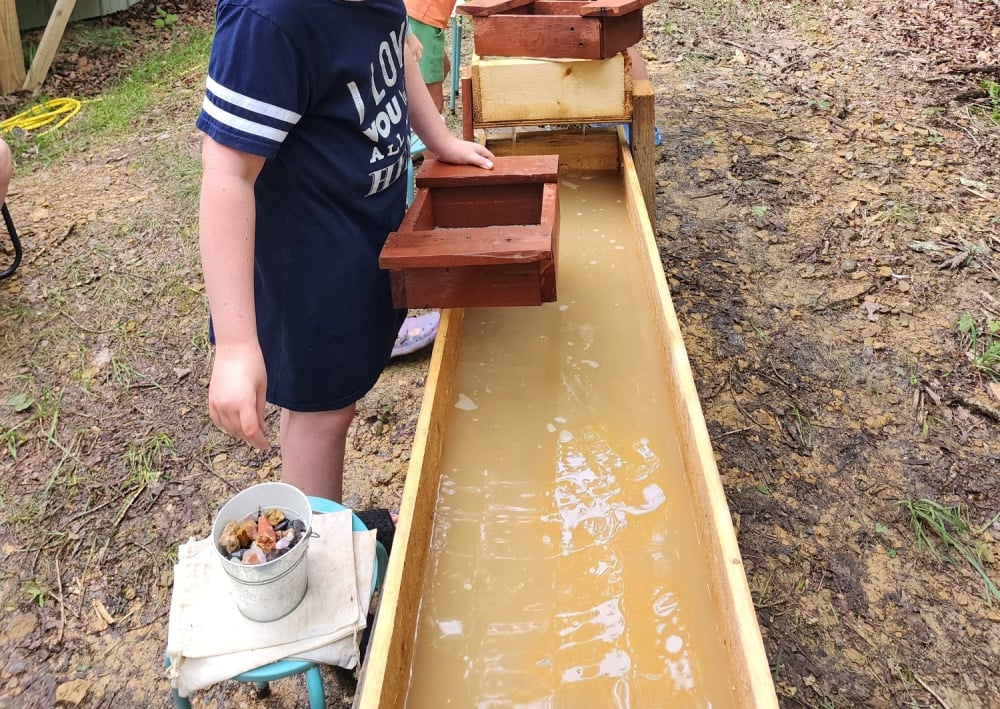
The oldest attendee, Miss A, choosing which pieces make the cut and go into the bucket.
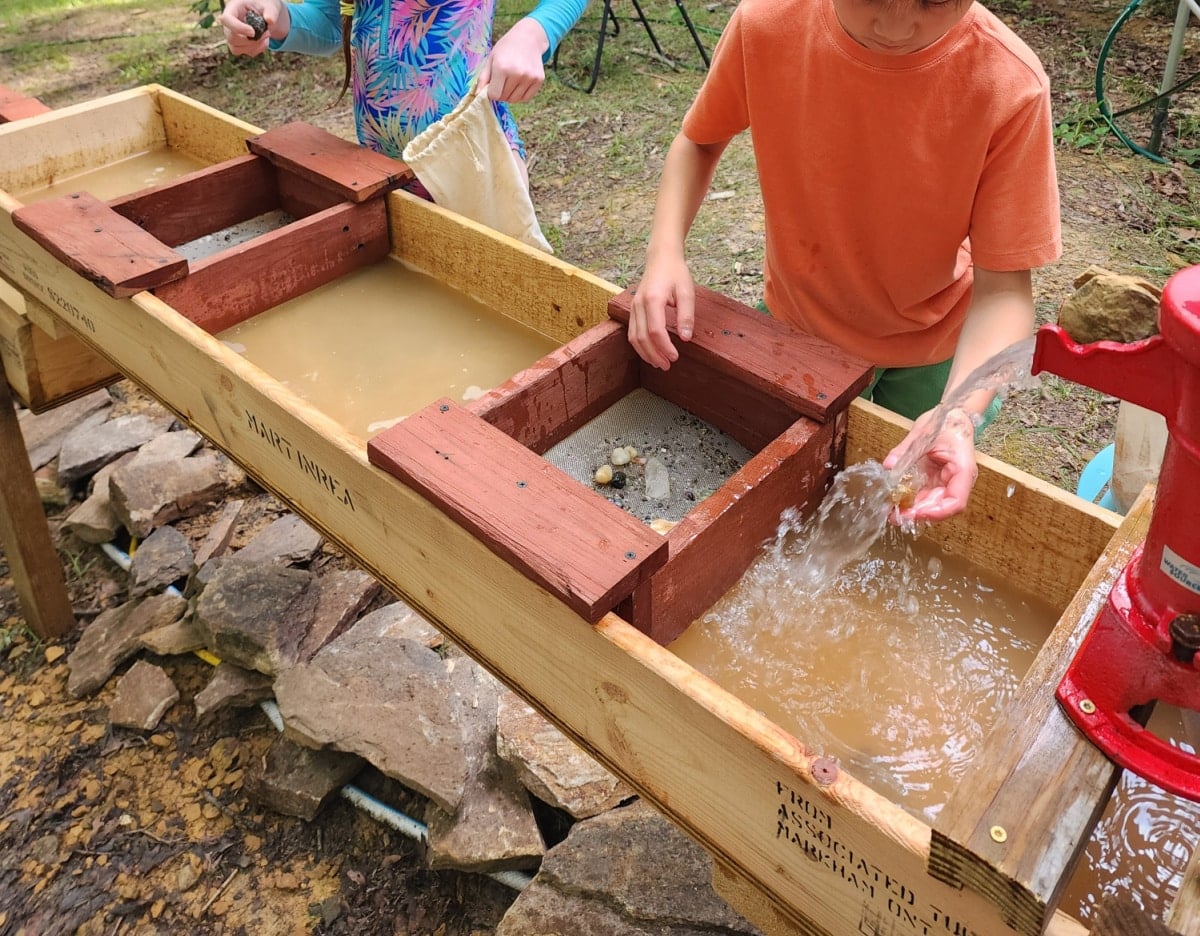
Of course you don’t have to have the hand well pump, but the kids sure did like the extra “water play.”
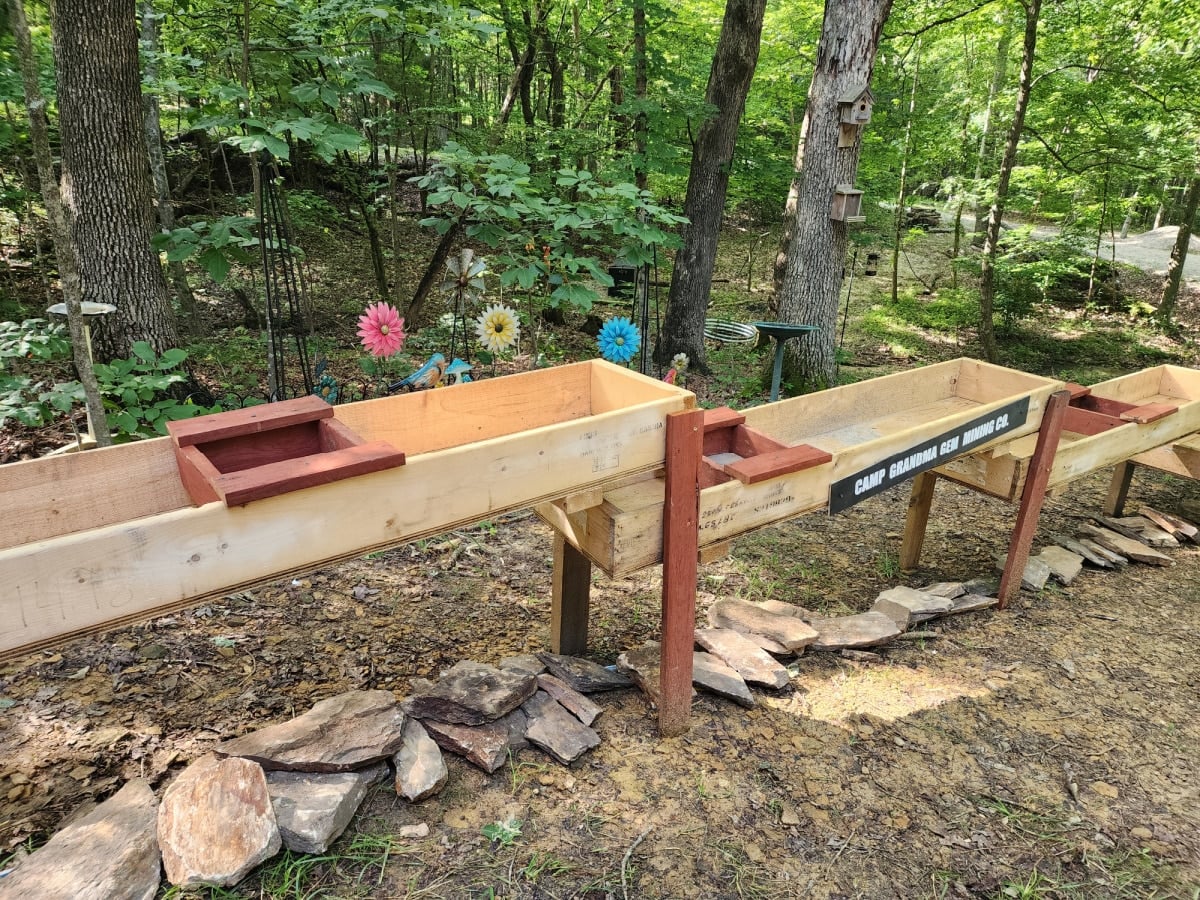
I love this view from my living room and dining room. I enjoy it during every meal. Terry had some creek rocks that her son gave her. We used them to cover the garden hose and the extension cord.
Cleaning and Storing the Gem Mining Sluice
After the kiddos left, we dismantled everything and stored it in a large shed. The crates were leaned up against the wall in random places, taking up very little room. The sifter boxes are stored in a corner.
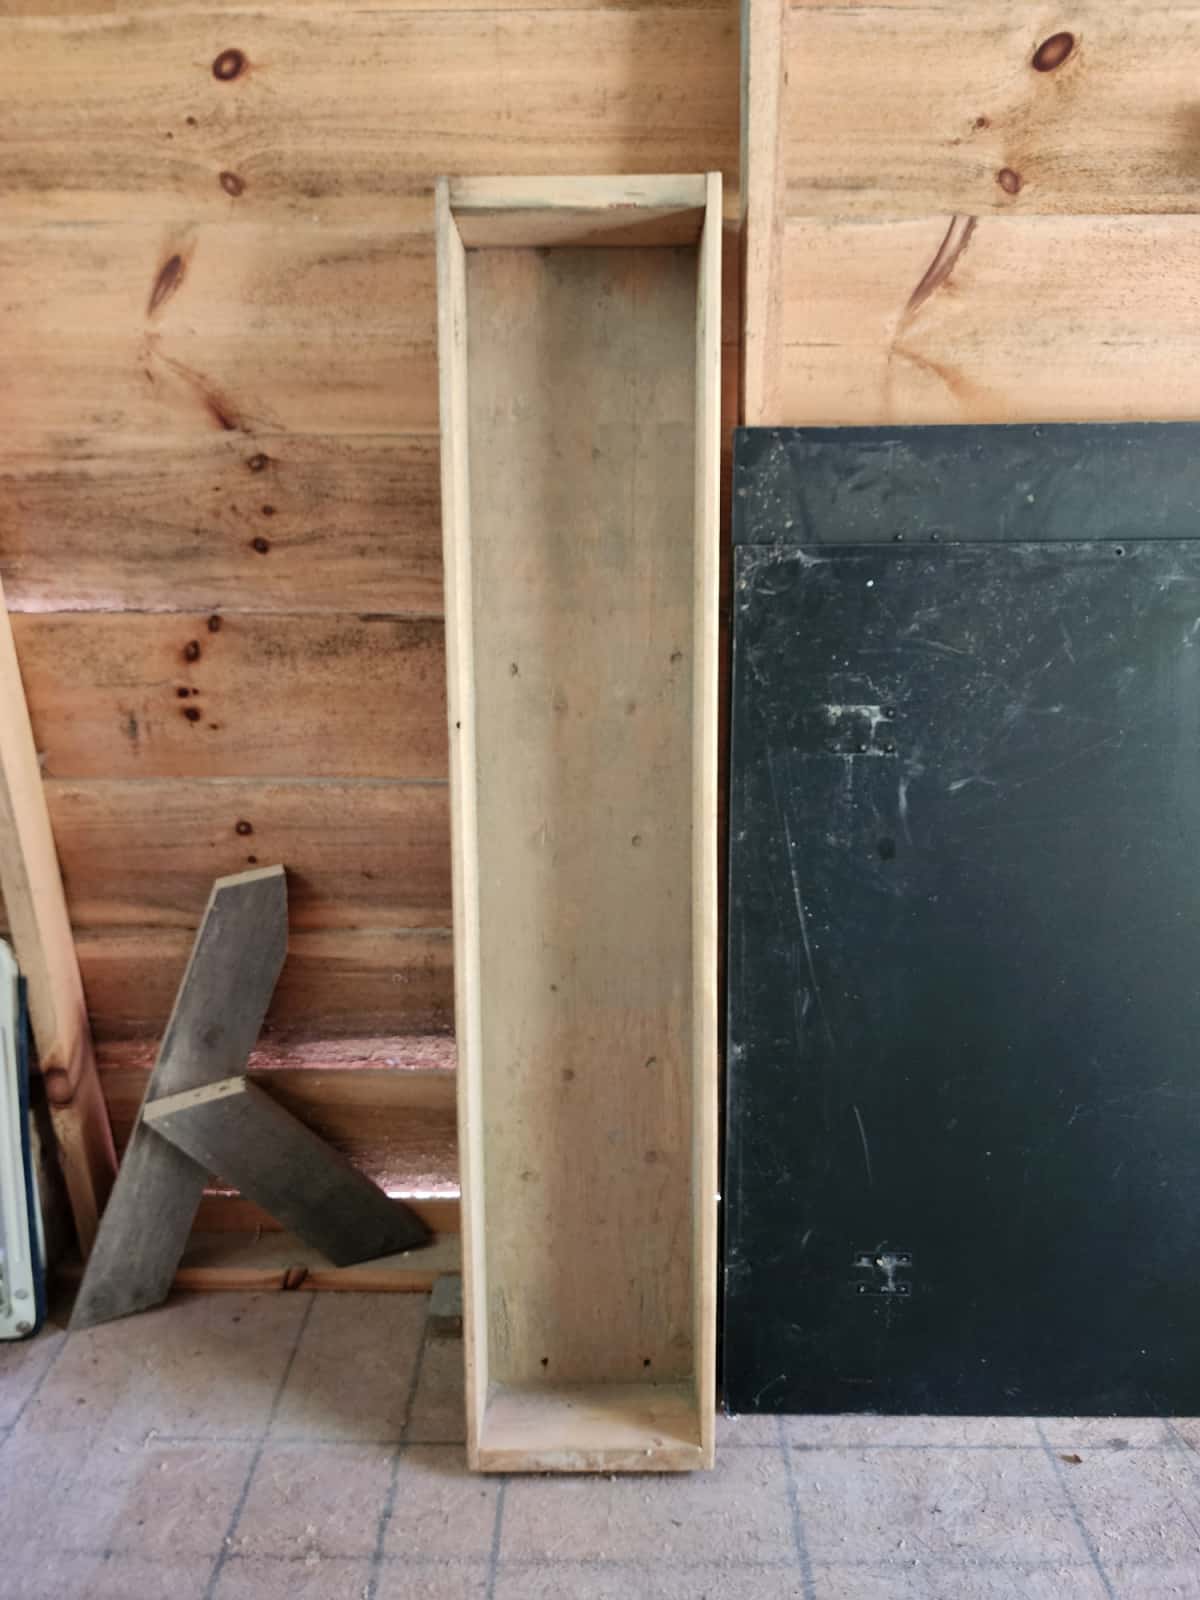
Here is one of the crates beside the ping pong table top. This was our first year including the gem-mining experience with a DIY sluice and Ping-Pong. They were both a big hit.
What Activities are Fun for Camp Grandma?
I’m excited to share some of the fun activities we have during our week of Camp Grandma.
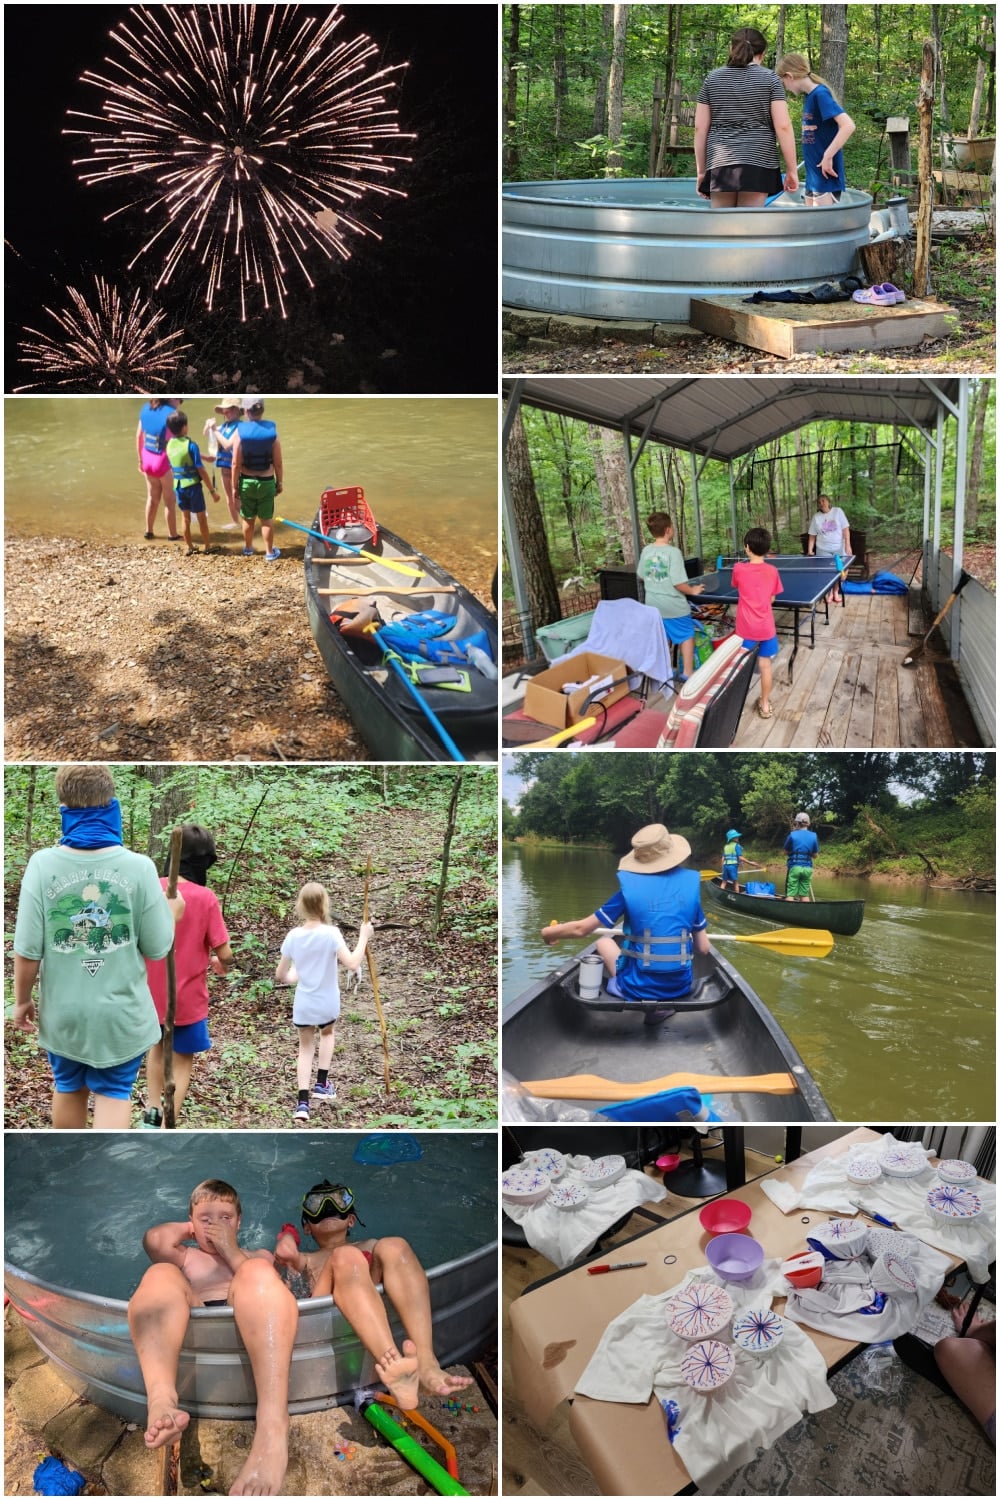
- Bingo
- Scavenger hunt
- Field trips: A local ice cream store, canoeing, a nearby playground, shopping at the dollar store to spend BINGO money.
- Tie-dye: T-shirts, towels, ball caps, and hair scrunchies.
- Make your own ice cream mixer with a variety of toppings.
- Make your own personal pizza.
- Painting ceramics and rocks
- DIY Walking Sticks
- Hiking
- Swimming
- Ping Pong
- Zip Line
- Camp Grandma Playground (tree-to-tree playground equipment, saucer swing, cargo net)
- Fireworks
- Red, White and Blue Sharpie T-shirts
- DIY Suncatchers
This was our third year canoeing, and by far the best year yet! The water level was perfect at 3feet 8 inches. It’s definitely one of my favorite activities. The kids love tie-dying T-shirts, but this year we added towels. Why? Because they will outgrow the shirts, but not the towels. New this year, I did infused ink T-shirts with Camp Grandma 2026.
Building this DIY gem mining sluice took some trial and error, but seeing the kids use it made every bit of the planning worthwhile. I hope sharing our measurements, sifting screens, mining bags, and water setup makes it easier for someone else to create their own backyard gem mining adventure. Whether you are planning a Camp Grandma activity, birthday party, family reunion, or summer project, this is one experience the kids will remember long after the last gem is found.
What a wonderful grandma you are!!
Thank you so much. We had a lot of fun with the kiddos this year.
gail