Corner Table Bench for the Kids (banquette)
As an Amazon Associate, I earn from qualifying purchases.
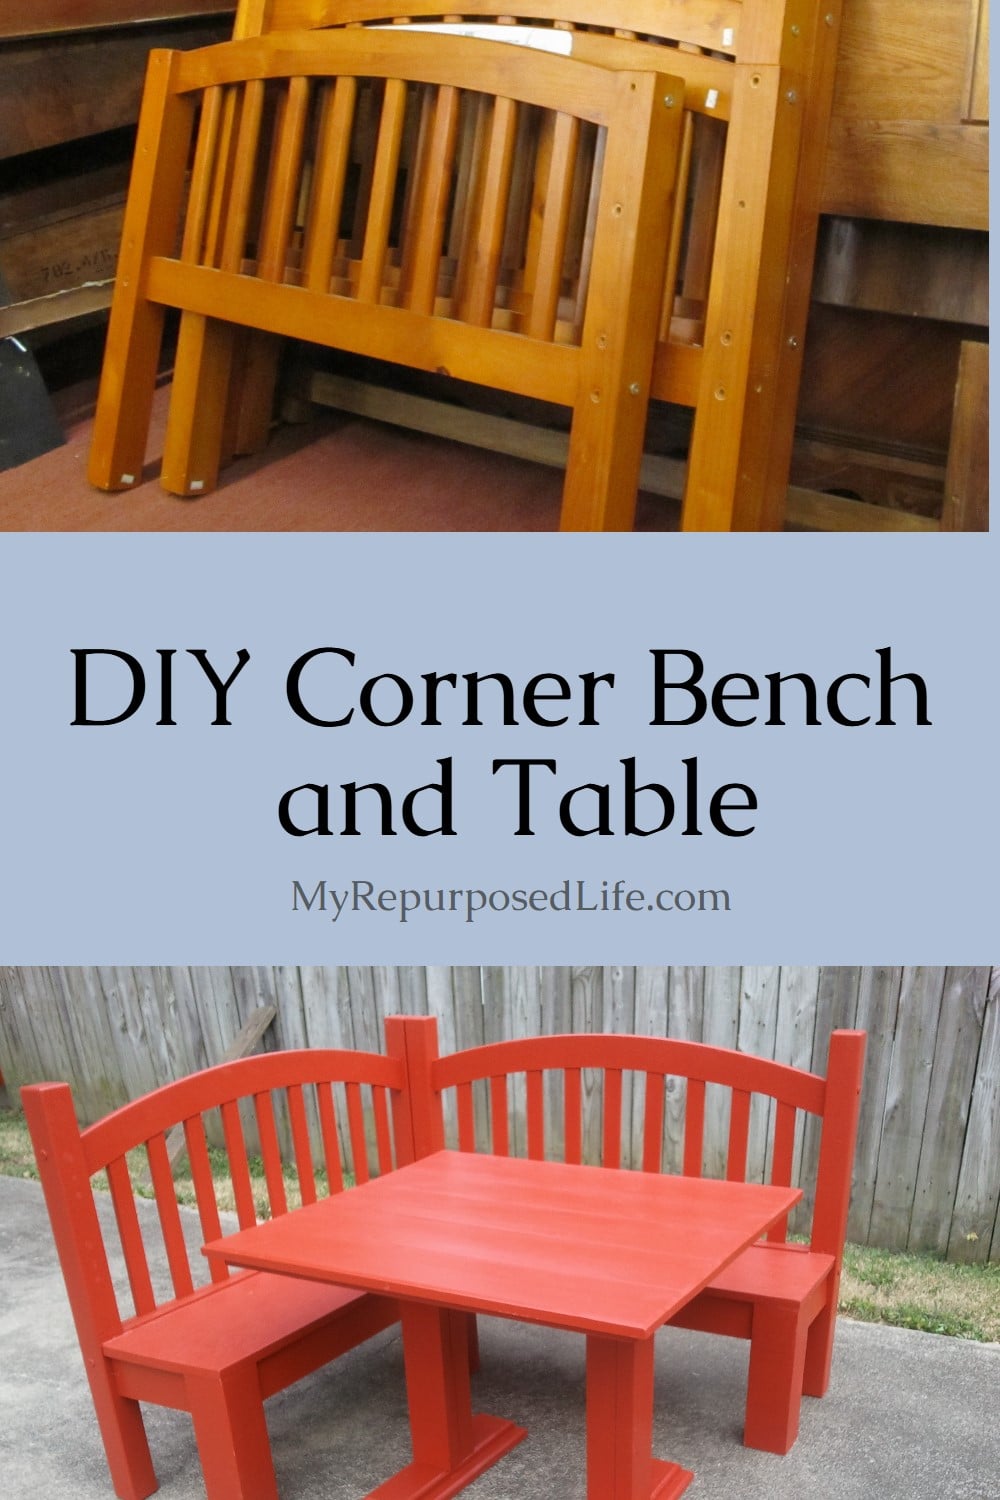
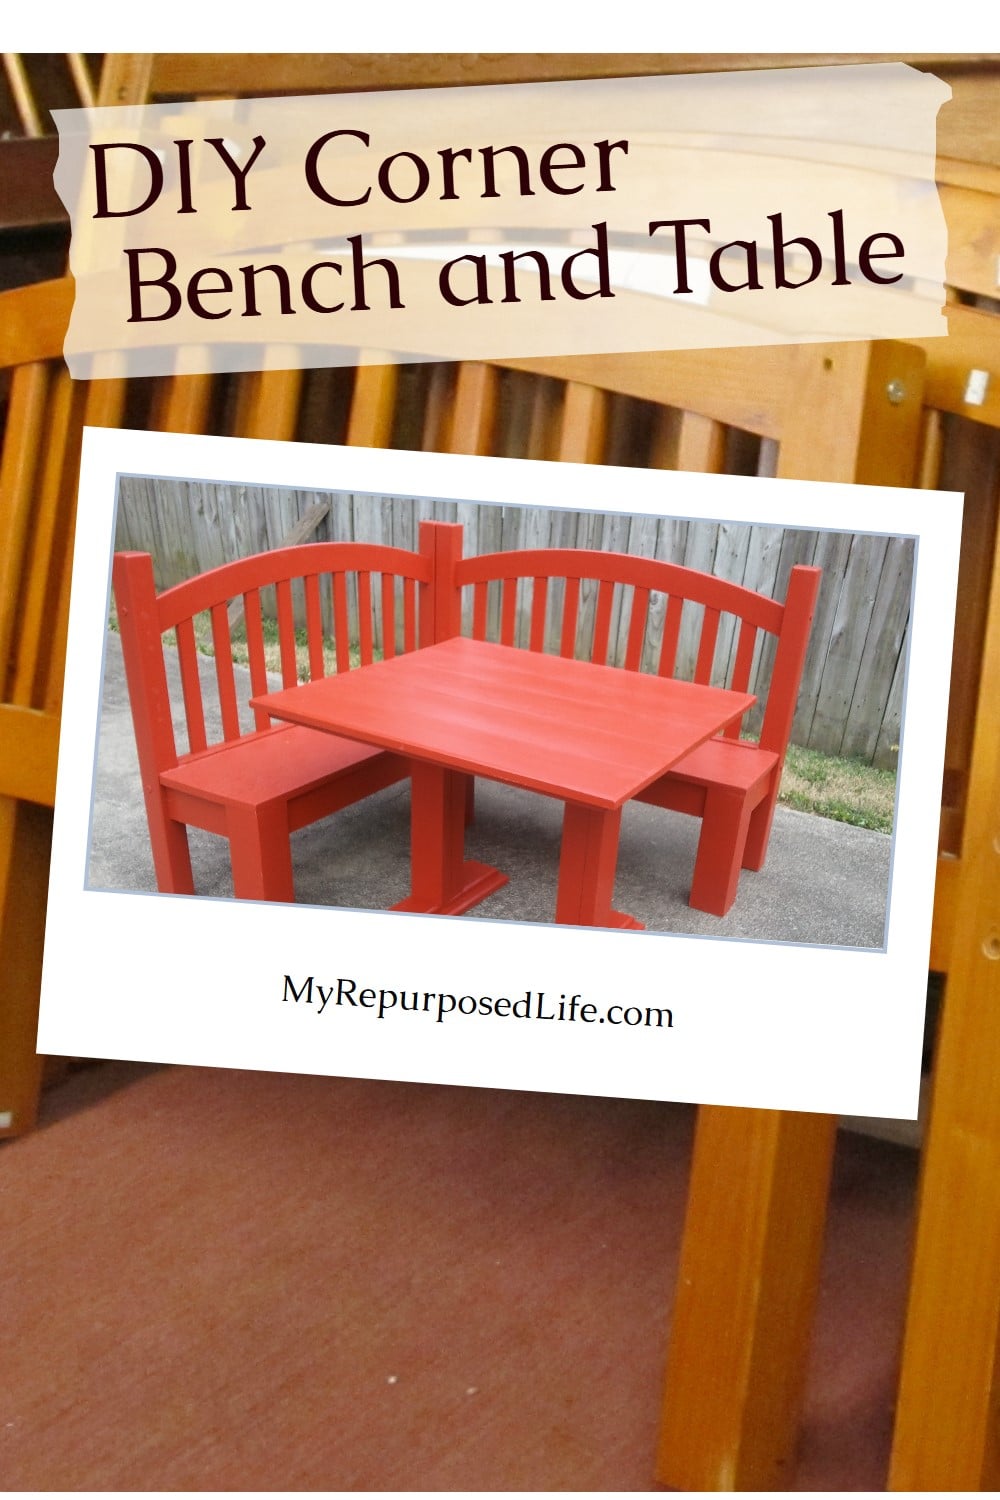
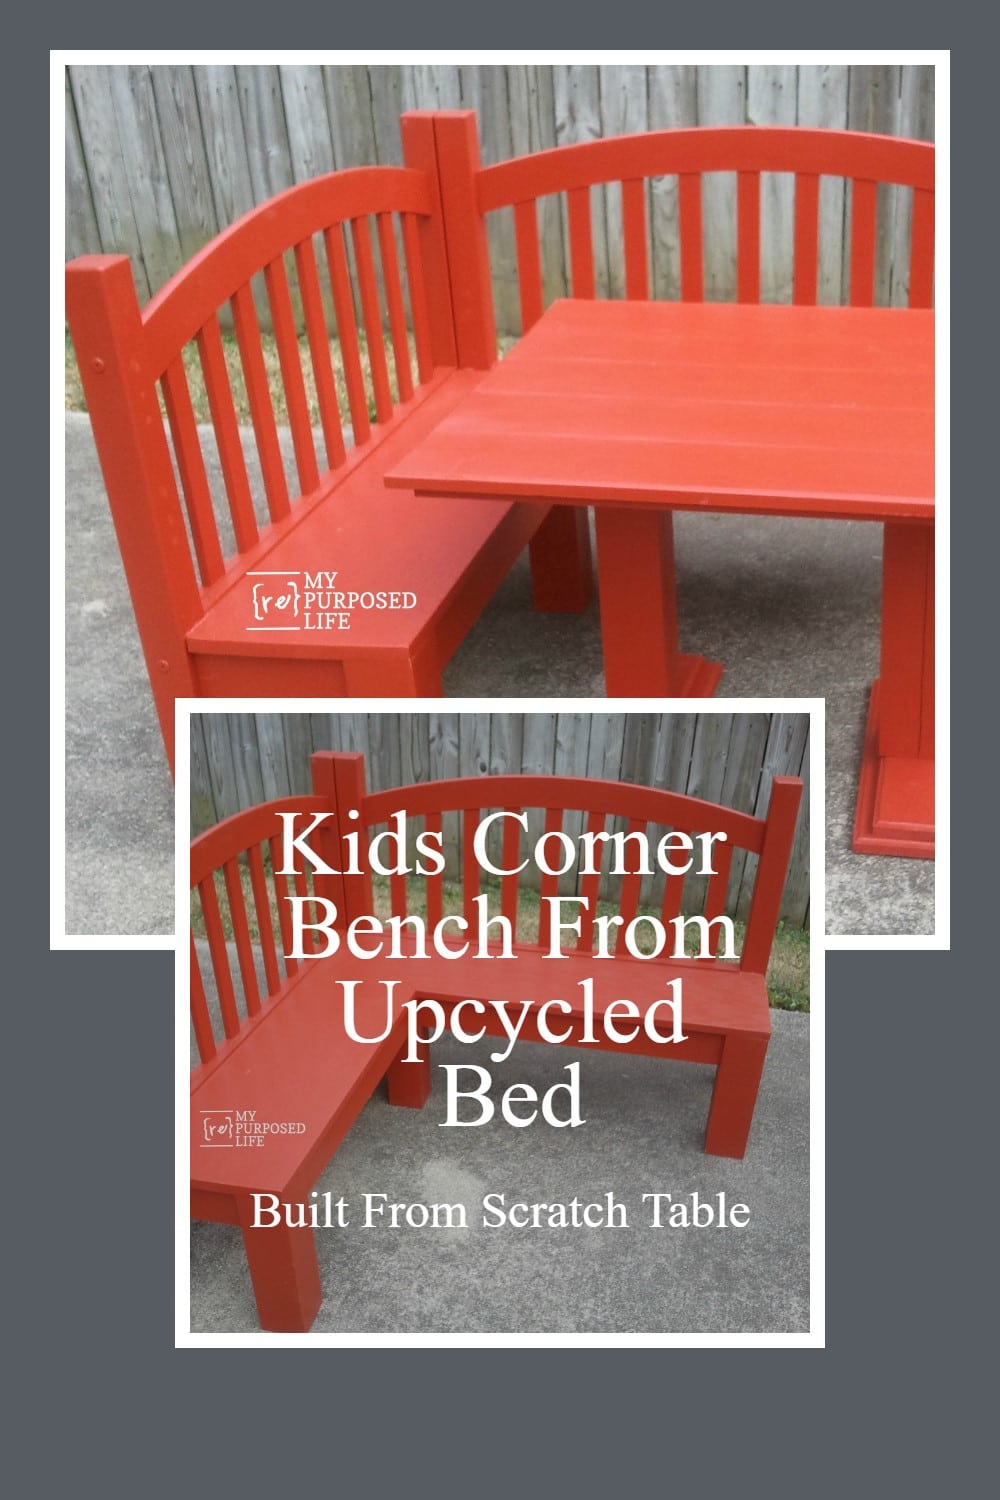
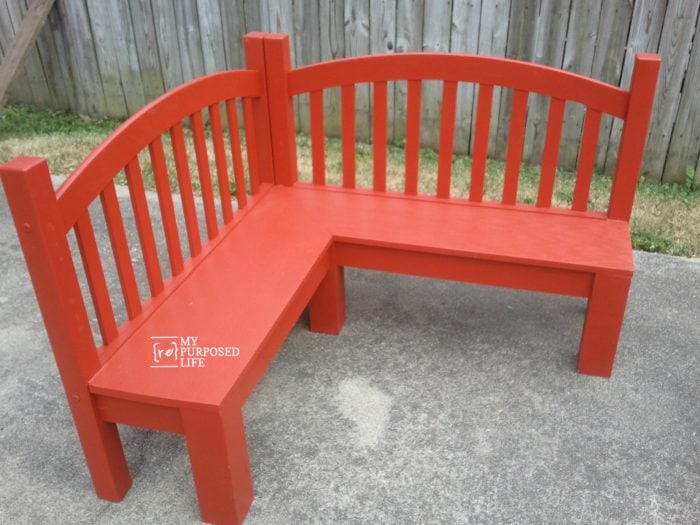
Can you use additional seating for the kids? I will show you how to make a kid’s corner table bench, perfect for a corner in the dining room or playroom.
")
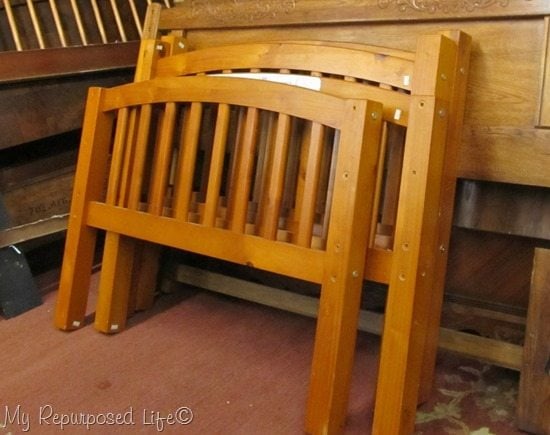
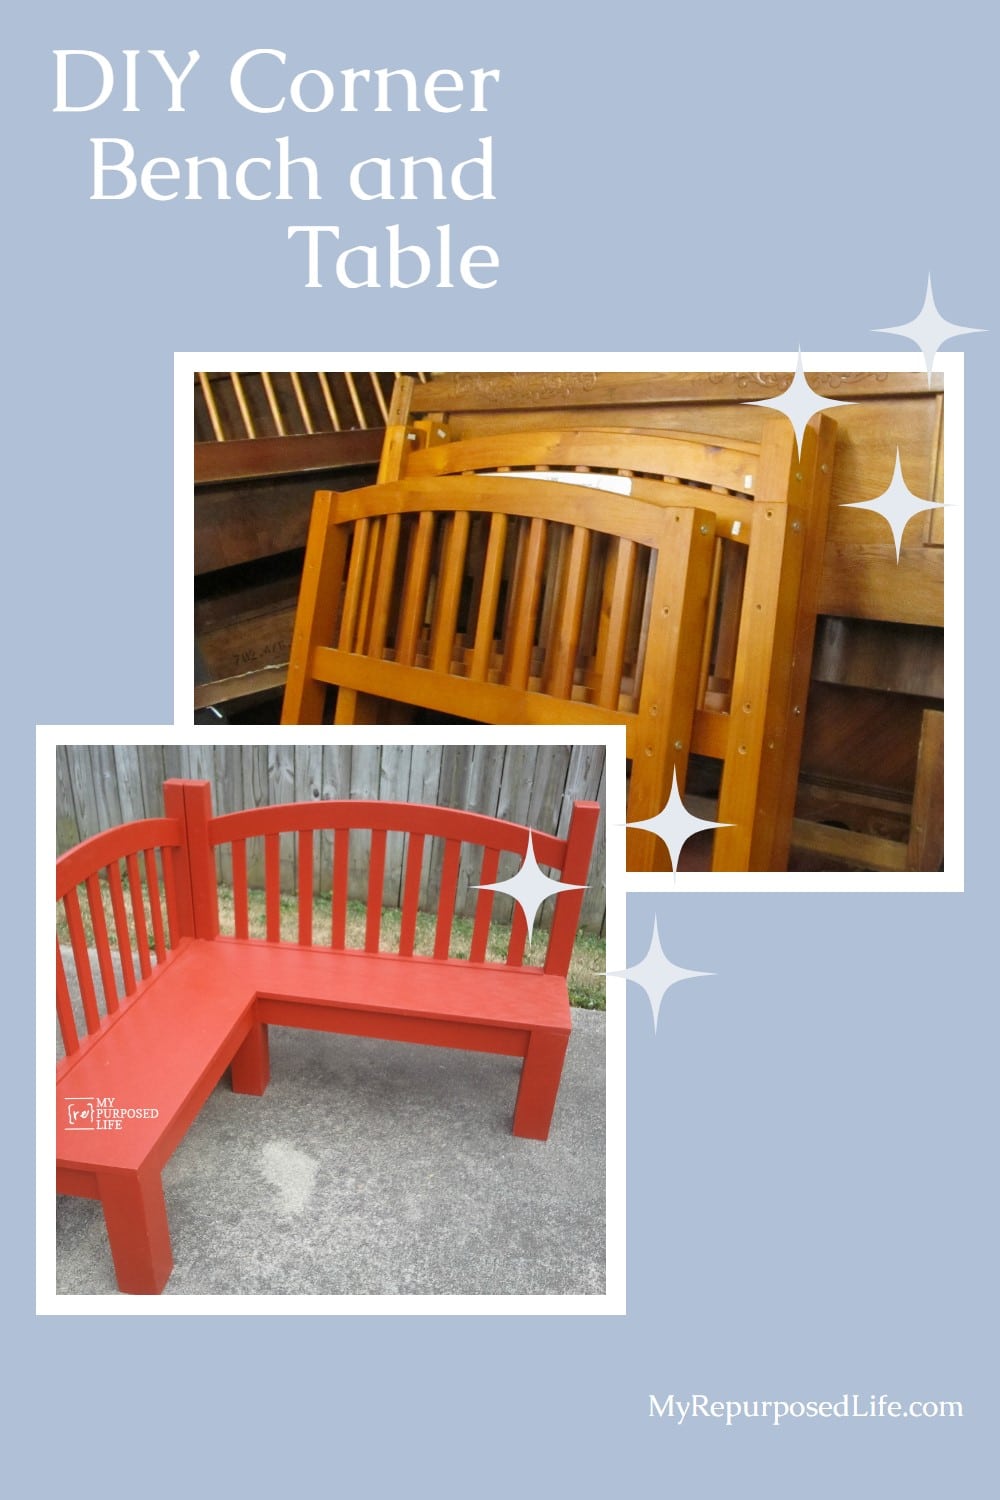
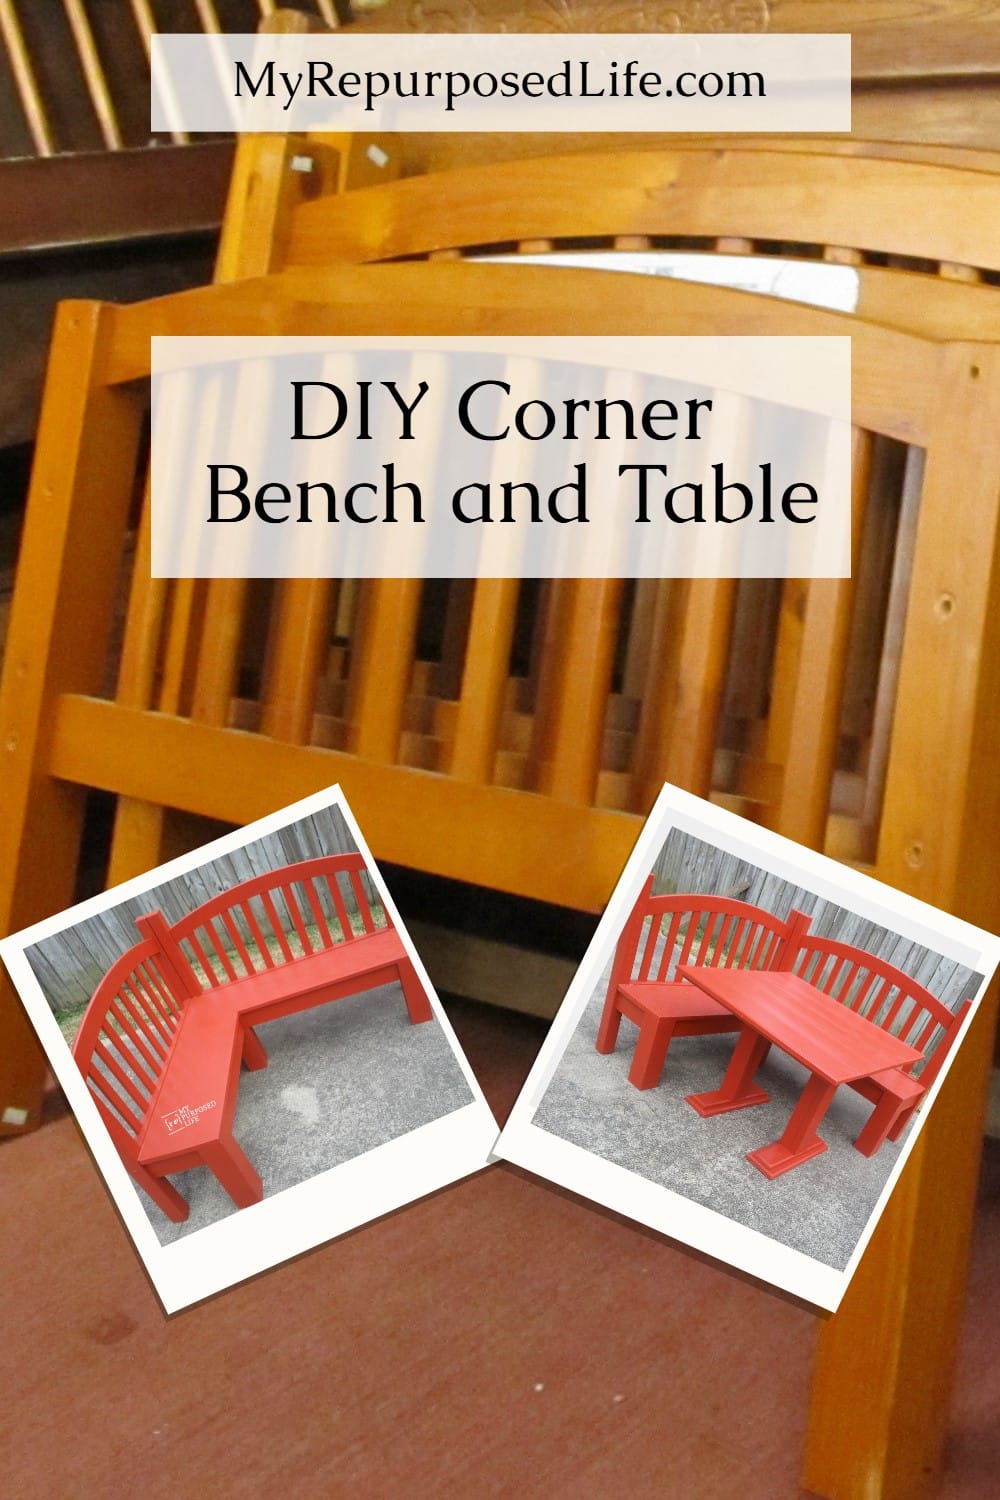
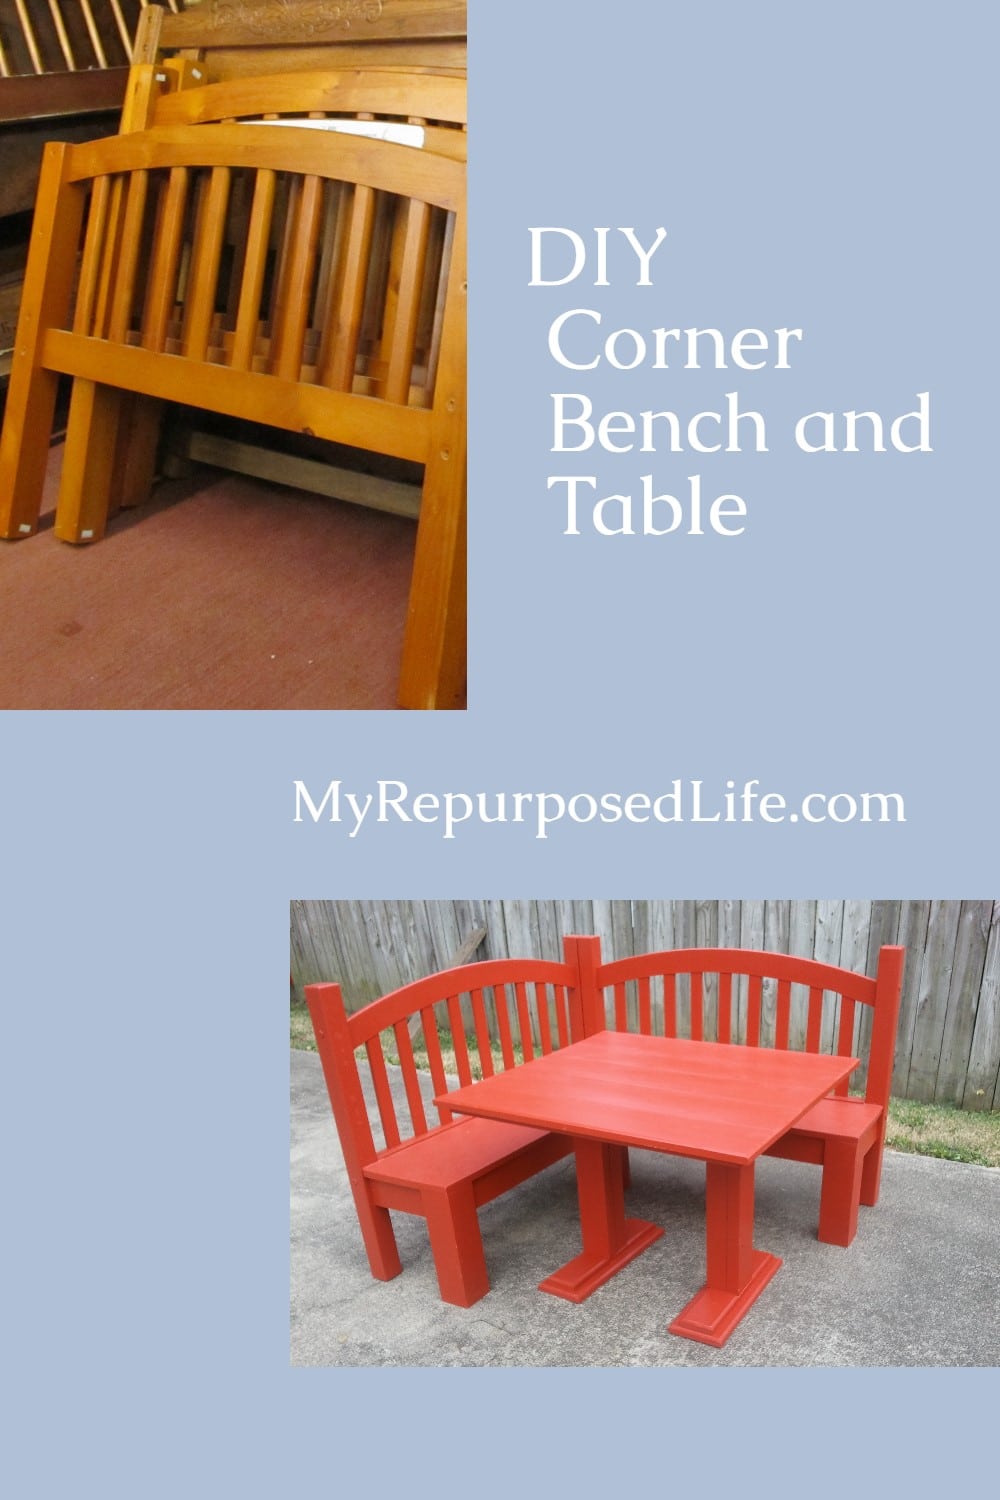
I have had a headboard and footboard in my storage shed for quite a while now. Maybe even a couple of years. It wasn’t sturdy enough to make a regular bench with the pieces. I saw a great bench at Running With Scissors, and it inspired me to make this cute little corner table bench or banquette.
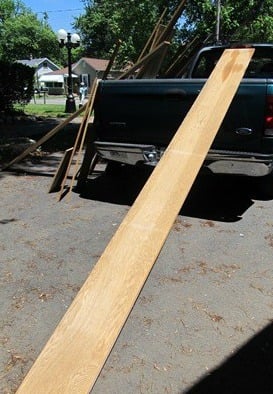
I picked up this really long board—12 feet long—and had no place to store it, so I got busy making this bench and cutting this monster down to size.
Rough Design of Corner Table Bench
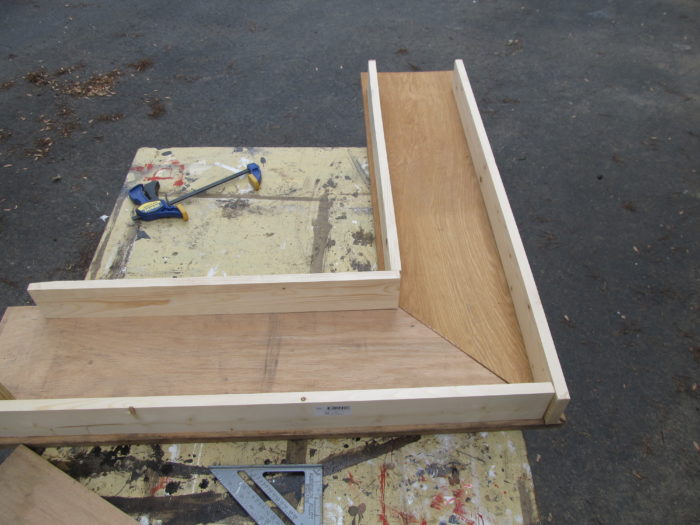
Using my miter saw, I cut it at a 45-degree angle and worked on making some pieces to skirt it out.
Use a Small Block to Mock up Table Legs
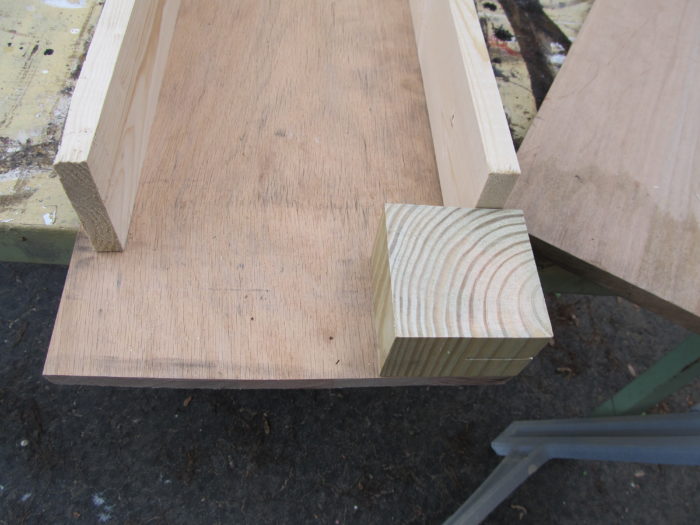
Because I knew I would be using 4×4 posts, I cut a small block to use as a guide.
Connect 45° Boards With Pocket Hole Screws
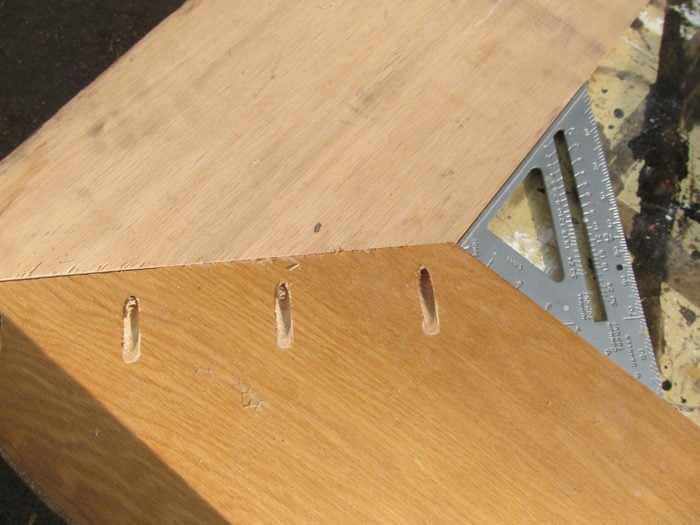
I connected the two pieces of board with pocket hole screws made with my Kreg Jig. Using a speed square ensures a good “square” joint.
Need more details on using a Kreg Jig? See my article How to use a Kreg Jig Pocket Hole System
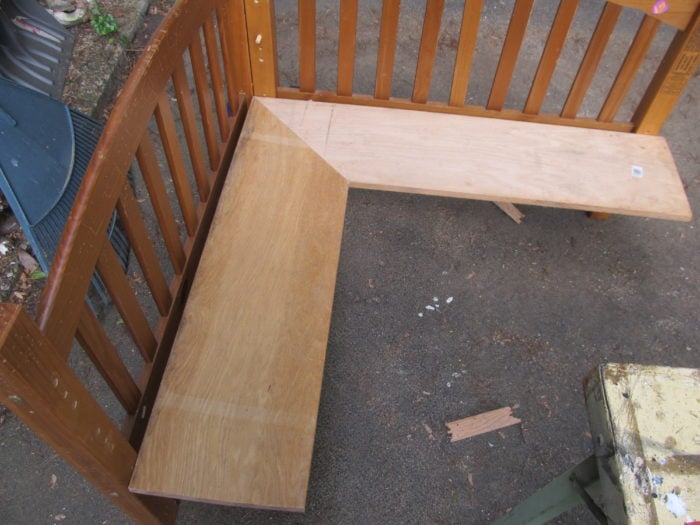
The bed pieces had some pegs sticking out, so I rested the boards on them to get a “dry fit.”
Cut Corner Table Bench Legs to Size
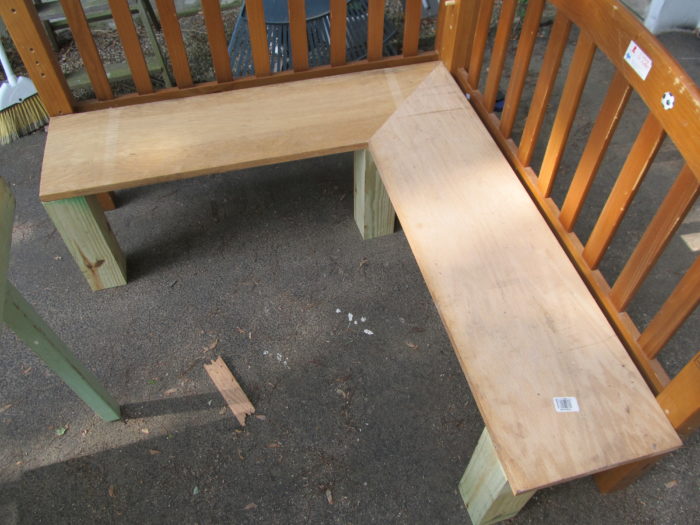
That allowed me to measure and cut the legs to size. I marked the placement of the legs on the bottom of the seat.
Attach Corner Bench Legs With Pocket Holes and Wood Glue
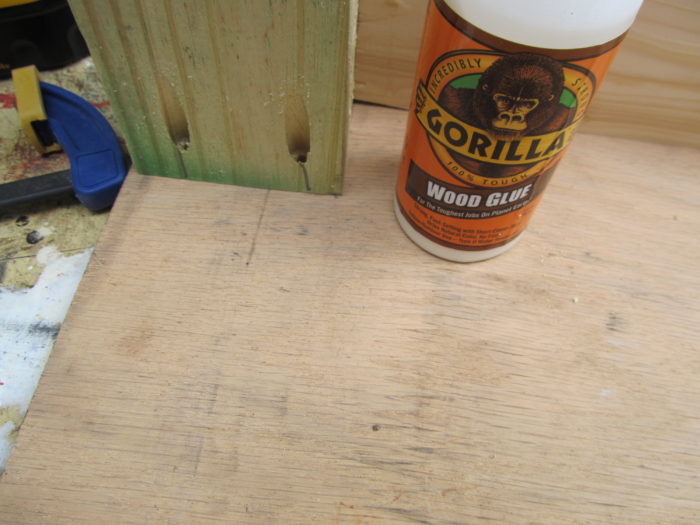
I attached the 4×4 posts with pocket hole screws and Gorilla Wood Glue.
Fill in the Gap With Scrap Boards
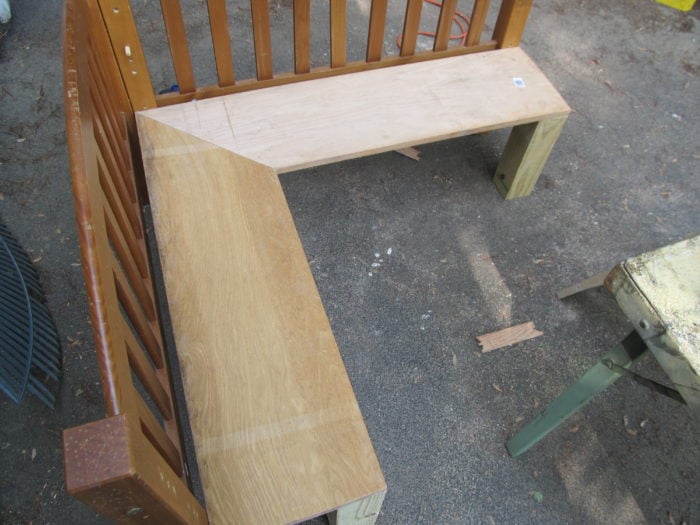
It’s looking good, but if you look closely, you can see a gap between the seat and the bed. I filled it in with a 1×4 that I cut to size and screwed into place.
Here, you can see the 1x4s in place. If you plan ahead, you could notch your seat to fill this void.
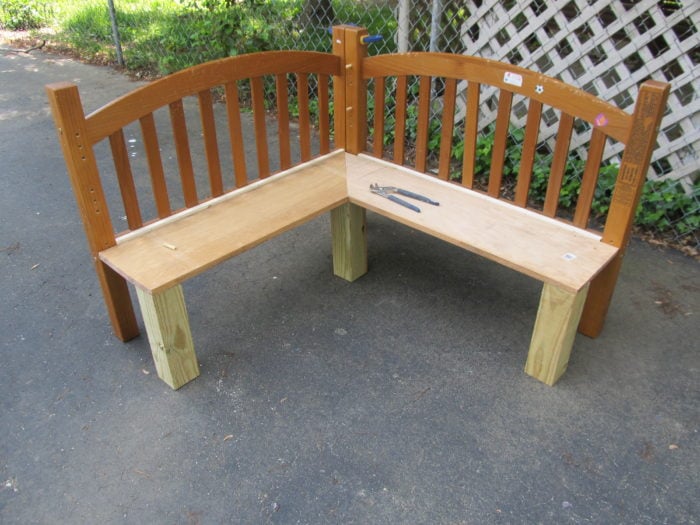
Add an Apron or Skirt to the Corner Bench
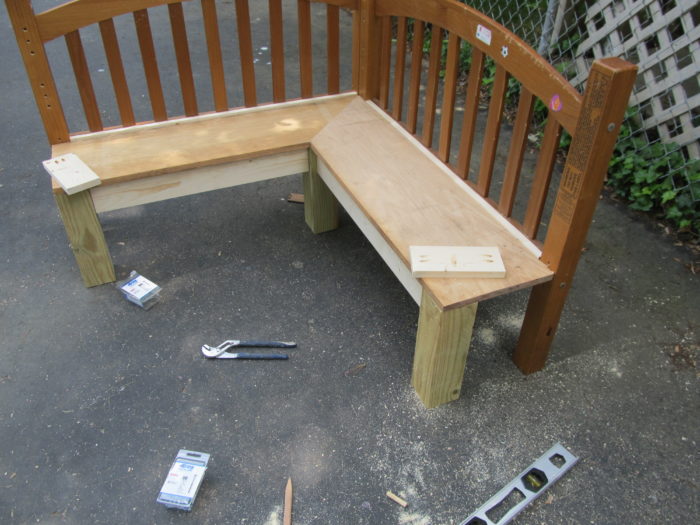
In this picture, I have attached the front skirt on each side. I used 1x4s and attached them with pocket hole screws. You can see the two end pieces lying on the seat, with pocket holes drilled and ready to attach.
Paint Underneath of Kid’s Corner Bench
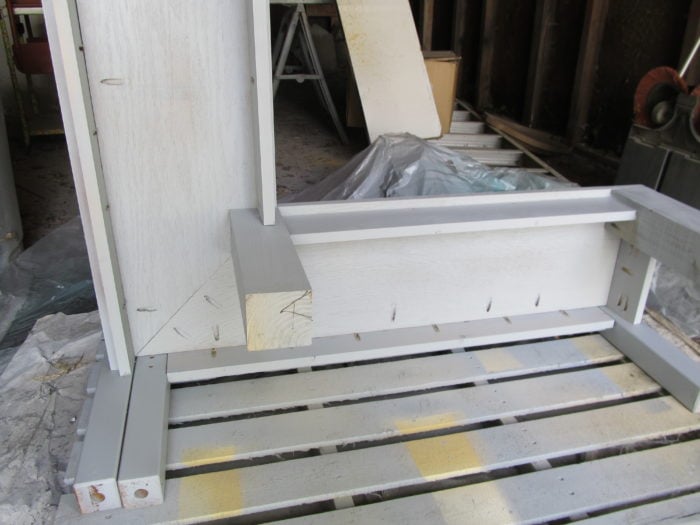
After all of that, it was ready for some primer. A piece like this is easy to paint with my Finish Max. This view of the underneath shows many construction details of building a corner bench.
Paint Red Topcoat
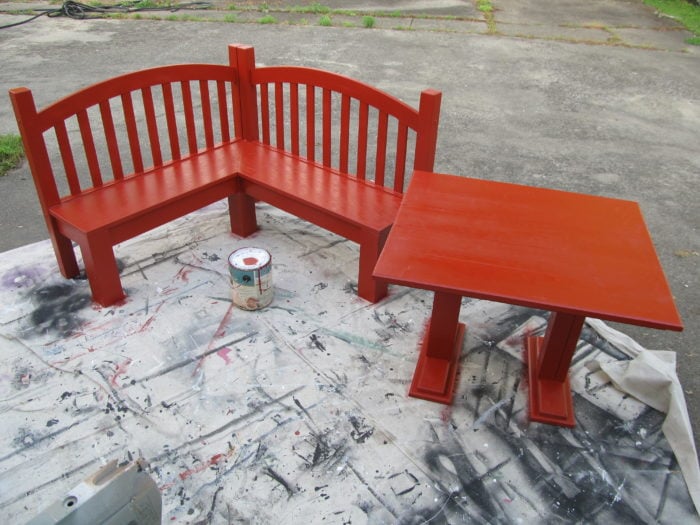
You can see that I used my red oops paint to paint the corner table and bench.

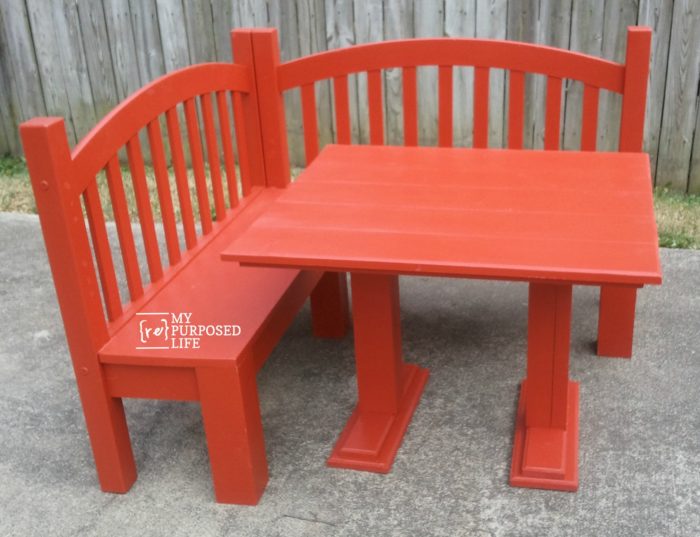
I think it’s perfect for a large dining room as the “kids” table. It’s great for meals and/or homework. It would also work great in a playroom for arts and crafts! If you’re handy with sewing, you could even add cushions.
I made the table from scratch; you can see it in the post DIY Kids Table.
Here are a few updated pictures:

If you love this, please pin it!
gail
See other fun benches here and kid furniture projects here Toddler Bench from a Bed
See my favorite Mission Style Headboard Bench with Storage-The Complete Tutorial
I love this bench and table. You did great!!!❤️
Very cool idea! This could be great indoors and outdoors. Fun for both parents and kids.
Lady Gail,
Is it possible for me to get a measurement and cut list of this wonderful project? We just moved and I’ve been holding onto these headboards (albeit my hubby’s consternation) forever…now i’m just itching to get this banquette set made for my lil bits. Please and Thank you in advance.
Cheryl,
It’s impossible for me to know the exact dimensions of this piece. It’s gone to a forever home. Your pieces might not be the same size as mine were. Typically kid’s seats are around 12″ off the ground. The seat pieces would depend on the length of your headboards after being connected. 🙂
I would love to see pictures of yours after you get it completed.
gail
What a great project! I’ve added a link to one of our pinboards. Check them out at Pinterest.com/Homedepot
I absolutely LOVE this! The color too! I would actually love an adult sized for my kitchen. We have lived here over a year and the spot for a table has yet to be filled. This would be PERFECT. Would you make a bigger one the same way? Thanks.
Thanks for your comment Krista. Yes I would build a larger one the same way. 😉 Have fun, good luck!
gail
That’s awesome love it i wish I could make it good job
Thank you. It was a very fun project.
What a great idea! I have a crib that my baby girl is about to grow out of and already have a twin bed waiting for her. I’m thinking I may do this for her and my 4 year old. Is there a way to make this outdoor friendly? You may have already said, I just didn’t see. Thanks for the great idea!!!
Andrea,
I think it’s difficult to make any wood project last a LONG time outdoors. But if you take the proper steps, it will last quite a few years. I would use outdoor paint, possibly oil based. After letting it cure really well, I would use a good outdoor sealant like marine varnish. You will need to make sure you get every nook and cranny sealed to keep out the elements. I would also recommend putting the piece on concrete, not the ground. If you put it in the yard, use some pavers or stepping stones under each leg.
gail