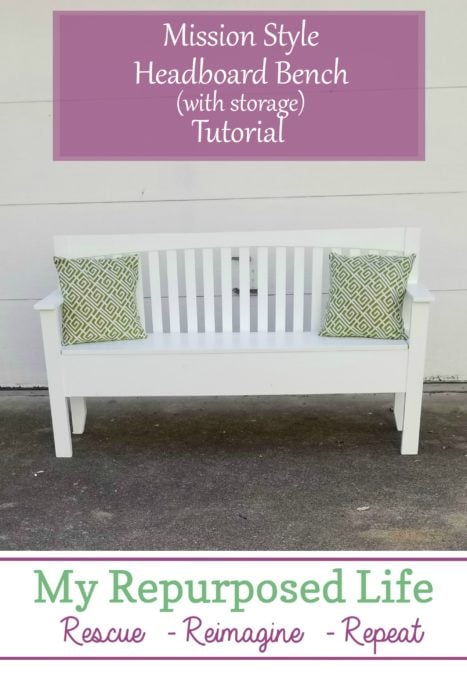
Mission Style Headboard Bench with Storage
As an Amazon Associate, I earn from qualifying purchases.
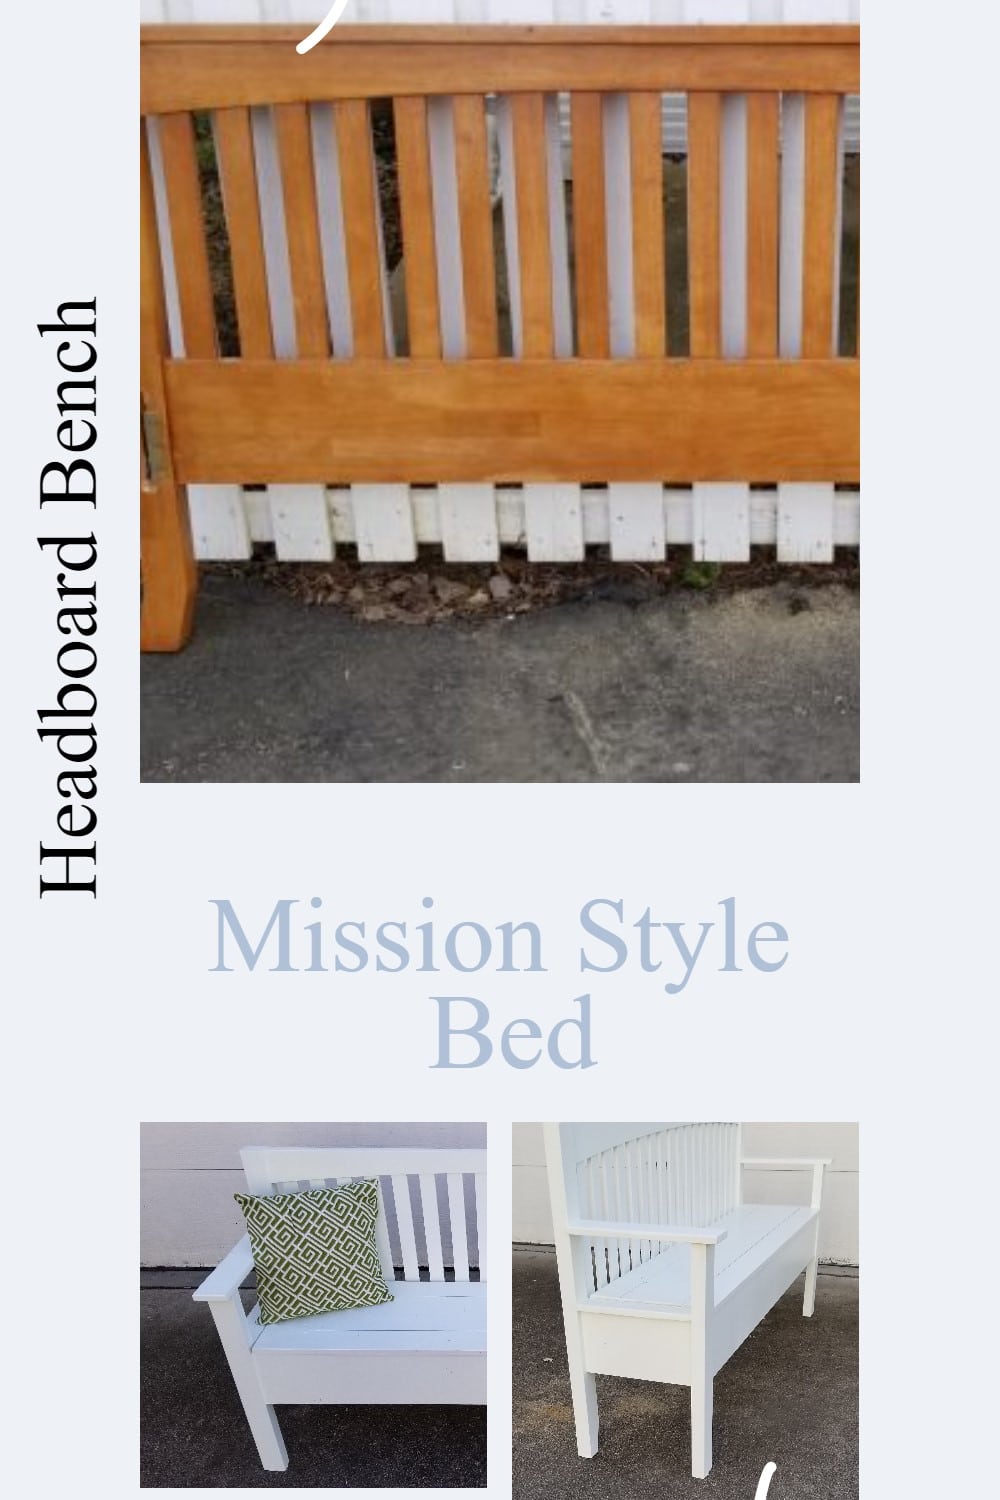
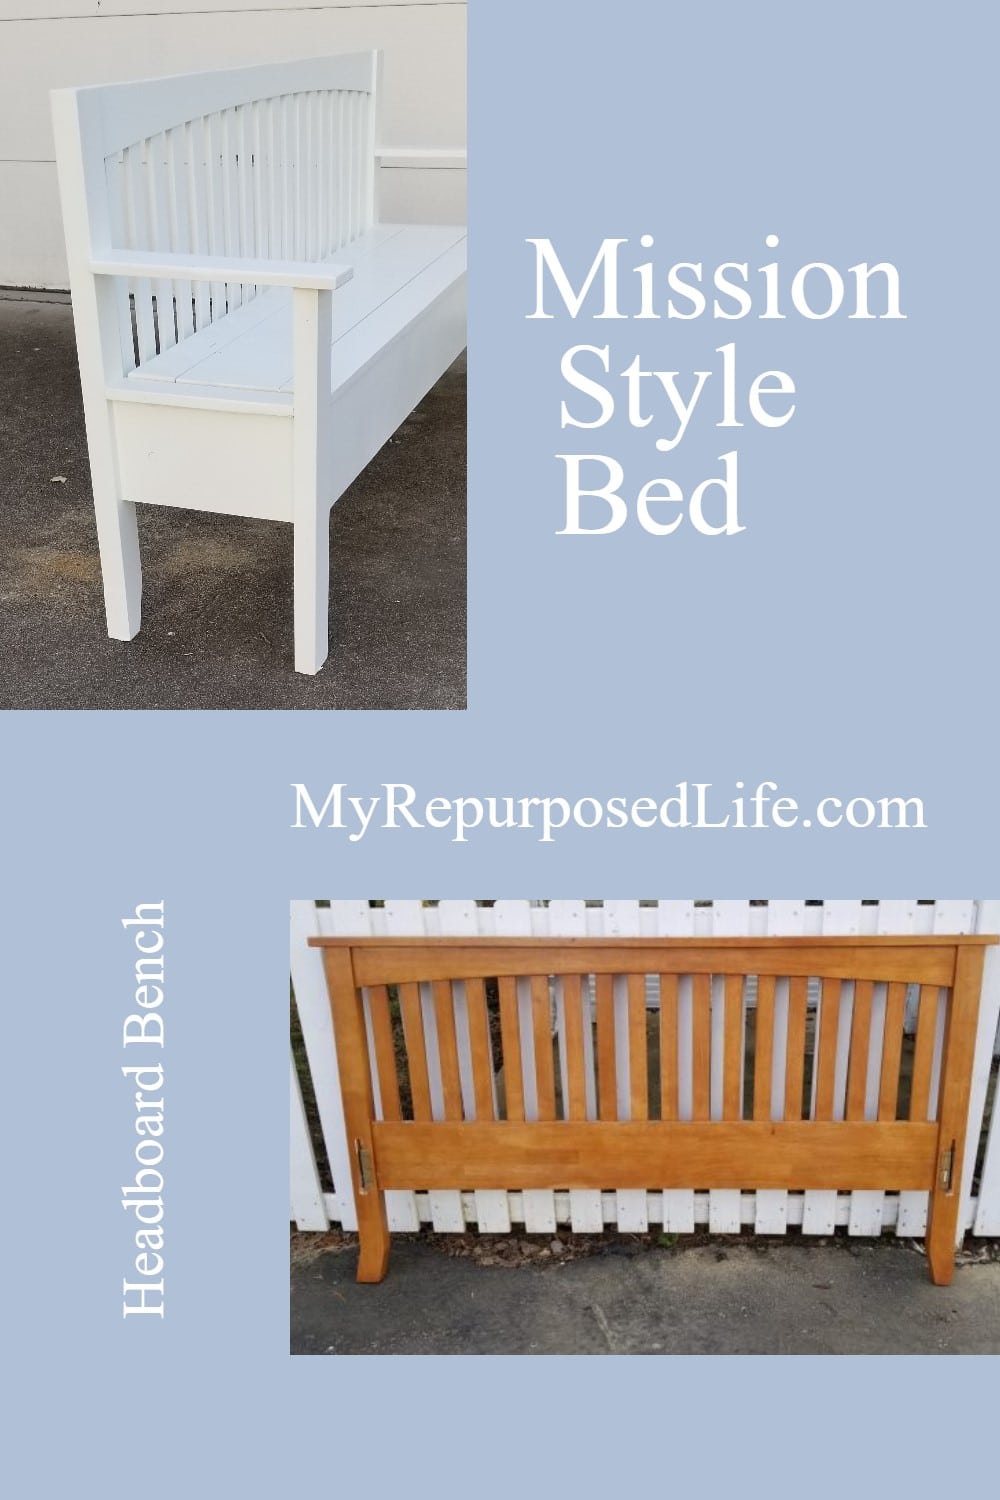
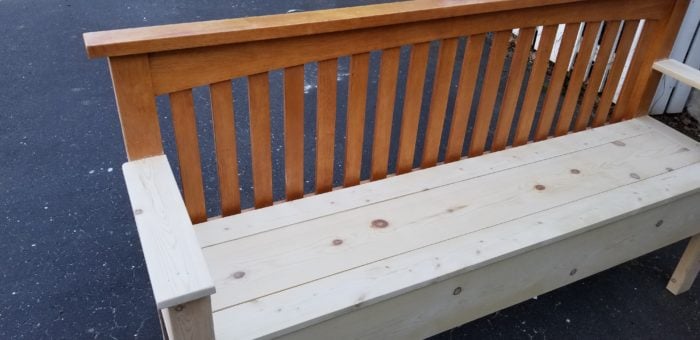
As soon as I got this mission style headboard I knew it would make a beautiful bench. Not only a pretty bench but functional as well with lots of storage under the seat. Let’s see how this mission style headboard bench came to be…
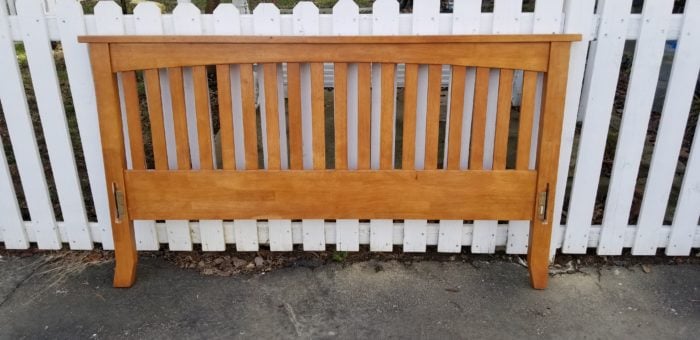
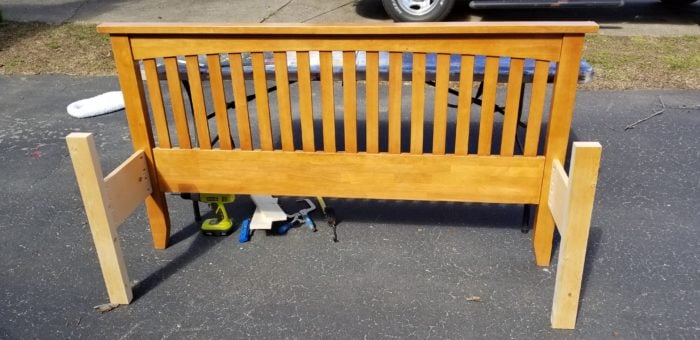
My neighbor Rodney drug this free headboard home for me. He knows I’ll take just about anything found on the side of the road. Notice the legs don’t exactly match, see below for the solution.
Be sure to watch the How To Make A Headboard Bench With Storage Video below
Step 1 Choose legs for headboard bench
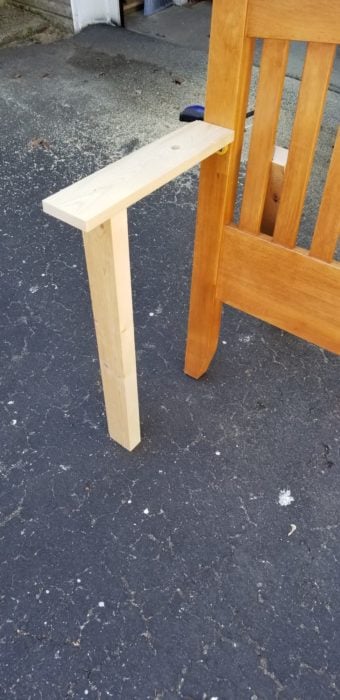
The very first thing to do when you build a bench out of a headboard is to decide what you’ll be using for the front legs. I opted for a ripped 2×4 to give the look of the back legs.
If your headboard has a matching foot board, you may want to cut it in half for armrests, like I did in this post Twin Headboard Bench Welcome Stencil.
Visit the My Repurposed Life Amazon Store to shop my favorite items.
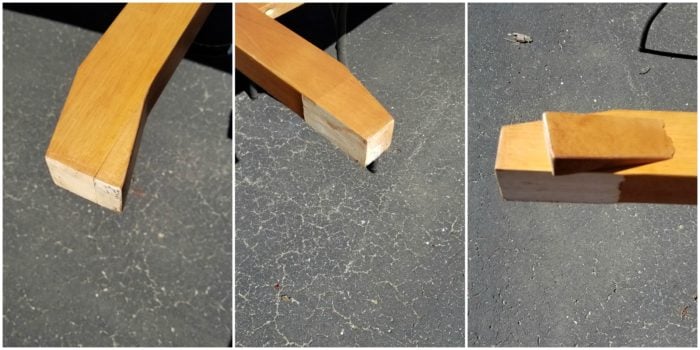
To make the legs match, I used a putty knife and a hammer to tap off the piece that was missing from the other leg.
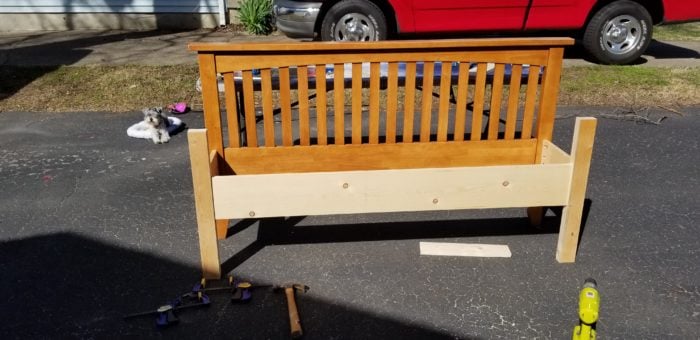
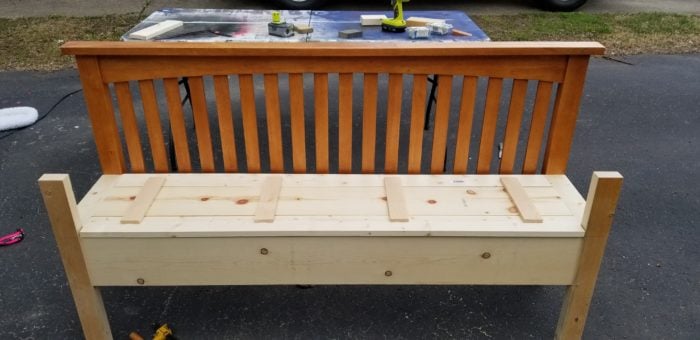
Step 2 Cut sides and legs
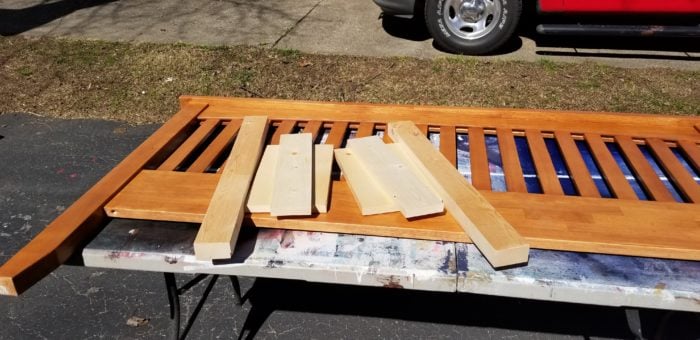
For the basic build of a mission style headboard bench there aren’t a lot of parts. You can see I ripped the 2×4’s to square them off a little to match the mission style headboard. In addition, you will see I cut the sides and the armrests.
Step 3 Use Kreg Jig to drill pocket holes
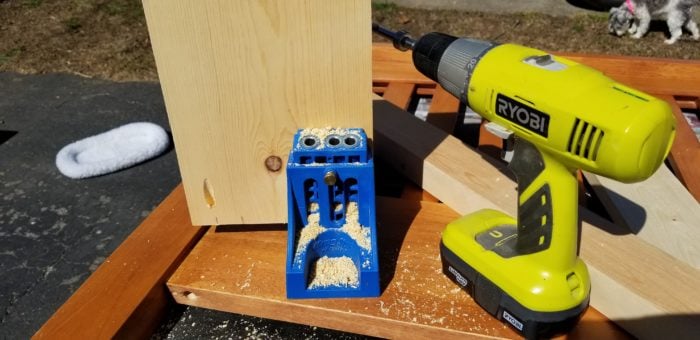
Back in the day I would drill through the bed post into the side board of the bench. Now I always use my Kreg Jig to make a good joint on the side board. You can see Lulu in the background. Because we have a LOT of hawks around lately and I have to keep her close by.
Step 4 Attach sides to headboard and front legs

I use a Kreg Multi-Mark tool to make it easier to measure keeping the left and right sides equal. Pocket hole screws securely hold the side in place.
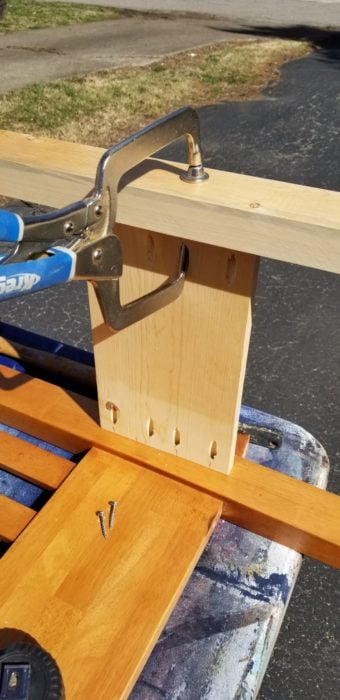
To add the front leg I used a right angle clamp to aid in holding everything in place. You can see I chose a wide board to match the board on the headboard.
If this project is too intimidating, see this Twin Headboard Bench Tutorial that is easily modified for a larger bed.
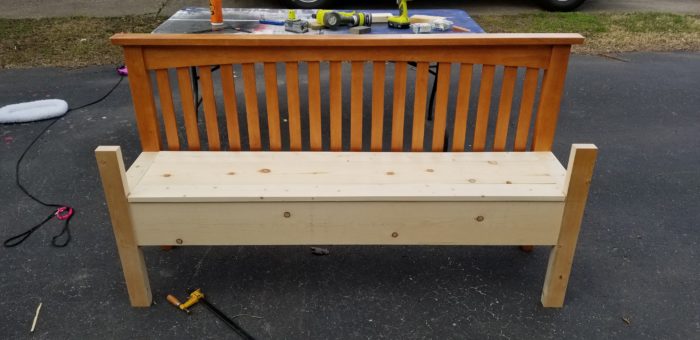
The headboard bench actually came together really quick and easy.

Just admiring my new bench…. hahaha I measure as I go. So now it’s time to add the front brace.
Step 5 Add front brace to headboard bench
More pocket holes and pocket hole screws were used to secure the front board. If you don’t want storage in your bench, this is when you would skip ahead and just attach a seat.
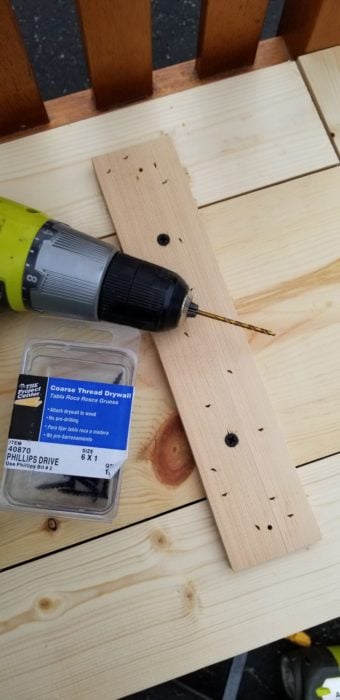
Step 6 Add cleats for bottom storage
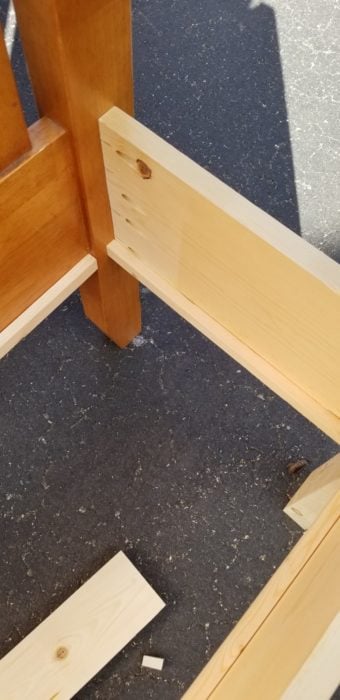
Using scrap pieces I made cleats to hold the bottom boards in place.
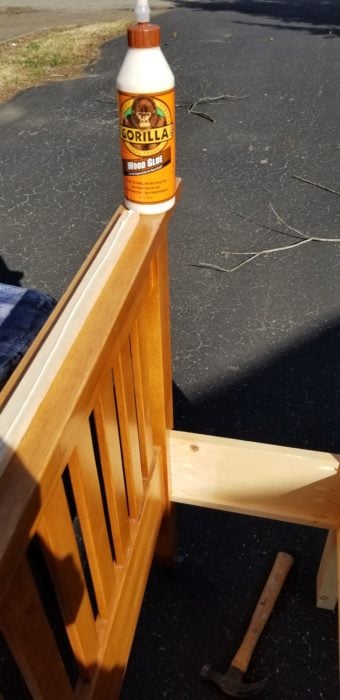
The cleats were secured with gorilla wood glue, brad nails, then wood screws. I use my nail gun to shoot brads to hold things in place until I can get the screws in place.

I had a 2 x 4 sheet of 1/2” plywood which I cut to fit the bottom of the mission style headboard storage bench.
Step 7 add center brace
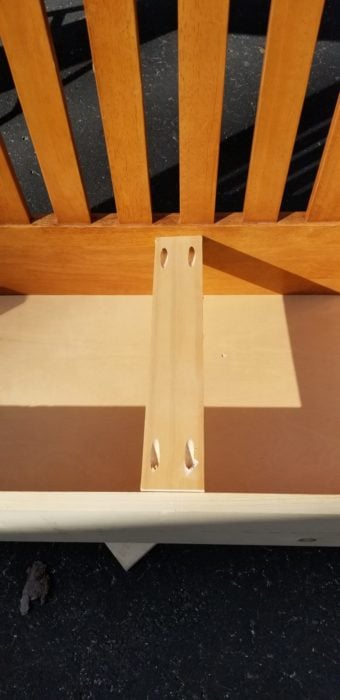
The bench is quite long and needs a middle support brace. I drilled pocket hole screws to secure the middle brace. This is just to show you where I put the pocket holes. I actually flipped it over and secured the brace with pocket hole screws from underneath.
As I was explaining to my neighbor how this was going to work, meaning the seat would lift up to reveal storage. Suddenly, I had a light bulb moment realizing that the armrests wouldn’t allow the seat to raise. uh oh plan b?
Rodney marked the cut line and I got out the small circular saw to trim off the top of the front leg. That would make this an arm less bench. Then I got out my phone and showed Rodney my inspiration picture I found on Pinterest.
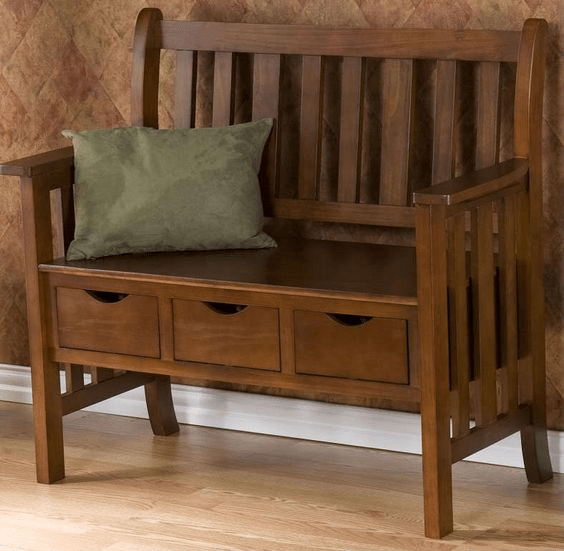
When I showed Rodney this bench he came up with a plan. I hope it won’t get too confusing. Basically we just need the seat to raise without interfering with the armrests.
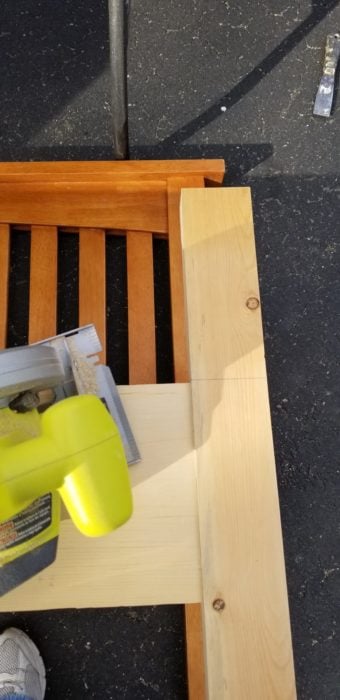
Step 8 Install side support pieces

To allow the bench seat to raise and lower, it will need to clear the armrest. On the left is the original side. The middle image shows a 2×4 brace set in place. The image on the right is the 1×4 place on top of the original side and the new 2×4 brace.
Step 9 Build Mission Style Headboard Bench Seat
It was necessary to make sure the seat boards fit perfectly in the area before actually putting the seat together.
I reached for lumber in the scrap pile to use for securing the seat boards.
I used gorilla wood glue and my nail gun to tack the pieces in place. Then I pre-drilled pilot holes and added small screws for good measure. I purposely left a small crack between the boards because I like that look. That is why I didn’t use my Kreg Jig to connect the plank board seat.
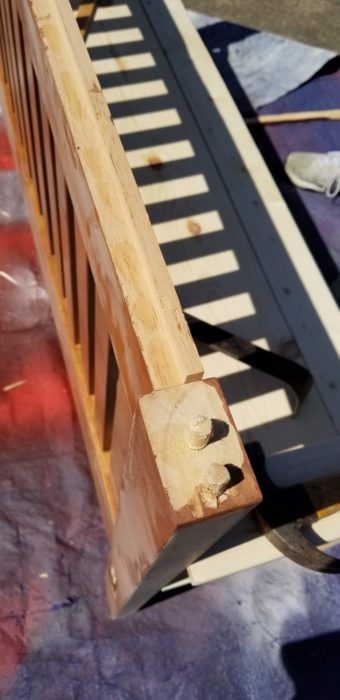
Step 10 Prepare headboard bench for hinges
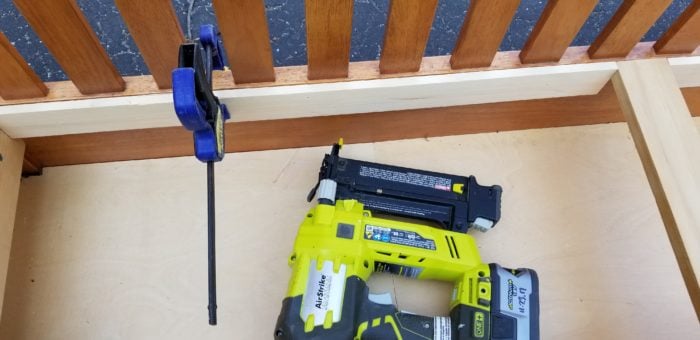
To add thickness to allow hinge installation I added small filler boards along the back of the bench. Wood Glue and a nail gun held everything in place until I could get screws in place.
Step 11 Install armrests
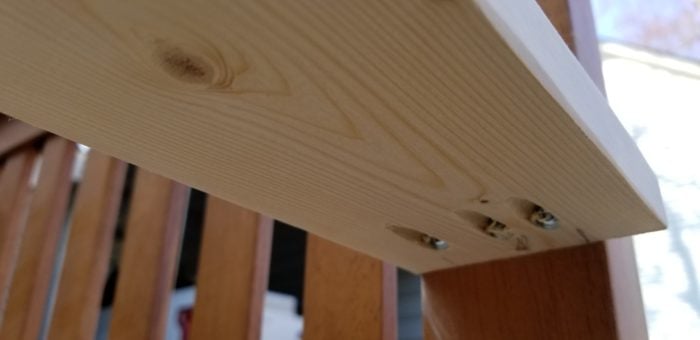
The armrests were cut to size. They were attached by drilling pocket holes and using pocket hole screws on the back.
The front of the armrest was secured using wood glue, brad nails, and finally a 2” wood screw. The entire project was sanded and the visible brad nail holes were patched with wood putty. I like to round over all the edges with my orbital sander to give everything a smooth rounded over look.

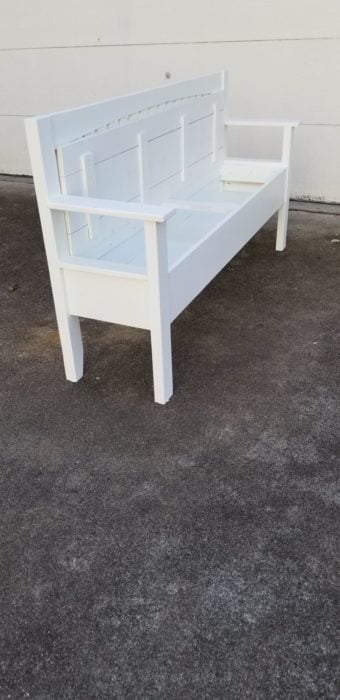
I love how the headboard bench is coming along. I’ve only made a few headboard benches with storage.
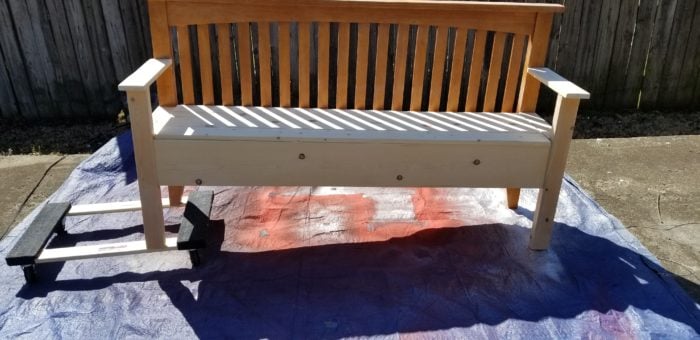
I wanted to show you how easily I move heavy pieces by myself. The furniture dolly on one side really makes it easy for me to glide it along and get it where I need it to be.
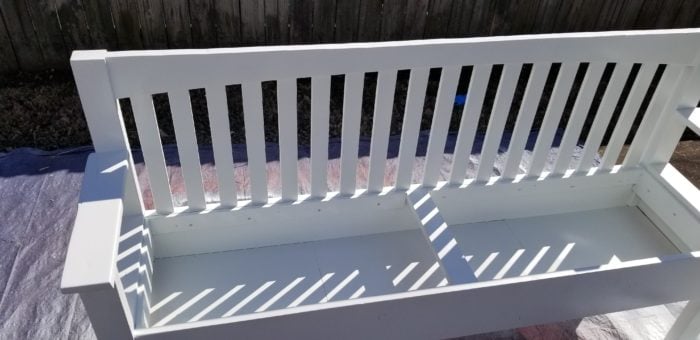
This is where I decided to make a design change. While sitting on the bench one last time I made the decision to remove the board across the back. It really made the bench uncomfortable.
Seriously—what was I thinking? I was calling it done, and ready to PAINT!
You can see my tools on the bench seat. I used my reciprocating saw to cut off the dowels and the insert all along the back. After cutting it, I sanded it really well with 150 grit and then 220 grit sandpaper on my orbital sander
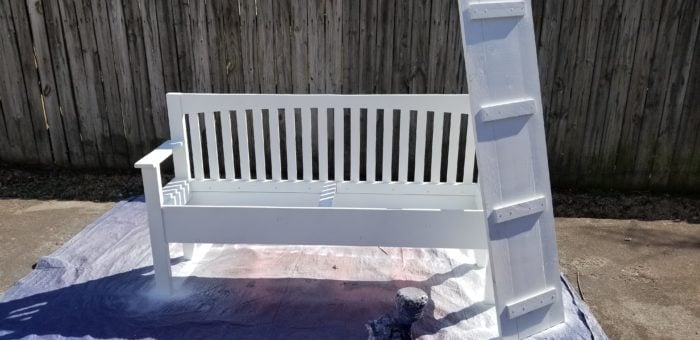
Step 12 Paint headboard bench
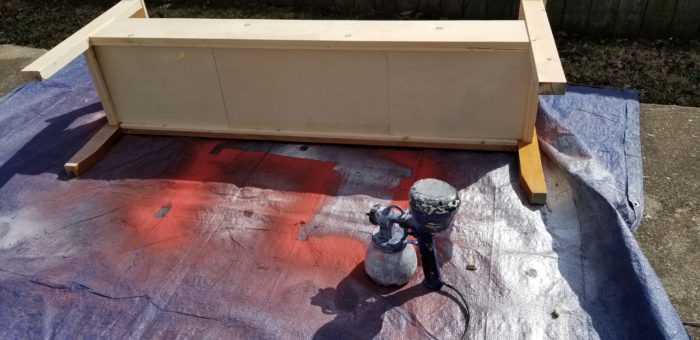
Finally, it’s ready to be painted with my Homeright Super Finish Max Extra. I mixed up some white diy chalky paint primer using plaster of paris. I always start painting my pieces upside down.
This is after two light coats of the chalky paint.
After the primer dried I did two light coats of white semi-gloss paint.
Not Shown: Adding the hinges. Time got away from me and I didn’t get the hinges installed yet. I plan to use the original hinges from the French closet doors I recently installed.
.
I had considered glazing the white bench with my favorite smoked glaze but after looking at the pretty white color I decided to leave it as is. You can see my other glazed projects here.
How To Make A Headboard Bench With Storage
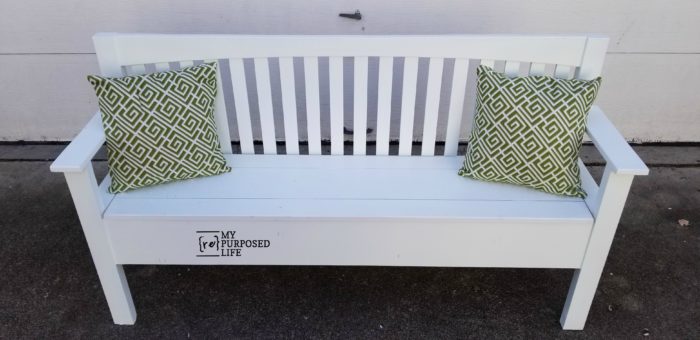
I LOVE the white mission style headboard bench! I wish I had more headboards like this. What do you think of the color? Would you have painted it white?
If you want an easier bench with storage, you could simply add a lower shelf to your headboard bench like I did with this White Twin Headboard Bench.
gail
Fab! Thank you for sharing & details!
Sheila
Angela,
I bought it on Amazon, you can see more details about it here: https://www.myrepurposedlife.com/rustic-side-table-roadkill-rescue/
If you purchase it online, I would love for you to get it through my amazon link in that post.
thanks!
Angela,
I bought it on Amazon, you can see more details about it here: https://www.myrepurposedlife.com/rustic-side-table-roadkill-rescue/
If you purchase it online, I would love for you to get it through my amazon link in that post.
thanks!
Angela,
I bought it on Amazon, you can see more details about it here: https://www.myrepurposedlife.com/rustic-side-table-roadkill-rescue/
If you purchase it online, I would love for you to get it through my amazon link in that post.
thanks!
Angela,
I bought it on Amazon, you can see more details about it here: https://www.myrepurposedlife.com/rustic-side-table-roadkill-rescue/
If you purchase it online, I would love for you to get it through my amazon link in that post.
thanks!
Angela,
I bought it on Amazon, you can see more details about it here: https://www.myrepurposedlife.com/rustic-side-table-roadkill-rescue/
If you purchase it online, I would love for you to get it through my amazon link in that post.
thanks!
Angela,
I bought it on Amazon, you can see more details about it here: https://www.myrepurposedlife.com/rustic-side-table-roadkill-rescue/
If you purchase it online, I would love for you to get it through my amazon link in that post.
thanks!
Angela,
I bought it on Amazon, you can see more details about it here: https://www.myrepurposedlife.com/rustic-side-table-roadkill-rescue/
If you purchase it online, I would love for you to get it through my amazon link in that post.
thanks!
Angela,
I bought it on Amazon, you can see more details about it here: https://www.myrepurposedlife.com/rustic-side-table-roadkill-rescue/
If you purchase it online, I would love for you to get it through my amazon link in that post.
thanks!
Angela,
I bought it on Amazon, you can see more details about it here: https://www.myrepurposedlife.com/rustic-side-table-roadkill-rescue/
If you purchase it online, I would love for you to get it through my amazon link in that post.
thanks!
Angela,
I bought it on Amazon, you can see more details about it here: https://www.myrepurposedlife.com/rustic-side-table-roadkill-rescue/
If you purchase it online, I would love for you to get it through my amazon link in that post.
thanks!
Angela,
I bought it on Amazon, you can see more details about it here: https://www.myrepurposedlife.com/rustic-side-table-roadkill-rescue/
If you purchase it online, I would love for you to get it through my amazon link in that post.
thanks!