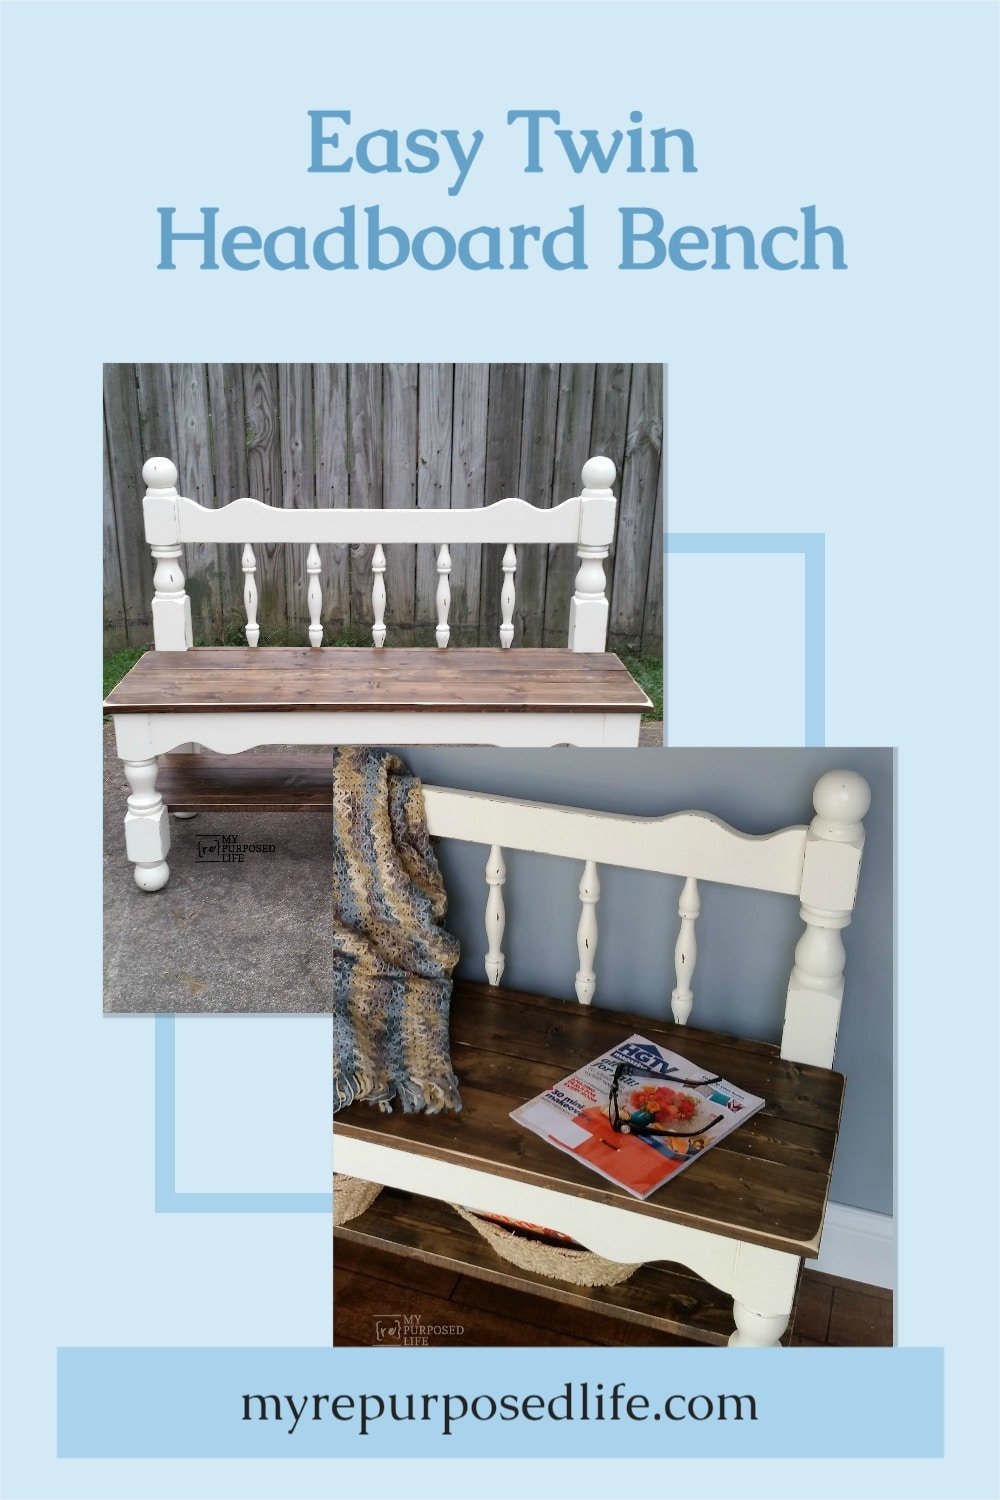
White Twin Headboard Bench
As an Amazon Associate, I earn from qualifying purchases.
I’m sort of partial to this white twin headboard bench. It’s been trendy on social media.
I also made a blue twin headboard bench with storage using an old drawer.
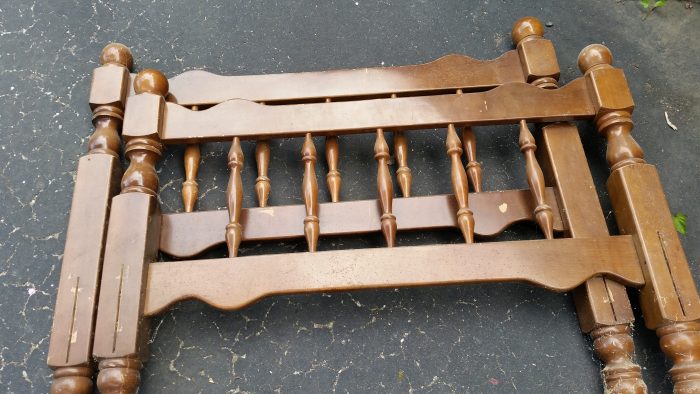
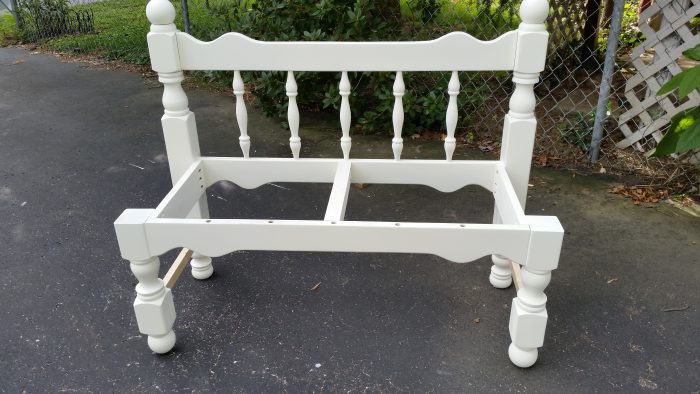
I think this twin bunk bed was given to me by my sister a few years ago. It’s been in my shed ever since.
There are many ways to make headboard benches, typically cutting the footboard in half to make armrests. I decided to make this one more like one of my favorite benches, this blue headboard bench with a lower storage shelf. I should have been making these headboard benches with storage shelves all along.
Doing that meant cutting up the footboard, so I used my reciprocating saw.
This is plan b. My initial piece ended up being too short. I’ll explain that in a minute.
Pocket Hole Assembly for Bunk Bed Bench
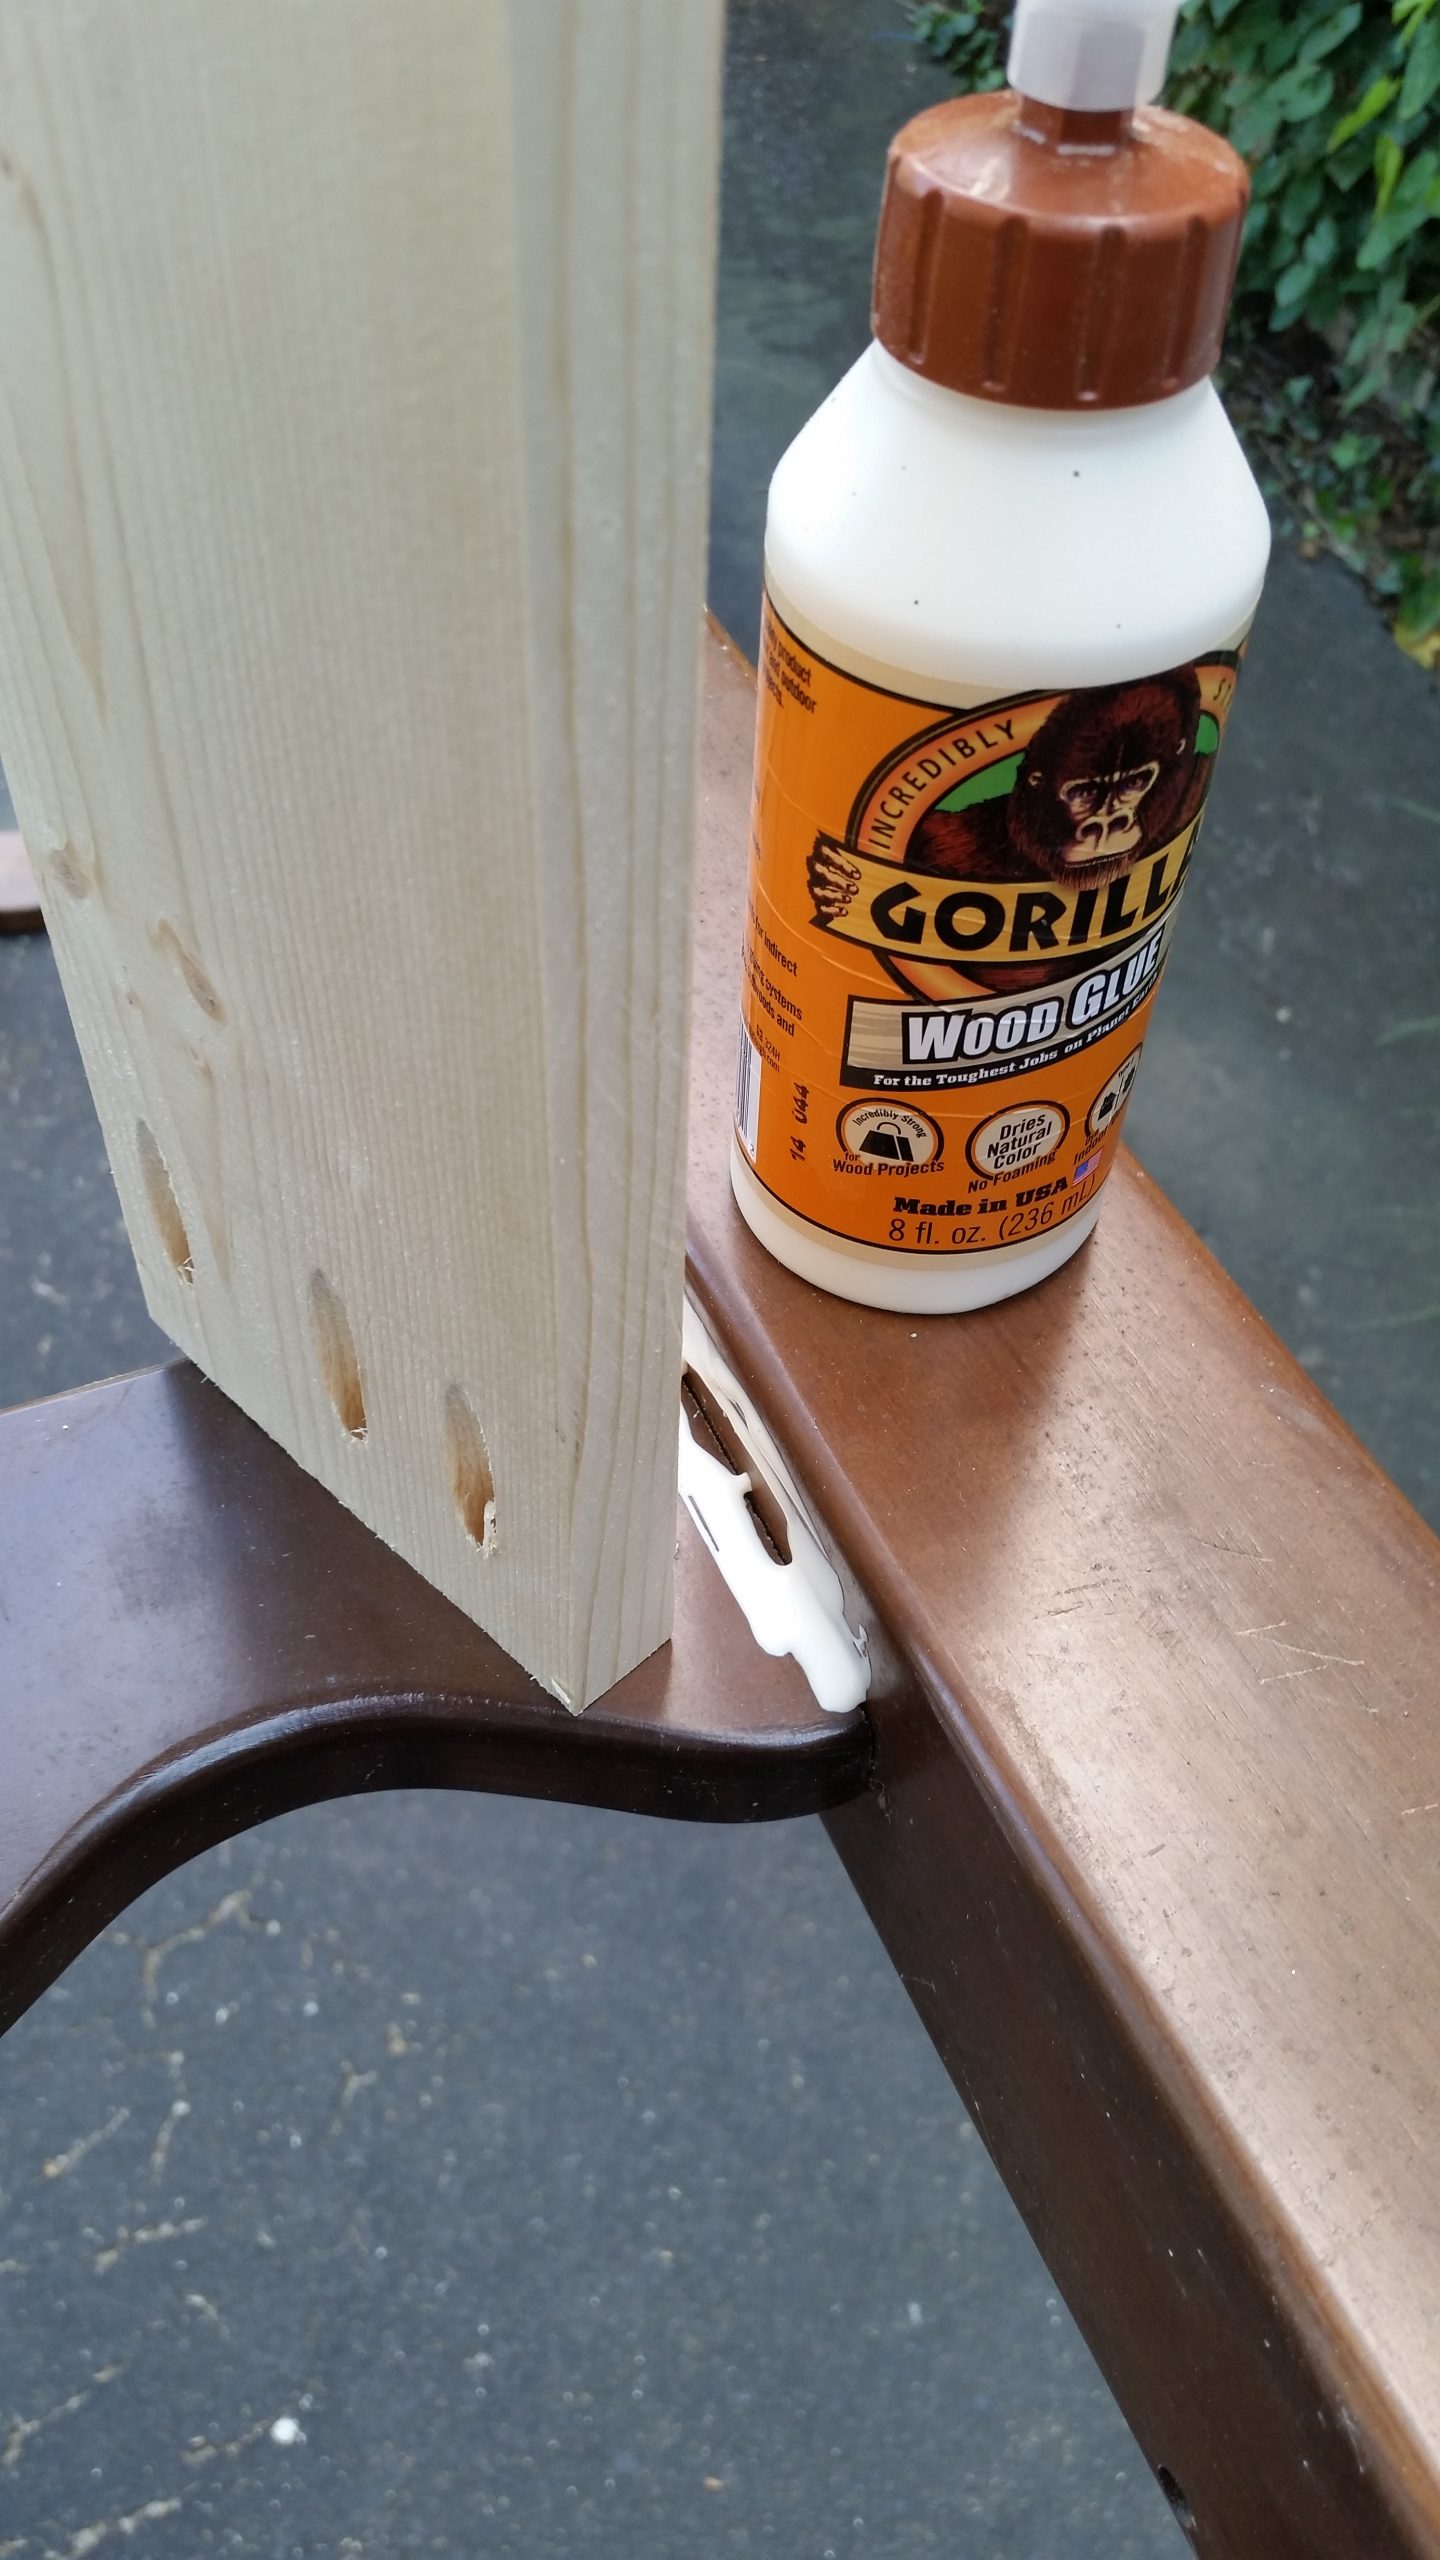
I used some scrap 1x’s—drilling pocket holes with my Kreg Jig to make the side rails. I ripped the 1x to match the size of the cross board and added some Gorilla wood glue for strength.
Need more details on using a Kreg Jig? See my article on how to use a Kreg Jig Pocket Hole System.
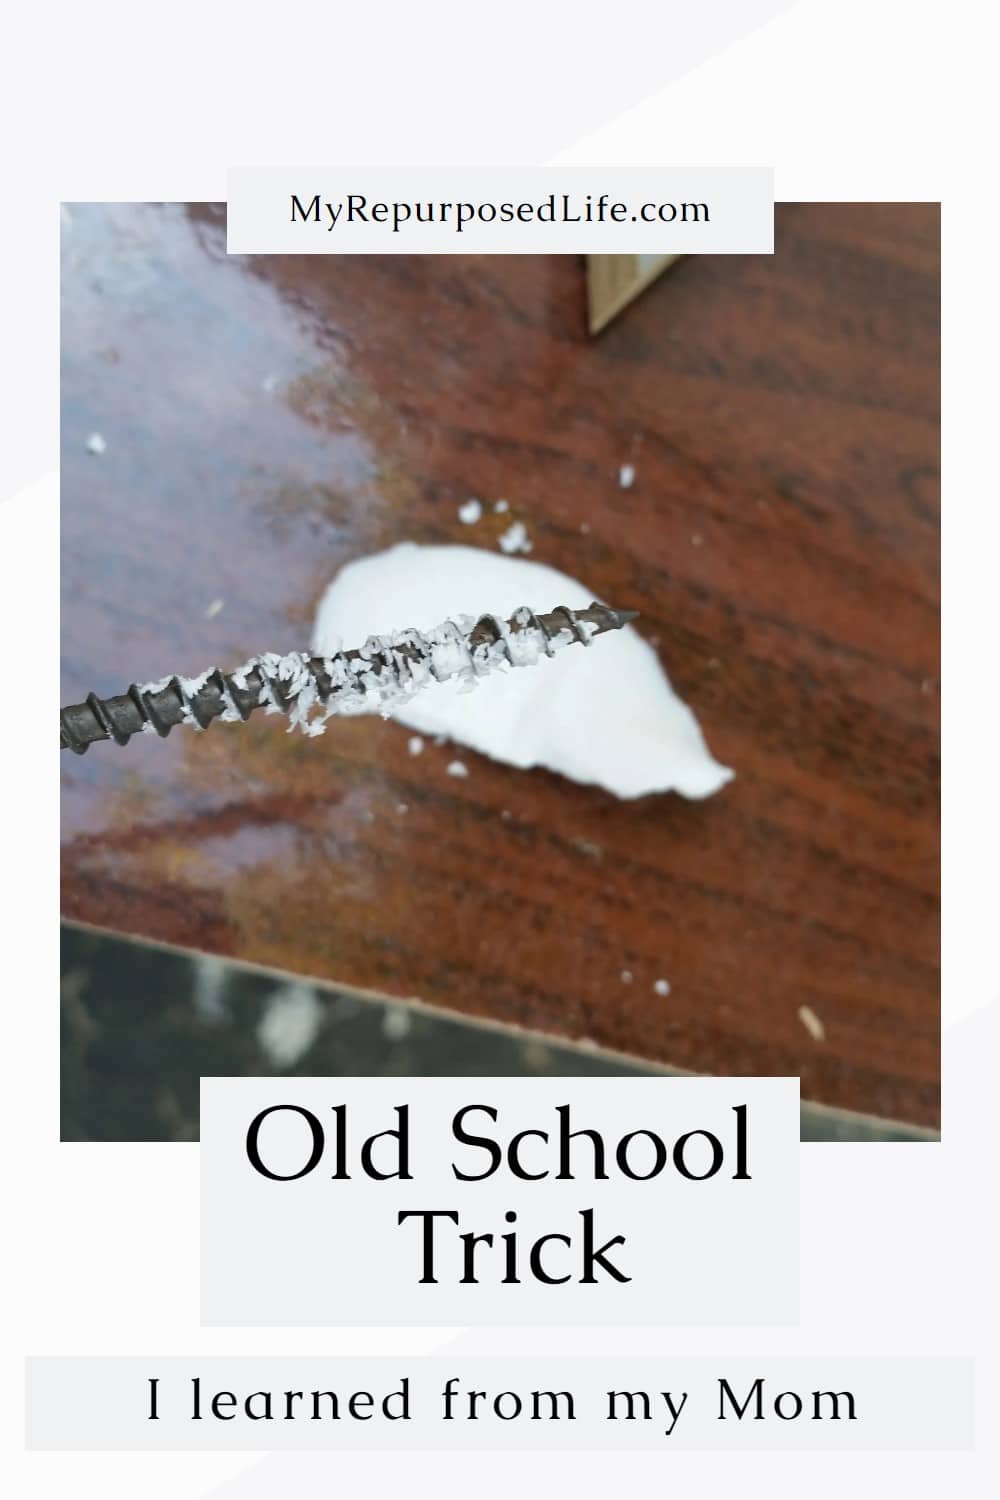
Bar Soap Helps Secure Long Screws
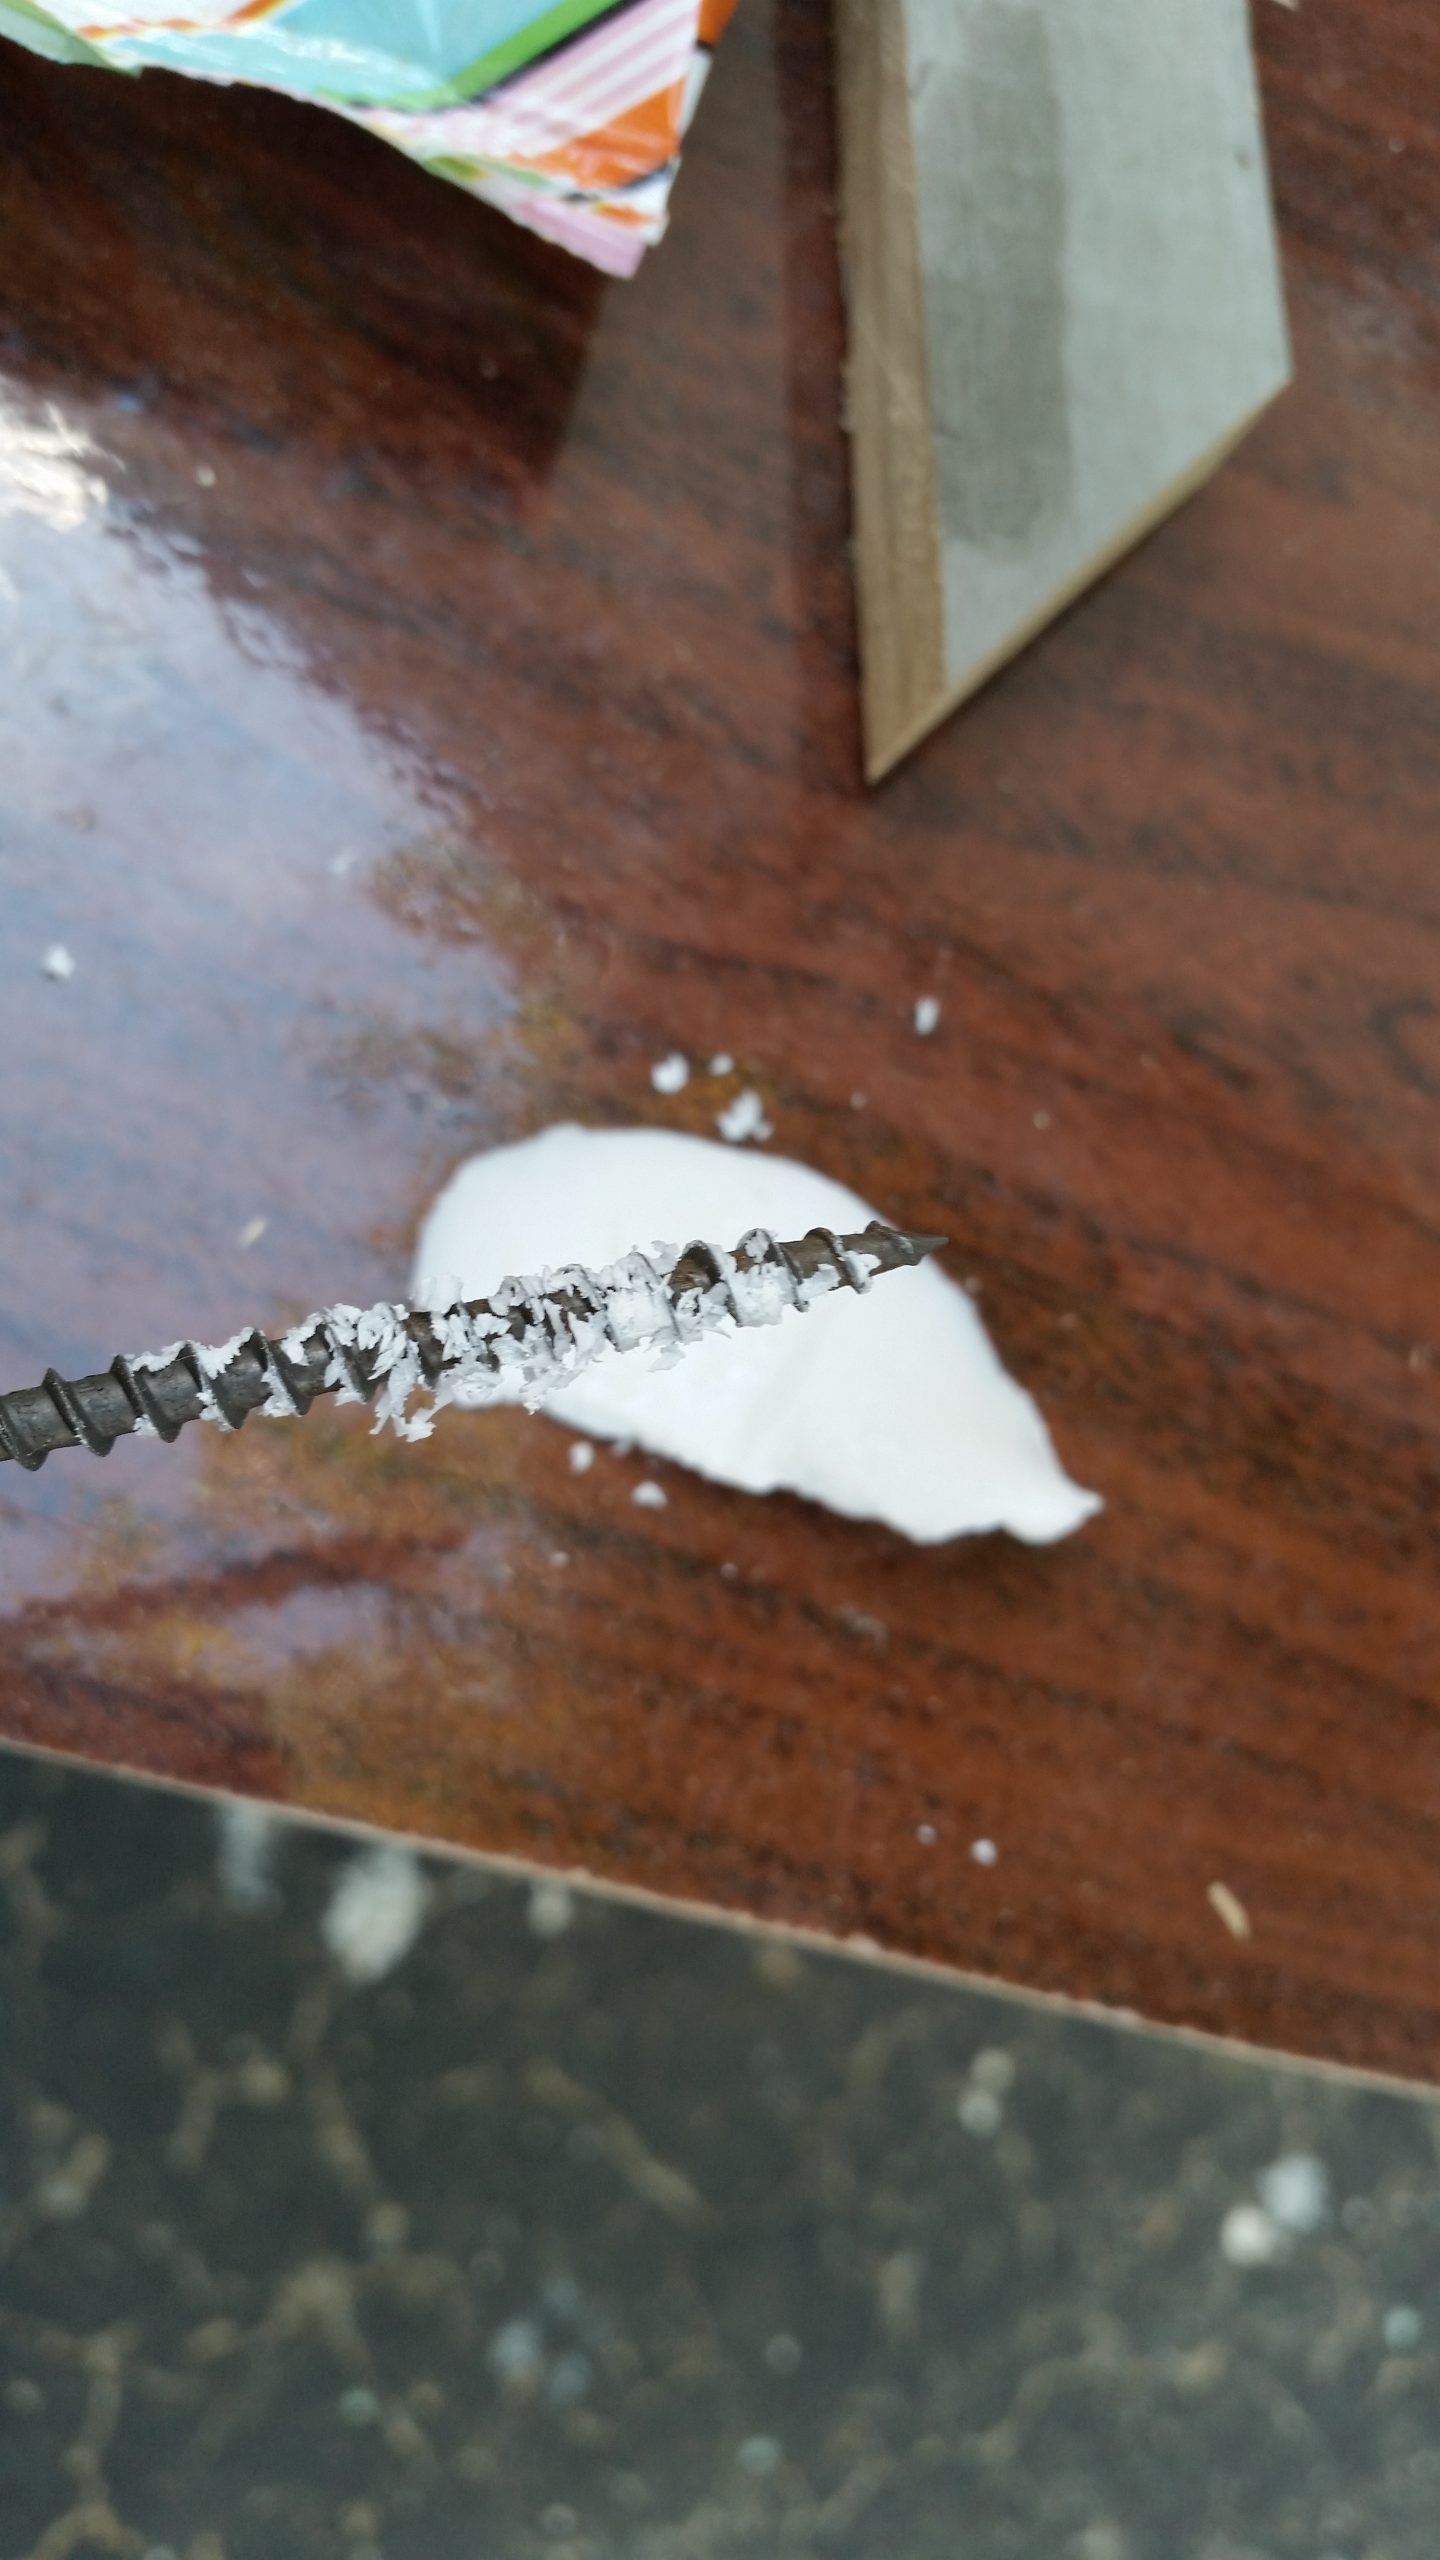
To attach the legs to the side, I used extra long screws that needed a little soap to help them along the way. If you don’t have bar soap handy, try shooting the screw, then back it out and try again. You may have to do that several times if you hear that dreaded SQUEAK!
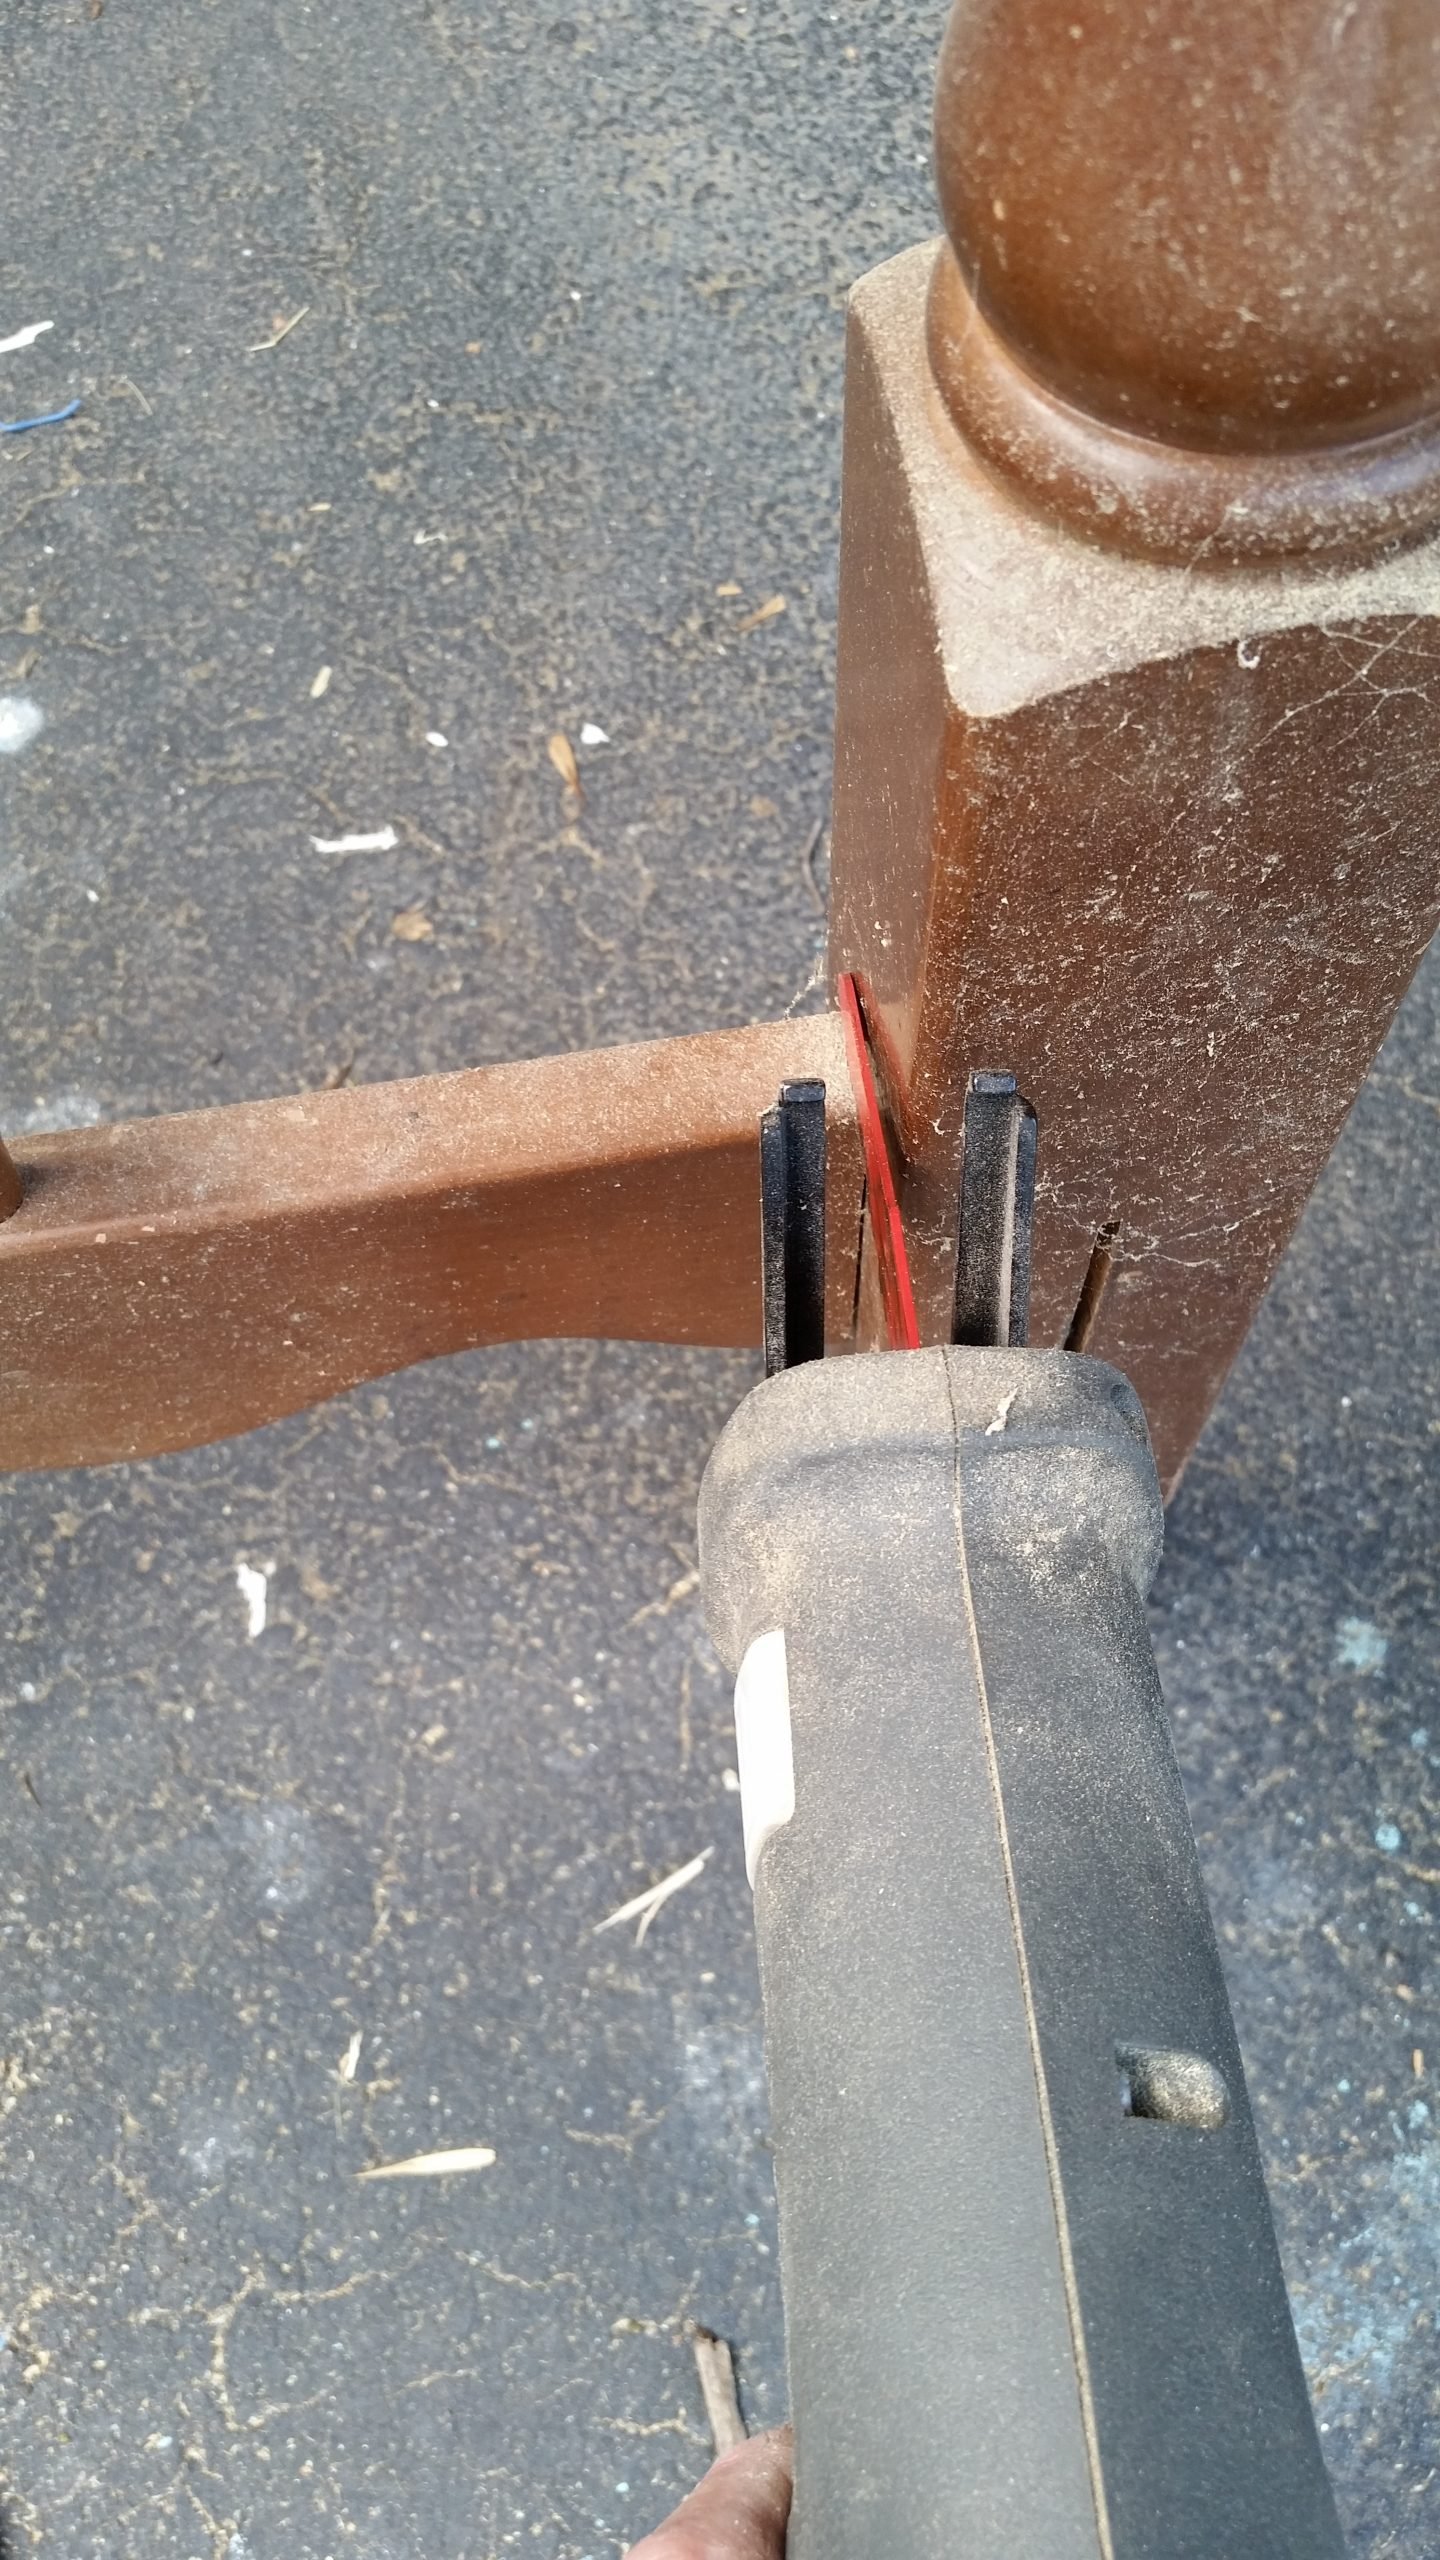
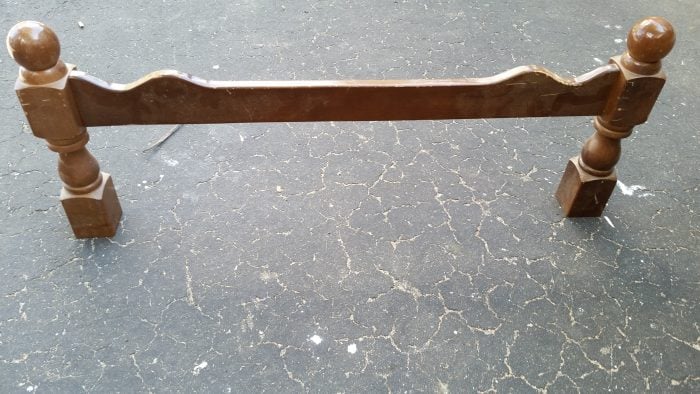
Bunk Bed Headboard Bench Frame Assembly
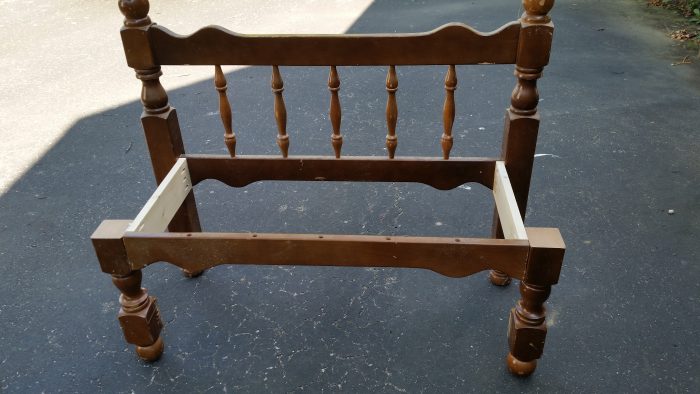
Remember when I said I would explain “plan b”? Initially, I cut the lower portion of the footboard to the height of the bottom of the side rails. Realizing I needed to have them taller, I used the top portion of the footboard instead.
Measure and Cut Seat Boards to Size

This is the dry fit of the seat. I added a tiny piece in the back instead of notching out a wider board. This is the great thing about making your own headboard bench. Sometimes, I run the boards from front to back, like this Twin Bed Welcome Bench.
Prepare to Paint
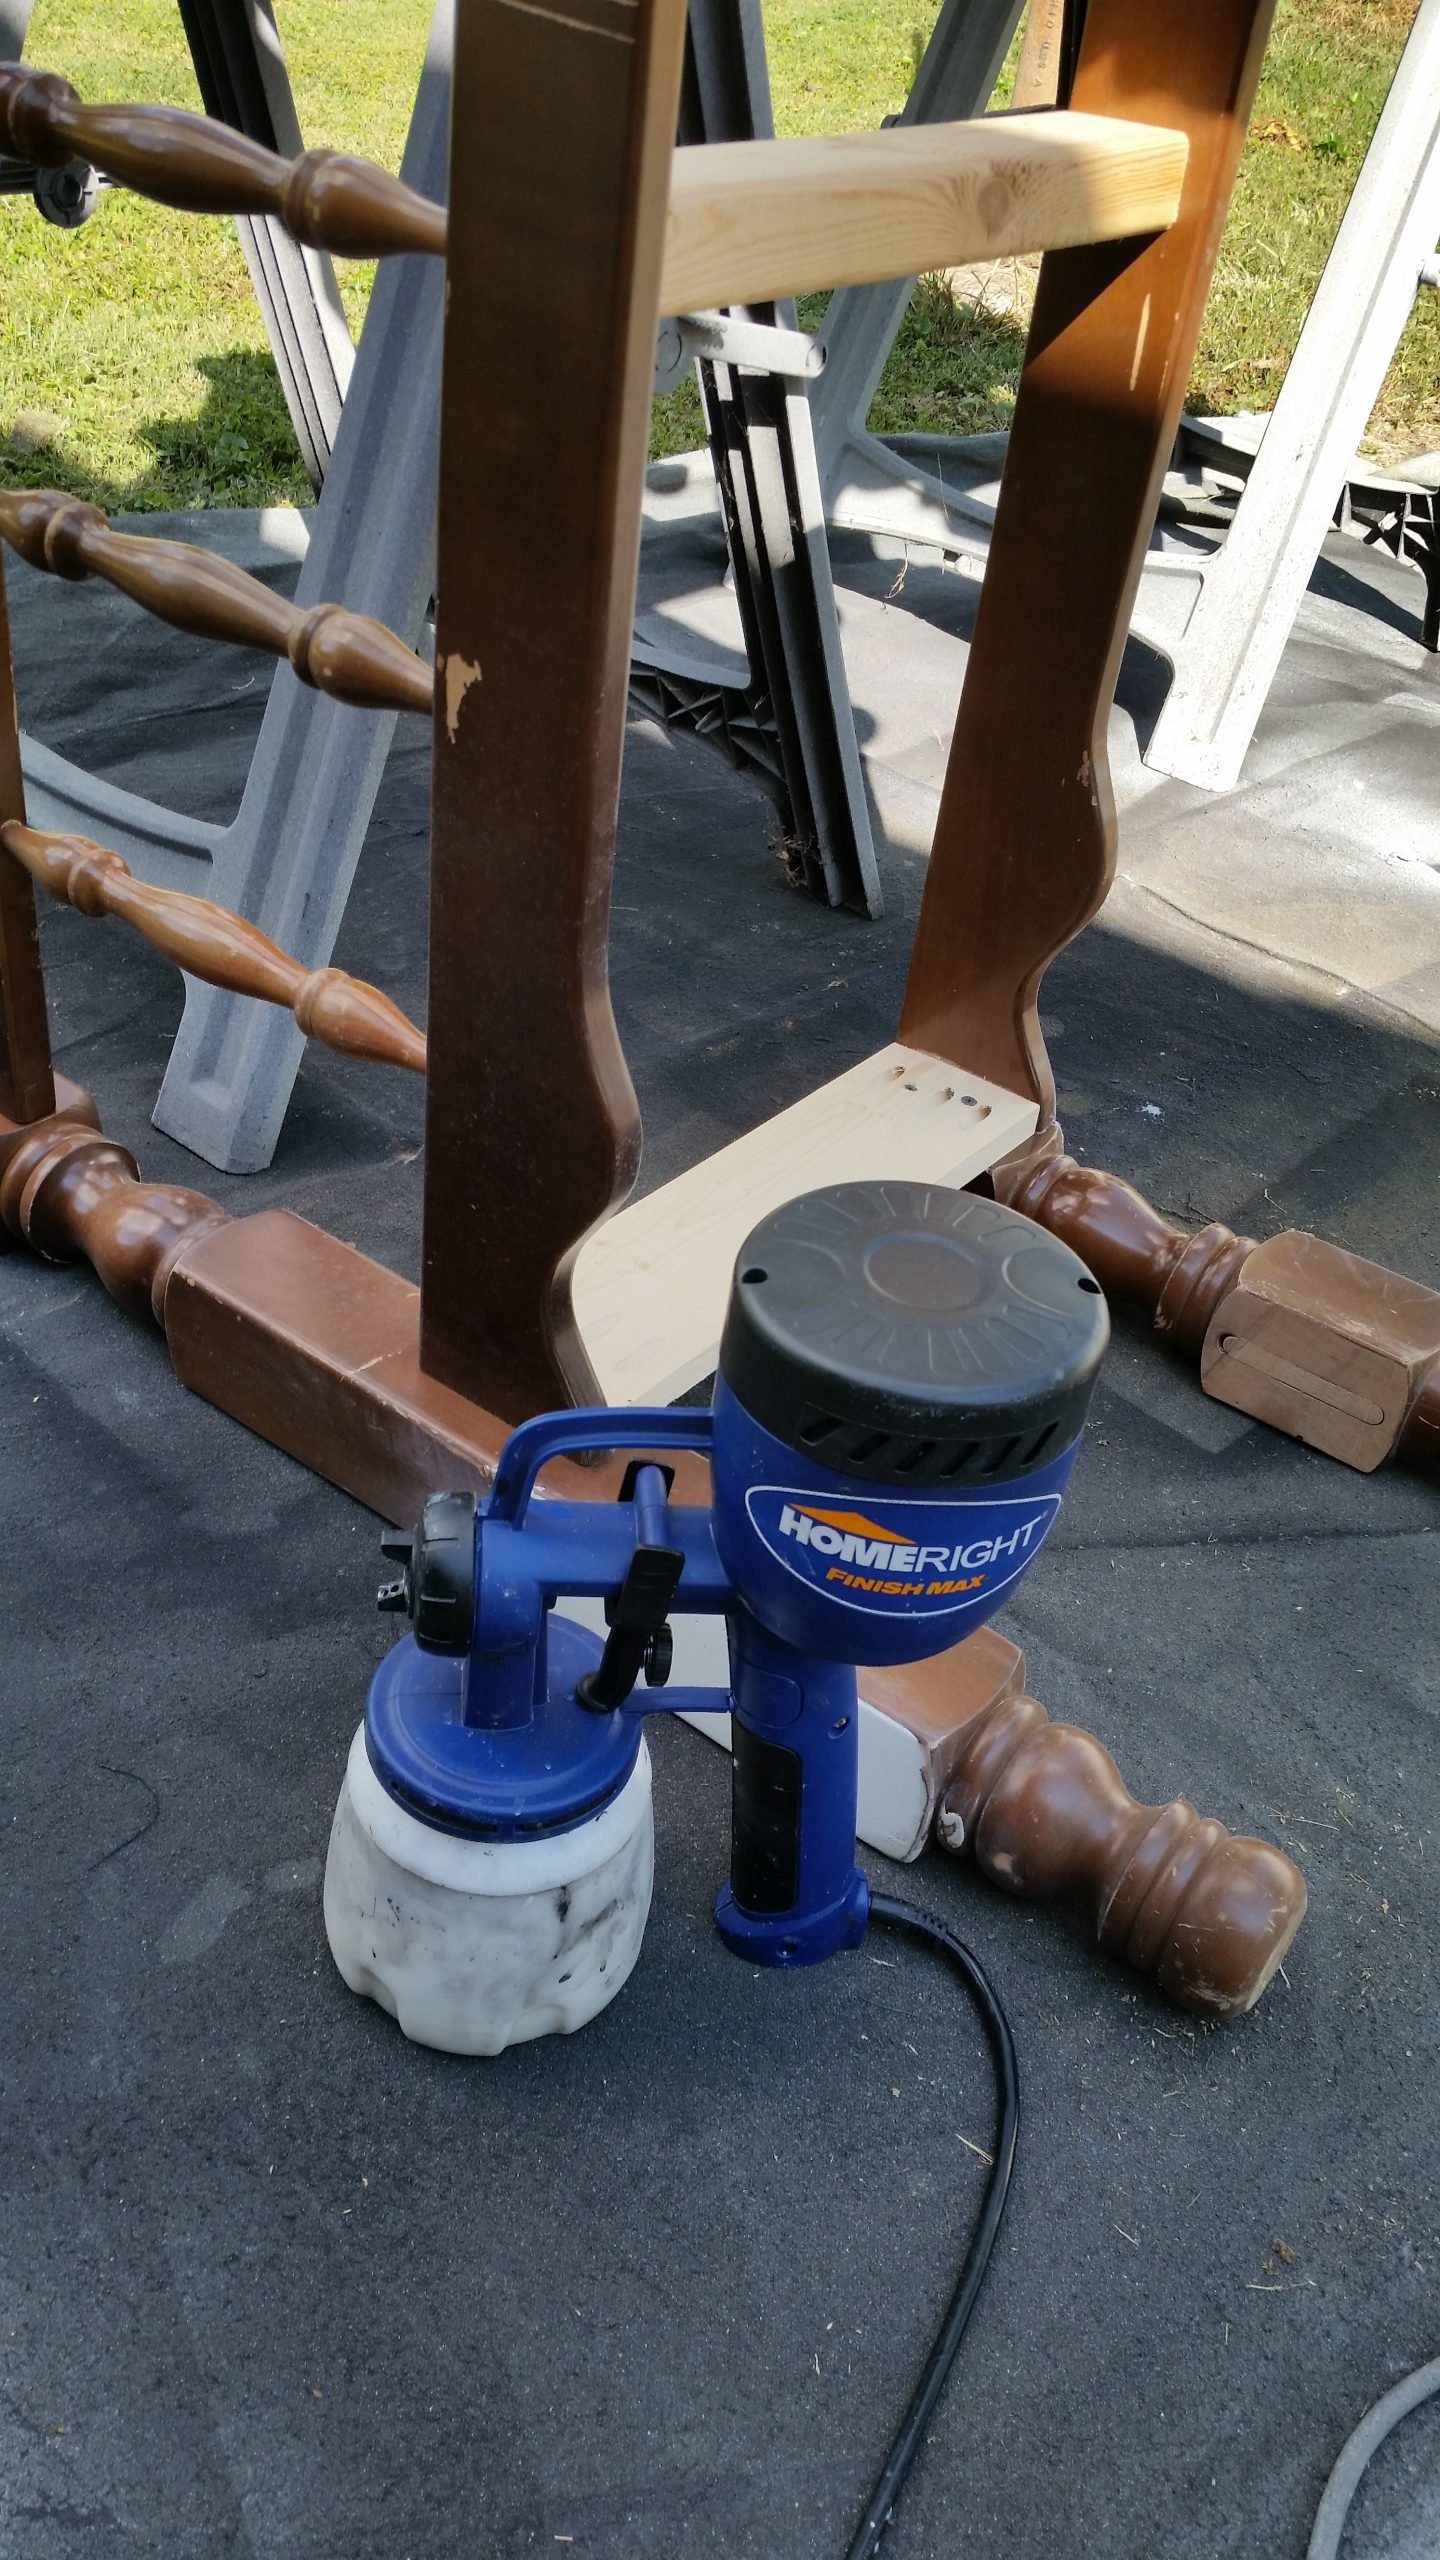
After patching the rail slots and sanding the posts where I had used the reciprocating saw, it was time to get busy with my Homeright Finish Max.
I had a slight change of plans to add a lower shelf
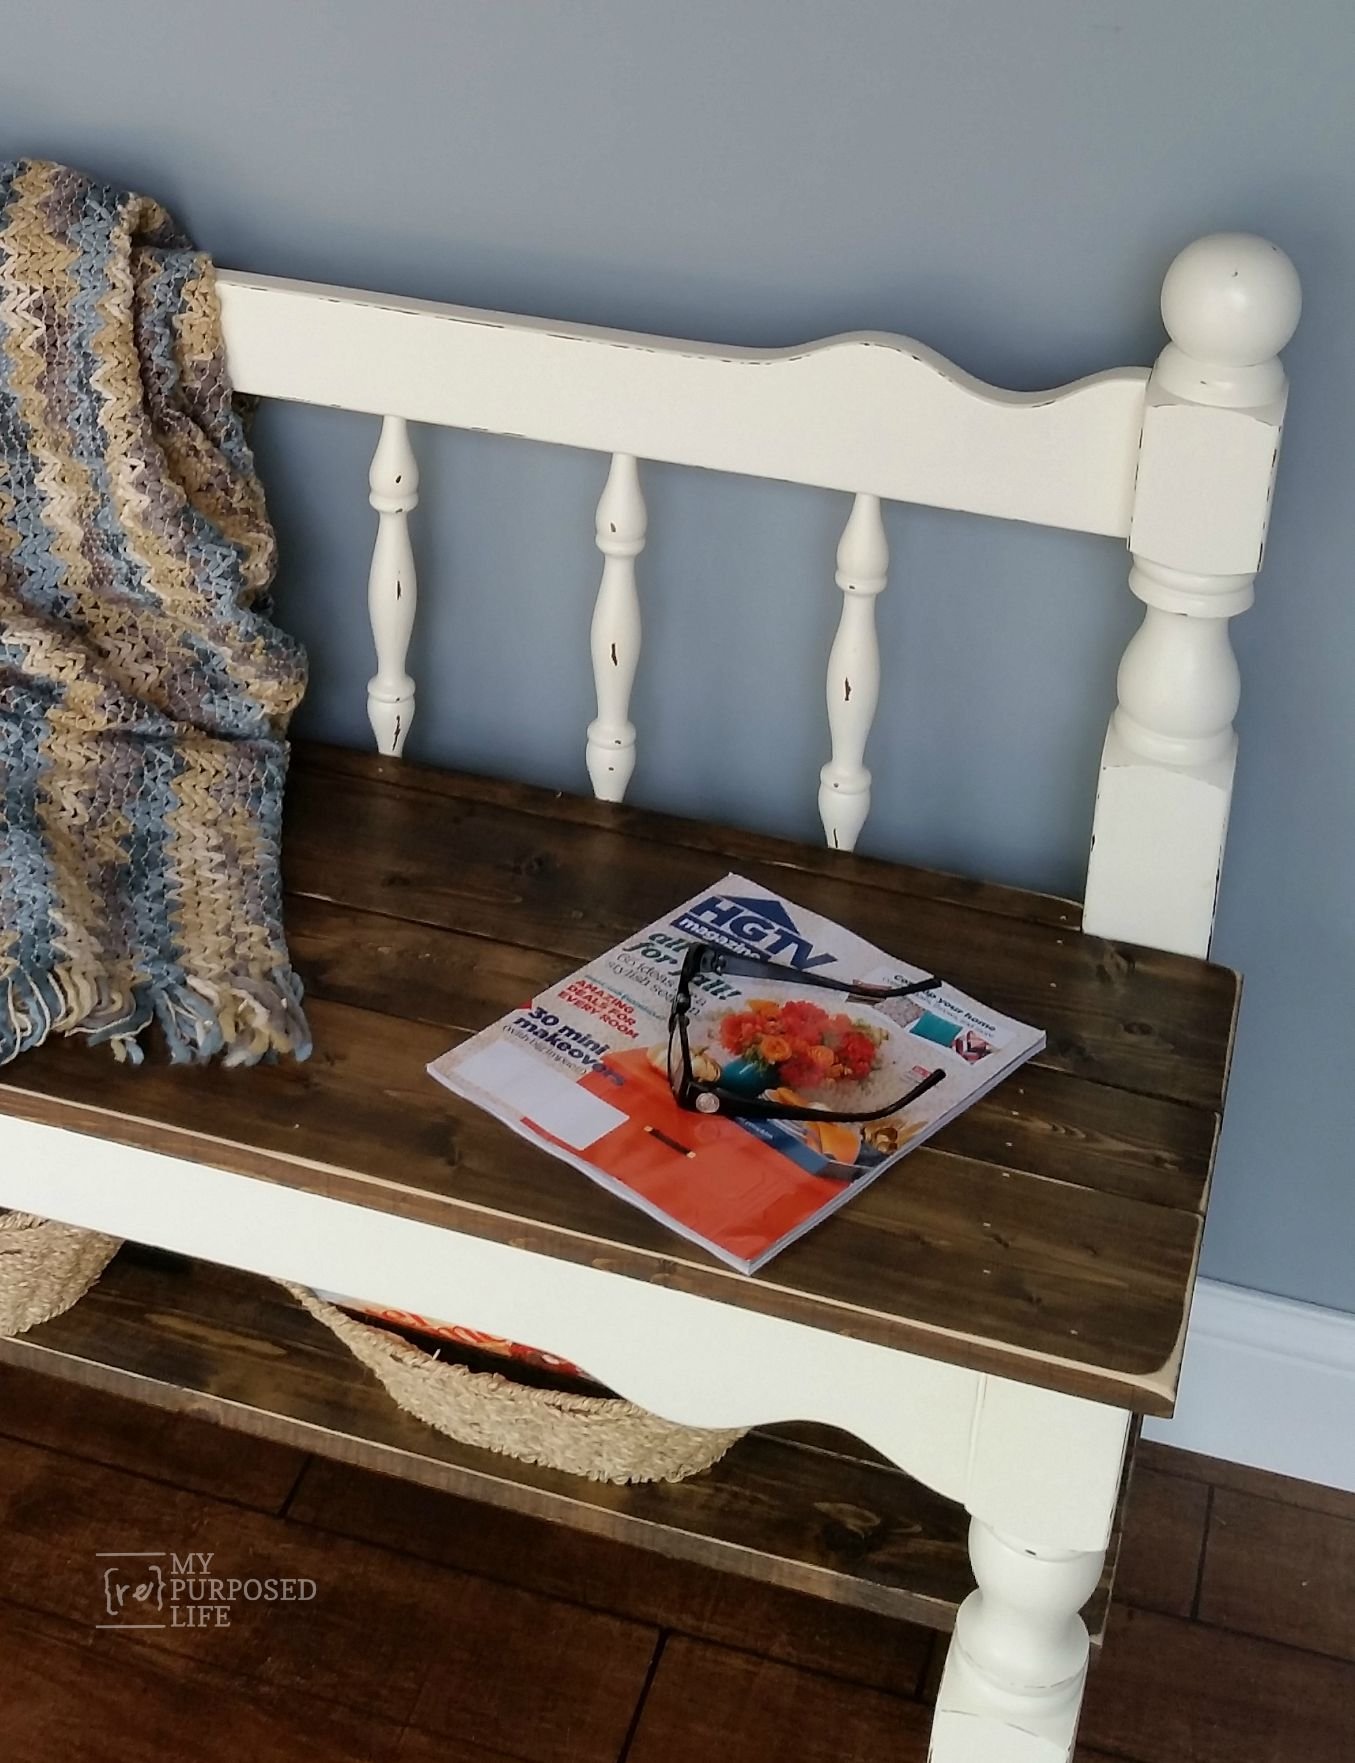
You can see that I added a middle brace (scrap 2×4) on the white twin headboard bench to help support the seat and some lower-side rails to hold the bottom shelf.
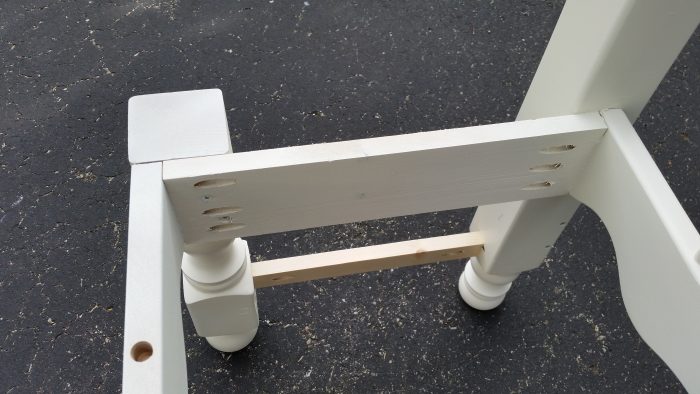
I used Kreg Jig pocket holes for all of that. Here, you can see where I used the extra-long screws to secure the front legs.
Easy Distressing with an Emery Board
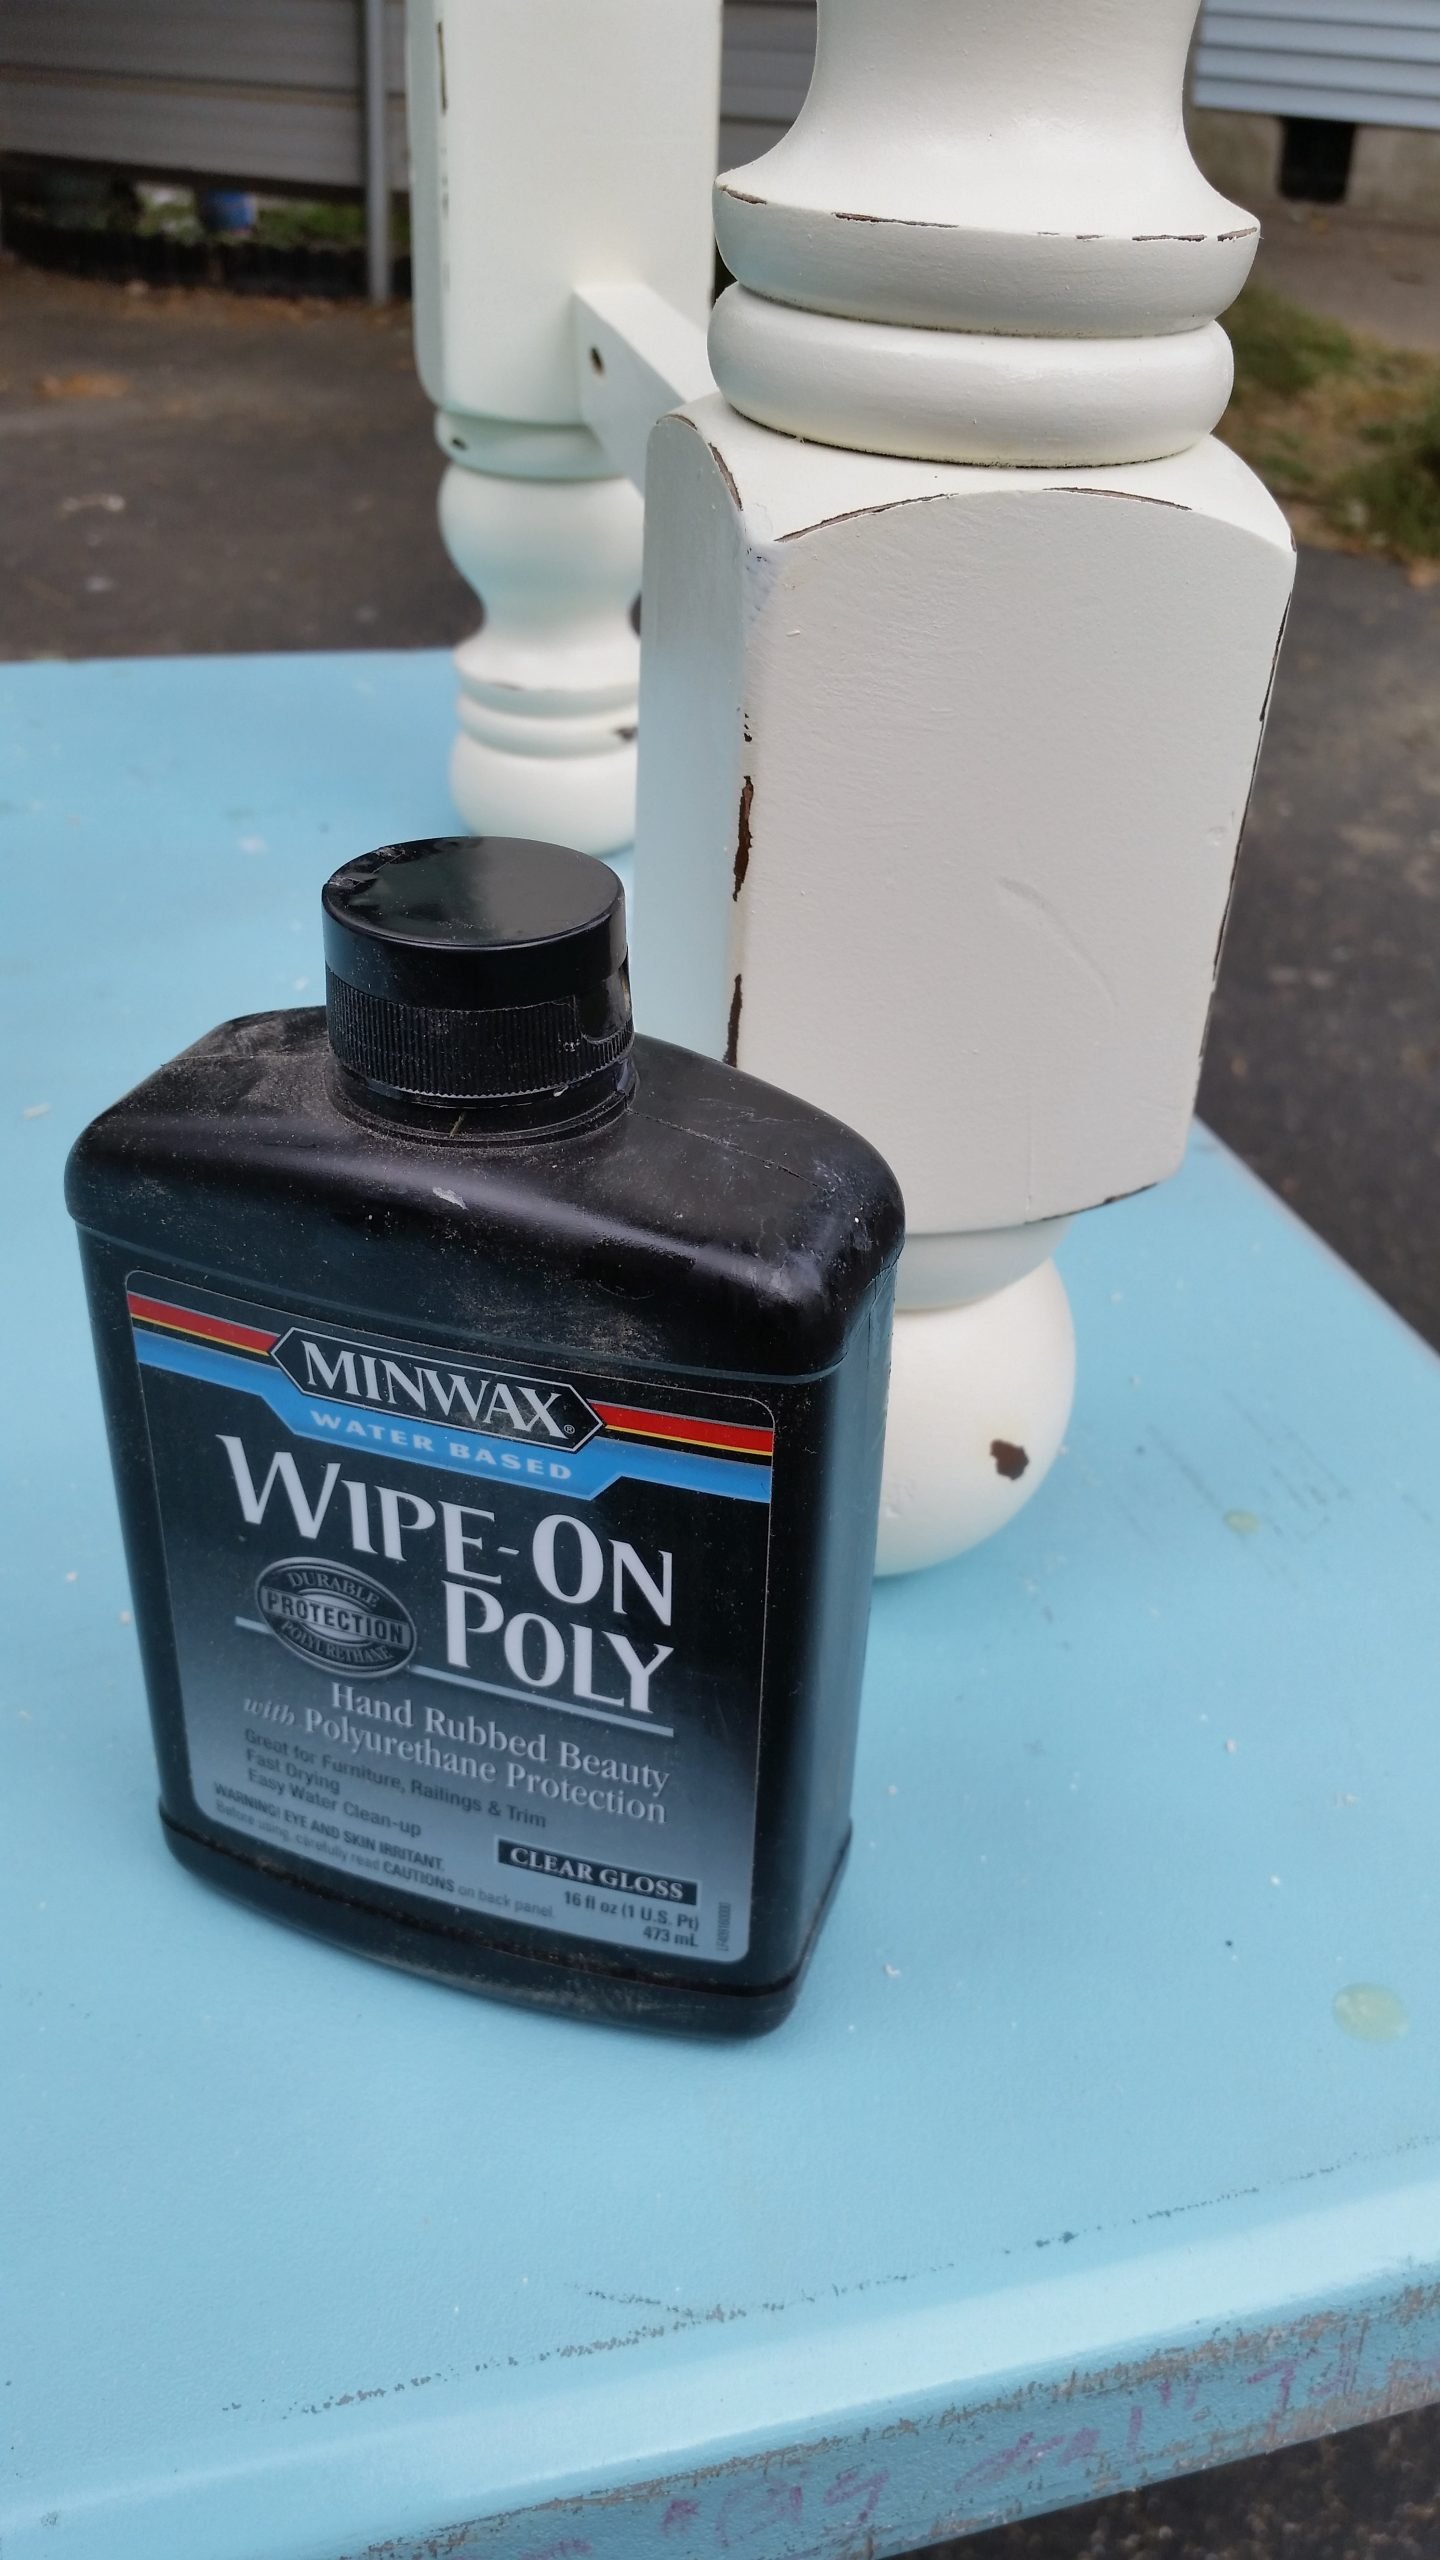
I painted the new lower side rails, lightly distressed the bench with an emery board, and gave it all a coat of wipe-on poly.
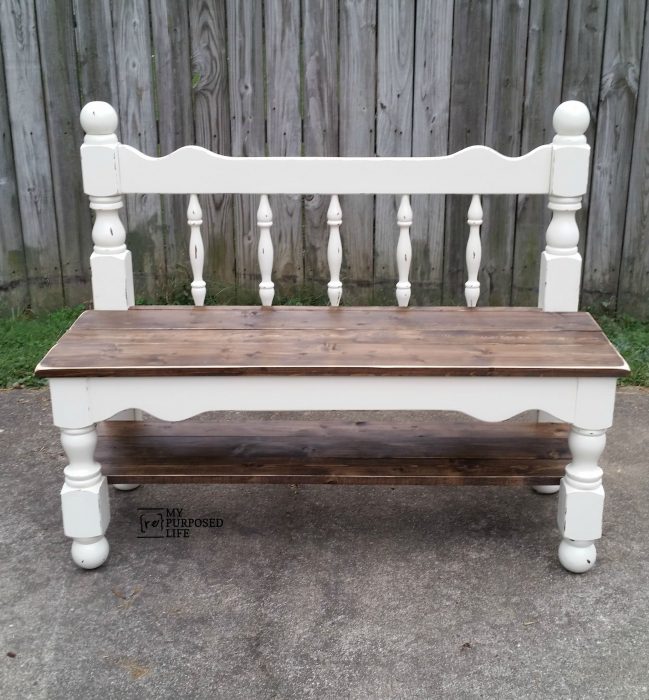
I usually forget to take pictures when I stain. It’s so messy that I don’t want to pick up the camera. I used Minwax dark walnut on some random 1x’s. I used what I needed to get the proper depth for the seat and the lower shelf. After the stain dried, I did a little sanding so that the seat and shelf wouldn’t look so “new” since I distressed the bench.


I thought this bench differed from any other I’ve made, but then I noticed it was similar to the small bench that Homeright gave away at Haven. You can see I have my picket fence coat rack hanging above it.
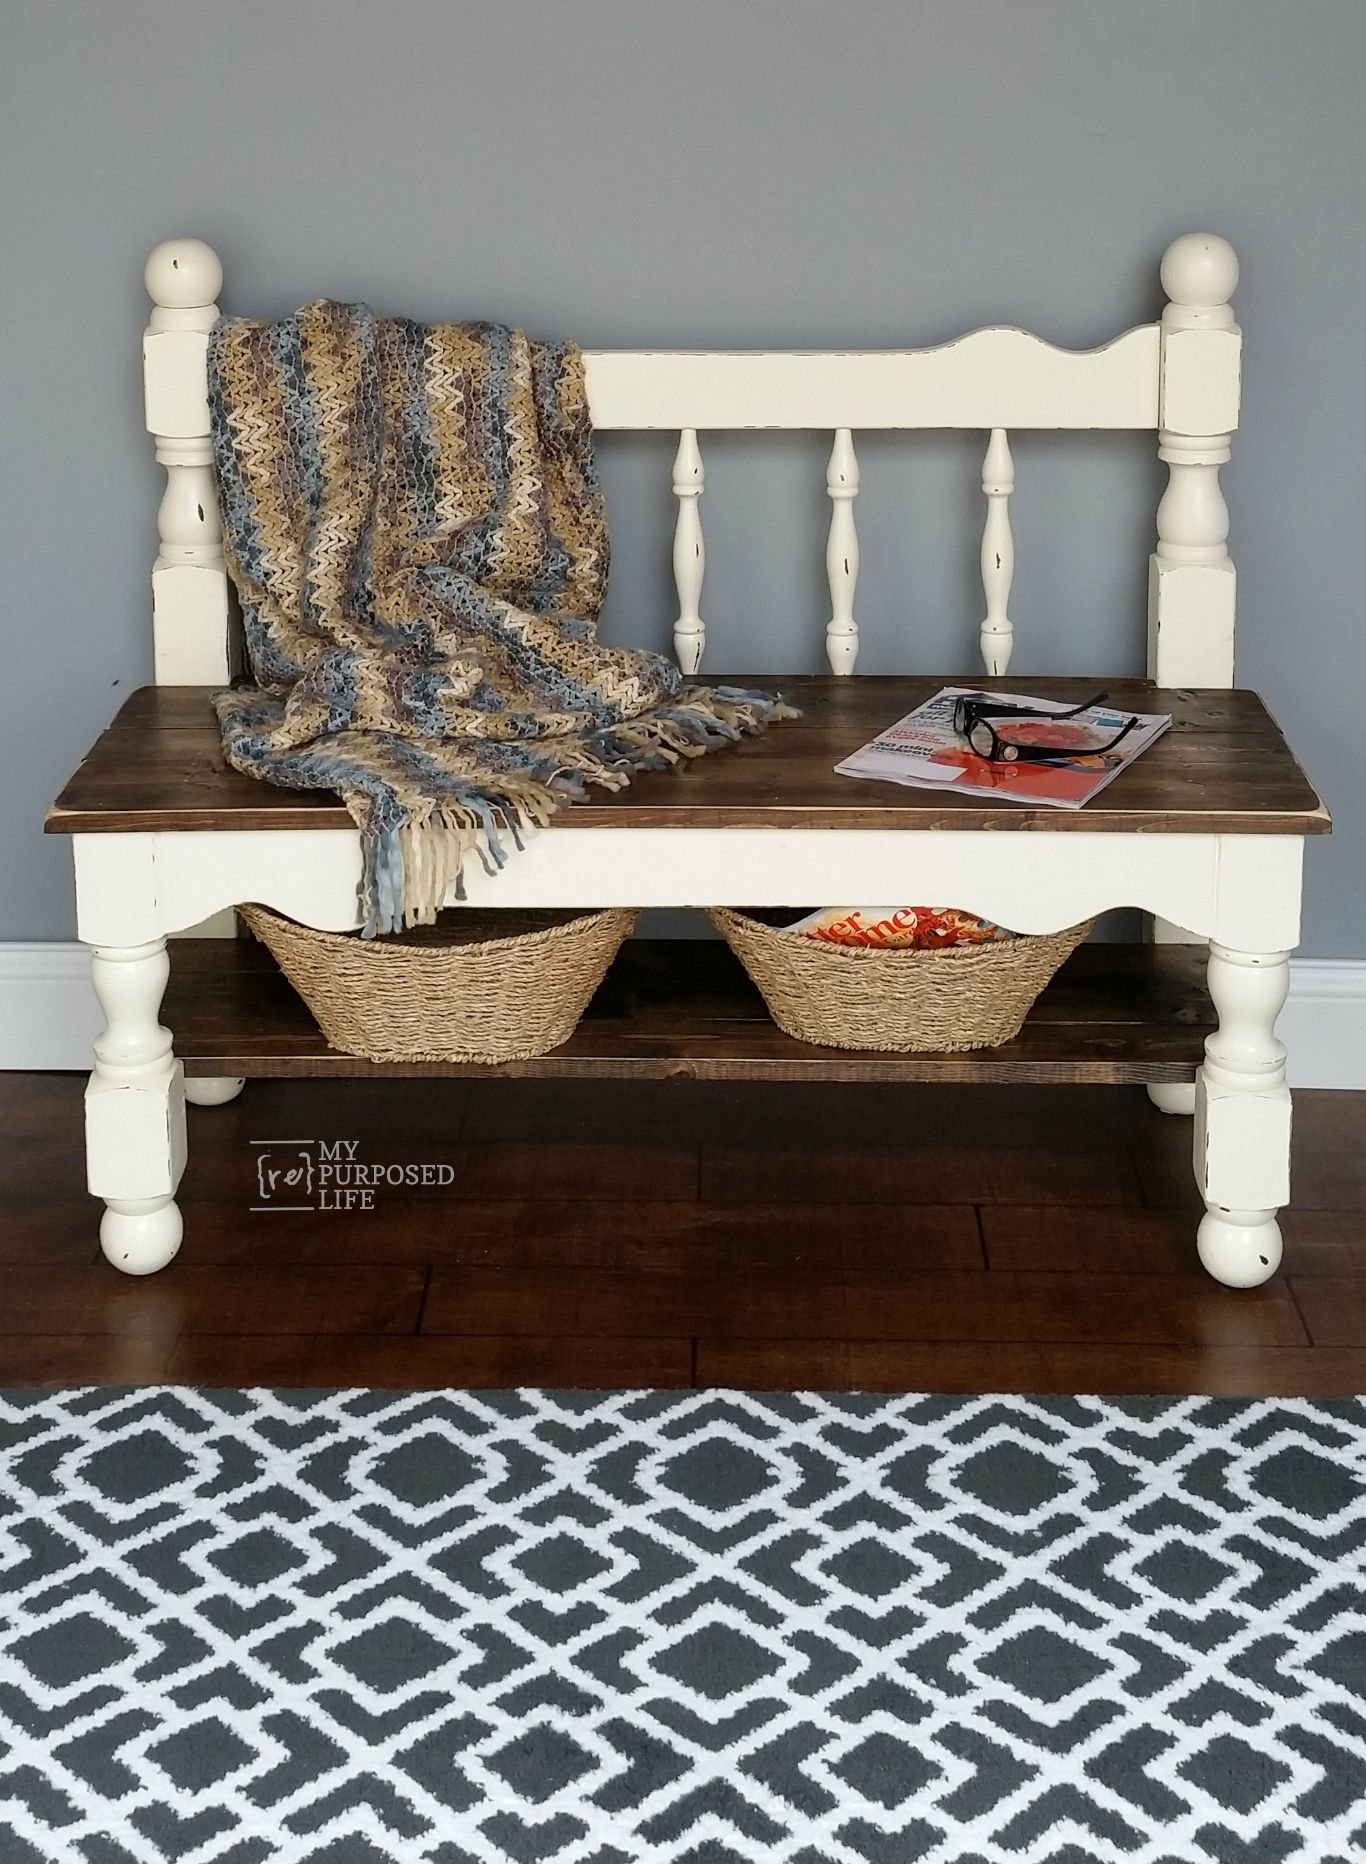
This white twin headboard bench will be great for a mud room or even an end-of-the-bed bench. The addition of the lower shelves makes this white twin headboard bench stand out. I don’t know why adding those took me so many years.
Please Save & Share on Pinterest
And, of course, it would work great for any home’s entryway. I always love the look of the dark wood with the white headboard.
gail
Related Content: See the shelf made from bed parts here (the parts I left from this project didn’t go to waste!)
See my favorite Mission Style Headboard Bench with Storage-The Complete Tutorial.
I love this! I’ve never tried to do this, but I wonder if you could make a backless bench using this method by removing the rail part for the back as well. This would provide a strong base for a bench.
Awesome idea Sherry. I can’t believe I’ve never done that before. I think I need to put that on my to-do list!
Thanks for stopping by!!
gail