Stenciled Bench
As an Amazon Associate, I earn from qualifying purchases.

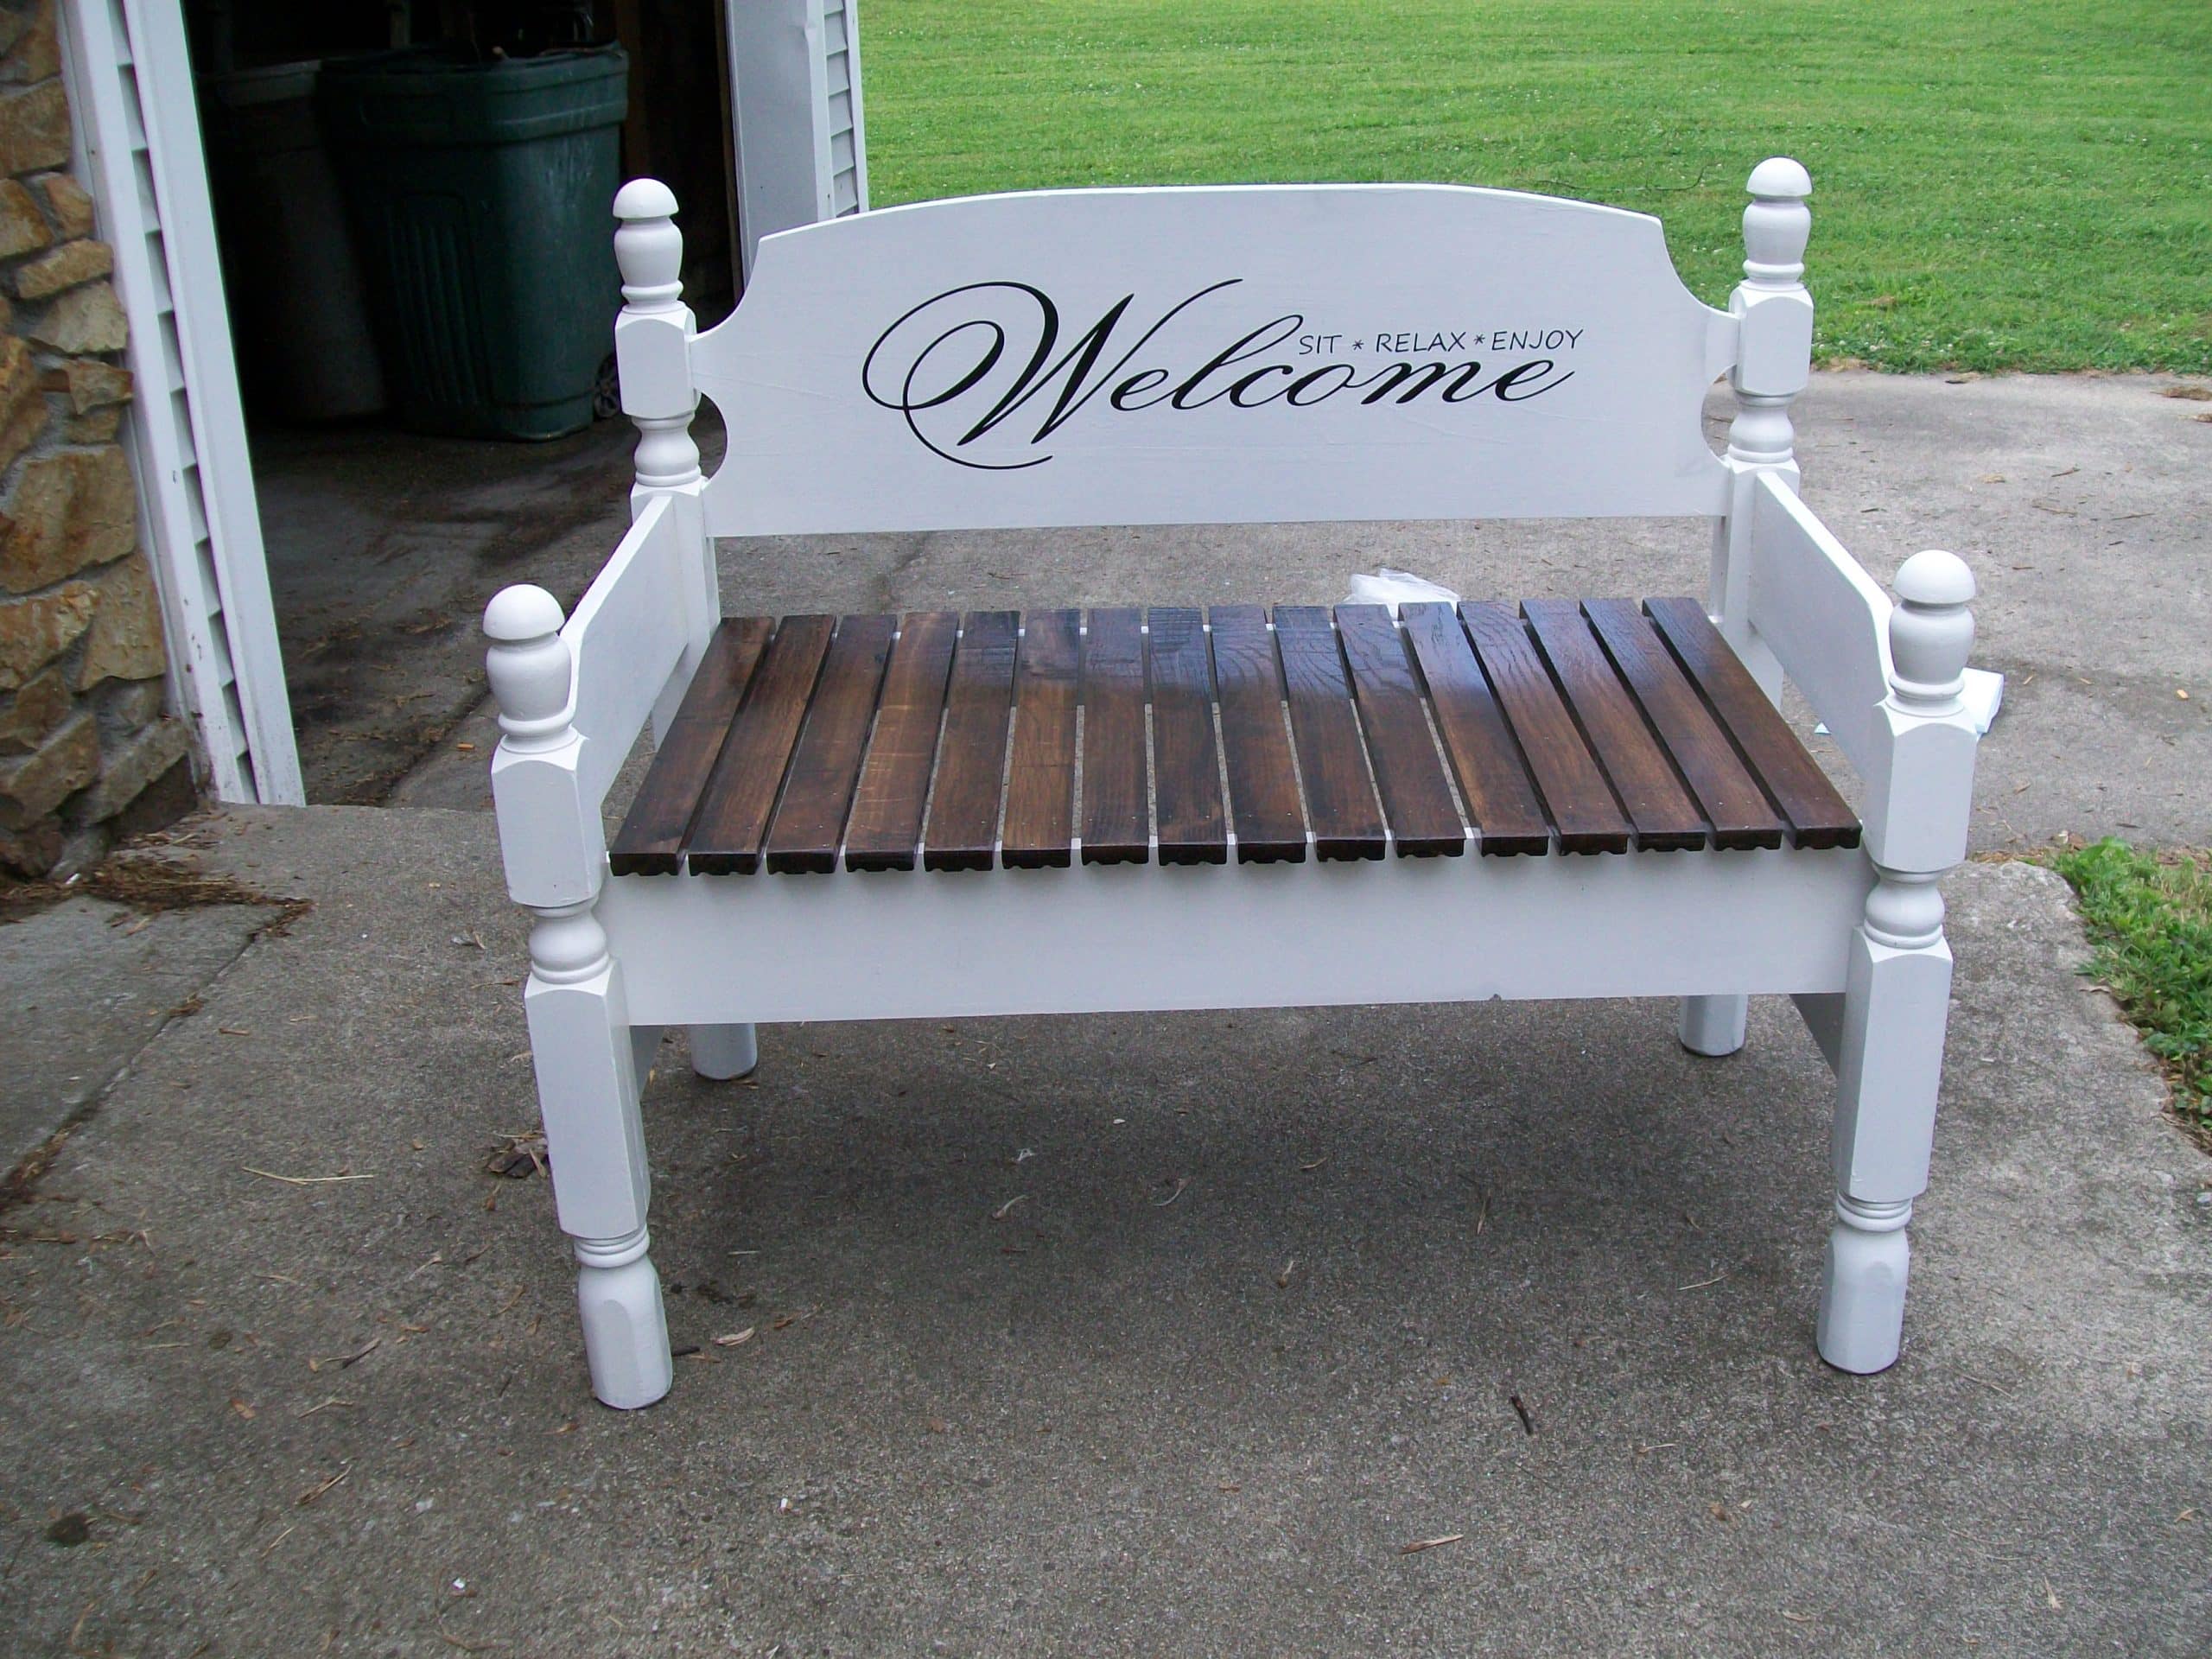
Stenciled Bench
How to make a simple stenciled bench out of an old twin bed. Easy project with my step by step directions below.

Today, I have another bench. Are ya’ll tired of benches yet? I also have a great tutorial on stenciling near the bottom of this post.
Visit the My Repurposed Life Amazon Store to shop my favorite items.
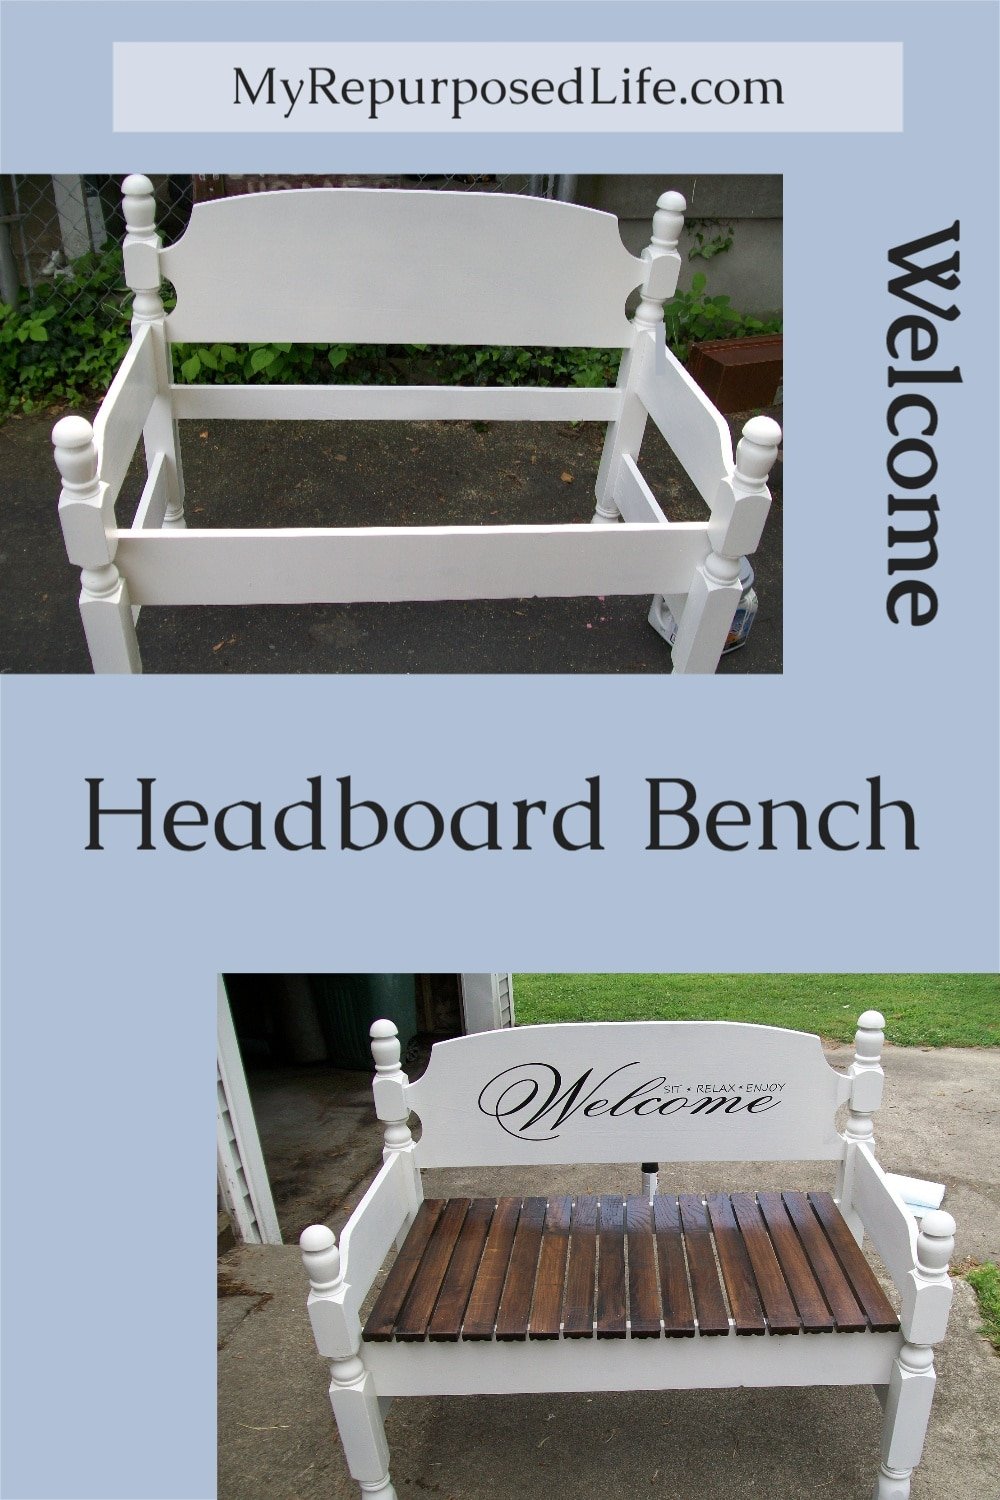
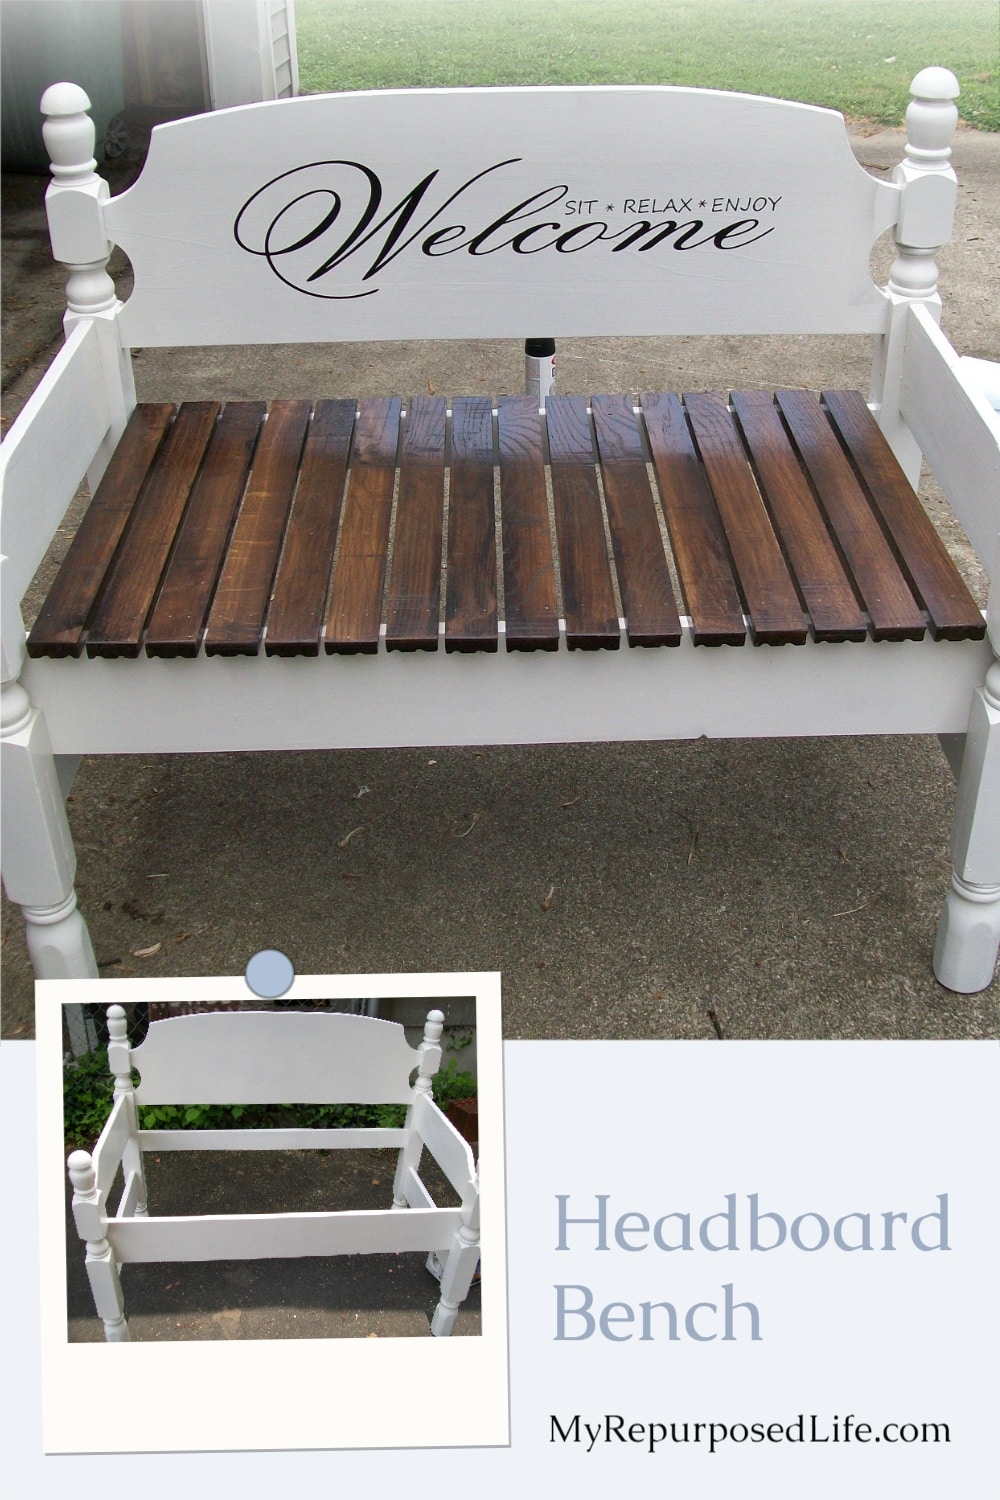
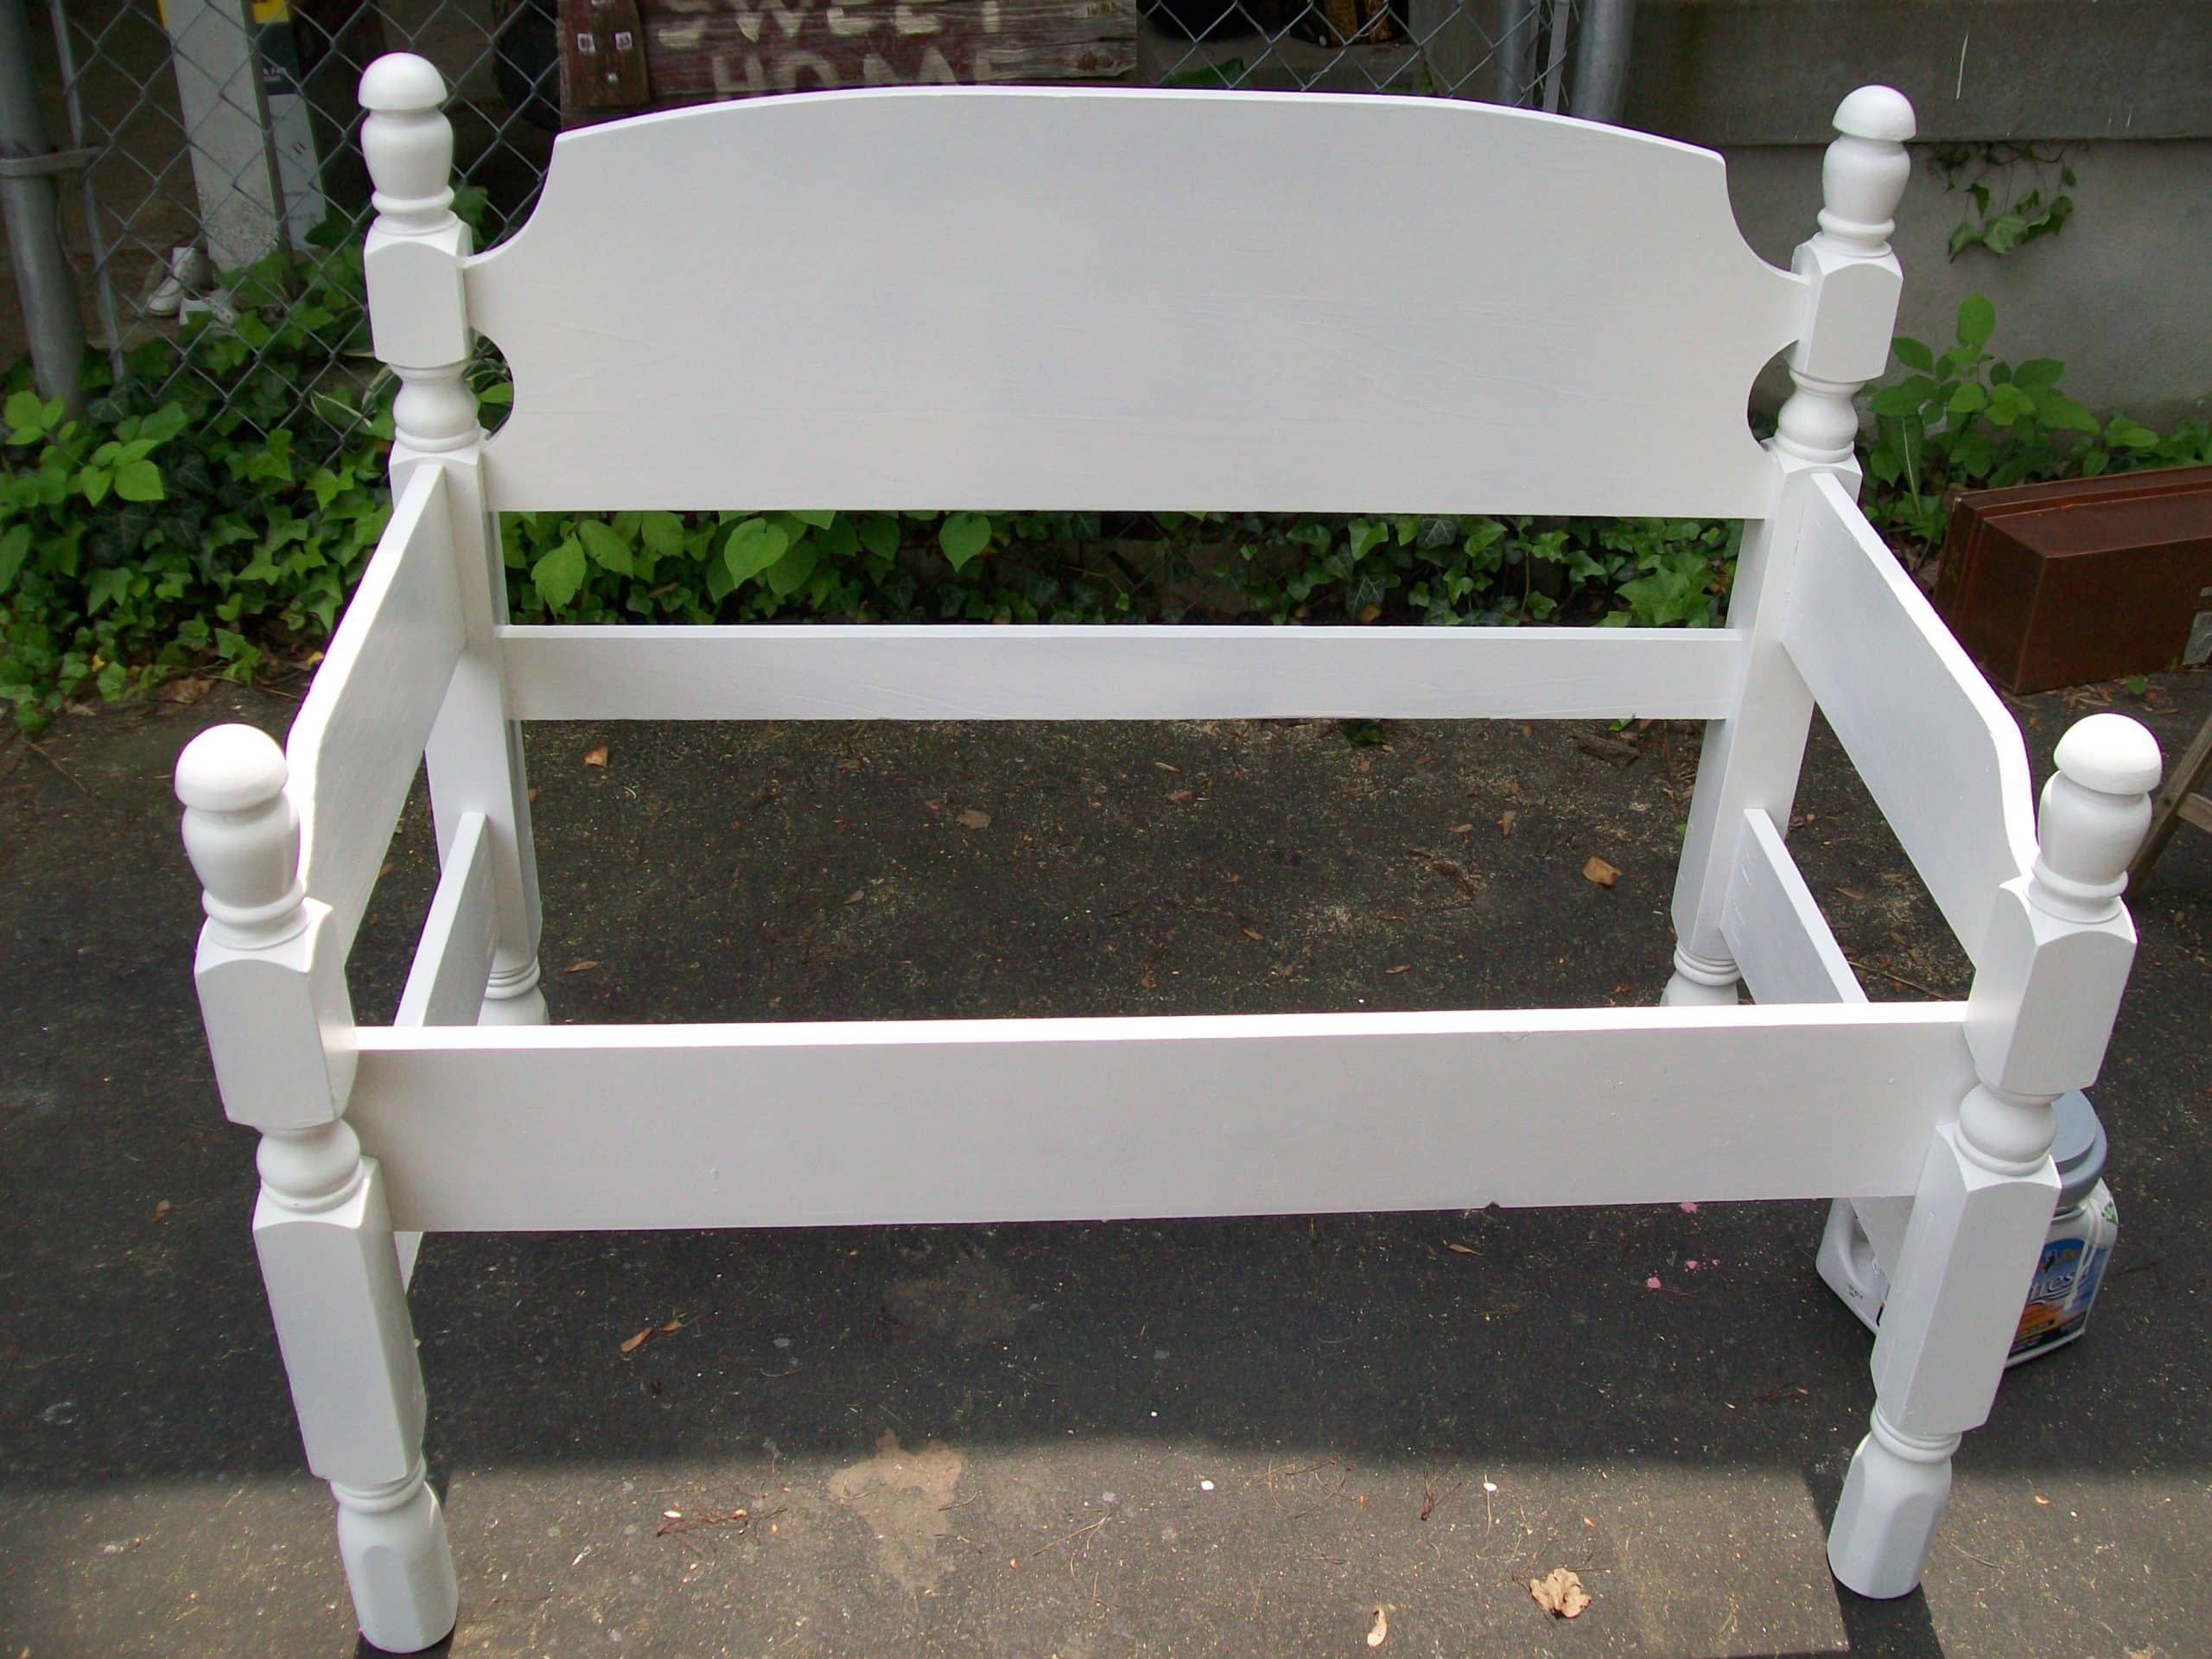
Simple twin headboard bench construction
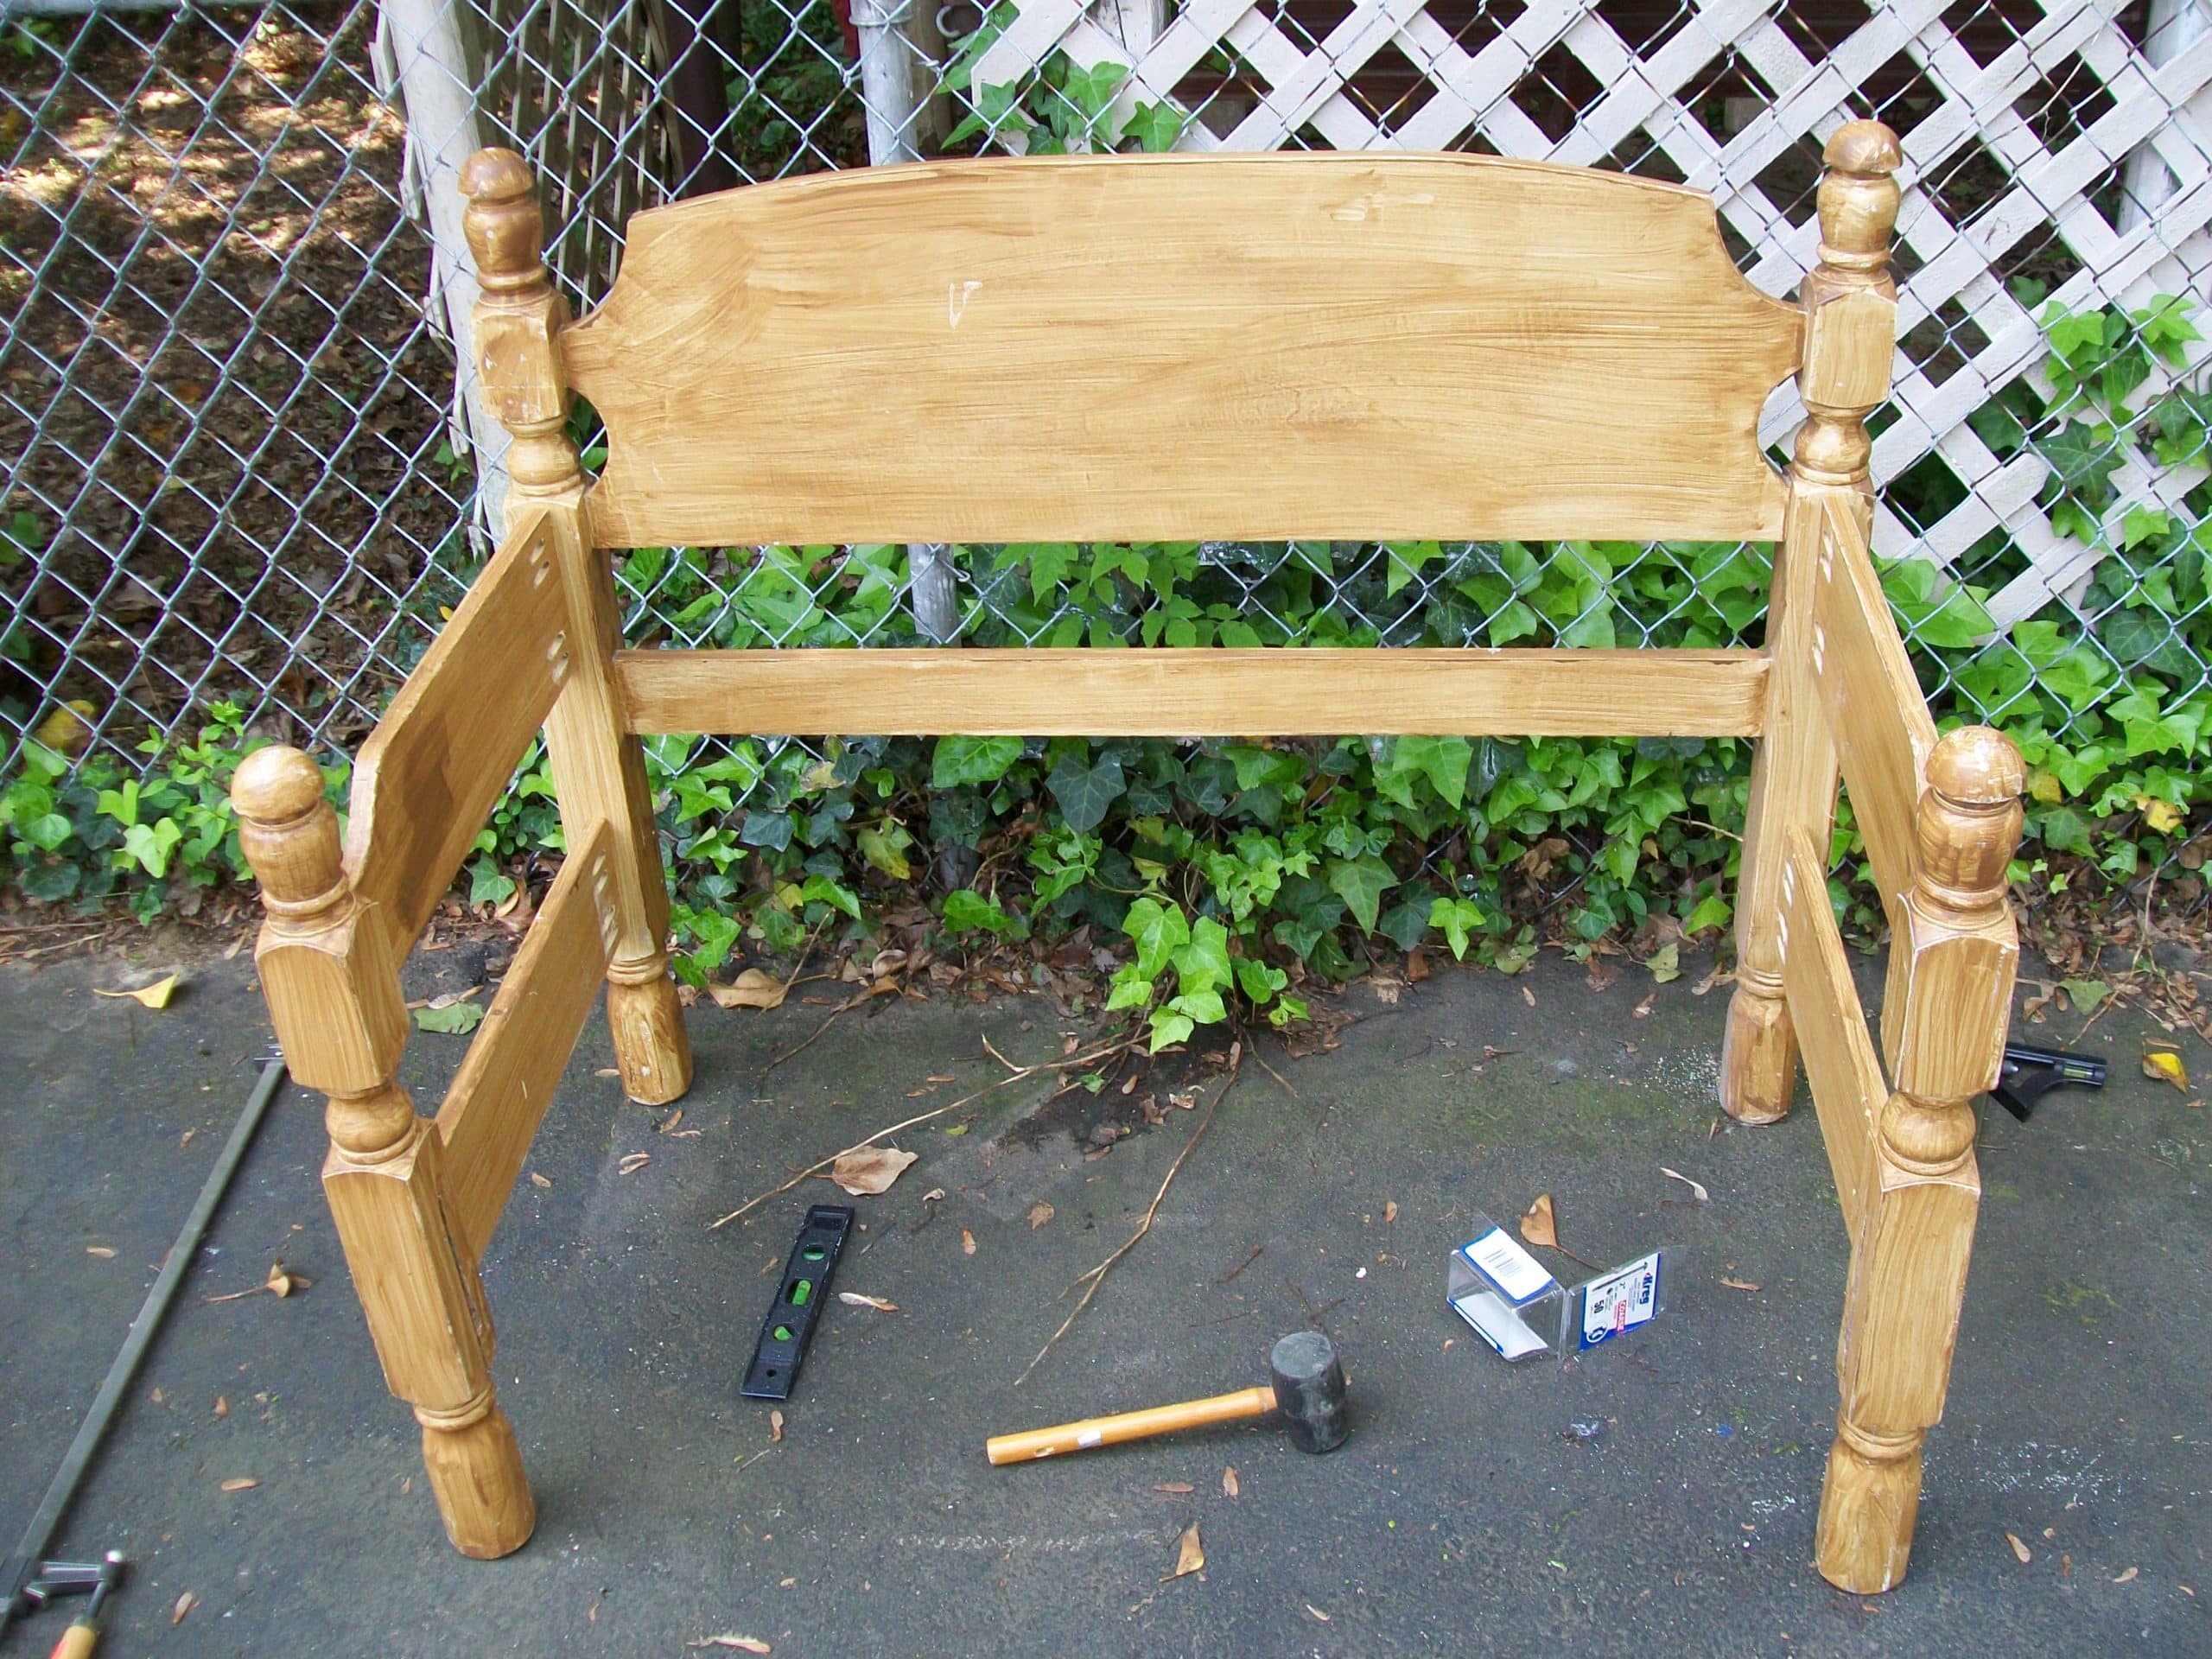
This bench was made out of a twin headboard and foot board. As always we (Cathy and I) cut the foot board in half to use as arms (sides) for the bench. I used my Kreg Jig to make pocket holes to join the pieces together. It’s such a tight fit, you don’t need to use wood glue.
Attaching front brace to headboard bench
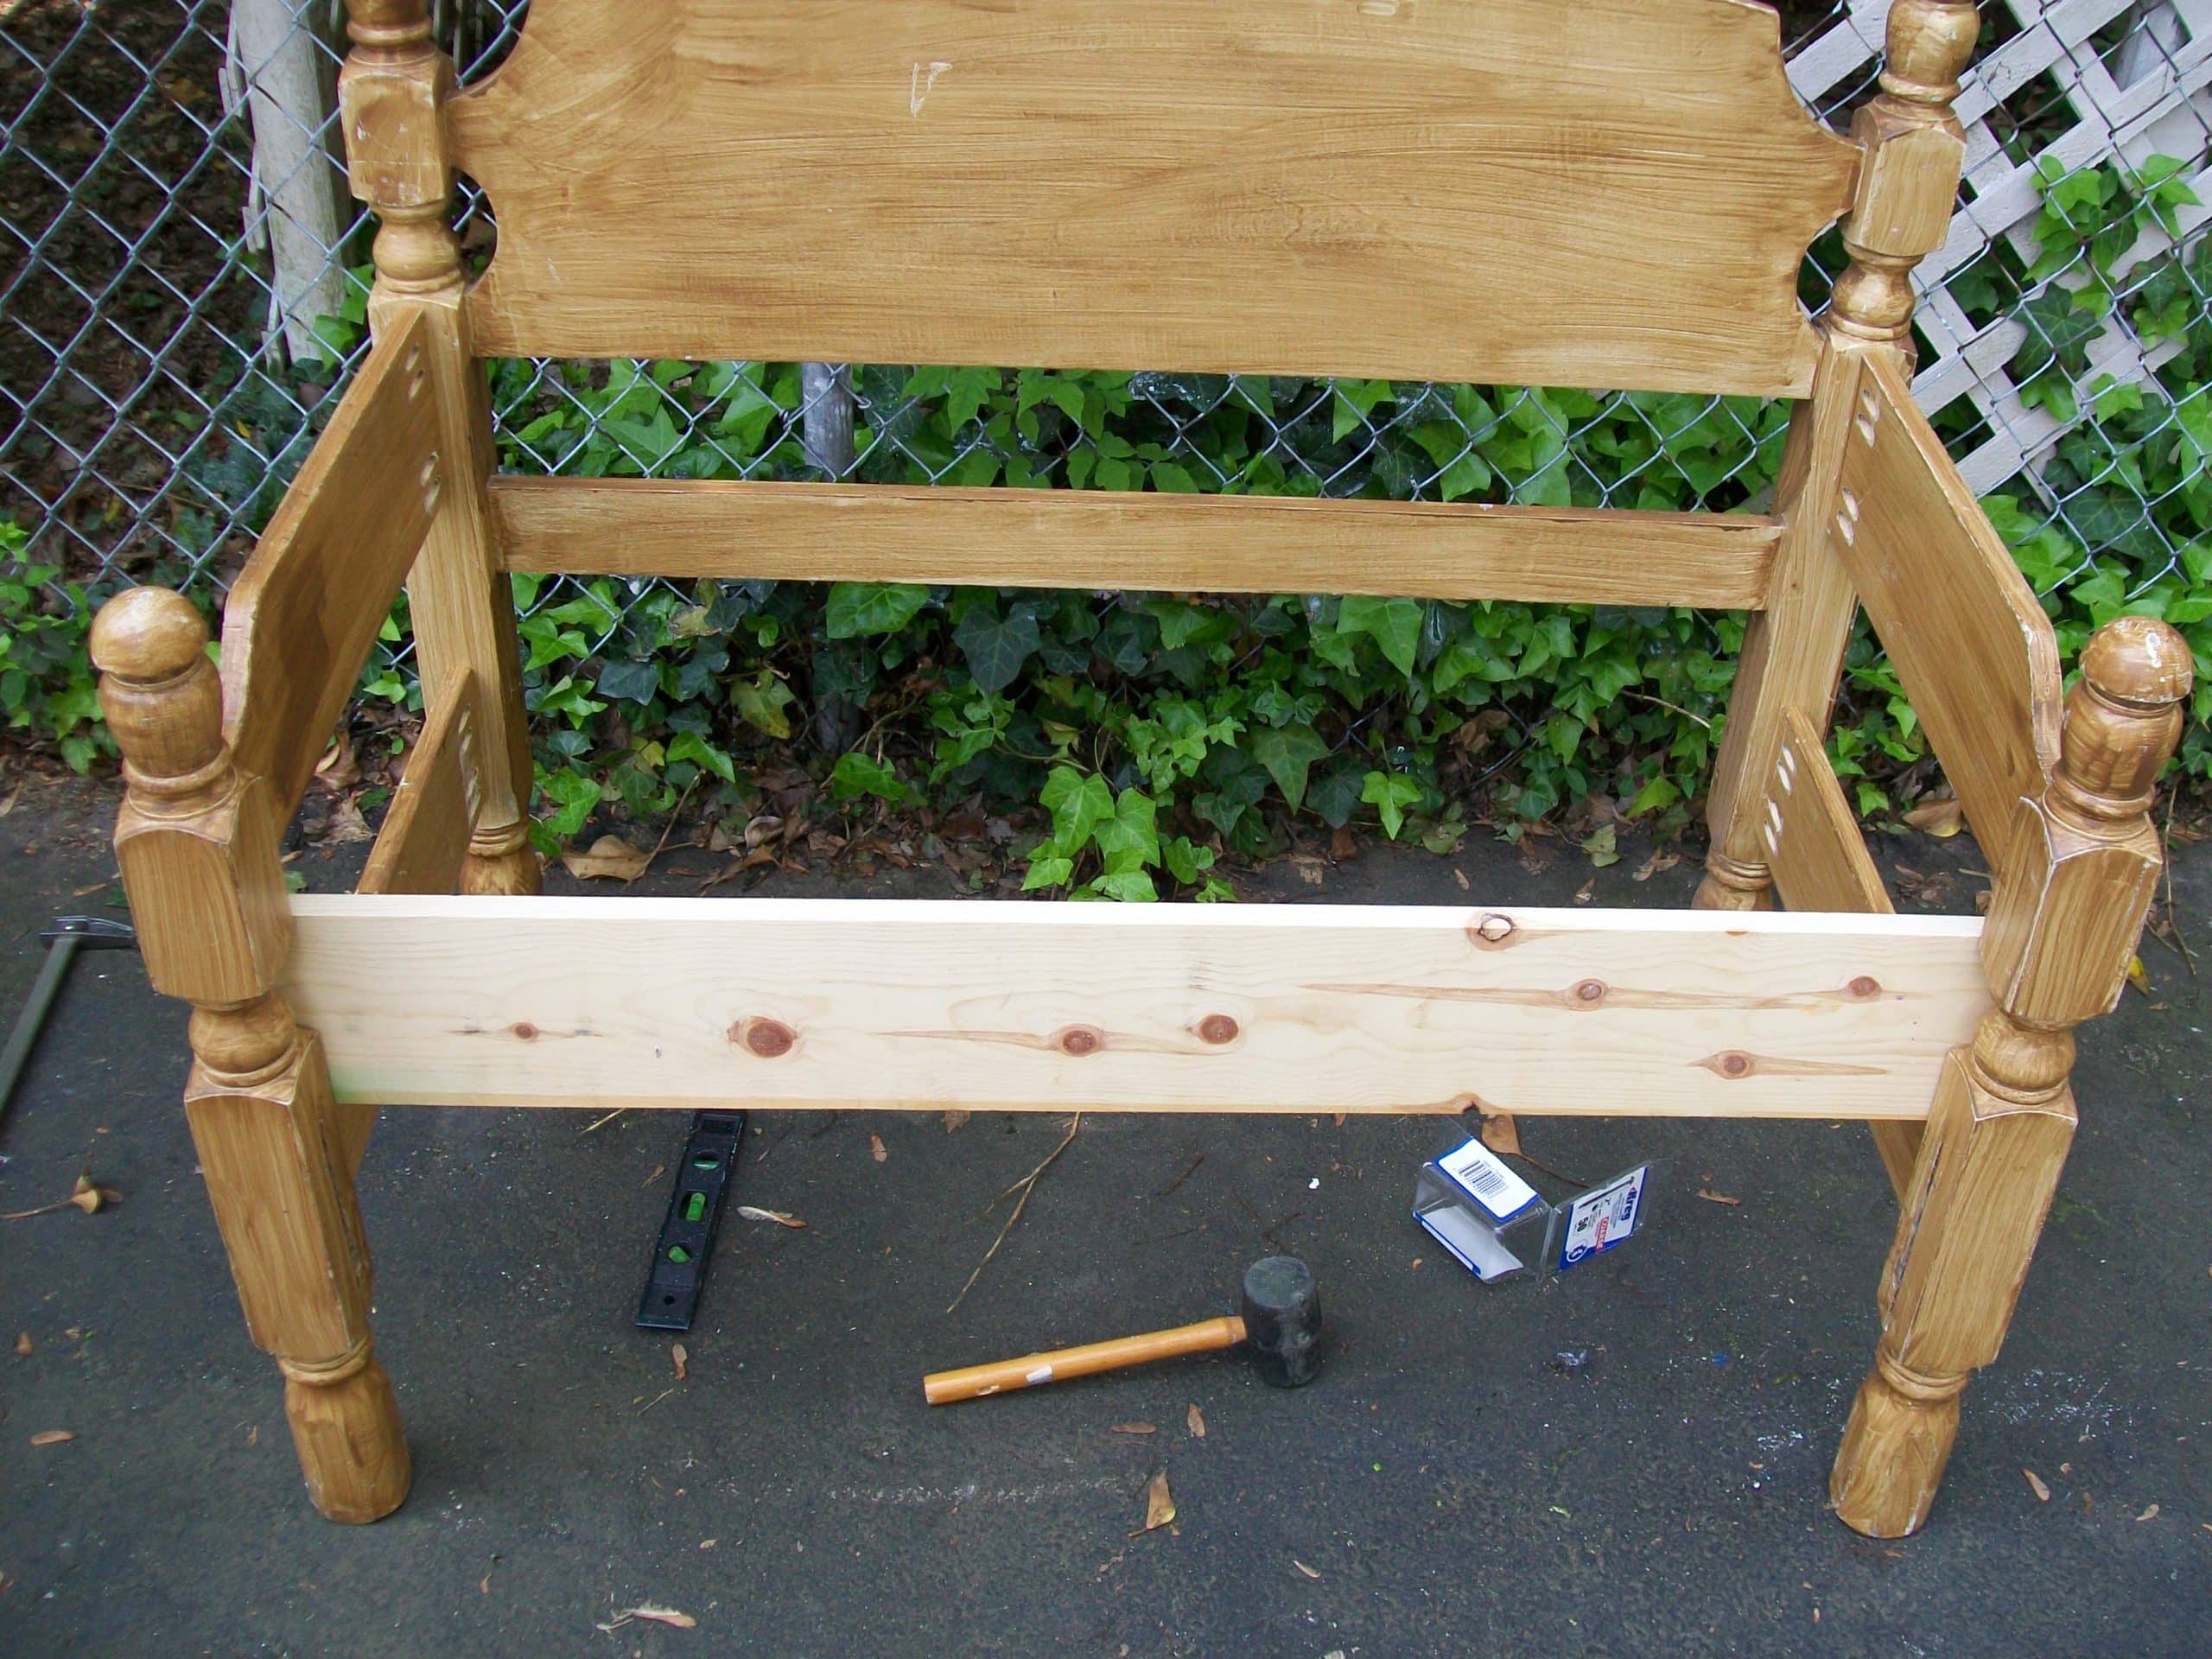
We used a 1×6 for the front brace.
Assure headboard bench is level
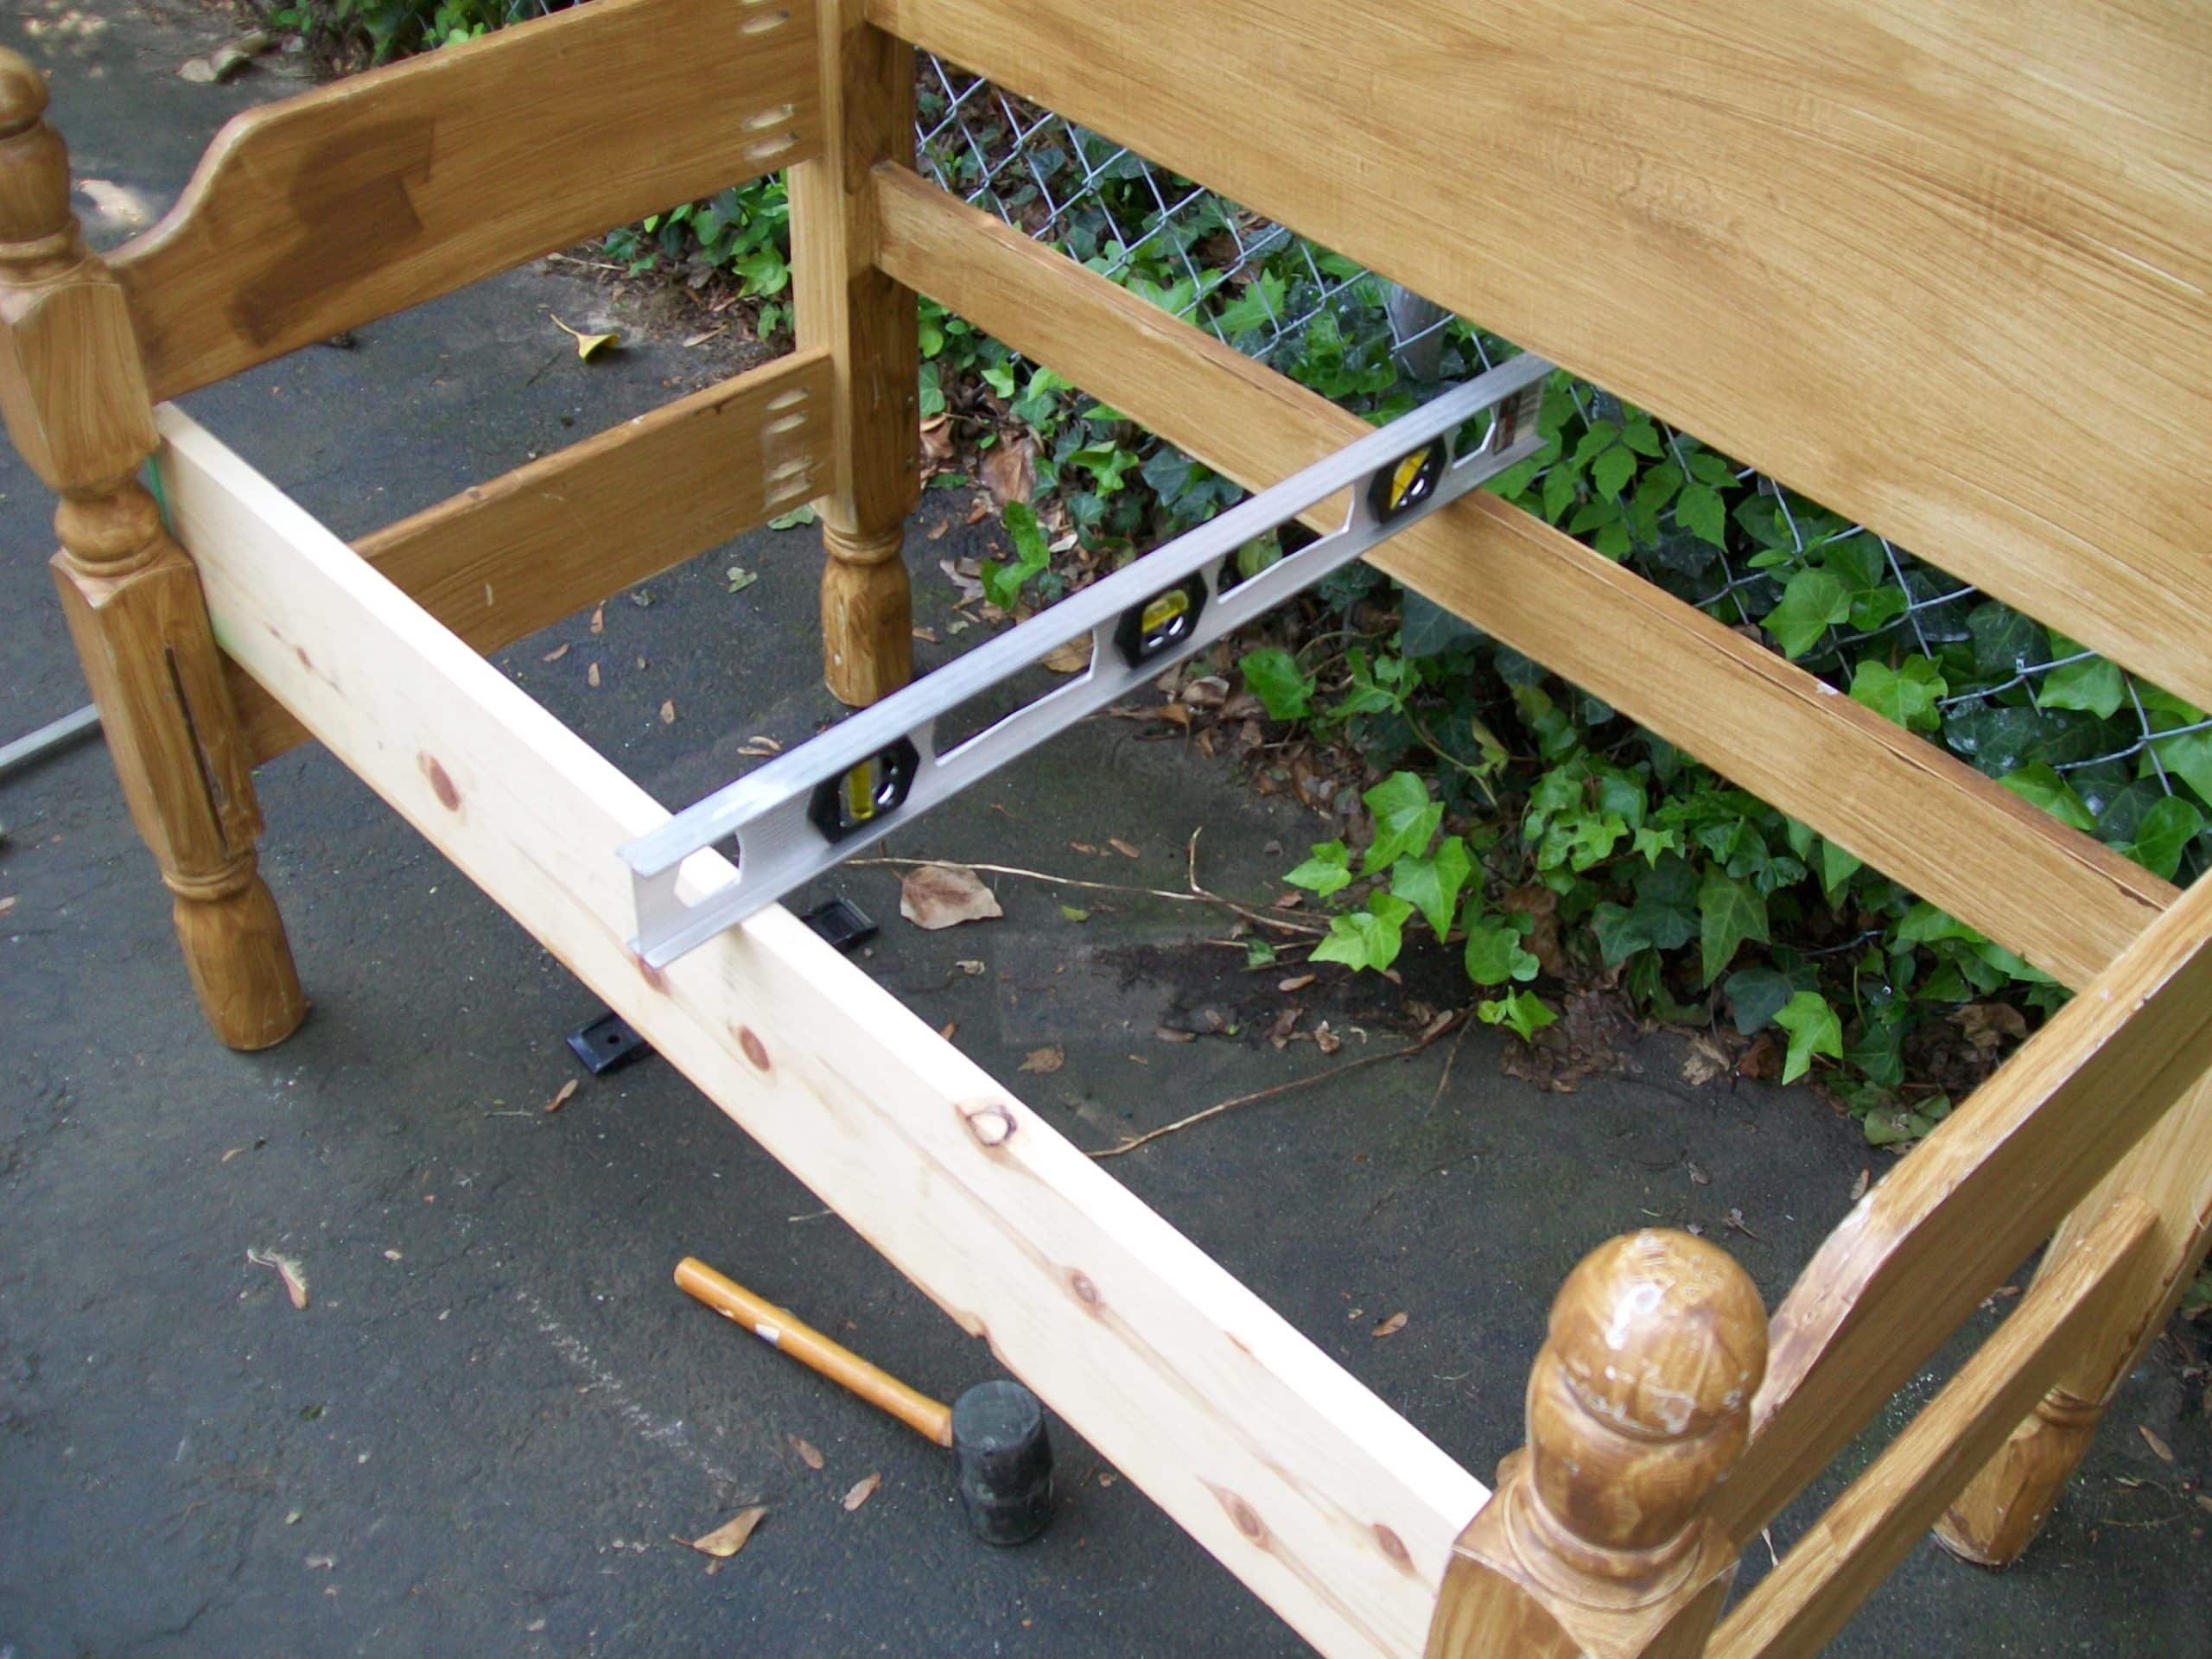
When using a level, make sure that you are working on a level surface. This is the ONLY level surface on my entire driveway.
Paint and Primer twin bed stenciled bench

The fabulous Finish Max was used to apply primer.
I then used the paint sprayer to apply Dutch Boy Refresh in “sweetened white”.
Not Shown: Hardwood flooring was used for the seat. I used my nail gun to attach plank seating. You can see more about that in my Twin Headboard Bench Tutorial.
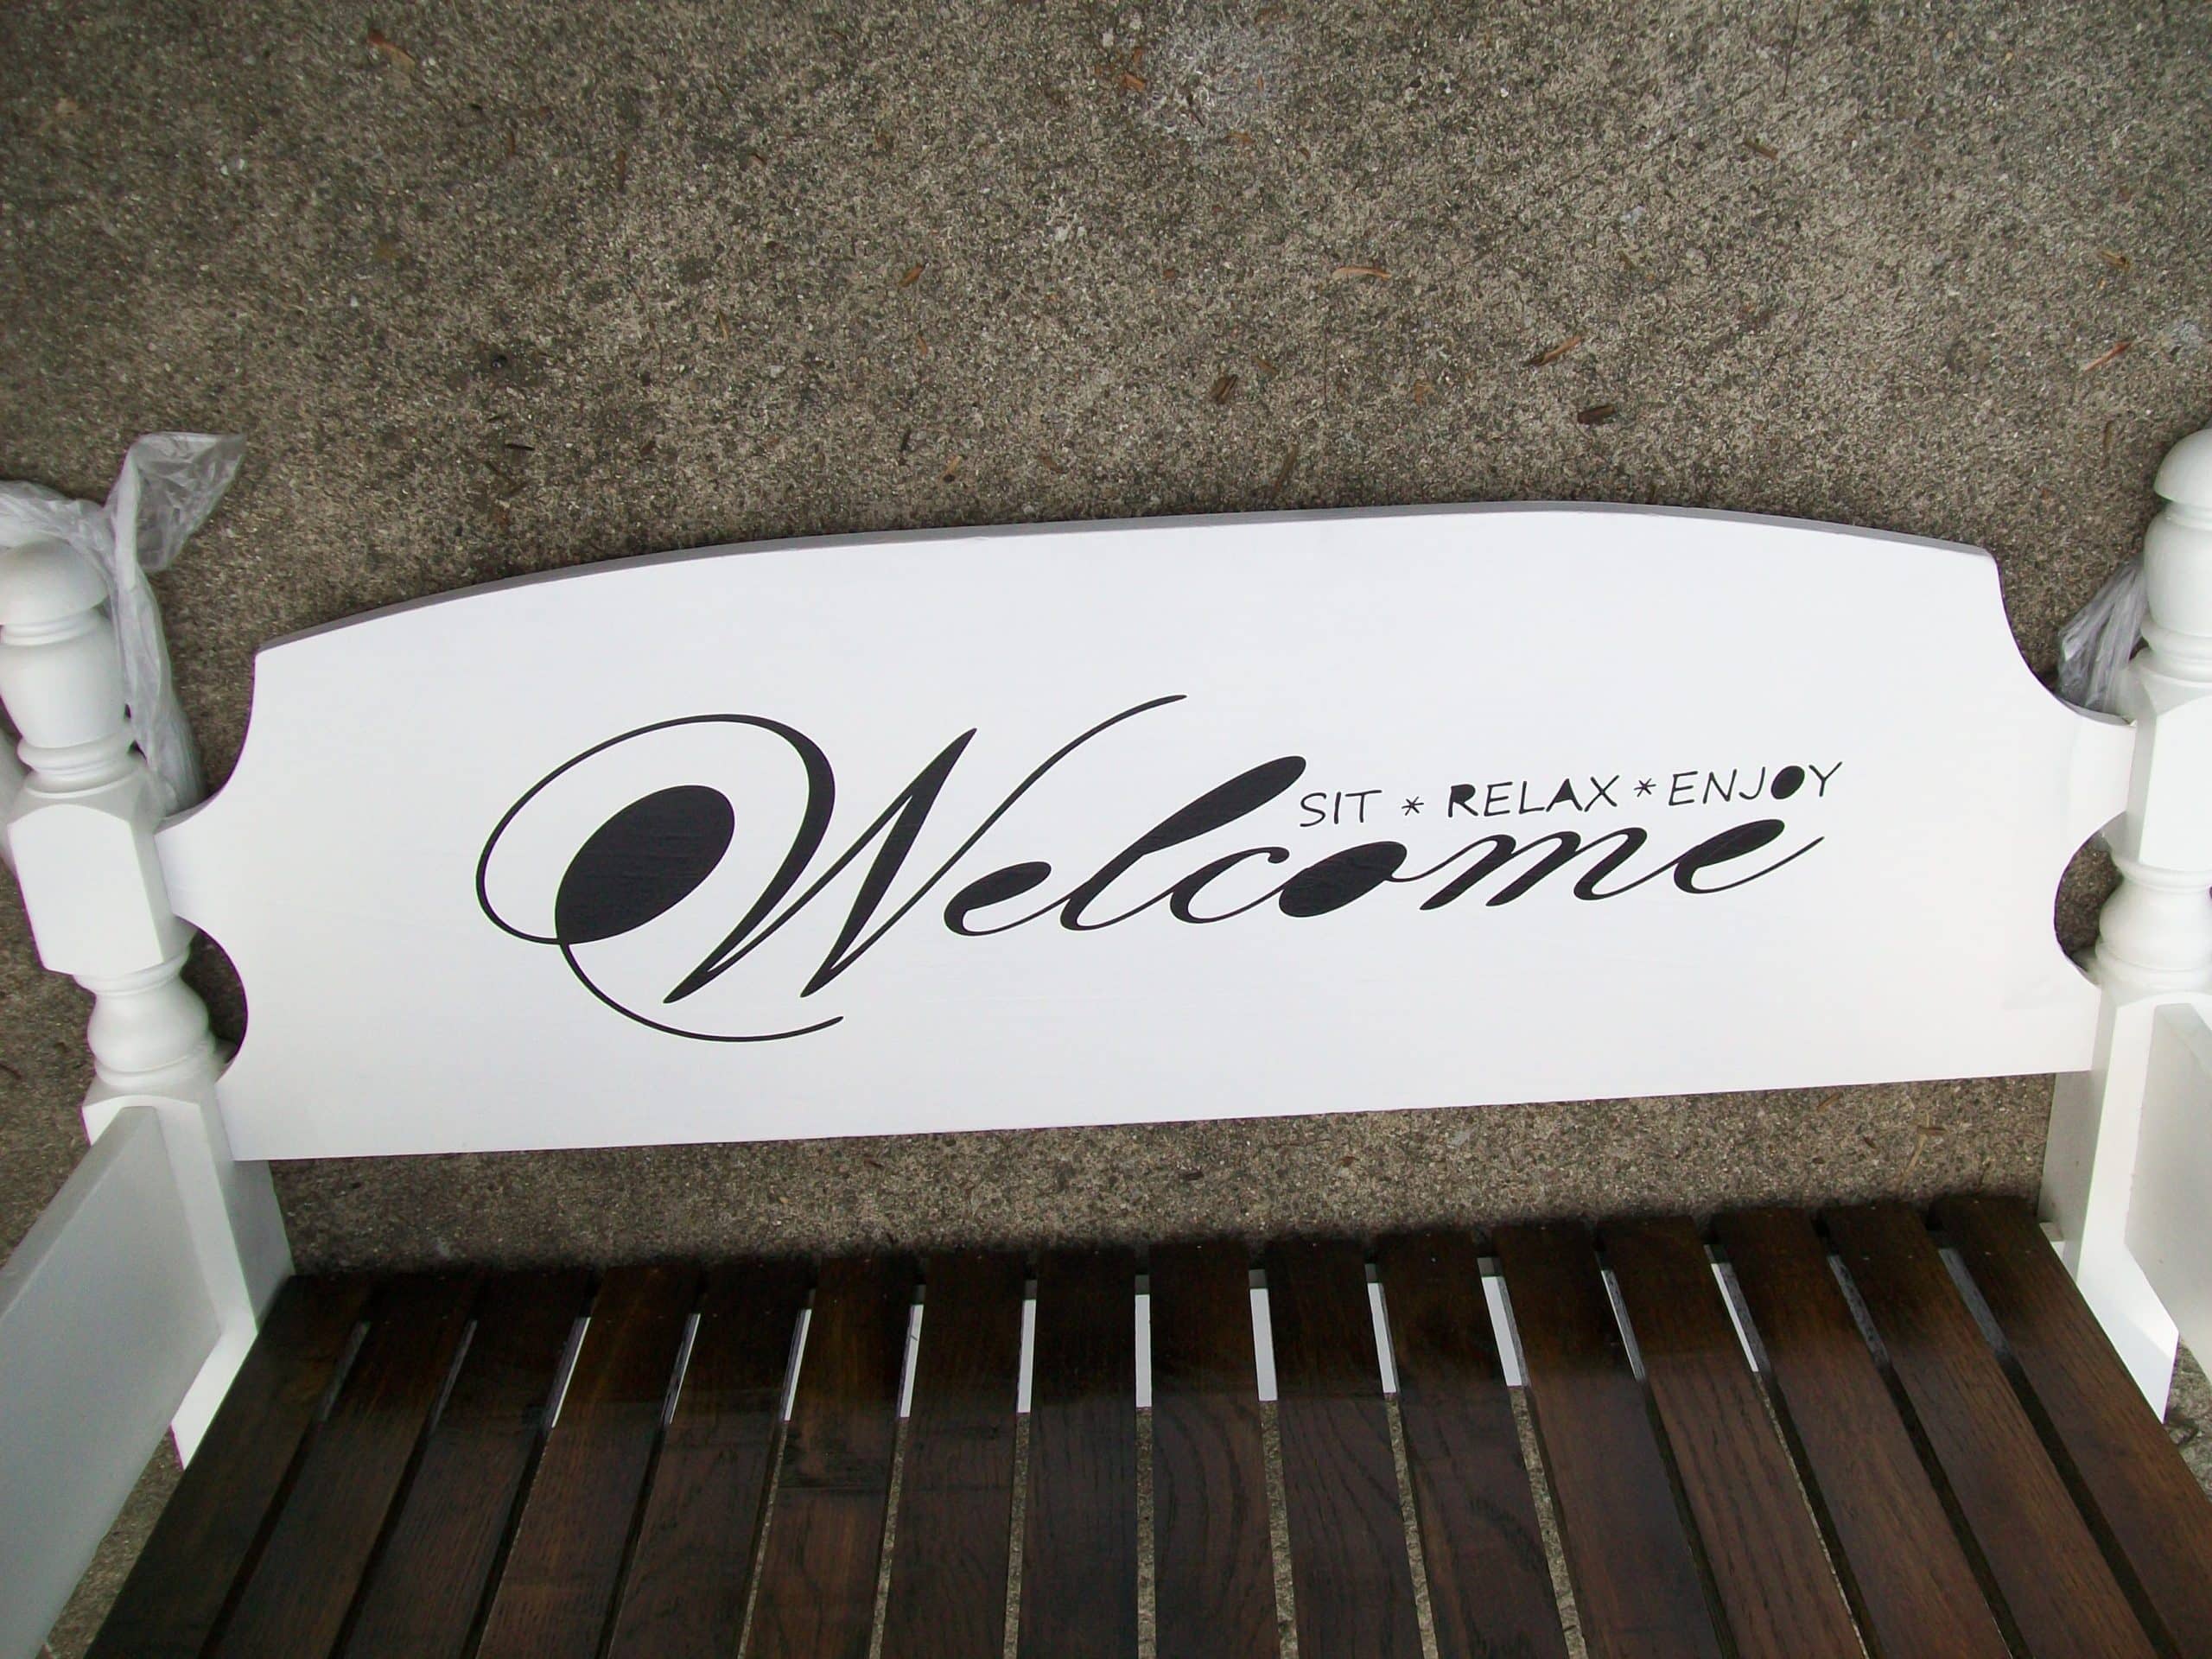
Design contact paper stencil

I made my design in the Silhouette program. To get the “W” in welcome larger, I “ungrouped” the word. Then I centered the “elcome” with the “w”. To save money (and vinyl), I cut it out of my polka dotted contact paper.
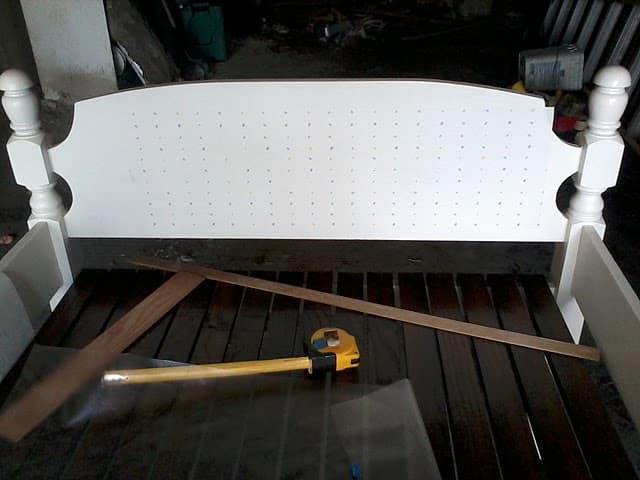
I peeled off the letters (leaving the oodles and boodles). I then applied the stencil onto the back of the bench. You can see that long piece of wood to the right that I used as a spacer when I attached the planks for the seat.
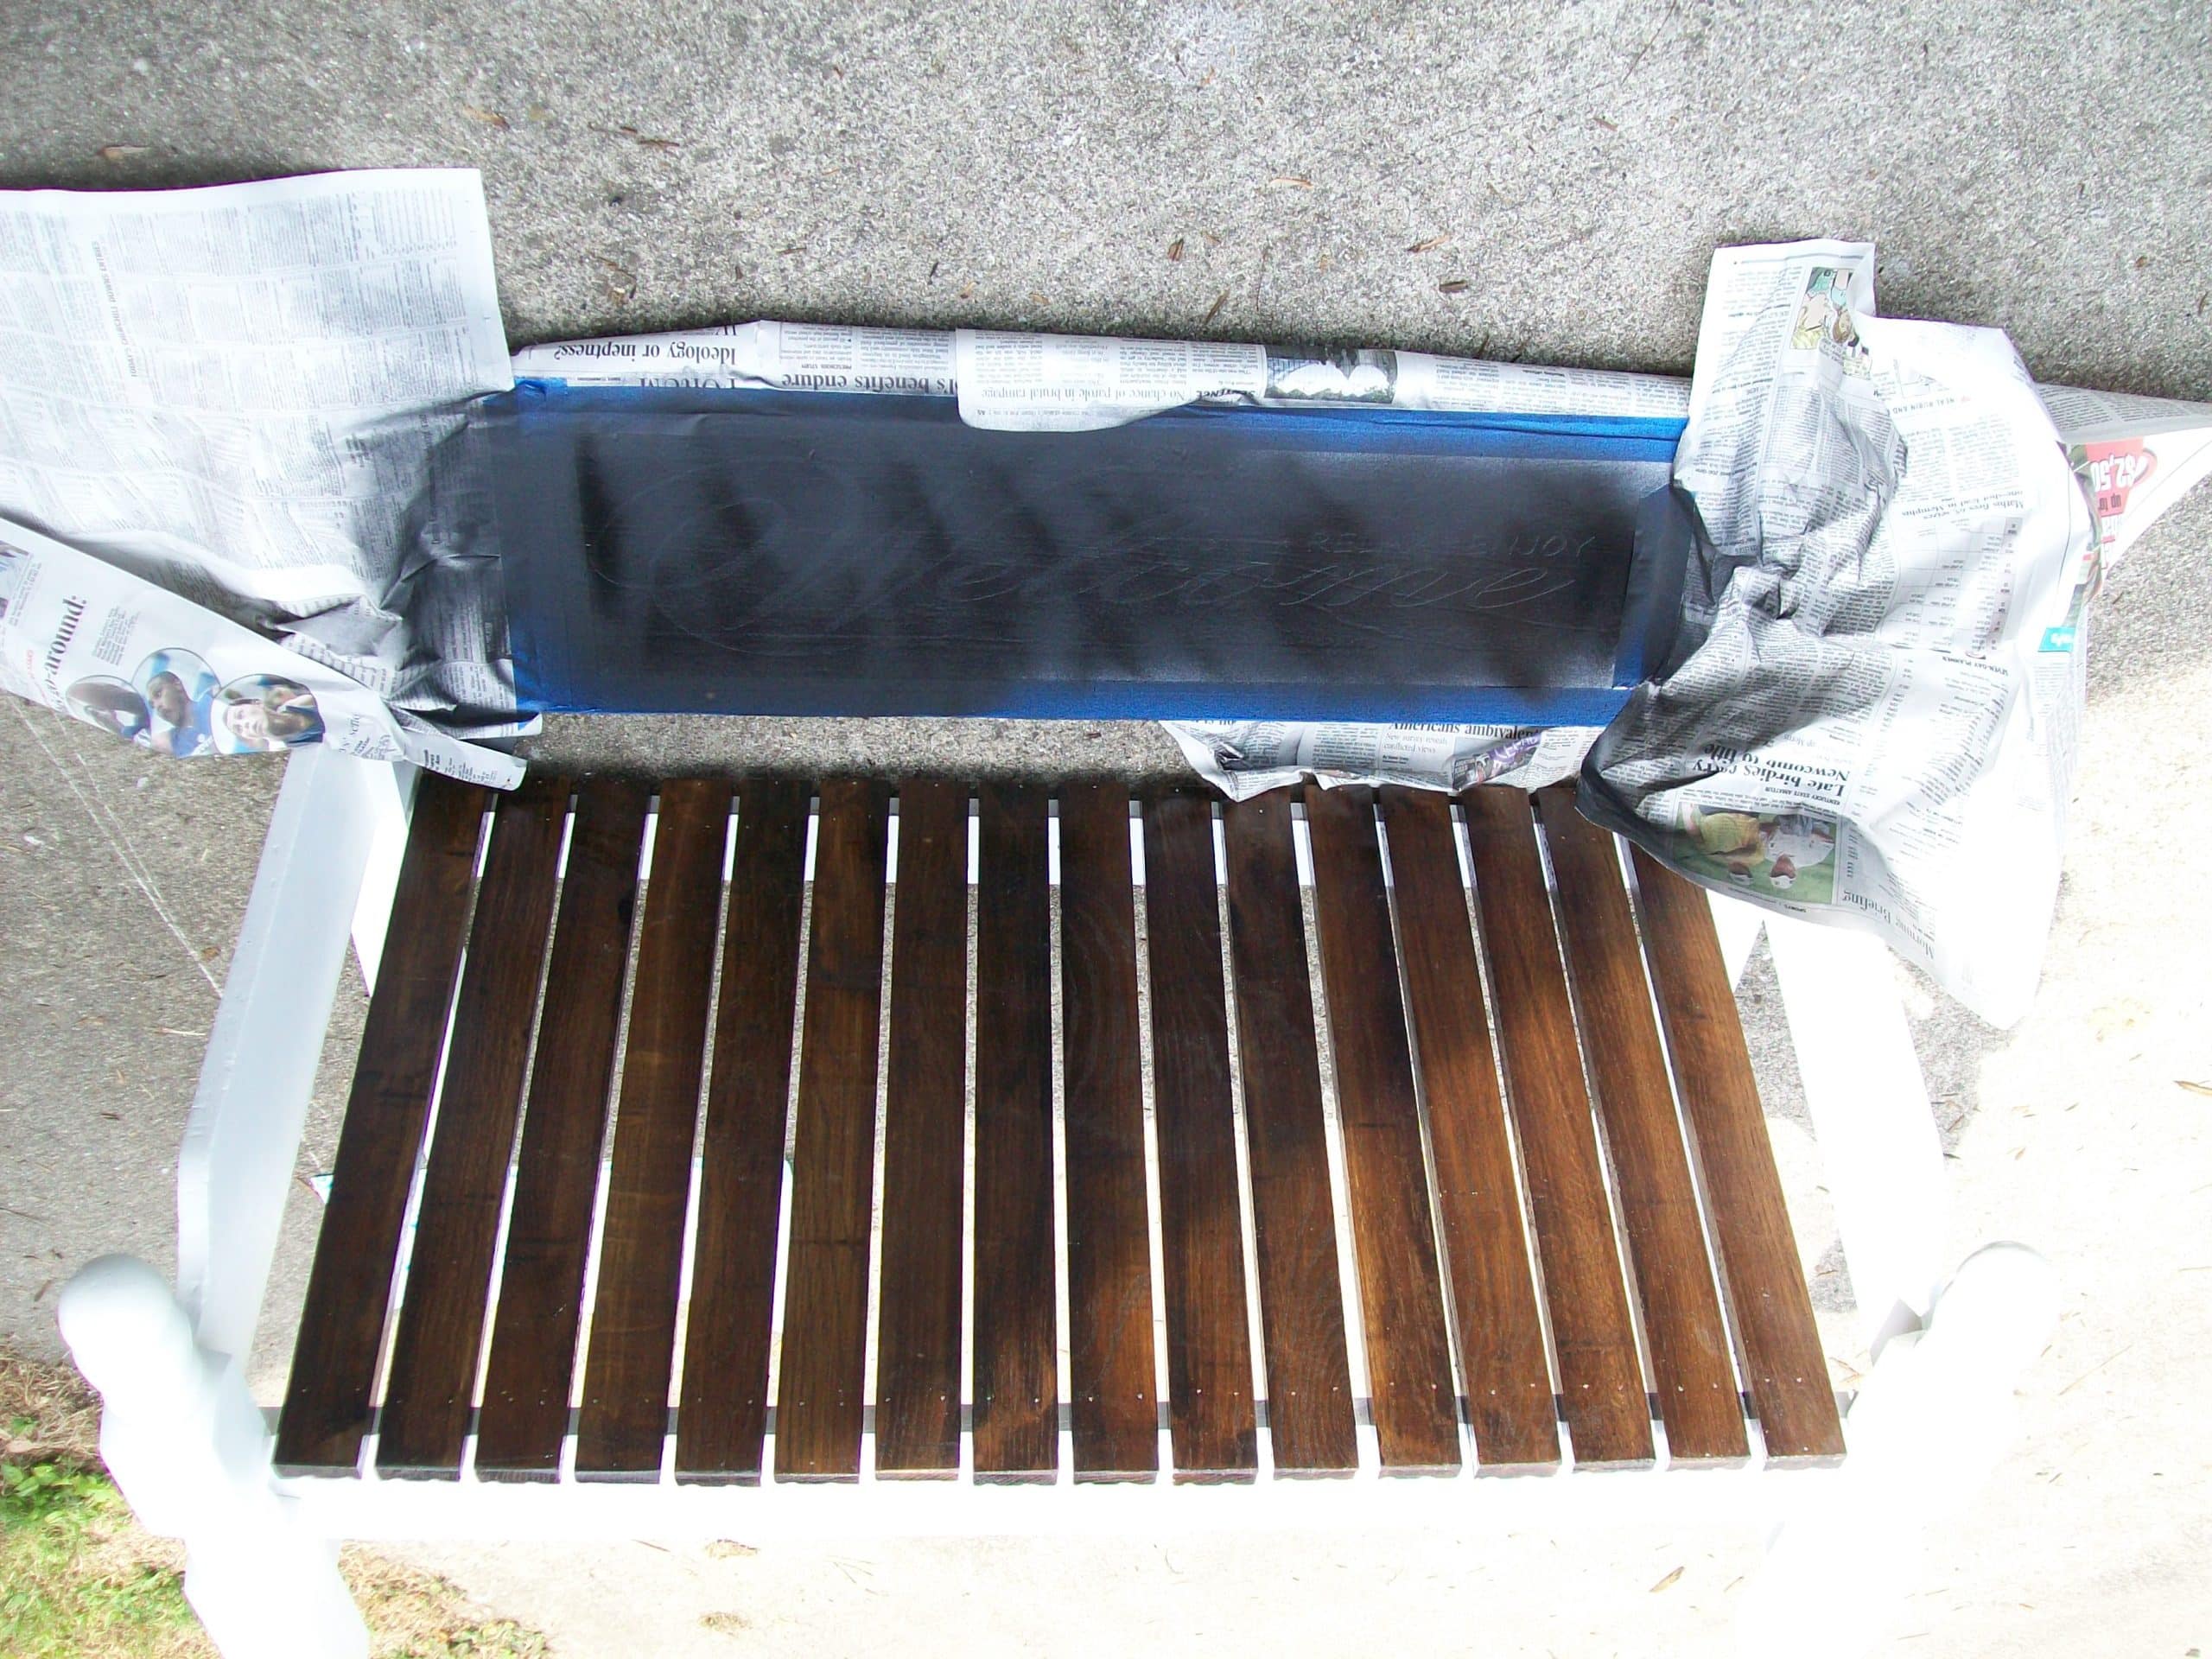
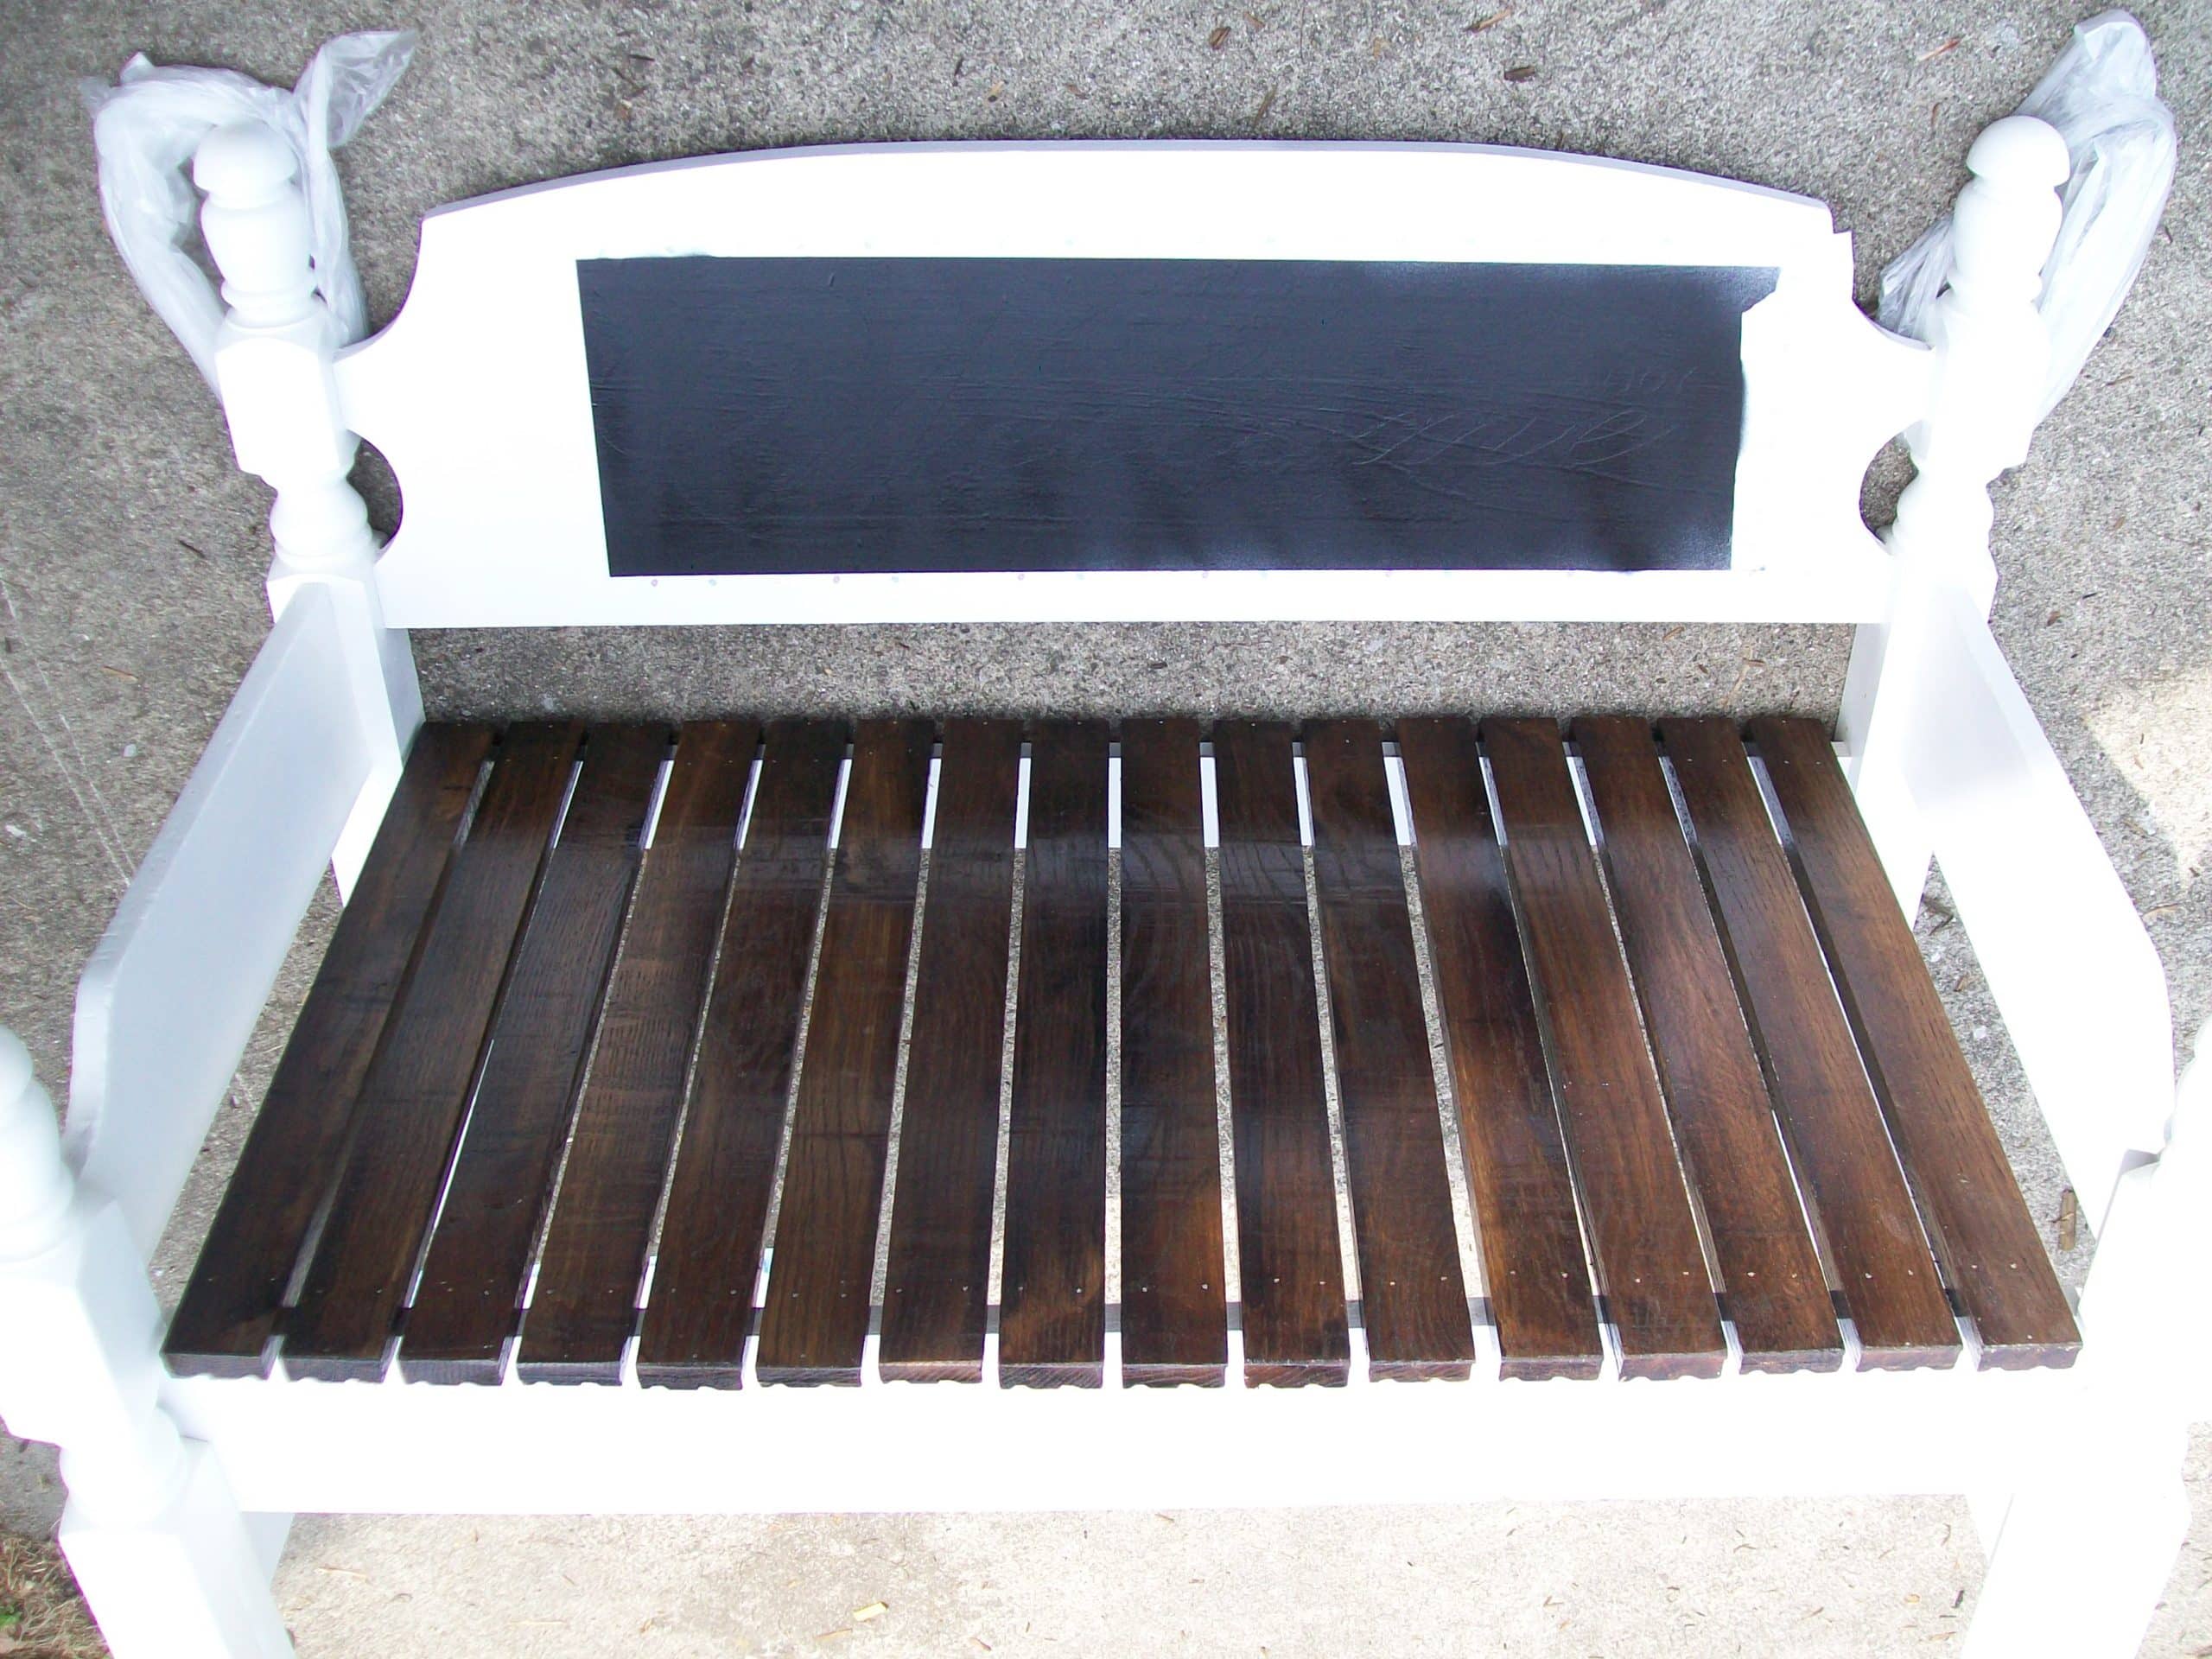
Speaking of the seat, this was the most work we have ever put into a seat. It is hardwood flooring that we (cathy) sanded off the finish, and we then stained with dark walnut. It was a honey oak color and I thought it was too light to use with a white bench.
Spray paint contact paper stencil onto headboard bench
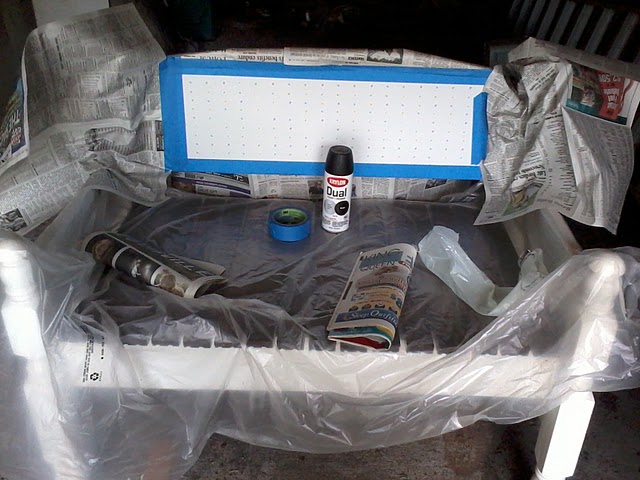
I used plastic and Scotch Blue painters tape to protect the bench from overspray. A krylon spray paint with primer and paint in one was used to spray the stencil. It worked fabulously on this project!
Light coats of spray paint on stencil
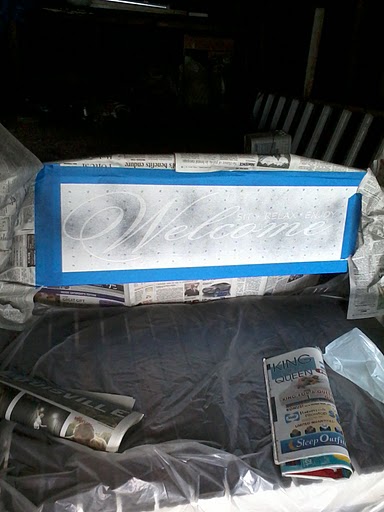
I started by spraying VERY light coats so that I didn’t have “bleed” happening under the stencil.
Then I continued with several more very light coats, letting each coat dry in between.
The last coat I applied a little heavier, but I laid the bench down, just to make sure there were no runs, drips, errors or bleeding. I had already removed the plastic when I remembered to take the picture.
Removing all of the plastic and tape was tedious, but a necessary step for sure. I had used small garbage bags to protect the posts of the headboard.
Easy spray paint stencil
The stenciled bench is almost done!
After removing the contact paper stencil, you can still see the oodles and boodles.
Voila! Virtually NO bleeding under this stencil. However, you can see I did have some over spray on the right. I used the Dutch Boy Refresh paint to touch that spot up.
Stenciled Bench | Welcome
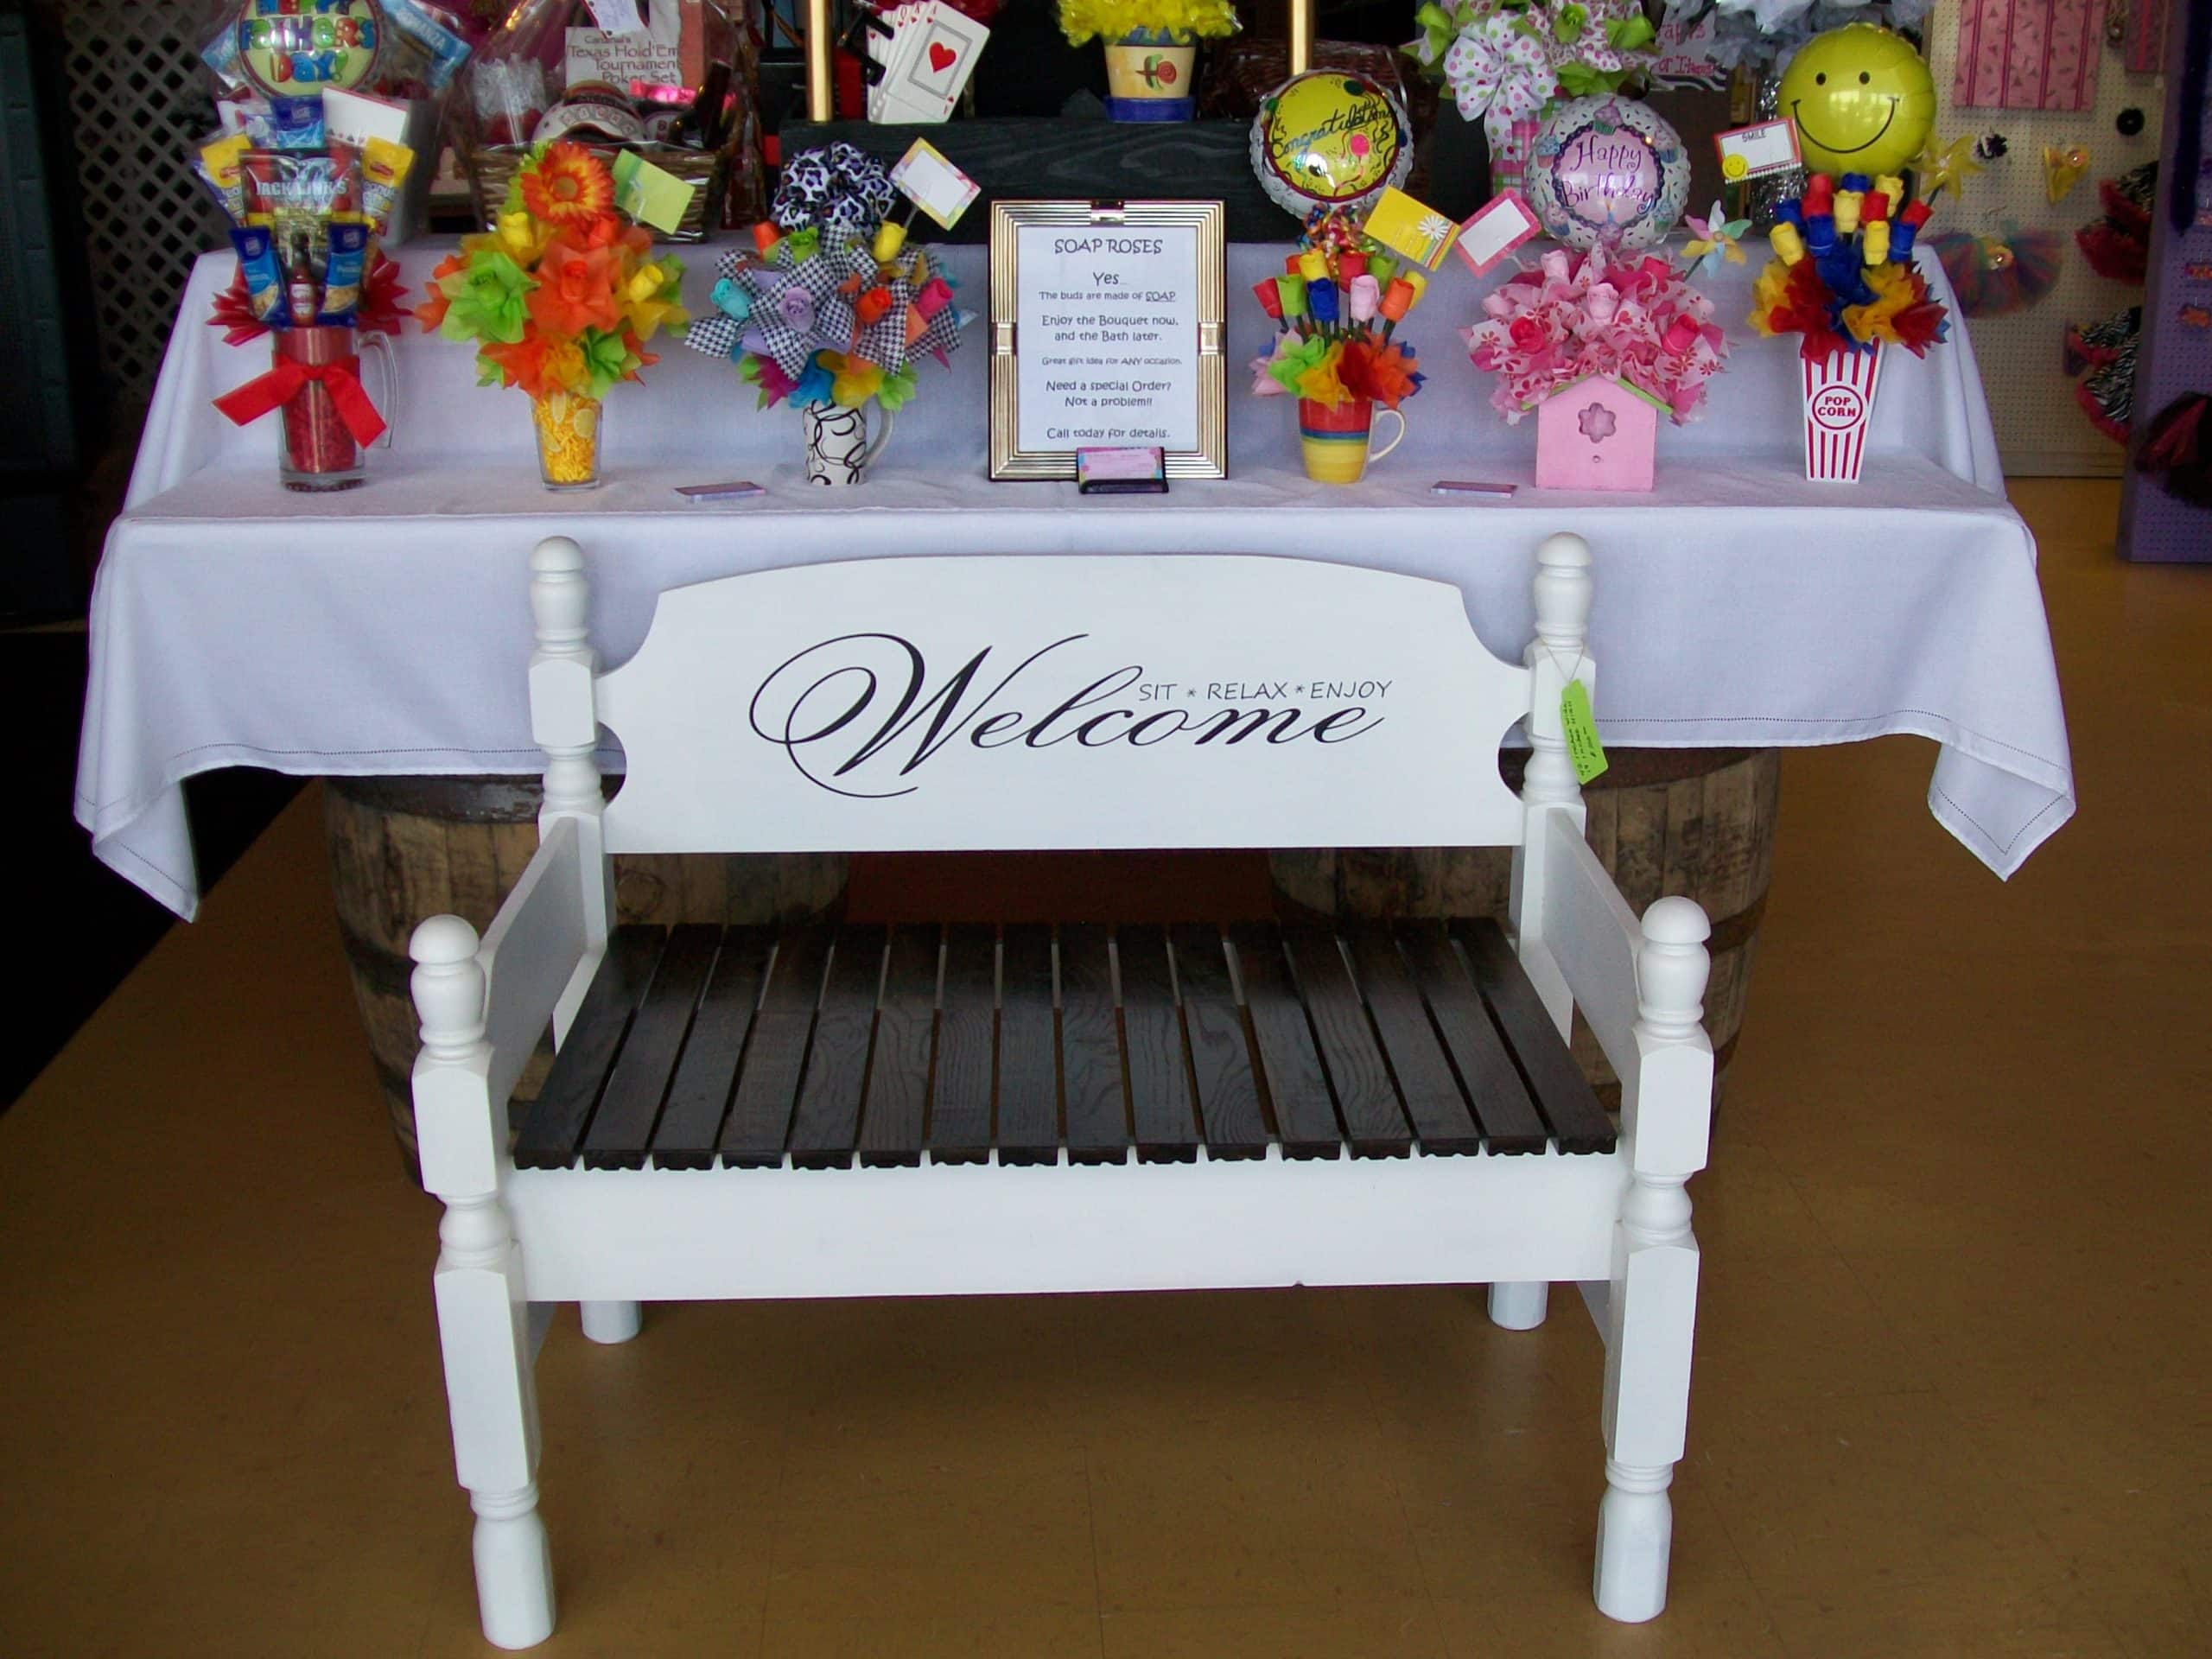
Here is the bench at Unique Creations! Did you notice it in my post about the store where my booth is? When I went up there today, Kathy had it sitting out in front of the store (outside) to display and draw in new customers! It made me smile to see it sitting there.
It’s going to be very difficult for me to make solid headboard benches without painting some kind of words on there! I love it!
See my favorite Mission Style Headboard Bench with Storage-The Complete Tutorial
gail
Pin It
See other fun benches here More ideas and benches Country Living
Sandra,
I apologize for the omission! I have updated the post with a link to another post Twin Headboard Bench Tutorial
Being hardwood flooring the planks are narrow at about 2″ each. You can space them, or butt them up against each other. It’s really a matter or what you prefer.
Thanks for stopping by! Don’t be a stranger.
gail