Twin Headboard Bench Tutorial
As an Amazon Associate, I earn from qualifying purchases.
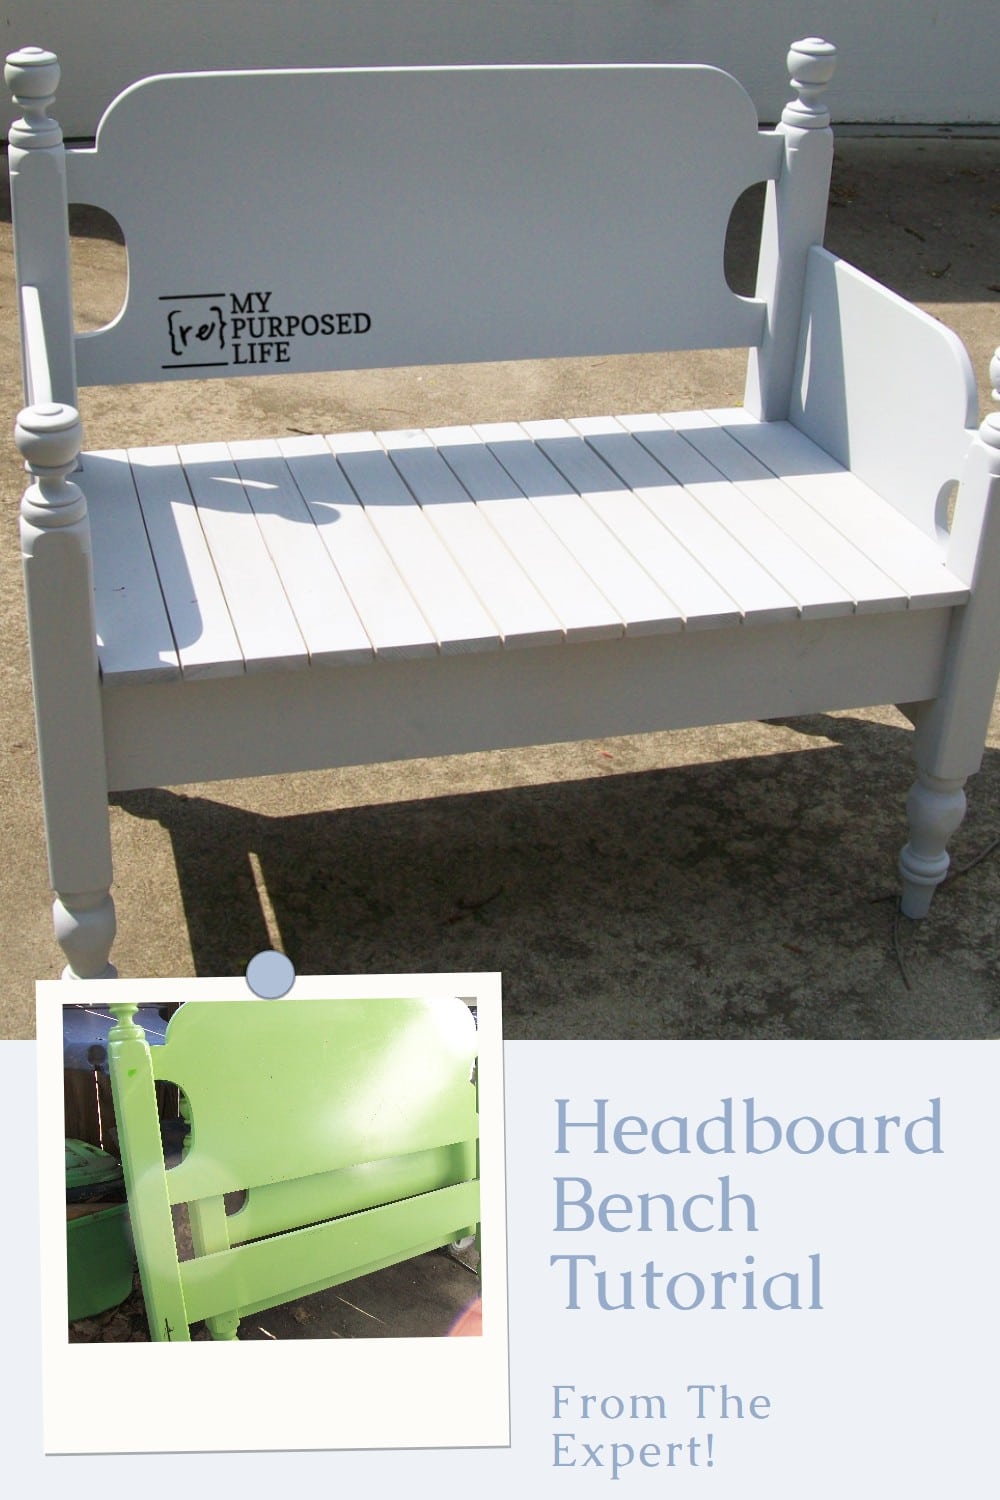
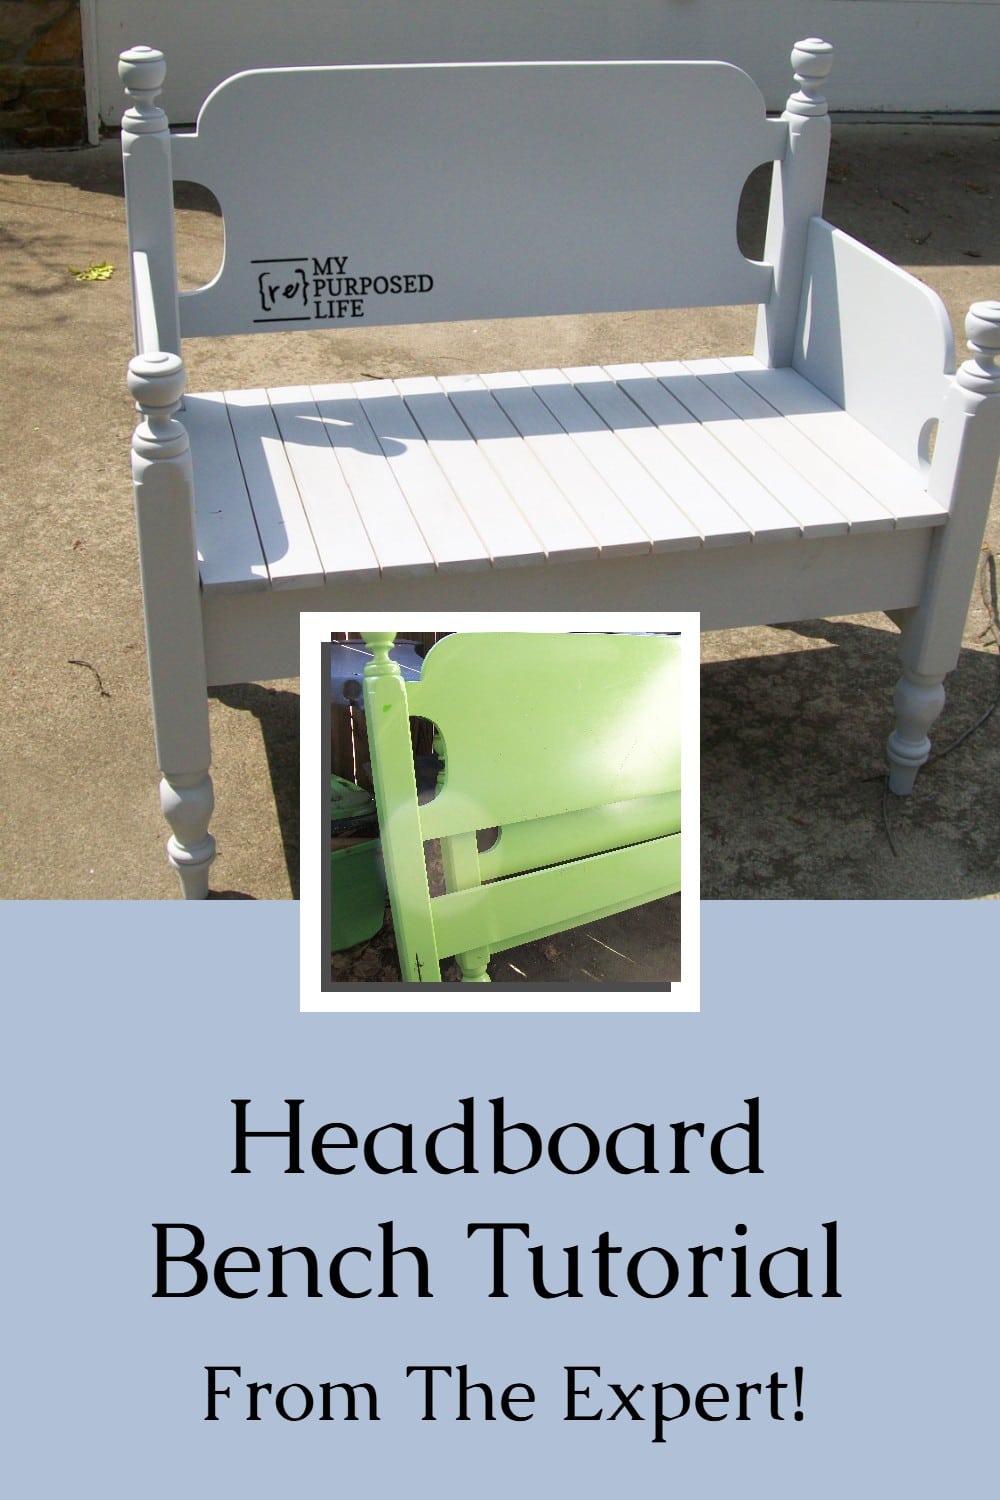

If you’ve ever found an old twin headboard and wondered what to do with it, this project is for you. In this tutorial, you’ll see how to turn that forgotten piece into a simple, sturdy bench that adds charm to any space. The step-by-step photos and tips make it easy to follow, even if you’re new to working with reclaimed furniture.
If you’re searching for an in-depth headboard bench tutorial packed with tips and pictures, you have landed in the right place.
I’ve built over 50 repurposed headboard projects, including more than 30 headboard bench projects. Many people prefer bed benches made from full-sized beds. I like the look of twin bed benches. They are very customizable depending on whether you use the footboard for the armrests or make your headboard bench armless.
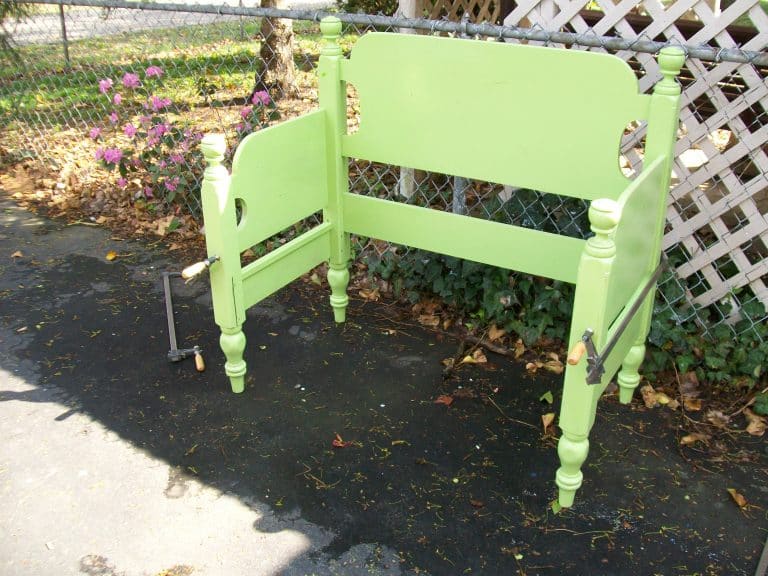
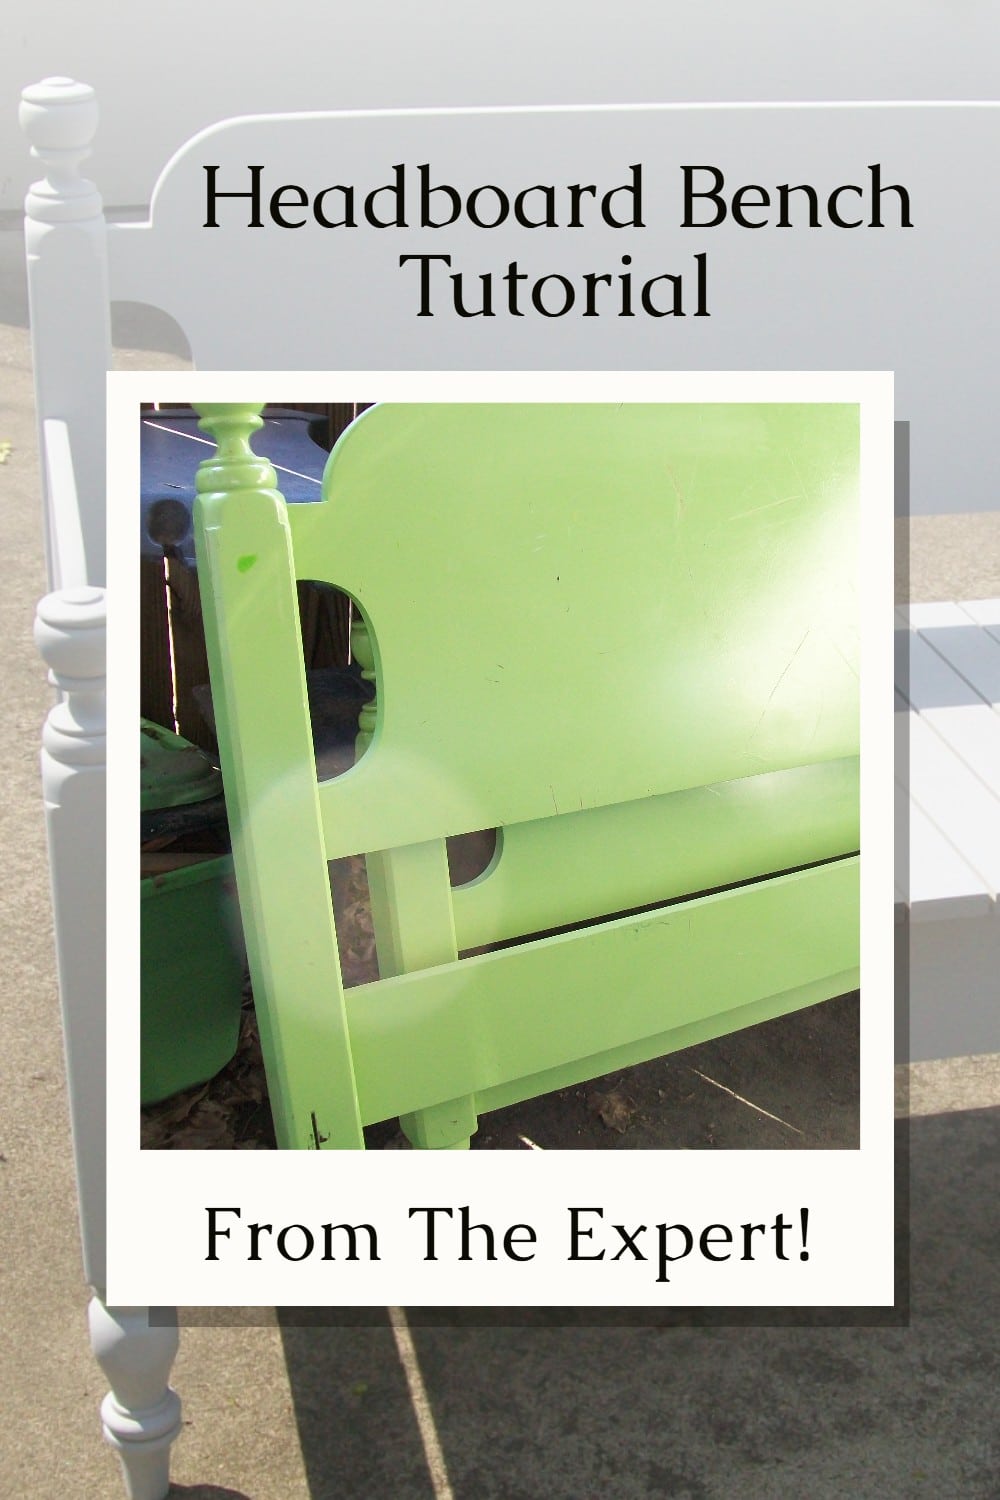
Twin Headboard and Footboard
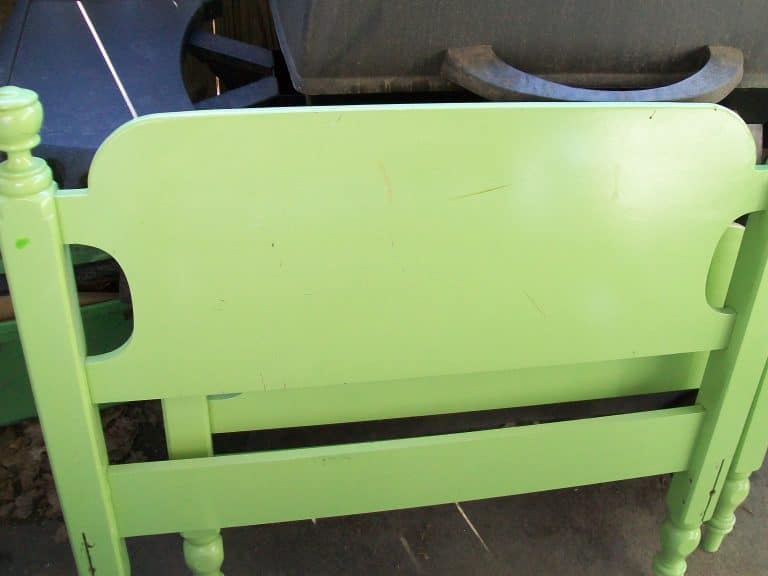
A friend asked me to turn this green bed into a twin headboard bench. I couldn’t say no. While making this bench, I thought it would be the perfect headboard bench tutorial article. Follow along with the detailed pictures and my directions to make your own twin bed bench.
Tweak the directions slightly if you’re building a full-sized or king-sized bed bench.
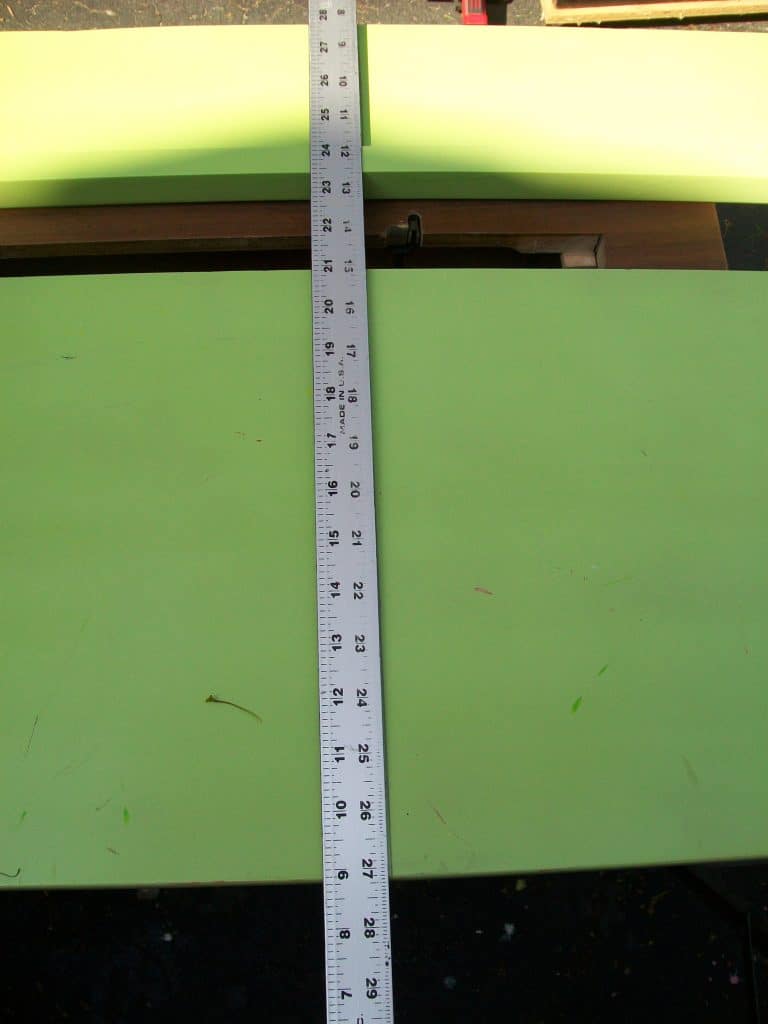
Measure Footboard
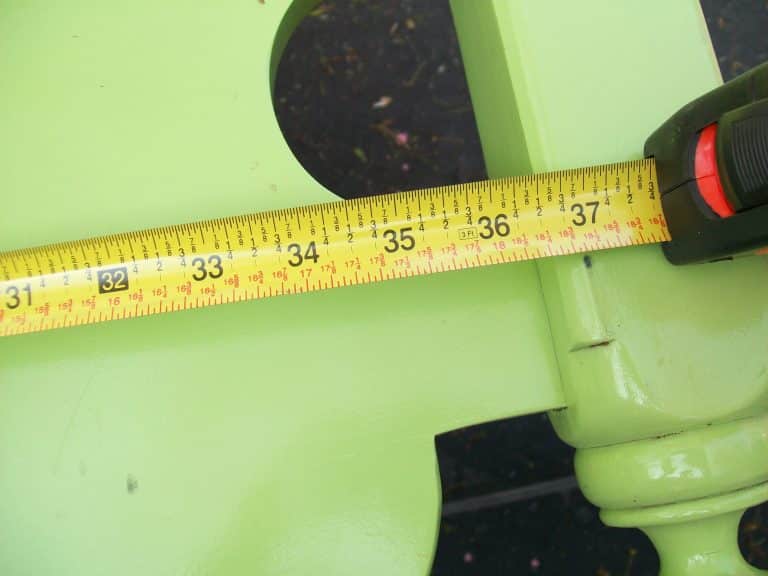
When making a headboard bench, the first thing to do is to measure the footboard. On a twin bed, I cut the footboard in half.
If you’re making a larger bed bench, cutting the footboard in half will make your headboard bench too deep.
In the image above, you can see that I will be marking the middle 18 1/2 inches from the bedpost. When making a larger bench, this is still a good depth for the armrests.
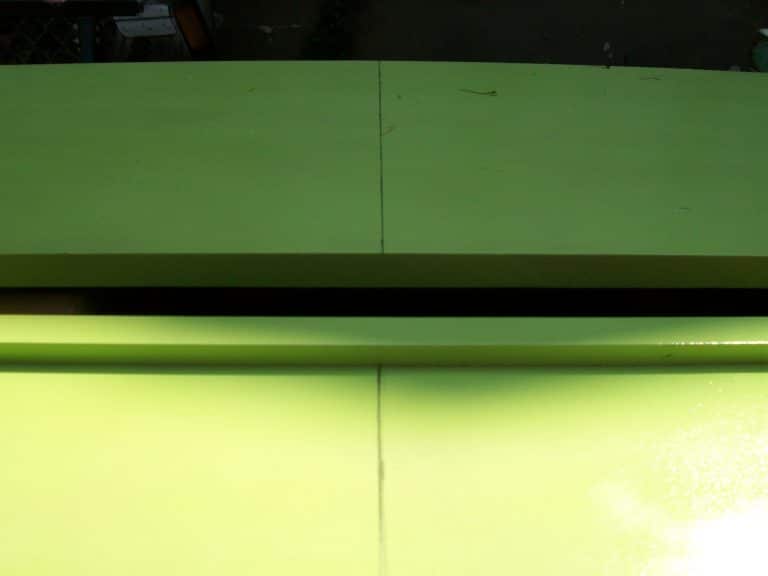
Mark The Center of The Foot Board
After measuring from each side to find the middle, I used a yardstick to draw a solid line.
Cut the Footboard in Half
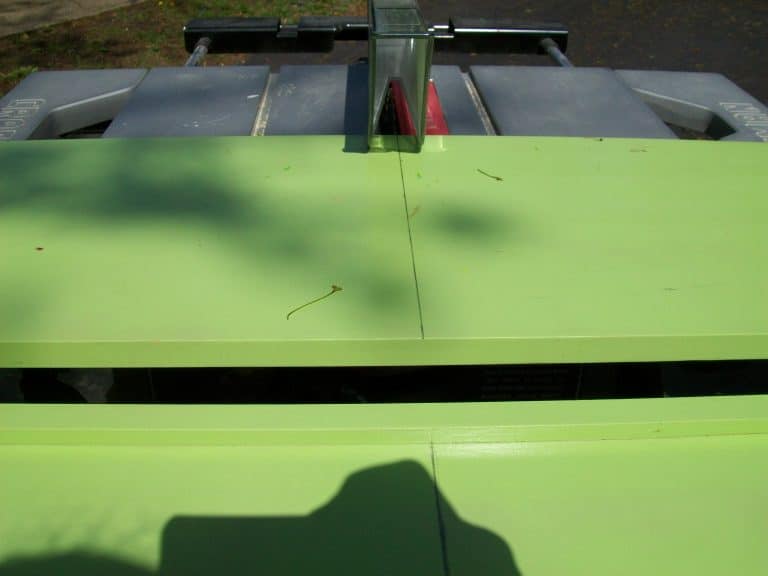
The table saw is the easiest way for me to cut it in half. You can use any saw you prefer. If you’re a novice, you can use a jigsaw or a circular saw.
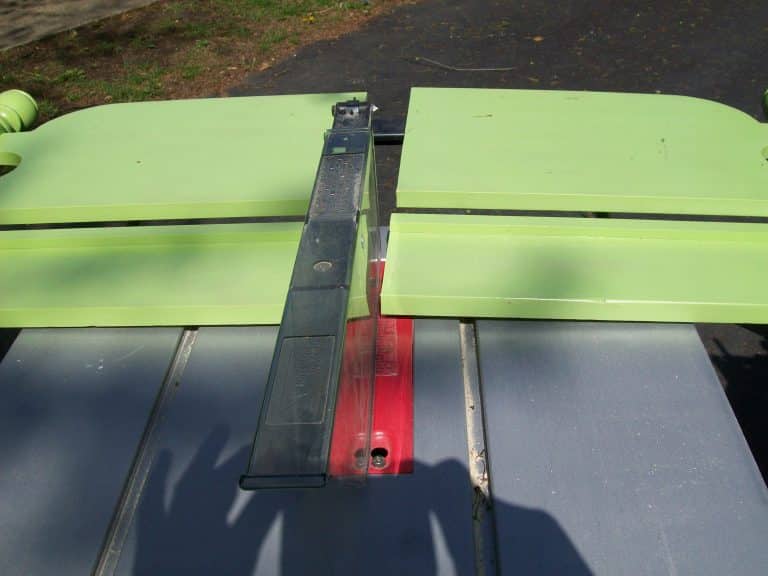
Remember, I’m working with a twin bed. Once the footboard is cut in half, it will be much easier to handle, especially if you are modifying this headboard bench tutorial for a larger bed.
Clamp Footboard in Place

I have one place to make benches or anything that needs to be level. This is the only place on the driveway that I can make it perfectly level.
You can see that I have clamped the sides (footboard cut in half) to the headboard (back). I call this a “dry fit.” I recommend ensuring everything fits before you attach your pieces throughout this headboard bench tutorial.
Mark Armrest Placement
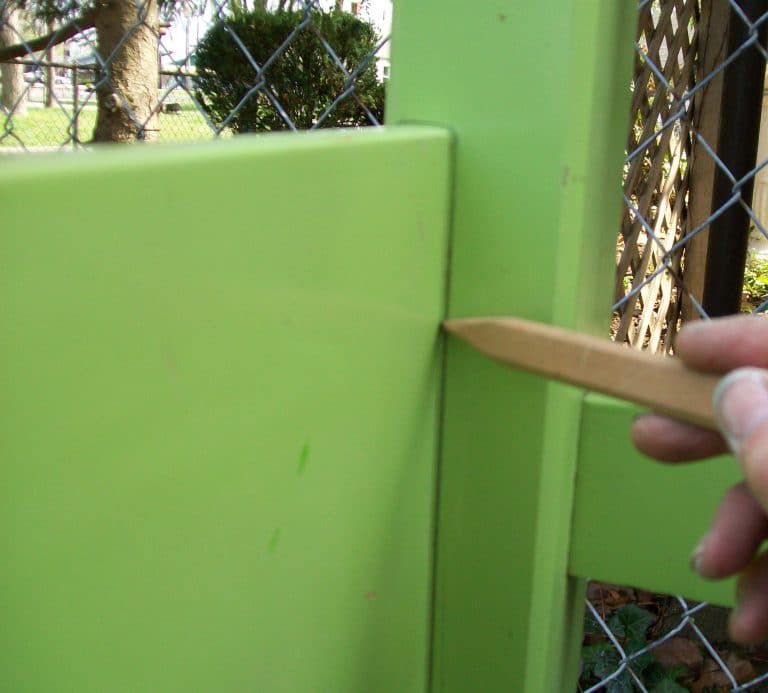
I marked the place where the footboard armrests would be attached.
Check for Level
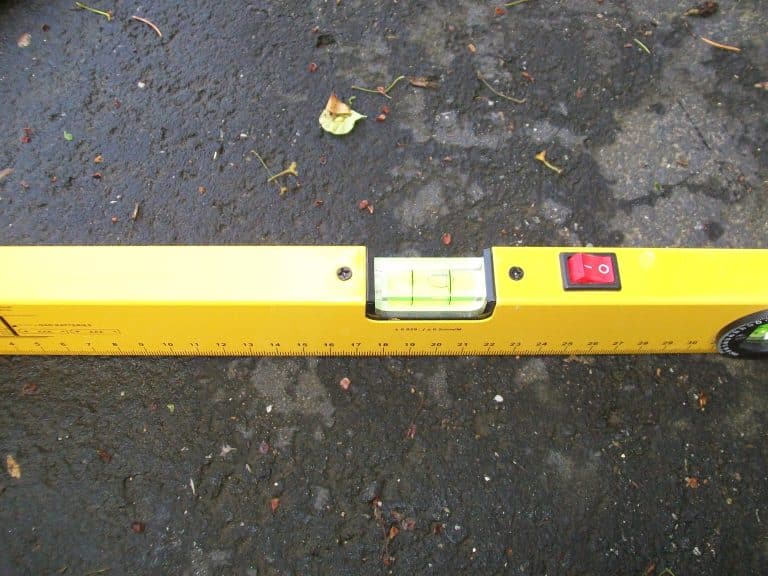
To ensure the sides are level, I check the driveway for levelness. See where the bubble is?

I make sure that the bubble is in the same place on the side (armrest)
Attach Footboard Armrests
I used my Kreg Jig to make pocket holes to attach the sides to the back. This is the first bench I’ve made this way. It is much better and easier than the old way Cathy and I used to make our benches. No glue is needed, and it really draws the pieces together.
The old way we did it, in the beginning, was by drilling pilot holes through the back and securing the armrests with screws from the back into the narrow piece of the armrest (footboard).
When using the pocket holes and filling them before painting, there are no obvious construction issues.
Install the Front Brace
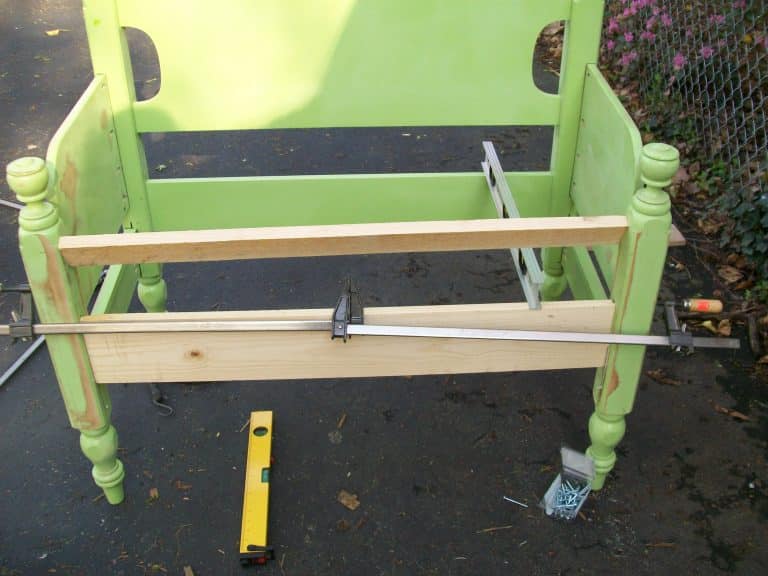
Most likely, your front brace will measure from bedpost to bedpost like the original board on the headboard.
I used a 1×6 for the front brace. I use two clamps because my clamp is not long enough to reach from one side to the other. Genius? Yeah, I think so!
The scrap board at the top helps steady everything while it is secured with pocket hole screws.
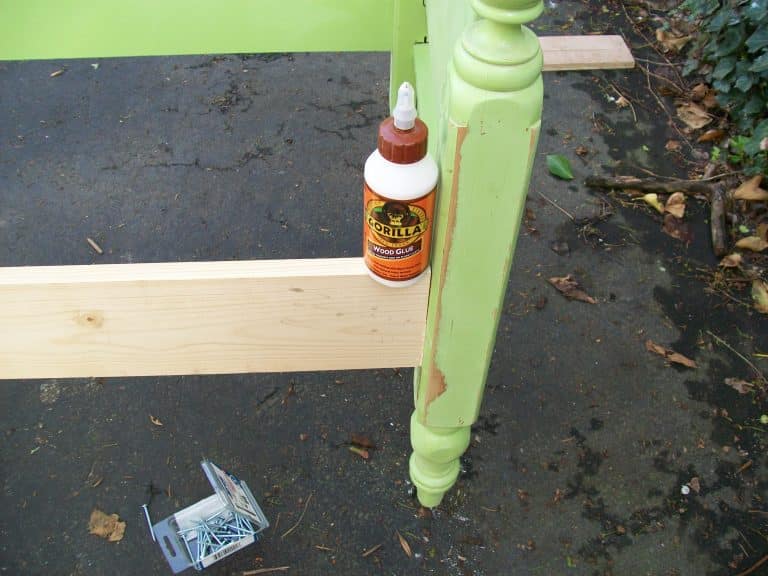
I used my Kreg Jig for pocket holes and supplemented with Gorilla Wood Glue for extra hold.
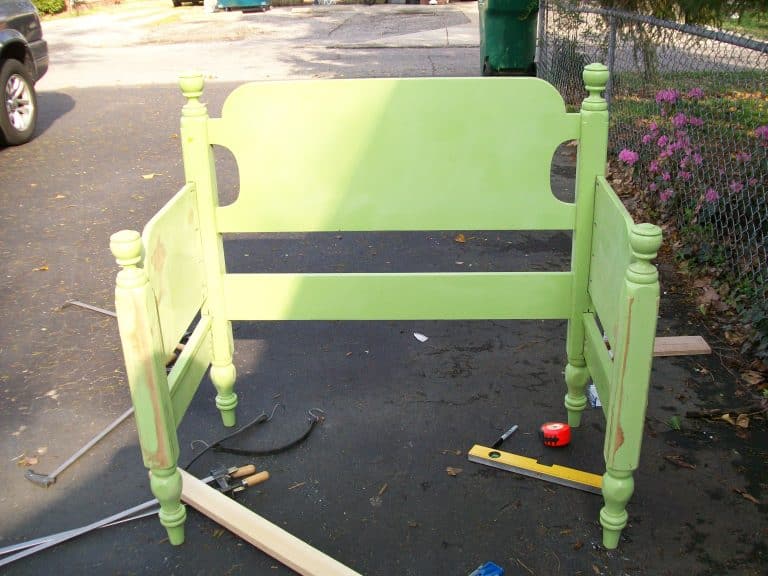
Headboard Bench Tutorial | Basic Construction

No matter the size of the bench you are making, this is the basic construction of a headboard bench.
You can see that I sanded the green paint. This paint was very glossy, and I knew it would be difficult for the paint to “stick” to it.
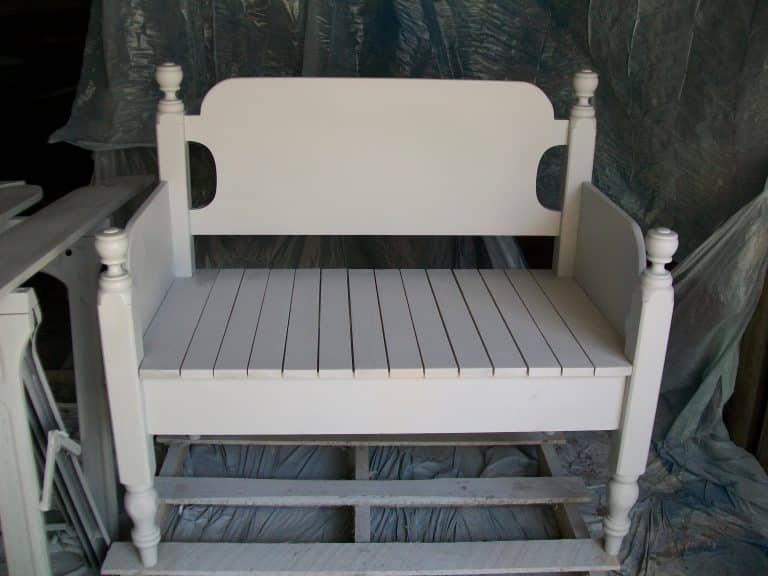
Installing a Wood Plank Seat on a Headboard Bench
Because I was making the bench for a friend, I bought 1x2s for the planked seat. I cut them to size and laid them across the seat to see how I would place them and space them. This is a dry fit of the plank seating.
You can see that I filled the “slots” from the original rails with some spackling.
Although this headboard bench tutorial shows how this bed was transformed, the design is not set in stone. That’s the best thing about doing it yourself. You can make the changes you want to.
Generally, I use reclaimed wood for the seat, including fencing and wood flooring.
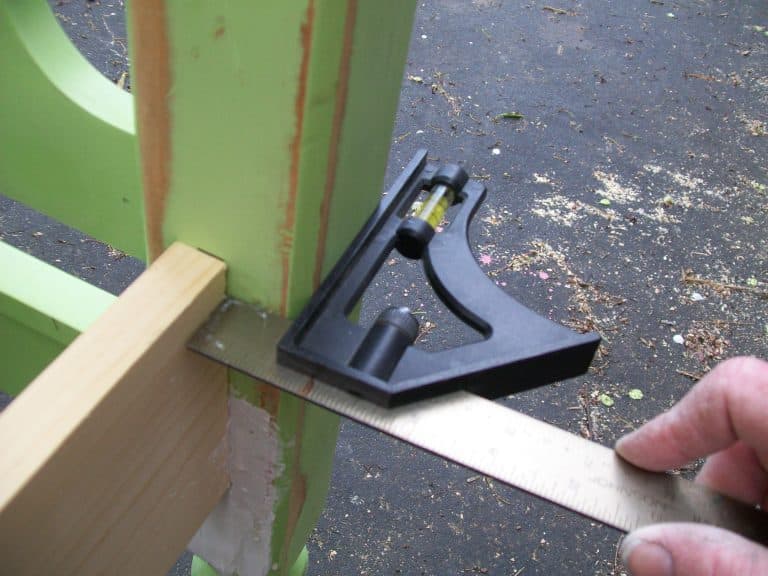
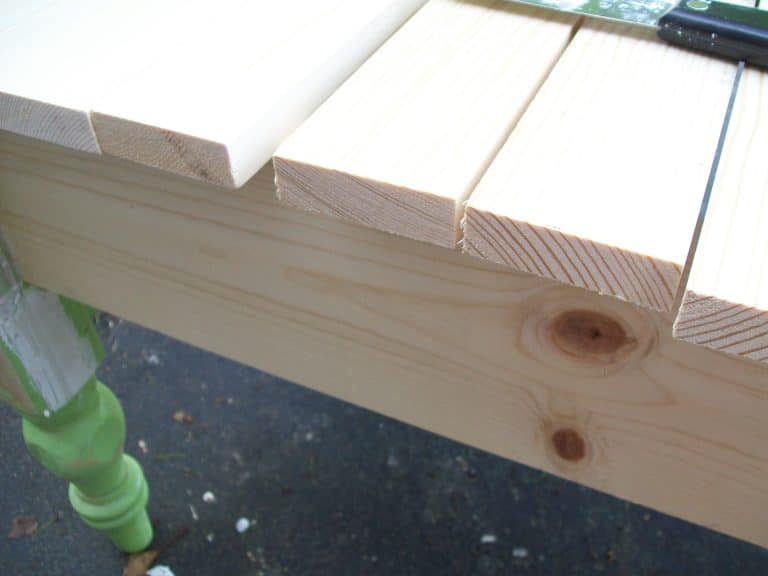
I use my combination square to set the depth of the planks.
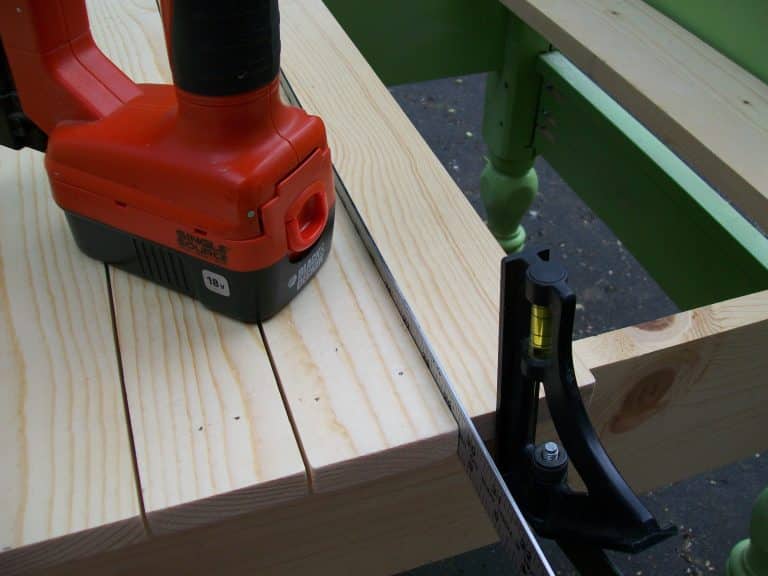
I used a metal yardstick to space the planks an even distance apart while using the combination square to set the “overhang”. Doing this ensures that each plank is uniform and equidistant. I used my 18-gauge nailer to nail the planks to the support braces.
Related Content: 50 Headboard Bench Ideas
Painting a Headboard Bench
I used my paint sprayer to apply a primer. Do you love how it looks so far?
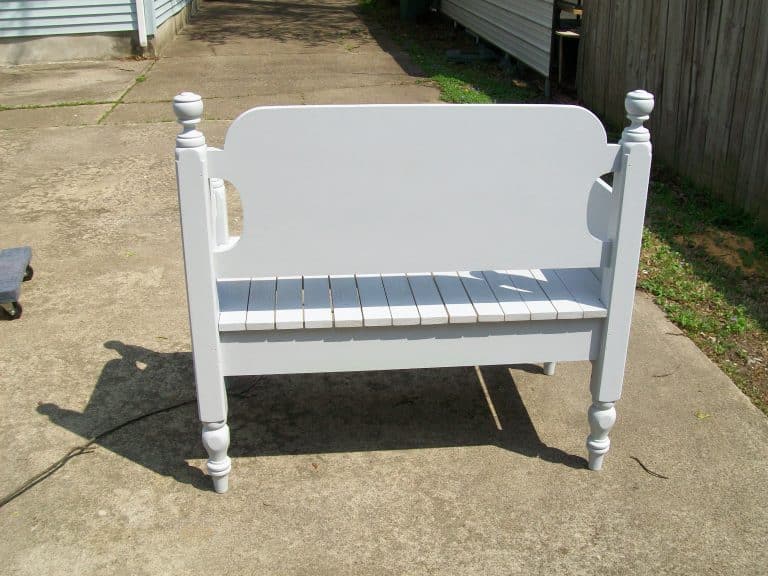
The twin headboard bench looks just as good from the back as it does from the front.
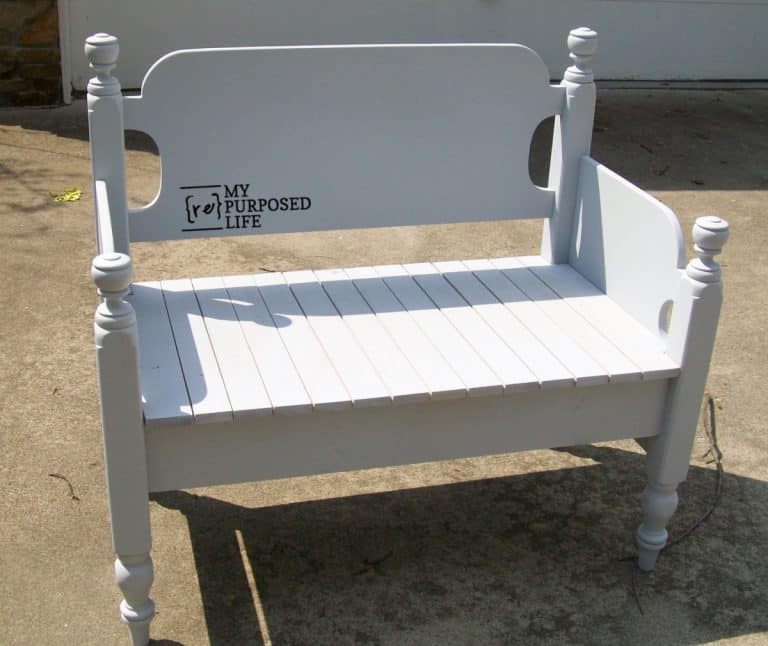
Okay, here’s the funny thing. This picture is still only a primer. Somehow, I did NOT take a picture of the finished bench! I will tell you that I painted the bench the same color as Jan’s Shutter Bookshelf.
I hope you learned something from this twin headboard bench tutorial. As I said, I’ve made benches from all kinds of beds. My friends and I have assembled a 50 Headboard Bench Projects collection.
And that’s it. A plain twin headboard can be transformed into a bench you can proudly use or display. It’s a great feeling to save something from the landfill and give it a new purpose. I hope this project inspires you to look at old furniture in a new way and start your own repurposing adventure.
More Ideas For You:
- Horizontal Plank Seat Option
- Full Size Bench With Storage in the Seat
- Spool Bed Bench Video Tutorial
- How to Add Height to a Bench
See my favorite Small Twin Bench With a Shelf (made from a tiny bunk bed)
I really like what you have done with these old beds! You’ve inspired me todo the same with the twin in my rafters. I am also inspired to get up and walk my dog earlier! thanks so much, Pam McD
Gail, you are DANGEREUSE with tools!!! Beautiful bench! I bet most of your neighbors wish their hubbies were half as good as you with a tablesaw! I always love looking at your projects.
Hi Gail! Tonya at Hillbilly Handiworks sent me and man! I’m glad she did. You do great work! I’m anxious to search your blog and see what other goodies you have to share.
Very creative idea!
I would have never thought of using it to make a bench.
Great job!
Great job! I love it!
You make it look easy! I love these benches. I’ll bet they’re big sellers.
Gail — what about a crib? Could that work? I see them all the time on craig’s list and wonder what I could do with them???
That is absolutely insane! I can’t believe that you did that with that!
I love it. I just happen to have a single bed set in the shed. Might drag it out & see if I can manage to come even a teensy wee bit close to what you have at producing this masterpiece! Love your work!