Pretty Headboard Bench
As an Amazon Associate, I earn from qualifying purchases.
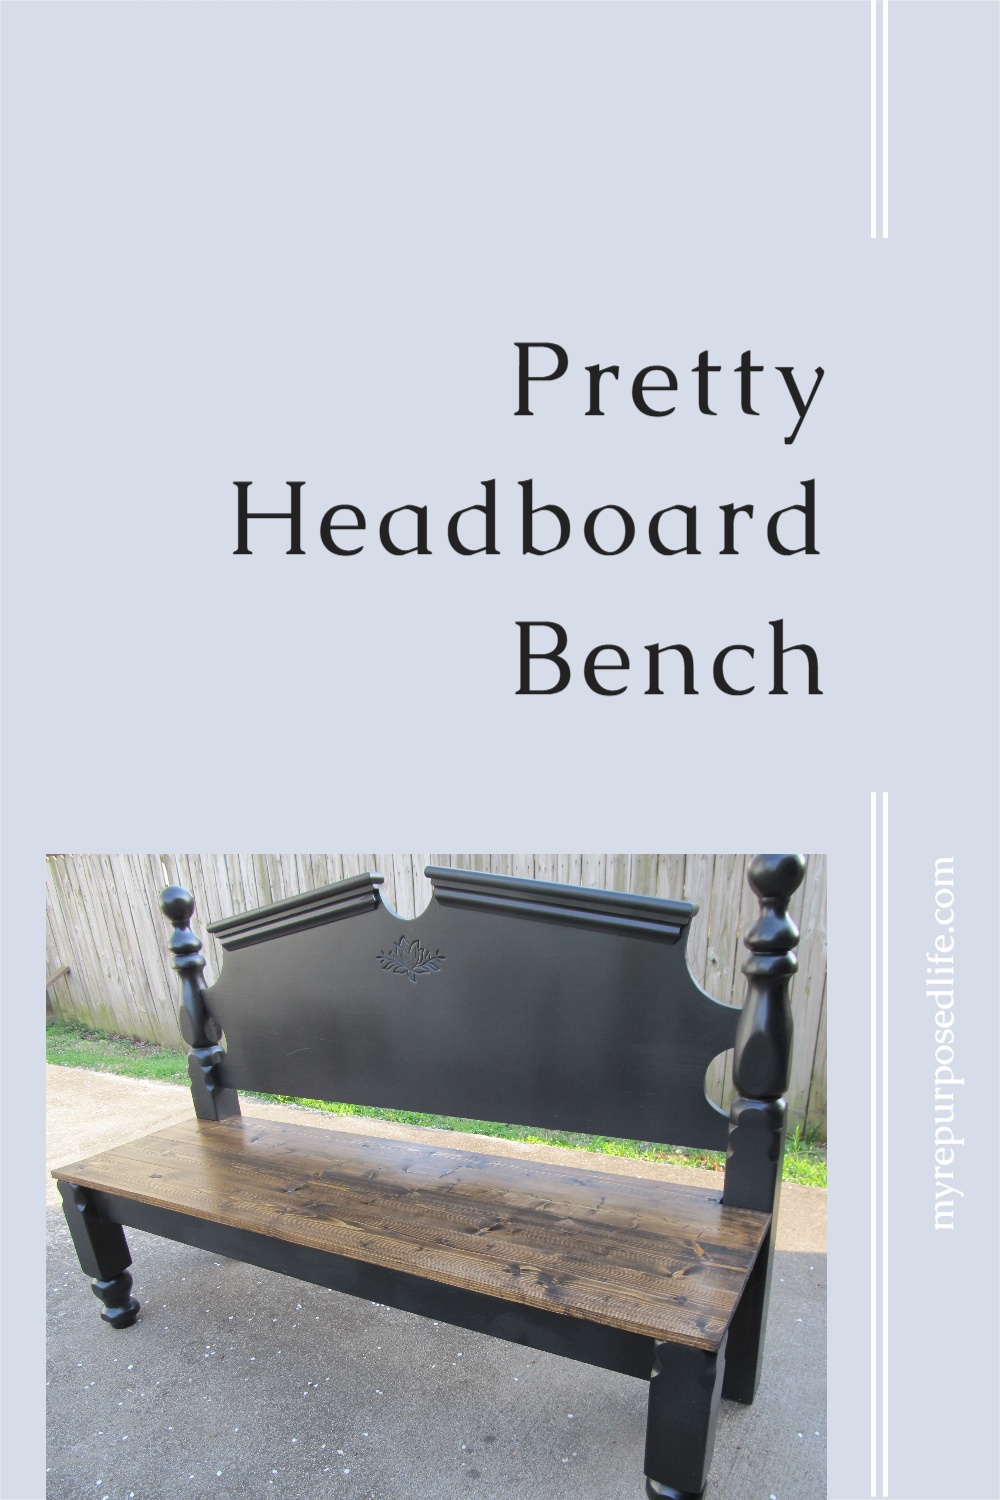
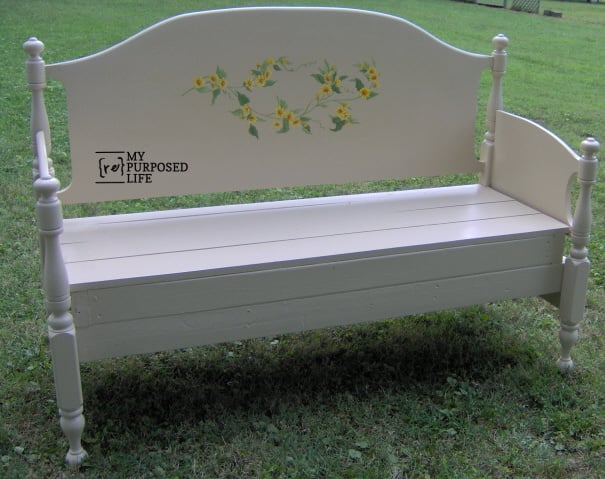
How to make a pretty headboard bench without arms.


Free headboard and footboard
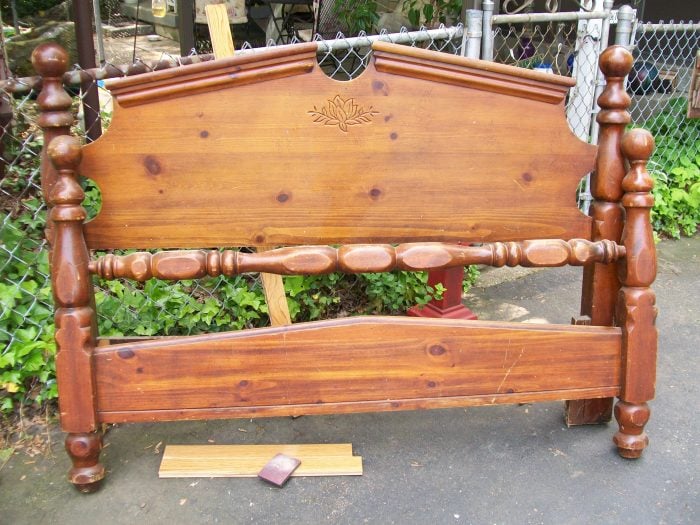
Cathy and I picked this bed up for free at a yard sale. It will become a pretty headboard bench.
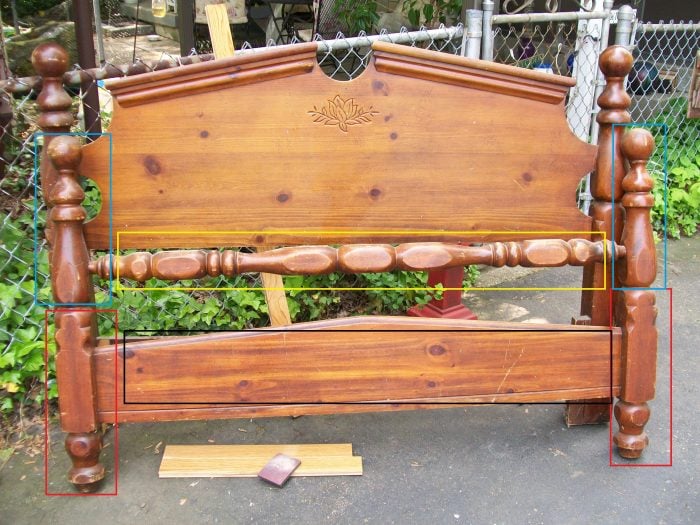
The Blue and Yellow pieces will be used for future projects. The Black piece was used for And They Lived Happily Ever After. I used the pieces outlined in red for this bench.

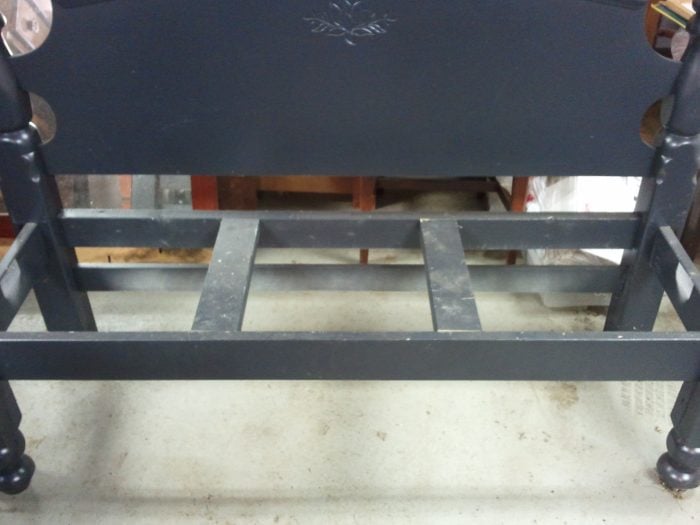
This bed had seen better days and was unusable as a bed. The side rails and the part where the left side rail (full size) goes were missing. This bed was for a full or queen set. Cathy and I typically cut larger beds in half to make corner benches because they are easier to handle and re-home.
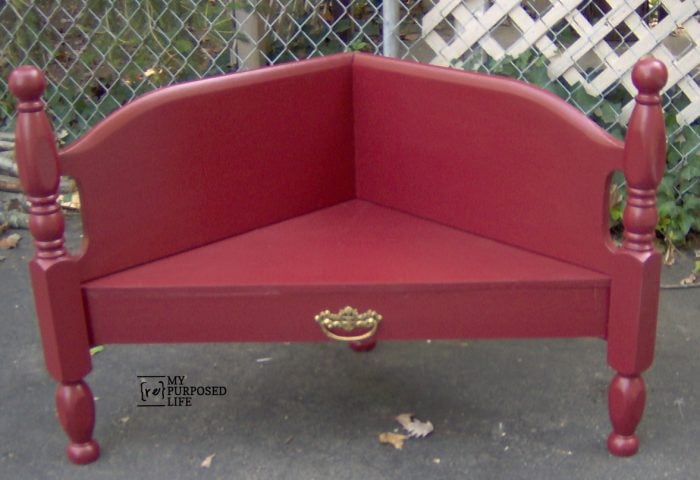
Corner Benches Made From Headboards
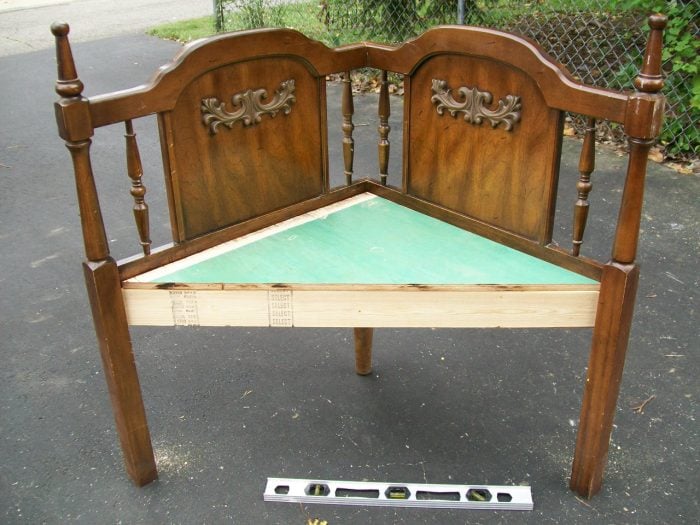
We do that because when we made a full-size bench, it was so heavy that she and I could move it from place to place, but we could not lift it into the truck by ourselves. It was too BIG!

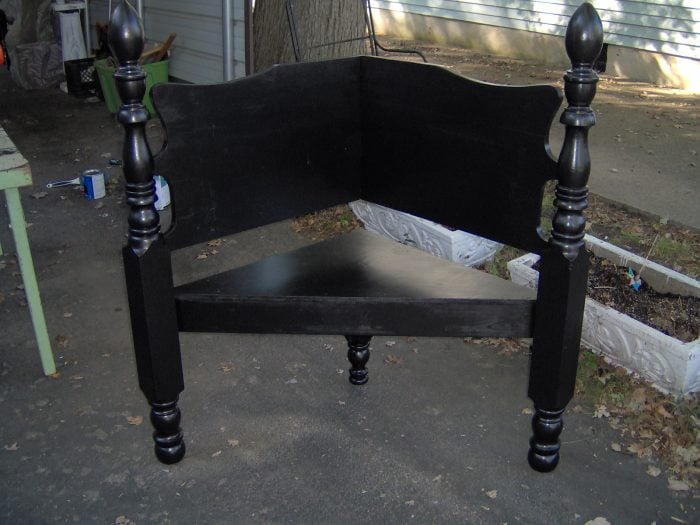
King Headboard Bench without Arms
large maple headboard bench
See this extra large maple headboard bench? It doesn’t look too big or too heavy, but it was!
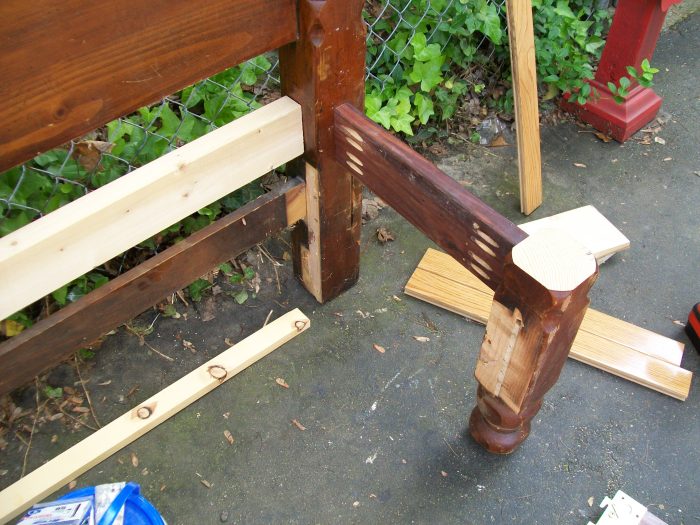
I talked Cathy into not cutting this latest bed. Let’s make it armless, and she agreed. As I was looking for something to use as front legs, Cathy suggested we use the original legs from the footboard. GENIUS!
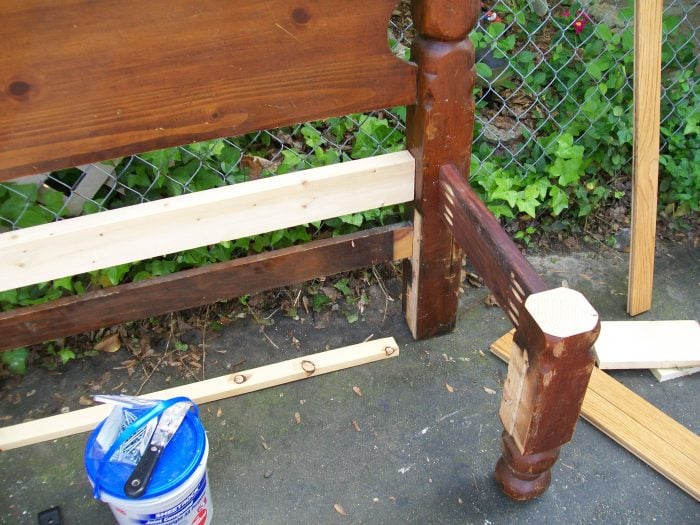
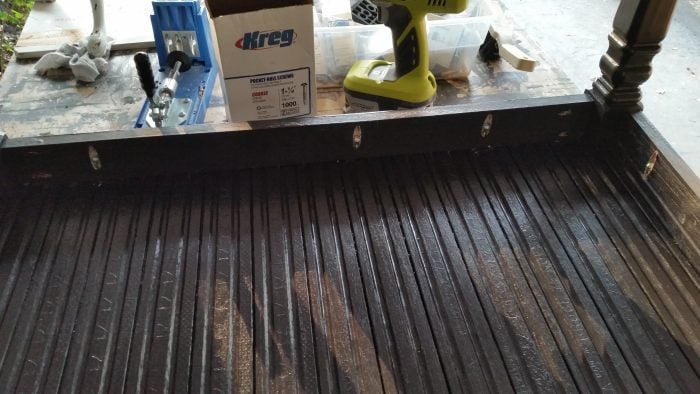
You can see where I cut the front legs off with the compound miter saw. We used side rails from another bed for the left and right side and the piece across the front. The flimsy piece in the back would not be strong enough to support a seat, so we added a 2×4. I have started filling the pocket holes that are NOT visible with drywall mud and those that are visible with wood putty.
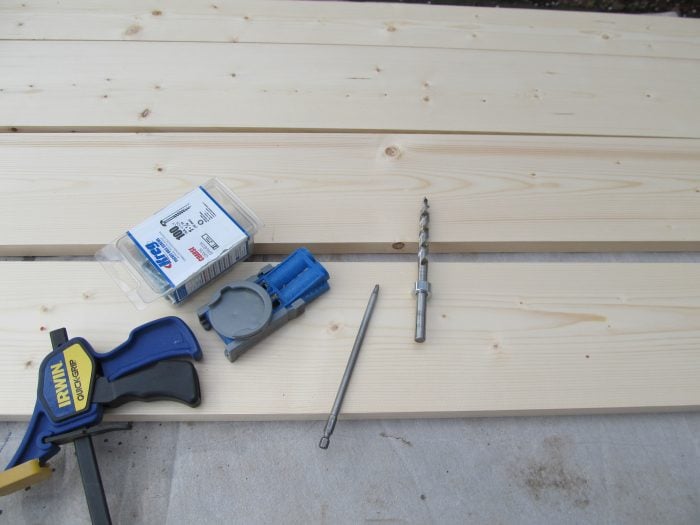
You can see that we used our technique of pocket screws using my Kreg Jig Jr.
Constructing a Headboard Bench
One last thing to do is add a front cross brace by adding more pocket hole screws.
Using a Paint Sprayer on a DIY Headboard Bench
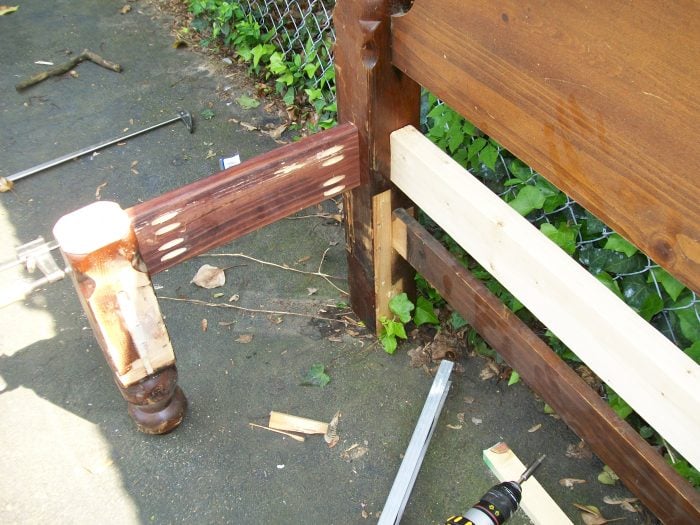
So, we got a little busy and forgot to take progress pics. You can see that we added the side rail across the front. (we did this with the pocket holes)
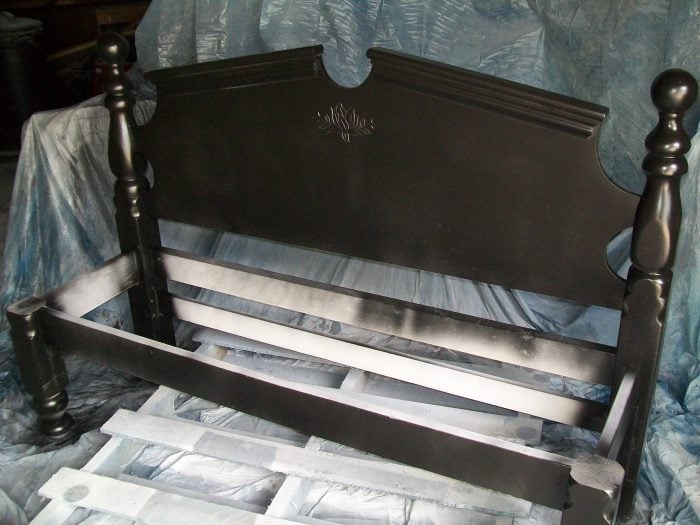
Then, it was off to the paint booth for a smooth coat of black paint!
Here, you can see that we added a 2×4 for extra support across the middle.
Can You Use Hardwood Flooring for a Headboard Bench Seat?

This bench will have scrap pieces of hardwood (laminate?) flooring.
I’ve shown you a lot of benches today. Which is your favorite? I have to say that I didn’t like this bench the whole time we worked on it. It wasn’t even on my top five list after I got the primer on it. I only started liking it after I began to painting it black!
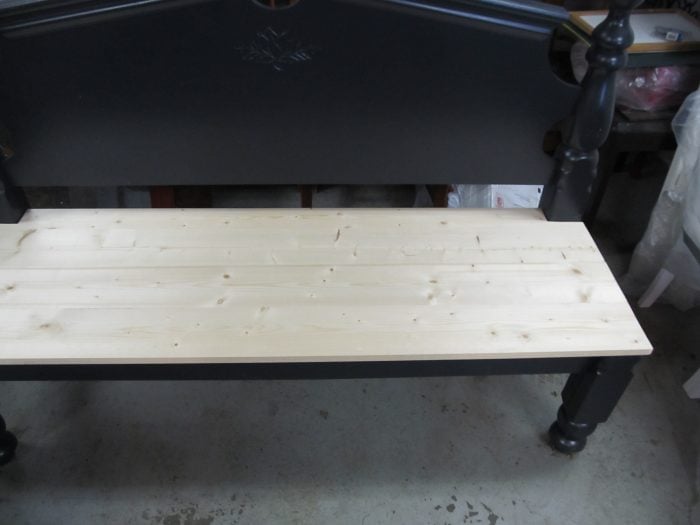
Assembling pine seat for bench
UPDATE:
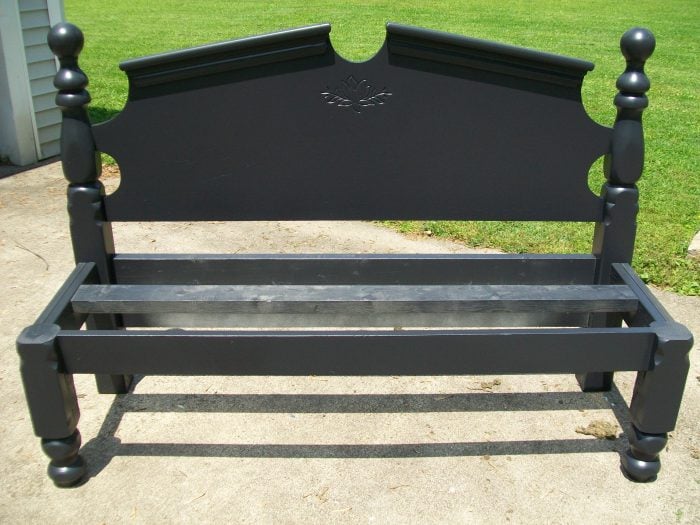
The bench is now finished.
I changed my mind about the seat. Instead of flooring, I decided to go with planks (lengthwise).
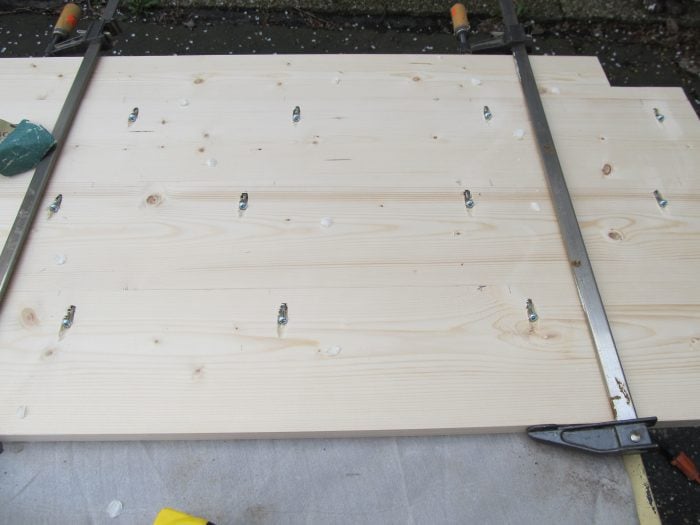
When connecting my boards with the Kreg Jig Jr, I clamped them so they didn’t shift left to right as I screwed them together.
Because I changed my mind about the layout, I removed the one brace that ran lengthwise and cut it into two braces from front to back. (I also used the Kreg Jig Jr. to make pocket holes for this step.
Notch The Seat for the Bench
Testing the boards to make sure the notches are suitable.

Black Headboard Bench
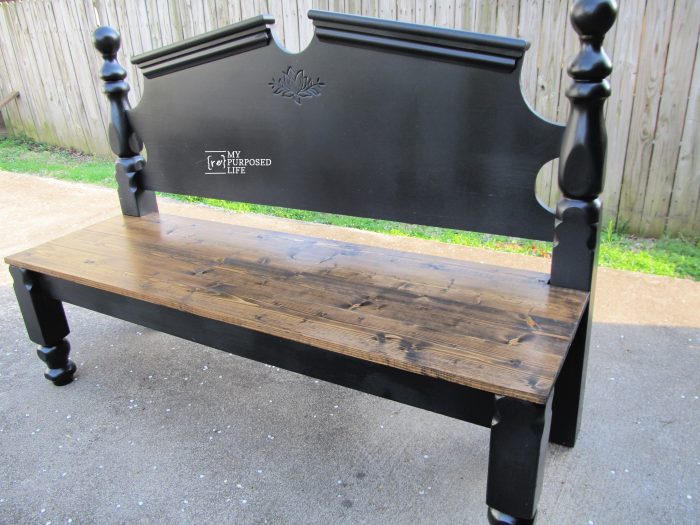
I stained the boards with Jacobean and applied some wipe-on poly over the stain.
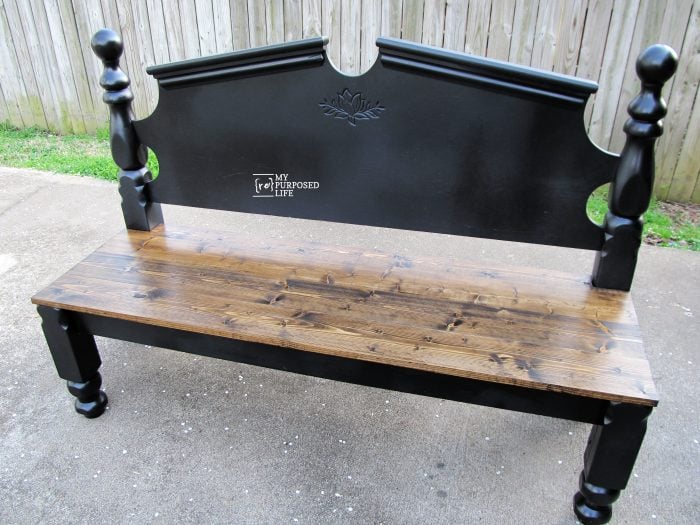
I attached the seat with pocket holes from underneath so that no nails or screws are seen.
EDITED TO ADD:
I’ve had some questions about how I attached the seat. I did it similar to this coffee table top. The pocket holes are drilled into the skirt of the bench. You can see more details in my post on how to make a coffee table using chair legs and hardwood flooring, and I am calling it done almost a year later!
See my favorite Mission Style Headboard Bench with Storage-The Complete Tutorial.
See other fun benches here
I’m happy you found my site interesting and here’s a fun fact . . . most people find me by my headboard benches! I would suggest finding a stool or chair that is the height that your bench “wants” to be to see how you feel about it.
I have added height to beds before. You can see an example in the “puzzle bench” I made out of bed, chair and crib parts. https://www.myrepurposedlife.com/jenny-lind-bed-bench/ scroll down through the pictures and you will see I used another bed part and attached them with pocket hole screws.
I’m here if you have more questions, and feel free to look at all the benches here: https://www.myrepurposedlife.com/category/bench/
have fun, good luck!
gail