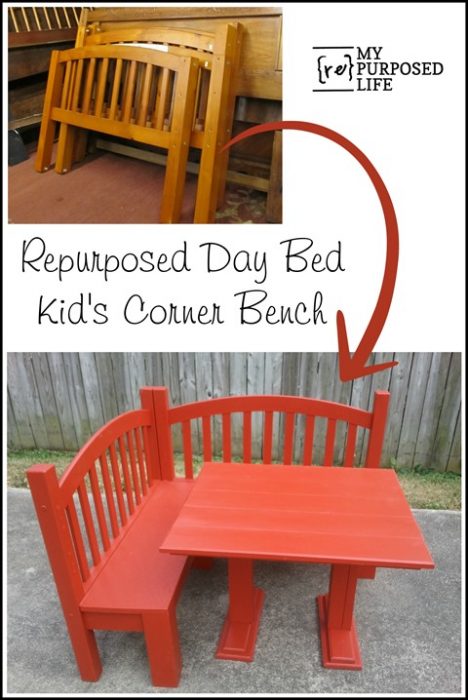
DIY Kids Table to Go With a Corner Bench
As an Amazon Associate, I earn from qualifying purchases.
How to make own DIY kids table, make your own so you can customize the size!
Have you see the cute red banquette (bench) I made for the kiddos? Once I made the bench, I thought it needed a table. I didn’t have a table, so I built one from scratch. I’m going to show you how I put this diy kids table together.
*This post contains affiliate links read more here*
Determine the size of your kids table
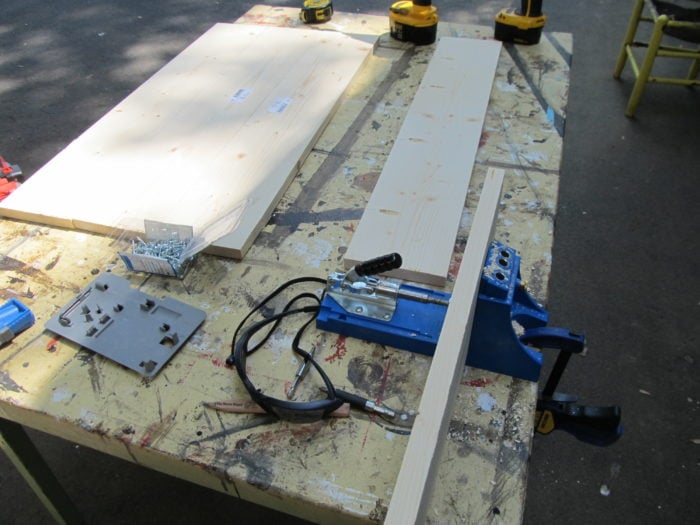 I measured the empty space on the bench to determine the size my table should be. I cut some 1×6’s to length, then drilled some pocket holes with my Kreg Jig, attaching all the pieces together with pocket hole screws.
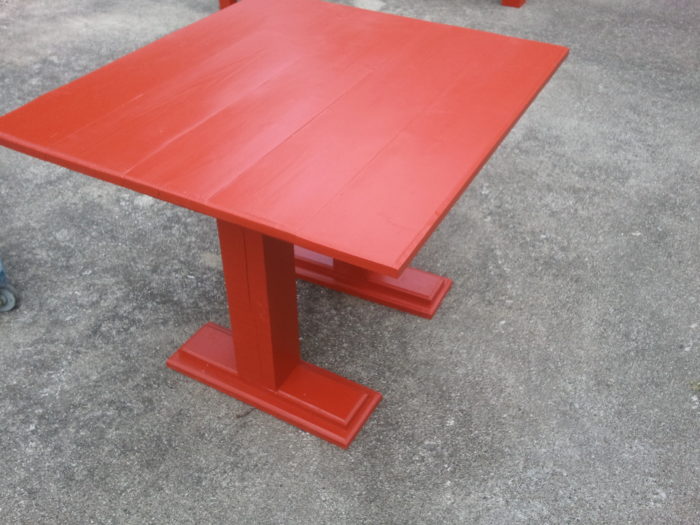
Why a pedestal table is better than a table with legs
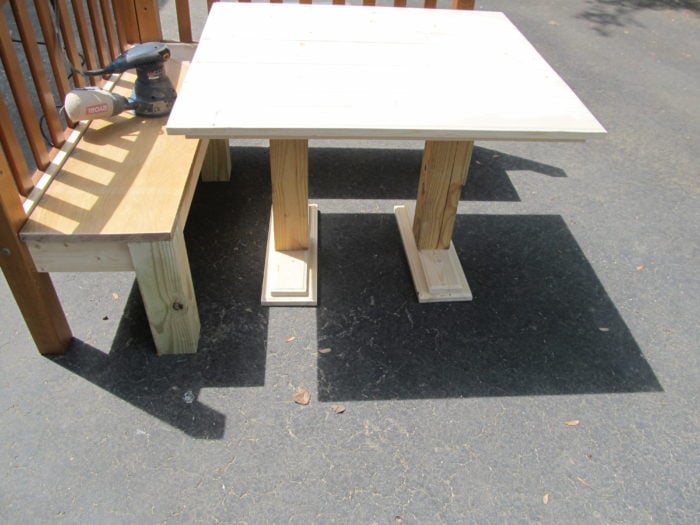
 I had originally thought I would do a table with 4 4×4 posts for legs. However, thinking things through, I realized that the kiddos would “knock their knees” on the legs as they scooted into the corner bench. Therefore I went with a pedestal type table. I used a 1×6 and a 1×4 for the base of the legs.
Routing edges gives a more finished look
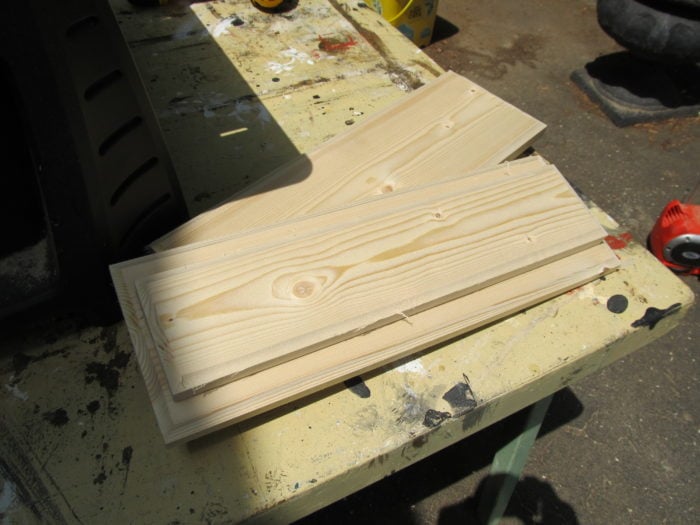
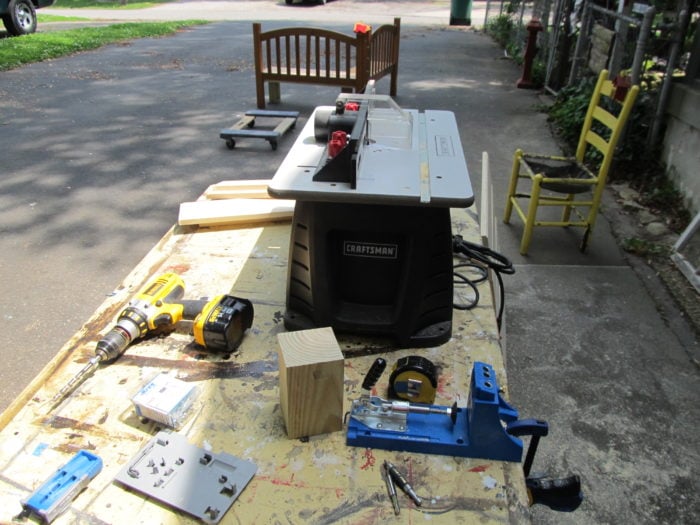
I just guessed at how big they should be, cut them to length and then used my router on the edges.
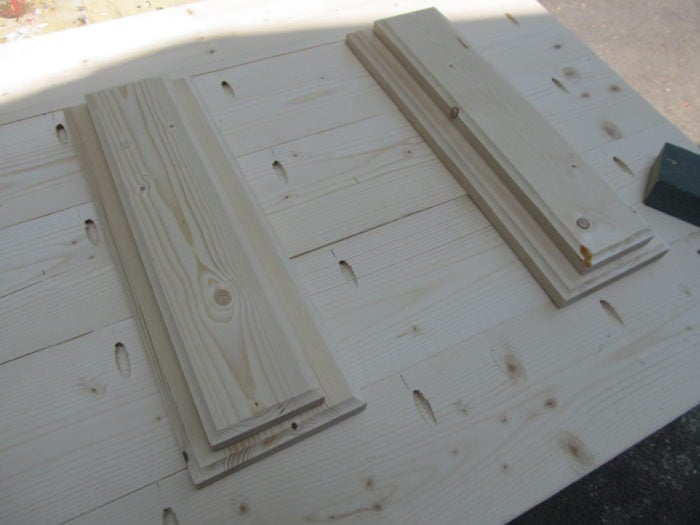
After I did that I sort of laid them on the back side of the table to get an idea of where I wanted to place them.
Wood glue and screws combine for a secure joint
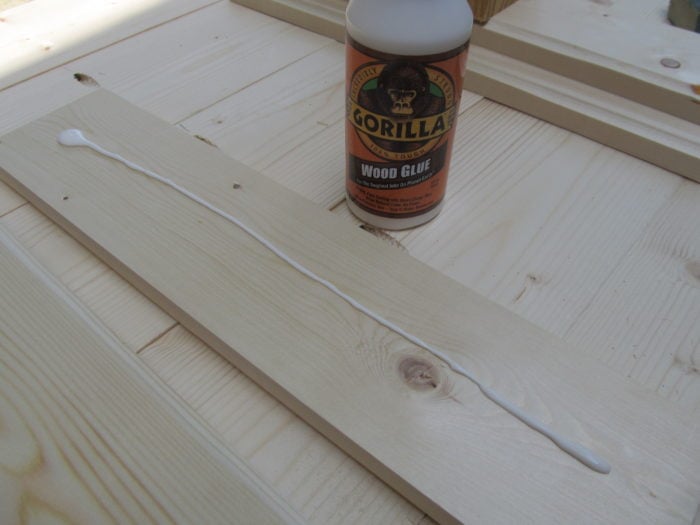 I used Gorilla Wood Glue to attach the top board to the bottom board of the base.
Mark table base for pedestal legs
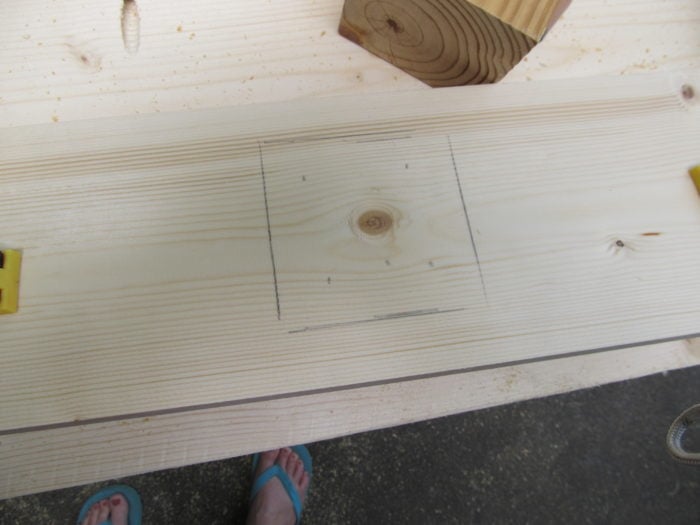 I marked the placement of the 4×4 post on the bottom of the base, then drilled pilot holes.
I used 2 1/2 inch drywall screws and gorilla wood glue to attach the 4×4’s to the base of the diy kids table.
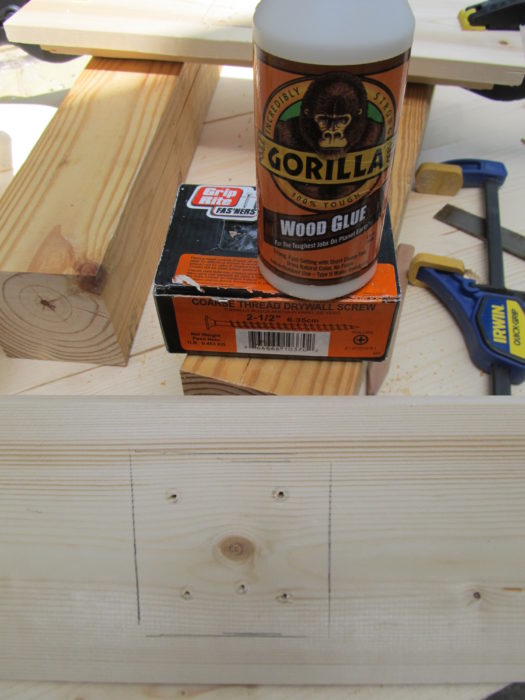
Pocket hole screws secure pedestal legs
 To attach the 4×4 post to the top of the table, I drilled pocket hole screws with my Kreg Jig Jr.
Frame table top for more strength
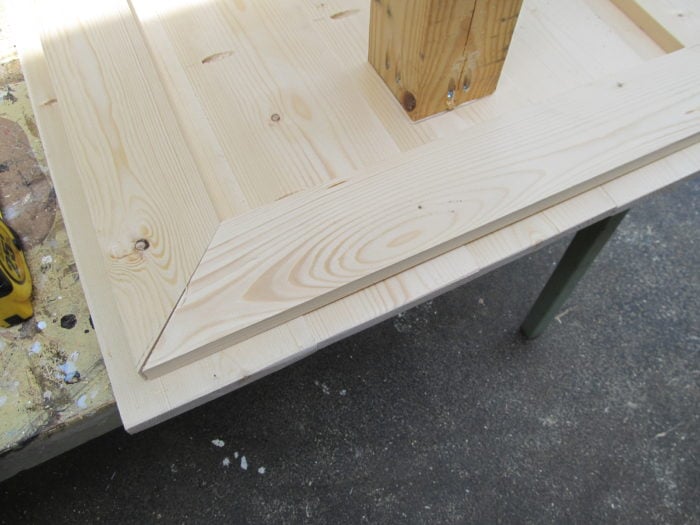 The pocket holes didn’t make the table top sturdy enough, so I added some 1×4’s to the bottom of the table. I mitered the corners to get a nice look/fit.
Countersink screws
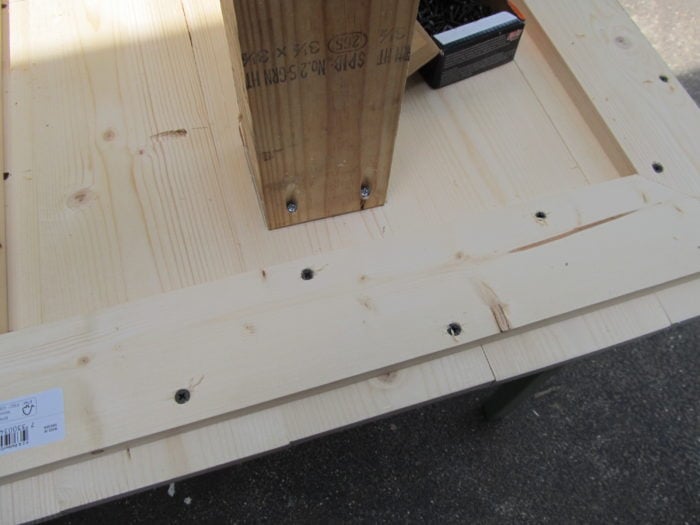 Pilot holes were drilled and the board was attached with Gorilla Wood glue and drywall screws.
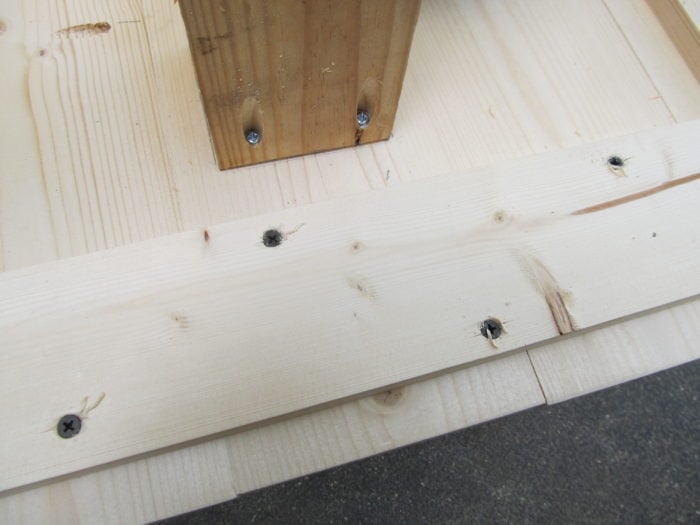 The 1×4 pine is soft, so it was easy to countersink the screw heads. Doing this “frame” around the table really added stability to the table.
DIY kids corner bench and table
 Testing it out!
Add primer and paint
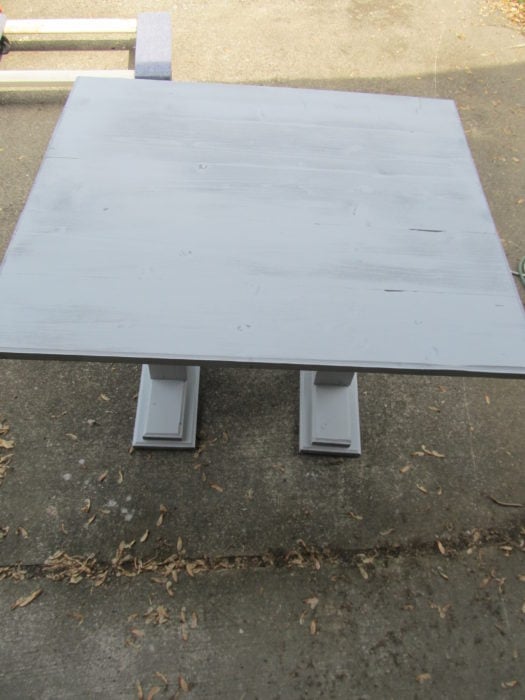
Primed it with some gray oops paint and primer in one. I of course used my Finish Max to apply primer . . .
 . . . and paint. I chose to paint the top of this table with a brush to get a really nice thick, protective top coat.
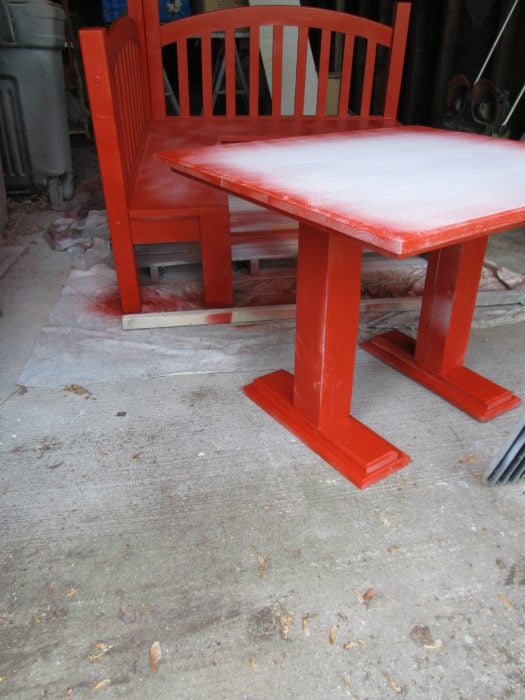
 Cassie @ Primitive & Proper was my coach on this color. I sent her an “after” picture to ask her opinion of the color choice. She suggested red. (thanks Cassie!)
I have to say I LOVE it!  No one will “knock their knees” on this. The only bad thing about this bench is it’s size. It’s nearly impossible for me to move alone. I must use a furniture dolly, and lay the bench down on its back.
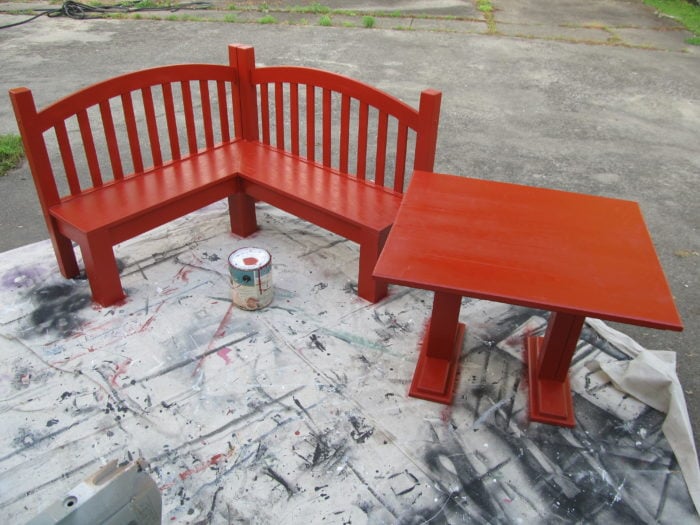
DIY Red Corner Bench and Table for Playroom
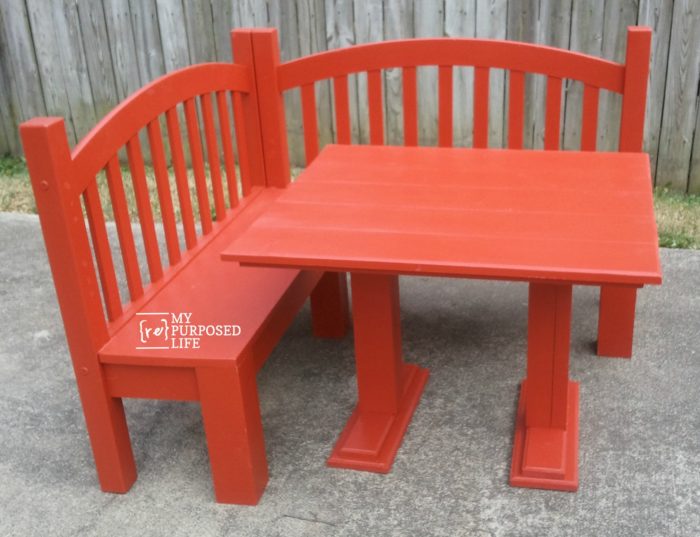
As I said in the corner bench post, this would be great for a dining room, think homework and snacks. It would also be fabulous in a large bedroom or playroom.
gail
I absolutley love this! And it would totally my match my backyard decor. Your site is amazing. I especially like the thrifting posts. It’s nice to read about another bloggers passion for scouring odds and ends.
Gail, you amaze me. You are so talented and make your creations look so easy! Love this!
What a sweet little set and another great tutorial! You are amazing!
What a cute perfect set for the kids! Great projects!