rolling pin display
As an Amazon Associate, I earn from qualifying purchases.

Any guesses what I’m repurposing these ceiling fan pieces into?

I never really noticed that all of these pieces are twisted slightly to allow for the slant on the ceiling fan blade. I gently bent them to a straighter position.
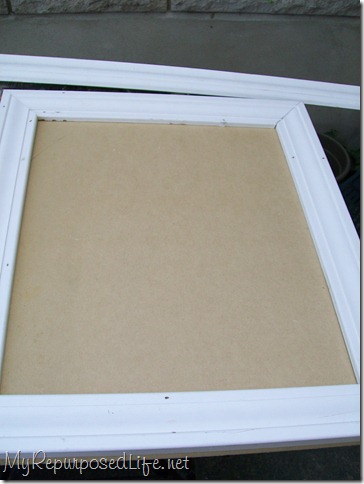
I grabbed a piece of scrap MDF and framed it in with some casing.
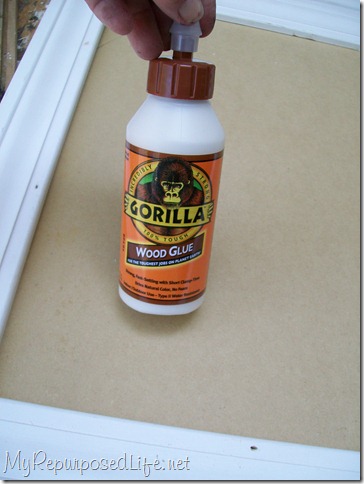
I used some Gorilla Wood Glue to hold them in place. This casing was of course a curb find hence the holes. I used some spackling to fill the holes.

Now this picture definitely gives it away! Some people (not me) collect vintage rolling pins. I’ve been thinking about a way to display them ever since Granny J mentioned it a couple of months ago. I had sort of thought I would use some kind of ceiling fan (arms, I believe they are called). I had planned to use the ones that Jamie brought to me in June. However, when I noticed that they are twisted, I tried to bend them in the vice and was unable to get them to look straight. Then I ran across these at Joey’s “fire sale” last week. He sold me that whole lot of stuff for $5.00, so I am supposing I paid about .50 for the set of 5.

I was having a hard time holding them to test how they would actually hold the rolling pin. I really like them in this position, but it was very hard to slide the rolling pin into position. The only way to really test it was to screw them into my work table. I didn’t want to put “test” holes in the board I made.

Here is the board with one coat of primer on it. I was testing the black pieces on this color. I sort of wanted a neutral but not white. This primer was an oops Kilz.

I decide that the pieces will have to be scooted over to the edge in order for the rolling pins to slide in and out easily. The pins will be held in place by their handles, not the rolling part.

This is after 3 coats of the primer. I used a little adjustable work bench to hold it so that I could figure out exactly where to put the top two pieces.

This is after 3 coats of the primer. I used a little adjustable work bench to hold it so that I could figure out exactly where to put the top two pieces.

The rolling pins can even be displayed in tandem.


I’m thinking it looks a little plain, like it needs some embellishment. Maybe some prettier rolling pins would dress it up better?

What do you think? I know I need to get some black screws. The only ones I had were too long. You know how impatient we DIY ladies can be!

Once again I have the problem with grainy pictures when I don’t use a flash.


So, there ya go, a quick and easy project! Wouldn’t you know the day after I worked on this, I came across the cabinet door that I picked up at Ikea. It would have worked perfectly for this project. I could make another if I can get those other arms bent into a straight position. 😉
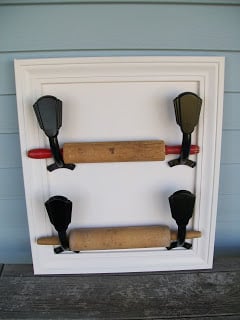
I updated this rolling pin holder by painting it white.
I hope this inspires you to think outside the box and repurpose something soon.
gail

This is a fantastic project, Love it!
What a fun idea!!
Very cool, Gail! You could always apply a glaze to the door for some extra variation in tones. I LOVE old rolling pins!
Donna
You really are the repurposing queen!!! I LOVE it & I’m putting it in the PoPP Spotlight on Saturday.
Gail… I like this!! I think it’s a great idea! And I like the way it looks with THOSE rolling pins. 🙂
What a great idea! I would never have thought of this! You just have one awesome, creative mind!
Great repurposing!
Love the old rolling pins. Do you like rustic? You could rustic up the whole thing a bit?
A bit of embellishment would be good. but, not sure what. hmm. maybe just some black screws in the corners to hold the board on the cupboard end?
How about just dabbing some black paint on the screws, then you do not have to take it apart. =)
thanks for the newsletter and ideas.
blessings
barbara jean
Whoa, you are smart! This is brilliant. Why didn’t I sit behind YOU during all my hard classes in high school?!
cute idea! I have seen a lot of rolling pins in antique stores. I like the ones I’ve seen with green painted handles
Great idea! I love your blog… so many creative projects. You are the queen for thinking outside of the box.!
Annette
You aren’t just thinking outside the box; you are thinking outside the pie tin, too. Your brain is amazing. This is beyond cool.
Brilliant! What a clever idea! Love it. You know what I do when the screws don’t match the paint? I use a black sharpie to color over them! I know–I’m such a cheater! But, it works!
I’d love for you to check out my blog for a fun giveaway!
http://alittleknickknack.blogspot.com/2010/08/another-csn-store-giveaway.html