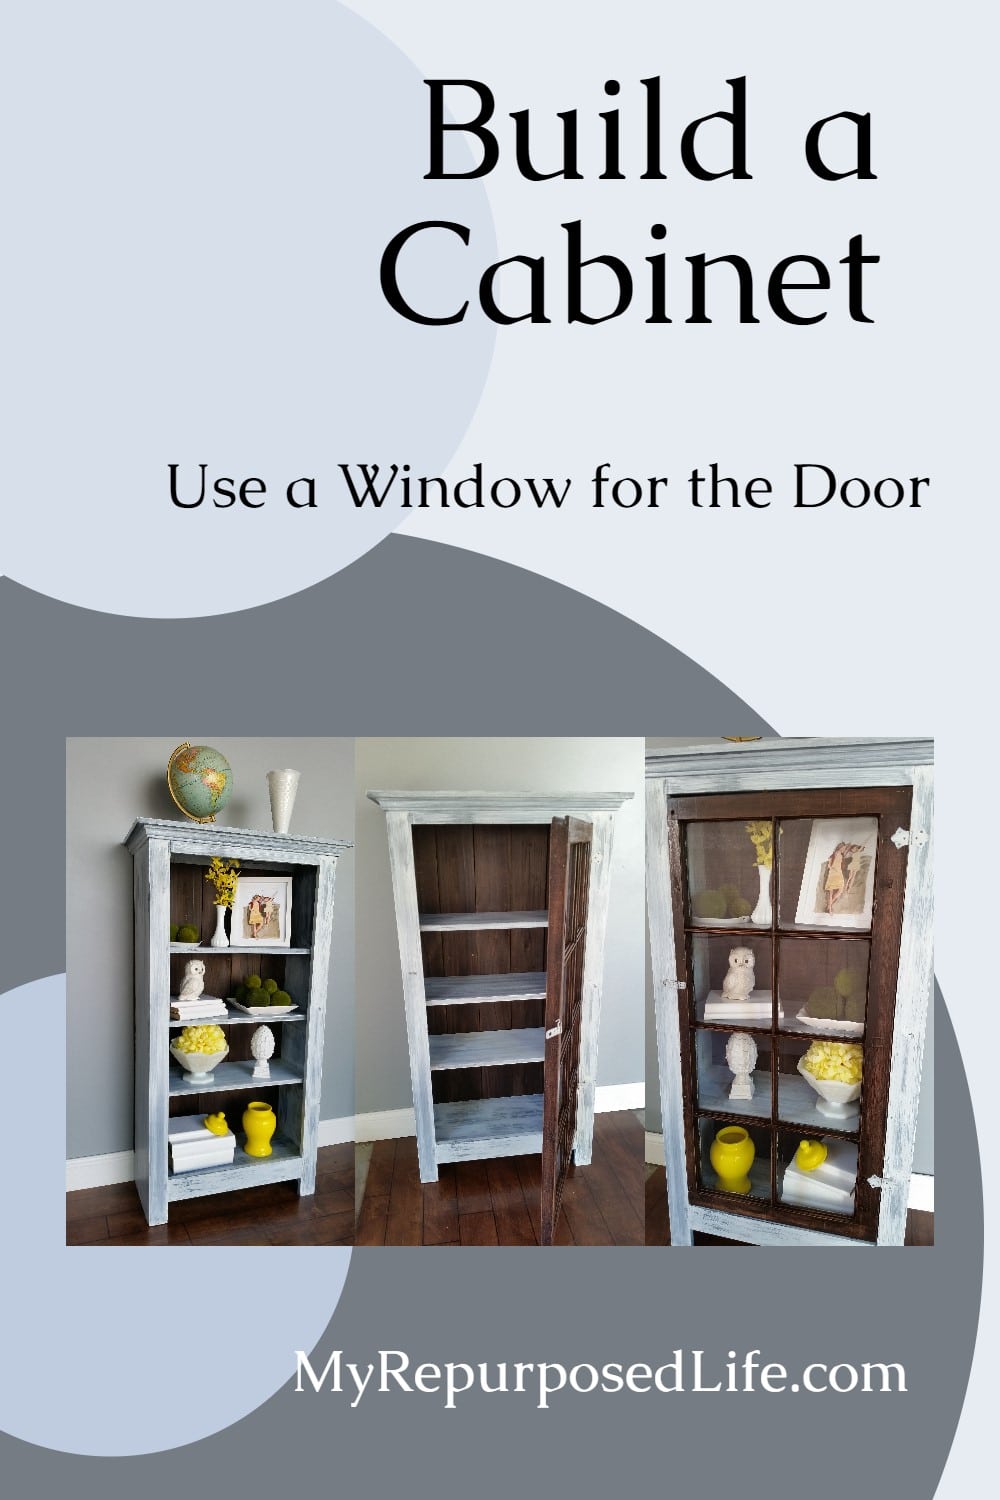
DIY Tall Window Cabinet
As an Amazon Associate, I earn from qualifying purchases.
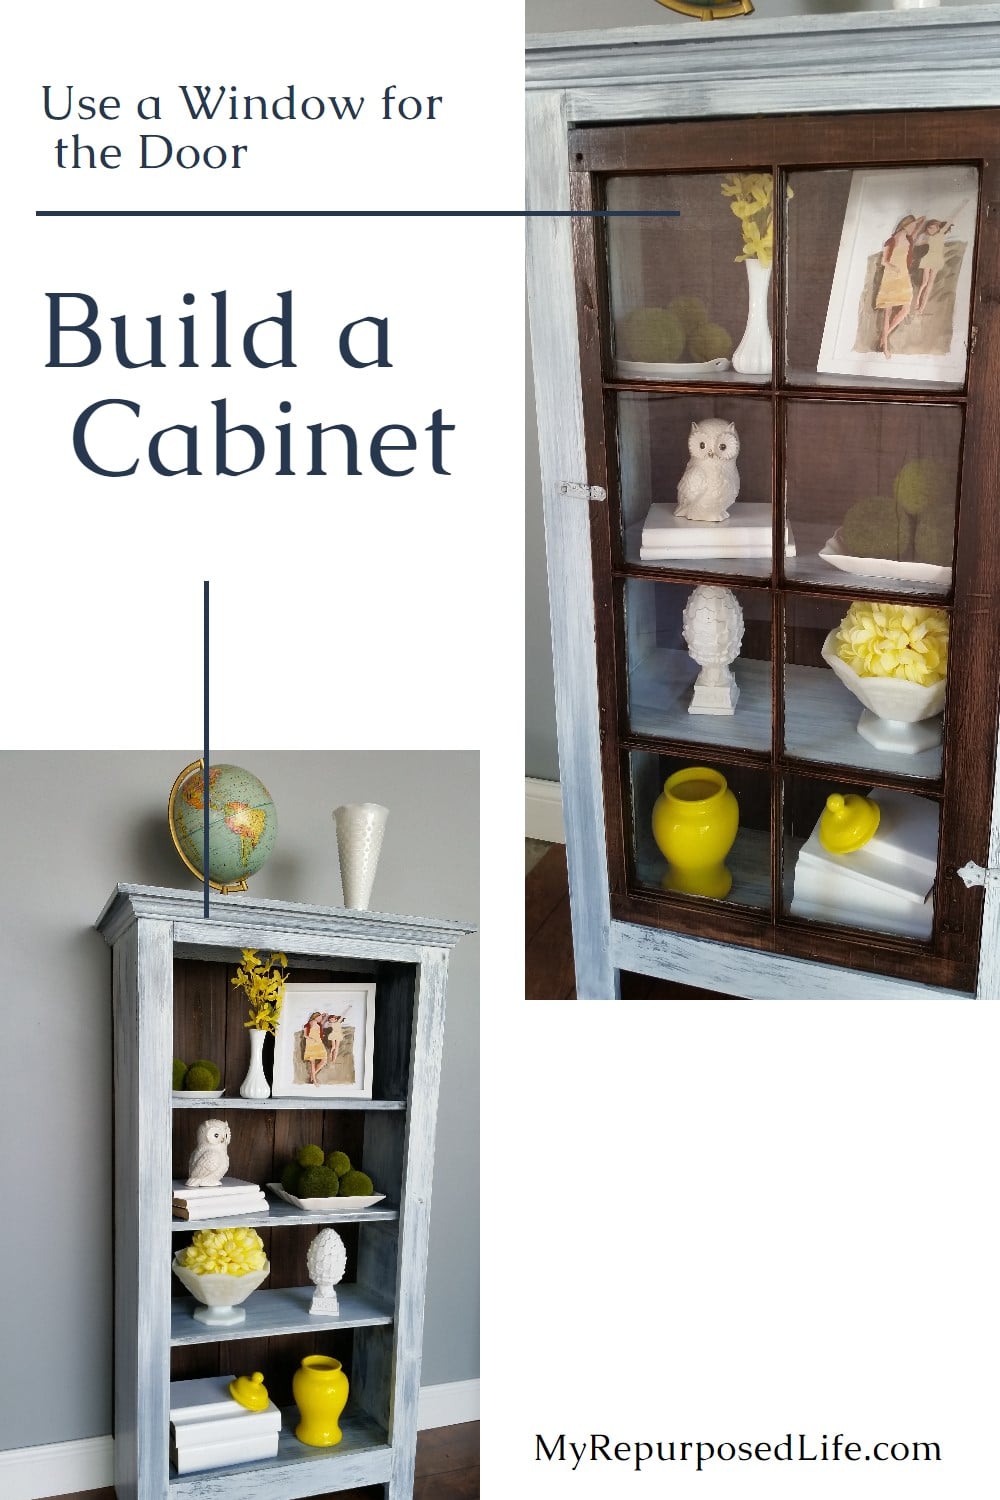
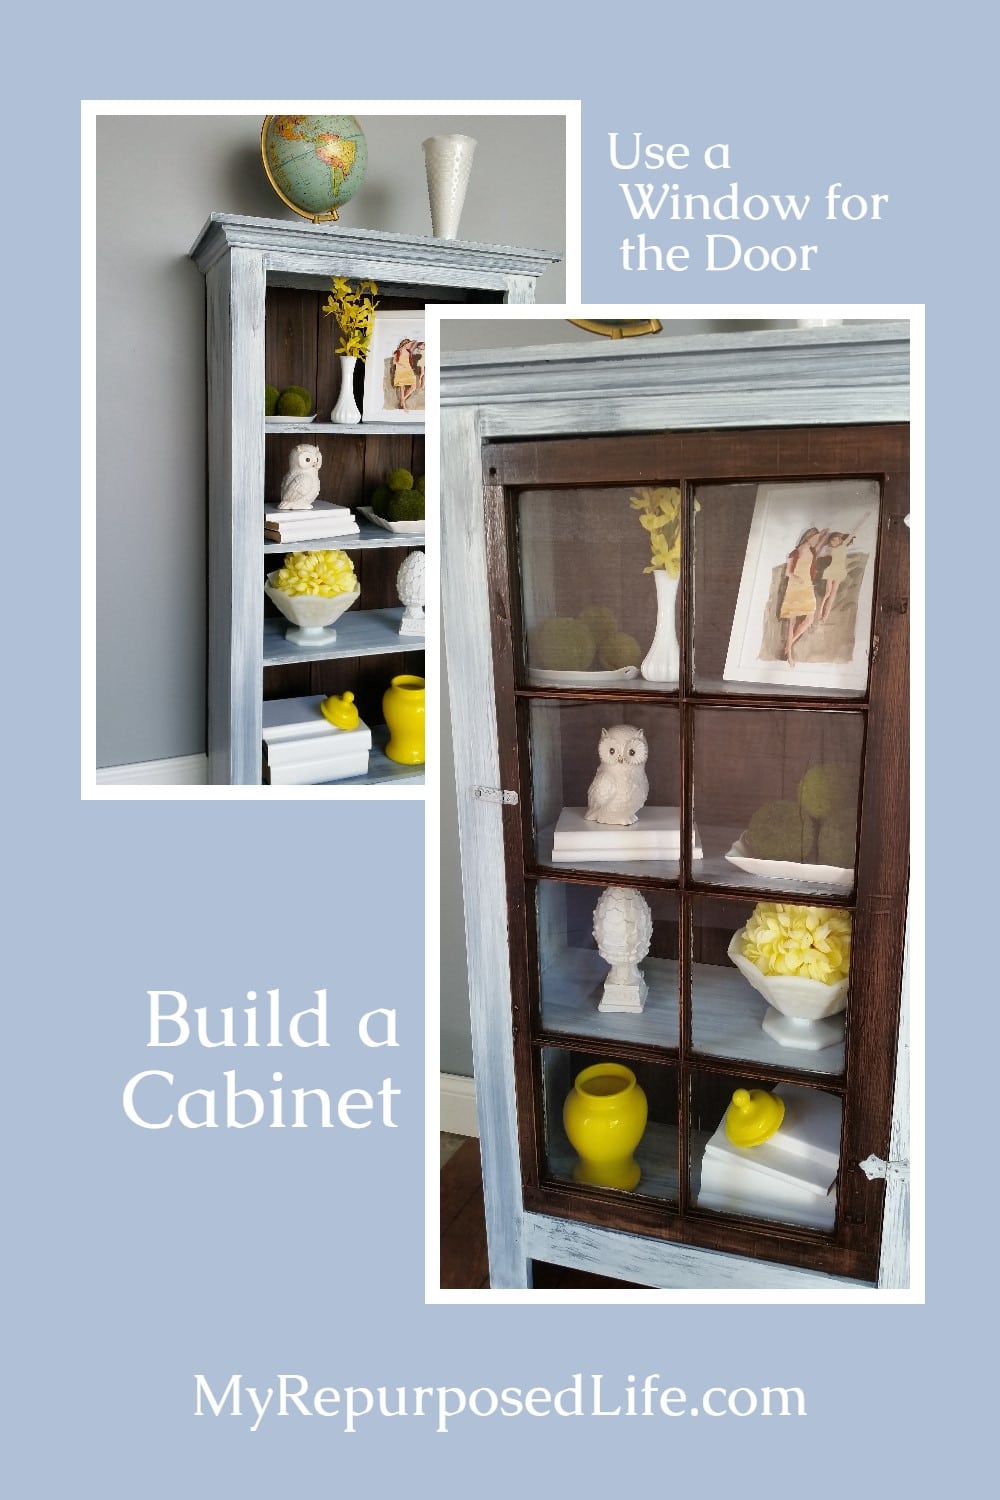
I love making window cabinets. However, I have never made a DIY tall Window Cabinet, so I thought it was time to create one. I’ve made window cabinets that hang on the wall and pieces that use two windows. I hope you find this helpful if you want to make a glass door cabinet. You can see some of my window projects at the bottom of this post. So, if you are looking for inspiration, hopefully, you will find something you like.
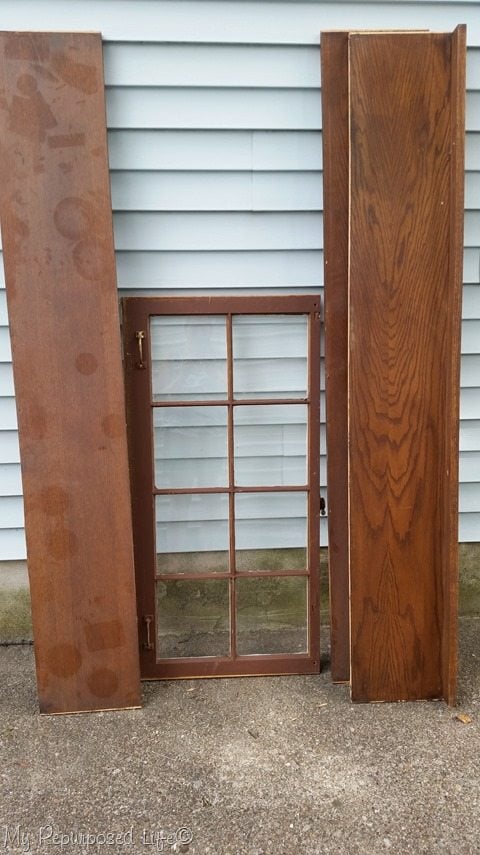
I have had several matching windows for a couple of years, so I thought splitting them up and using one for this project would be okay. The other boards are reclaimed from a huge unwanted hutch. Of course, you can buy new lumber to achieve the very same look.
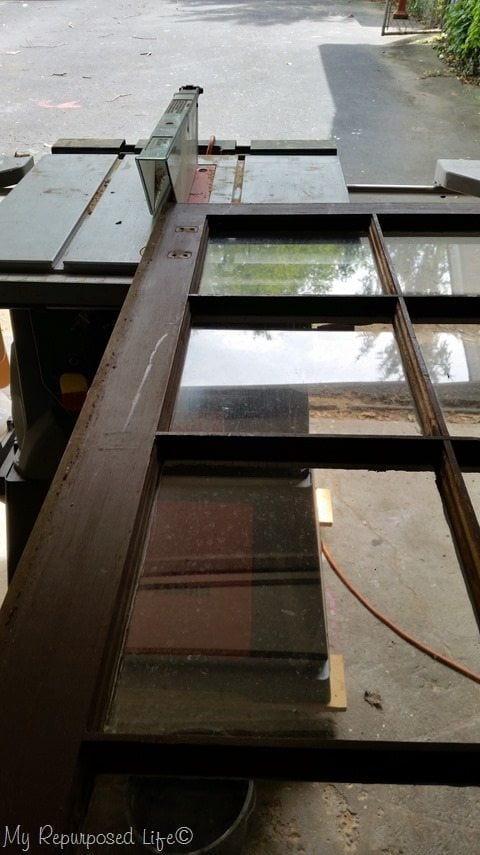
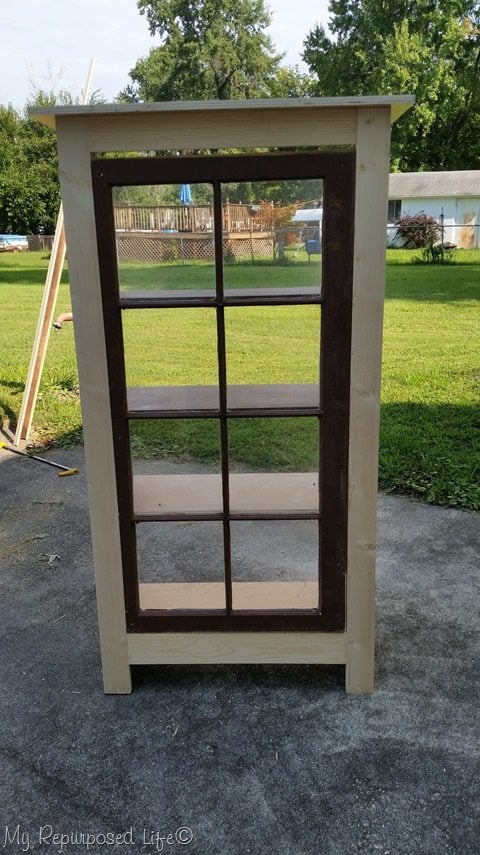
Windows are a little funny in that they are set on an angle. Cutting on the table saw was safe after the weather stripping and hardware were removed. You could skip this step if you’re intimidated by the saw. Your design may need to be altered a little, making your cabinet more evident that the door is an old window.
Visit the My Repurposed Life Amazon Store to shop my favorite items.
Building a DIY Tall Window Cabinet
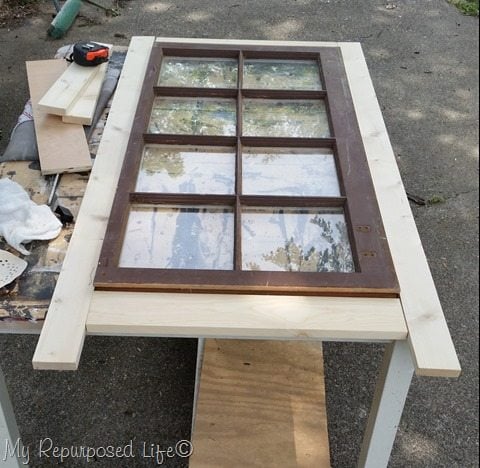
I ripped some 1x’s to make a front facing to frame the window.
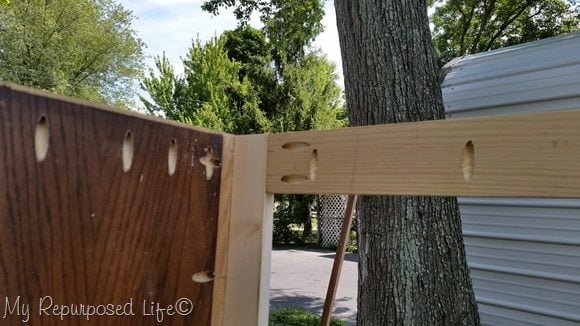
This entire cabinet was constructed using Kreg pocket holes using my K4. I attached the sides to the front-facing. I remembered to drill some holes pointing upward to secure the top of the cabinet.
Adding shelves to Tall Window Cabinet
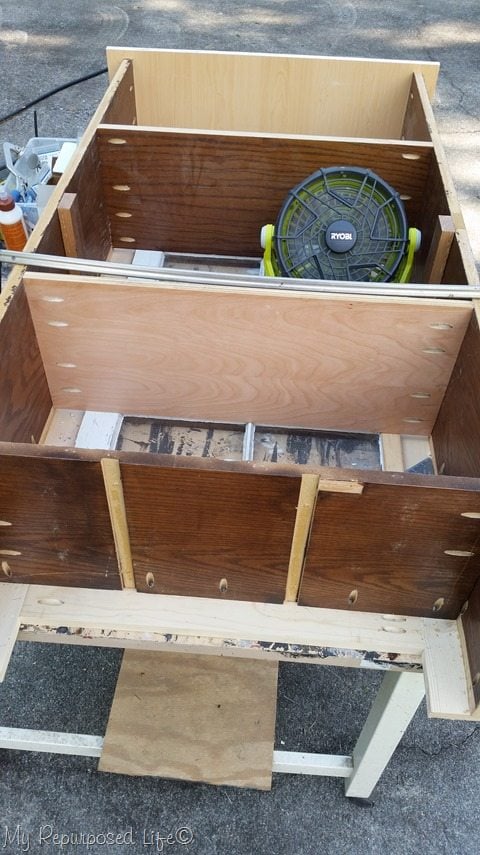
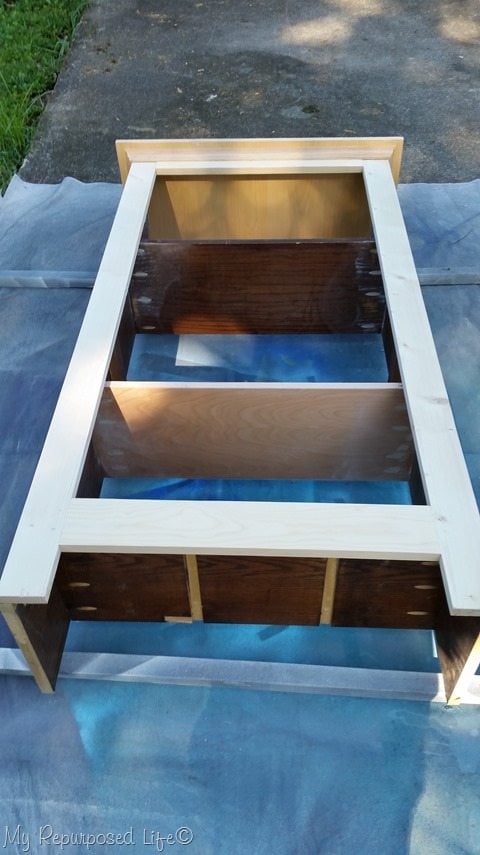
After attaching the top, I laid the tall window cabinet on my work table and got busy adding the shelves—again with pocket holes. Besides the top and the bottom, there are two stationary shelves and one removable shelf. The removable shelf is held in place by cleats. I used a speed square all along the way to ensure everything was square.
Although the window is not yet attached, I used it (look under the shelves) to ensure my shelves align with the window panes.
It’s a good idea to do a test fit
I quickly placed the window in the cabinet to ensure it was all coming together as planned. While designing the tall window cabinet, I cut the shelves at a depth, allowing my window to sit flush against the facing. (another good reason to put the window in place while adding my shelves.
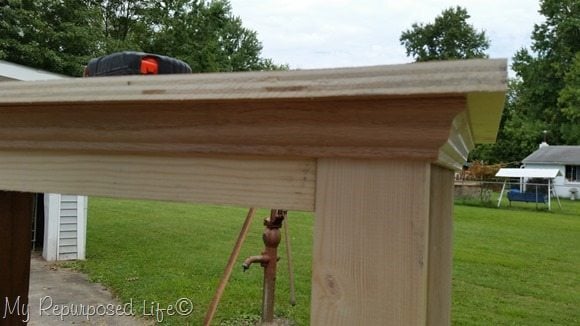
I added some inexpensive trim and plywood for the top, which has a raw edge.
How to cover up a plywood edge
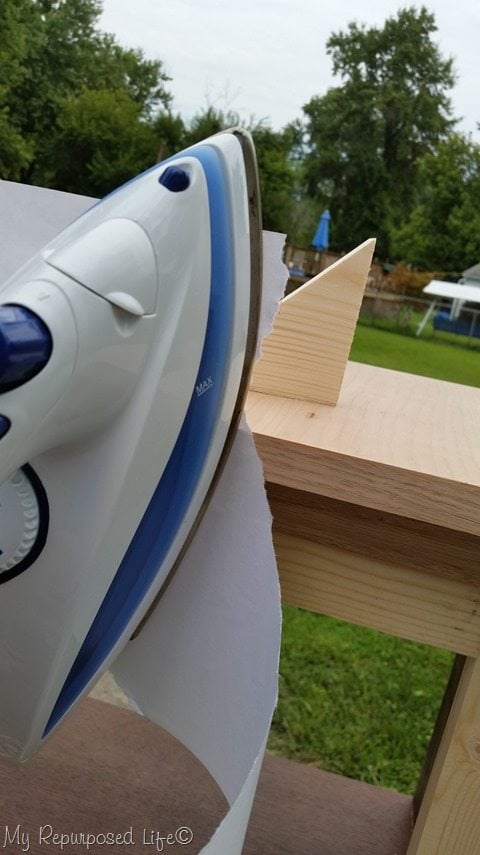
It’s not a problem; I had some 3/4 edge banding to handle that. I used some scrap paper and that little wood triangle to burnish it. Not shown, I used a Quad Trimmer to make the edge banding flush. The plywood was 1/2″, and the edge banding was 3/4″.
Time for paint! I laid the tall window cabinet down, resting it on some scrap 2x2s to keep it off the drop cloth. I always begin painting with the underneath side.
Time to paint with the Finish Max
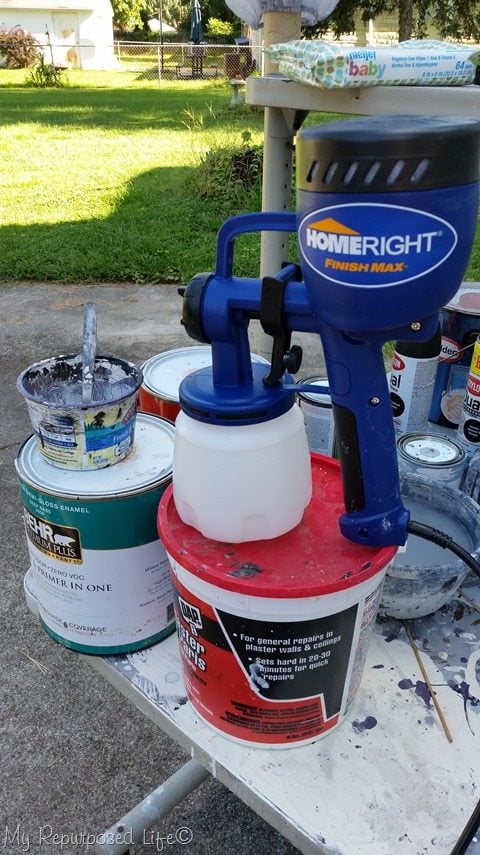
Of course, I mixed up a batch of my favorite diy chalky paint primer. Look at my shiny new Finish Max from Homeright!
How to strain paint
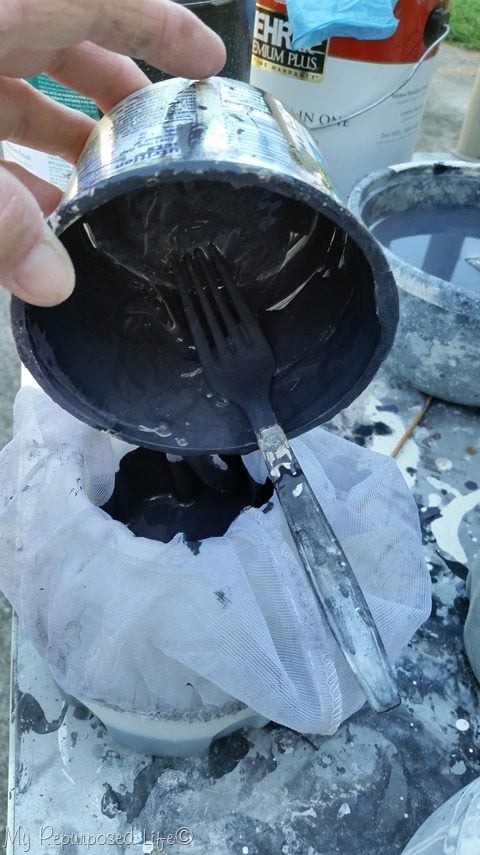
I always strain my paint into my paint cup using a mesh strainer.

This is how I squeeze out the filter to ensure I don’t waste a lot of paint. I always put the strainer right into a small bucket of water. I’ve been reusing the same filter for a long, long time.
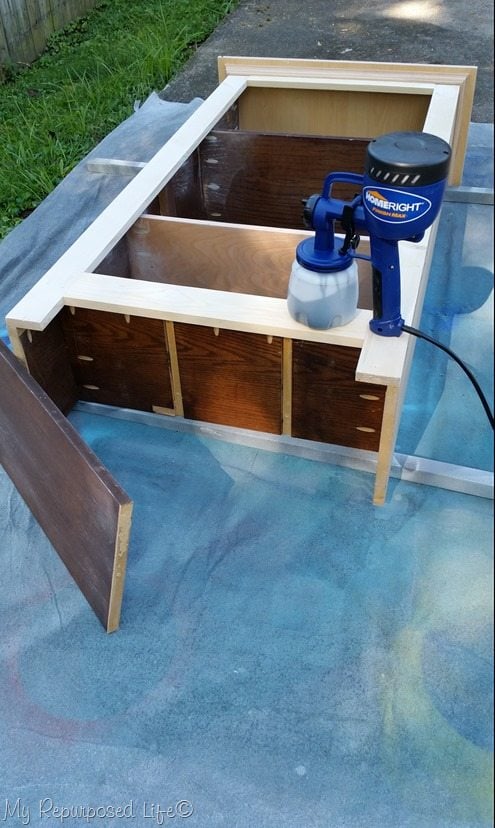
Yay! I’m ready to paint the tall window cabinet. You can see that I have the removable shelf leaning there so I can paint it.
Easy paint spraying tips
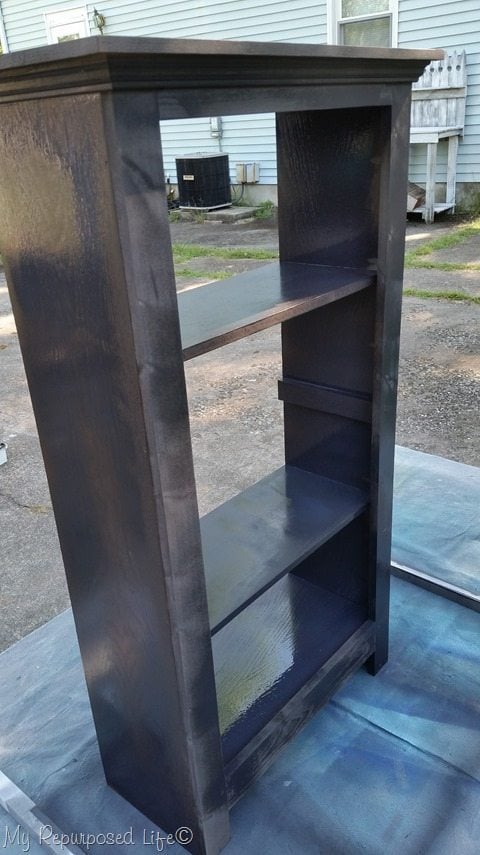
After spraying it lying down, I set it up and gave it two coats of chalky paint primer. I love how quick and easy it is to paint any furniture with my Finish Max! Look closely at the drop cloth; there is no visible sign of where I painted the cabinet while lying down. I rarely change the paint flow (twisting the little knob), but I vary the spray pattern repeatedly while I paint, depending on what I’m painting. Using a horizontal pattern while doing the front left and right sides would be counterproductive. However, I used a flat pattern while painting the wide sides.
After the Beluga (black) dried, I did a wash—using a cheap chip brush with some Polished Pearl. I had to work quickly to get it on and wipe some off, so there are no pictures of the process. I was a painted mess!
This was the result.
What kind of back to use for a shelving unit
For the back, I attached the reclaimed fencing I had stained. I typically use the fencing “as is” in a grey-weathered look—but I wanted this to look different.
Does the cabinet need a door?
So, I styled the tile window cabinet to see how it would look. I was floating around working on other projects, and the day ended without the door (window). Honestly, I was really on the fence about even adding the window.
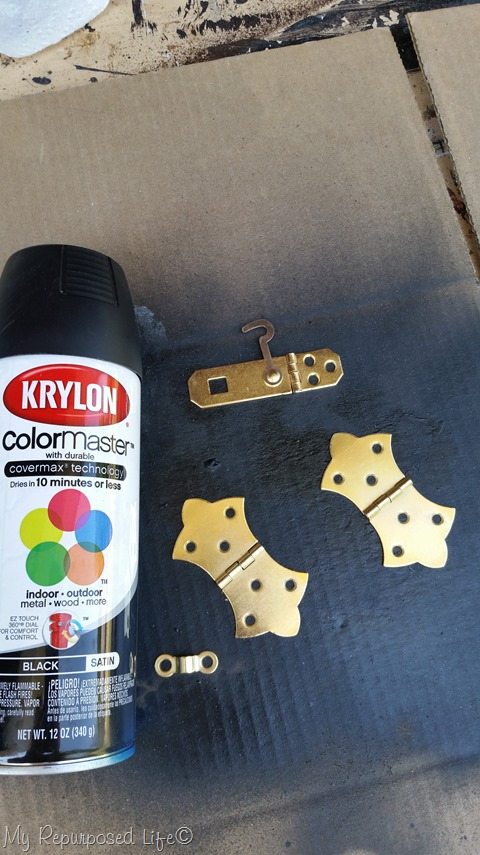
This is the hardware I bought for the window. It’s too shiny to suit me. I chose the same color scheme for the cabinet—black with a whitewash.
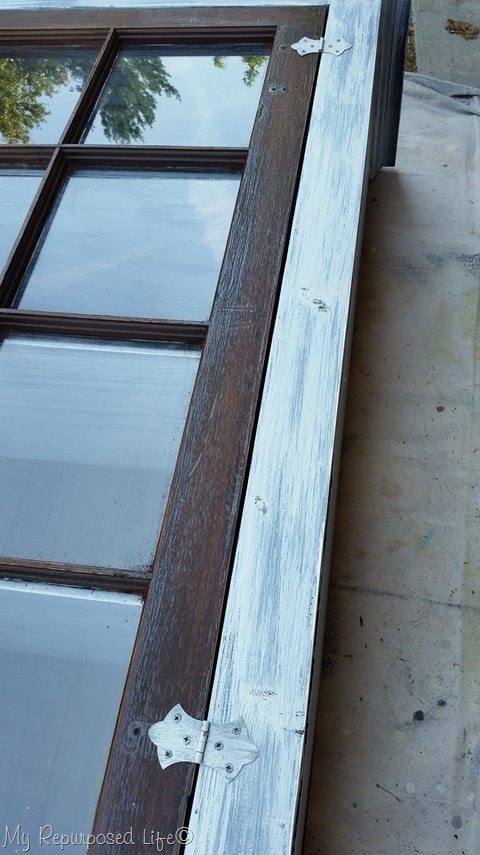
I think the hardware turned out well, don’t you? A side note about the window. I did several things to it that I didn’t take pictures of. I stained it with a hickory color first, which was too brown. Then I tried some dark walnut. I liked the color okay, but it had too much shine. Finally, I grabbed some sandpaper to knock off the shine.
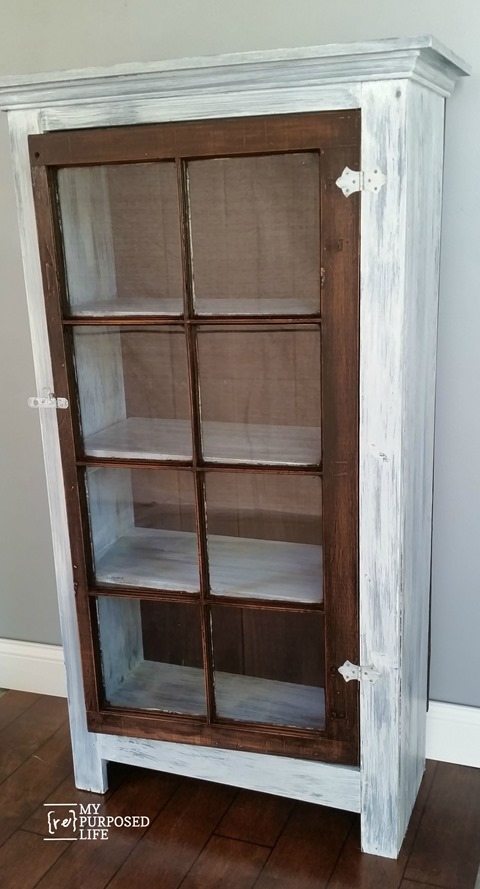
I’m still not loving it with the window, but since I designed the entire piece around it, I feel I should use it.
Do you love the tall window cabinet?


A small peak inside. What do you think? Yes or no to the window (door)? Do you love or hate the color combination? I think all my friends (you know who you are) realize how much I struggle with paint choices. It can make or break a project.
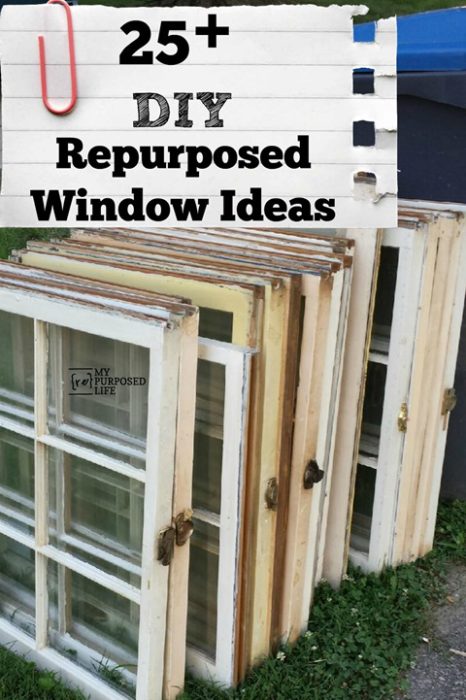
See more DIY Repurposed Window Ideas Here.
Gail… I LOVE your cabinet just the way it turned out! Such a cool design, especially with the panes matching up to the shelves. Bravo! I know you love your Finish Max, I have a new one I’m using next week for a project, I can’t wait to break it out!
I am currently making patio furniture out of pallets. This would make it so much easier to paint. Thank You!
I so need this sprayer!! I could use it with the furniture and craft projects that I am constantly working on. This is something I could handle and not aggravate hubby with him having to help me!!!
I’m going to be painting a huge china cabinet soon, it would be amazing to be able to spray it!
I enjoyed seeing the process that you have developed for creating your window cabinets. Thanks for taking the time to share it with us!
Are you kidding me?! I have so many projects to do from A. curbside treasures to B. Rescuing and C.Rescuing from thrift stores.
I have so many ideas swirling around in my head, and new ideas from reading your blog … I want to tackle them all, but painting is such a horrendous hurdle for me to overcome (fibro gal here) that winning a sprayer would be such an answer to my dilemmas! And bring back such repurpose to my pieces! Thanks!
What a fun tool! If love to have one to use on my dining table, a sofa table I got for free, and an ugly little cabinet/side table that I know will be interesting in another color! So many projects, so little time. 🙂
I like the shelf you made with and without the door both. Maybe you’d like it more if the widow matched the body or if it had a pop of color…like a matte turquoise. Just a thought. 🙂
I have an old goldilock’s style table and chair set that I want to paint and use in my kitchen.
I agree I think this particular cabinet looks best without the window door.
We could use the finish max about now. We have gone thru other spray paint machines and are not having mich luck in our repurposing business. Your help would be appreciated!
I would so love the opportunity to win the Finish Max. I have eight antique dining chairs to paint before I re upholster them and the spray finish just makes the chairs so clean and finished. Thanks!
I really, really want one of these! I have sooo many projects to use it on. The biggest one though, would be repainting my daughter’s bedroom suite. It needs it badly and it would make a wonderful birthday prent for her!!!
I would LOVE to win the Homewright Finish Sprayer!! I have so many project I could use it on!
Impressive job! It looks really classy w/ the shelves lined up with the window whatsits. (I know they have e name but it’s 3:30 am and my brain is not working well)
A cabinet my late husband made for me does not have its parts lined up so well. Maybe you’ve started something—
f might try to remedy that.
If I had a Homeright Finish Max i’d finally get the guts to paint a large round coffee/cocktail table for my living room. I’d like it to be a showpiece with a really smooth paint job under the glass top. I’ve been putting this one off for about a year now and must do something soon or give it up……..