• Skip to primary navigation
  • Skip to main content
  • Skip to primary sidebar
  • Start Here
  • Shop Favorites
  • About
    • Welcome To My Repurposed Life Home of Repurposed Furniture
    • More About Gail
    • Disclosure
    • Privacy Information
  • Gallery
    • Repurposed Furniture
  • Repurposed Items
    • Building Supplies
    • Miscellaneous Household Items
    • Picture Frame/Chalk Board
  • DIY
    • Home Reno
    • outdoor living
    • Painting
    • Shop Talk
    • Tips for Around the House
    • Build It
      • Furniture
      • Home Decor
      • Storage
    • Crafts
      • Dollar Store
      • Easy
      • Holidays Seasonal
  • Furniture
    • Chair
    • Desk
    • Dresser/Chest
    • Headboard | Bed Parts | Cribs
    • Kids Furniture
    • Table
    • Kids Furniture
My Repurposed LifeĀ®
menu icon
go to homepage
subscribe
search icon
Homepage link
  • About
  • Start Here
  • Project Index
  • Furniture
  • Subscribe
    • Email
    • Facebook
    • Instagram
    • Pinterest
    • RSS
    • Twitter
  • Ɨ
    Home Ā» Repurposed Furniture Ā» Door Headboard Update

    Door Headboard Update

    Modified: Feb 7, 2022 by Gail Wilson
    This post may contain affiliate links

    Pin
    Share
    Tweet
    How to repurpose an old door into a unique headboard. Easy tutorial make your own headboard out of a door. #MyRepurposedLife #upcycle #repurposed #door #headboard #tutorial via @repurposedlife


    Pin it!

    Using an Old Door to Make a Headboard

     This is an update on my original headboard made from an old door.  Yep, I actually tackled this door and made it into a headboard.

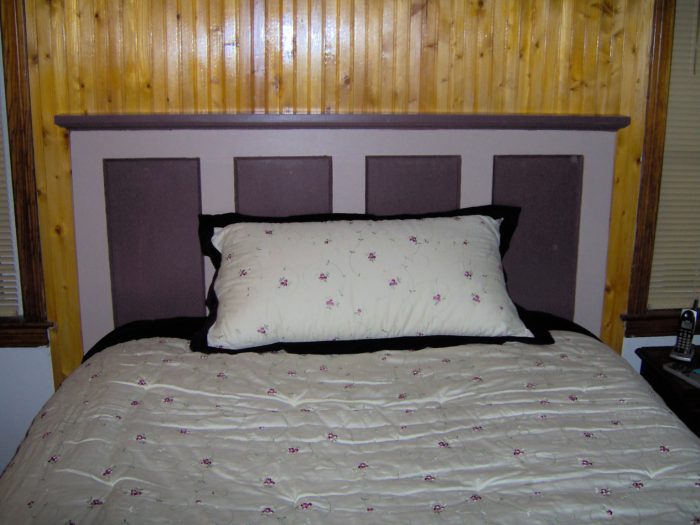
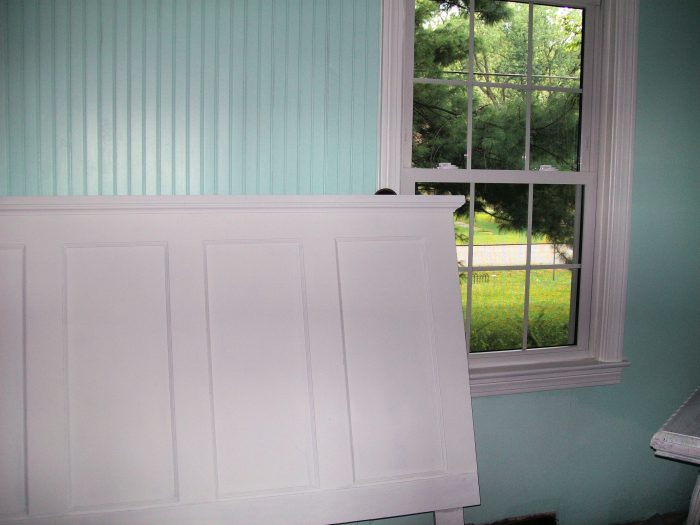
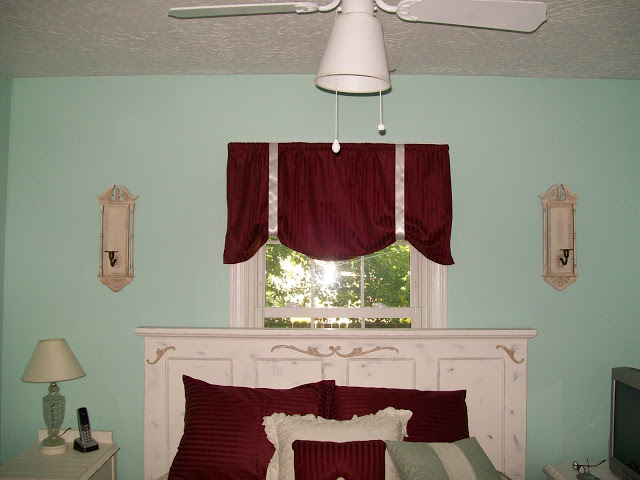
    This is how the headboard has look for the last year.

    Painting Door Headboard

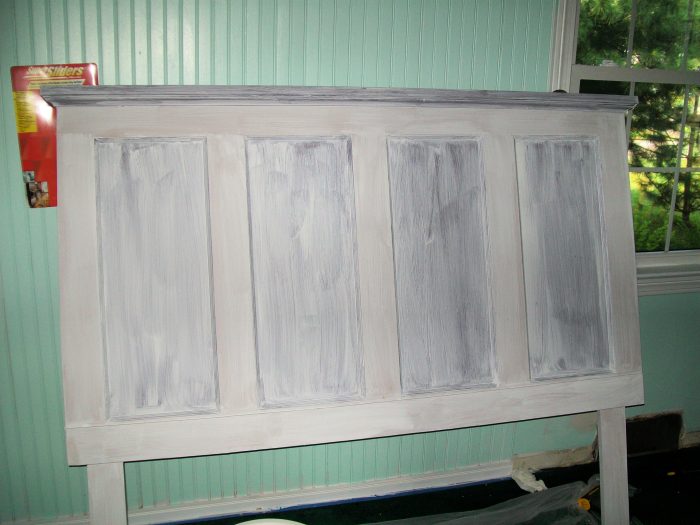
    I painted over the dark colors with Kilz primer.

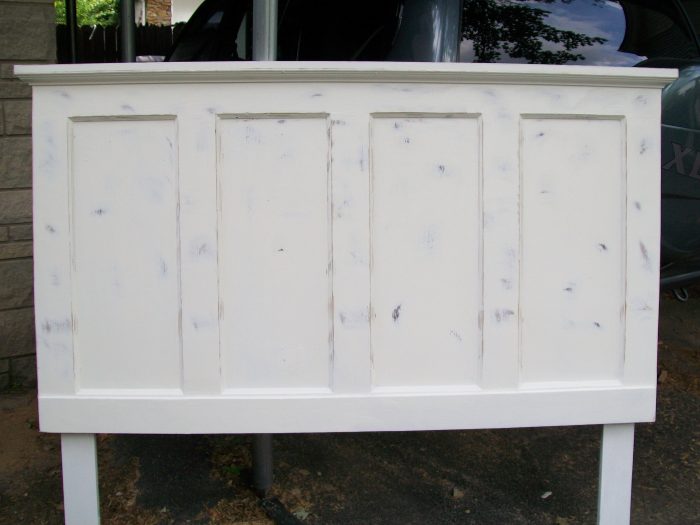
    I then painted it with a coat of Glidden Crisp White Linen.

    Trim Height of Legs

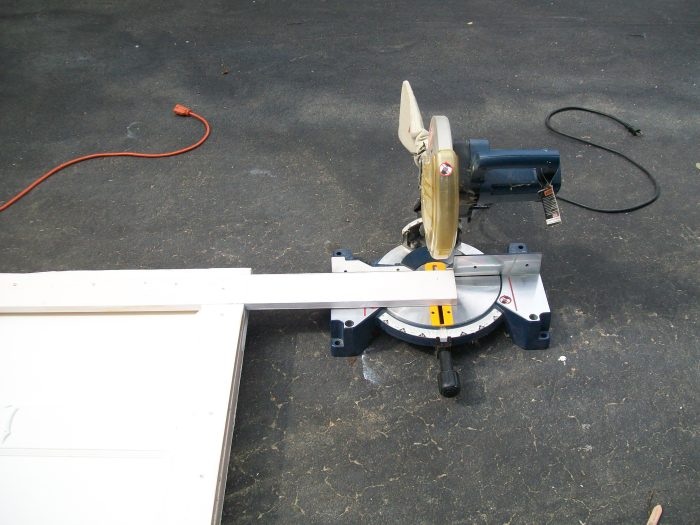
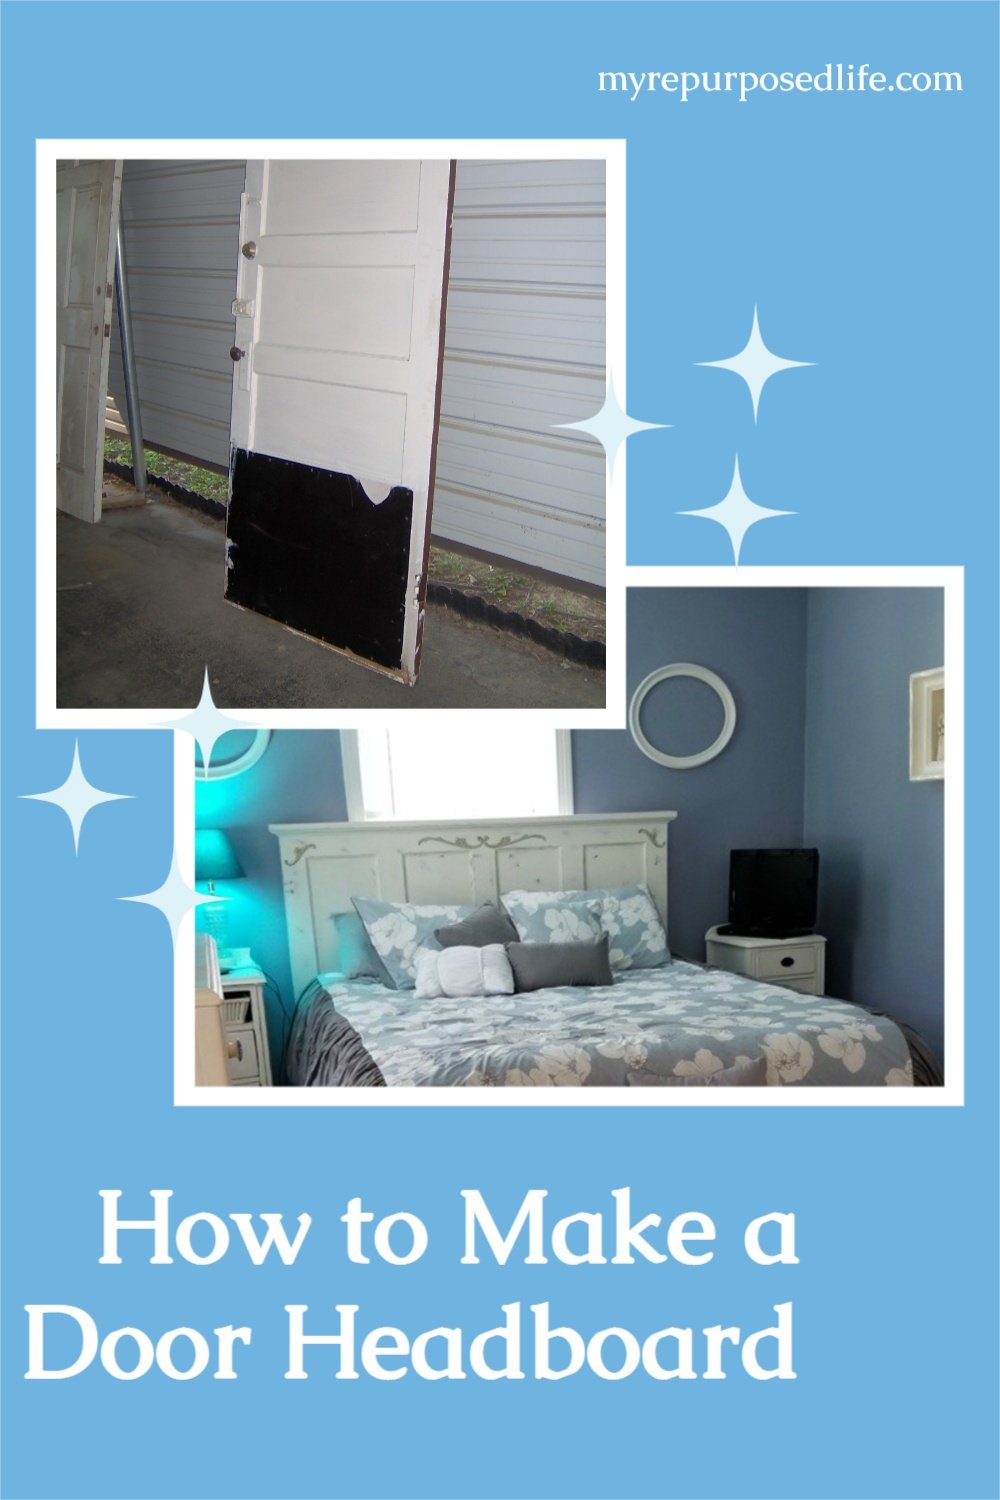
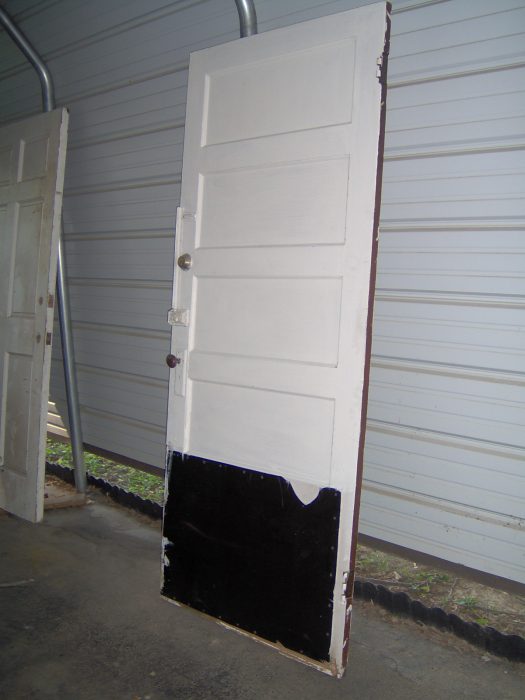
    Ever since I originally built it I felt like it was too tall. After building it and dragging it into the house to see that it was a little too tall, I was not inclined to drag it back out to trim it up. Last week, after I painted it I decided I wanted to distress it. Since I had to bring it outside to distress it, I thought I would go ahead and cut a little off of the legs. If you look closely you can still see the number “1” for the apartment number where the door came from. (notice the saw is unplugged while I arranged the saw and the headboard. You can NOT be too careful doing this kind of work.)

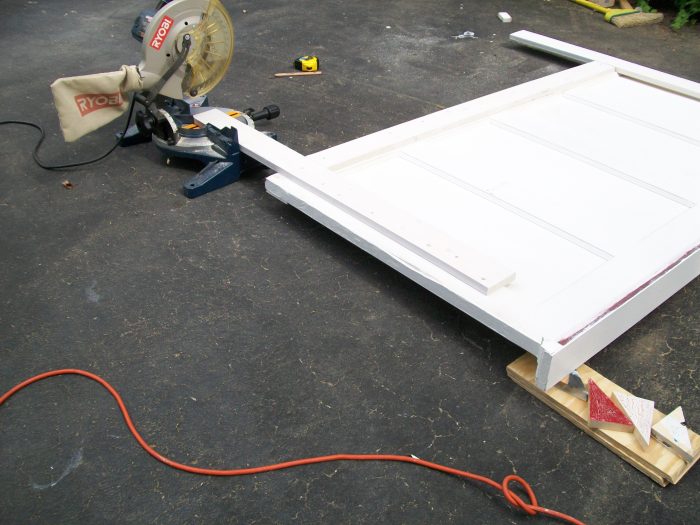
    The door would not lay correctly on the driveway so I propped it up with some scraps.

    I cut off 1 ½ inches off each leg.

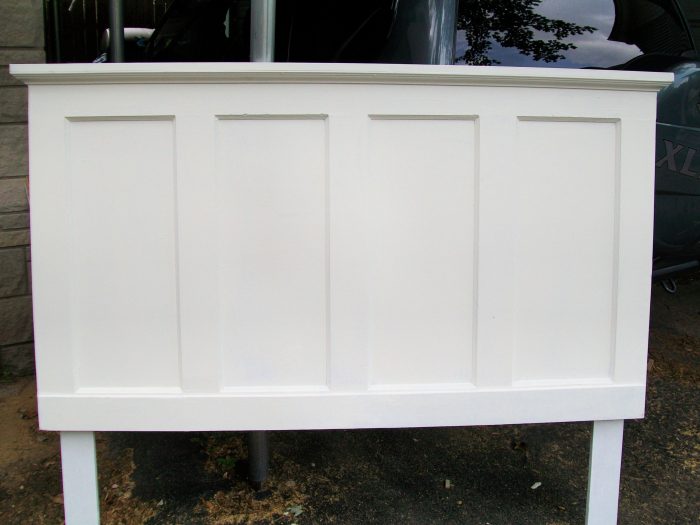
    This is what it looked like before I distressed it. I decided to distress it so that it would look more like my nightstand.

    Distressing Furniture

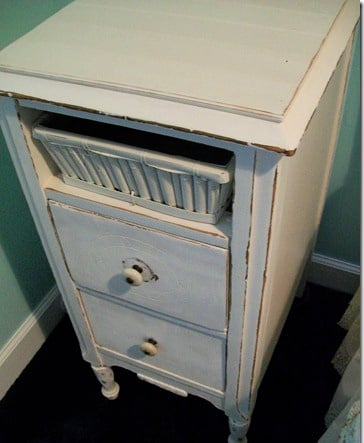
    Notice the matching knobs I picked up last week with all that hardware.


    Now, I’ve told ya’ll before I’m not good at distressing. You know I should really call it di-“stressing”, because I stress over it so much. I know it sort of looks like it has the measles, but I’ve sort of gotten used to it.

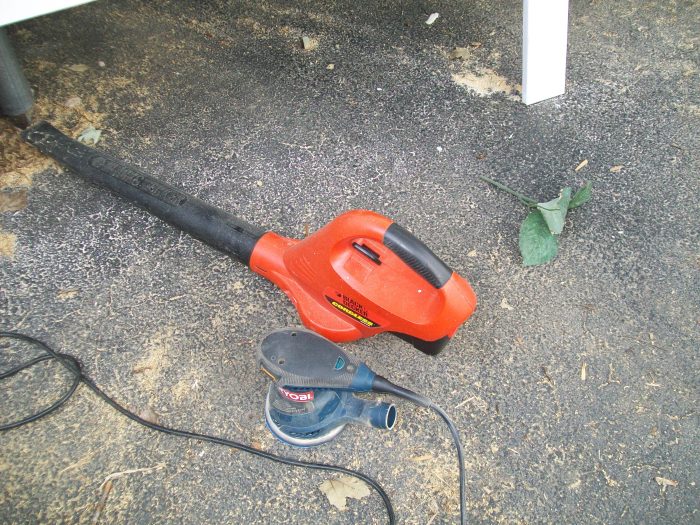
    I sanded it with my orbital sander and I used the leaf blower to blow off most of the dust. After which, I wiped it down really well.

    Adding Embellishments

    A friend tried to get me to make a new headboard from those really cute doors I got at a yard sale last Spring. She thought the door headboard was not very soft or feminine. I totally agree with her, BUT it’s been 100 degrees outside. Too hot to build a headboard.

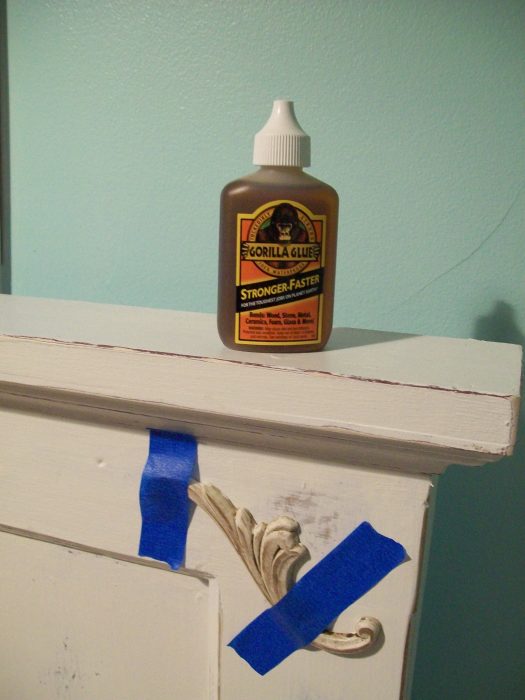
    So to soften the headboard a little I added some wooden appliques simply gluing them with the fabulous Gorilla Glue.

    old door headboard

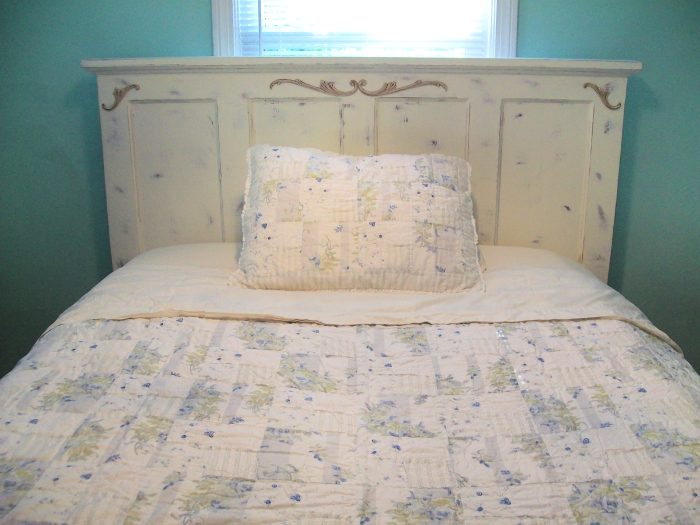
    I glazed them so that they would show up a little more. I apologize for the grainy pictures. You would think with three windows I would get a lot of natural light. I have a lot of trees shading the yard/house, so there is light, but not sunlight per se. So now the secret is out! I decided to put my bed in front of the window. The first night I slept in my new room, there was a huge lightning storm. I was re-thinking THAT decision! But because it opens up the room so much, I’ll brave the storms.

    This is how it looks now, in my "new" bedroom.

    Another Update:

    See the latest Floating Farmhouse Shelf (I painted my bedroom, the prettiest blue)

    other updates on the bedroom:  painting a ceiling fan tutorialhow to update old wood trimpainting knotty pine

    Want to see more door projects?

    door-projects


    Pin
    Share
    Tweet
    Gail Wilson
    Website

    Gail Wilson is the author and mastermind behind My Repurposed Life. She is obsessed with finding potential in unexpected places and believes that with a little hard work and imagination, any old thing can be made useful again, including herself!
    Gail reinvented herself during a midlife crisis and has found purpose again. She hopes you will find new ideas for old things and pick up a few tools along the way.

    About Gail Wilson

    Gail Wilson is the author and mastermind behind My Repurposed Life. She is obsessed with finding potential in unexpected places and believes that with a little hard work and imagination, any old thing can be made useful again, including herself!
    Gail reinvented herself during a midlife crisis and has found purpose again. She hopes you will find new ideas for old things and pick up a few tools along the way.

    Reader Interactions

    Comments

      See comments Cancel reply

      Your email address will not be published. Required fields are marked *

      This site uses Akismet to reduce spam. Learn how your comment data is processed.

    1. Patricia

      July 25, 2016 at 4:59 pm

      pretty makeover! I like the distressed look with the wooden embellishments!
      your bedroom looks so calm and serene...

      Reply
    2. belle

      May 28, 2014 at 5:49 am

      Love the "new" headboard. And the background - soft minty green is much nicer than the old paneling.

      Reply
    3. Vintage Headboards

      November 03, 2012 at 2:23 pm

      Nice work!

      Reply
    4. Chris

      November 05, 2010 at 3:55 pm

      Gorgeous. Really. I need to do stop by the ReStore and see if I can find me a door!

      Reply
    5. Stephanie Lynn @Under the Table and Dreaming

      August 15, 2010 at 4:30 am

      Gail - This is fantastic. You can not even tell it was a door! Fabulous job. Thanks so much for linking to the DIY Club! Hope you have a wonderful weekend! ~ Stephanie Lynn

      Reply
    6. The DIY Show Off

      August 14, 2010 at 11:56 pm

      Great job Gail! It's so pretty - love the new details too! šŸ™‚

      Roeshel

      Reply
    7. Meg

      August 12, 2010 at 3:33 am

      Just took a look at the doors you had linked to this post. I LOVE them! Did you end up doing anything with them?

      Reply
    8. Meg

      August 12, 2010 at 3:32 am

      Great job! I love the wooden applique's you added to the headboard!

      Reply
    9. mysalvagedtreasures

      August 12, 2010 at 12:15 am

      I love to see projects like this....so inspirational. What a great job. Lots of work, you should be proud.
      Betsy

      Reply
    10. Robin

      August 11, 2010 at 1:22 pm

      This is a truly great way to recycle (or upcycle as I like to call it.) I love it and would love to see you post this at my linky party Upcycled Awesome!
      http://tinyurl.com/Upcycled9 and come back to my blog for Stashbusting-September. I promise it will be worth your while!

      Reply
    11. ROBIN18447

      August 11, 2010 at 3:02 am

      Will this door work for a king size bed?

      Reply
    12. Brandy

      August 07, 2010 at 9:39 pm

      Well done!!
      lifeofperks.blogspot.com

      Reply
    13. Mandy's Creative Corner

      August 06, 2010 at 8:38 pm

      It turned out beautiful! I just love how the distressed look ended up =) Well done!

      Reply
    14. dec0r8or

      July 24, 2010 at 3:07 am

      Hey your headboard looks great! Thanks for stopping by my blog and telling me about yours. It's fun to see how different people tackle the same project. I know I'm happy when I can save a few bucks by using my creativity! I'm off to see more of your projects now. šŸ™‚

      Reply
    15. Sheri@childmade.com

      July 23, 2010 at 5:08 am

      Super great looking finished headboard! You have a good eye for looking past the obvious. Thanks for sharing ... I've posted a link. Stop by and say "hi," maybe add a few links of your own!

      Reply
    16. Becky@Beyond The Picket Fence

      July 23, 2010 at 4:29 am

      Looks good Gail and thanks so much for reminding my overworked brain how to save blog template. I kind of got a few things figured out--too tired to worry about more now.

      Reply
    17. LisasCreativeHome

      July 23, 2010 at 1:01 am

      Looks Great! I Love it!

      Reply
    18. Sylvia

      July 23, 2010 at 12:29 am

      Nice job. It looks great. Glazing might just take it up a notch or two. Can't wait to see the entire room.

      Reply
    19. ~ Regan

      July 22, 2010 at 10:37 pm

      Love the decals-I think they make the headboard more feminine.
      When I distress, I like to use my mouse sander to go over the edges, pushing harder randomly to make more defined stress marks. Sometimes I go over the solid parts of the furnitiure, but mostly, that just gets a few worm holes and glazing. I like how yours came out- I think you are being hard on yourself! šŸ˜‰
      Can't wait to see the rest of the makeover!

      Reply
    20. Marydon

      July 22, 2010 at 6:19 pm

      Wow!! I am impressed! Love the details your added, just dressed it right up.

      Have a lovely day ~
      TTFN~ Marydon

      Reply
    21. Sandra

      July 22, 2010 at 3:20 pm

      Very nice! I love love it! I painted our bedroom furniture in Cottage White but I think I need to do something to them. Hmm? I may add glaze to match the curio cabinet I did a while back. I hope you're having a wonderful day.
      Sandra

      Reply
    22. dogsmom

      July 22, 2010 at 1:22 pm

      I will do my best to come back but Happy Anniversary (ahead of time)

      Reply
    23. Amanda@The Hand Me Down House

      July 22, 2010 at 12:49 pm

      I love the appliques you added - the look so great! Well...the whole headboard looks great! šŸ™‚ Love the bedding you put with it, too.

      Reply
    24. Cassie @ Primitive & Proper

      July 22, 2010 at 11:55 am

      the pieces are all coming together- looks great! and you are distressing???? what??!?!?!? šŸ˜‰ i am proud of you!

      Reply
    25. Cassie @ Primitive & Proper

      July 22, 2010 at 11:55 am

      the pieces are all coming together- looks great! and you are distressing???? what??!?!?!? šŸ˜‰ i am proud of you!

      Reply
    26. Granny J

      July 22, 2010 at 11:50 am

      The headboard looks great and the trim pieces are perfect for it.

      Reply
    27. A Pretty Pastime

      July 22, 2010 at 11:34 am

      Very Nice! I can't wait to see the whole room reveal.

      Stay cool!

      Katy

      Reply
    28. Jess @ Frugal with a Flourish

      July 22, 2010 at 11:06 am

      Love the headboard!!! I think the additions of the wood appliques are perfect!

      Reply
    29. Proper Prim

      July 22, 2010 at 9:46 am

      Well you have been a very busy girl again... Love that headboard.

      Are you adverse to glazing it? the "de"stressing kind of goes hand in hand with it... I think you would get the result you are looking for if you do... and don't worry nightstand doesn't have to match... nothing is matchy, matchy anymore.

      Just a thought, it still looks great the way you have it.

      Hugs, Deb

      Reply

    Primary Sidebar

    Hi, there! I’m Gail Wilson, the author and mastermind behind My Repurposed Life. I’m obsessed with finding potential in unexpected places and believe that with a little hard work and imagination, any old thing can be made useful again—myself included! I hope you’ll enjoy the journey and pick up a few tools along the way… literally!

    More about me →

    Footer

    ↑ back to top

    SEEN ON

    Might I Suggest

    • Start Here
    • Furniture Makeovers

    Newsletter

    • Sign Up! for emails and updates
    • Contact

    About

    • Gail's Favorites on Amazon
    • About

    As an Amazon Associate I earn from qualifying purchases.

    Copyright Ā© 2023 My Repurposed Life Ā· Privacy Policy Ā· Disclosure