Drawer Front Sign | Welcome
As an Amazon Associate, I earn from qualifying purchases.
Have you ever made a drawer front sign? I’ve used them for lots of things, including shelves and coat racks. I was wanting some thin stock for another project—drawers are a perfect way to get free wood! While I was working on the other project, I decided to make this drawer front sign.
Part Out Vintage Drawer

This is the drawer I need to dismantle for the cabinet grade plywood that makes up most of the drawer.
*this post contains affiliate links, read more here*
Disassemble Drawer

All drawers are different. It’s best to examine how your drawer is constructed before you just start banging on it. I chose to use a 6 in 1 painter’s tool to sever the staples that attach the drawer front to the box of the drawer. Then, I noticed two tiny screws that were set at an angle inside the front of the drawer. Lastly, I used a hammer to separated the back and sides where they were attached.
Remove all Staples & Screws

When you dismantle a drawer, you need to inspect it for staples, etc. Look how long those are on the left! Can you believe it? The staples on the right were shorter and more difficult to grab with the vice grips. I used a screw driver to pry them out enough to grab them.
Patch Holes on Drawer Front

I used spackling or drywall mud to fill the holes where the drawer knobs had been. Do you see the nice framing around the drawer front? I knew this would be perfect for a sign.

A sanding sponge was used to smooth everything out, and a dust brush came in handy to remove all the sanding debris. Do you use one of these? As you can see, mine has been around a long time!
Ready to Paint
 Do you paint the back of your projects? I do 99% of the time. However, I don’t usually do all the coats I do on the front. I used the paint pyramids to hold the drawer front off the table, so I could paint the front.
 The first coat was quickly applied with a chip brush and a chalk type paint. This brush is actually my glazing brush, and wasn’t the best choice for me to grab.
 How about a sneak peek of the project that netted me this drawer front? In the background you can see the pieces of the drawer sides that I’ve cut, sanded and stained. Check back soon for that project.
 So, I ended up switching to a foam brush for a smoother finish. I ended up doing 3 coats of black paint.
Make Twisted Wire Hanger

While the paint was drying, I got busy on making the wire hanger for this project. You can see a tutorial on how to make a twisted wire hanger by visiting that link. For this hanger, I used 4 strands of wire.
Wax Drawer Front Welcome Sign

I’m not thrilled with how the patching worked on the holes for the drawer knobs. But, they aren’t as noticeable in real life as they are in the photos. I applied some Miss Mustard Seed Furniture Wax.
Attach Wire Hanger

Using my Ryobi Staple Gun, I fastened the wire, then folded the wire back over the staple for good measure.
Stencil Drawer Front Sign

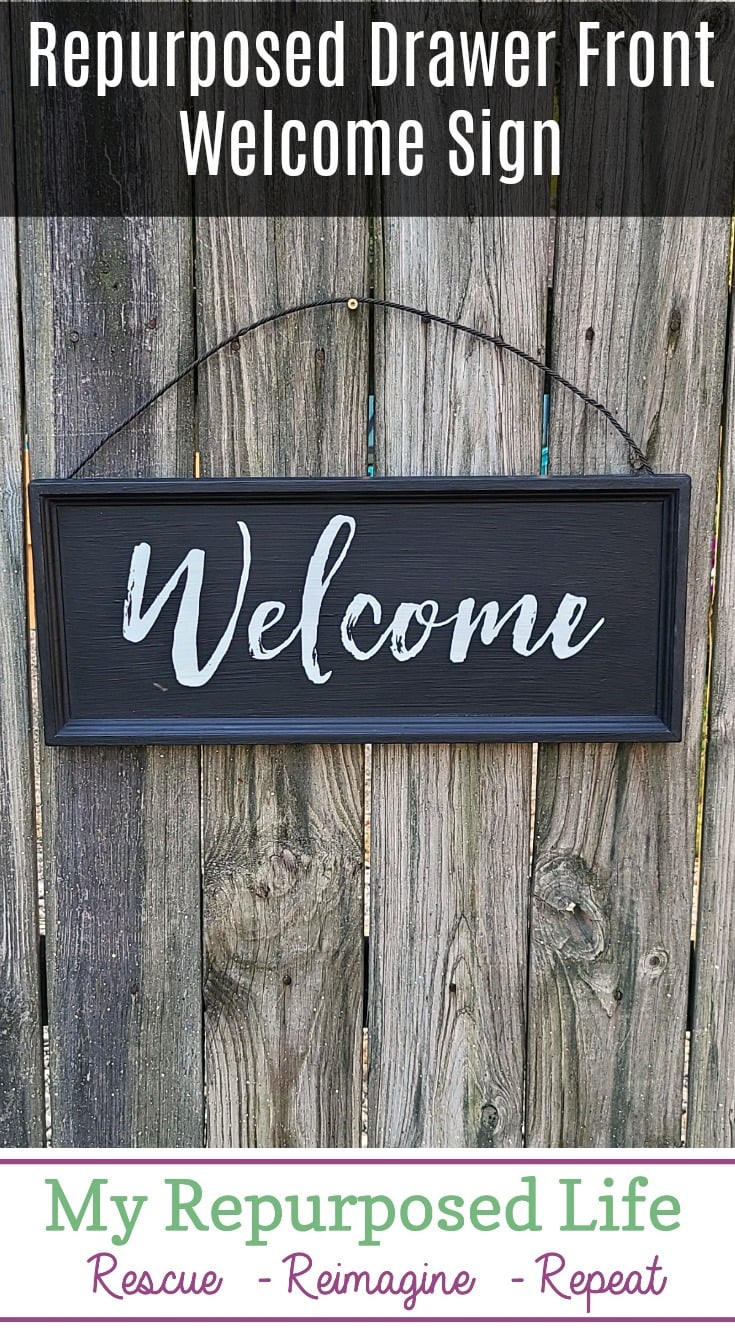
I added the word welcome to the drawer front sign. Chalking is so easy!
DIY Drawer Front Sign

Why didn’t I see that speck of dirt under the W when I was taking my pictures? What word/s would you put on a sign like this?
gail
Wow! Colette!
I’m so jealous!!! 🙂
Have you seen my Easy Cabinet Door Projects? https://www.myrepurposedlife.com/easy-cabinet-door-projects/
They are sooooo awesome for so many projects!
gail
Wow! Colette!
I’m so jealous!!! 🙂
Have you seen my Easy Cabinet Door Projects? https://www.myrepurposedlife.com/easy-cabinet-door-projects/
They are sooooo awesome for so many projects!
gail
Wow! Colette!
I’m so jealous!!! 🙂
Have you seen my Easy Cabinet Door Projects? https://www.myrepurposedlife.com/easy-cabinet-door-projects/
They are sooooo awesome for so many projects!
gail
Wow! Colette!
I’m so jealous!!! 🙂
Have you seen my Easy Cabinet Door Projects? https://www.myrepurposedlife.com/easy-cabinet-door-projects/
They are sooooo awesome for so many projects!
gail
Wow! Colette!
I’m so jealous!!! 🙂
Have you seen my Easy Cabinet Door Projects? https://www.myrepurposedlife.com/easy-cabinet-door-projects/
They are sooooo awesome for so many projects!
gail