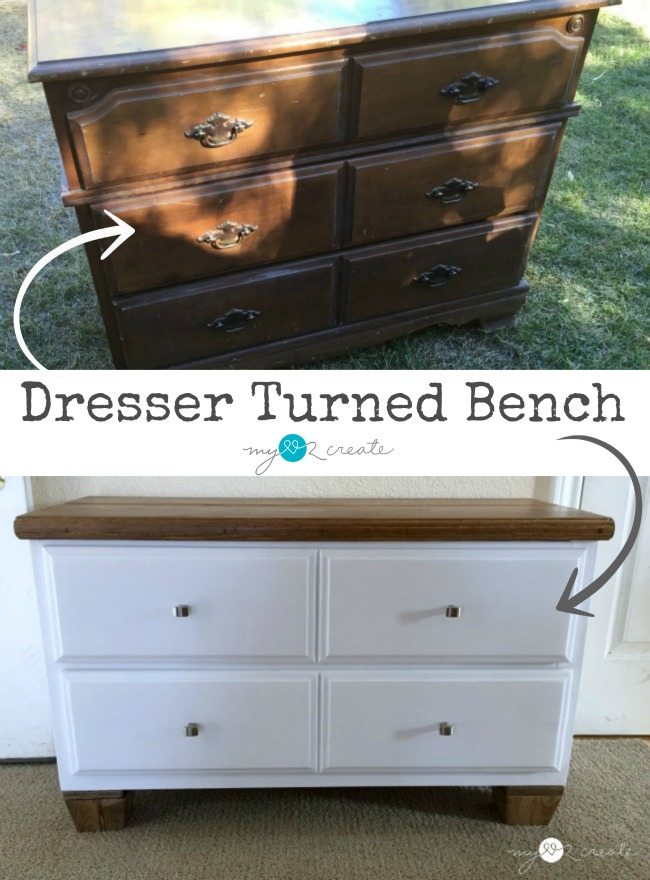
Dresser Turned Bench | seating with storage
As an Amazon Associate, I earn from qualifying purchases.
Hello MRL readers! It is good to be back. For those who may be new here my name is Mindi and I blog over at MyLove2Create, I also have the opportunity to contribute here once a month. Today I am sharing my Dresser Turned Bench. I had such a fun time doing this project. It is actually pretty simple, let me show you how I did it!

It is kind of an interesting story of how this dresser turned bench project came about…it all started back when I was doing my Teen boys bedroom makeover…
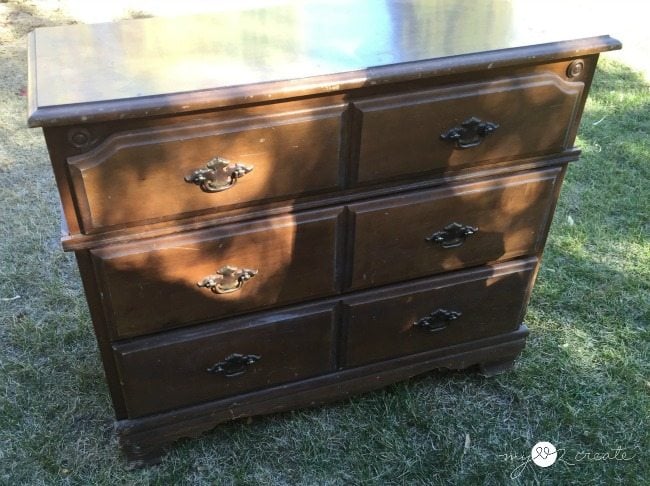
I had this dresser you see above and another one. Wouldn’t it be great if I combine them to make a bigger dresser?
*this post contains affiliate links*
Dismantle dresser
I began by removing the trim from this dresser.
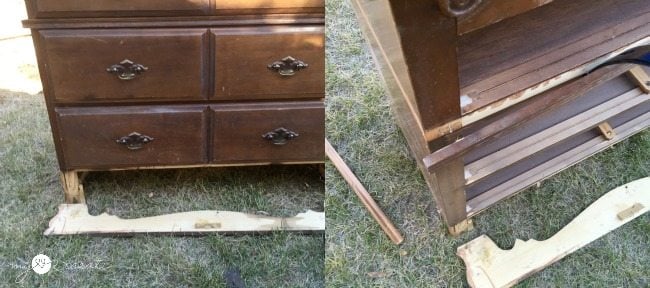
Because this dresser had a nice break, where the trim was, it was a perfect place to cut it. So I measured and marked my cut line.
How to Cut a Dresser in Half
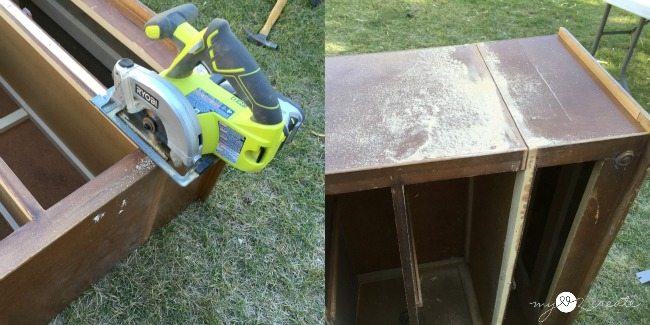
I then used my Ryobi Circular saw and cut all four sides on my line. I would cut one side, flip the dresser, and cut the next, until I had cut all the way around. At this point I felt awesome like Gail, because we all know she is the master of cutting up furniture and making it amazing. I was excited to finally try it, and it was pretty fun! 🙂
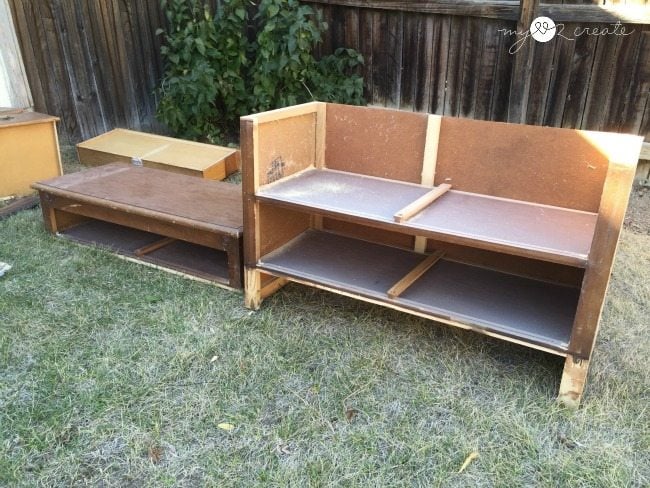
This is what I had after cutting the dresser, you can see the removed drawers on the side. I used the bigger portion of the dresser on the right, but I am sure there will be a repurposed dresser project in the future with the left over top piece on the left.
Remove bottom of dresser with a saw
I decided that I didn’t want the “legs” for this dresser turned bench so I cut them off too. And this is where I tried fitting the two dressers together but I could see it was NOT going to work. So I set this cut up dresser on my back porch and proceeded to extend my other dresser with scrap wood.
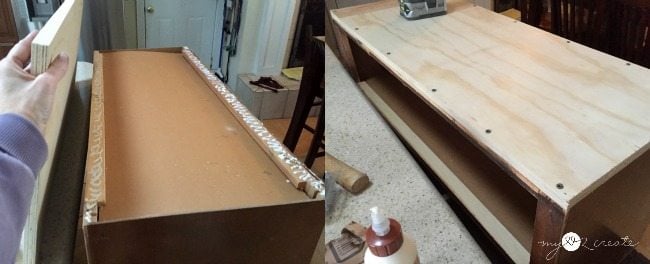
Add scrap lumber for support
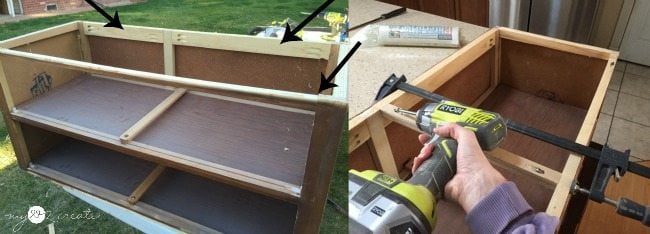
Before I set the dresser away, I had added some scrap 1×2’s to the back for support with Kreg Jig pocket holes, and also re-attached the front piece with pocket holes, because it had fallen off when cutting it apart (photo on the left). I decided to add a middle support piece with a scrap strip of plywood at the top.
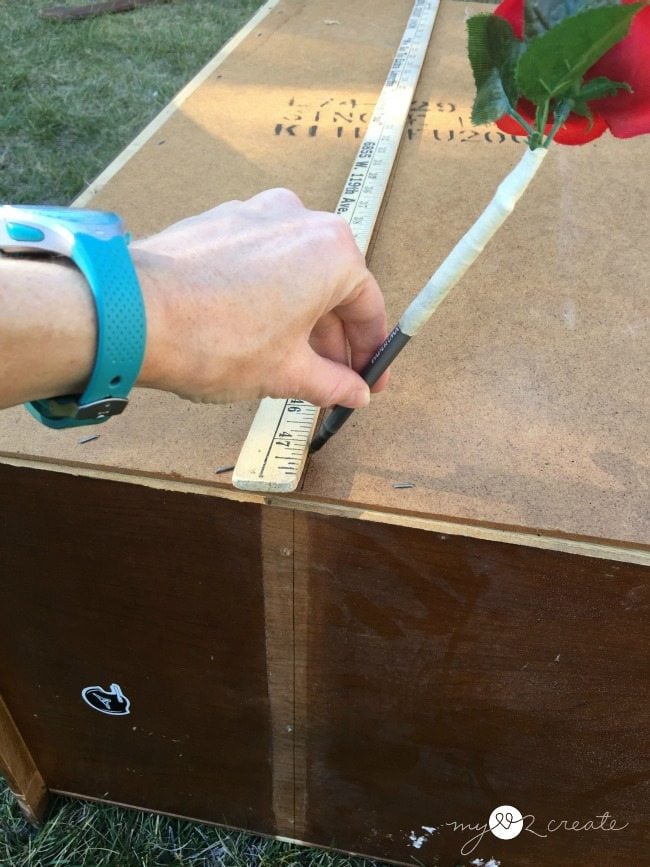
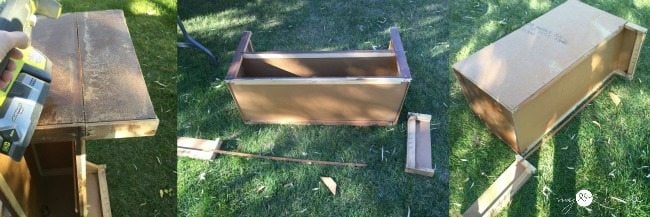
Cut plywood for dresser turned bench bottom
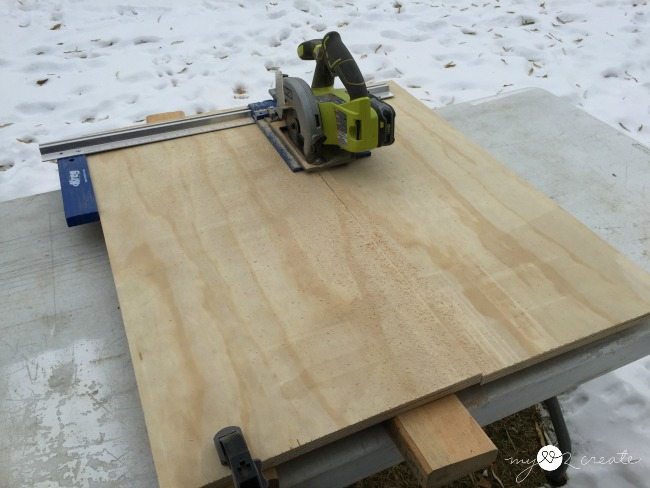
Can you see how the weather has changed? From green grass to cold snow where has the time gone!? I grabbed some scrap plywood and ripped it to create a bottom for the new bench. See photos below.
Cut boards to size for dresser turned bench top
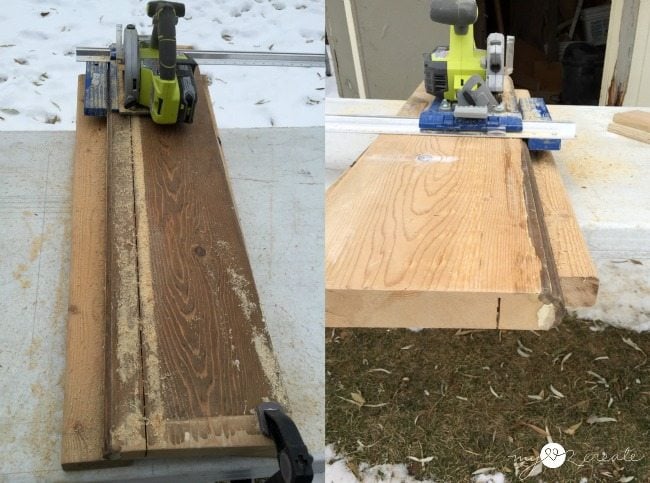
I also needed a top and grabbed these 2x shelf boards that I had gotten for free. I also needed to rip one of them to make it fit. My saw couldn’t cut all the way through. So I made one pass and then flipped the board and made a second pass to get my full cut. My Kreg Rip Cut makes my job easy because I don’t own a table saw.
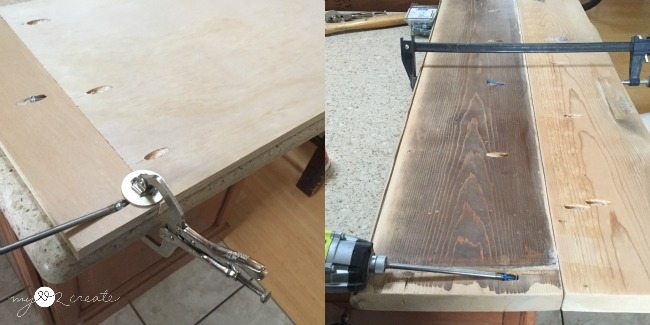
I drilled pocket holes and then used glue and pocket hole screws to attach the boards together for my dresser turned bench.
Need more details on using a Kreg Jig? See my article How to use a Kreg Jig Pocket Hole System
I glued and screwed the plywood onto the bottom of the dresser, making sure to pre-drill holes first.
Dresser bench feet
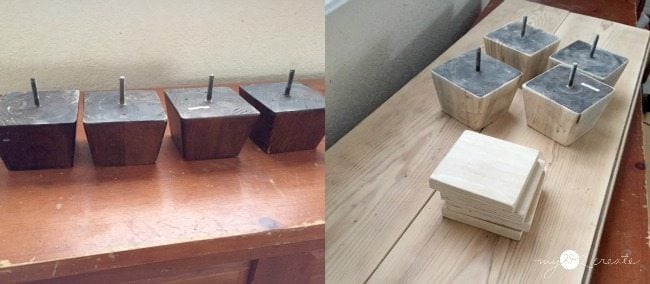
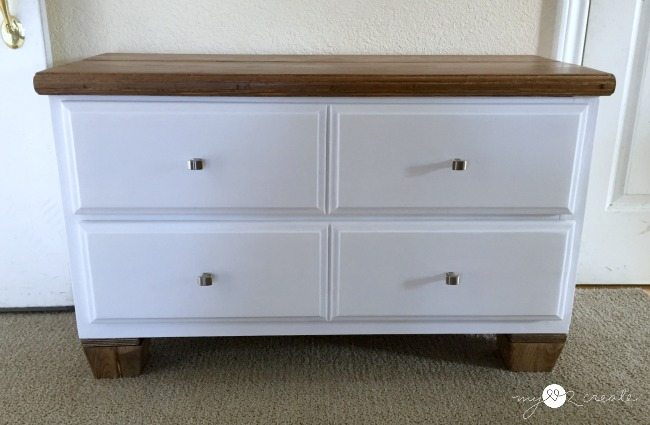
So, I had been debating on what to use for the feet when I remembered these feet I had taken off of an old couch. I thought they would be fun for the bench feet. Quickly I realized that the screws were too long for the plywood so I cut some smaller plywood scraps to screw onto them to make them fit better. I sanded everything down to prep for staining.
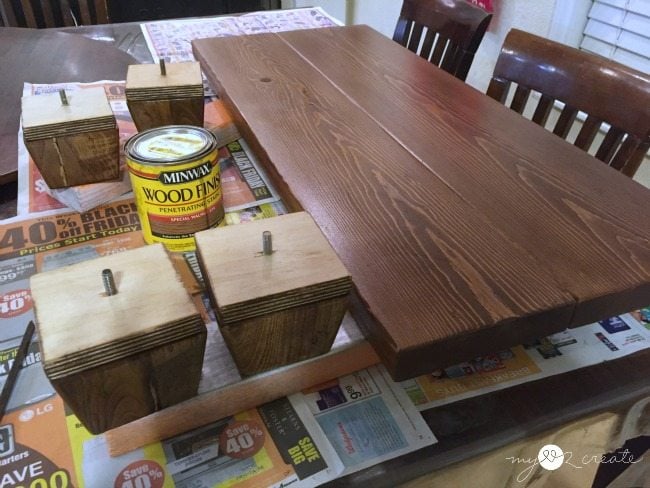
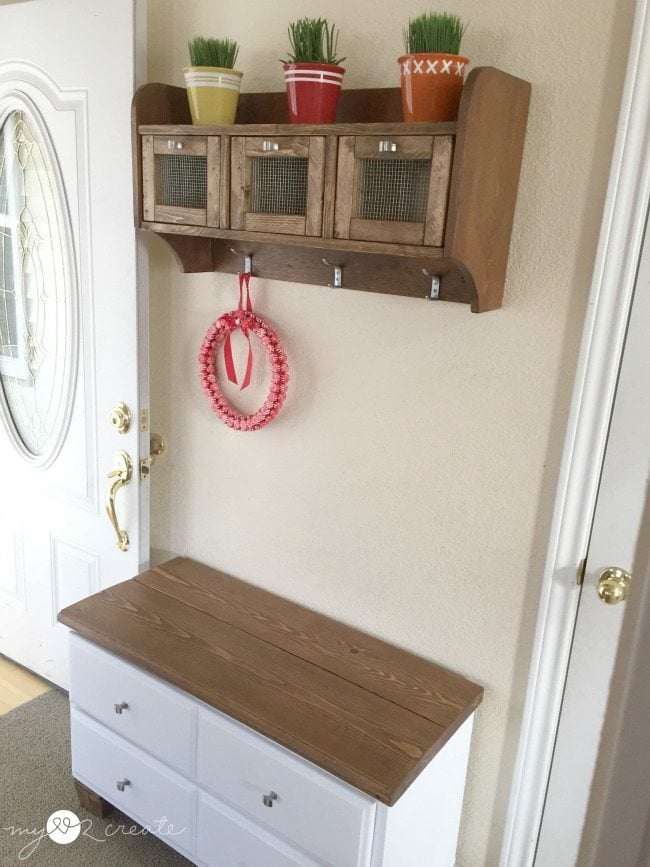
I decided to go with Special Walnut to match the hanging storage shelf I had made, which this bench will be sitting under. While I stained and added poly to the top and feet I painted the dresser and drawers white. Unfortunately I totally forgot to get a photo of that, but I primed first with Gail’s DIY chalk paint recipe and it worked great!
Assemble new bench made from a dresser
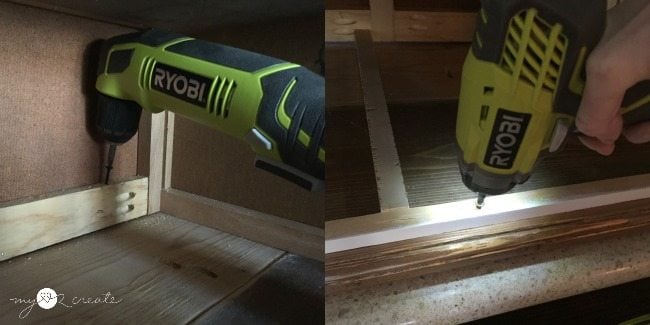
Once everything was dry I could put it all together! I turned the new dresser turned bench upside down onto the bench top and screwed them together. I needed my right angle drill for the screws in the back. It would also be easy to just nail the bench top onto the dresser from the top.
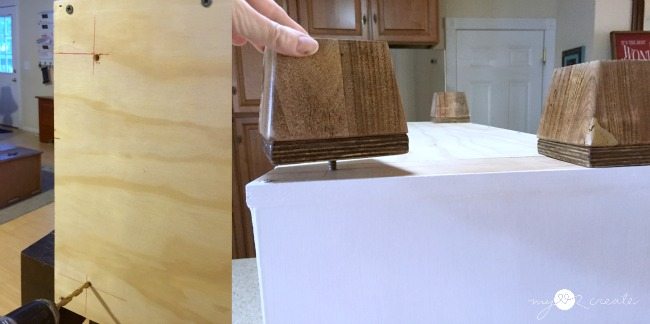
To attach the feet, I measured out how far the screws were from the edge of the feet and marked it on the plywood. Then I drilled holes and screwed the feet onto the bottom.
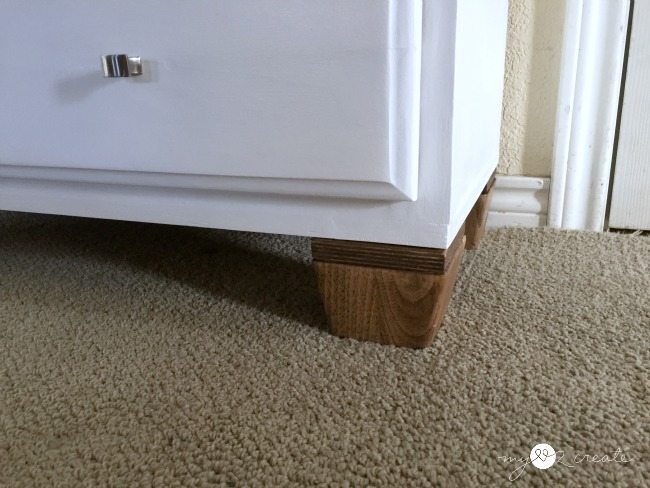
They are different but work great. Maybe they wouldn’t be my first choice, but since I was trying to do this for free, they fit the bill. 🙂 Which reminds me, the dresser was free too.
Isn’t the dresser turned bench lovely?
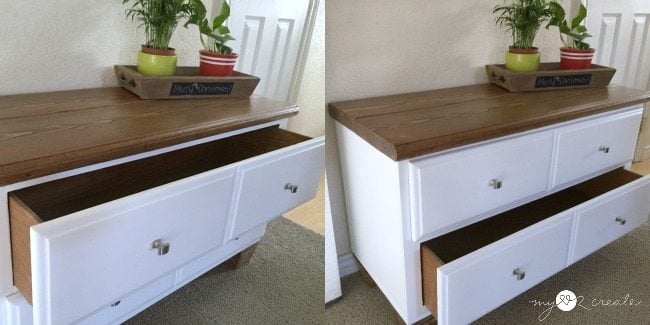
The drawers work great and this will be so very helpful during the winter months when my kids have tons of extras coats, boots, hats…
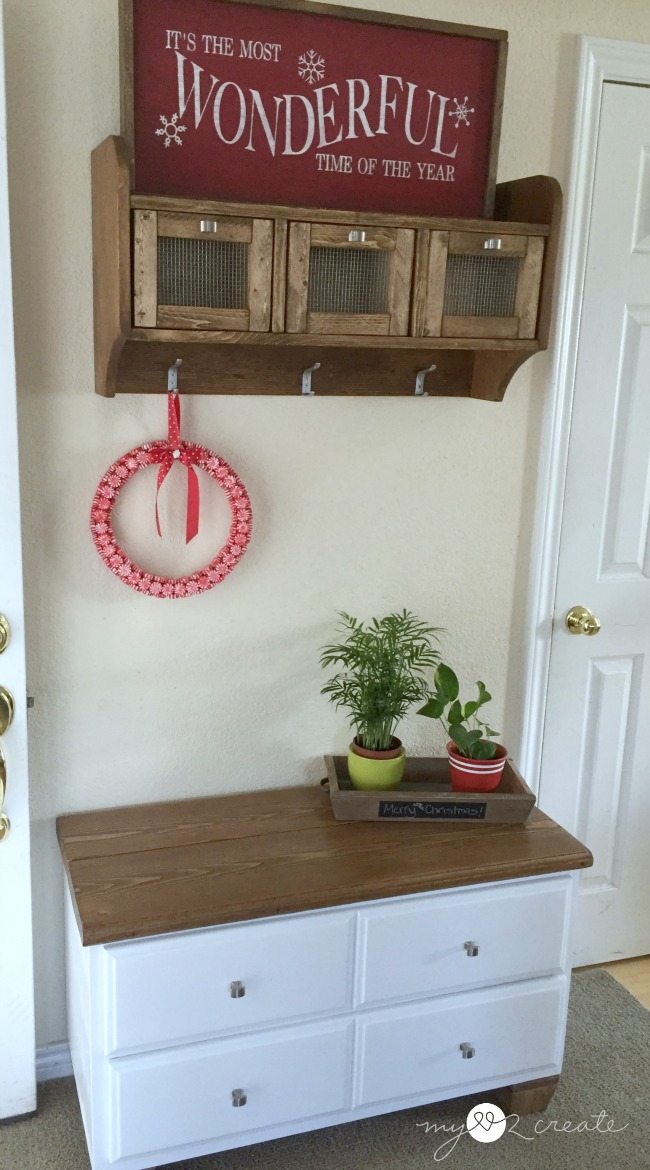
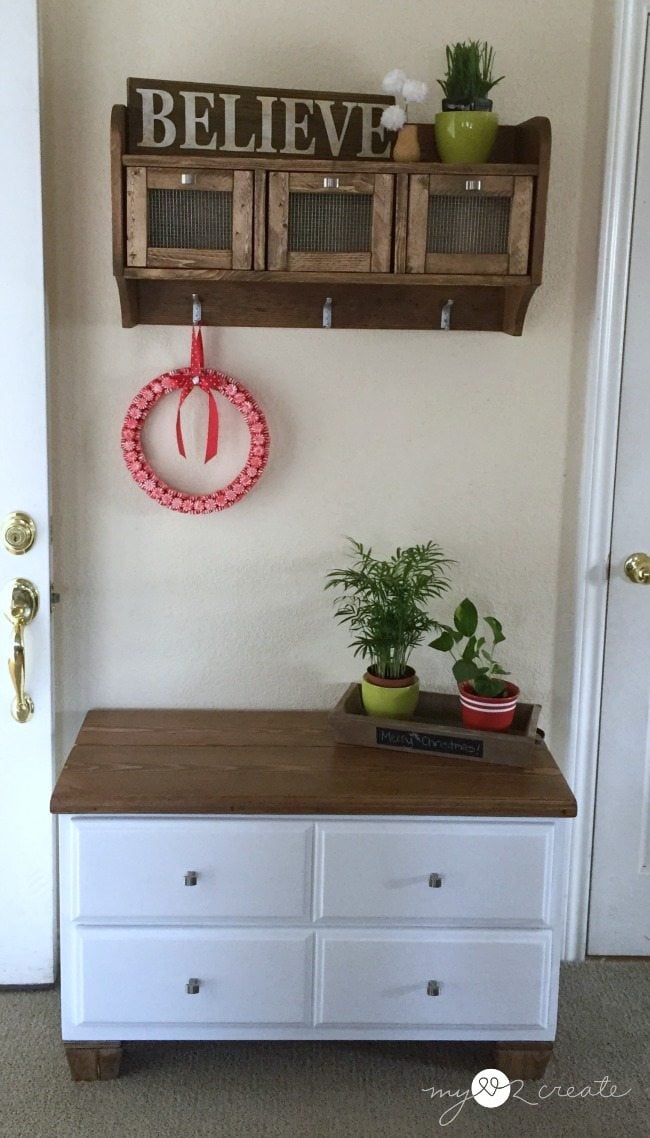
It makes a fun little entryway bench, don’t ya think? So much more useful than an unused dresser sitting on my back porch! The pulls I used for the bench and the hanging storage shelf above were salvaged from another free dresser that had died.
We have been pulling out the Christmas Decorations this week and so I grabbed a few things, like my peppermint wreath to try and stage some photos.

The wood grain on the bench top is my favorite part, it is so pretty!
I am sure I will change things up with the decor, and the kids will take over the drawers…this will be a nice compliment to my Hall Closet Makeover that I did at the beginning of the year. With 8 people and all the winter clothes we can always use a little more storage!
So what do you think of my dresser turned bench? Do you have any old dressers that could be turned into a bench? Do you think you would attempt this project? I love benches, and ones with storage are even better…so what are you waiting for…get started!!
Thanks for reading!
Hugs,
Mindi
see more of Mindi’s posts here
Looking for great repurposed dresser ideas?
I’ve always wanted to turn a dresser into a bench – thanks for the tutorial, Mindi! Yours looks awesome.
Another great project. I love the contrast of the stain plywood and the white draws. Awesome job.
Very nice, Mindi and so creative! GAIL – you have some serious competition here!
OMG what a great re-do!. Love everything about the new seat. Extra storage is always needed. I can vision this piece in almost any room or entryway. I LOVE IT!!!
Wow Mindi! What a great transformation. I love the clean straight lines; it looks fresh and current.
Thank you for sharing! Tali
wow! I love your dresser Mindi! Cutting up furniture is so much fun, I think I’m addicted to it! How do I know this? Because JUST reading your tutorial makes me want to get my saw out! I love how you did the feet–I always try to grab feet off of couches when I see them on the side of the road! Anyhoo thank you for a fabulous tutorial on turning a dresser into a bench!
gail
I really love the way you solved each challenge as it arose, Mindi! It’s brave and creative to pursue a vision from start to finish.
The squares of plywood that you used as ‘spacers’ on the feet look awesome.
It’s comforting to know that I’m not the only one who has pieces of furniture in various stages of rehabilitation scattered around! This one turned out to be functional and very attractive – thank you for sharing your process.
Fantastic makeover Gail! I love the bench in the entryway… everyone needs a little seat now and then (though here it would be piled high with backpacks!) Great transformation! 🙂
I think that I have said this before, but you are a genius.