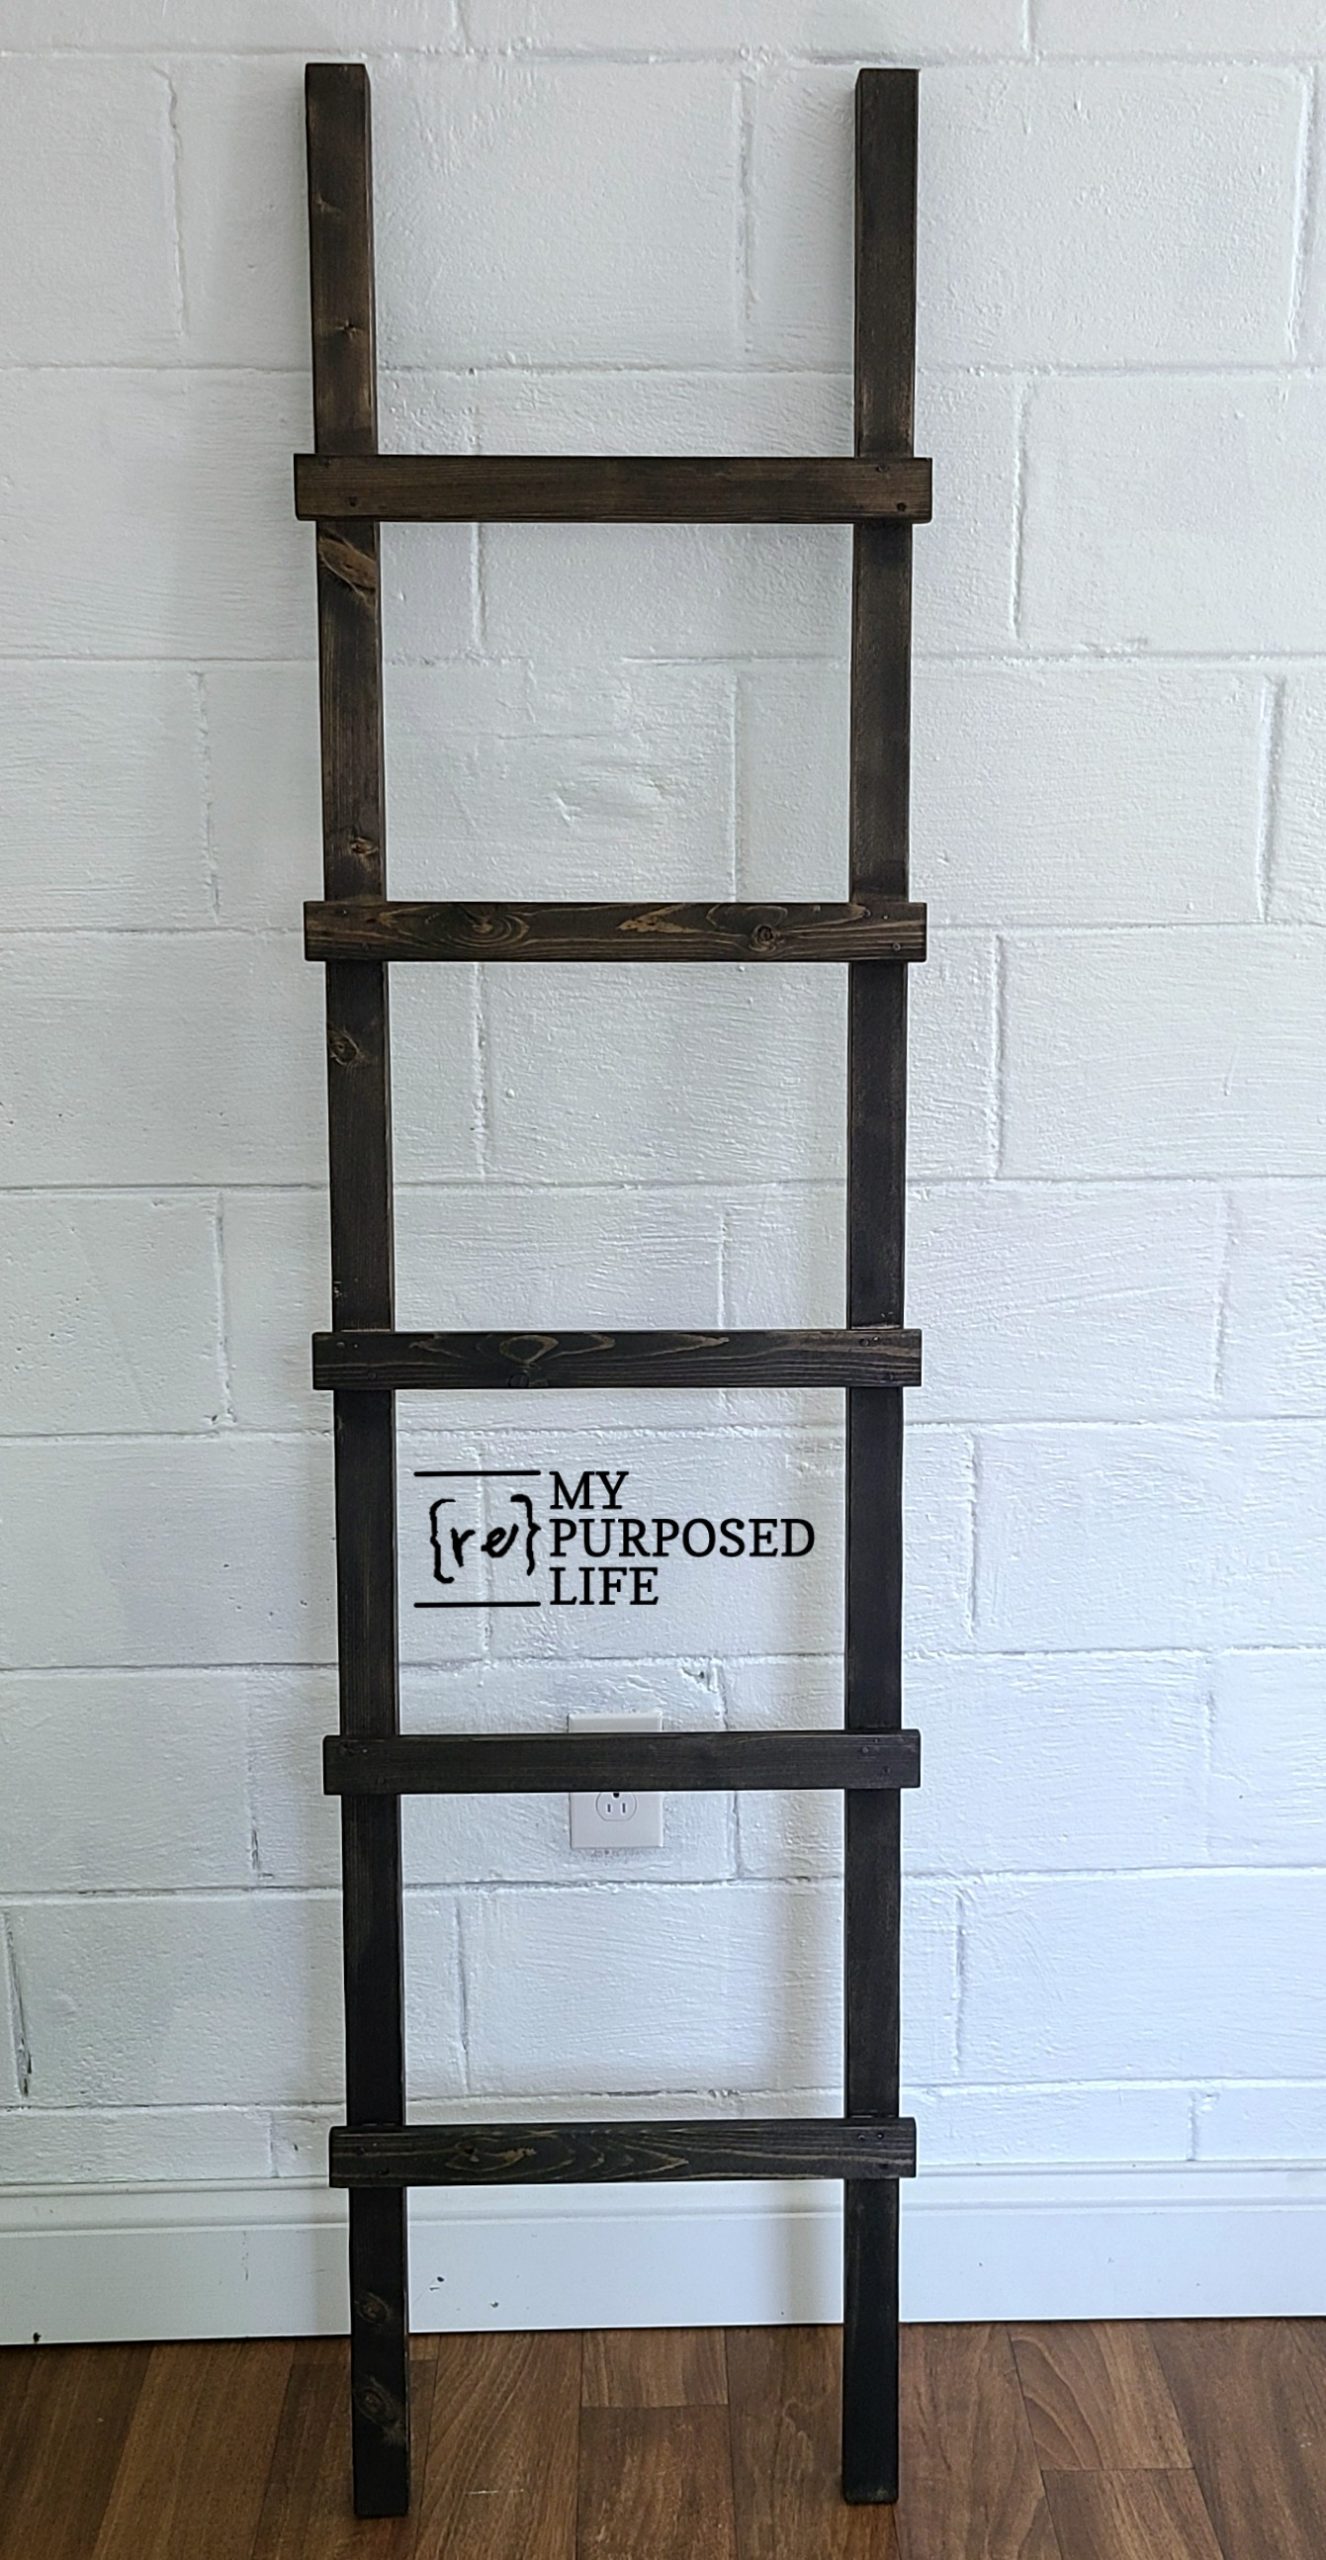
Farmhouse Ladder
As an Amazon Associate, I earn from qualifying purchases.
I didn’t actually plan to build a farmhouse ladder. But when I finished my Flour Sack Towels last week, I went looking for my craft display ladder for photographing the towels. It wasn’t there! Did I sell it? Too bad, the towels would have looked so cute on it with all the small spindle rungs.
So, I needed some sort of easy ladder project. And, boy do I have the best farmhouse ladder tutorial to share with you!
Easy DIY Farmhouse Ladder Tutorial

Isn’t it beautiful?
Let’s see how easy this farmhouse ladder is to make!

Do not be intimidated by my project, I’ll be sharing an alternate way for you to make your farmhouse ladder without this scary table saw.
I am a use what you have kind of gal. Because I’m still safe at home because of Covid 19, I haven’t been frequenting The Home Depot as much as I would LOVE to!
Plan Your Project

I started with an 8’ 2×4, and a shorter 1×4 (scrap board). Both of these were ripped exactly in half on the table saw.
Sand All Lumber

Sanding really well is an absolute must! You can see this 2×4 had grooves in it. I actually sanded my boards before ripping them to make it easier.

Beginning with the 60 grit, then moving to the 220 grit to get a nice finish on the boards worked really well.
Tip: Remove Mill End of Lumber

Before cutting the boards to the length I wanted, I trimmed off the mill end of the boards.
Ladder Side Rails

Each of the side rails were cut at 6 feet. (out of the 8’ 2×4 that was ripped in half)
Rungs of Farmhouse Ladder

The thinner boards (1×4 ripped in half) were cut to about 18” in length. I cut 6 boards, but only ended up using 5 of them.

The board on top has been sanded to remove the sharp edge on all sides. I wanted to make sure that whatever is hanging on the farmhouse ladder has nice edges rounded over.
How To Assemble

This is the design stage of the farmhouse ladder rungs. I was trying to figure out the best layout for the rungs. This is when I decided that 5 rungs would work best.
*this post contains affiliate links, read more here *
Mark Side Rails for Rung Placement

I marked my side rails with a combination square using small marks so they wouldn’t be seen when I stained the lumber. An Irwin quick clamp held the boards together.
Nail and Glue Rungs

In order to assemble the farmhouse ladder, I needed a tape measure, a kreg multi-tool , Gorilla Wood Glue, and a nail gun.

Using a dab of wood glue, and one brad nail on each side, I added the top rung, then the bottom rung.

This handy multi-tool is so helpful for getting the overhang of the rungs equal. You may choose to make your farmhouse ladder with the rungs flush with the side rails.
NOTE: I chose a 1/2” overhang.

Does stain cover wood glue? No, it does not—be sure to wipe away any excess glue. You can see one brad nail holds the rungs until the wood glue sets up.
Allow Wood Glue to Set Up

After allowing the wood glue to set up, it was time to add the nails.
Nails Give Farmhouse Ladder a Rustic Look

Of course, you could use wood screws for your farmhouse ladder assembly, but I chose to use nails. I wanted a more rustic look for my project.

Looking back, I wish I had paid more attention to where I placed the brad nails so they would be hidden by the larger nails. Don’t you love how the nails add to the ladder?
Don’t Skip This Step

This is where I keep it real. As I finished the assembly, I noticed the ladder was a little “off”. My neighbor Rodney walked over and grabbed my rusty old square. Well, looky there! Even though I measured down from the top on each side rail, and up from the bottom, it’s not square.
It’s a little difficult to explain, but Rodney stood the ladder up and rested it on one rail and sort of gave it a shove. ![]()

Much better! If you don’t have a square, you can use a piece of plywood or something similar.
Time for Paint or Stain

A dark ebony stain seemed perfect for this project.

Let’s take a close look of the stain and the nails! I colored the head of the nails with a sharpie to make them stand out a little more. Isn’t it scrumptious?

It is perfect for displaying the Flour Sack Towels.

All of the edges are very smooth and don’t snag the throws at all.
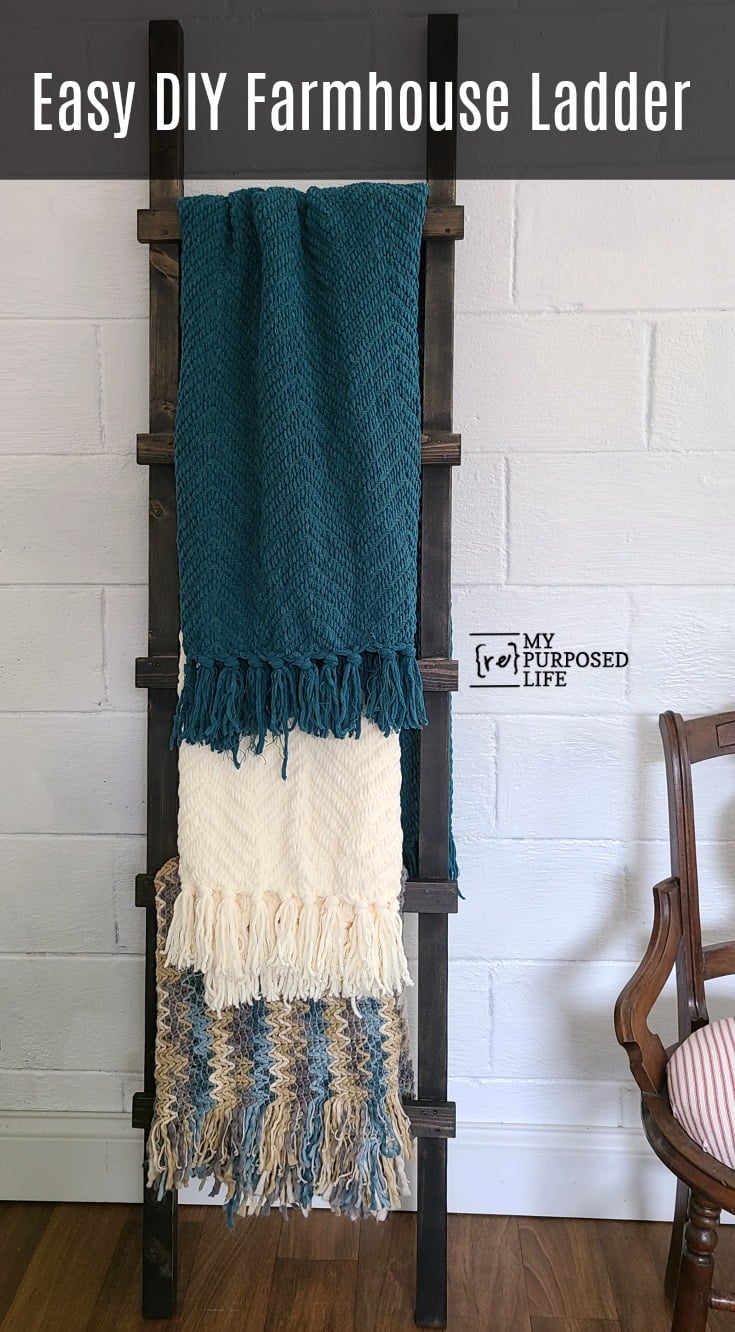
The farmhouse ladder is already in The Sugar Shack. It was really hard for me not to paint it, but I’m glad I didn’t.
Don’t forget to Save & Share this idea on Pinterest!
Measurements for DIY Farmhouse Ladder
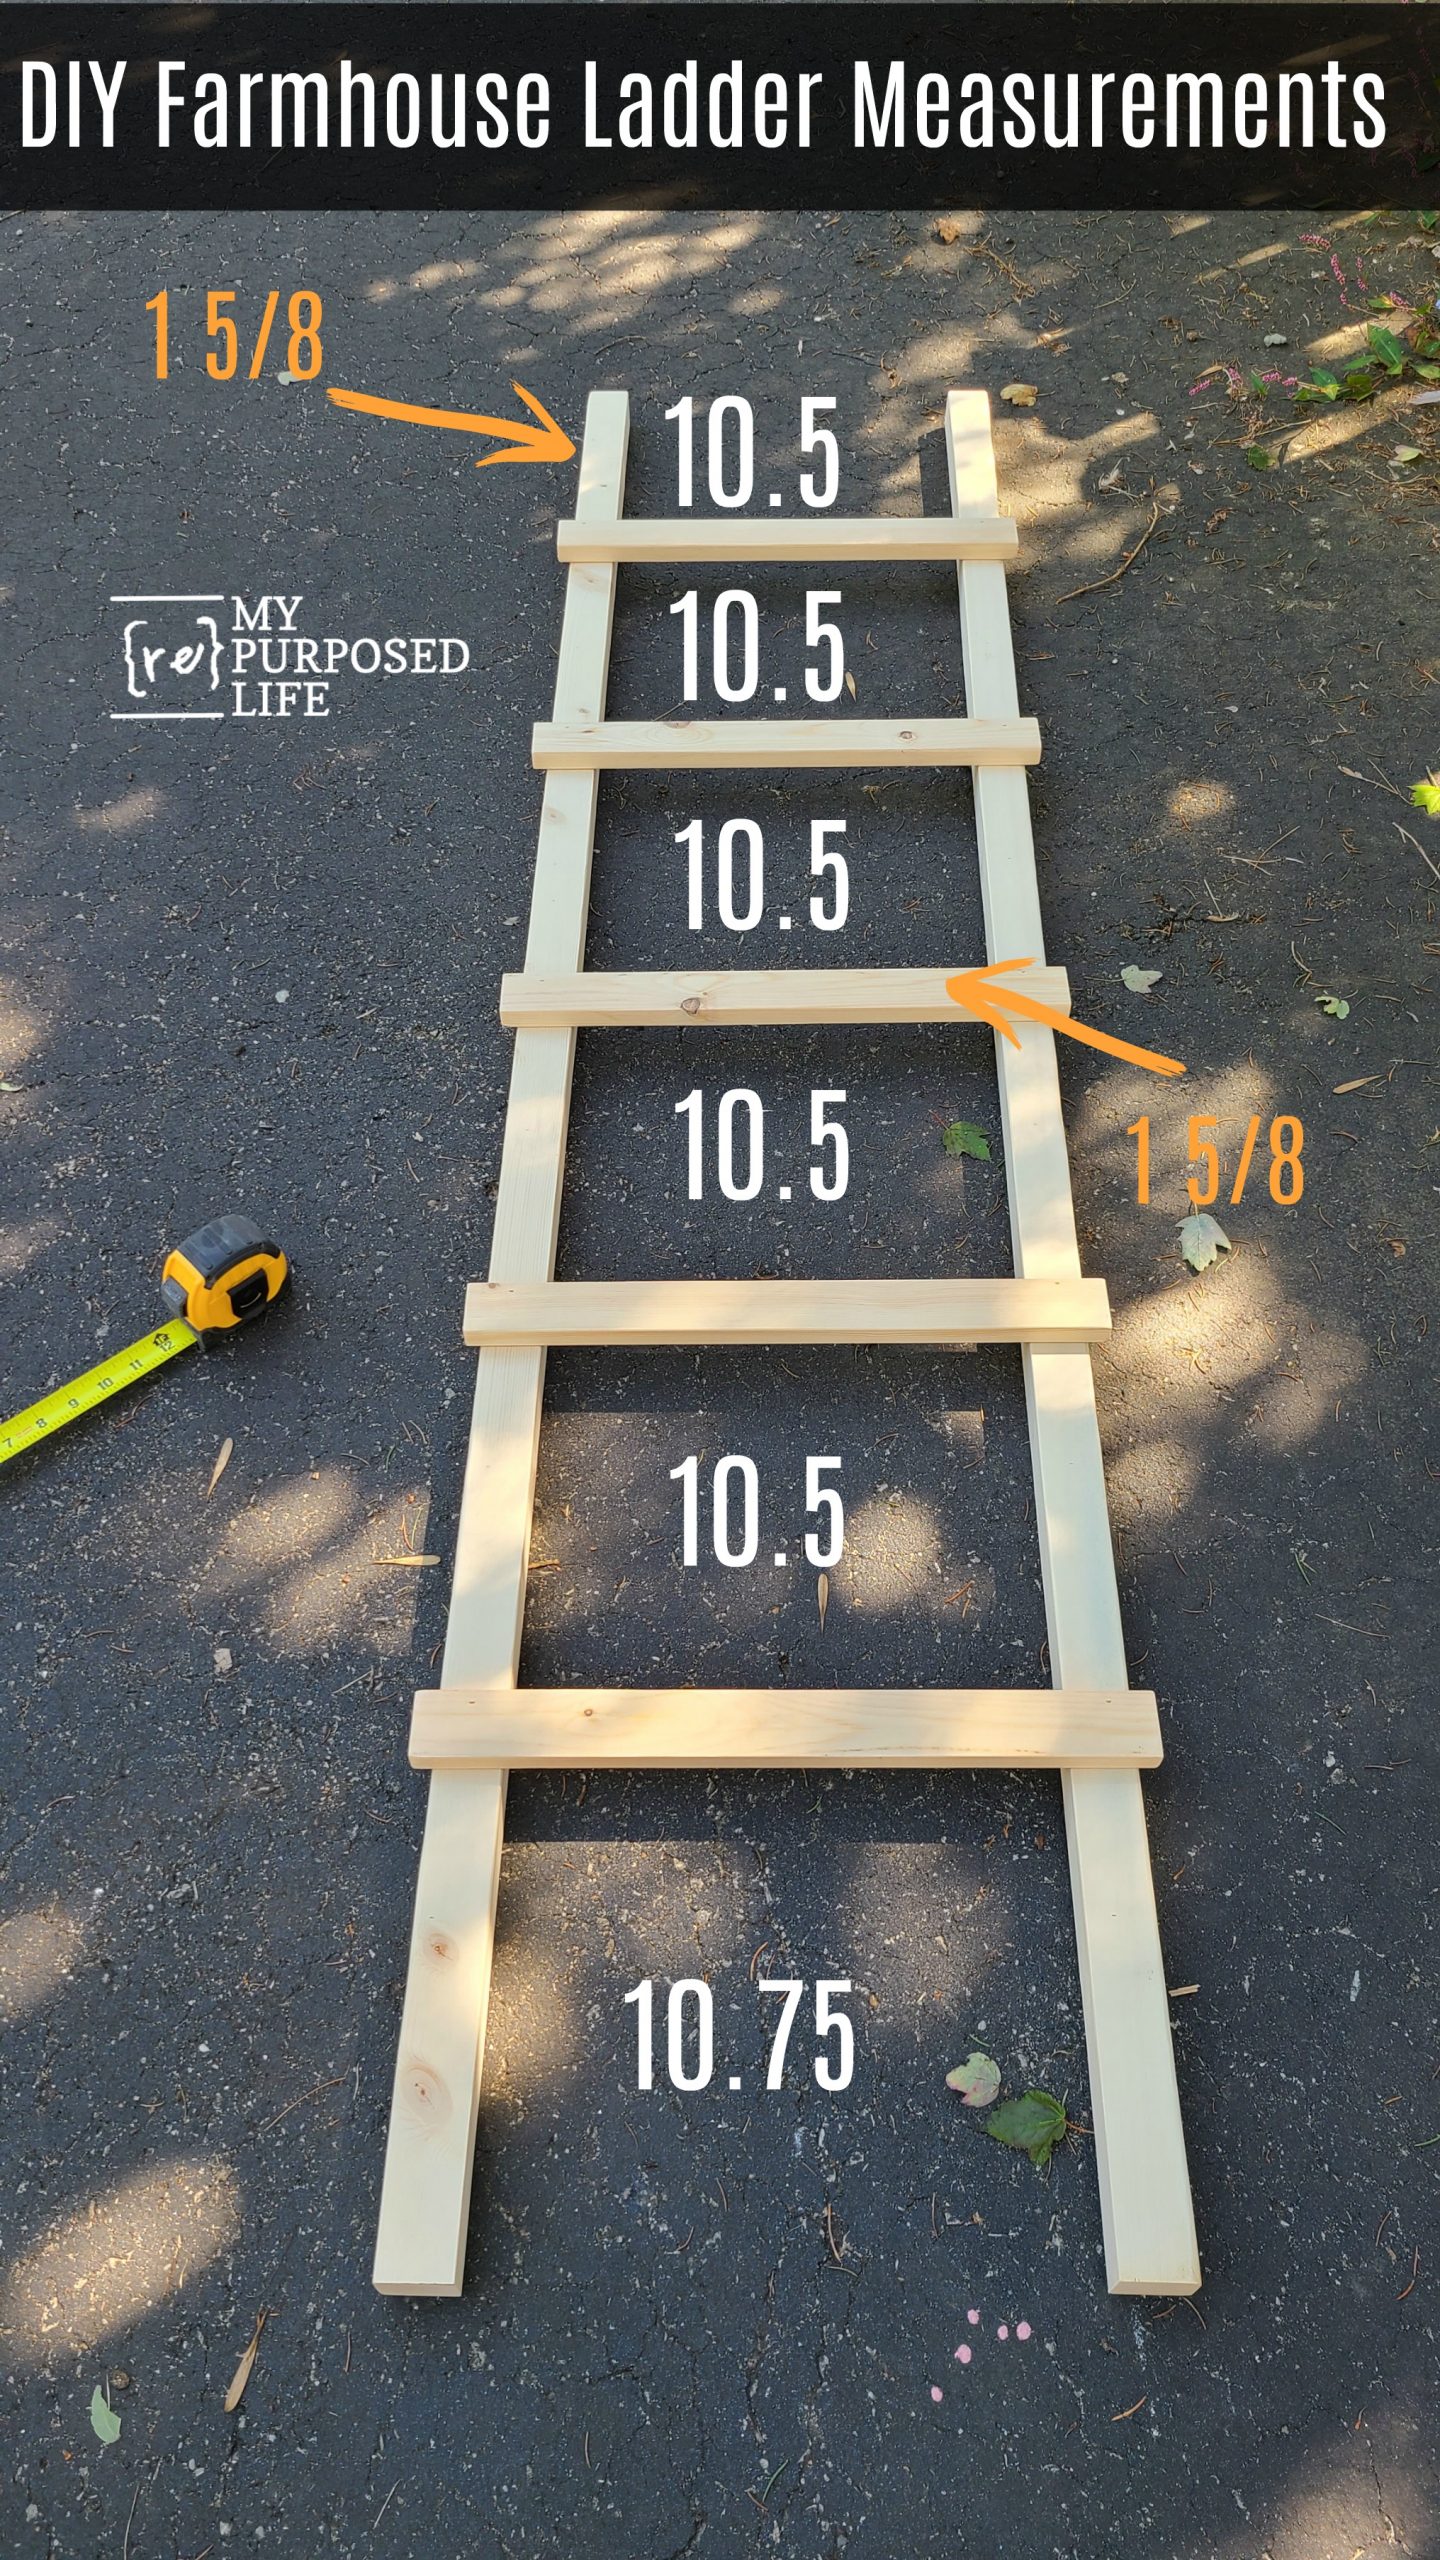
Cut List For Easy Farmhouse Ladder
- (2) 2x2x8 cut 6’
- (1) 1x3x8 cut 18” will net you 5 rungs
1×3 is sometimes called a furring strip. Using this cut list will allow you to only cut to length. You won’t need to rip the boards like I did.
Materials Needed
- Sandpaper
- Wood Glue
- Brad Nails
- 4D 1 1/2” Nails
- Stain (or paint)
Helpful Tools
- Tape Measure
- Pencil
- Saw (Jigsaw, Hand Saw etc)
- Hammer
- Sander (optional)
- Clamps
- Combination Square
- Carpenter’s Square
Will you make one? Do you think you will paint it or stain it?
gail
Love it!!!
Love it. Just wondering, did you angle the parts that lean up against the wall?
No, I didn’t angle the parts that lean against the wall.
gail
Great ladder! Totally understand what your neighbor did and why it worked! Been around handy people enough to visualize that. I would totally stain it…I love the wood look, although maybe not as dark. Have no idea where i would put it, so I don’t see myself making it. It will be in my mind though!
I think I need one of these!
Another great project!! If only I was so industrious! But alas!!!!
Thank you! It’s been a while since I’ve been so productive! I’m still nursing a bad wrist, but have decided it’s going to hurt whether I work or not. It’s great to be back working on projects, especially when they are as easy as this farmhouse ladder!
gail
Would I make it? No. While my house is more “Early Goodwill” than anything else, I’d love to buy one. However, I suspect my cats (9 of them at the moment) would think it was great fun to knock it over… Oh well.
hahahah yeah, this would be a cat’s dream! 🙂
thanks for stopping by and taking the time to leave a comment.
gail