Floral Decoupaged Side Table Makeover
As an Amazon Associate, I earn from qualifying purchases.
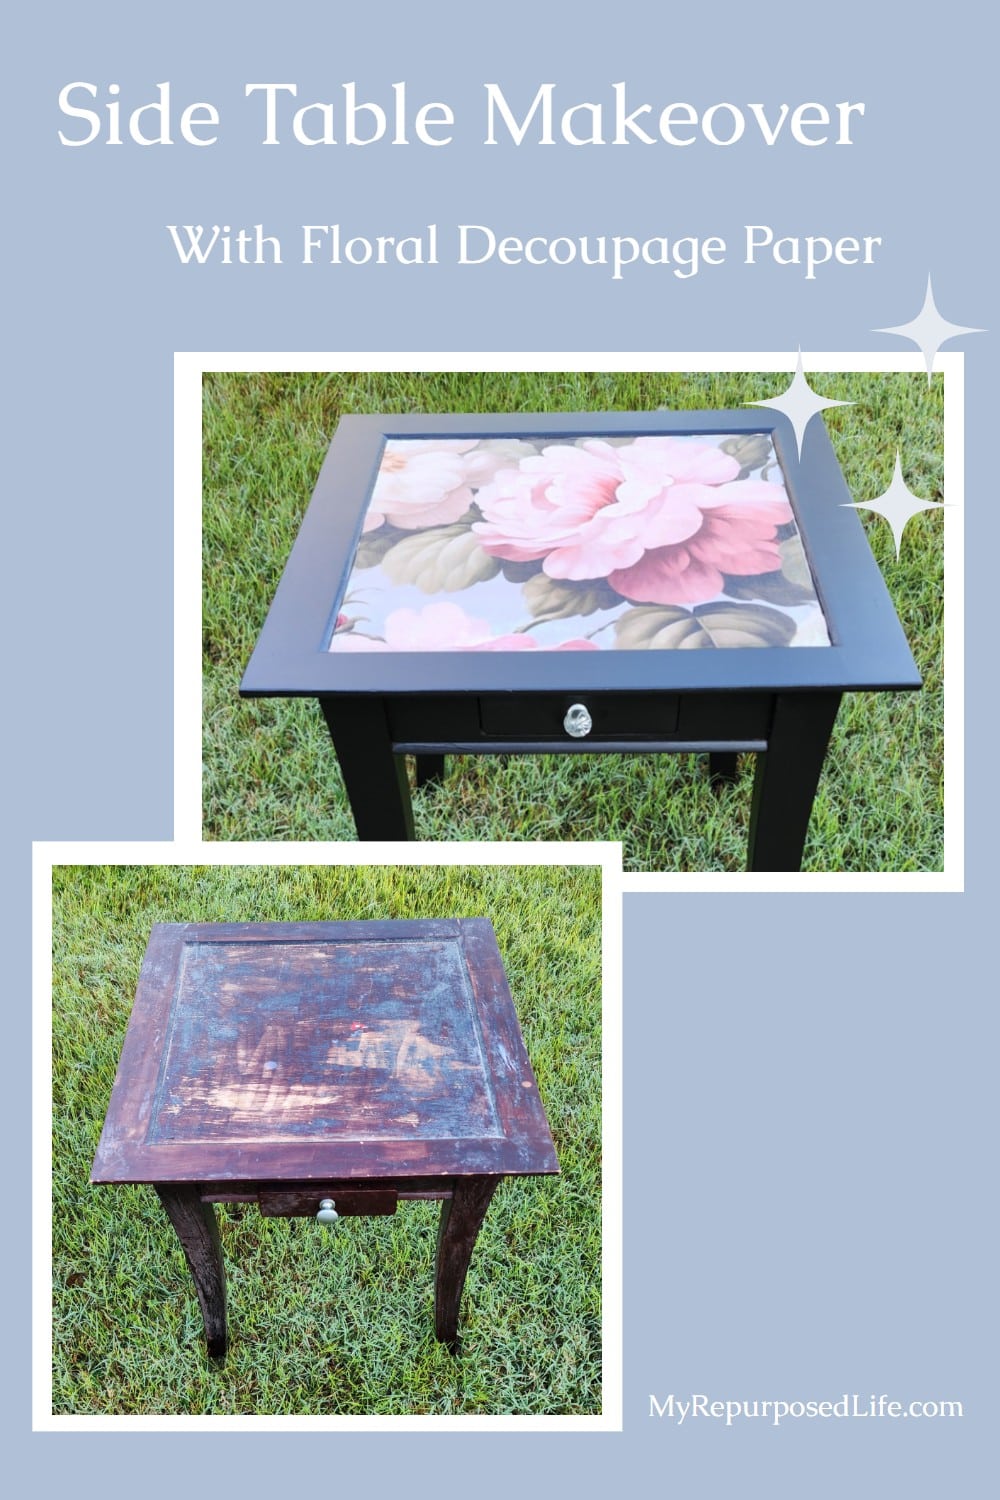
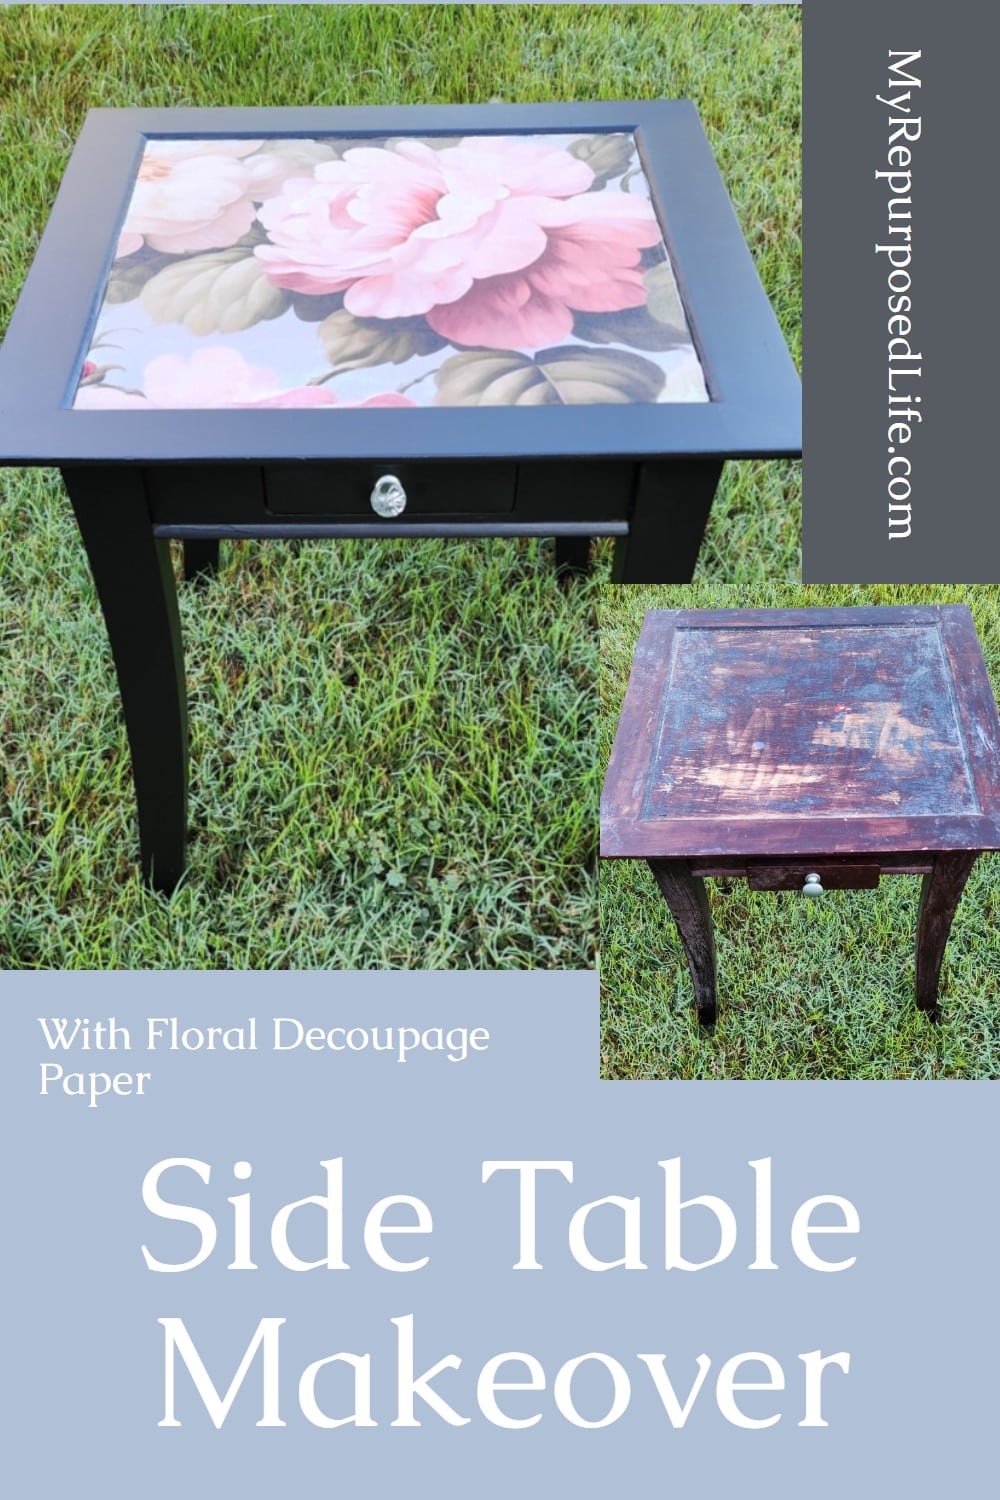
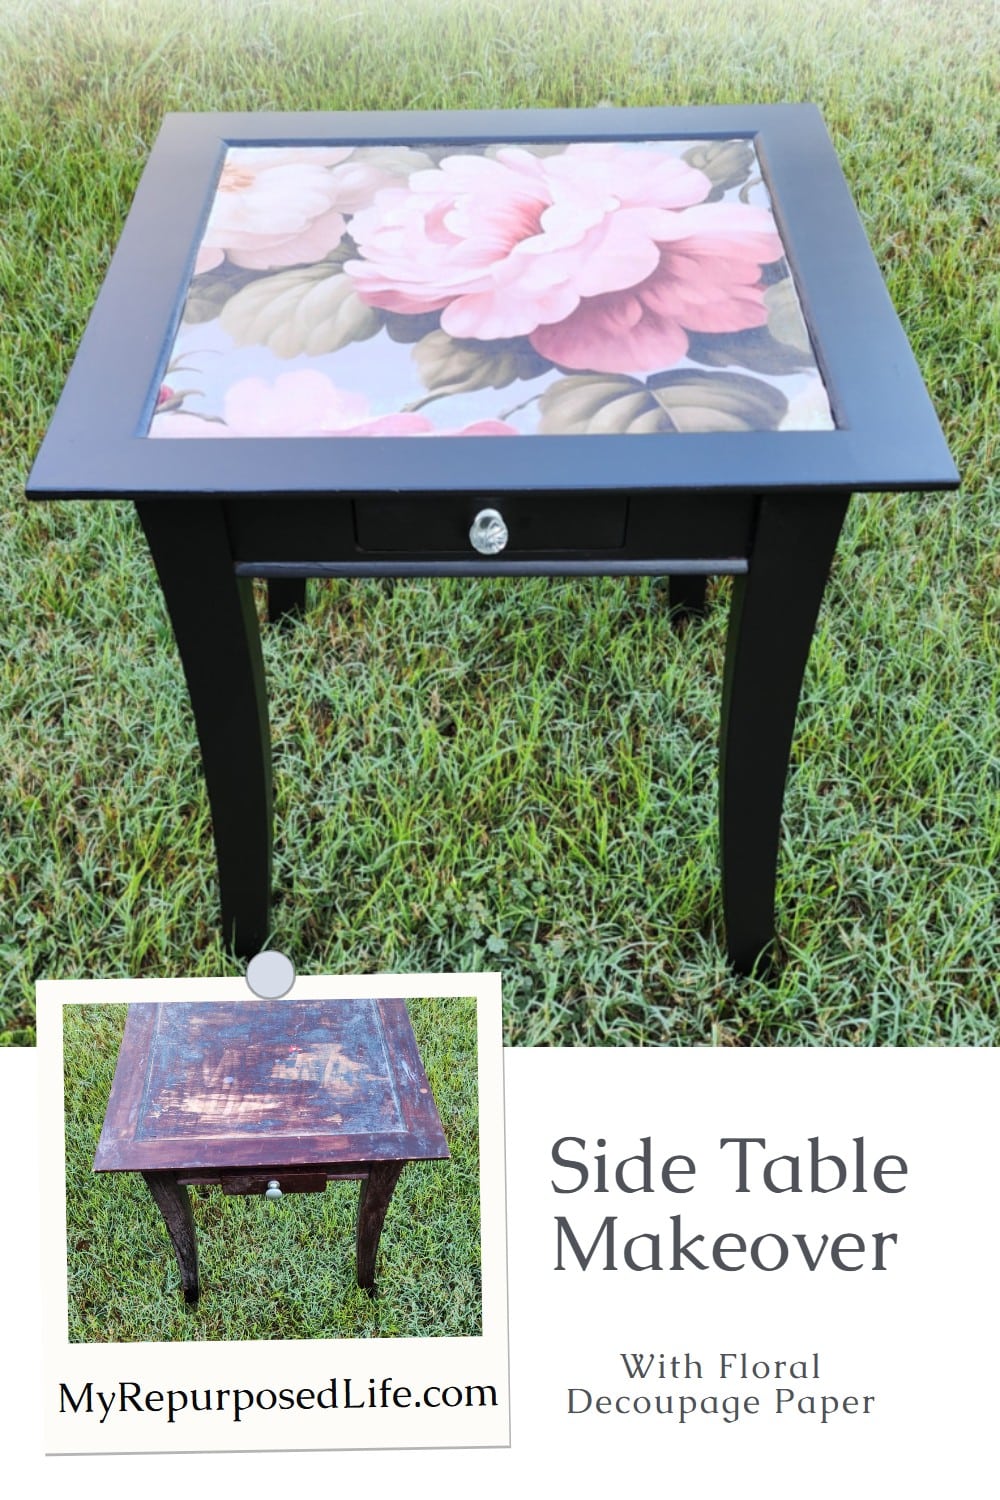
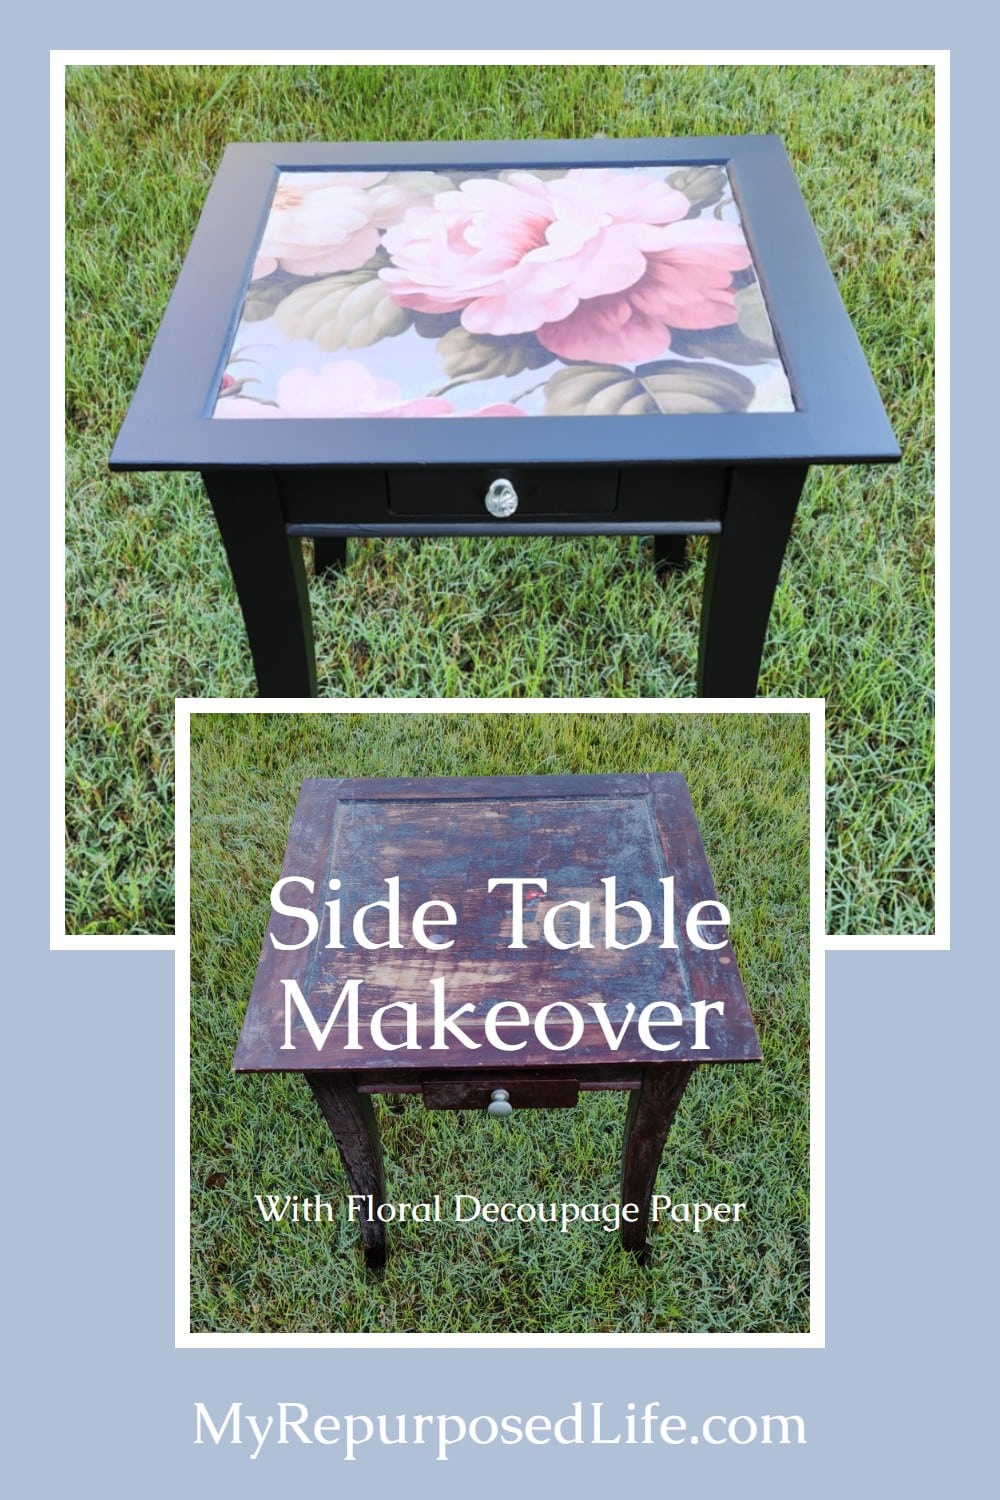
An old square side table can look tired and outdated, but a little creativity goes a long way. With paint and a bold floral design, this piece became a decoupaged side table that feels fresh and full of personality. The mix of dark paint and bright flowers gave new life to something that was once overlooked.
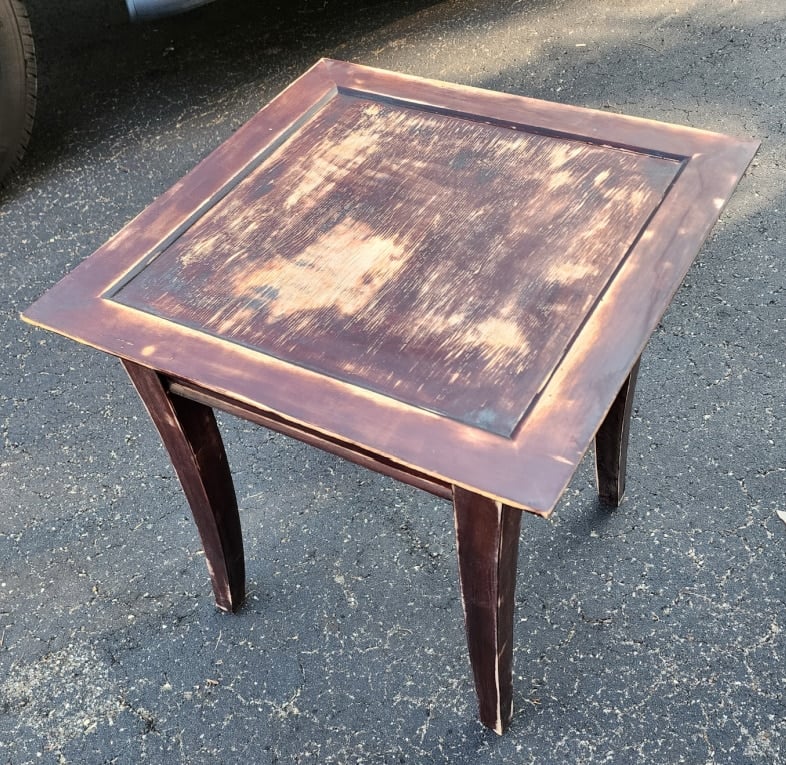
Before the Makeover: The Original Side Table
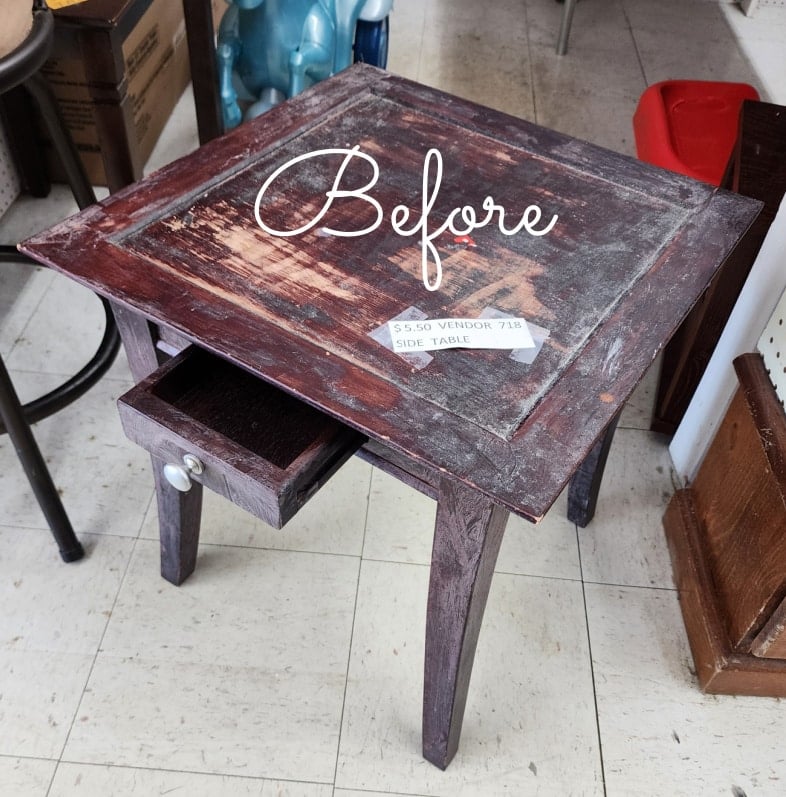
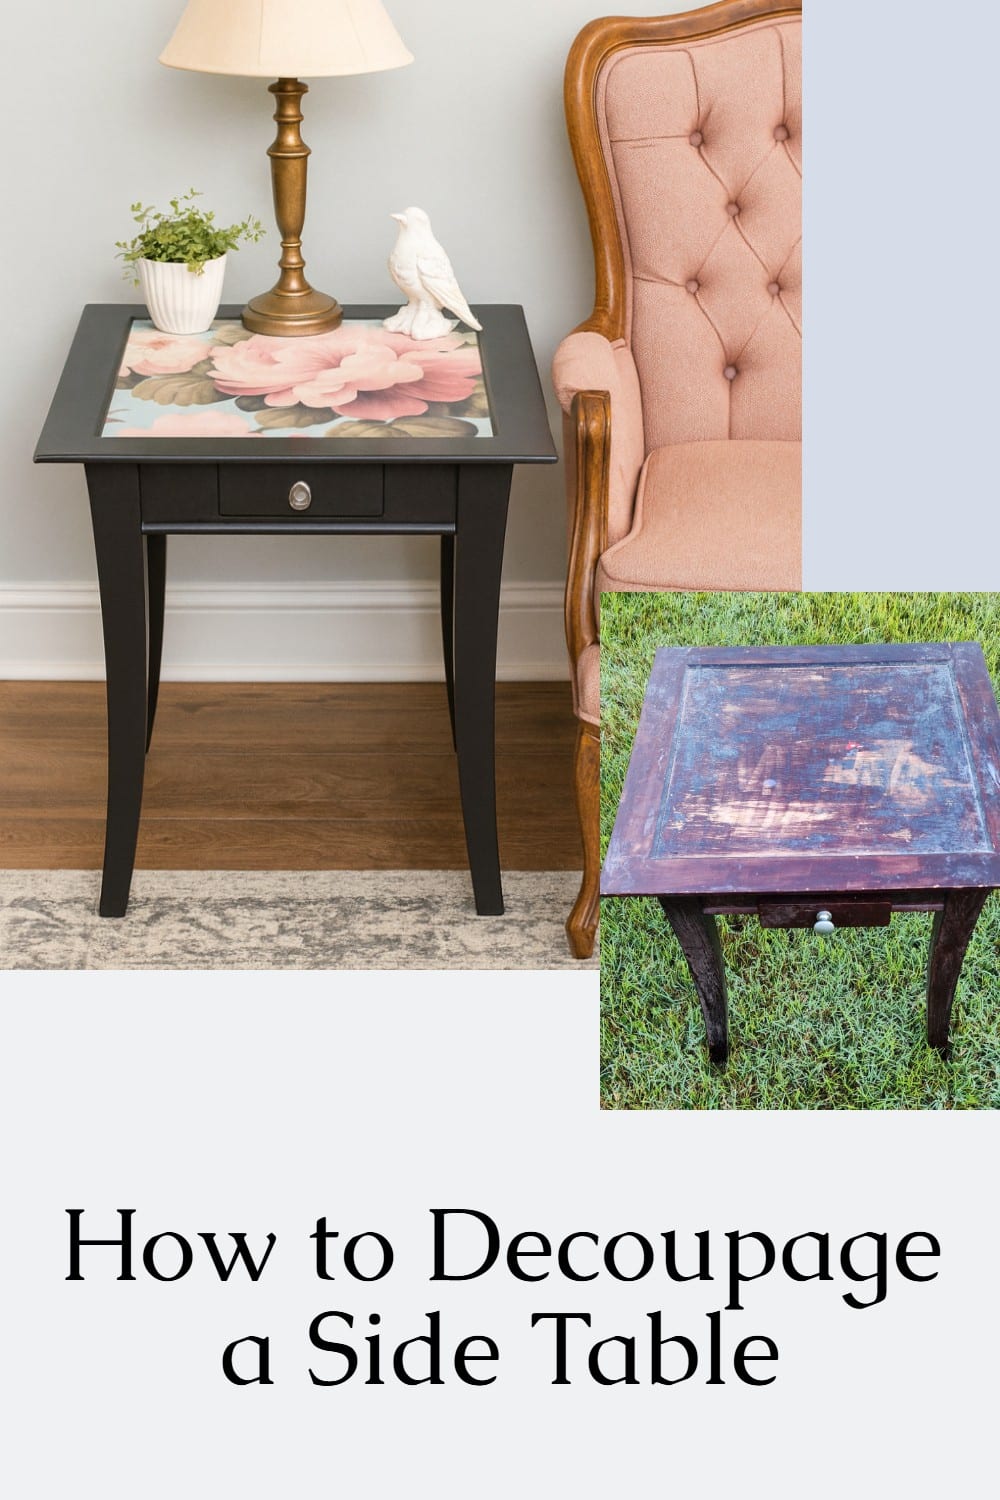
A friend spotted this sad little table at one of her favorite thrift stores. She tucked it under another table until I could find the time to go check it out. You can see the price sticker reveals a steal of a deal for only $5.50. I knew immediately that it would be perfect for this month’s Furniture Fixer Upper Tour. Please visit my friends after you’ve read the details of this sad square side table.
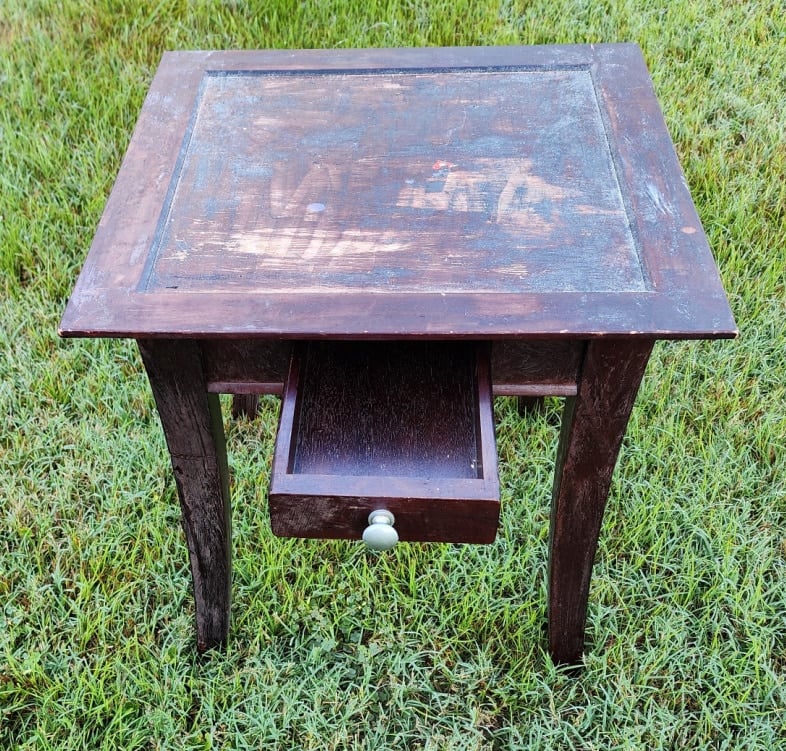
The poor gal is in rough shape. It’s unclear to me why she looks so rough. I love the small drawer that extends nearly the depth of the table.

Prepping the Side Table for Paint and Decoupage
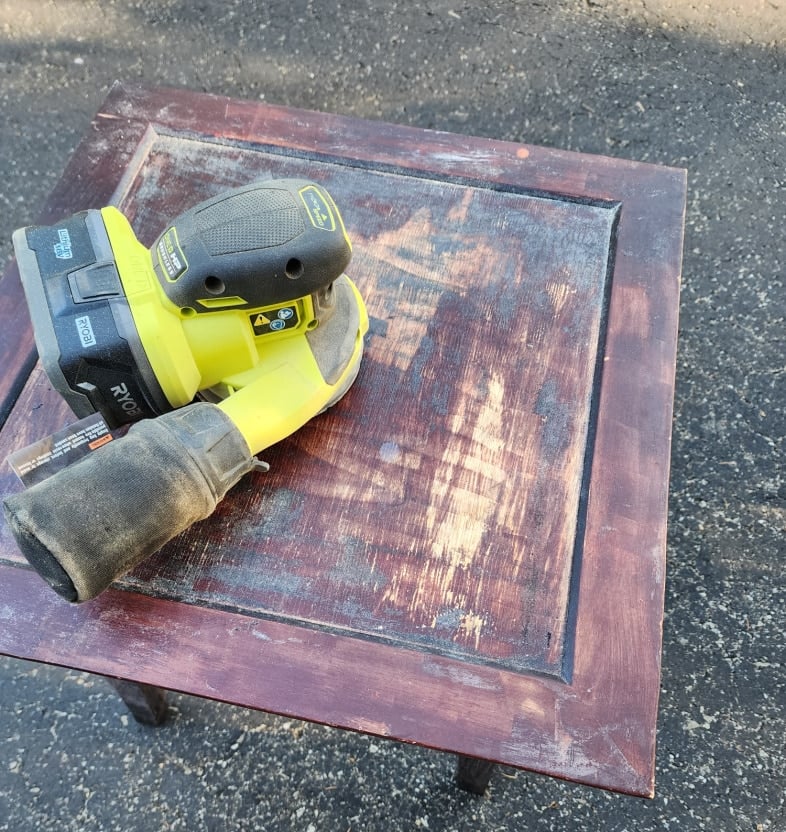
Although the tabletop looks really rough to the eye, it was surprisingly smooth to the touch. I gave the top a quick sanding with my orbital sander.
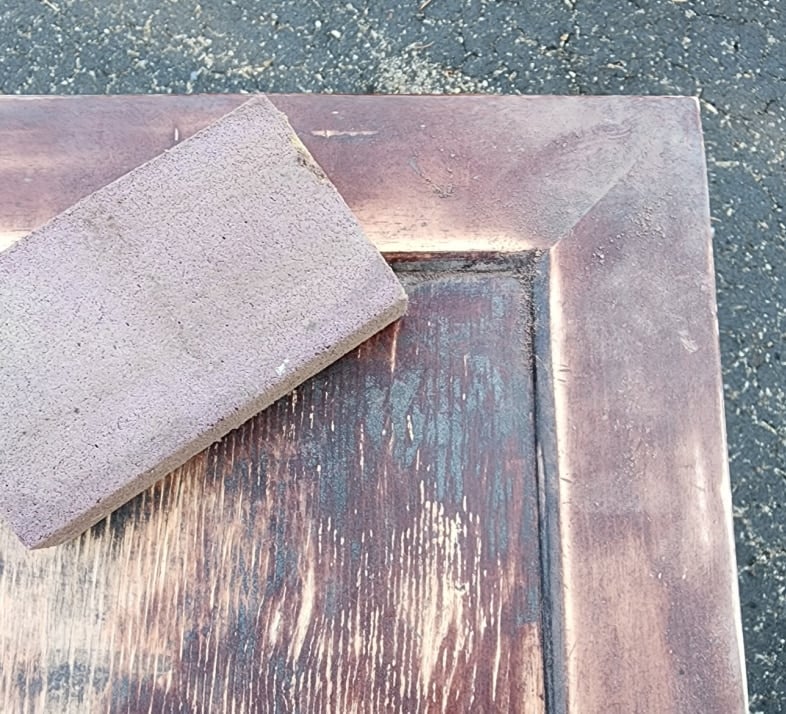
The corners were a little gooey. I’m unsure whether someone tried to strip the finish or sand it. I also used the 80-grit sanding sponge on the table skirt and the drawer.
Cleaning a Side Table Before Painting
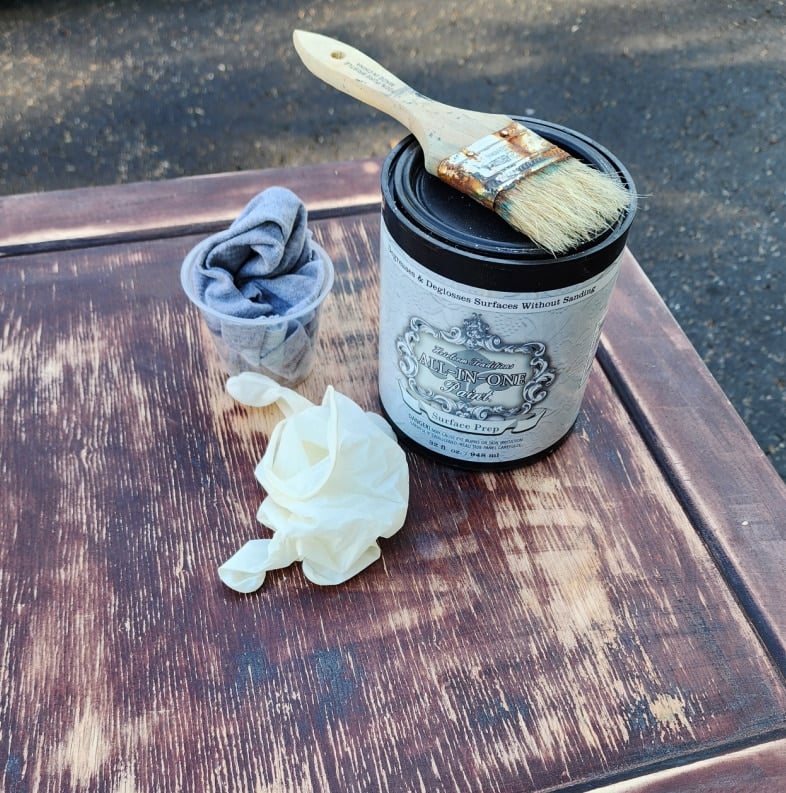
My go-to for prepping furniture these days is Surface Prep by Heirloom Traditions. You may know that sometimes I use the Surface Prep Wipes. This little gal needed a little extra TLC. I prefer to pour the solution into a container instead of dipping a dirty paintbrush into the can.
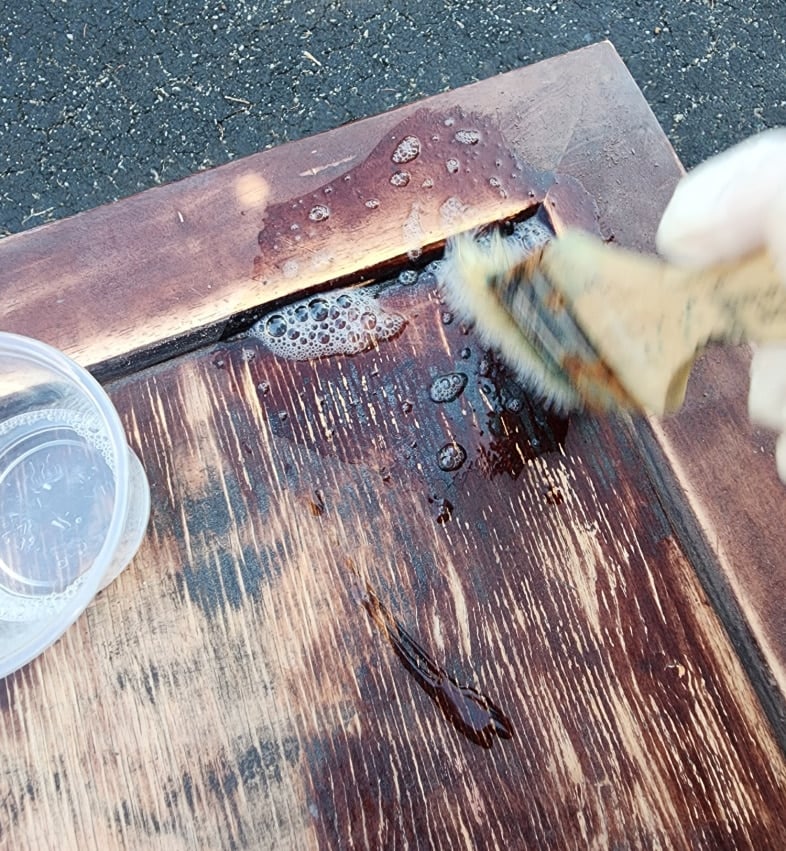
The cheap chip brush easily gets the solution into the corners that need extra love.
If your project is really grimy, you may want to use a kitchen scrubby before wiping it off with a soft cloth.
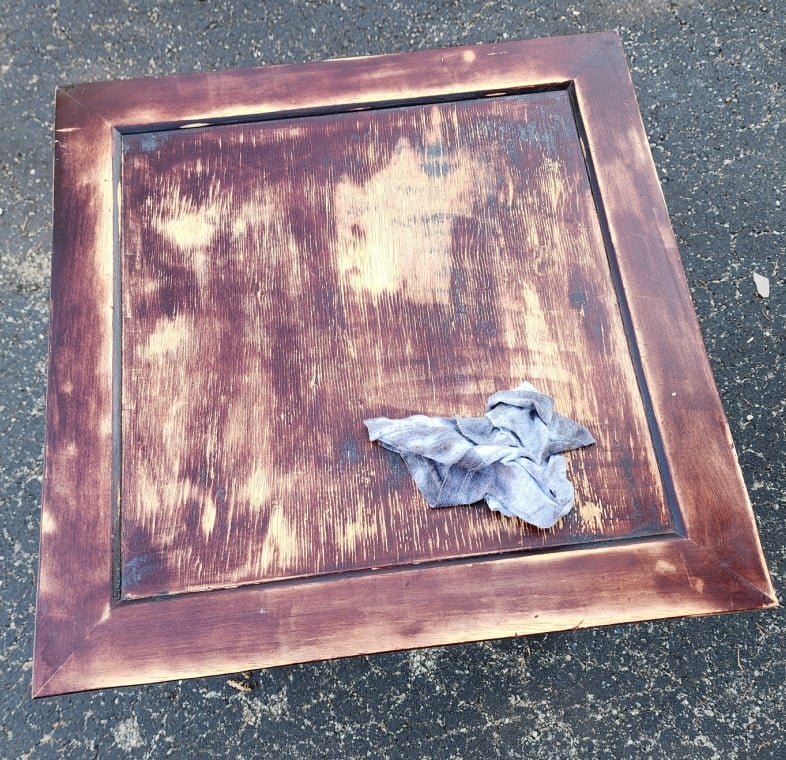
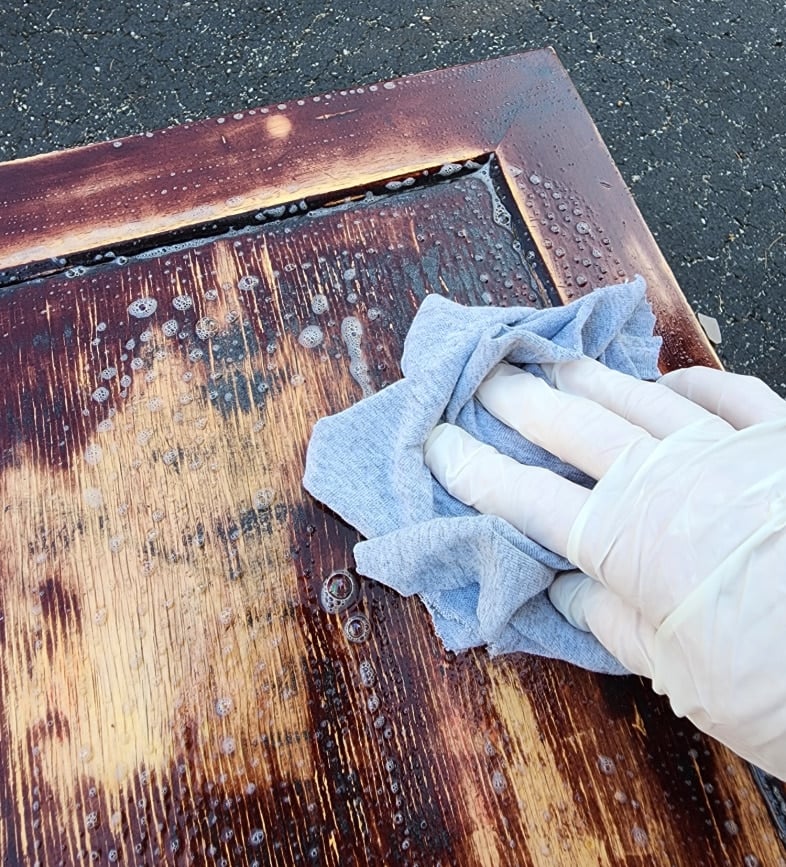
The tabletop is ready for paint and decoupage.
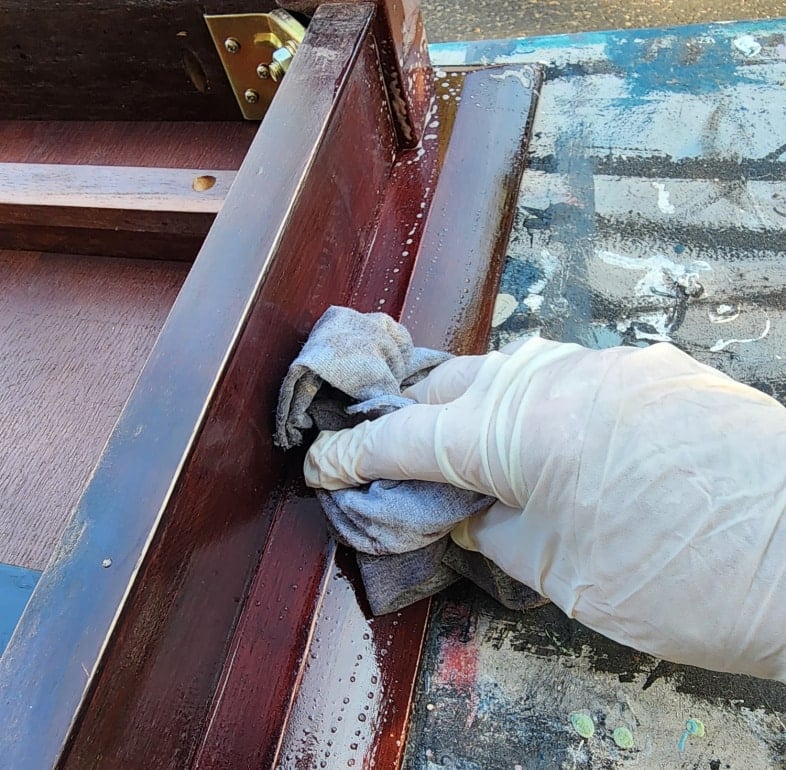
At this point, the cloth is saturated with the Surface Prep solution. I continue wiping the rest of the table, including the legs and the drawer, with the wet cloth.
Painting the Table Base
The small side table is ready for paint, and then it’s getting a new outfit: floral decoupage paper!
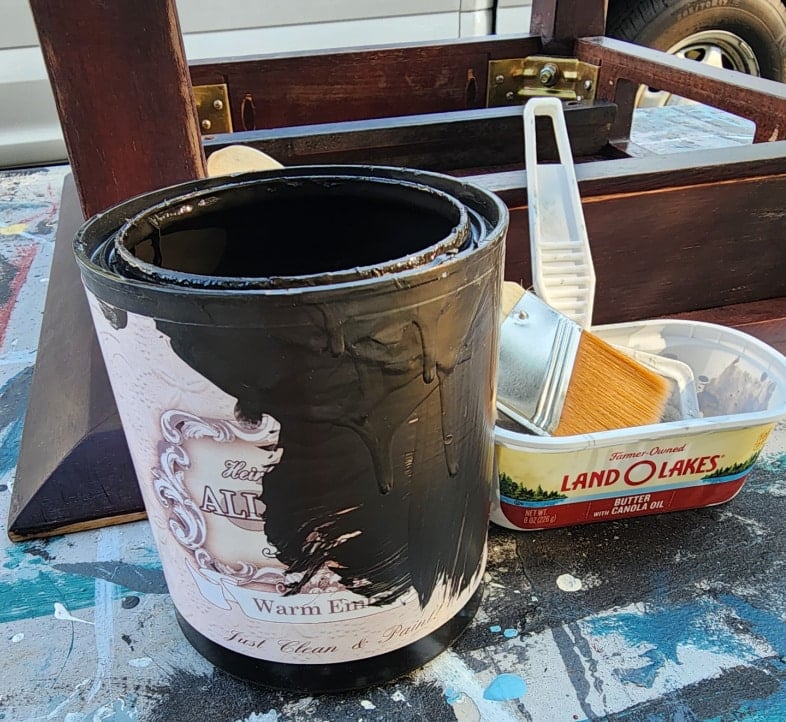
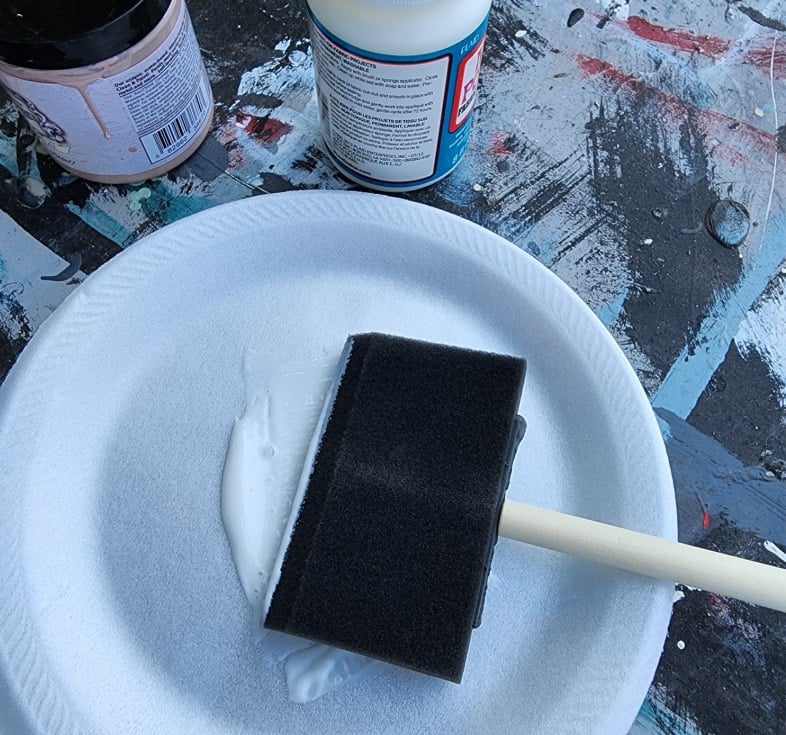
I began painting out of the small butter tub, but later I added a styrofoam plate to my arsenal. Using the tub alone didn’t allow me to offload extra paint from my roller. I also switched out the broad brush for a smaller brush to do the trimming as a second coat.
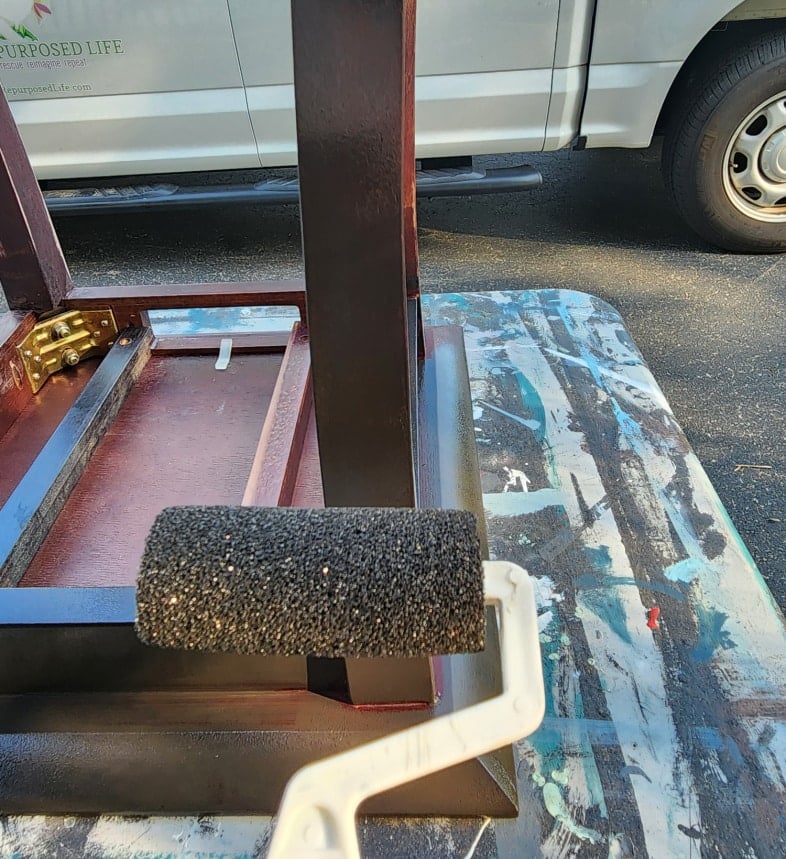
As always, I begin painting the underside of the table first. This keeps the tabletop from getting scuffed up. The small foam roller gives good coverage on the table legs.
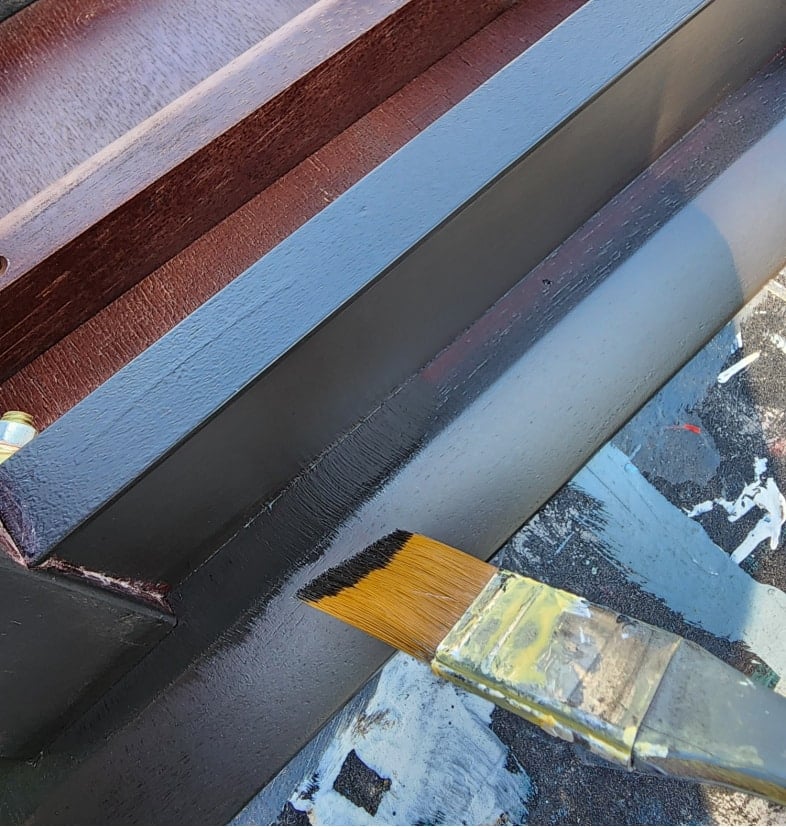
The small brush was perfect for the areas where the roller didn’t reach.
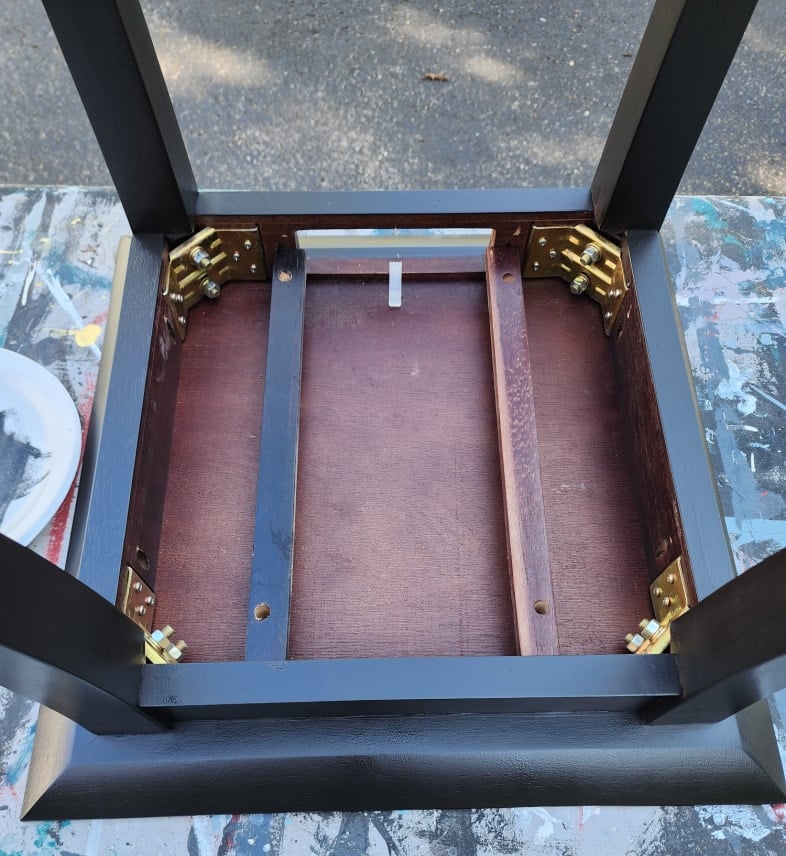
Generally, I paint the entire underside of my furniture pieces. Because the table was in good shape, I opted to leave it natural. I’m unsure why one drawer guide looks painted. They both are as I found them.
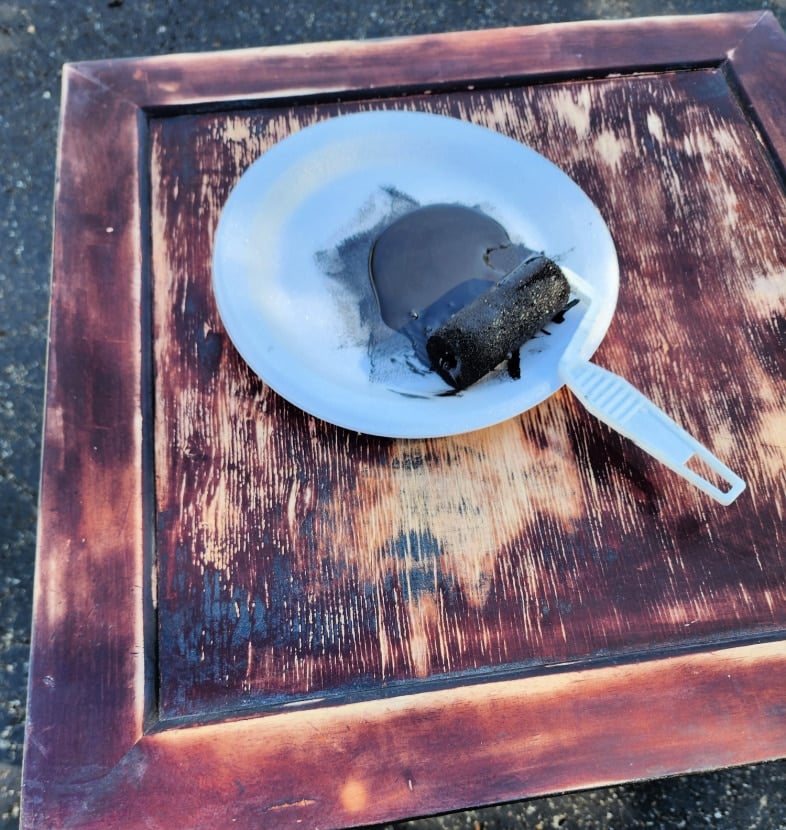
The tabletop is easy to paint using the small foam roller. A styrofoam plate makes a great paint tray in a pinch. I painted the top black, but later changed my mind—more details in a minute.
Painting the Small Drawer
I painted the front and sides of the drawer black (Warm Embers). On the sides, I was careful to do two very light coats that would allow the drawer to slide easily.
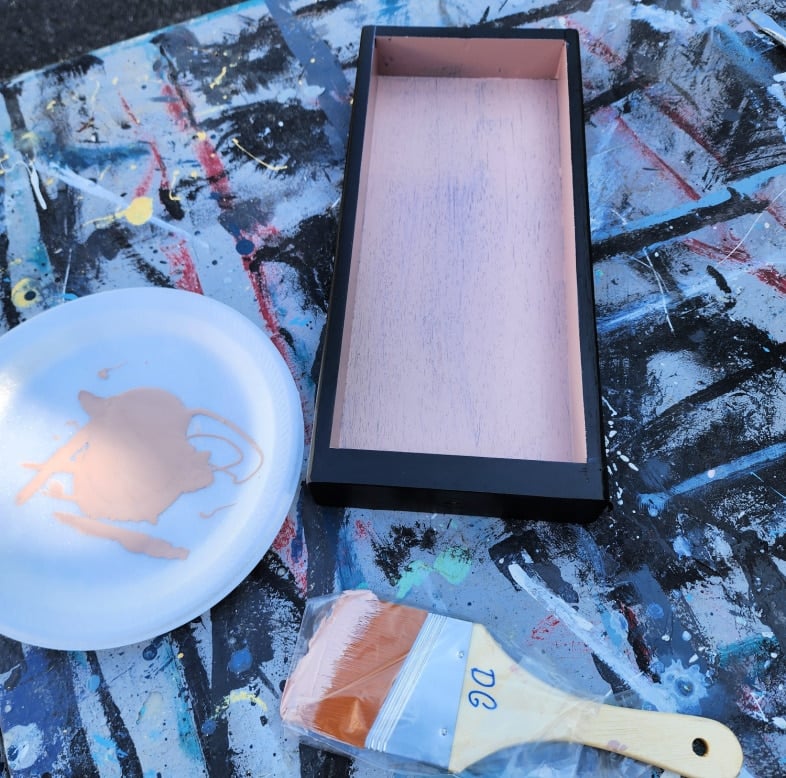
Inside the drawer, I chose a pale pink (Tea Rose) to coordinate with the floral decoupage paper.
Floral Decoupage Paper
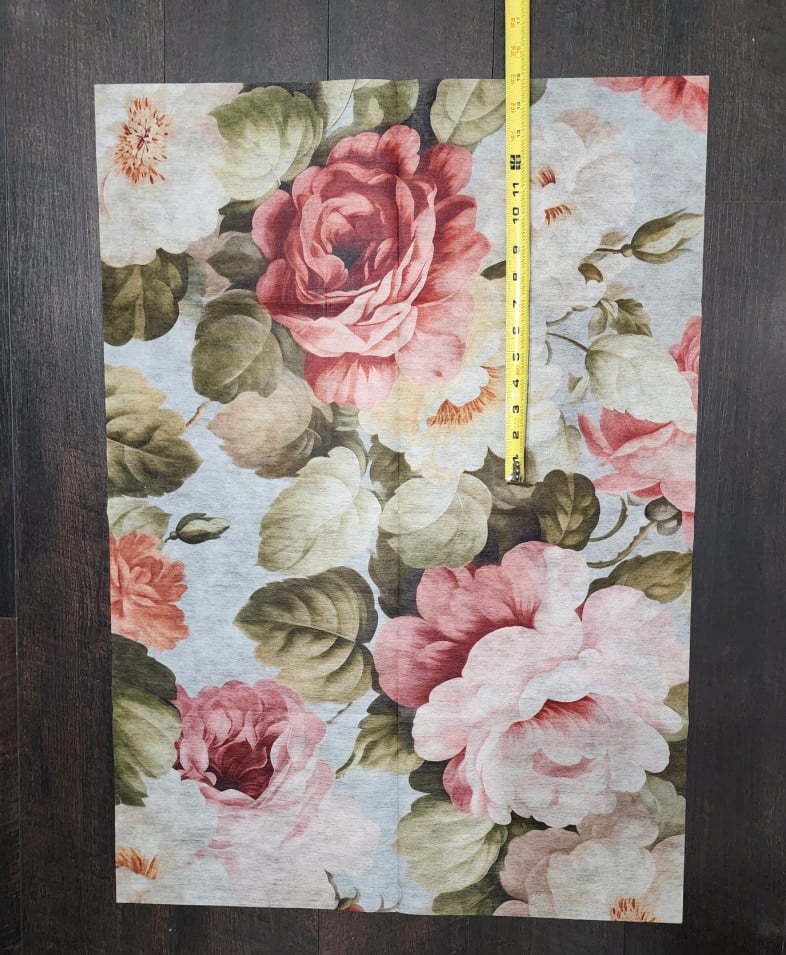
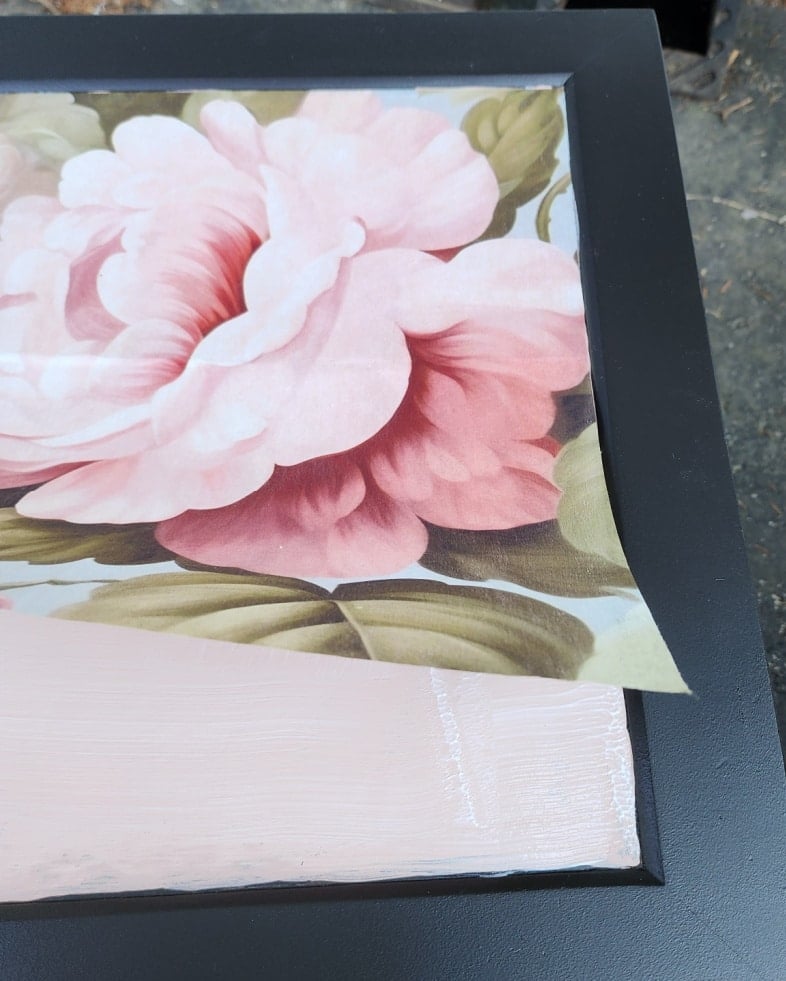
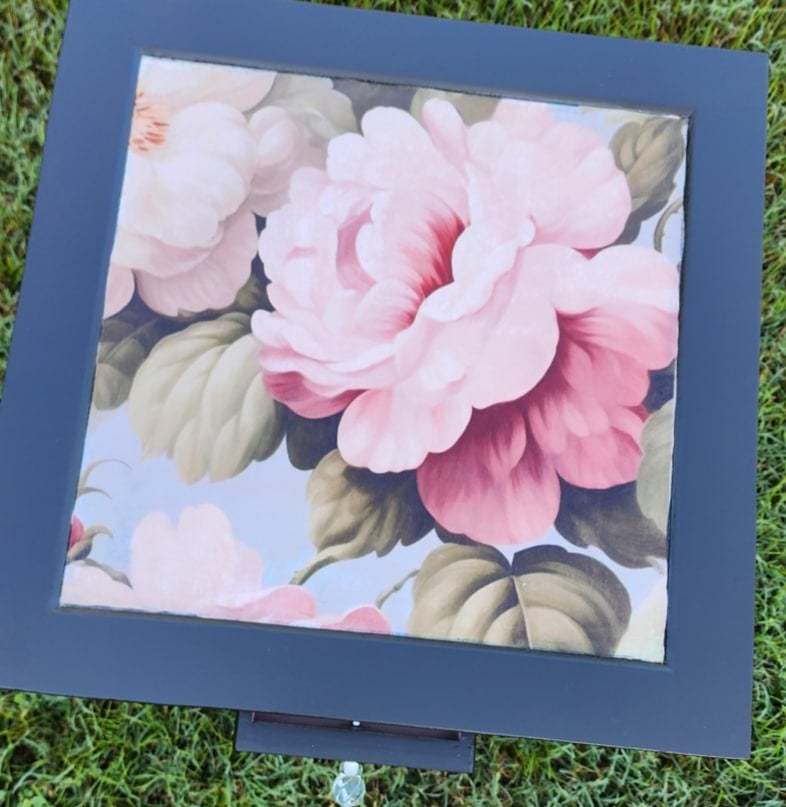
I purchased this floral decoupage paper from Christy’s Etsy shop after seeing her furniture fixer upper project earlier this Summer. It’s SALON de LA GLOIRE A1 Decoupage Fiber by Redesign with Prima. Above, I have selected to use the dark flower, measuring it as a 15″ square to fit the inset of the side table.
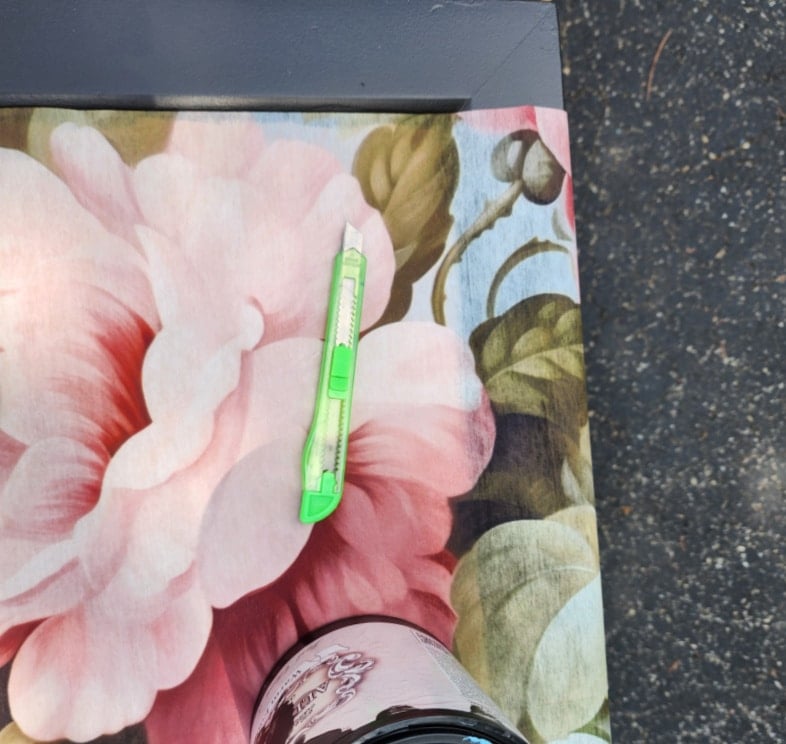
After consulting with Christy about this project, she recommended that the tabletop be a light color, such as a pale blue. However, I had already painted the drawer Tea Rose. As I laid the paper on the table, I changed the flower without realizing it. I held the paper in place and trimmed it with a cheap exacto knife.
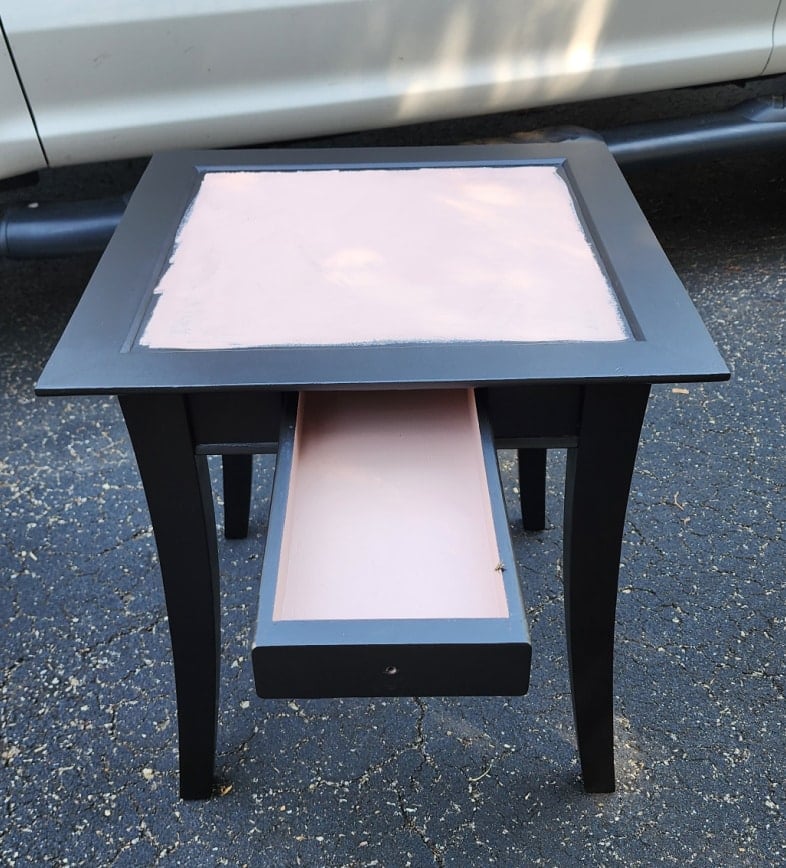
I painted the table top the same pink as the drawer, but didn’t get close enough to the edge. Once I placed the floral decoupage paper on the table, I realized that I needed to get closer to the edge.
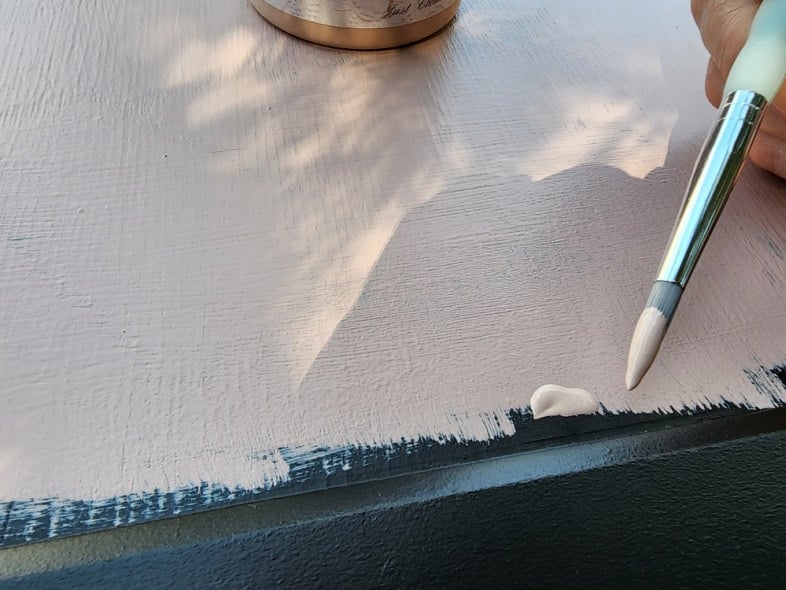
I used an artist’s brush to get closer to the edge with the pink paint.
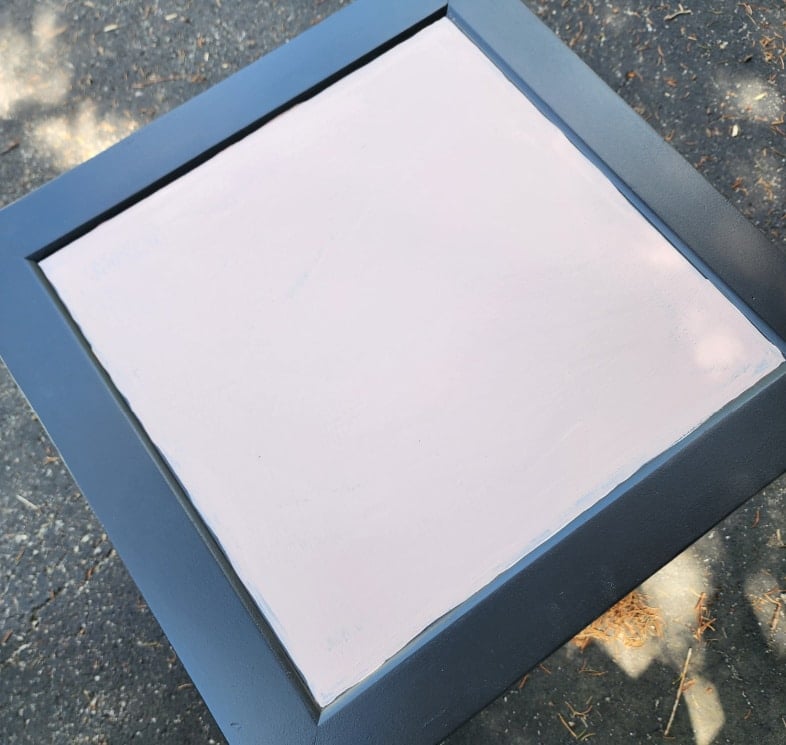
The tabletop is now ready for the large floral paper. To say I’m nervous is an understatement. The paper has a texture that surprised me. I expected it to be thin and flimsy. It almost feels like fabric, similar to landscape fabric, but thinner.
Applying Redesign by Prima Decoupage Paper
The only Mod Podge I had on hand was “fabric.” It was unopened, but old. I added a bit of water to dilute it a bit. The Mod Podge was applied with an extra-large foam brush.
As I mentioned above, I was so nervous about getting this right the first time. Therefore, there aren’t more pictures.
I weighted the paper down with a paint can near the lower portion of the table. The Mod Podge was brushed on liberally, then I laid the paper down. I immediately brushed on another generous amount of Mod Podge and lowered the paper.
There was a slight crease where the paper had been folded in the package. As Christy suggests on her site, I used a hair dryer to warm it up–but remember, I then ended up using a different piece without realizing it. In our chat, Christy mentioned using plastic wrap under my fingers to smooth the paper. I tried a glove, which didn’t work very well. Since I don’t work with many large decoupage pieces, I don’t have a brayer to roll out on the paper. In a panic, I closed the lid and used the Mod Podge jar to roll on the paper.
I then applied another coat of Mod Podge over the top of the paper. Whew!! It was a success! I’ve watched YouTube videos, and people talk about being able to reposition the paper. Luckily, I didn’t have to test that theory.
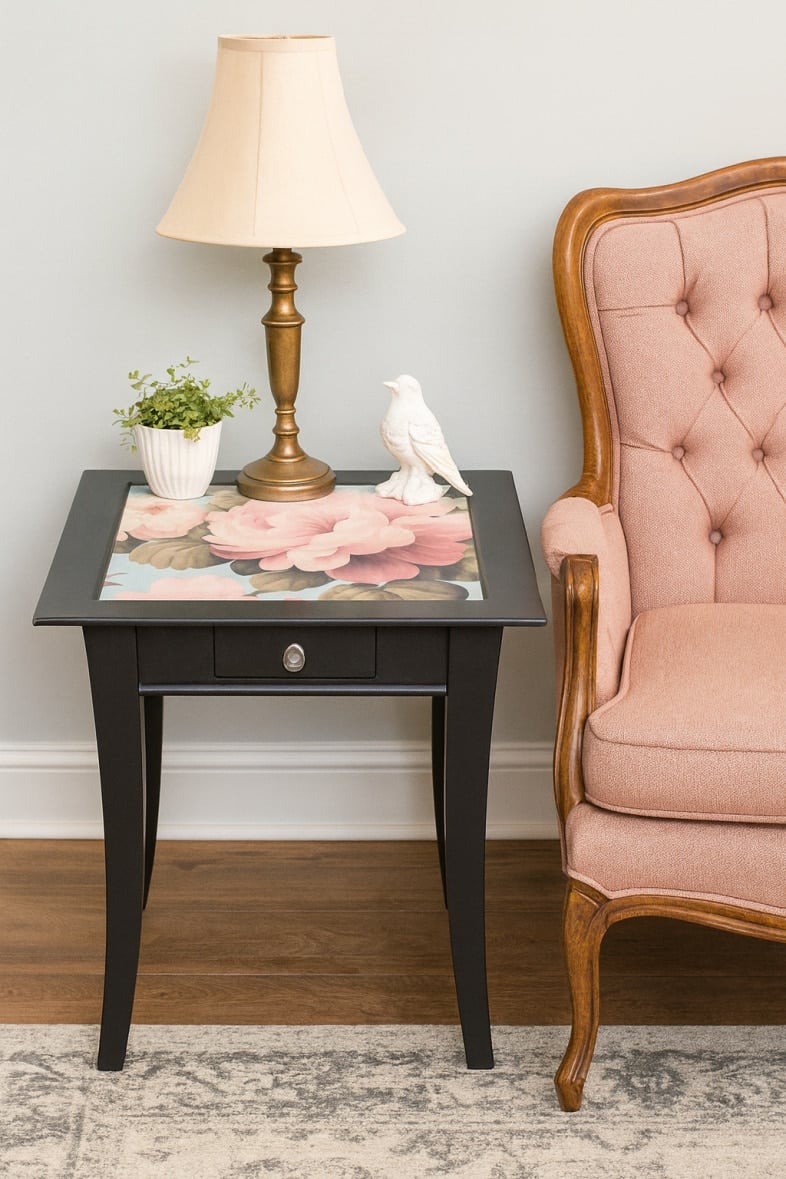
Floral Decoupaged Side Table
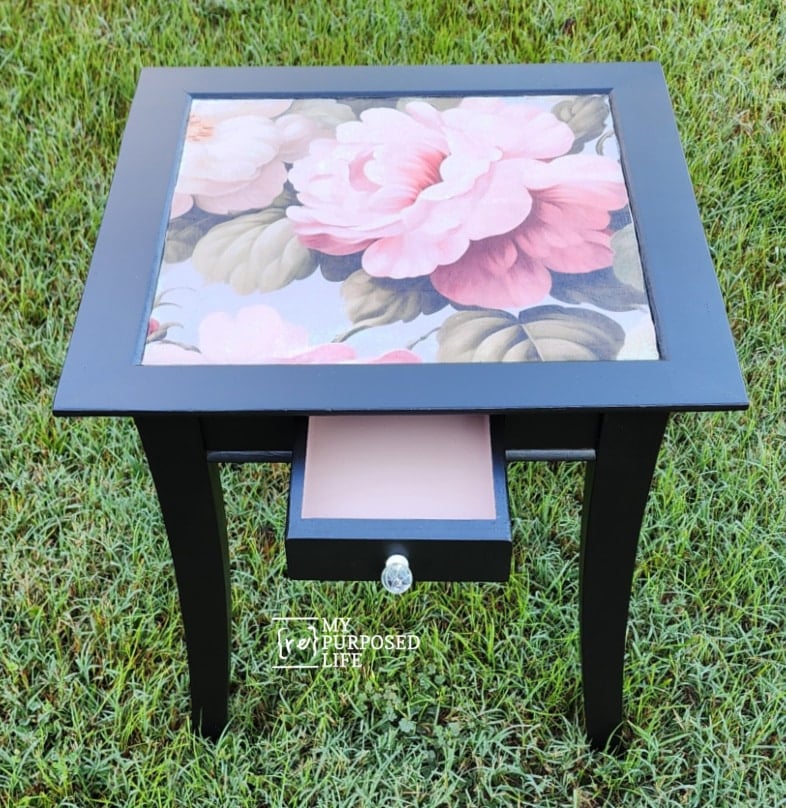
I love the Tea Rose color inside the drawer, don’t you? A dark color (black) makes it challenging to find something in a drawer.
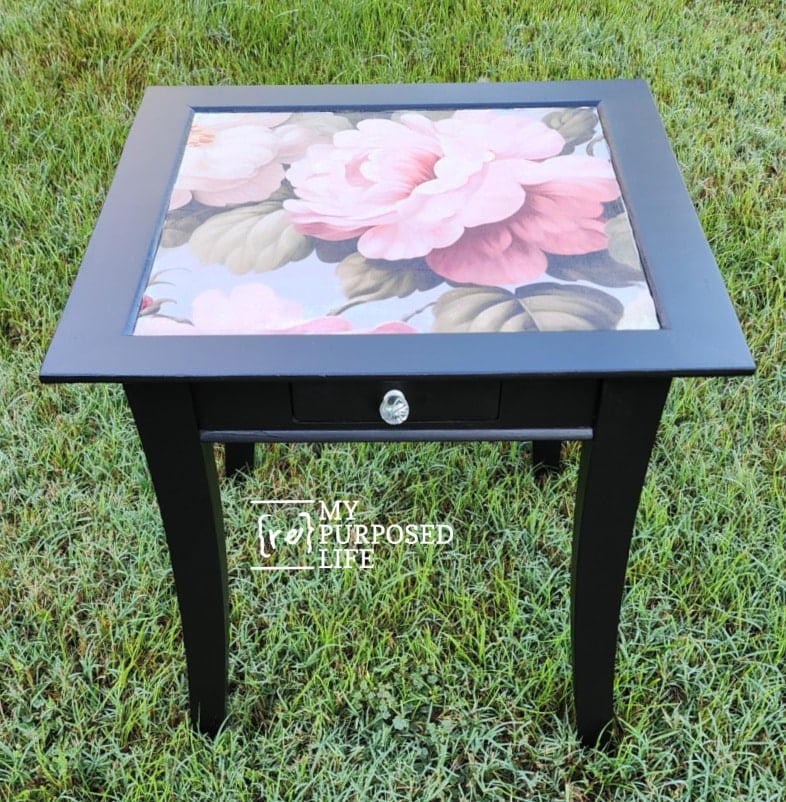
I replaced the original silver knob with a petite glass knob I bought at Hobby Lobby. The clean lines of this table are beautiful, and I’m thrilled with how it turned out. I still have a large piece of the paper for another project down the road. Maybe I won’t be so nervous next time.
The decoupage floral table reminds me of a table you may have had in your home in the 1950s. I genuinely wish I could keep it, but I don’t have a place for it.
Related Content: Decoupage Project Ideas
AI-Generated Suggested Use for Floral Decoupaged Table
Denise mentioned in her article today how she used AI to generate a photo for her blanket box. Since I went out of town just as I finished this table and didn’t have a chance to stage it, I thought I would give it a try. What do you think?
Furniture Fixer Upper Projects

- Blanket Box Makeover
- Pretty Black Dressing Table
- How to Paint Inherited Furniture to Fit Your Style
- Floral Decoupage Table (You are here, thank you.)
- Quick Painted and Stained Dresser Makeover
Furniture Fixer Upper Tour Projects
If you love seeing old furniture get a second chance, be sure to visit more Furniture Fixer Upper Tour makeovers. Each project starts with good bones and ends with a fresh new story.
See more Furniture Fixer Upper makeovers here
You will find everything from small side tables to large statement pieces, all transformed by talented DIY bloggers who believe in saving furniture rather than replacing it.
Your table is gorgeous! From the black paint to the beautiful floral decoupage paper!
Thank you Heather! I do love how it turned out.
Amazing work! Love the floral decoupage 💕
Thank you Natalie! I am very pleased with my first decoupage paper project.
gail
Lovely!
Thank you Tracey!
gail
Absolutely beautiful, Gail! Thank you for the shout out…I’m so happy it turned out so well! XOXO
Christy,
I so appreciated you taking the time to advise me about this project. I love how it turned out.
gail
Gail, this little table went from super sad looking to absolutely gorgeous! I love the Salon de la Gloire floral with the tea rose – beautiful! Pinned XOXO
Thank so much Denise! I took your advice and did an AI image for my “after” shot. Thanks!
gail