• Skip to primary navigation
  • Skip to main content
  • Skip to primary sidebar
  • Start Here
  • Shop Favorites
  • About
    • Welcome To My Repurposed Life Home of Repurposed Furniture
    • More About Gail
    • Disclosure
    • Privacy Information
  • Gallery
    • Repurposed Furniture
  • Repurposed Items
    • Building Supplies
    • Miscellaneous Household Items
    • Picture Frame/Chalk Board
  • DIY
    • Home Reno
    • outdoor living
    • Painting
    • Shop Talk
    • Tips for Around the House
    • Build It
      • Furniture
      • Home Decor
      • Storage
    • Crafts
      • Dollar Store
      • Easy
      • Holidays Seasonal
  • Furniture
    • Chair
    • Desk
    • Dresser/Chest
    • Headboard | Bed Parts | Cribs
    • Kids Furniture
    • Table
    • Kids Furniture
My Repurposed Life® Rescue Re-imagine Repeat
menu icon
go to homepage
subscribe
search icon
Homepage link
  • About
  • Start Here
  • Project Index
  • Furniture
  • Subscribe
    • Email
    • Facebook
    • Instagram
    • Pinterest
    • RSS
    • Twitter
  • ×

    Home » DIY » Build It » how to faux mantel

    how to faux mantel

    Published by Gail | Published February 1, 2013 | Updated April 9, 2019
    As an Amazon Associate I earn from qualifying purchases.

    Pin
    Share
    Tweet
    blue roof cabin guest post
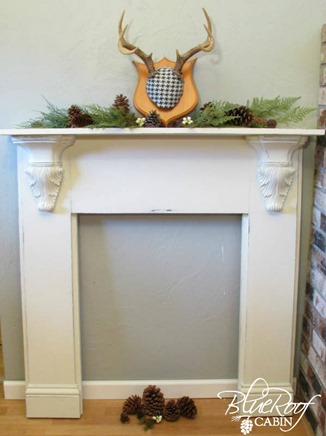
    DIY Faux Fireplace Mantel with plans 1


    Hey there I'm Mimi and I blog over at Blue Roof Cabin. I am so thrilled to be here at My Re-Purposed Life to share one of my recent projects. I love to build and re-purpose discarded treasures so you know I love it here!

    One of my favorite things to build are Faux Fireplace Mantels. Even though I already have one in my home and have no room for more I just keep making them.

    decorative brackets to use on mantel 2
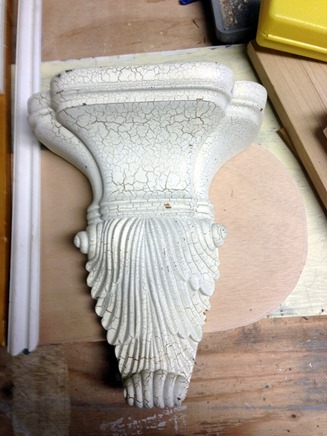
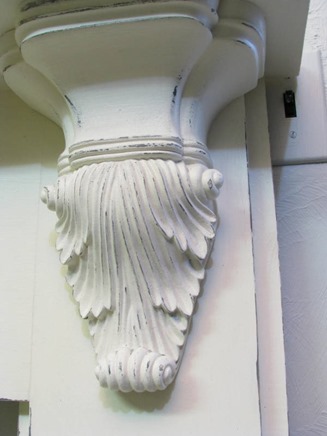
    My latest inspiration came when I found two decorative Corbels while thrifting. They were a good size and I knew they would look great on a mantel. I decided to keep the design simple so that the Corbels would be the focal point.
    Building a Faux Fireplace Mantel 3
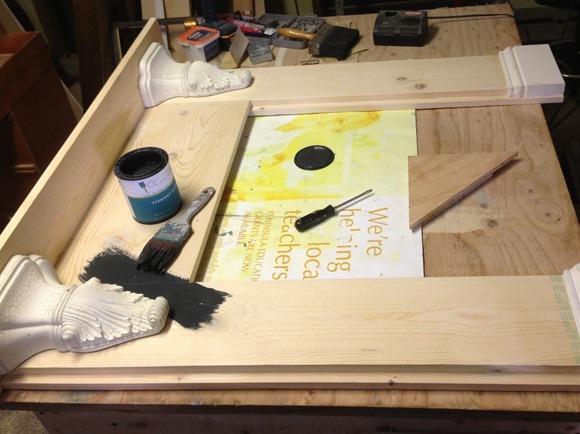
     For the sides I used two 1 x 8 pine boards cut to 43 ¼" long. I attached them to a 1 x 12 x 26" board to make the basic frame. I used my Kreg jig to make pocket holes and glued and screwed them together.
    How to build a faux Fireplace Mantel 4
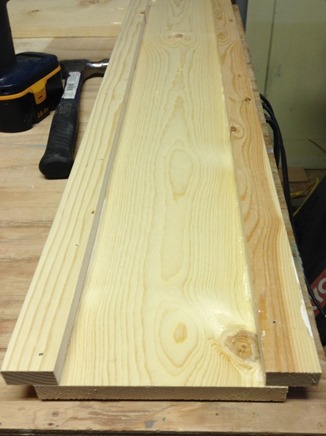
     To give the sides some dimension I used 1 x 2's and offset them so that ¾" would show on each side of the 1 x 8. I attached with glue and nailed from the backside.
    Pocket Holes to build a Mantel 5
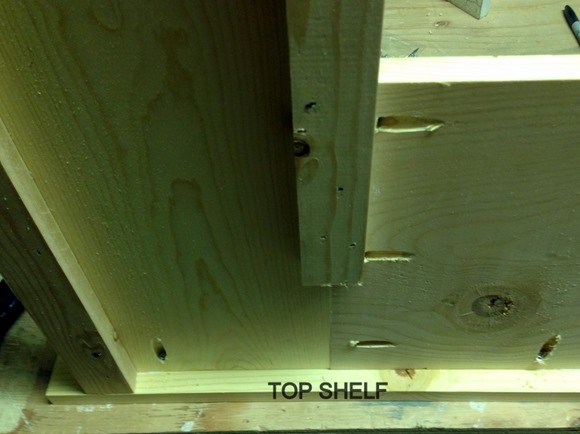
     Then I flipped it upside down and used glue and pocket holes to attach the top shelf.
    Mantel base trim detail 6
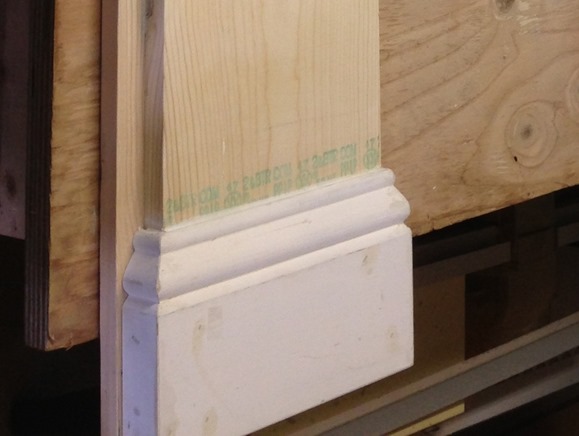
     I used my chop saw to miter cut some beefy trim for the bottom. I attached it with glue and my nail gun.


    IMG_0619-001 7
     Lastly I attached the Corbels with Liquid Nails and then screwed a couple screws through the back side just to make sure they held.
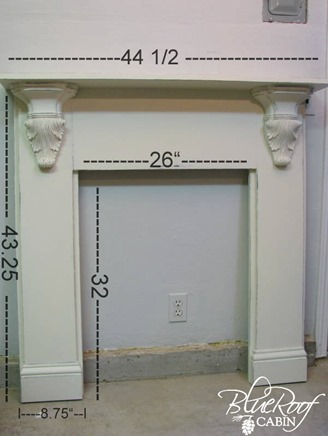
    Faux Fireplace Mantel dimensions 8
     Here's the final dimensions.
    cleat to mount fireplace mantel 9
    To attach to the wall I cut a 1 x 4 in half at a 45 degree angle with my table saw to make a french cleat. That way it only needs a couple screws to attach it to the wall. The nice thing about this Mantel is it is very light weight and with only two screw holes you could just use it for the Holidays and put it away for the summer if you want. (that's crazy talk isn't it, who would put their mantel away?)
    Decorative Corbels 10
    To finish my mantel I painted first with a slate gray then some white homemade chalk paint for the top coat. I lightly distressed the edges to reveal the gray underneath.
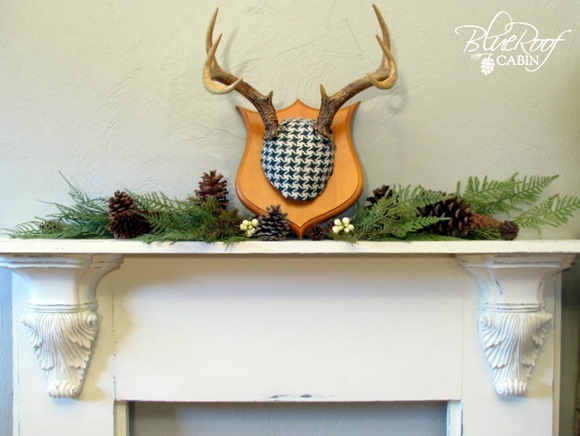
    Mantel with Decorative Corbels 11
    This one is all about the Corbels.
    DIY Faux Fireplace Mantel Tutorial
    If you want to see some more DIY Mantel plans check at these posts on my Blog, a Mantel From Pine Boards and DIY Mantel that is in my Living Room.
    Thanks Gail for letting me stop by today!
    Oh my gosh Mimi—Those corbels are awesome! So perfect for a faux mantel. I never ever come across any corbels….well that I can afford that is! Love the idea of storing the mantel  🙂 Thank you so much for sharing your DIY Faux Mantel today!
    Pin
    Share
    Tweet

    Related Content:

    • Faux Fireplace Mantel Makeover
      Faux Fireplace Mantel Makeover
    • Rustic Fence as Mantel Decor
      Rustic Fence as Mantel Decor
    • Cree Light Bulbs how to deal with the end of Daylight Savings
      Cree Light Bulbs how to deal with the end of Daylight…
    • Repurposing Ideas Trending  2019
      Repurposing Ideas Trending 2019
    • Farmhouse Shelf Tutorial You Can Make
      Farmhouse Shelf Tutorial You Can Make
    • Repurposed Piano Fall into a Mantel
      Repurposed Piano Fall into a Mantel

    Reader Interactions

    Comments

      See comments Cancel reply

      Your email address will not be published. Required fields are marked *

      This site uses Akismet to reduce spam. Learn how your comment data is processed.

    1. Mary

      August 31, 2022 at 3:15 pm

      Hi, what sort of finish would suggest on a simple mantel for bedroom that will be attached to a Pallet Wood Wall? Paint? More pallet wood? Any advice would be fantastic. Thank you for the instructions - just what I needed!

      Reply
      • Gail Wilson

        August 31, 2022 at 11:54 pm

        What would you think about pallet wood with a little sealer on it to give it a shine? Or a slightly dark stain? Try it on a scrap piece first.
        I bet it's going to look great whatever you do.
        Gail

    2. Elisa Rosenberg

      October 11, 2016 at 11:12 pm

      What do you put inside? I have a faux fireplace and want to put in a panel of faux brick but am having difficulty finding one to fit or I can trim to fit. I would appreciate your advice.
      Thank you,
      Elisa

      Reply
      • Gail Wilson

        October 12, 2016 at 9:09 am

        Elisa,

        I'm sorry-I don't really have any advice since this is a guest post. I've never done a faux mantel. Have you tried looking on pinterest or a google image search?

        gail

    3. Maggie

      April 06, 2015 at 11:25 am

      What size board did you use for the top piece? i see it's 44" long but how deep is the wood?

      Reply
      • gail@myrepurposedlife.com

        April 06, 2015 at 1:54 pm

        Maggie,

        This wasn't my project, it was a guest post, but I'm guessing Mimi used a 1x8 like the other boards that framed the mantel piece.

        gail

    4. Sim

      December 09, 2014 at 8:36 pm

      Mimi and Gail,
      I love the fireplace mantle. I especially liked the directions. If gave me inspiration to build my own mantle/ faux fireplace. I am a beginner put it turned out pretty well. Thanks for the inspiration. I plan on adding a ;ink to your blog on my blog because of the great instructions.
      Take Care
      Simmer Dougherty
      http://peacocksandpapertrees.blogspot.com

      Reply
    5. SweetPepperRose

      February 21, 2013 at 1:40 am

      Nice work! I'm a little intimidated with power tools and depend on hubby for that - but I'll keep trying!

      Reply
    6. Debra Howard

      February 02, 2013 at 6:02 pm

      Beautiful! Those would be perfect to use those candle holders for fireplaces with.
      Debbie

      Reply
    7. Full Circle Creations

      February 02, 2013 at 1:19 am

      I love those corbels. It is definitely all about the corbels. Mimi does great work!

      Reply
    8. Bliss

      February 01, 2013 at 6:34 pm

      Looks nice. I have suggested to my married daughter that her bedroom wall needs a faux mantel, I'm going to email her to look at yours. Maybe she will be inspired, or maybe I will make more work for her dad.

      Bliss

      Reply
    9. Sharon @ Elizabeth & Co.

      February 01, 2013 at 2:31 pm

      So cool and very pretty! This would add so much character to a room!

      Reply

    Primary Sidebar

    Hi, there! I’m Gail Wilson, the author and mastermind behind My Repurposed Life. I’m obsessed with finding potential in unexpected places and believe that with a little hard work and imagination, any old thing can be made useful again—myself included! I hope you’ll enjoy the journey and pick up a few tools along the way… literally!

    More about me →

    Join Our Mailing List

    ​

      Click the topics you're interested in below:

      Subscribing above means you agree to our Privacy Policy​

      Footer

      ↑ back to top

      SEEN ON

      Might I Suggest

      • Start Here
      • Furniture Makeovers

      Newsletter

      • Sign Up! for emails and updates

      About

      • Gail's Favorites on Amazon
      • About

      As an Amazon Associate I earn from qualifying purchases.

      Copyright © 2023 My Repurposed Life · Privacy Policy · Disclosure