Guest Post Sawhorse Desk by
As an Amazon Associate, I earn from qualifying purchases.

Today we have a super project from Anita @ Going a little Coastal. Check it out:

Thank you Gail for inviting me over to your place today. I am so excited to be here.
Gail was one of the first bloggers I followed. Once I learned what following was that is. I think the first project I saw was the little cabinet that she made out of a window. Old windows and bead board. I was pretty much hooked after that. Her talents make me a wee bit nervous about doing a project out of wood. What was I thinking?
I have been wanting to put together a sewing area in my guest room so I can just keep my machine out and be encouraged to do more projects. I really want an old vintage table but until I find it I thought I’d put something together on the cheap. I found some plans over at Ana-White.com for a sawhorse desk and thought it might be something I could do. I’ve used a power tool before. How hard could it be? All I needed was 4 2×2’s and 2 2×6’s. 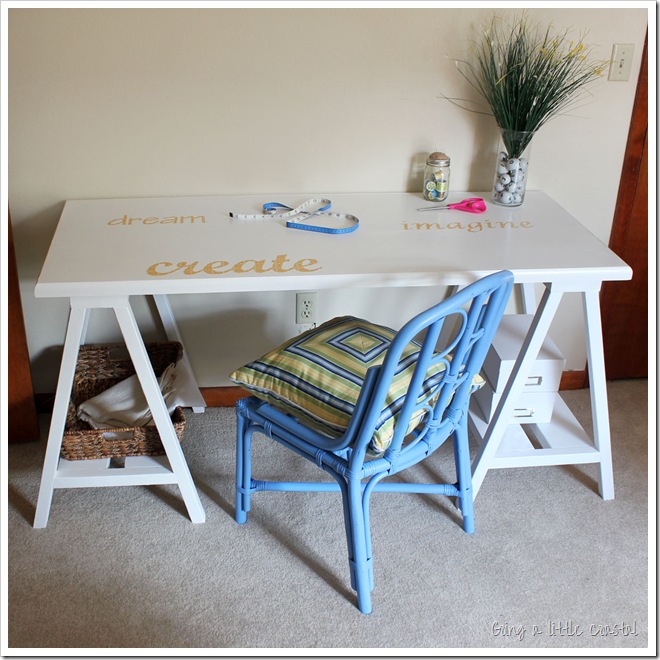
Here’s what I started with. I haven’t mastered taking pictures while cutting wood. The wood was cut according to the plans from Ana. She has a nice little list and easy to follow plans. I had some old flat panel doors in the garage since we are replacing them in the house. I thought it would make a good top. I used wood filler to fill where the hinge was. Turns out I really didn’t need to. Oh well. 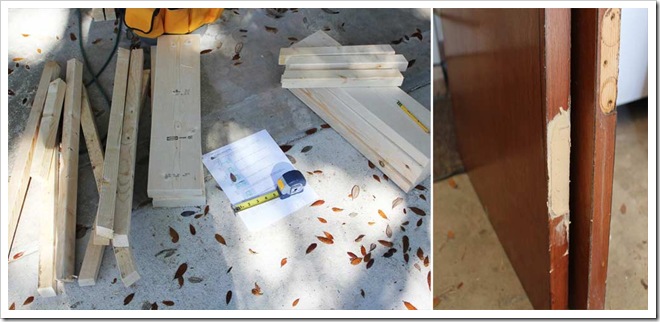
I made sure I predrilled all of the holes to keep from splitting the wood. I marked where the legs would be so I could get the screw in the center. 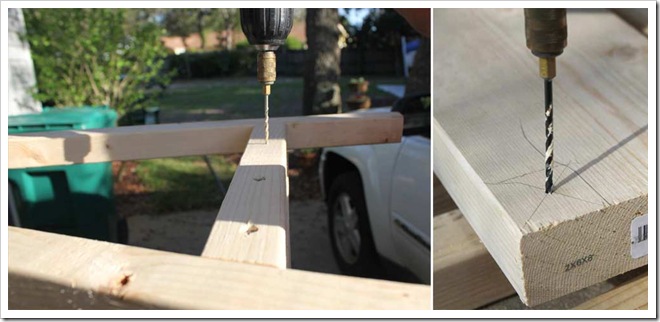
In no time I had this! Not to shabby. Actually it was pretty shabby. Here is a tip: Sand it all down really well PRIOR to putting it all together. The 2×2’s are really kind of rough. So either upgrade to better wood or sand the crapola out of it. Sadly I learned this lesson after I already had primed and painted it. It bugged me so much that I filled some more, resanded and repainted. 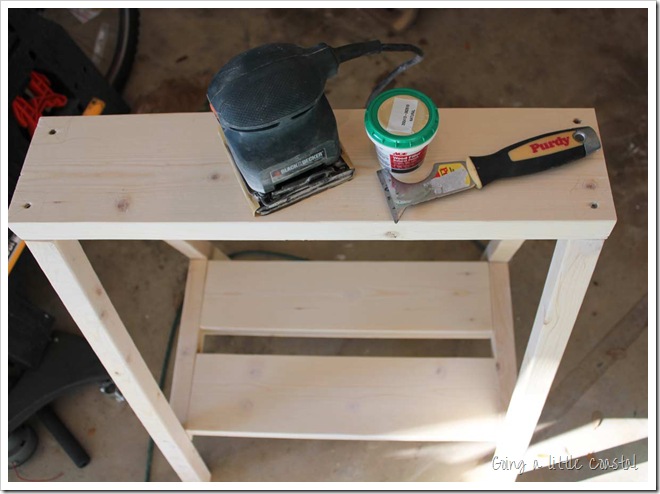
The door had to be cut down so it would fit on the only wall available at the moment. I added trim to hide the cut edge. I blobbed on some caulk on the cardboard inserts since I only had wood on the two ends to nail into. The rest was all nailed on. It has a nice rounded edge to it. I did need to fill a bit with caulk since the cut was not all that straight. Remember, caulk and wood filler are your friends. 🙂 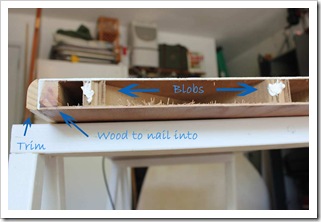
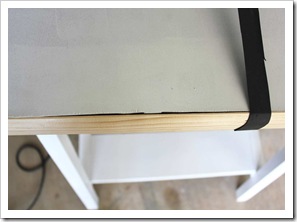
I hemmed and hawed about what to do with the top. I painted it all white and then I decided to add some words to the top using some really cute scrap book paper. I printed out the words on the computer and then just taped them to the cute paper and cut them out. No machine to do it for me. Just me and my scissors.
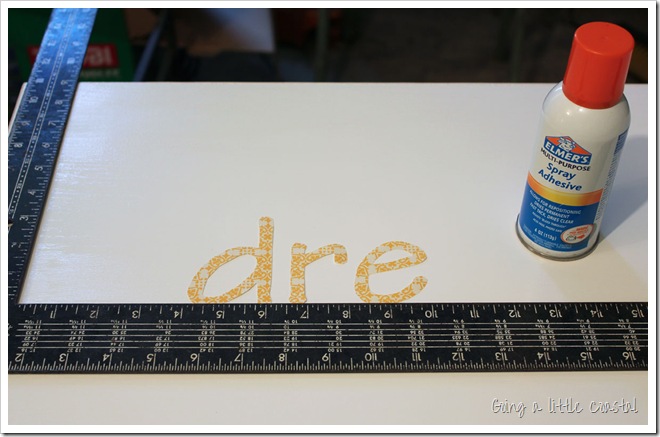
I used some spray adhesive to glue the letters on and used an angle to get them on straight. The adhesive gave me time to move them a bit. Then I applied some water based polyurethane. Water base is best for applying on light colors. It won’t yellow over time. Use several light coats. The first brush stroke went on rather heavy and my word started to ripple but I just smoothed it down it was okay. 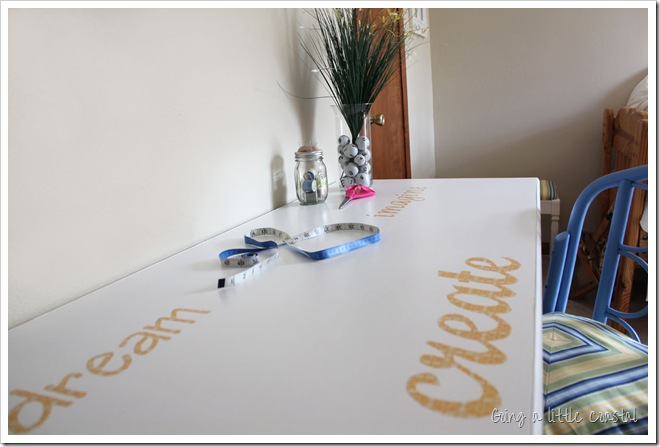
I left the door knob hole there. I figured I could run the cord for my sewing machine through it. Then if company comes I can just place something pretty over it. 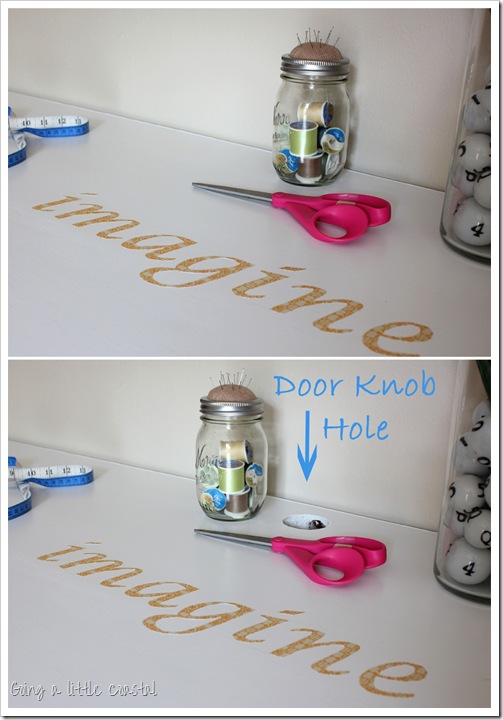
I still have work to do in this room. Painting and finding a daybed. I need to find my extra long needle so I can tuft the center of that poufy cushion. I love that I have this extra space to work at and I don’t have to worry about the mess. 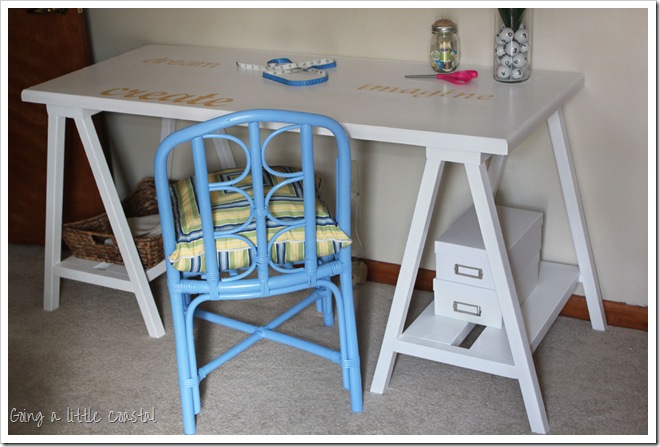 So there you have it. It’s a pretty easy project. There are a few angle cuts but nothing too confusing. I hope you all will come visit and see this room when it’s all finished. Thanks again Gail for this opportunity. It’s been lots of fun!
see ya,
Thanks Anita for a great tutorial. (and the kind words you said about me and my blog) Be sure to hop over and see all the wonderful photos on Anita’s blog.
Today is the big day! My baby girl is getting married! I’m so happy to welcome Andy into our family and I am happy that Jamie is marrying into a loving family. We’ll have a few more guest posts while I recover from this weekend!
gail
Check out other door projects here: [categorythumbnaillist 18]


I did the same thing but used short file cabinets……I love them!
Holy Moly Anita this is beautiful!! You did an awesome job and I love the words you added!!!
Oh my gosh Anita that is soo cute! Fabulous job! Adore it!
Anita, how nice to see you over here today… I’m impressed with your carpentry skills.. your little table or it’s not really so little, but it’s really nice….
Great Job with those power tools!!
Sandy
It looks AMAZING! What a perfect little table with a
built in “cord whole!” LOVE IT!
Well, look at you…crafty girl! This turned out great Anita. That was so smart leaving the doorknob hole for your cords!
~Tricia
Hi Anita-
I love desks like this – it looks perfect – the sawhorses – the top. What a great DIY project. You should be proud.
My best- Diane
Very impressive!
Suzy xxx
You MADE the saw horses!! I’m impressed! It looks adorable. Great job!
Awesome! This is so much more than a sawhorse deck.
This is a classy desk. Your finishing is perfect. Kudos! Ginger:)
love that anita! it’s so fresh and open… beautifully done!
love that anita! it’s so fresh and open… beautifully done!
That is a great idea for a desk. Love the finished product. It’s clean and bright and not cluttered. Love it.
What a great desk, Anita. It looks so crisp in white, too. You did a great job, girlfriend!
Cute idea!! Love the words on the top, too.
What an adorable desk/table. You did a great job with it. Thanks for sharing.
Anita the “Tool Girl!!!” So love it! And I love the door knob idea!!
Great job!
Smiles~
cricket
Anita the “Tool Girl!!!” So love it! And I love the door knob idea!!
Great job!
Smiles~
cricket
Anita, your table is awesome! I love the sawhorses! I think it was really smart to leave the doorknob hole, too. You did a great job!
Congratulations, Gail! It sounds like you’re getting a wonderful son in law. Enjoy the day!
Thanks everyone! This is not a hard project. An extra set of hand to screw it together is good but Gail has a way with her clamps so I know it could be done alone!
Have a great time at the wedding Gail! Remember to breath. Can’t wait to see pictures of Jamie in her dress!
Get out…I’m impressed with your power tool skills. The saw horses are amazing! I love the look of them for desks and sofa tables. The knob hole is perfect for hiding cords. Great idea to add the inspiration words, too. You did a great job! Love your craft room! 😀
Can’t wait to see pictures, Gail! Very happy for you and Jamie. Have a beautiful day!
~Michelle
xo
What a great project and it really looks professional!
Good luck with the wedding.
Amy
Nice job on the desk Anita!
Gail,
I’m so happy for your daughter and son-in-law. Have a wonderful day!
Holly
Shut Up! you made that? YOURSELF??
Gah woman, you are good. It looks just like the one from pottery barn. I love that you left the hole. And how long did it take to cut those letters? they are perfect! I love this project, really well done!
Wowzers!!! I wasn’t expecting that cool project at all. Power tools??? Do your talents never end Anita? And hand cutting those letters and then getting them straight must have been tough. I bet Gail is so glad you were a guest blogger because this is fabulous.
What a cute project! Love the way it turned out. You make it sound so simple.
Congrats, Gail! We got married three weeks ago, and I hope your day today is as wonderful was ours was. Enjoy every moment – I’m sure your daughter will be stunning! Can’t wait to see pictures!
I love that desk. If a person was short on room they could leave the top loose and when they needed to store the desk, the ends would make perfect little end tables. I love the idea of leaving the doorknob hole to put cords through. Now I want one for the room I’m putting a daybed in. See what you started? *grin* Thanks for helping Gail out. I’m sure she’s chewed her nails down to the quick by now from nerves.
Anita, I’m so impressed with your very cool table! I love the words on it and the “cord hole” works out just right too!
You did great!
Gail, I’m thinking of you and Jamie this morning, hope all is perfect today!
That table is fantastic… perfect for your space. You did a amazing job on that Anita. Thanks so much for sharing.
Gail, so happy the big day is here and I didn’t have to get up early for this one… lol. They will never forget the date anyway. Hope all goes well and the weather is perfect for the beautiful couple. Wish them all the best for me. Most importantly though… HAVE FUN and don’t stress.
Hugs, Deb
I really like what you did with this Anita!! I love Ana’s site…so many great things to make there. It’s one of my dream places to visit…just like Gail’s is.
Oh my!! You did a great job and it looks fabulous!