Yardstick Tray
As an Amazon Associate, I earn from qualifying purchases.
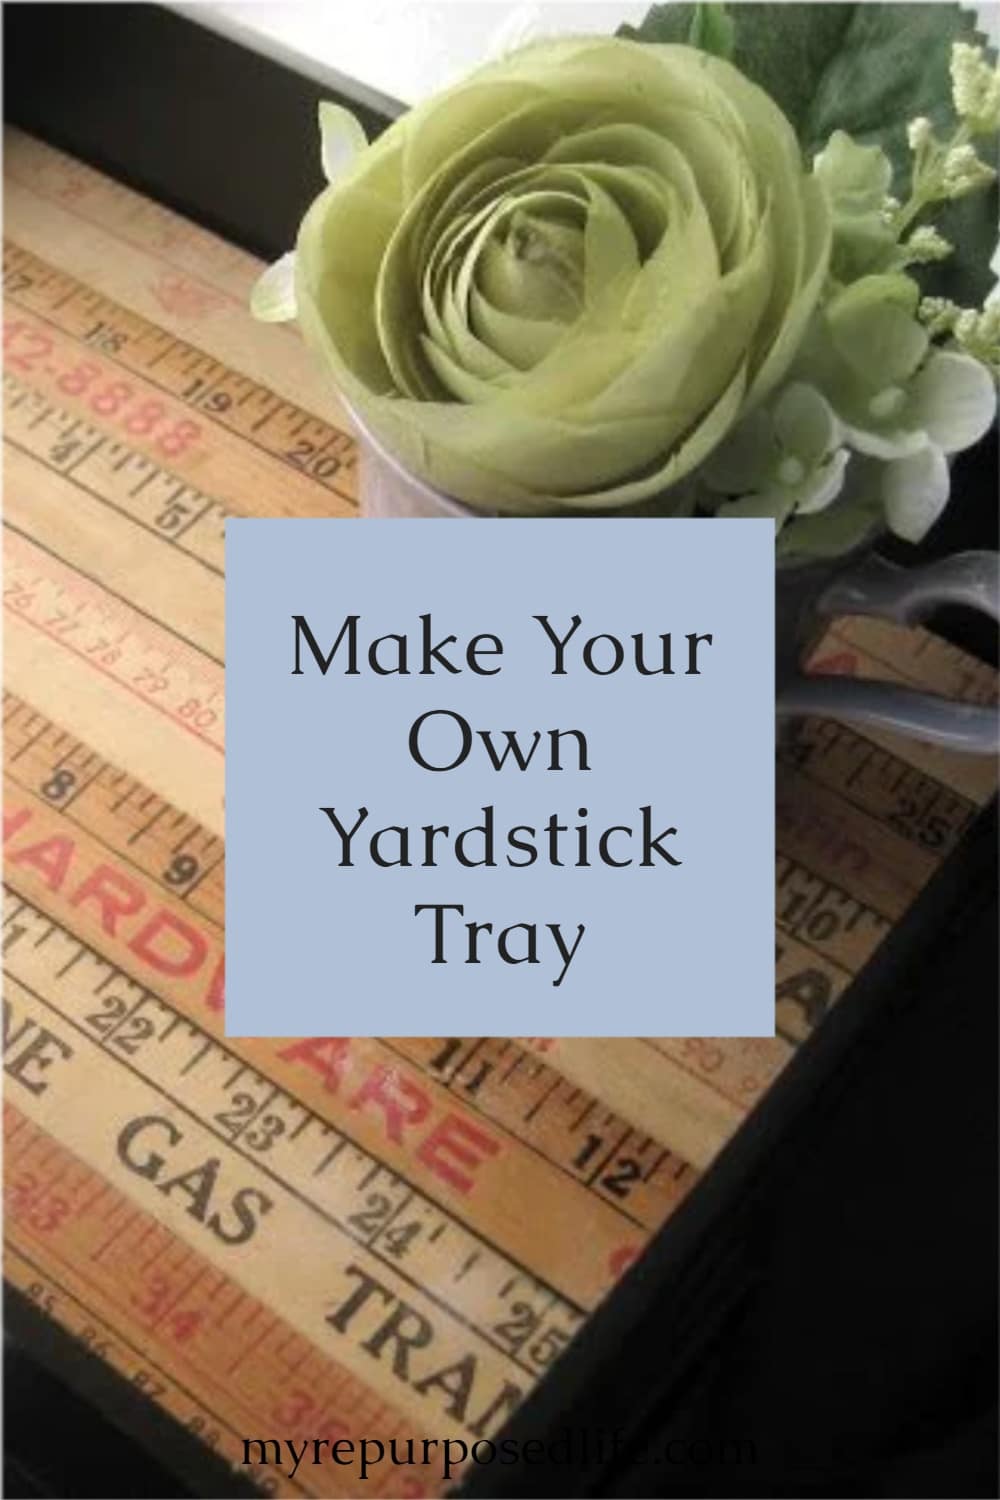


Nice to virtually meet you! I’m Paige from Little Nostalgia, and I’m so excited to be posting here! A big thanks to Gail for having me over, so to speak. Today I’ll be showing you an easy DIY project you can tackle this weekend. Say hello to the vintage yardstick tray!
If you only have a few yardsticks, you may want to make a Yardstick Biz Card Holder.
This is one of my all time favorite pieces. It’s cool and kind of unusual, but still functional. I haven’t hosted any wine and cheese nights since I made it, but you better believe it’s making an appearance at the next one.
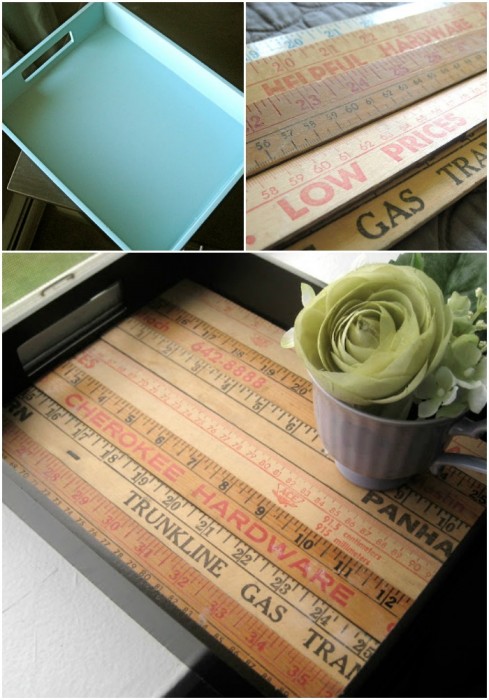
Supplies
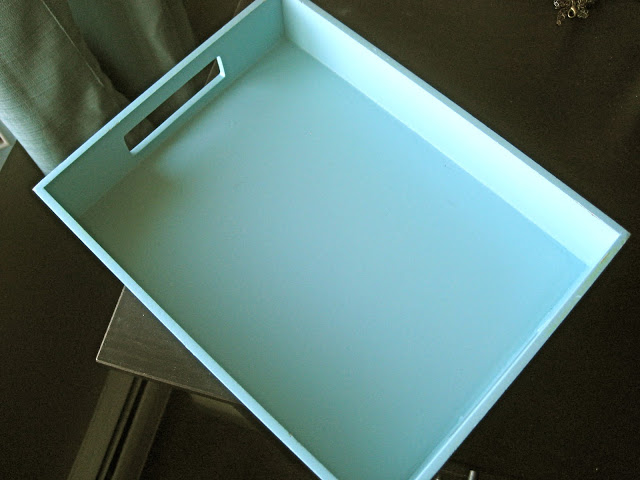
- a tray
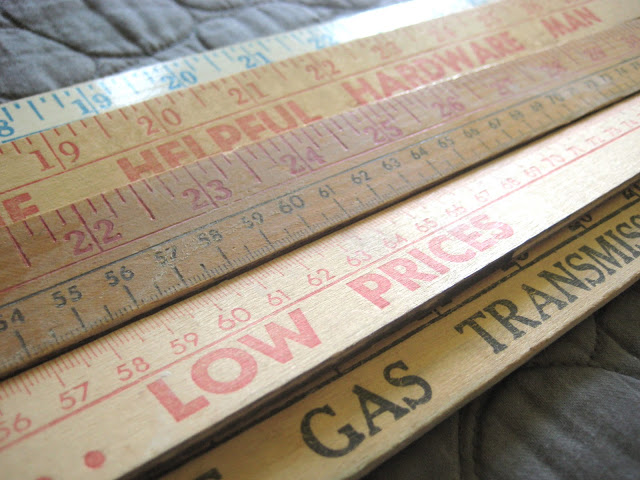
- vintage yardsticks or rulers
- spray paint
- wood glue
- a small saw
First, gather your yardsticks and/or rulers. When I was casing estate sales and thrift stores for mine, I tried to find ones that were similar in color, but you don’t have to:
Next, use one of the yardsticks to measure your tray. Once you’ve found the length, it’s time to start cutting. Because this project has so few cuts and uses thin material, it’s great for people who are new to using tools, or who live in the city (like me!) and don’t have a yard or garage for big power tools.
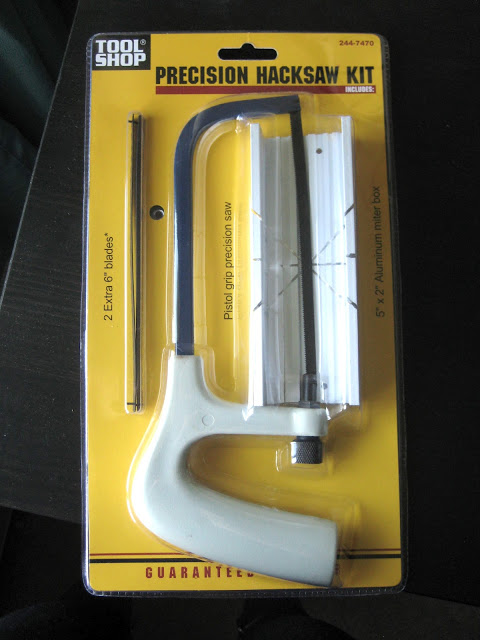
Here’s the saw I used instead:
Cut down however many pieces of yardstick you need, depending on the size of your tray. After you’ve double checked your slicing skills to make sure everything fits, it’s time to bust out the spray paint!
Before…
After!

You can do any color you want; I went with Krylon’s oil-rubbed bronze. The can says I can handle the tray after an hour, but I’m paranoid and like to let things sit overnight. So that’s what I did.
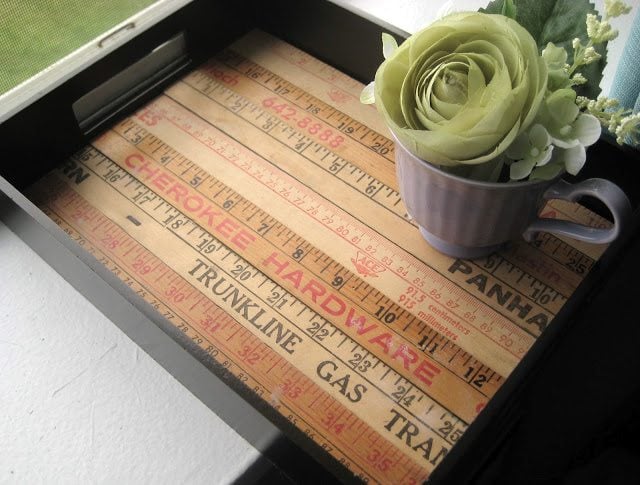
When it’s fully dry, grab your yardsticks and glue them into place. I used my trusty Gorilla Glue, but any kind of wood adhesive will be fine. Again, I let it sit overnight with a heavy book on top of it, just to be safe. And that’s it! Yardstick tray: complete.
Now you have a fun conversation piece to use at your next get-together. Have you ever made anything out of old yardsticks/rulers? Or revamped an old tray?
If you have a thrift store tray that needs an update, you could always paint it and trace a cool design on it like Maryann did with her navy tray. Maryann definitely knows the power of paint!
Trays are so handy for decor and more, don’t you think?
gail
Super idea!! Where do you find your yardsticks? I can’t find any around here.
Renee,
I have a booth at a “resale” mall type place. You know, unmanned booths with a central checkout. There are a lot of “junk” booths that sell the most random stuff cheap! I think a lot of the items are storage unit buyouts.
I rarely go to anything like goodwill anymore.
Good luck!!
gail
This is really neat. Nice job
Thanks Pam!
I hope all is well with you. Are you like me, ready for some cooler weather?
gail
What a great upcycle! Adding this to my list of favorite projects. 🙂
Hi, this blog is really instructive. I would like to know more about this.
pallet racking
Love it Paige!! I needed an idea for a tray this just might be it!! Thanks for sharing!
Barbara ‘@ chase the star