DIY Closet Doors Makeover
As an Amazon Associate, I earn from qualifying purchases.


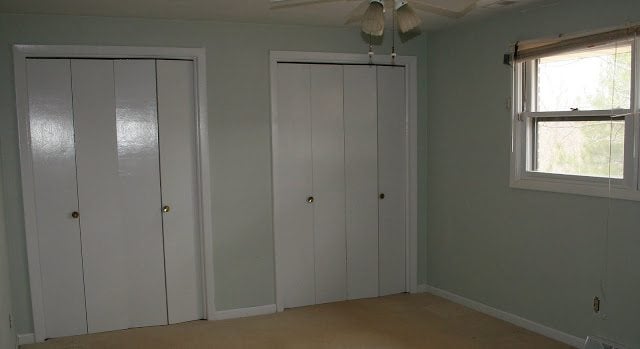
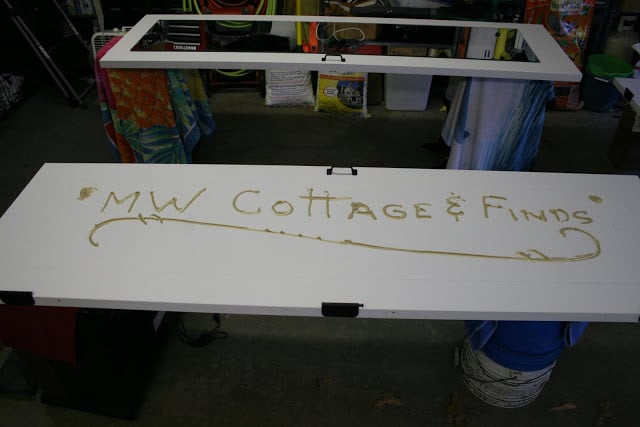
Hi-I’m Chris from Midwest Cottage and Finds….I’m a bit of a new DIY-er and am so inspired by Gail and all of her projects –I cannot tell you how thrilled I am to be guest posting over here at My Repurposed Life!! I decided to share one of my favorite projects that I have completed so far….. Here is the breakdown on how my bedroom diy closet doors went from this.

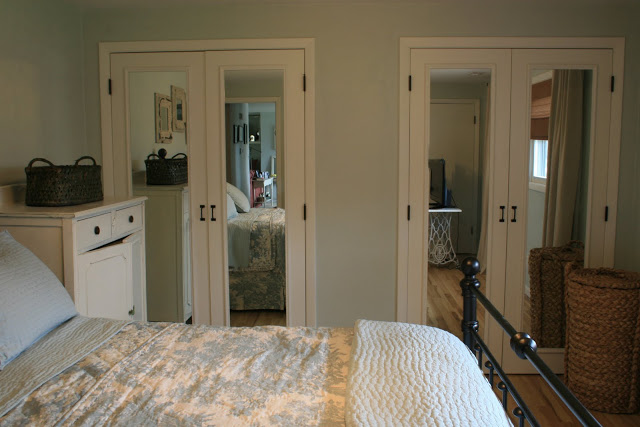
I fell in love with these doors when I saw them in Kevin and Layla’s blog-
The Lettered Cottage. I knew they would be perfect for my master bedroom…a smaller room – so in addition to looking great the mirrors would make the room appear larger……….
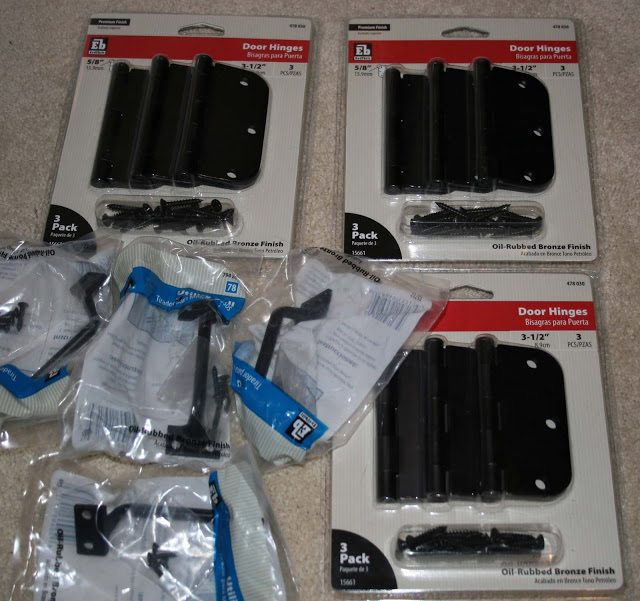
We purchased 4 new 24″ interior doors from Lowes @$20.00 a piece, hinge hardware and window handles (to use as the door handles) from Home Depot–all total $40.00…..You might be lucky enough to already have closet doors that could be transformed… unlike me who was still sporting the bi-fold 60’s doors!
The hardware I purchased even came in oil rubbed bronze–SCORE…. no painting!!
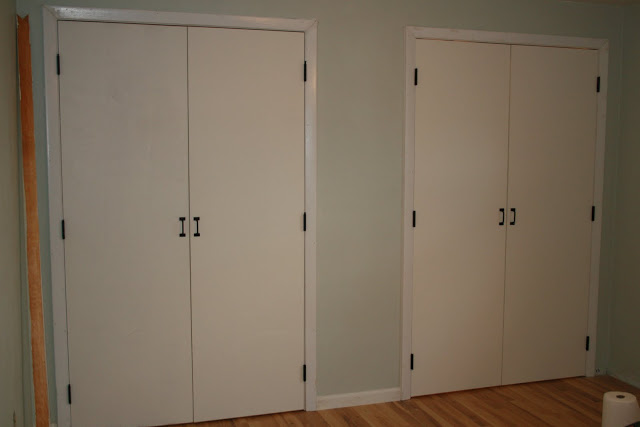
I lined up the doors and started painting–several coats…pulled out my ol’ faithful Purdy……

When I completed the painting the hardware was added
after careful measurements were taken…..I am always so nervous drilling that first hole!

Before we went to the next step we made sure they our hardware was lined up, measurements looked good and the doors fit well…once the mirrors are added they become VERY heavy, easier to double check yourself at this stage….and things were looking good!!
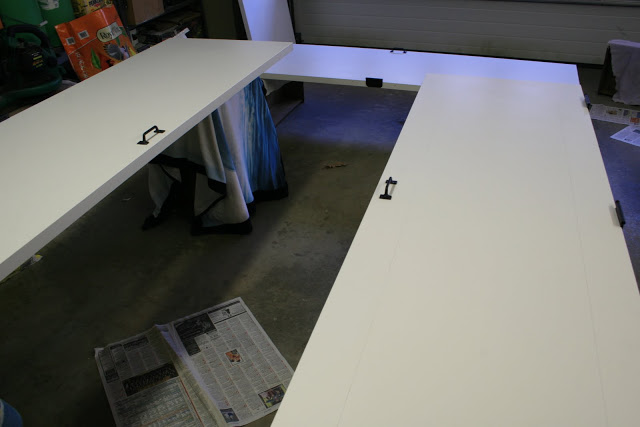
Next up ……penciling in the outline for the mirrors…this is a little tricky..TIP**It is helpful to mark the top and bottom of the doors to be certain your measurements are correct for each..I wanted the mirror to be a little higher on the top of the door–so there would be a few more inches of actual door showing on the bottom of each door…which sounds simple until you have 4 doors laying in front of you and you are wondering ummm..which end is up???
I called local mirror and glass companies and had 4 quotes on the price of cutting the custom mirrors….They ranged from $150.00 to $293.00..
TIP**call around it is worth the time..you will be surprised how many local places handle custom mirrors….
BIG TIP**—you will be covering the mirror edges with trim so you will not need the sides beveled…
that a lot saves $$$!
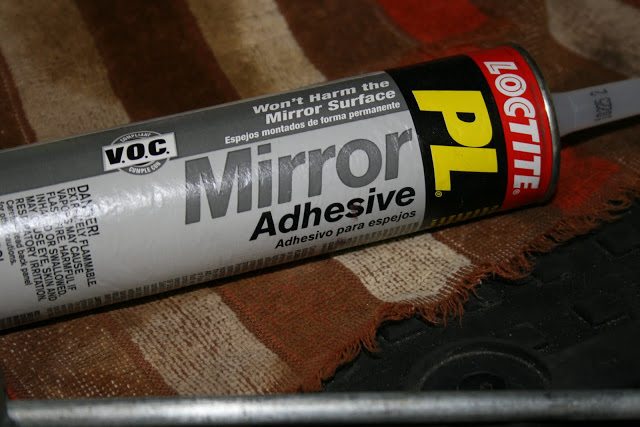
Next I prepped the doors to secure the mirrors…..Make sure you use mirror adhesive…VERY important…The mirrors are very heavy…Read the directions on the adhesive very carefully–the doors have to sit for a few days for the adhesive to set…So have them in an area that they will not have to be moved for a few days…..
I added a bit more adhesive after being creative!
I painted the trim to match the doors and added the trim around the mirror edges….and after a few days of sitting undisturbed ……….
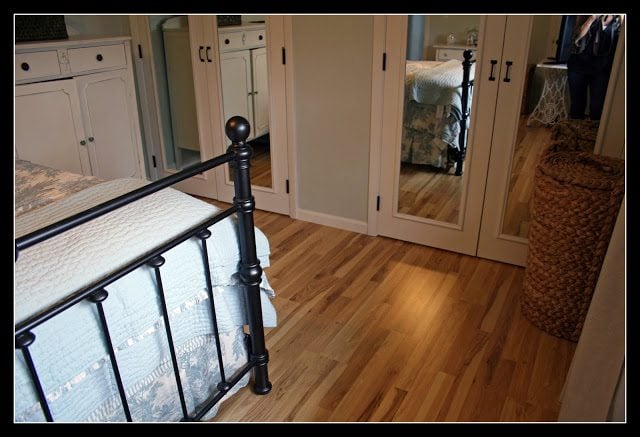

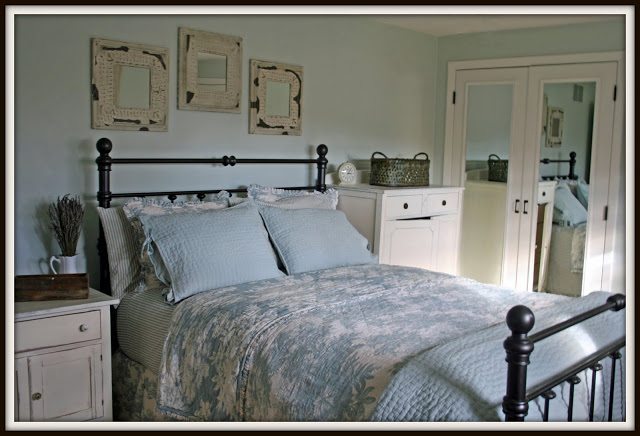
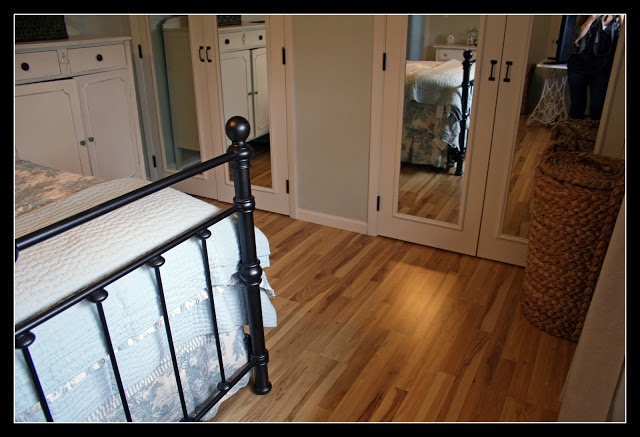
I LOVE them…it completely changed the look of the room…along with new bedding, paint and a new bed that was purchased in the ugliest color I have EVER seen until we painted it–but that is for another DIY post!! Thanks again Gail for letting me share this will your faithful readers! If you are interested in any of my other projects and my furniture painting tips- (LOVE ANNIE SLOAN CHALK PAINT) Hop over to Midwest Cottage & Finds Enjoy and hope to share more soon! Chris

Oh my! Don’t you LOVE Chris’ bedroom? The closet door makeover is just the icing on the cake! Be sure to check out Chris’ blog and her other fabulous links!
gail


How do the doors stay closed? Really nice idea as I have bifold slotted closet doors that need replacing.
Lori,
I have small doorstops at the top of the closet frame with magnet catches. Hope that answers your question.
gail
Did you just buy two slab doors? Also, how did the doors latch? I don’t see a kit or directions for that. Did you have to take off the original trim before switching out the doors? Thank you!! Looking to do this in our mancave with our shoe and coat closets that are right next to each other, originally there were all bi-fold doors.
Colleen,
This isn’t my project. But looking at the post, I see she bought four doors. It sounds like your project is a lot like Chris’ room. I don’t think she used any latches.
gail