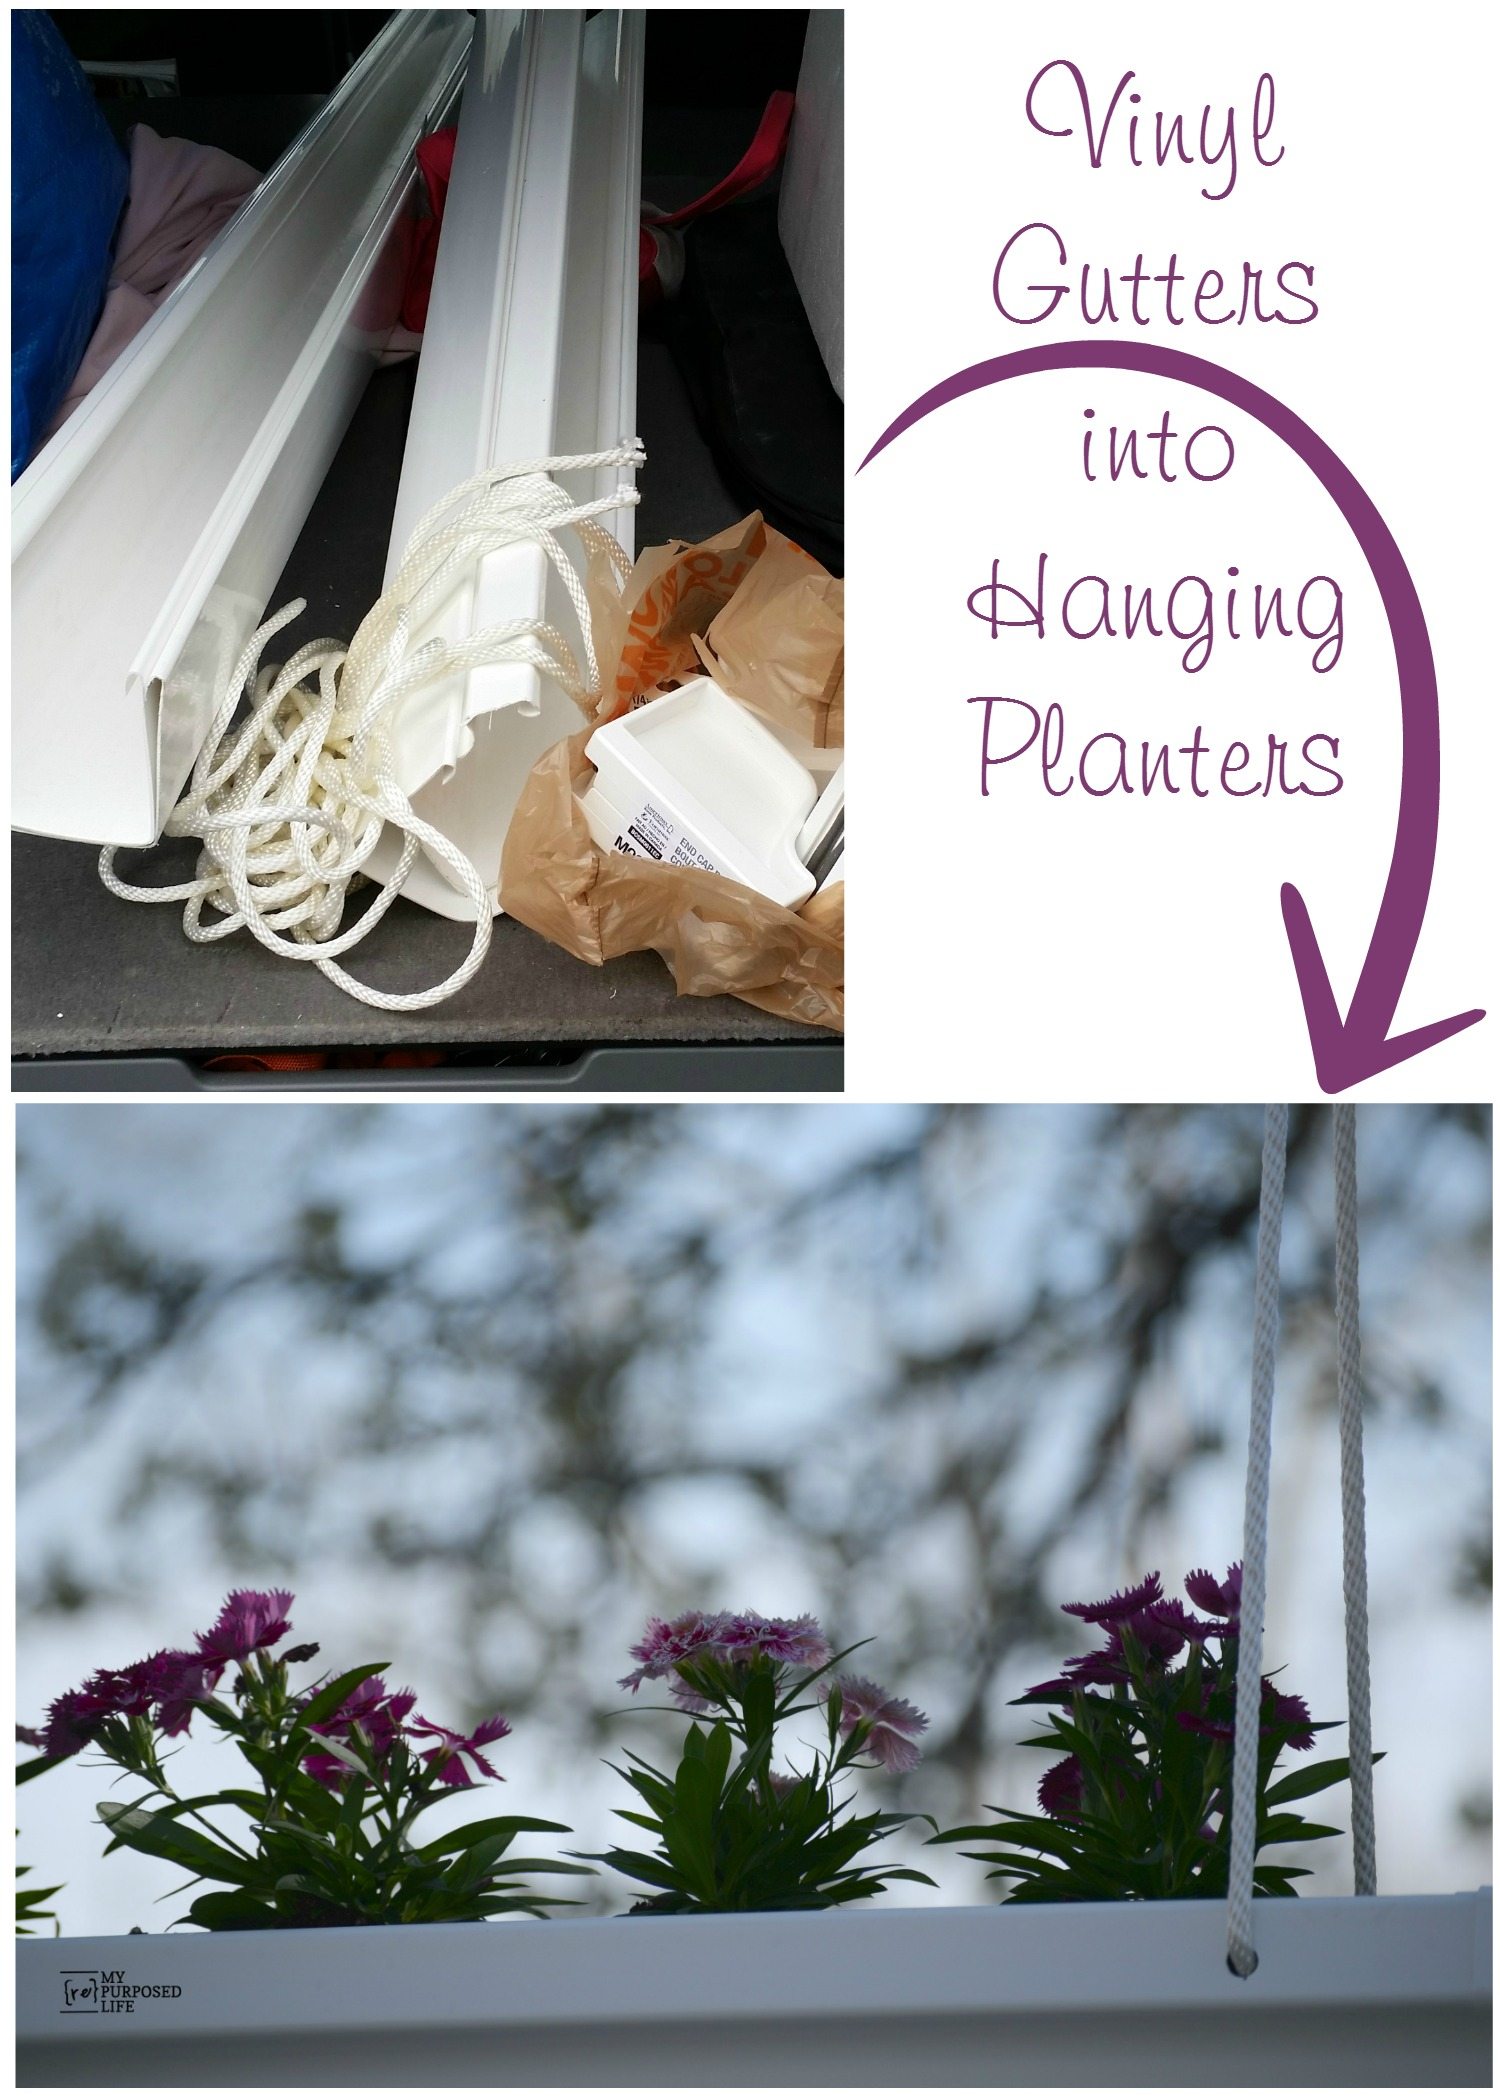
Gutter Planter for Pergola or Arbor
As an Amazon Associate, I earn from qualifying purchases.
*I’m so happy to tell you this is a sponsored post from The Home Depot*
It’s here! The #DIHWorkshop where you can make a gutter planter is right around the corner! Today, I’m going to show you how I made my own gutter planter for my new DIY picket fence arbor.
Be sure to see below how you can sign up to make your own hanging gutter planter.

This is the inspiration photo I showed you last week. I didn’t need to spin it much, because it was nearly perfect for where I need to show off some pretty flowers. I didn’t have a good spot to hang it from my home, but my new arbor was in need of some color!
Making a gutter planter for the new arbor


After installing my picket fence and front arbor, many people asked me if I was going to do a trellis. I knew I wasn’t, but I really didn’t have a plan. After I was contacted by The Home Depot about this virtual party to spread the word about the DIH Workshop, I knew these hanging gutter planters would be perfect to hang in this open area.
It was time to go shopping!
What I bought:
- (2) 10 ft Vinyl Gutters $3.98 each
- (2) “S” hooks (2 pack) $1.86 each
- (4) Screw Eye Lag Thread .67 each
- (4) End Cap (2 pack) $6.93 each
- 40 ft Braided Nylon Cord .22 a foot
- 20 potted flowers 1.33 each (not figured in the cost below)
Grand total for me was around $50 not counting the flowers—but remember I doubled mine because I wanted to do two sets of two planters. I was concerned about getting the amount of rope wrong, but I ended up using almost every bit of it.
Other items you will need to make this project at home:
- Saw (The Home Depot recommended a jig saw, but I used my compound miters saw)
- Painter’s Tape (to make the rope easier to thread through the holes in the gutters)
- Drill
- Drill bits (3/8 for the rope holes) and whatever size you need to pre-drill for your lag screws (to hang your gutter planter.
- Paint and or Stencils if you want to customize your planters
Shopping for supplies

I enlisted the help of a nice man named Ernie to help me cut the gutters and measure out the rope.
The gutters come in 10 ft lengths, and they wouldn’t fit in my car. I bought 2 gutters, and doubled the other supplies as well. If you need to cut your gutters, you can do it in the self serve trim and molding dept.
 Ernie helped me find the items necessary for my gutter planters.
Designing the gutter planter project
 First, I measured the arbor and got right on cutting the gutters to length.
 I marked the gutters and used my compound miter saw to cut the vinyl gutters very slowly.
 On my way! I have my four gutter pieces cut to size.
How do the gutter planters hang on the arbor?
 I used a 3/8 bit to drill the holes in the gutters to make my planters.
 My new easy DIY sawhorses were used to rest the gutters as I drilled the holes necessary for the ropes.
 These are all the supplies I needed to make two sets of hanging gutter planters.
Easy way to thread rope through gutter planter holes
 Taping the ends of the rope made it easier to thread through the holes I drilled in the gutters.
Configuring the proper length
 I measured the height of my space in the arbor, and used those measurements to start threading and knotting the rope.
How to hang the gutter planter
 Holes were pre-drilled in the 2×6’s in order to screw in the eye lag screws, on which I hung the “s” hooks.
 Doing the first planter was really simple, however, getting the second planter to match the first was a little more challenging.
I love how perfectly they fit from side to side.
 I followed the recommended height of 12” between the gutter planters.
What plants work best for gutter planter?
 The next day, I went back to Home Depot to get the flowers and potting soil.
 Planting flowers on my diy potting bench makes life so much easier.
 The hanging gutter planters are ready to be put in place.
Unique planter for front arbor

My new gutter planters hang perfectly snug right in between the upright 4×4’s of my new arbor.
Note: There are four holes in the bottom of each gutter where the rope threads through, you may want to drill some additional holes for drainage. I chose not to at this time.

We could have painted our gutter planters, but I chose to leave mine white because they look so pretty in my arbor.

We could have painted our gutter planters, but I chose to leave mine white. I can’t wait to see what everyone else did with their gutter planters!
More gutter planter ideas
 Are you ready for a LOT more inspiration from my friends? See all the fabulous gutter planter options below from my friends above and many more:
- Domestically Speaking
- My Repurposed Life (you are here)
- Designs by Studio C
- Restoration Redoux
- Cupcakes and Crinoline
- The Creative Mom
- Her Toolbelt
- The Contractor Chronicles
- A Girl and a Glue Gun
- Make It Love It
- Live Laugh Rowe
- My Fabuless Life
- Place of my Taste
- Hawthorne and Main
- House By Hoff
- All Things Thrifty
- Lou Lou Girls
- Reality Daydream
- Over The Big Moon
- Pretty Providence
- The Rustic Life
- The Glam Farmhouse
- Boxwood Avenue
- Our Vintage Farmhouse
- A House and a Dog

Although these gutters were pretty easy for me, if you’re new at DIY or don’t have the tools you need, then go NOW to sign up for the #DIHWorkshop on April 21 from 6:30-8:00 at The Home Depot near you. Make a date with your friends, sisters, daughters, or aunts—and just do it! You will have so much fun, AND you will have something to show for your night out.
gail
I was so happy to be asked to do this project for the Home Depot. I was compensated for my time and supplied with everything I needed to complete this new gutter planter for my fabulous front arbor.
Turned out darling Gail!! Love them in white, they are perfect with your gorgeous white arbor!!
Wonderful instructions and photo tutorial as well.
Thank you Shannon! I still smile every time I look at my fence/arbor. If only I could get the job finished (painting)
gail
i am signed up at our local HD for this class. it should be fun. i love how yours turned out!
I love what you did with your gutter planters, Gail! I may do this on each side of my swing…you got me thinking. 🙂
I love them Mary Beth! They make me smile every time I look out my window. 🙂
gail
What a fun project! Your pergola is the perfect place for these hanging gutter planters, love it!
-Shonee
LOVE it!! I would never have even thought to do something like this! I signed up for the workshop plus another one on patio and deck staining! As always thanks for the great info!
I love this project! I can think of so many ways to use these planters too! Your pergola is absolutely perfect for the pop of color.