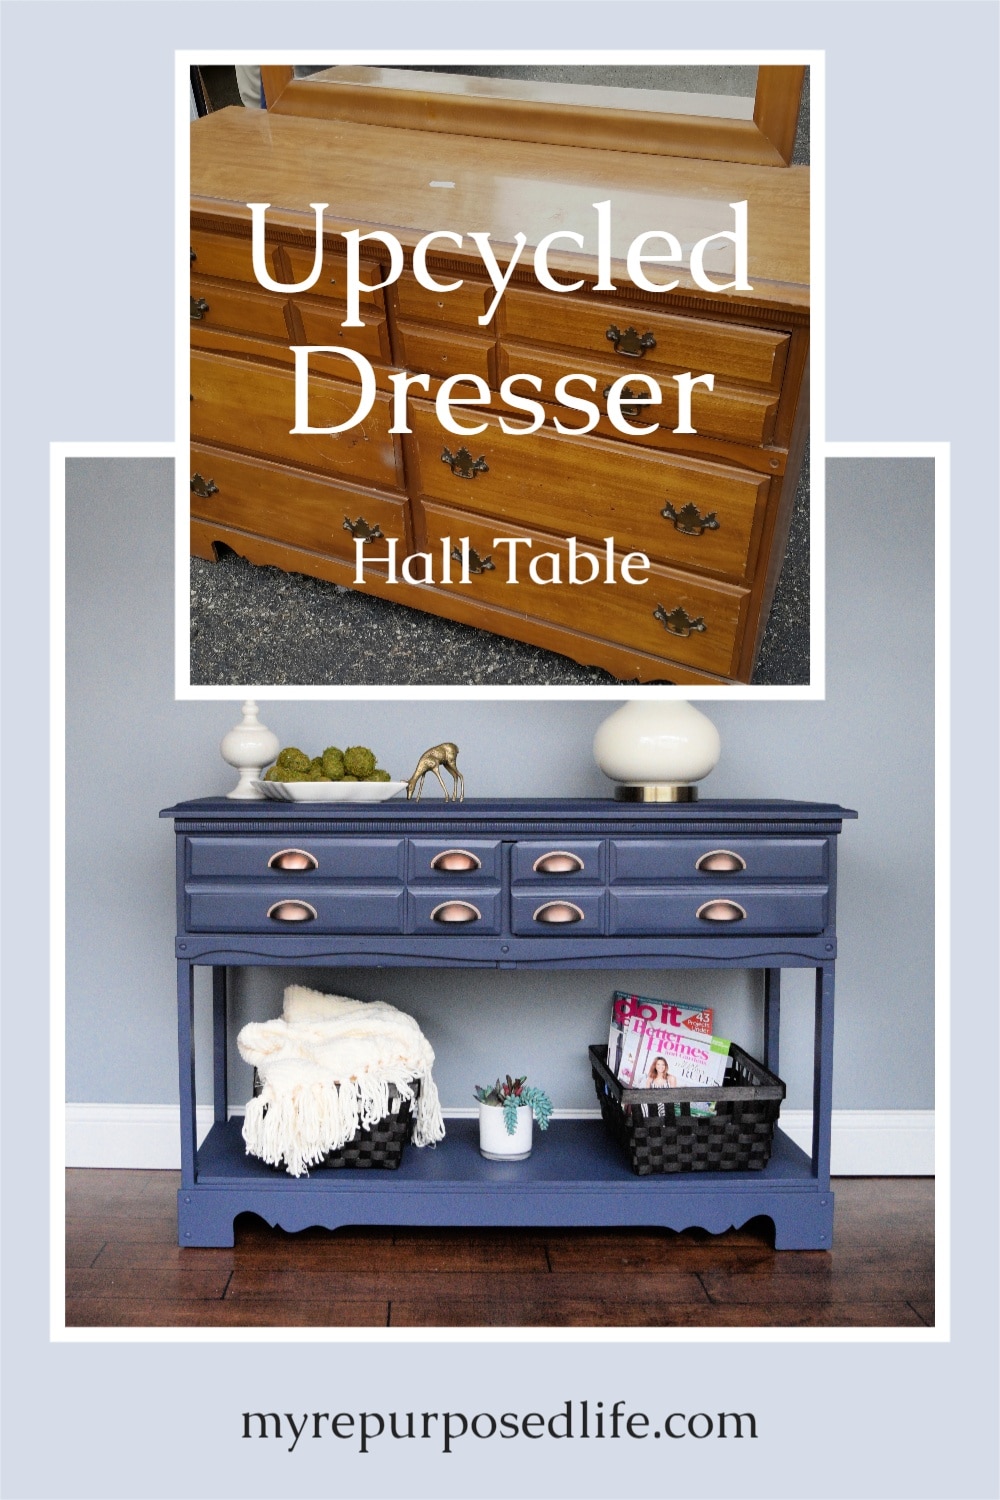
Hall Table Repurposed Dresser
As an Amazon Associate, I earn from qualifying purchases.
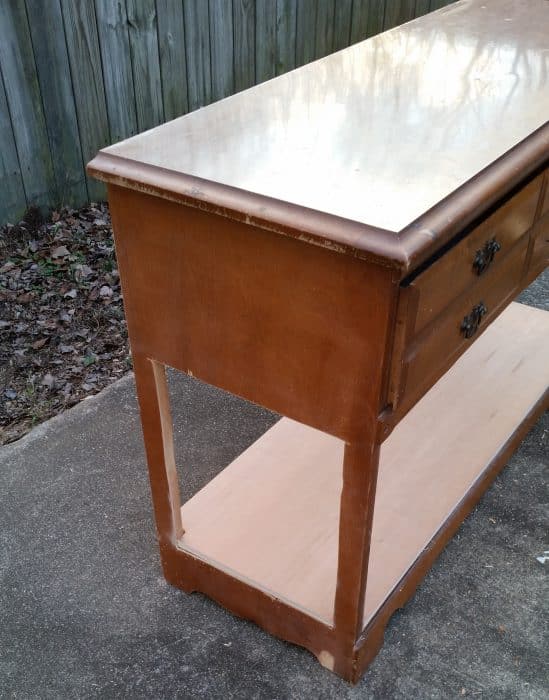
I have a fantastic repurposed furniture project to share with you. It’s a hall table (sofa table) made from a dresser.
I love cutting up furniture. Although this hall table made from a dresser wasn’t too hard, it was a little more complicated than I expected.
Yard Sale Dresser Repurpose
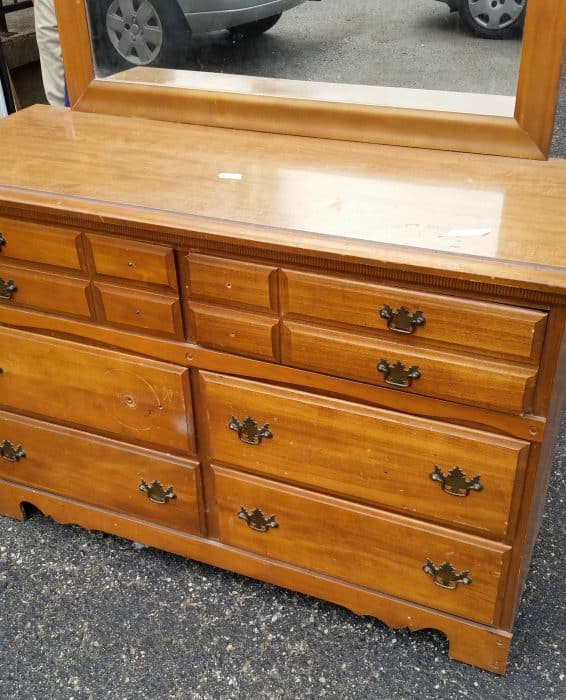
I scored a $10 dresser at a yard sale. When I purchased the old dresser, I had no idea I would be upcycling it into a hall table!
Designing the Upcycled Dresser into a Hall Table
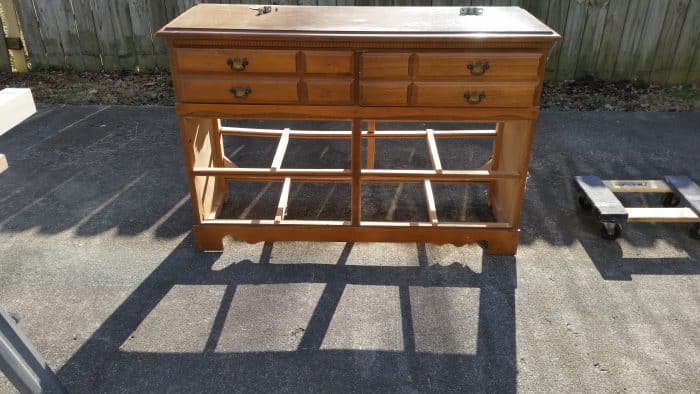
It wanted to be a hall table, but I didn’t want to build a base for it, so I started by removing some of the drawers.
I LOVE what I do! There’s something about furniture demolition that is very rewarding!
Related Content: Before & After Furniture Makeovers
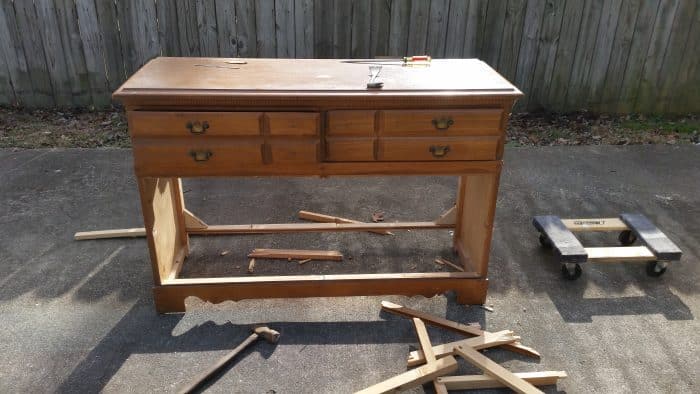
Cut the Sides from the Dresser
First, I used my jigsaw to cut out each end of the dresser. It’s not the best design execution, but it’s all good!
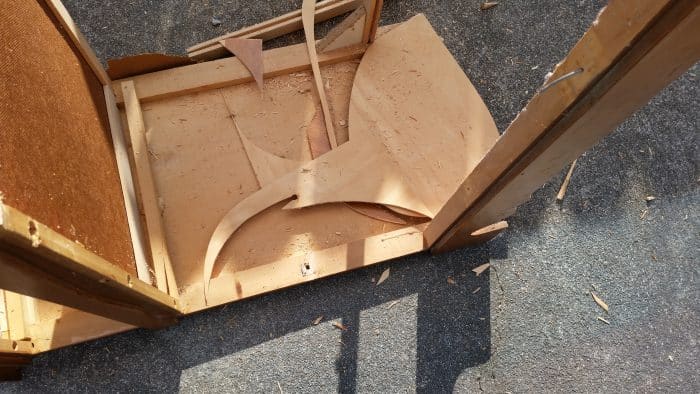
These pieces fell to the ground as I cut the sides to make a new hall table.
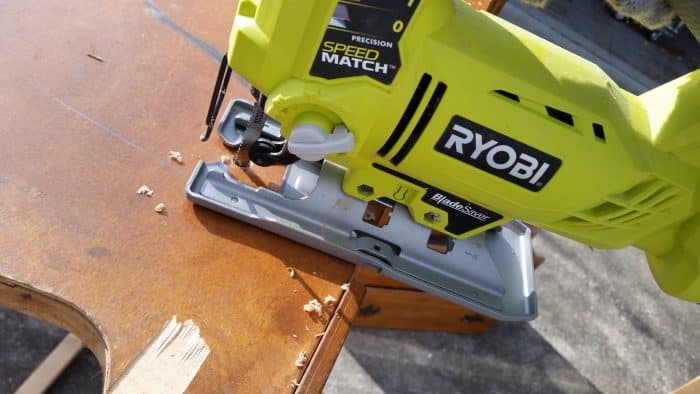
To cut away the pieces, I drew a line right on the edge of the support pieces and drilled a hole to allow my jigsaw blade to start the cut.
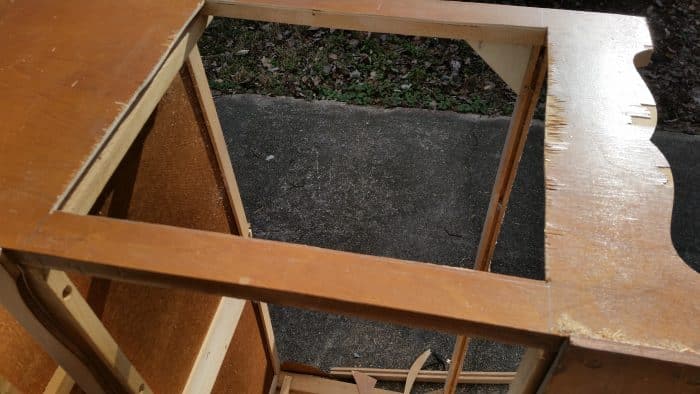
Can you See the New Hall Table Taking Shape?
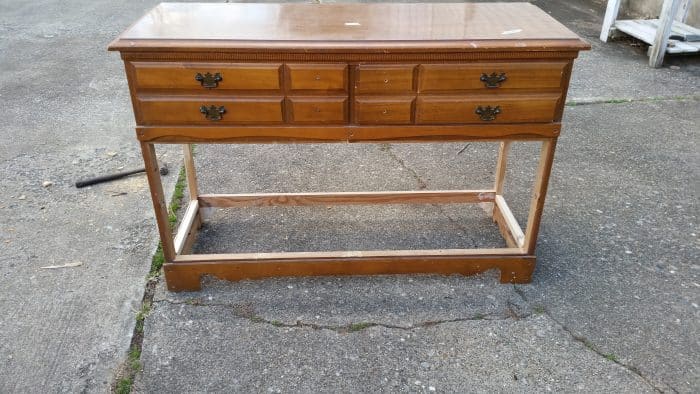
This is what I was left with. Do you think it’s looking like a hall table (sofa table)?
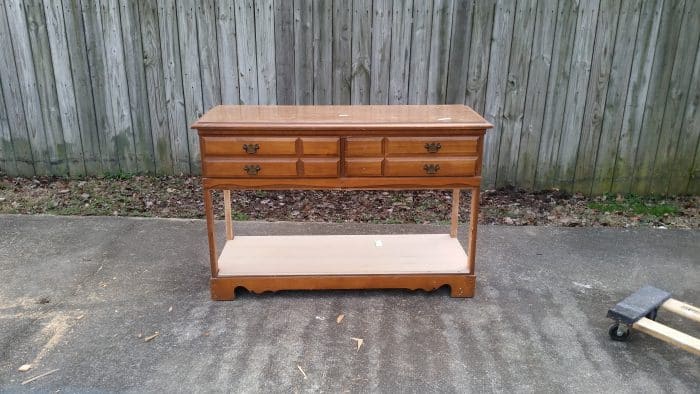
I used a scrap piece of plywood to create a bottom shelf.
There were some veneer issues to deal with.
Time for Painting!
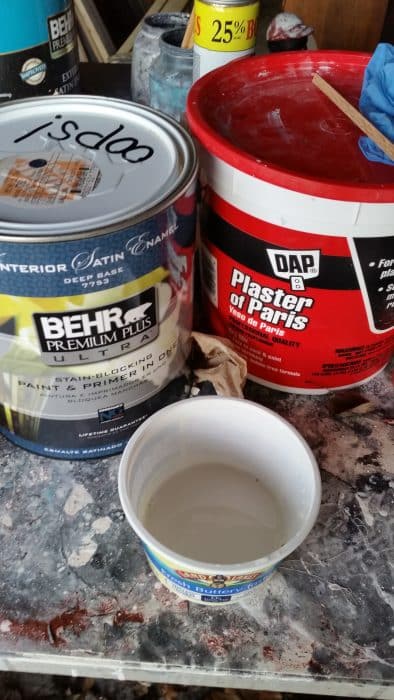
Next, I mixed up some DIY chalky paint primer using some blue oops paint from Home Depot.
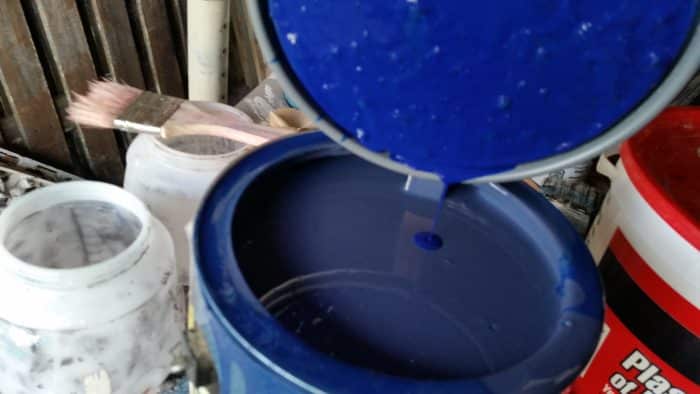
This was the strangest oops paint I have ever used. When I opened the can, the color (see the lid) did NOT resemble the fingerprint on the lid. This can was very full, and I had difficulty stirring it. You’ll see the messy can in the picture below.
The top of the can says the name of this color is Dark Denim. I’ve heard people in the paint department add extra colors to change the original custom paint. I suppose that keeps the customer from returning it and coming back to buy it later.
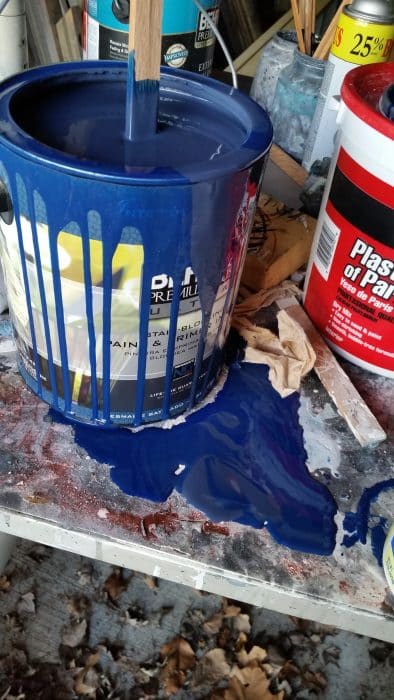
It seems to be true since this can of oops paint was so full. I had to stir, and stir, and stir to get the pigments to blend to make the correct color. Oops! I made a huge mess! But I finally got rid of the really bright blue paint and got the prettiest blue ever!
Related Content: Navy Blue Furniture Projects
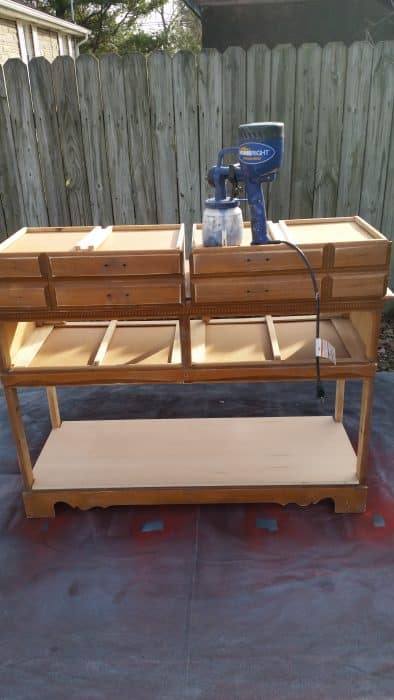
I gave everything a light sanding and prepared to paint the new hall table with my Homeright Finish Max.
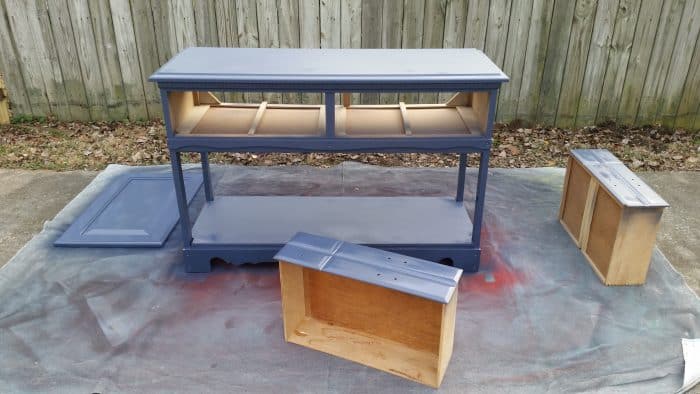
Using the Plaster of Paint mixture as a primer, I applied two light coats of blue. I also applied a primer coat of blue to a cabinet door that I was making into a But First. Coffee sign.
Sanding & Patching

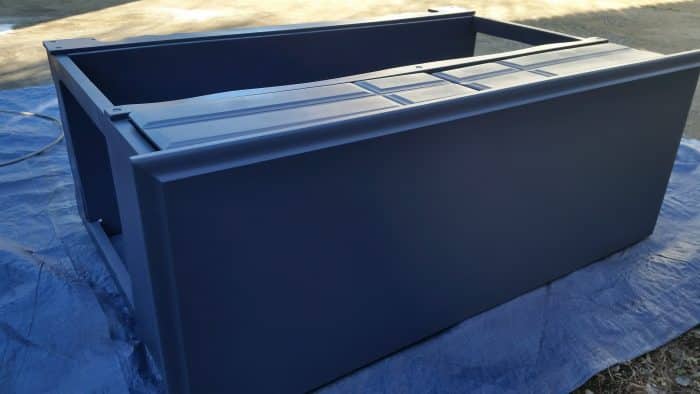
I prefer to patch my pieces after the primer coat to see exactly what shows up. I did two coats of spackle, sanding in between.

All in all, I applied three light coats of paint with my paint sprayer.
I almost always paint my pieces’ underneath for a more finished look.
TIP: to get the best coverage on the top of a dresser or table, lay the piece down so you’re spraying vertically instead of horizontally.
This is after two coats of the chalky paint primer.
I considered the handles in the above photo, but they were too big for the small drawer sections.
I know the drawers are wrong here, but this is the way they fit best.
To achieve a smooth surface, I like to sand it with brown craft paper before spraying the top coat of paint.

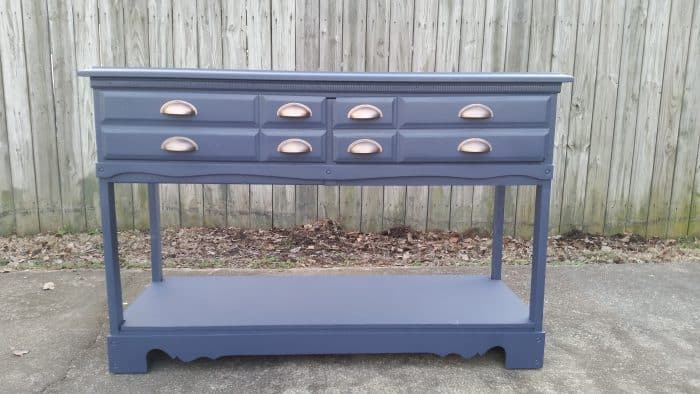
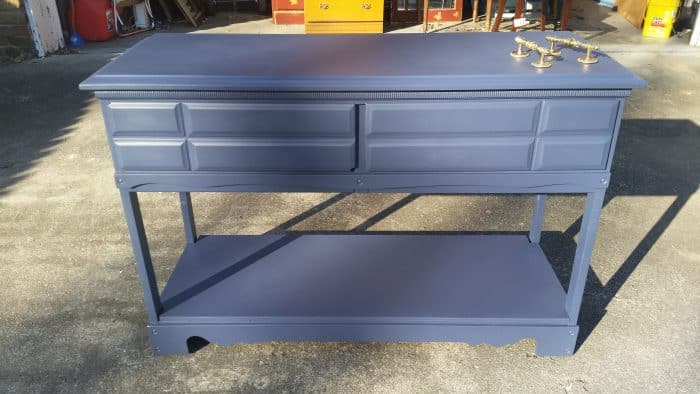
I added some pulls to the former dresser and new hall table, which I purchased from my friends at D. Lawless Hardware.
I would love it if you would PIN this!
Upcycled Dresser into a Hall Table
 After seeing how Mindi painted the outside of her drawers, I decided to try it with this project. I typically dislike doing this because the drawers tend to stick. I only did one light coat of chalky paint on the sides of each drawer.


What do you think? I’ve made many dresser projects, and I currently have one more “dresser in waiting.”

This dresser is in the queue for projects; what would you like to see me do to it?
gail
Sharing here: Refresh Restyle Inspiration Monday
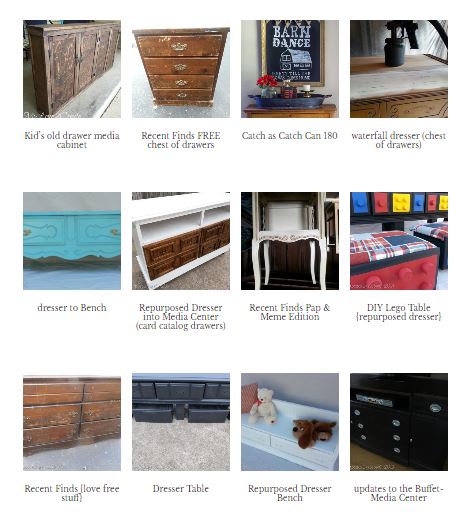
Here are more repurposed dresser ideas.
Sharing here: Elizabeth & Co. Be Inspired DIY Like a BOSS
Check out some more dresser ideas here
That is very cool with the bottom drawers taken out. I love the colour, too! I would be too nervous (chicken?) to cut out the sides like you did, but it really turned out beautifully.
P.S. A jigsaw cuts neater on the back side, but I’m not sure you could have gotten in there anyway. Another solution for stopping the tearing that occurs with plywood is to put masking tape, pressed on firmly, over the cut line and cut through the tape.
Julie,
Yeah, I know both of those things about the jigsaw. I couldn’t have done it from the inside, and when I’ve used tape, it didn’t work so well. So I just went with it.
Thanks for the input for those who try this at home. 🙂
gail
This is darling Gail! Your tutorial instructions are always impeccable! This is definitely on my share list! Pinned!
thank you for your comment Leanne! I appreciate you sharing (pinning) more than you know!
gail
I love how this table turned out Gail! You did a beautiful job. Pinned!
thank you Jeanie, and I appreciate you pinning!
gail
I love, love, love this piece, and that color is so gorgeous. Do you think you could ever replicate that color again, because I’m sure you are going to want to use it again. I love the way you cut the sides out instead of building legs and a base. I have often wondered if that could be done. Beautiful job.
Patty,
I bought a gallon of this oops paint. I checked the can and it actually had the name of the color on it. That’s rare for an oops paint. It is Dark Denim.
gail
Beautiful results and I love using brown paper bags too! Huge transformation 🙂 Pinned!
What a GREAT idea!
It looks FABulous!
-What is this “snow delay” you speak of?
We got 6.5″ yesterday and looks like we’ll finish at 6 more today. : p
h a t e i t…..(oh my aching back!)
Catherine
Best makeover ever. I was doubtful at the beginning, but glad it turned out so well. Love the color, too. Well done! Pinned.
Thank you for pinning!
Love this! I will remember this idea the next time I find a dresser in distress!
Idea for your next dresser in waiting… a coffee station, or a wine rack/bar/cabinet.
Thank you for sharing your projects with us!
Will pin this one!
Susan,
I appreciate your ideas for the dresser in waiting. It’s so petite… I guess I need to beef it up a little.
thanks for pinning!
gail
Hi Gail! I am so happy to have found your site! You always have the most original ideas and excellent taste in finishing things. I’m a new bee to the DIY world and I’m always jazzed to see what’s trending . You and your fellow DIY bloggers are an inspiration and very helpful with instructions on how tos’ . Keep up the good work!!!! Sincerely Gail S.
I am happy you found My Repurposed Life! I’m always here if you have any questions.
Thanks for your sweet comment.
gail
awesome sauce gail, what would i like to see you do with that other dresser …. turn it into a 3 bedrom 2 bath house i know you can do it ha ha xx
hahaha wouldn’t that be nice… to work that magic on a dresser–make it a house! lol
Gail, you did a really great job on this – love the paint color as it turned out. I’ve never seen the trick with craft paper – thanks for sharing. You’ve got great skills!
Rita,
I get so many packages from Amazon, that I don’t even have to BUY that brown craft paper for sanding. Win/Win!
Wow, what a creative idea, and amazing transformation! You’ve definitely inspired me to look at my dressers differently (I can already hear the ‘uh-oh’ from my husband…) 😉
Thanks for sharing!