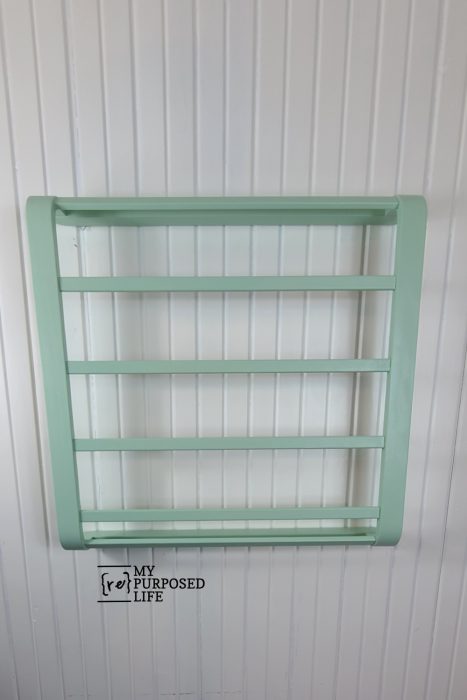
• Skip to primary navigation
  • Skip to main content
  • Skip to primary sidebar
  • Start Here
  • Shop Favorites
  • About
    • Welcome To My Repurposed Life Home of Repurposed Furniture
    • More About Gail
    • Disclosure
    • Privacy Information
  • Gallery
    • Repurposed Furniture
  • Repurposed Items
    • Building Supplies
    • Miscellaneous Household Items
    • Picture Frame/Chalk Board
  • DIY
    • Home Reno
    • outdoor living
    • Painting
    • Shop Talk
    • Tips for Around the House
    • Build It
      • Furniture
      • Home Decor
      • Storage
    • Crafts
      • Dollar Store
      • Easy
      • Holidays Seasonal
  • Furniture
    • Chair
    • Desk
    • Dresser/Chest
    • Headboard | Bed Parts | Cribs
    • Kids Furniture
    • Table
    • Kids Furniture
My Repurposed Life® Rescue Re-imagine Repeat
menu icon
go to homepage
subscribe
search icon
Homepage link
  • About
  • Start Here
  • Project Index
  • Furniture
  • Subscribe
    • Email
    • Facebook
    • Instagram
    • Pinterest
    • RSS
    • Twitter
  • ×

    Home » DIY » Hanging Quilt Rack

    Hanging Quilt Rack

    Published by Gail | Published March 22, 2022 | Updated December 9, 2022
    As an Amazon Associate I earn from qualifying purchases.

    Pin
    Share
    Tweet
    How to make a wood wall mounted quilt rack using an upcycled crib end. Step by step details and ideas to use the quilt rack for other purposes. #MyRepurposedLife #repurposed #upcycle #crib #wood #quiltrack #blanketrack #baby #nursery via @repurposedlife

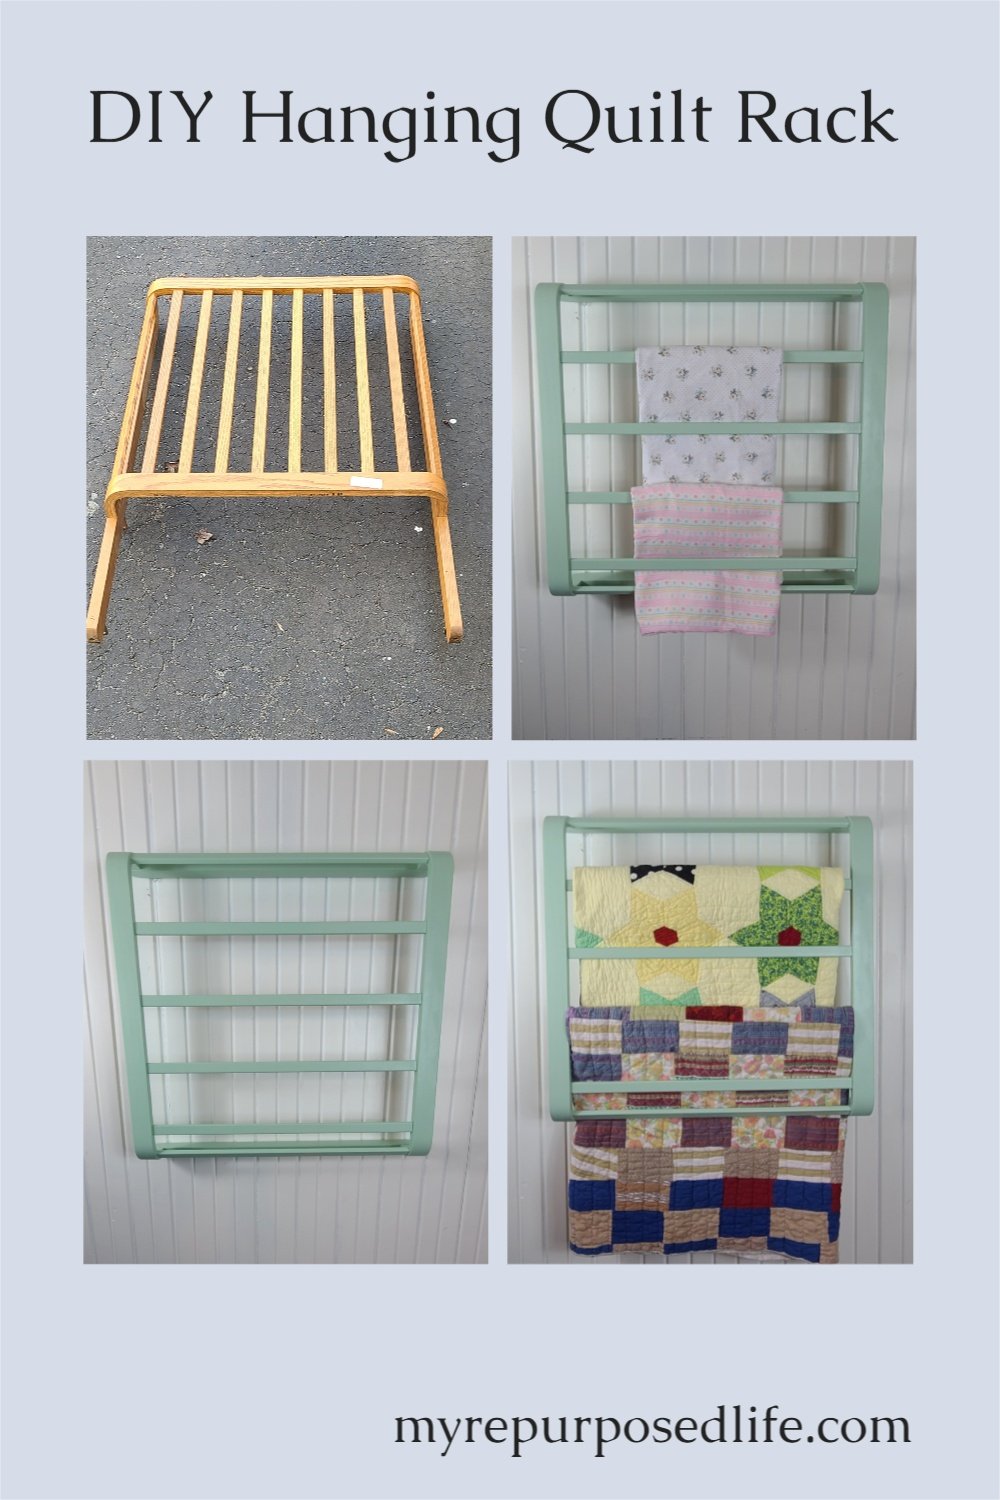
    How to make a hanging quilt rack out of a repurposed crib. Yes, make your own DIY hanging quilt rack.

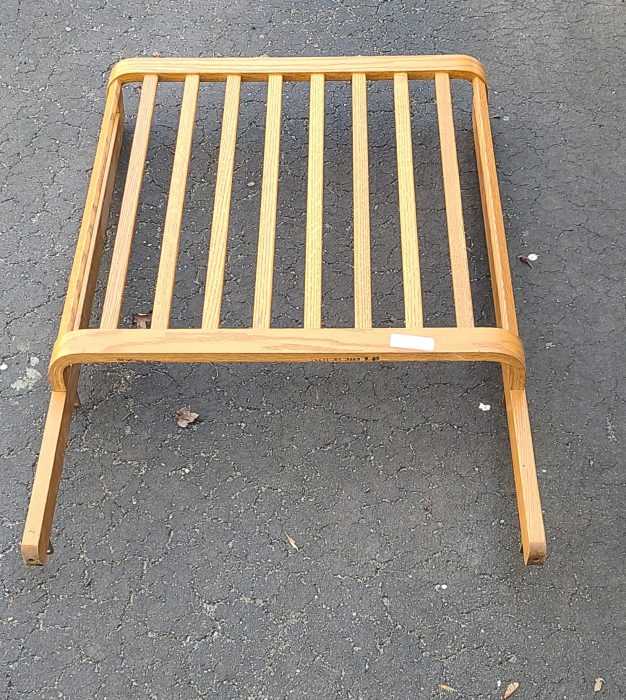
    Do you call this a crib end, or a crib headboard? I've made several projects from repurposed cribs, including a kid's toybox bench.

    Wood Wall Mounted Quilt Rack
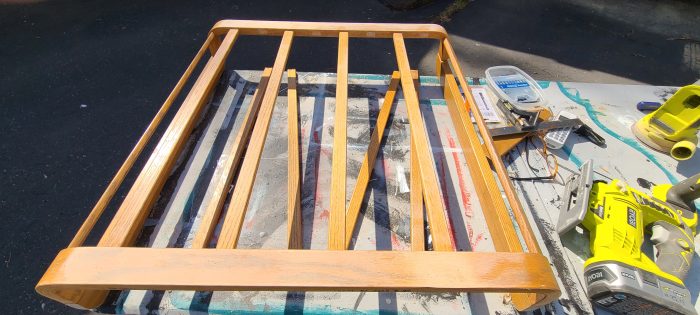
    hanging quilt rack with quilts

    Share on Twitter!

    Save to Pinterest!

    Dismantle Crib End

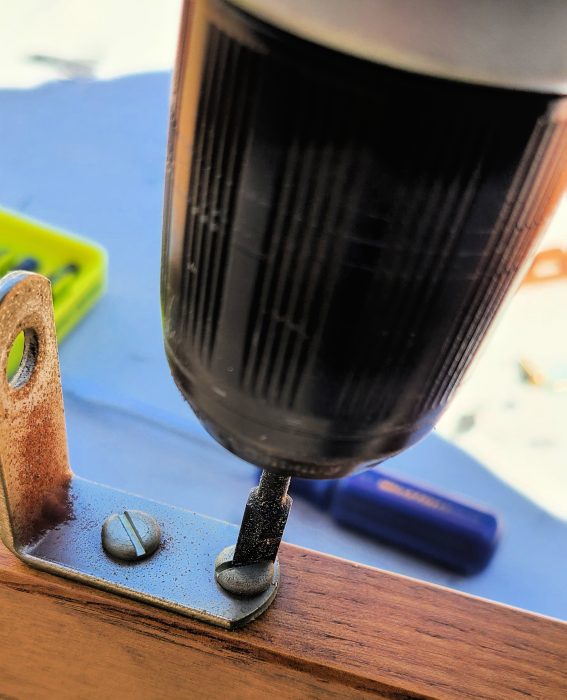
    First, I started dismantling, and removing hardware. Some of the hardware is worth keeping, like these "L" brackets.

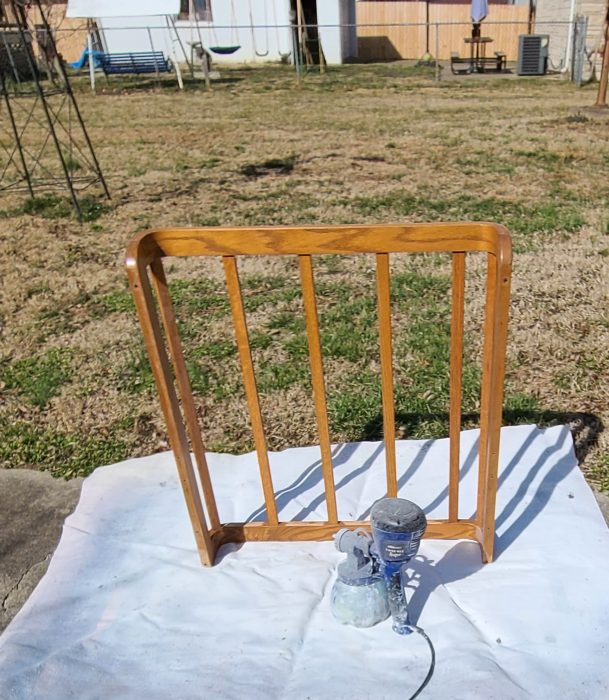
    Prepare to Cut Crib Leg Off

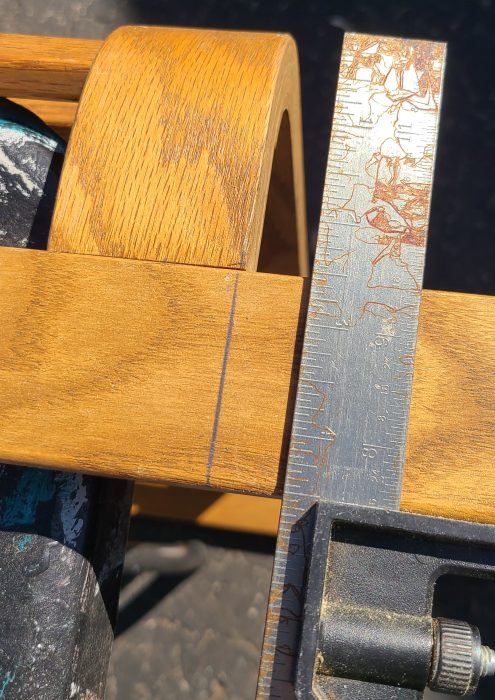
    In order to turn this crib end into a hanging quilt rack, the leg needs to be removed. I marked a straight line.

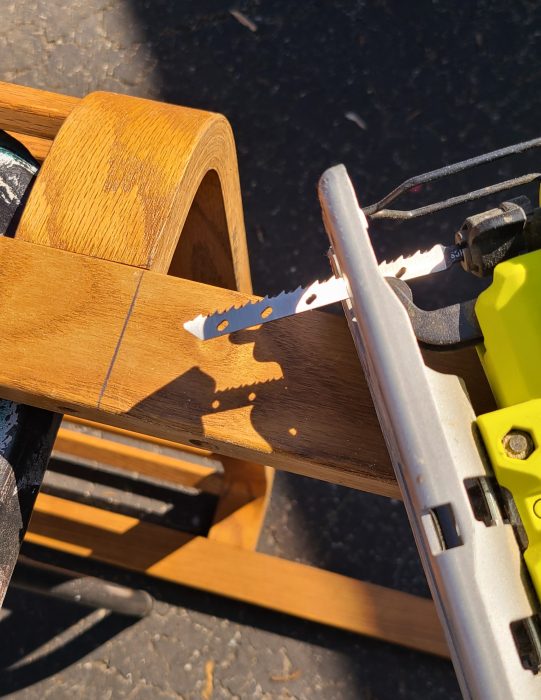
    Using a jigsaw to cut off the crib leg was the easiest job ever. If you're new to woodworking, I suggest a jigsaw and a power drill be your first purchases.

    With the leg removed, it was time to make the straight profile match the original side. The easiest way to round off and edge is to first cut on the diagonal, then use an orbital sander to finish the job. This would take forever sanding the sharp corner had I not trimmed it off with the jigsaw first.

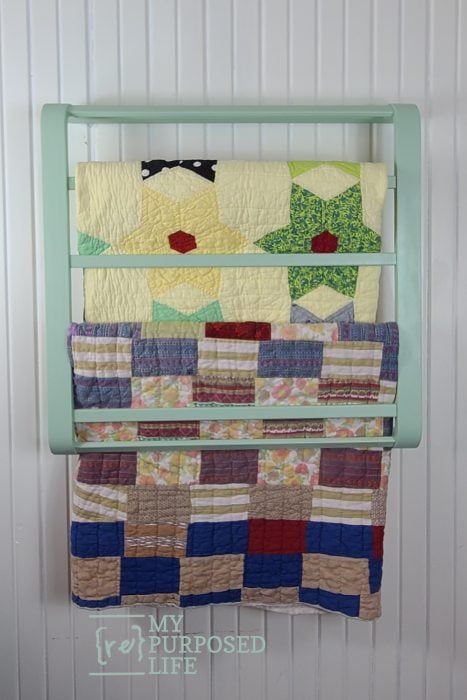
    Upcycled Crib End | Hanging Quilt Rack

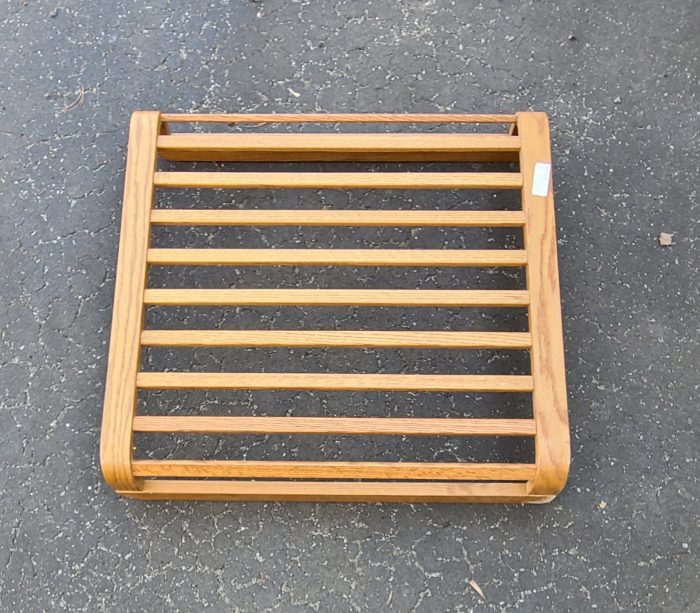
    Can you see it now? This is looking more like a quilt rack already.

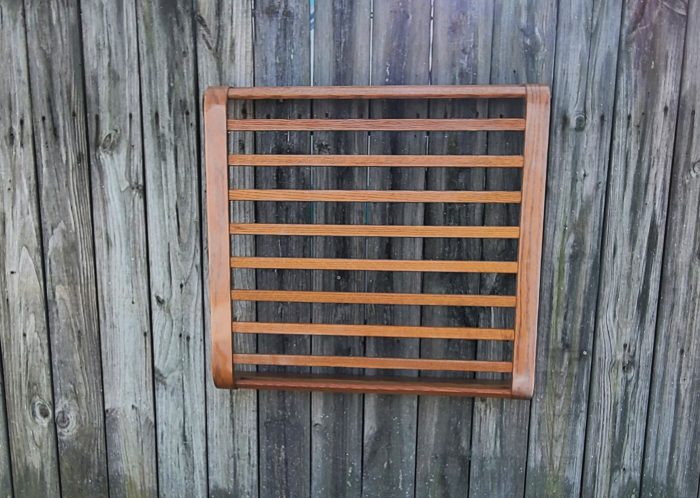
    I hung the crib end on the fence to see how it looked. I sent the picture to a couple of friends who actually collect quilts, and they each said that a few of the rungs needed to be removed.

    After marking which rungs were to be cut, I used the jigsaw to remove them. Doesn't it look better already?

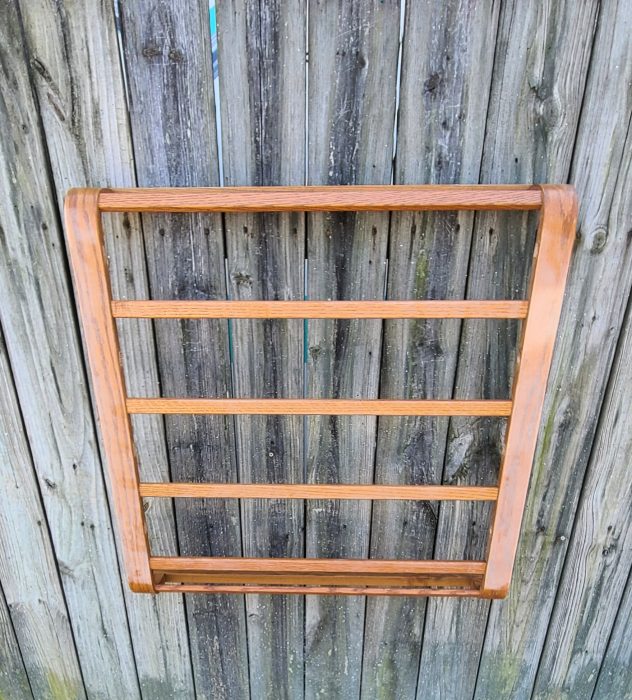
    If you were making this into a blanket holder, you might want to adjust the rungs accordingly.
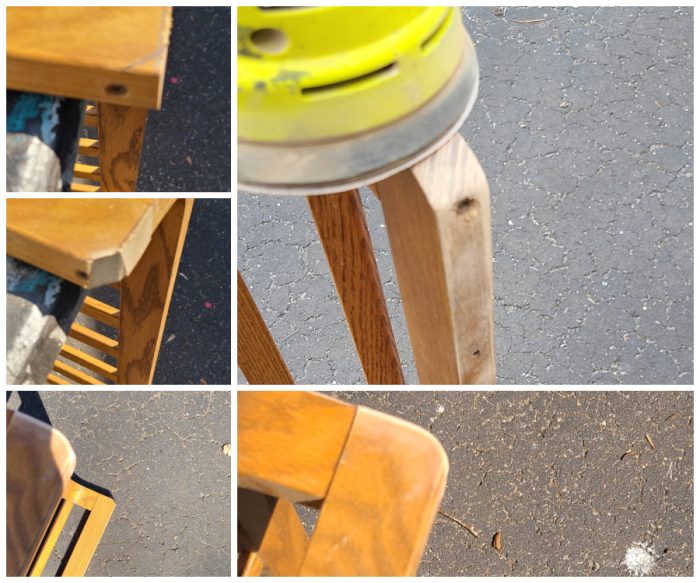
    Sand Dowels

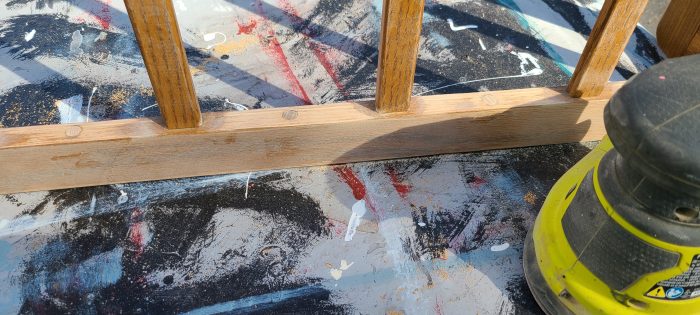
    I used the orbital sander to smooth out the "dowels" that were holding the rungs in place.

    Paint Project with Paint Sprayer

    I recently painted a kitchen chair by hand, so for this job--I brought out the Finish Max!

    DIY Chalky Paint

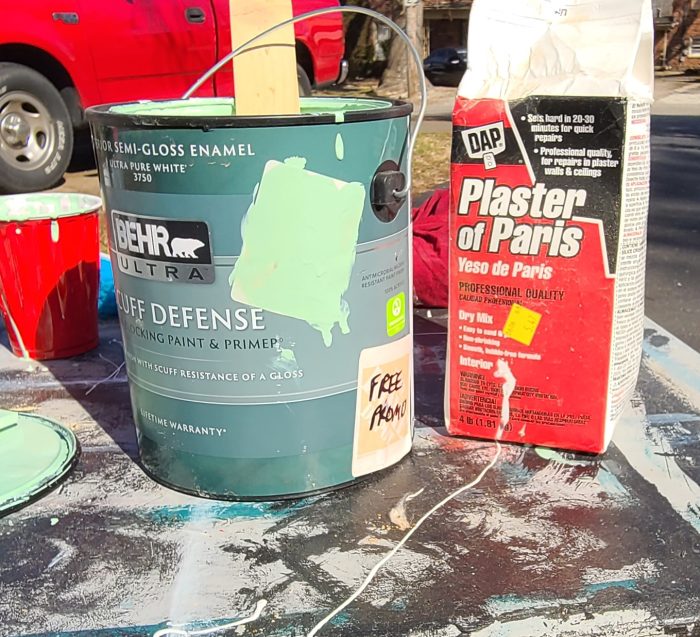
    So, after looking through my paint stash, I realized that I haven't painted anything with the FREE paint yet. I mixed up some of it with plaster of Paris. Homemade Chalk Paint works really well on projects like this that have a little shine to them.

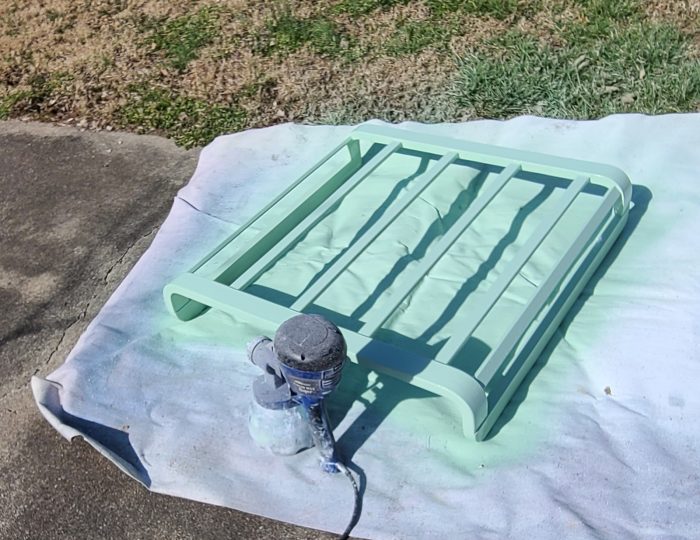
    Do you use paint sprayers? They really are the only way to go when painting rungs like the ones on this hanging quilt rack.

    Do You Need to Wax this Project?

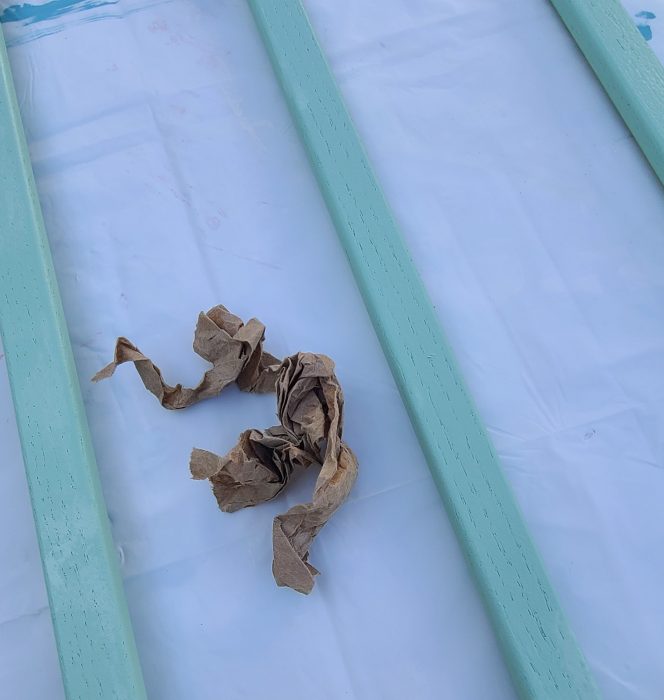
    Because I use the latex paint (without Plaster) as a top coat, there's no need to wax this project. Before applying the topcoat, I use brown craft paper to smooth the finish.

    Add D Rings for Hanging Quilt Rack

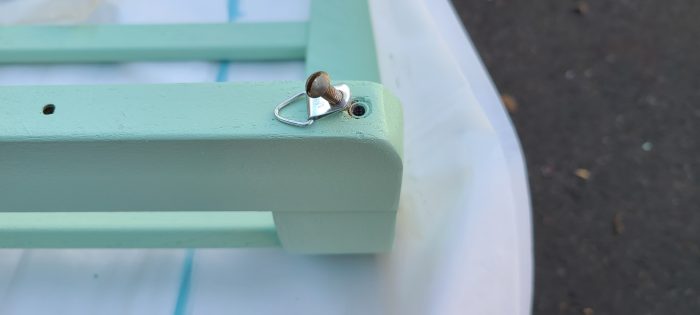
    Can you believe it? I was able to use the original hole and screw to add D rings for hanging the quilt rack.

    Hanging Quilt Rack

    Hanging Blanket Rack
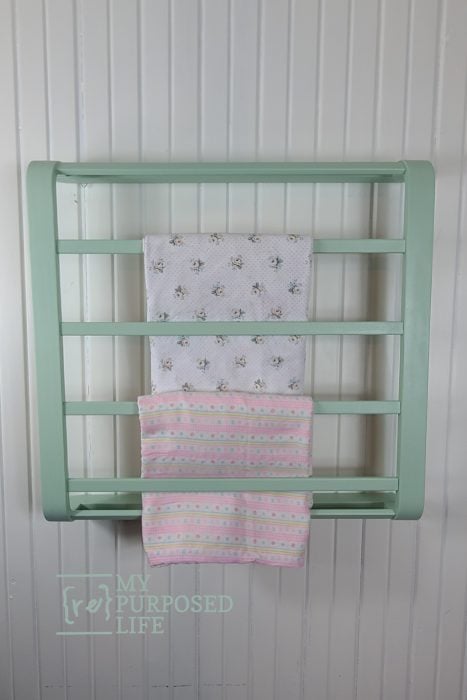
    green blanket rack holding baby blankets

    Wouldn't this be so sweet in a nursery to hang baby blankets? What else do you think it would be good for?

    gail

    Old Crib Hacks

    Print Friendly, PDF & Email
    Pin
    Share
    Tweet

    Related Content:

    • Upcycled Crib into Toy Box Bench
      Upcycled Crib into Toy Box Bench
    • 50 headboard bench ideas
      50 headboard bench ideas
    • tufted upholstered headboard bench
      tufted upholstered headboard bench
    • How to Build A Headboard Bench Video
      How to Build A Headboard Bench Video
    • Mission Style Headboard Bench with Storage
      Mission Style Headboard Bench with Storage
    • Projects for Children | Repurposed beds & Cribs
      Projects for Children | Repurposed beds & Cribs

    Reader Interactions

    Comments

      See comments Cancel reply

      Your email address will not be published. Required fields are marked *

      This site uses Akismet to reduce spam. Learn how your comment data is processed.

    1. Laurie in Edmonton, Canada

      March 23, 2022 at 1:23 pm

      Can see it being used in a craft room to hang supplies with S hook or cup hooks. The fact that it is offset from the wall makes it a perfect quilt rack.

      Reply
      • Gail Wilson

        March 23, 2022 at 8:13 pm

        Ohhh, that's a great idea about the S hooks! Yes, being offset makes the difference. That has me thinking about how I can decoratively replicate it using the crib rails.... hmmm you have me thinking!

        thanks!!
        gail

    Primary Sidebar

    Hi, there! I’m Gail Wilson, the author and mastermind behind My Repurposed Life. I’m obsessed with finding potential in unexpected places and believe that with a little hard work and imagination, any old thing can be made useful again—myself included! I hope you’ll enjoy the journey and pick up a few tools along the way… literally!

    More about me →

    Join Our Mailing List

    ​

      Click the topics you're interested in below:

      Subscribing above means you agree to our Privacy Policy​

      Footer

      ↑ back to top

      SEEN ON

      Might I Suggest

      • Start Here
      • Furniture Makeovers

      Newsletter

      • Sign Up! for emails and updates

      About

      • Gail's Favorites on Amazon
      • About

      As an Amazon Associate I earn from qualifying purchases.

      Copyright © 2023 My Repurposed Life · Privacy Policy · Disclosure