Headboard Coat Rack
As an Amazon Associate, I earn from qualifying purchases.
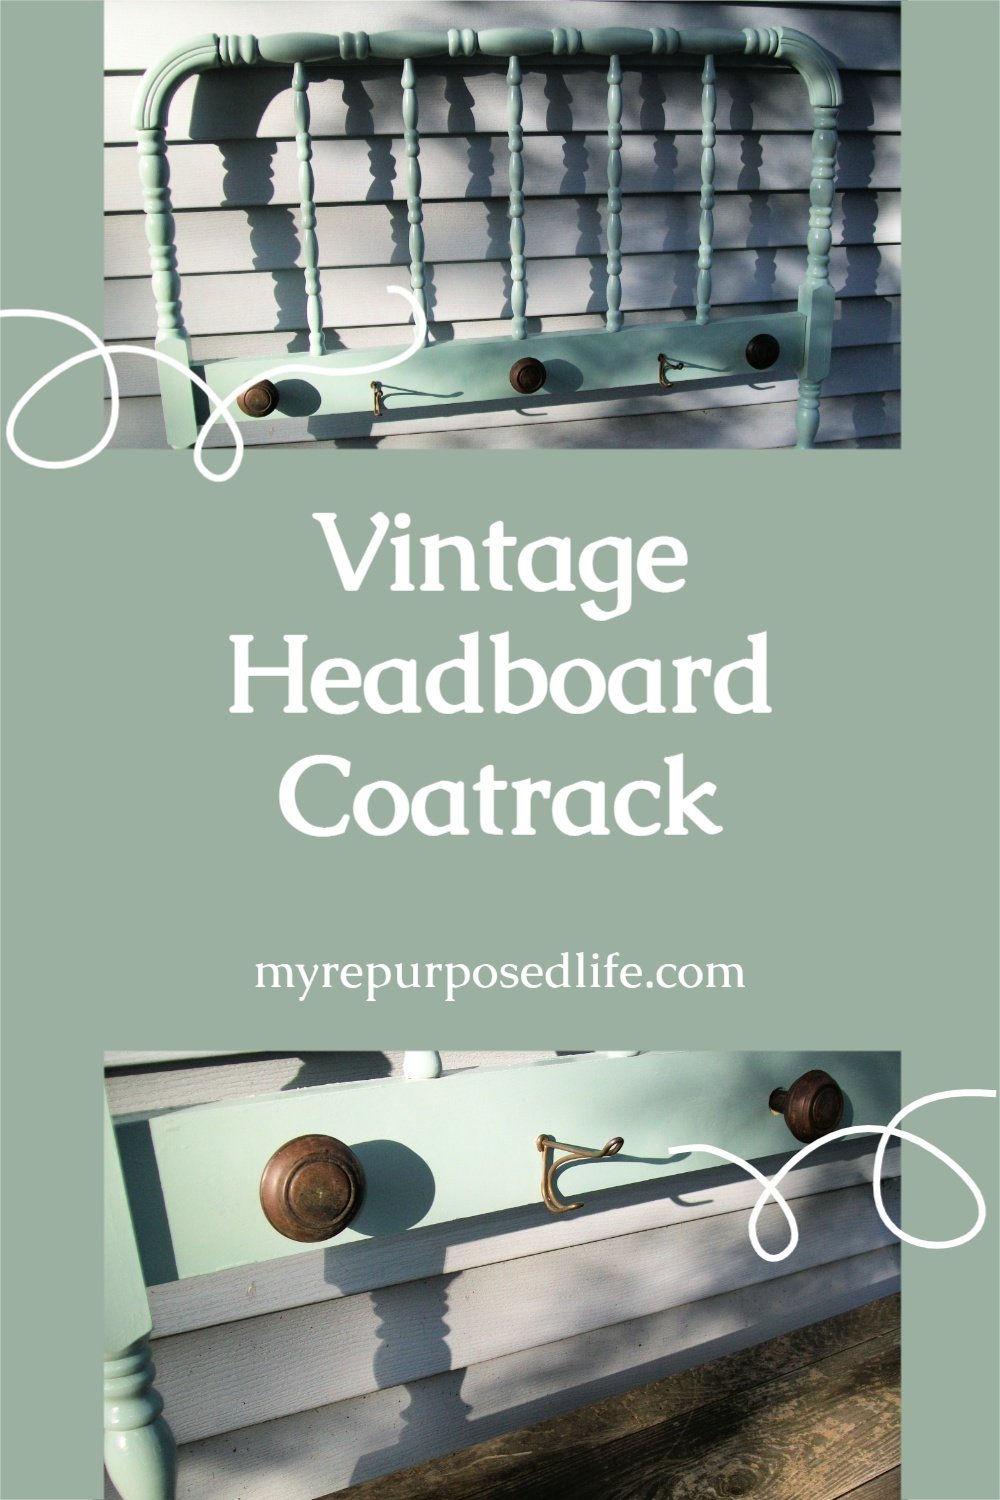
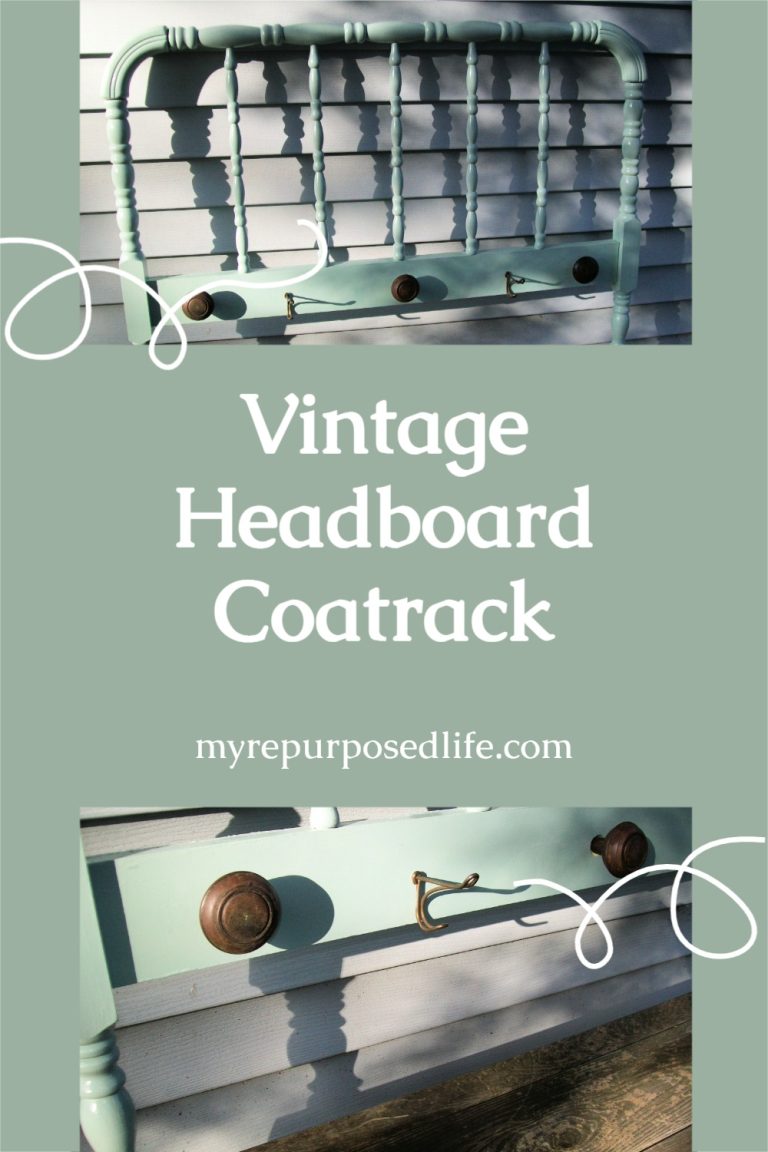
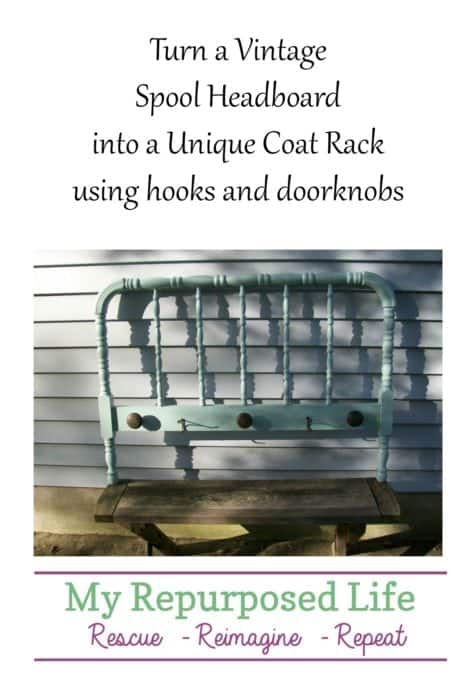
In this article, How To Make a Headboard Coat Rack, I’ll show you how to turn a vintage spool bed into a fun and unique coat rack using vintage coat hooks and doorknobs.
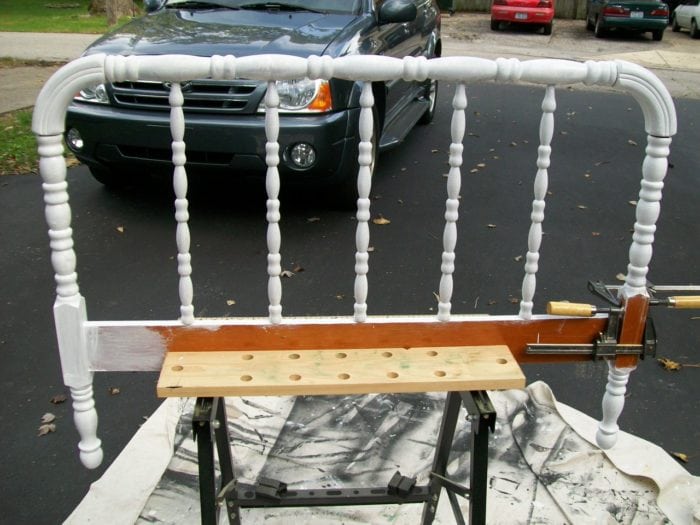
I felt this vintage spool bed was not strong enough to make a headboard bench, but it was so darn cute that I knew it was worthy of a fabulous project. Some minor repairs needed to be made using clamps and gorilla wood glue.

Vintage doorknobs and hooks will be a great addition to this charming headboard.
Ensure Your Headboard is Strong Enough to Hold Your Coats
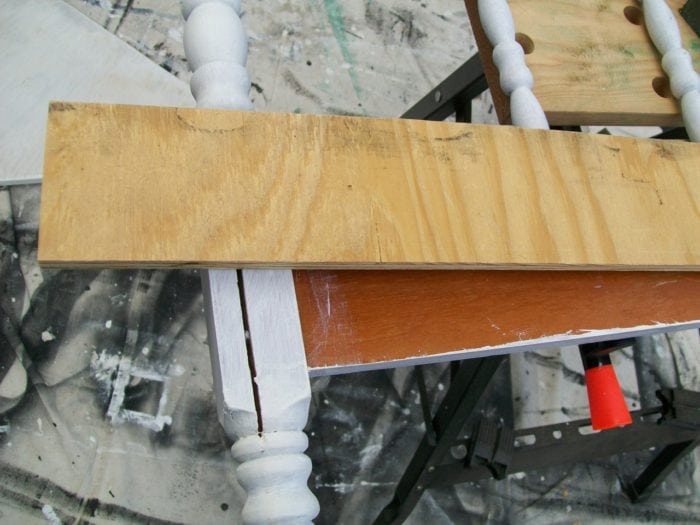
The crossboard was not quite thick enough, so I cut a piece of thin plywood to give it some oomph. Small things like this make a big difference when learning to do DIY repurposed furniture projects. You never really know what you’ll run into; it’s best to be prepared. It’s one good reason why I never throw out wood scraps. Scrap wood like this made a difference in this project. I wouldn’t have wanted to rip a new piece of plywood to get this small piece.
Use Wood Glue and Clamps to Add the Scrap Piece of Plywood
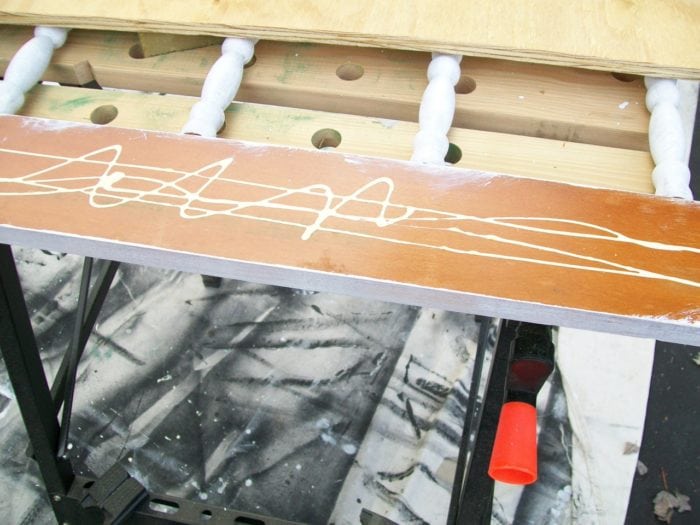
Wood glue will give a great hold to this small piece of plywood.
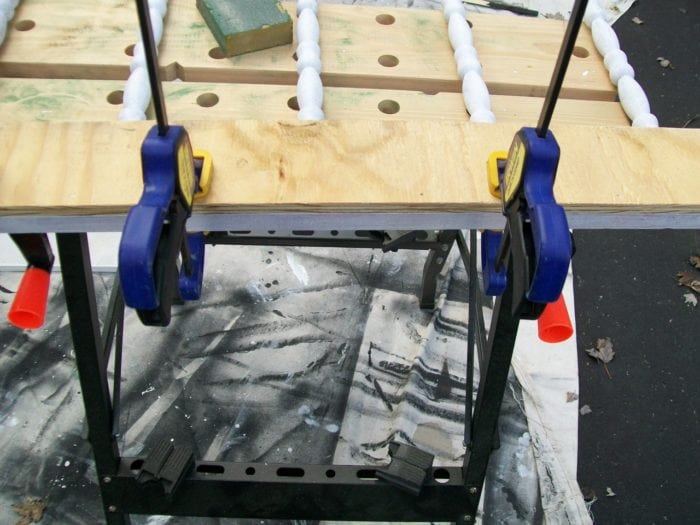
I love these quick clamps! They are fast and easy to use.
Use Small Dowels to Attach Vintage Doorknobs

While the glue was set up, I got busy working on the vintage door knobs. Because I never throw anything away, I had small dowels left over from some broken chairs. They will be perfect for inserting into the vintage knobs for this repurposed headboard coat rack.
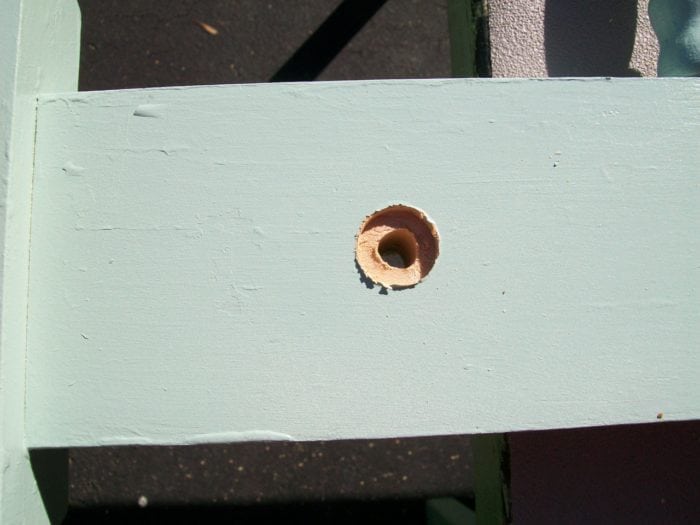
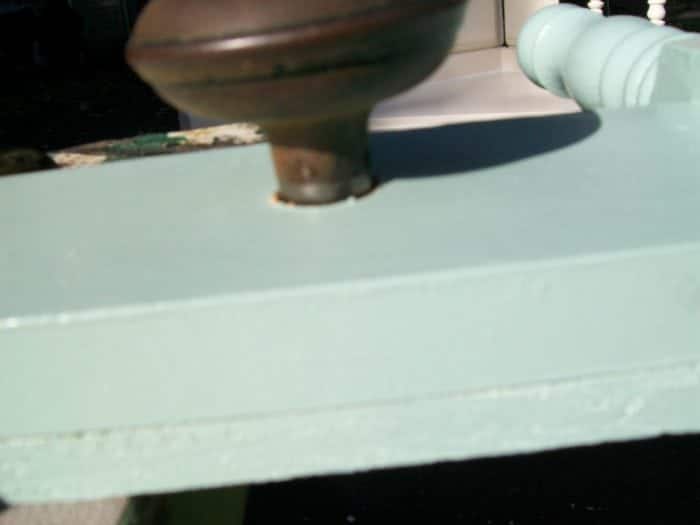
I spray-painted the headboard coatrack with a very pretty green. Countersink holes were drilled using a paddle bit and a regular wood bit. This would allow the dowel to fit into the smaller hole and the base of the vintage doorknob to rest in the larger hole. Because the small dowel hole was slightly smaller than the dowel, it fit very snugly in the hole. Wood glue was put into the smaller hole as I screwed the dowel in.
Add Vintage Wire Coat Hooks
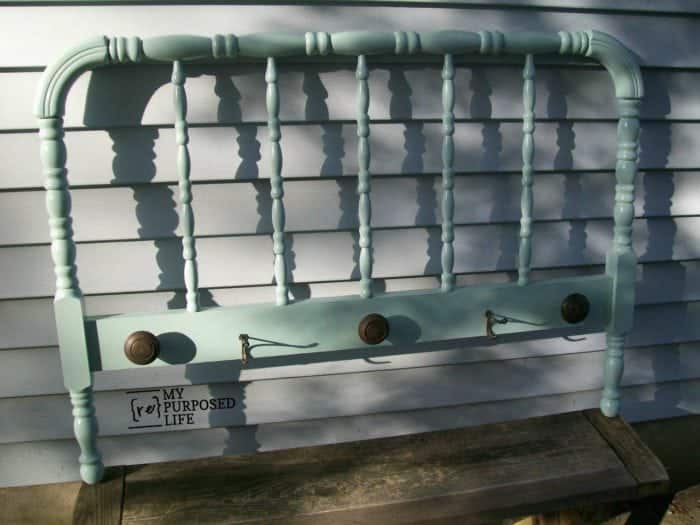
I ended up using three door knobs and two of the hooks. Lesson learned…I didn’t follow my own advice. I thought these hooks were pretty sturdy because they are old, and I have seen them used to hold loads of things. However, when I was trying to screw them in, 2 of them broke off. Finally, I remembered to take my own advice and add some bar soap to the threads! voila! Easy peasy! Drilling pilot holes would have also been very helpful.

Pretty Green Headboard Coat Rack

I didn’t take a picture of the back. I added 2 d rings(16-inch centers) on the bottom board to hold the weight of the piece and the things that would be hung on it. Another d ring was added at the top of the headboard coat rack to secure it to the wall.
This headboard coat rack was one of the first items to sell at Glendale.
gail
Oh my gosh Gail I love this.Havent been on here for awhile because of health issues but, catching up with all your posts. I have your stuff saved on my Pinterest board just for you lol. Always finding new stuff to add to it. Love the trailer what a wonderful job but, I would expect that from you 😄 Be safe out there. Thanks for being a inspiration to all us ladies out there!
I love this. The vintage hooks and knobs make it perfect. I’m in Christmas mode. And I can see this being decorated for the holidays, as you walk in the door.
That is incredible creative. I’ll be on the lookout for a bed frame now, so I can copy you of course!
Love it! I have 3 headboards I scored curbside and am working on something like this! Yours look Awesome, love the knobs!
Very creative! Love it!