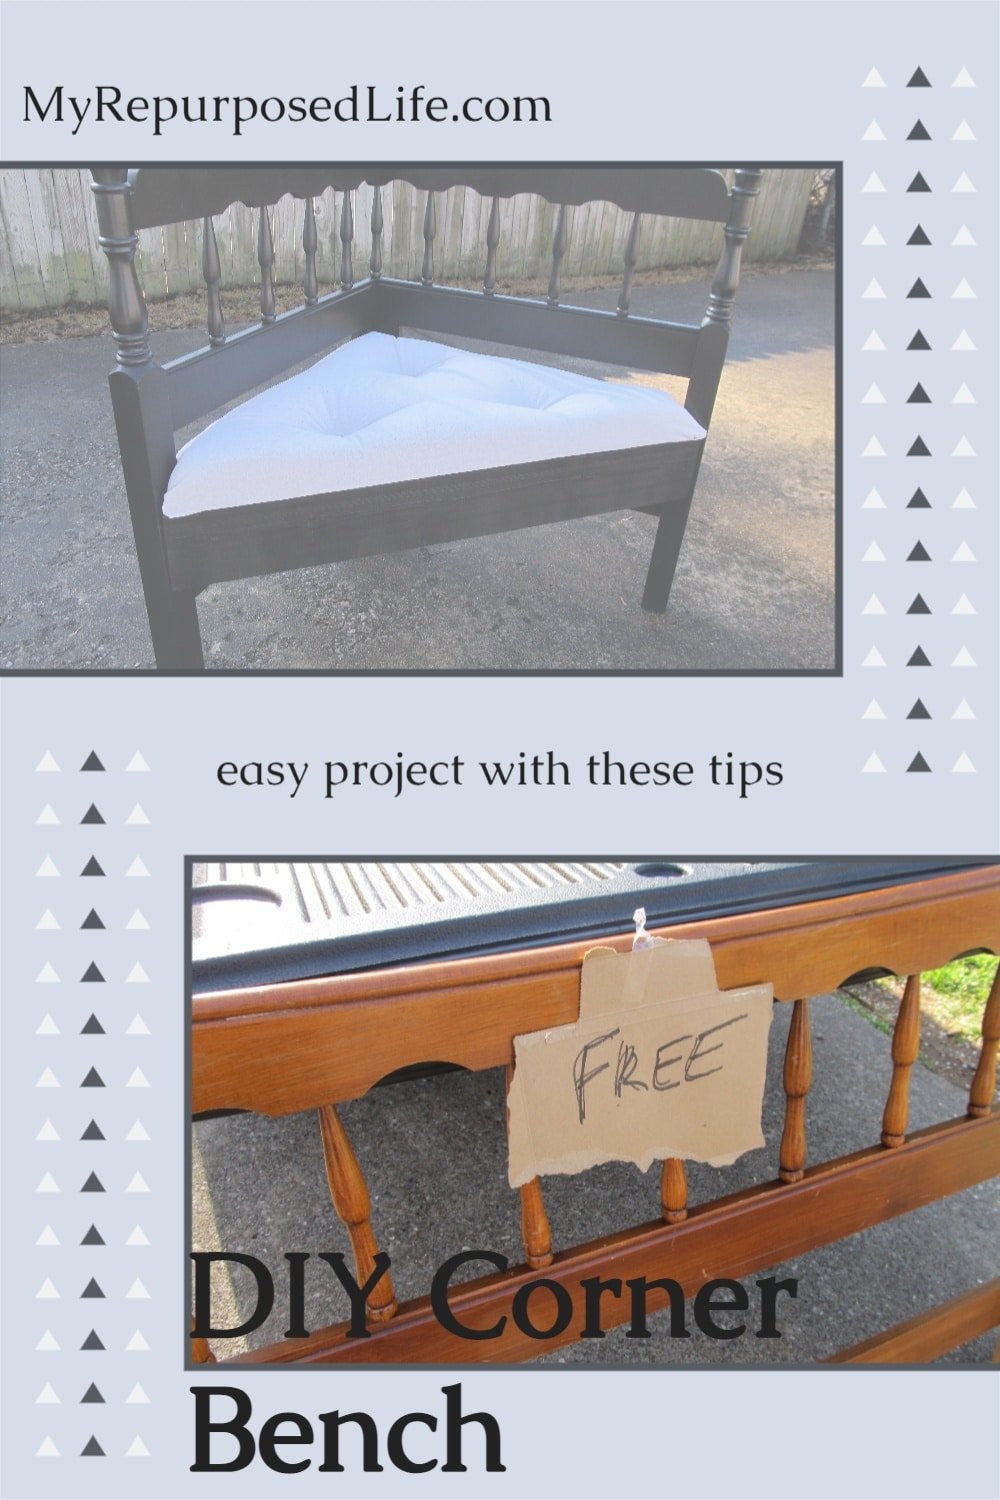
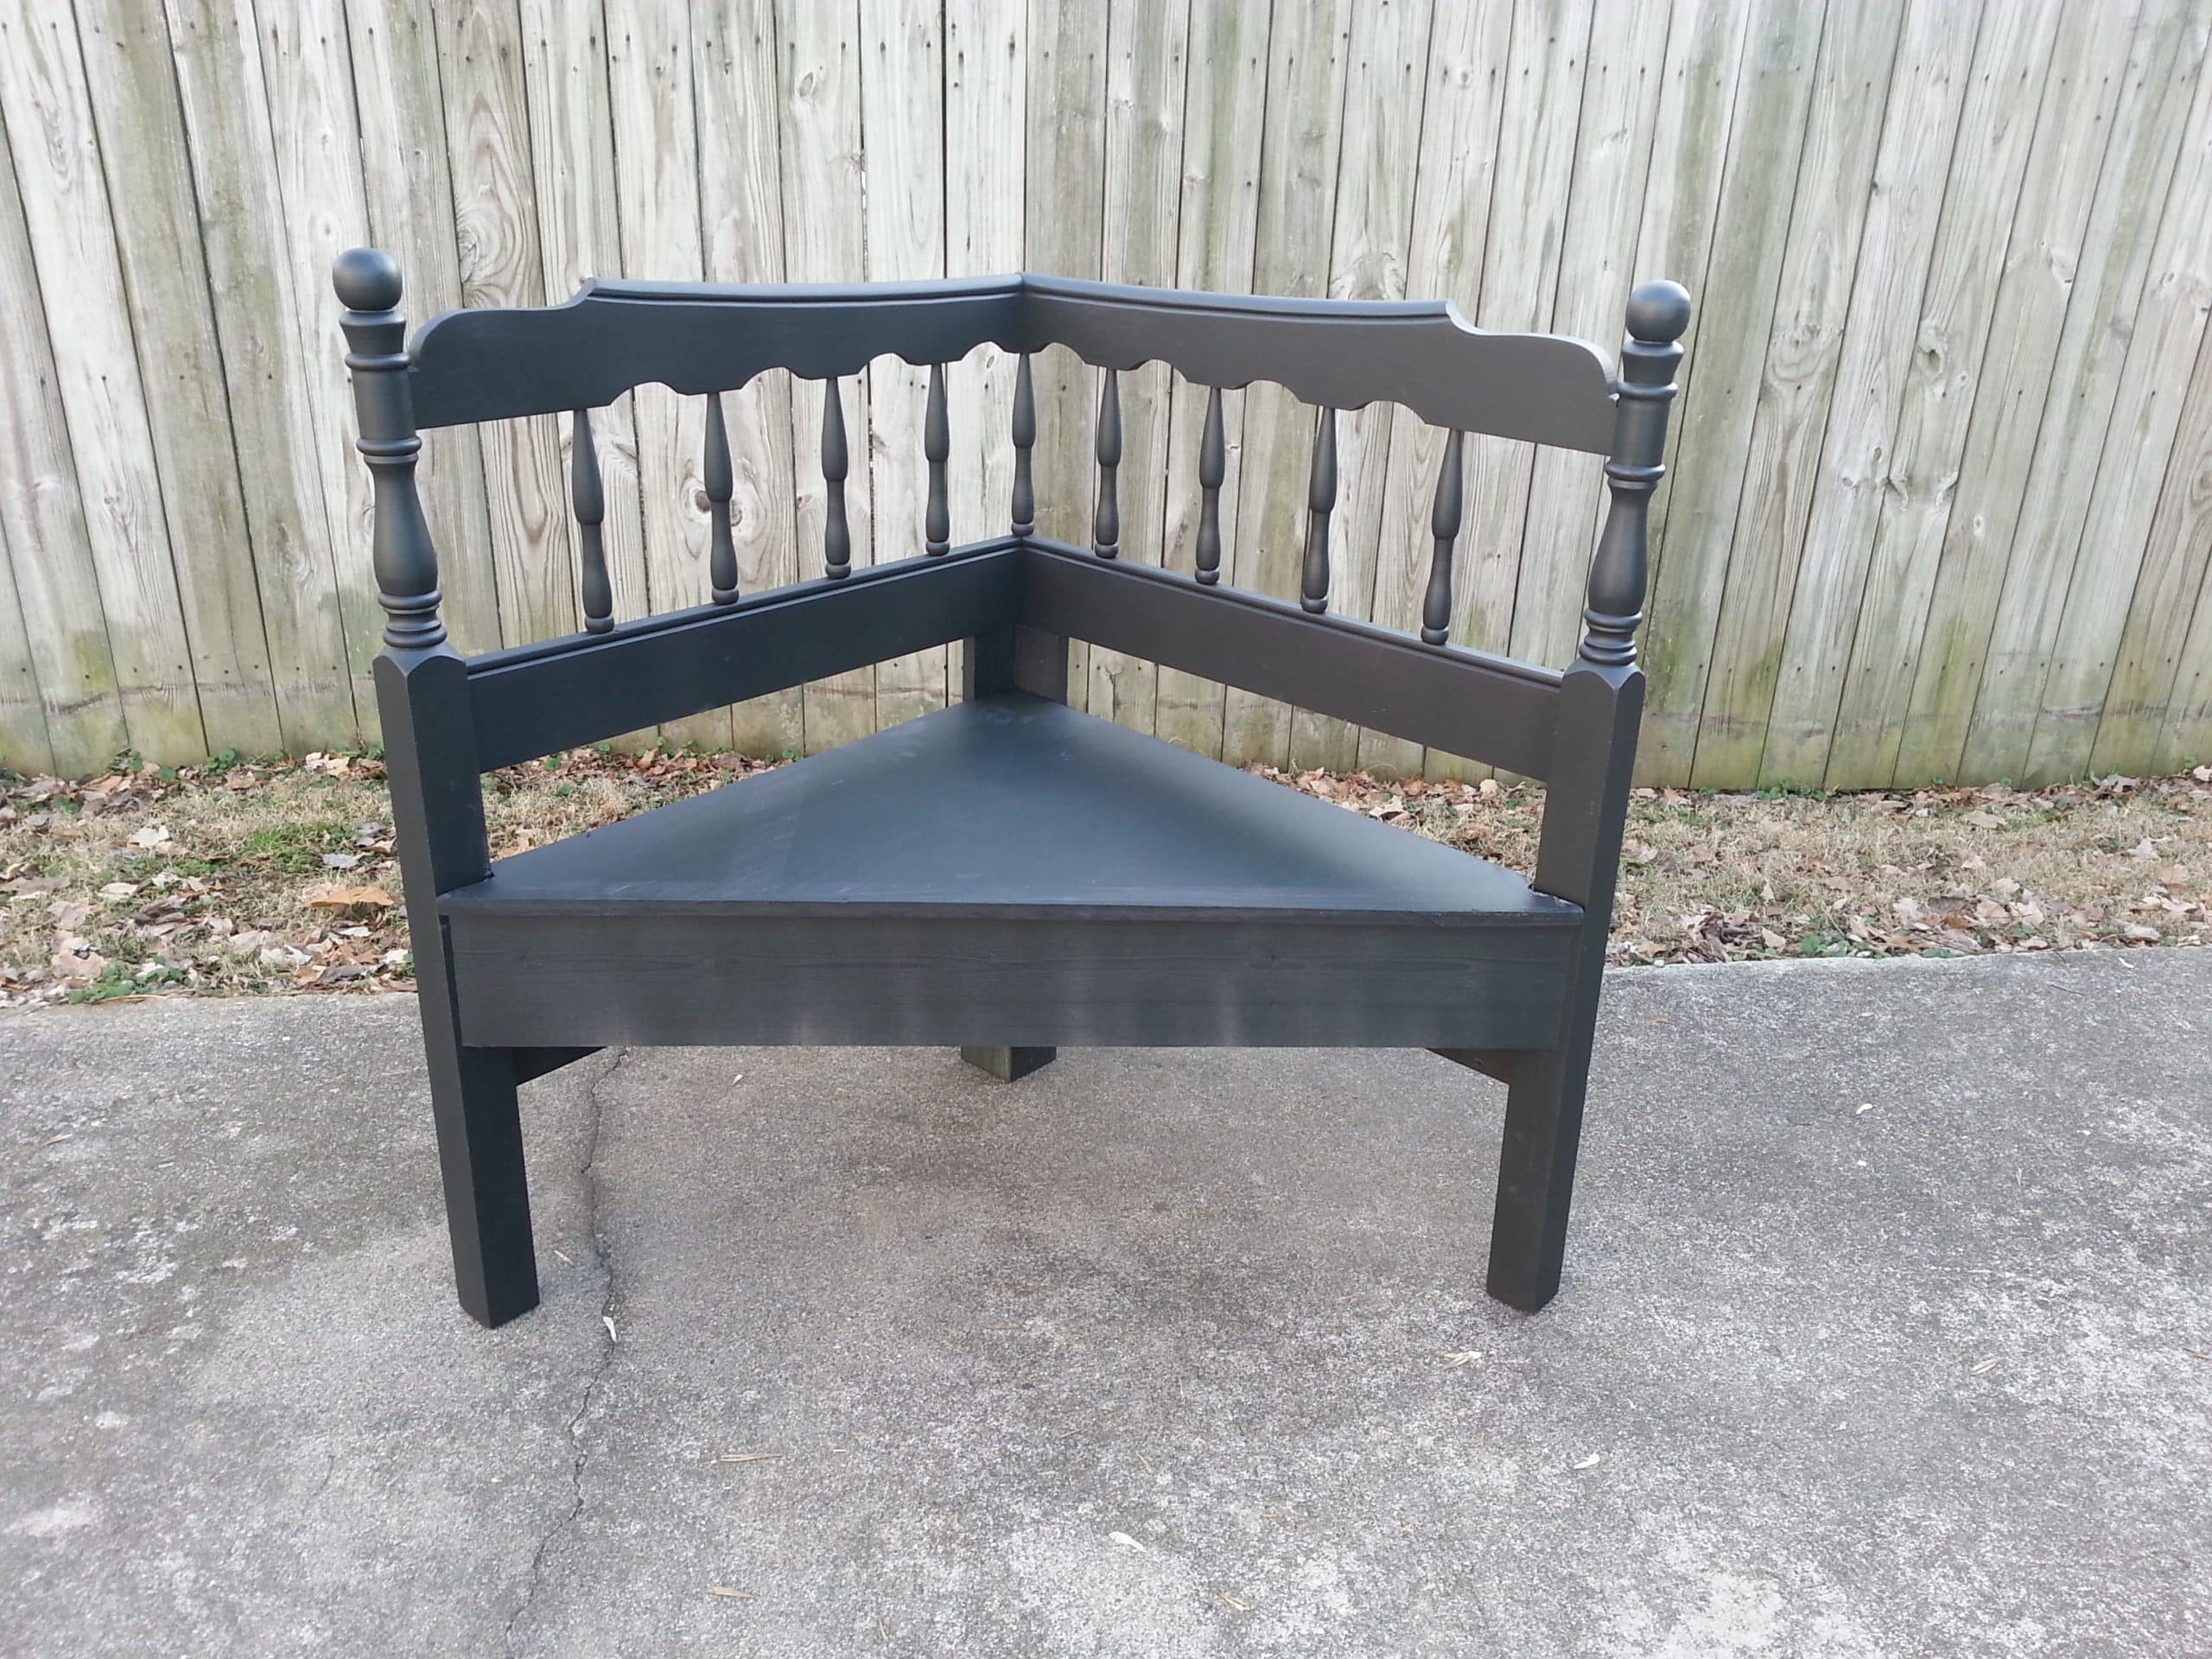
Making a headboard corner bench can seem a little intimidating at first, but I hope this tutorial will show you just how easy it can be. Full sized beds make very long benches. Cutting the headboard in half and making a corner bench is another option. The corner bench is easier to move around and takes up less room. I hope this article inspires you to make your own headboard bench from a full or queen bed that fits perfectly in that special corner in your home.
White Corner Bench Red Corner Bench Black Corner Bench
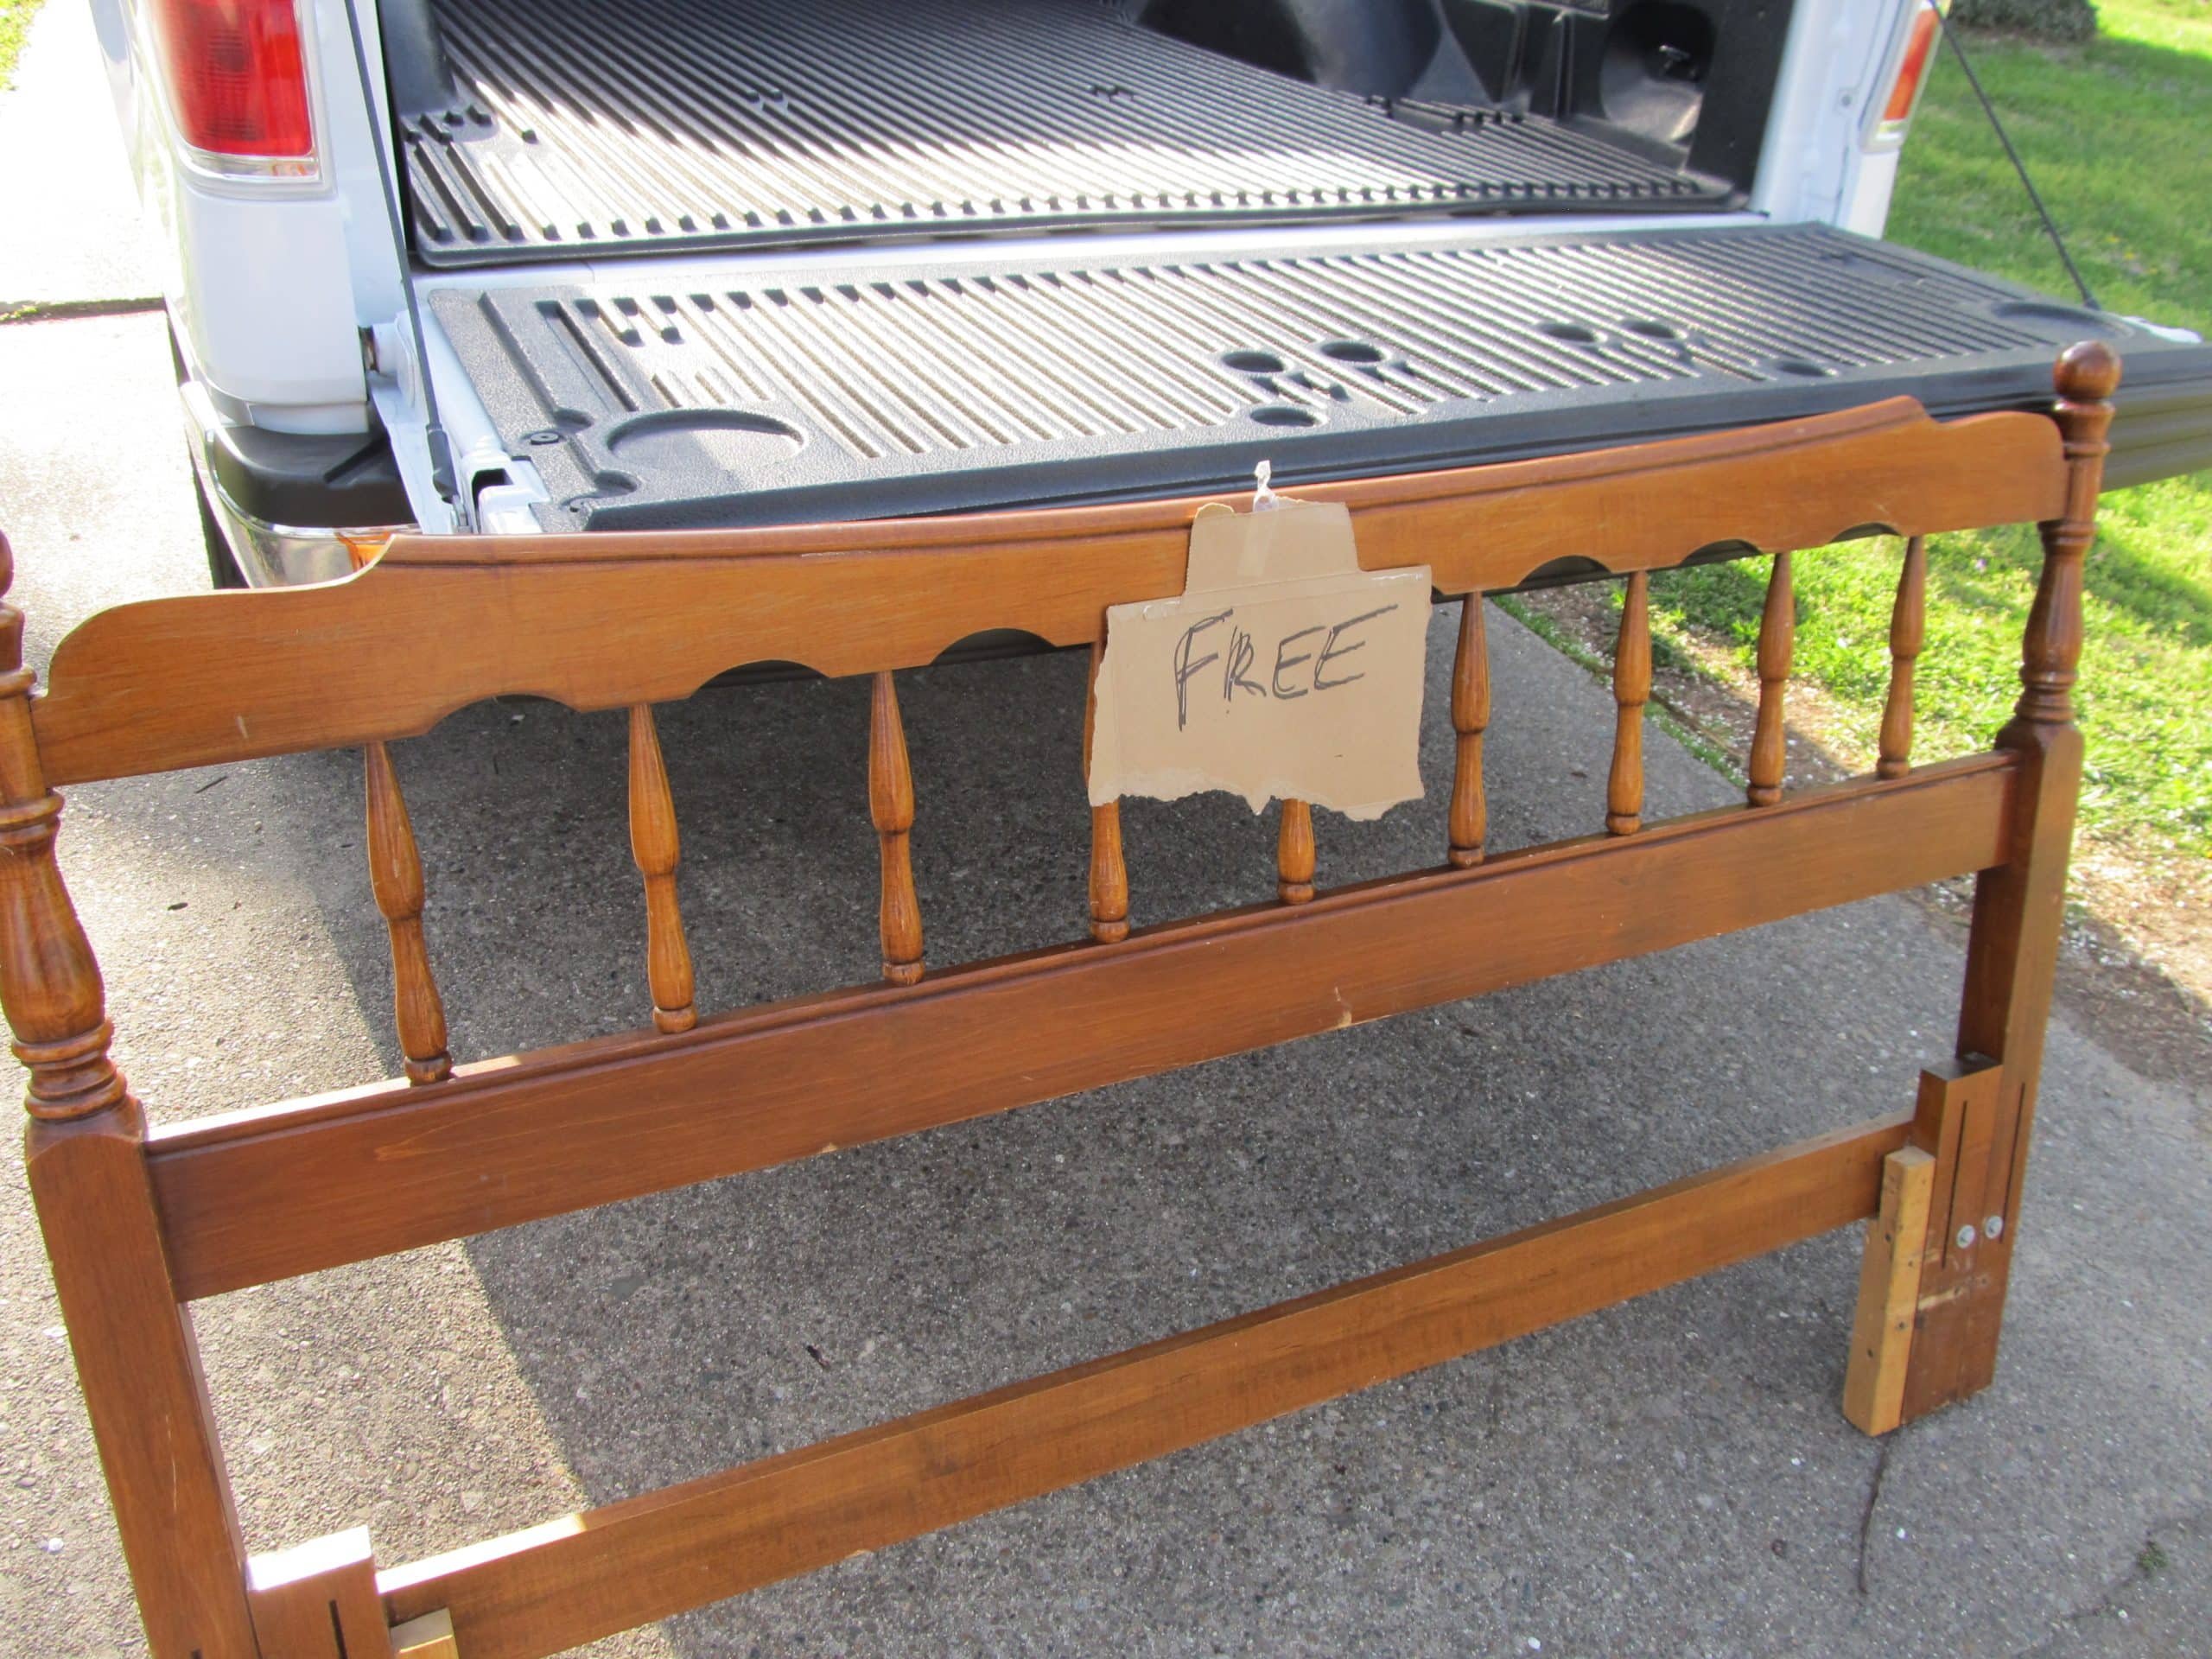
Last Spring I got a call from a friend to alert me that there was a headboard out to the garbage on her street. I borrowed a truck and hurried right over to scoop it up.
Visit the My Repurposed Life Amazon Store to shop my favorite items.
How to make a Corner Bench out of a Headboard
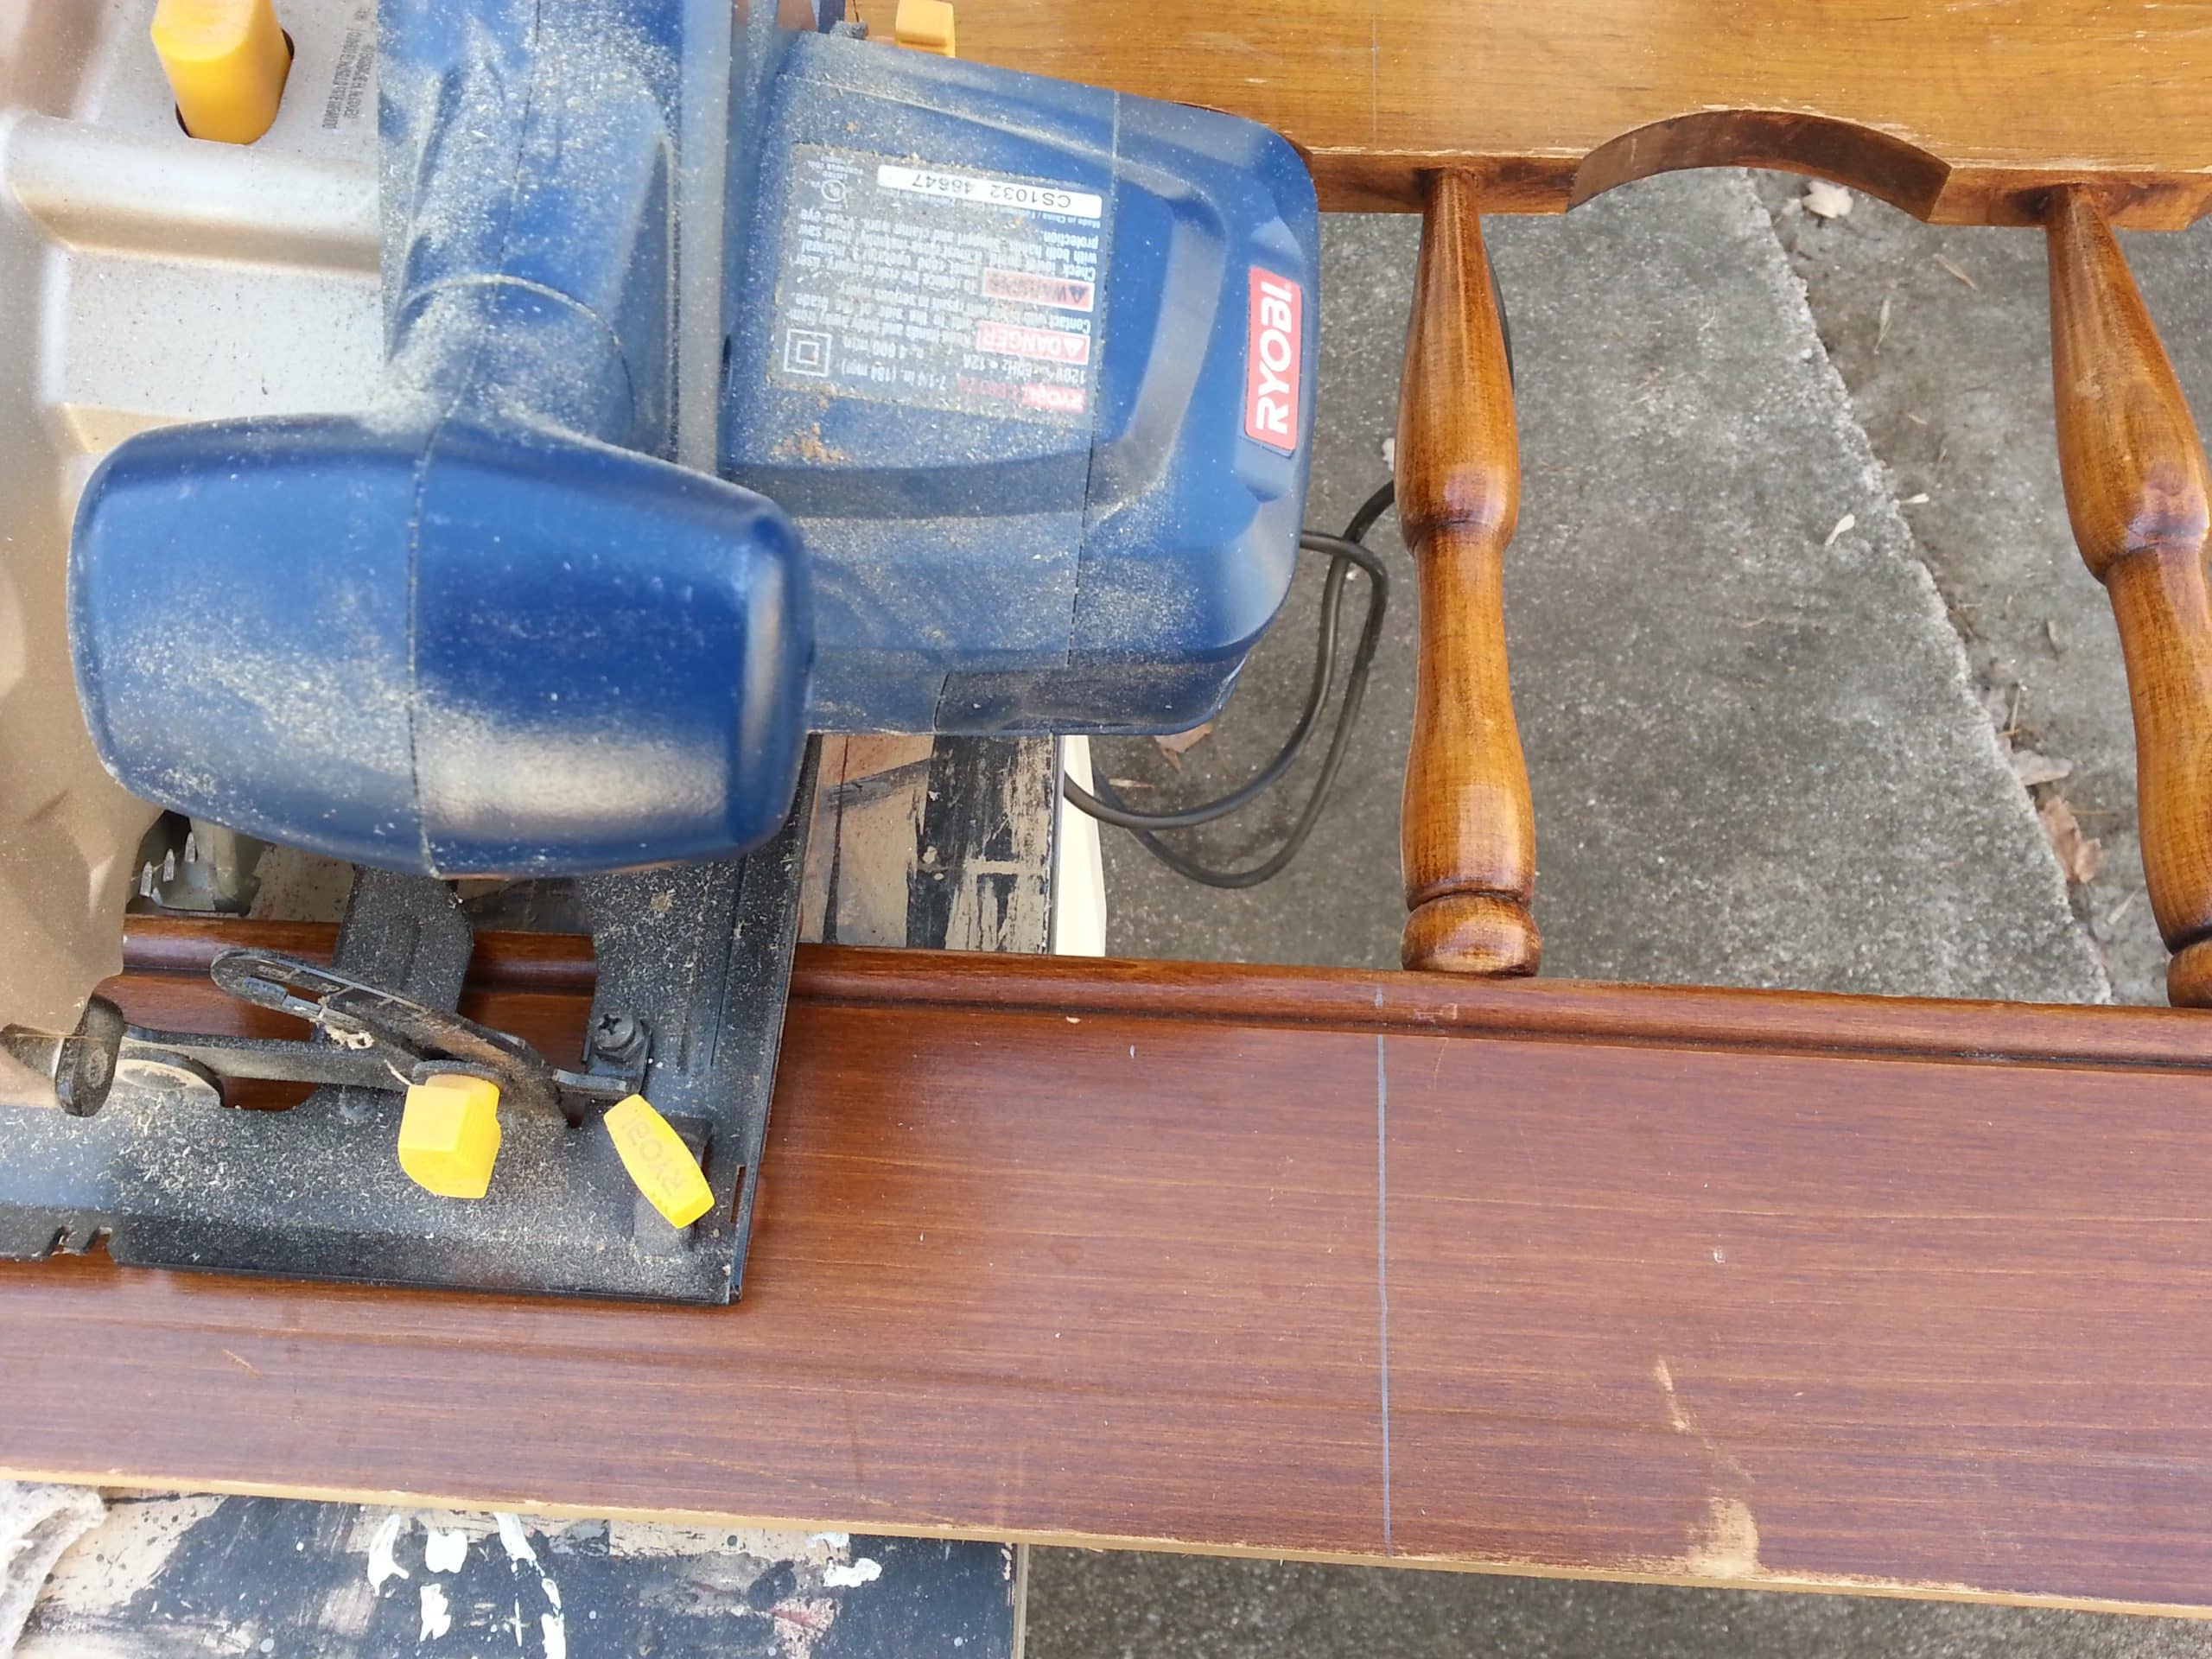
Cut the headboard. As you can see in the picture I didn’t cut it exactly in half. It’s difficult to explain, but because one side is butted up to the other side, if you cut it exactly in half, one side will end up being shorter than the other. See more details on how to cut a headboard for a corner bench by clicking that link.
I used my kreg jig to make pocket hole joints to attach the two pieces together.
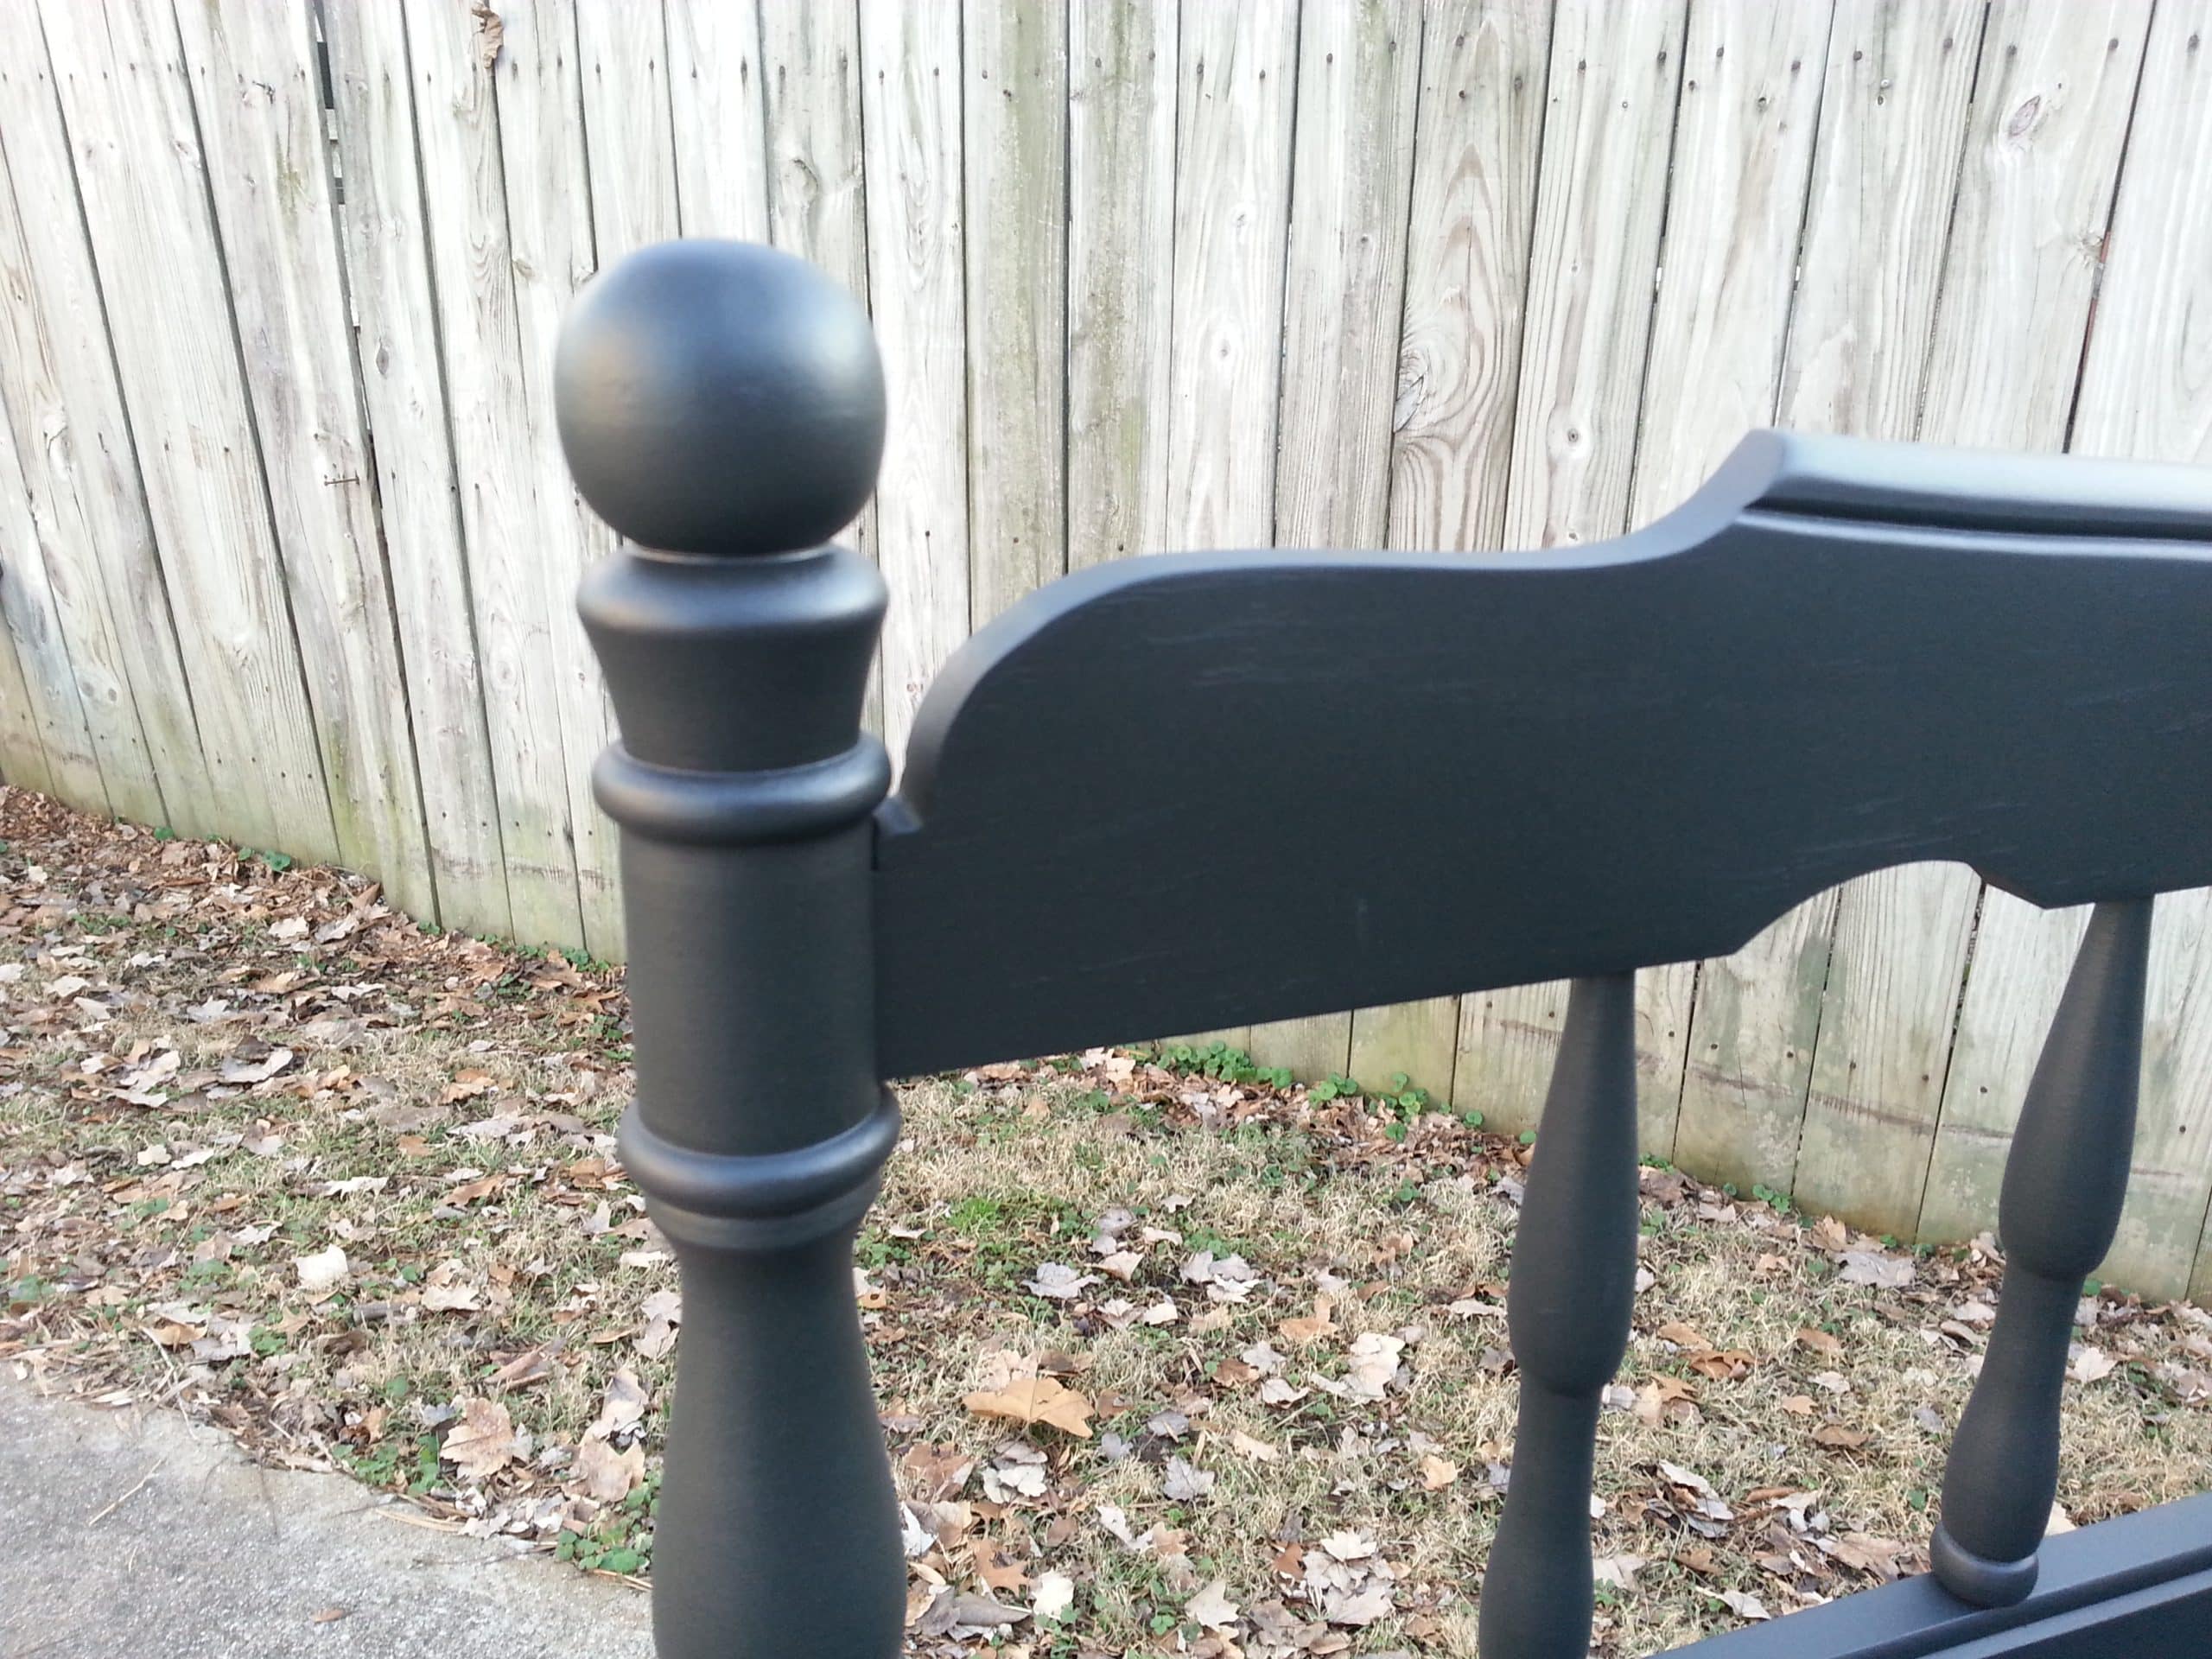
Attach headboard pieces on a 90° angle
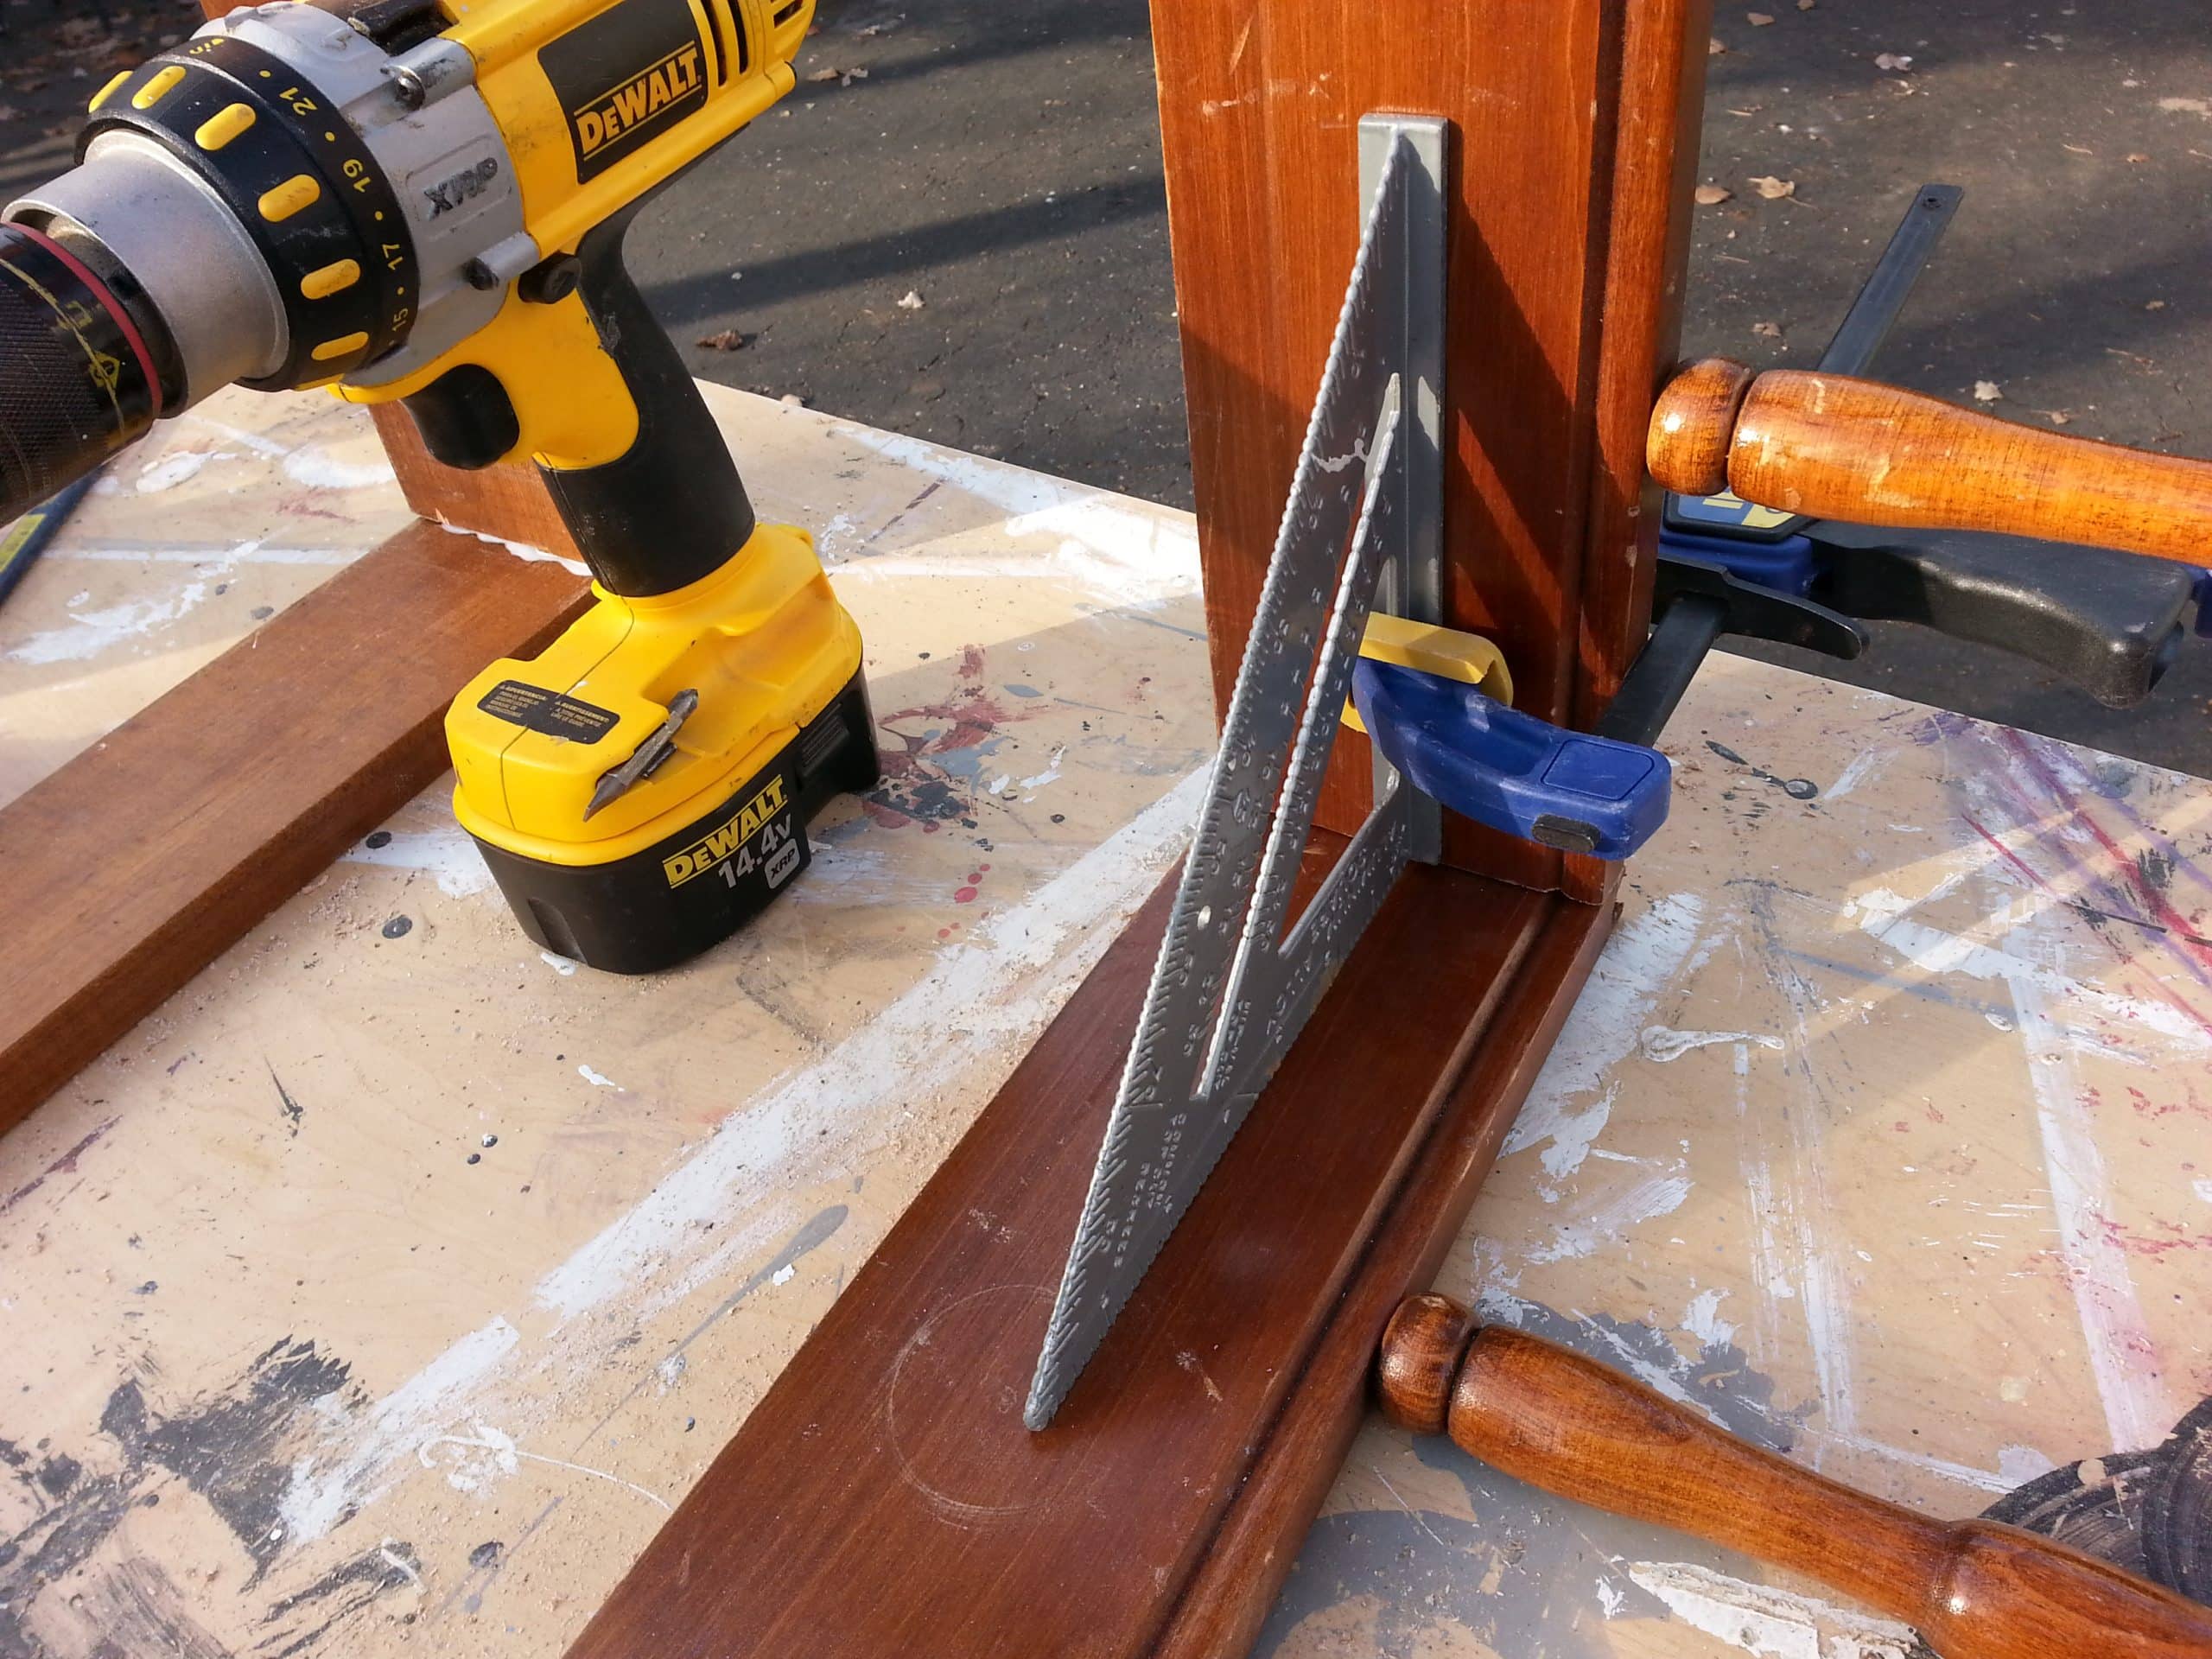
I used Gorilla Wood Glue and the pocket holes along with a Speed Square to make sure everything lined up. (NOTE: there is no spindle where the two pieces meet)
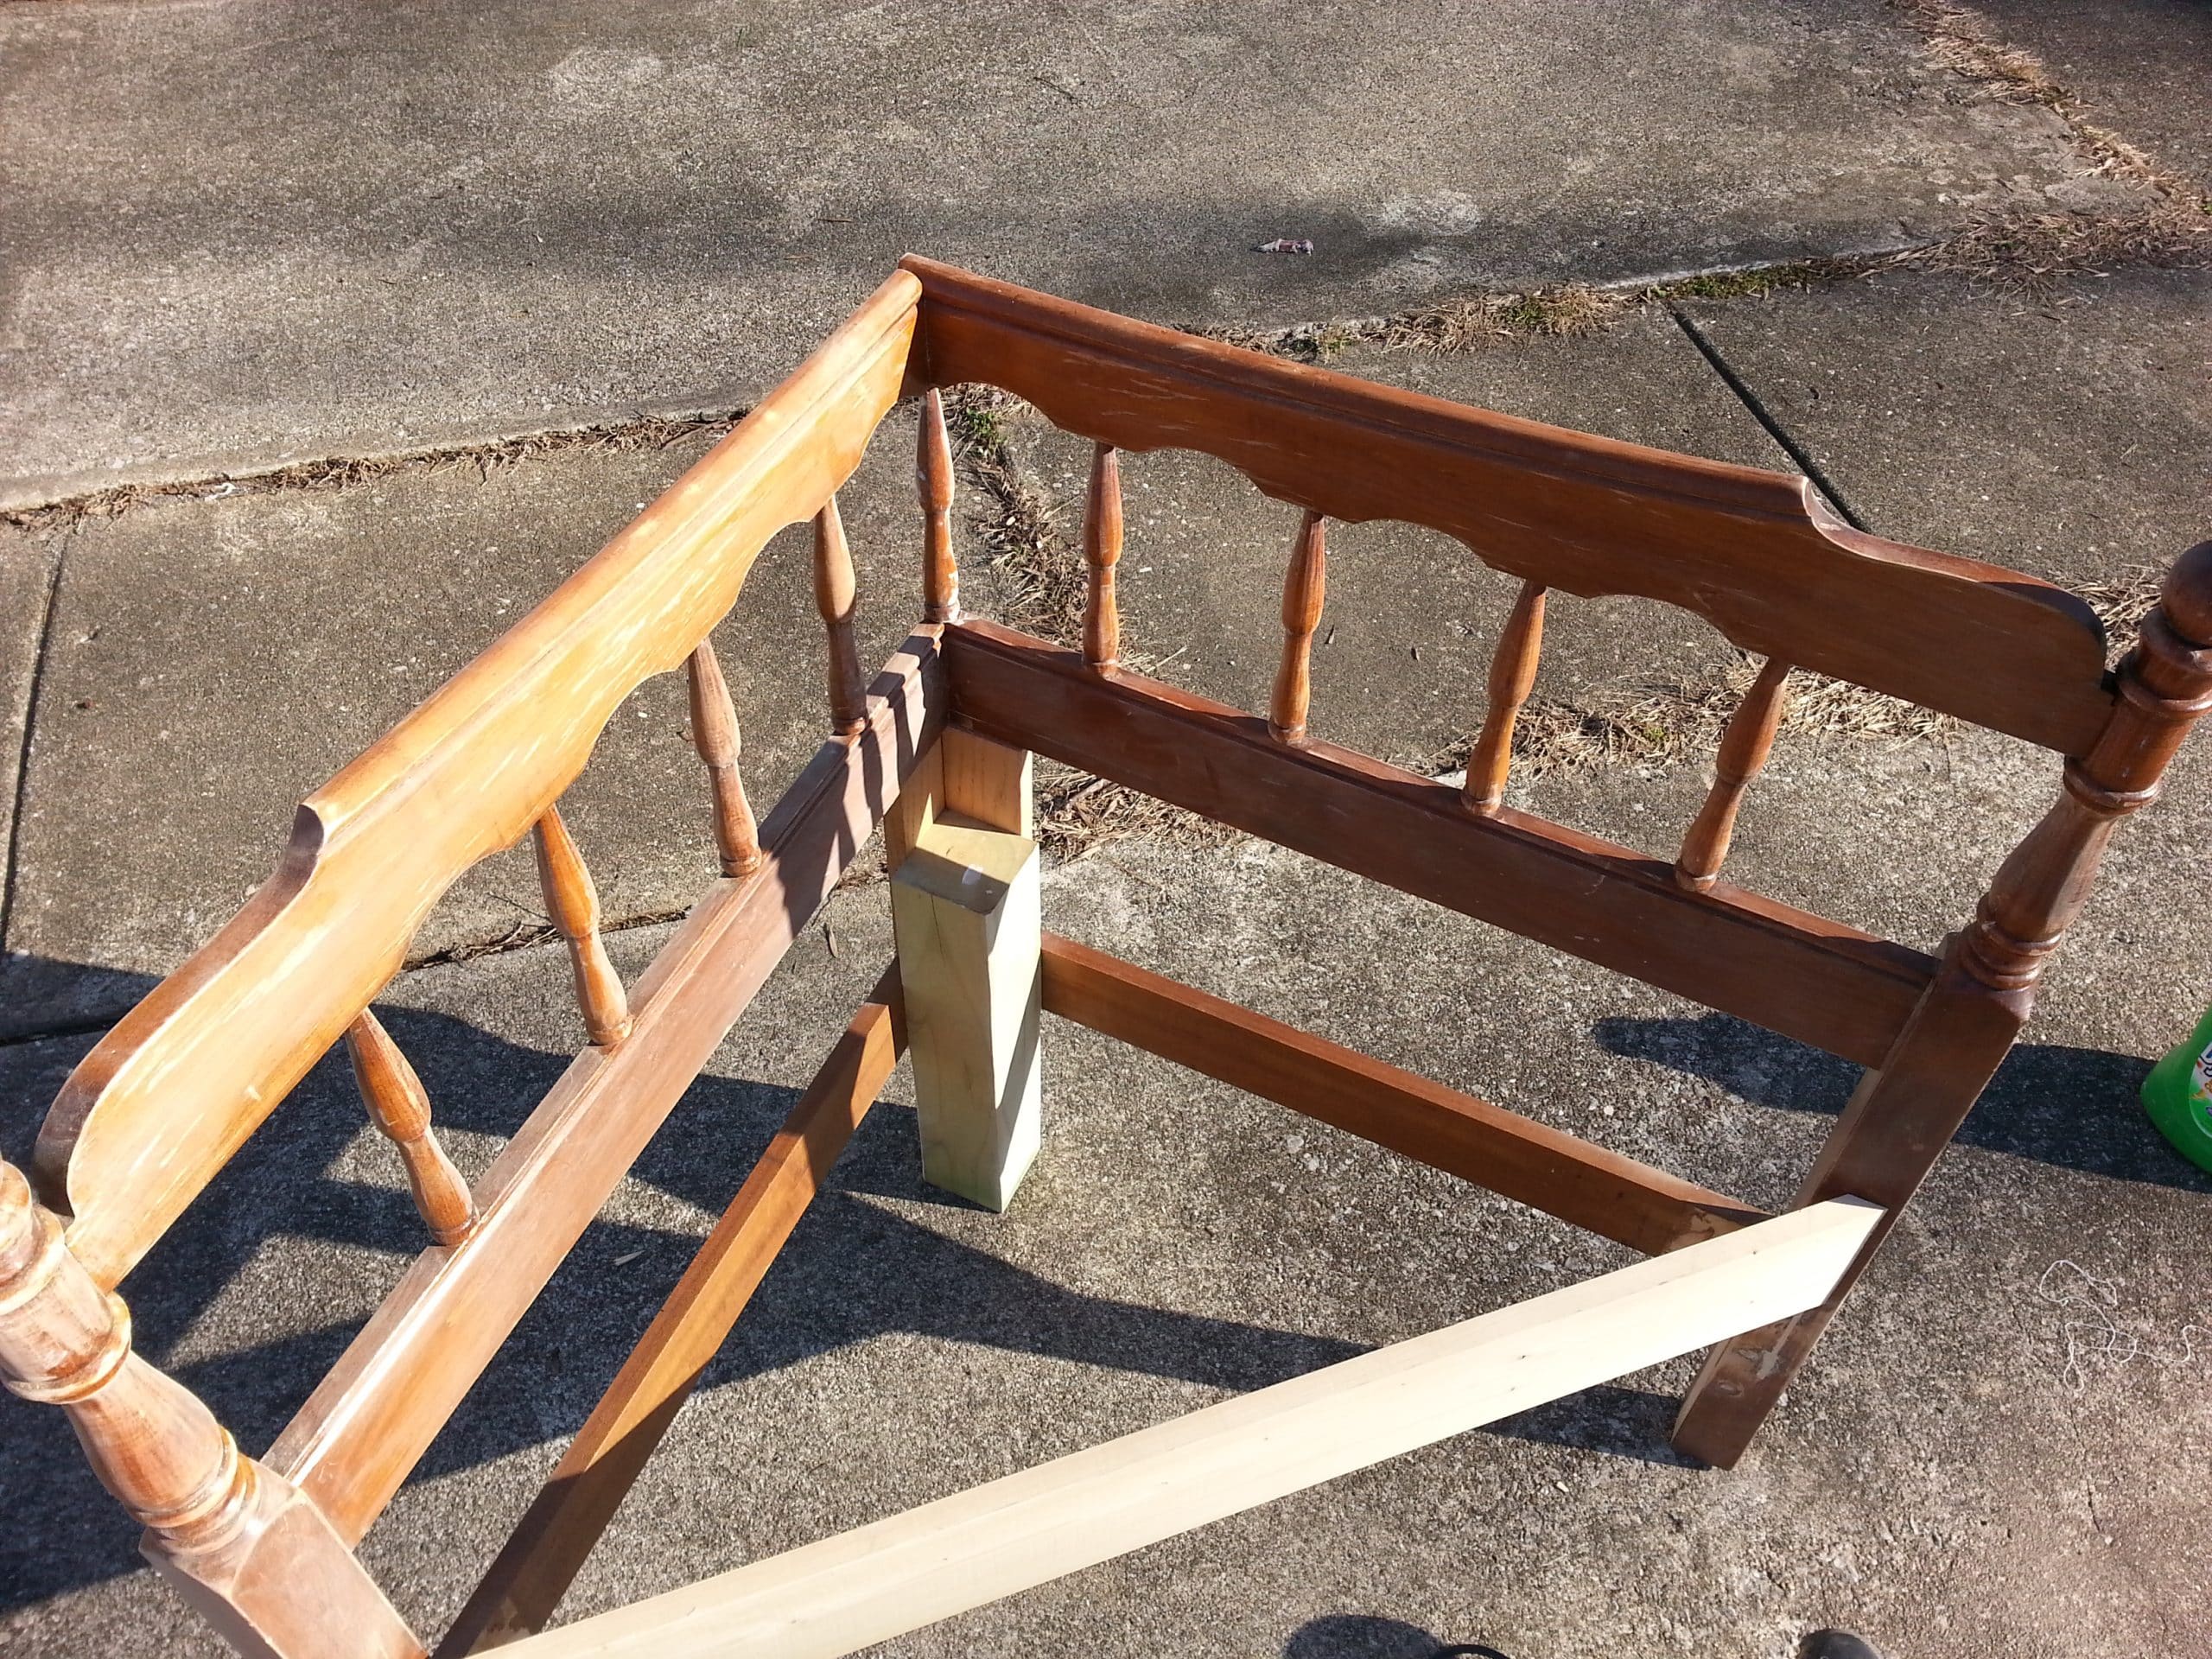
Add a third leg in the back of the headboard corner bench
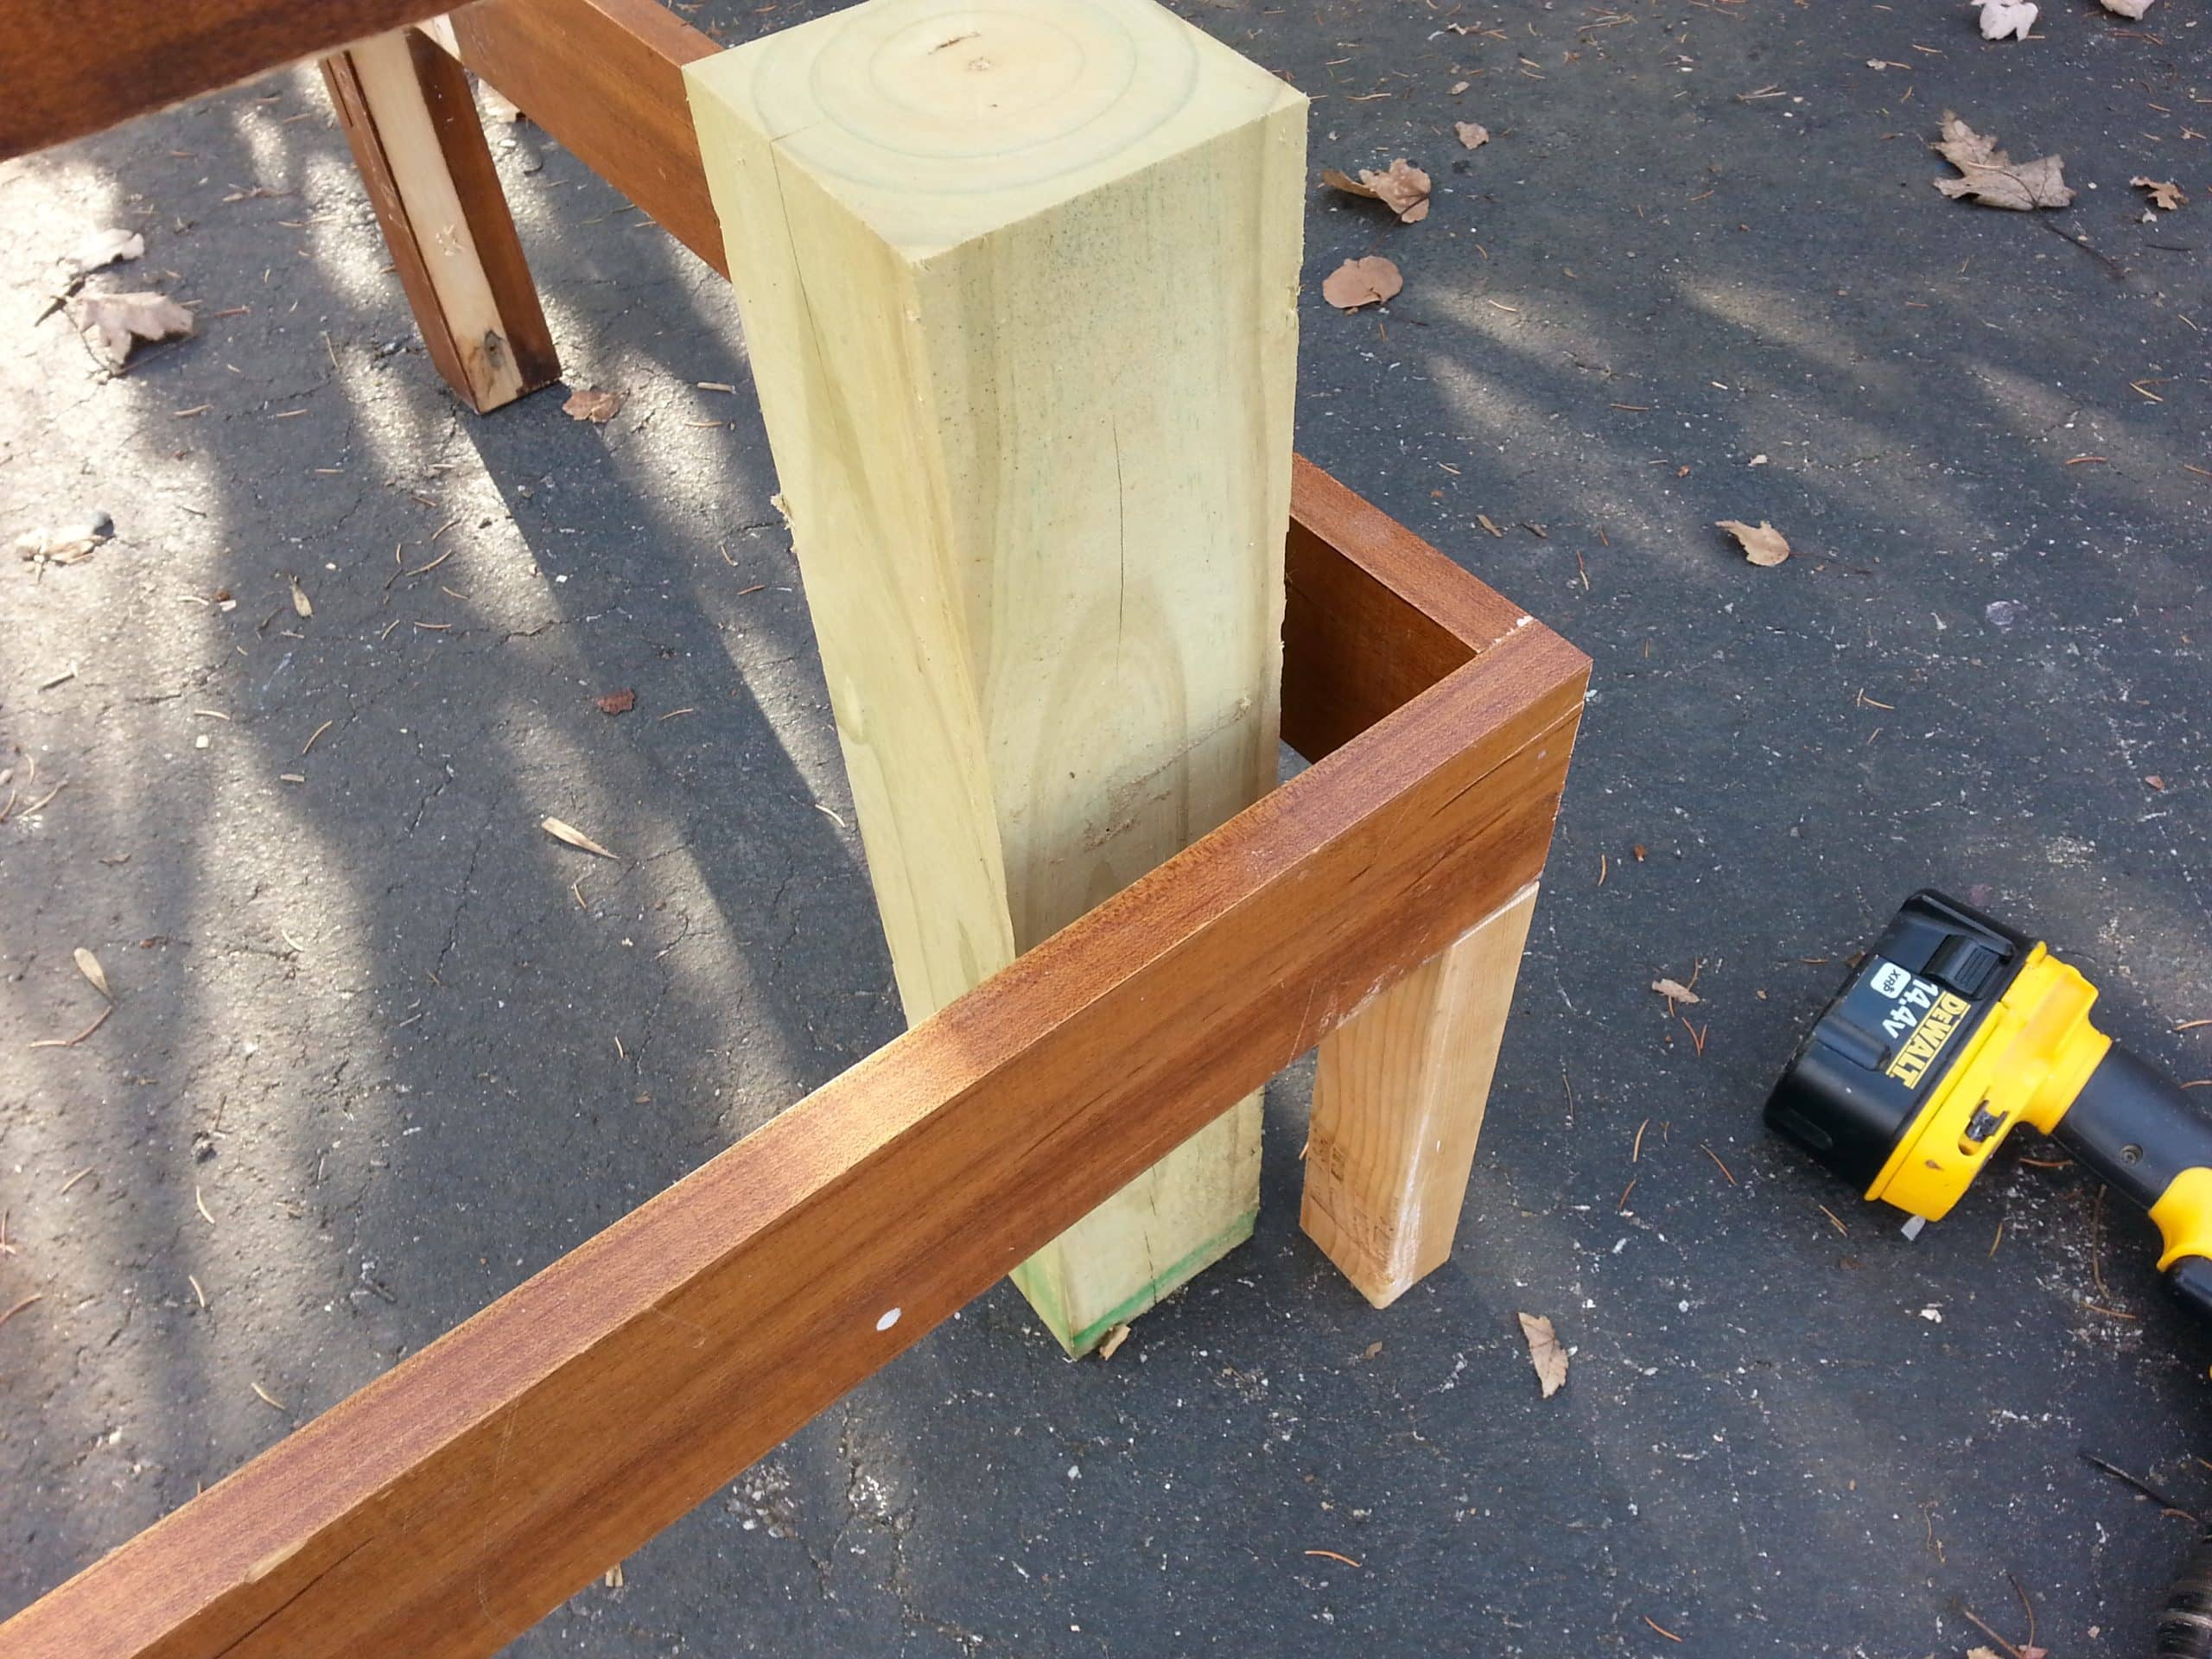
I used a scrap piece of 2x4 to hold the back up while I figured out the height of the back brace/leg.
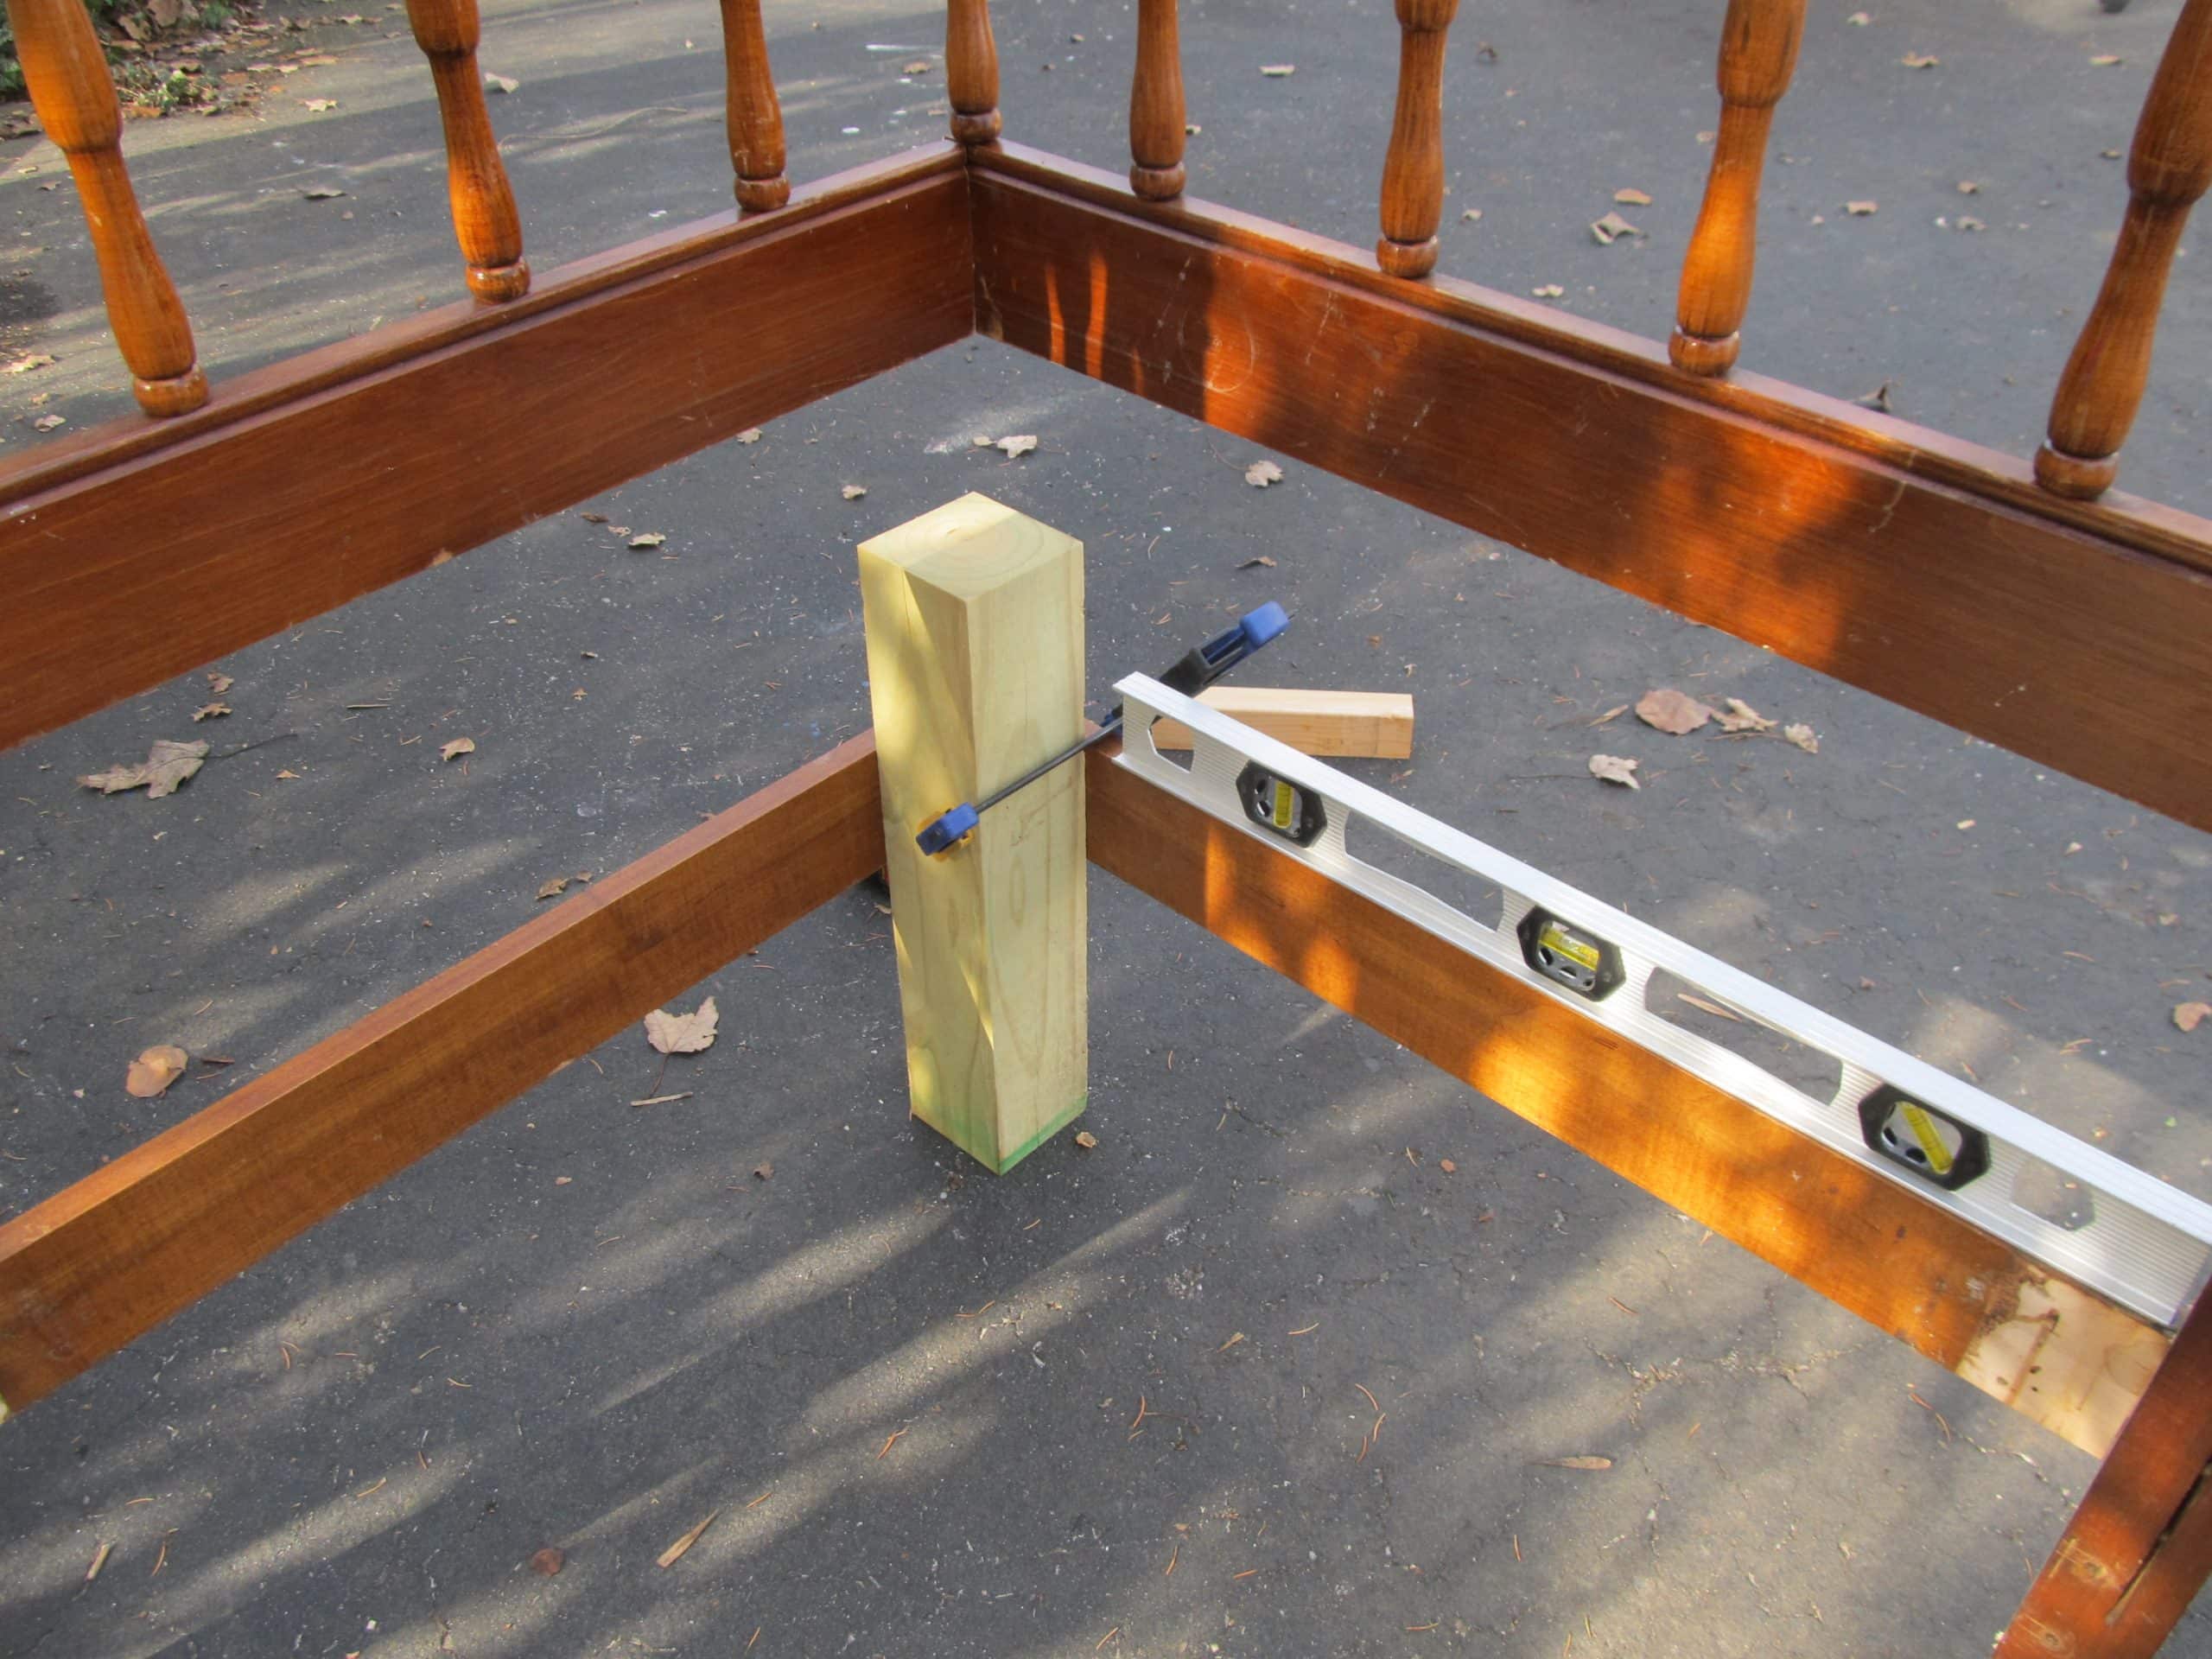
The back leg will also be the support for the seat, so it’s important to get it the right height, while using the level for good measure. (NOTE: I have placed the extra spindle in the middle where it would have originally been cut in half)
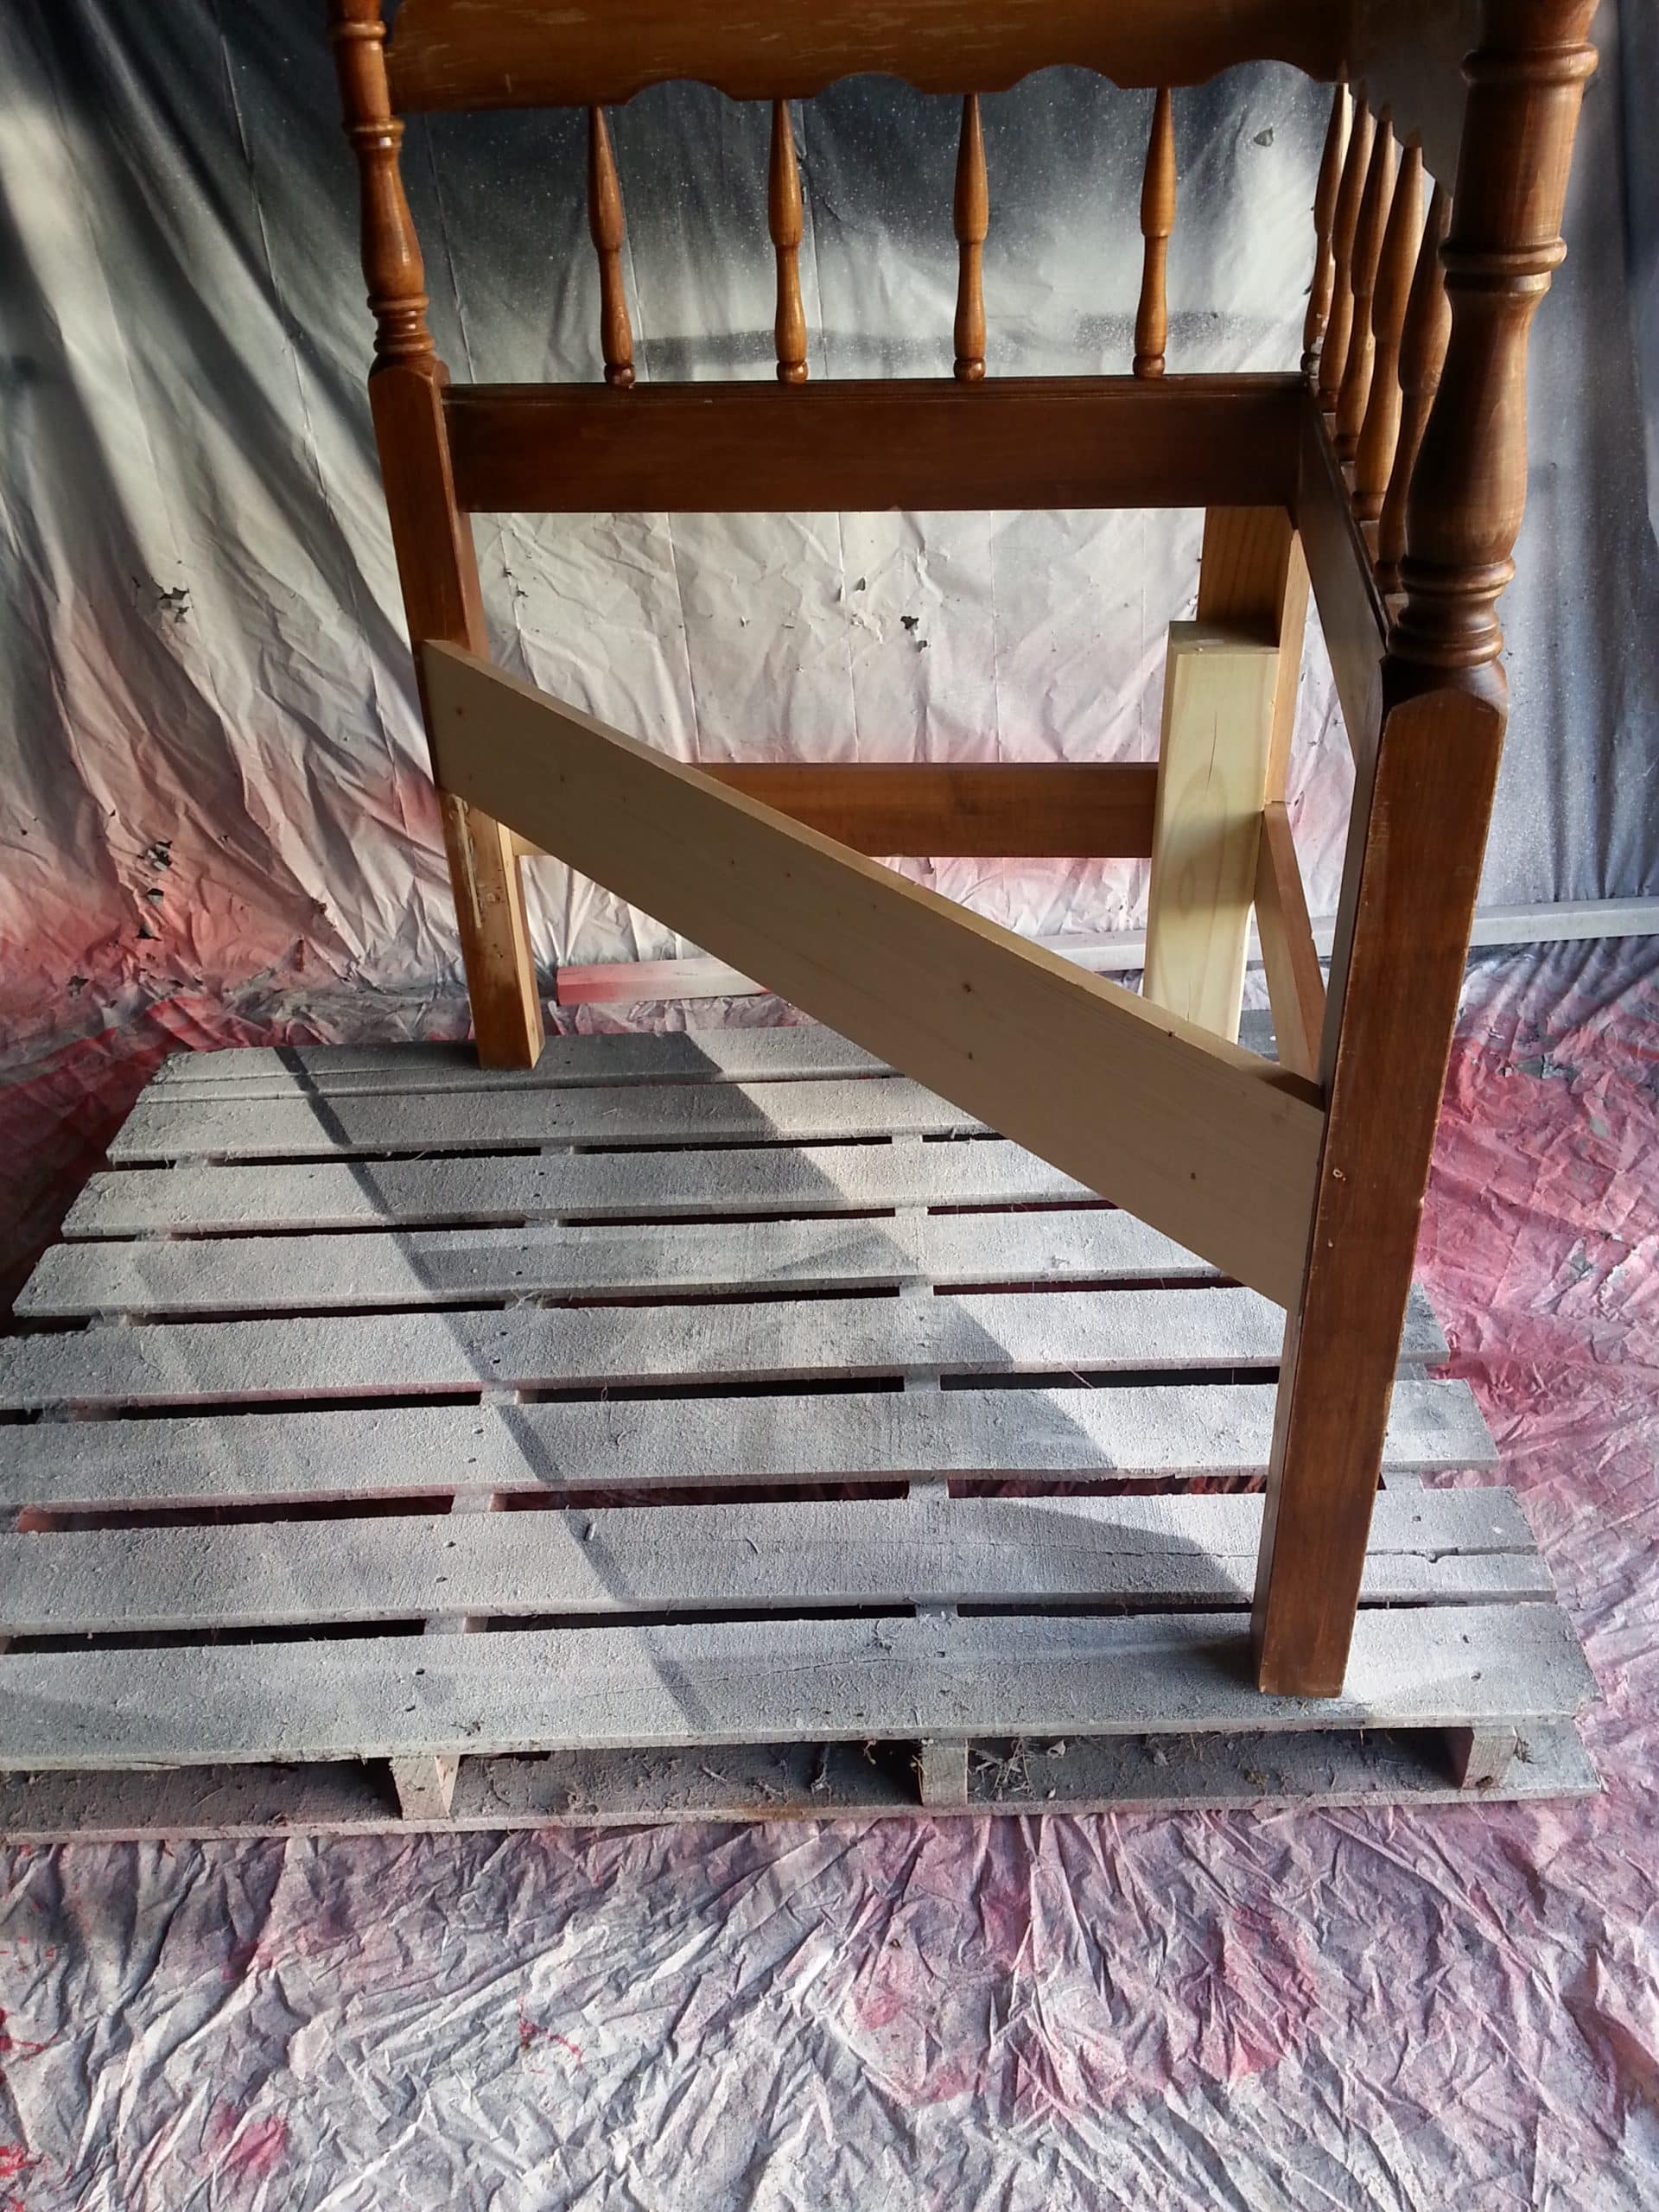
The Corner Bench will need a front brace
As I uploaded this picture, I wondered why I wrote the 2” on the board. After thinking about it for a bit, I remembered it is to remind me to tell you that even though I drilled the pocket holes at the ¾” setting, I used 2” screws because I was attaching the ¾” board to the square post of the bed.
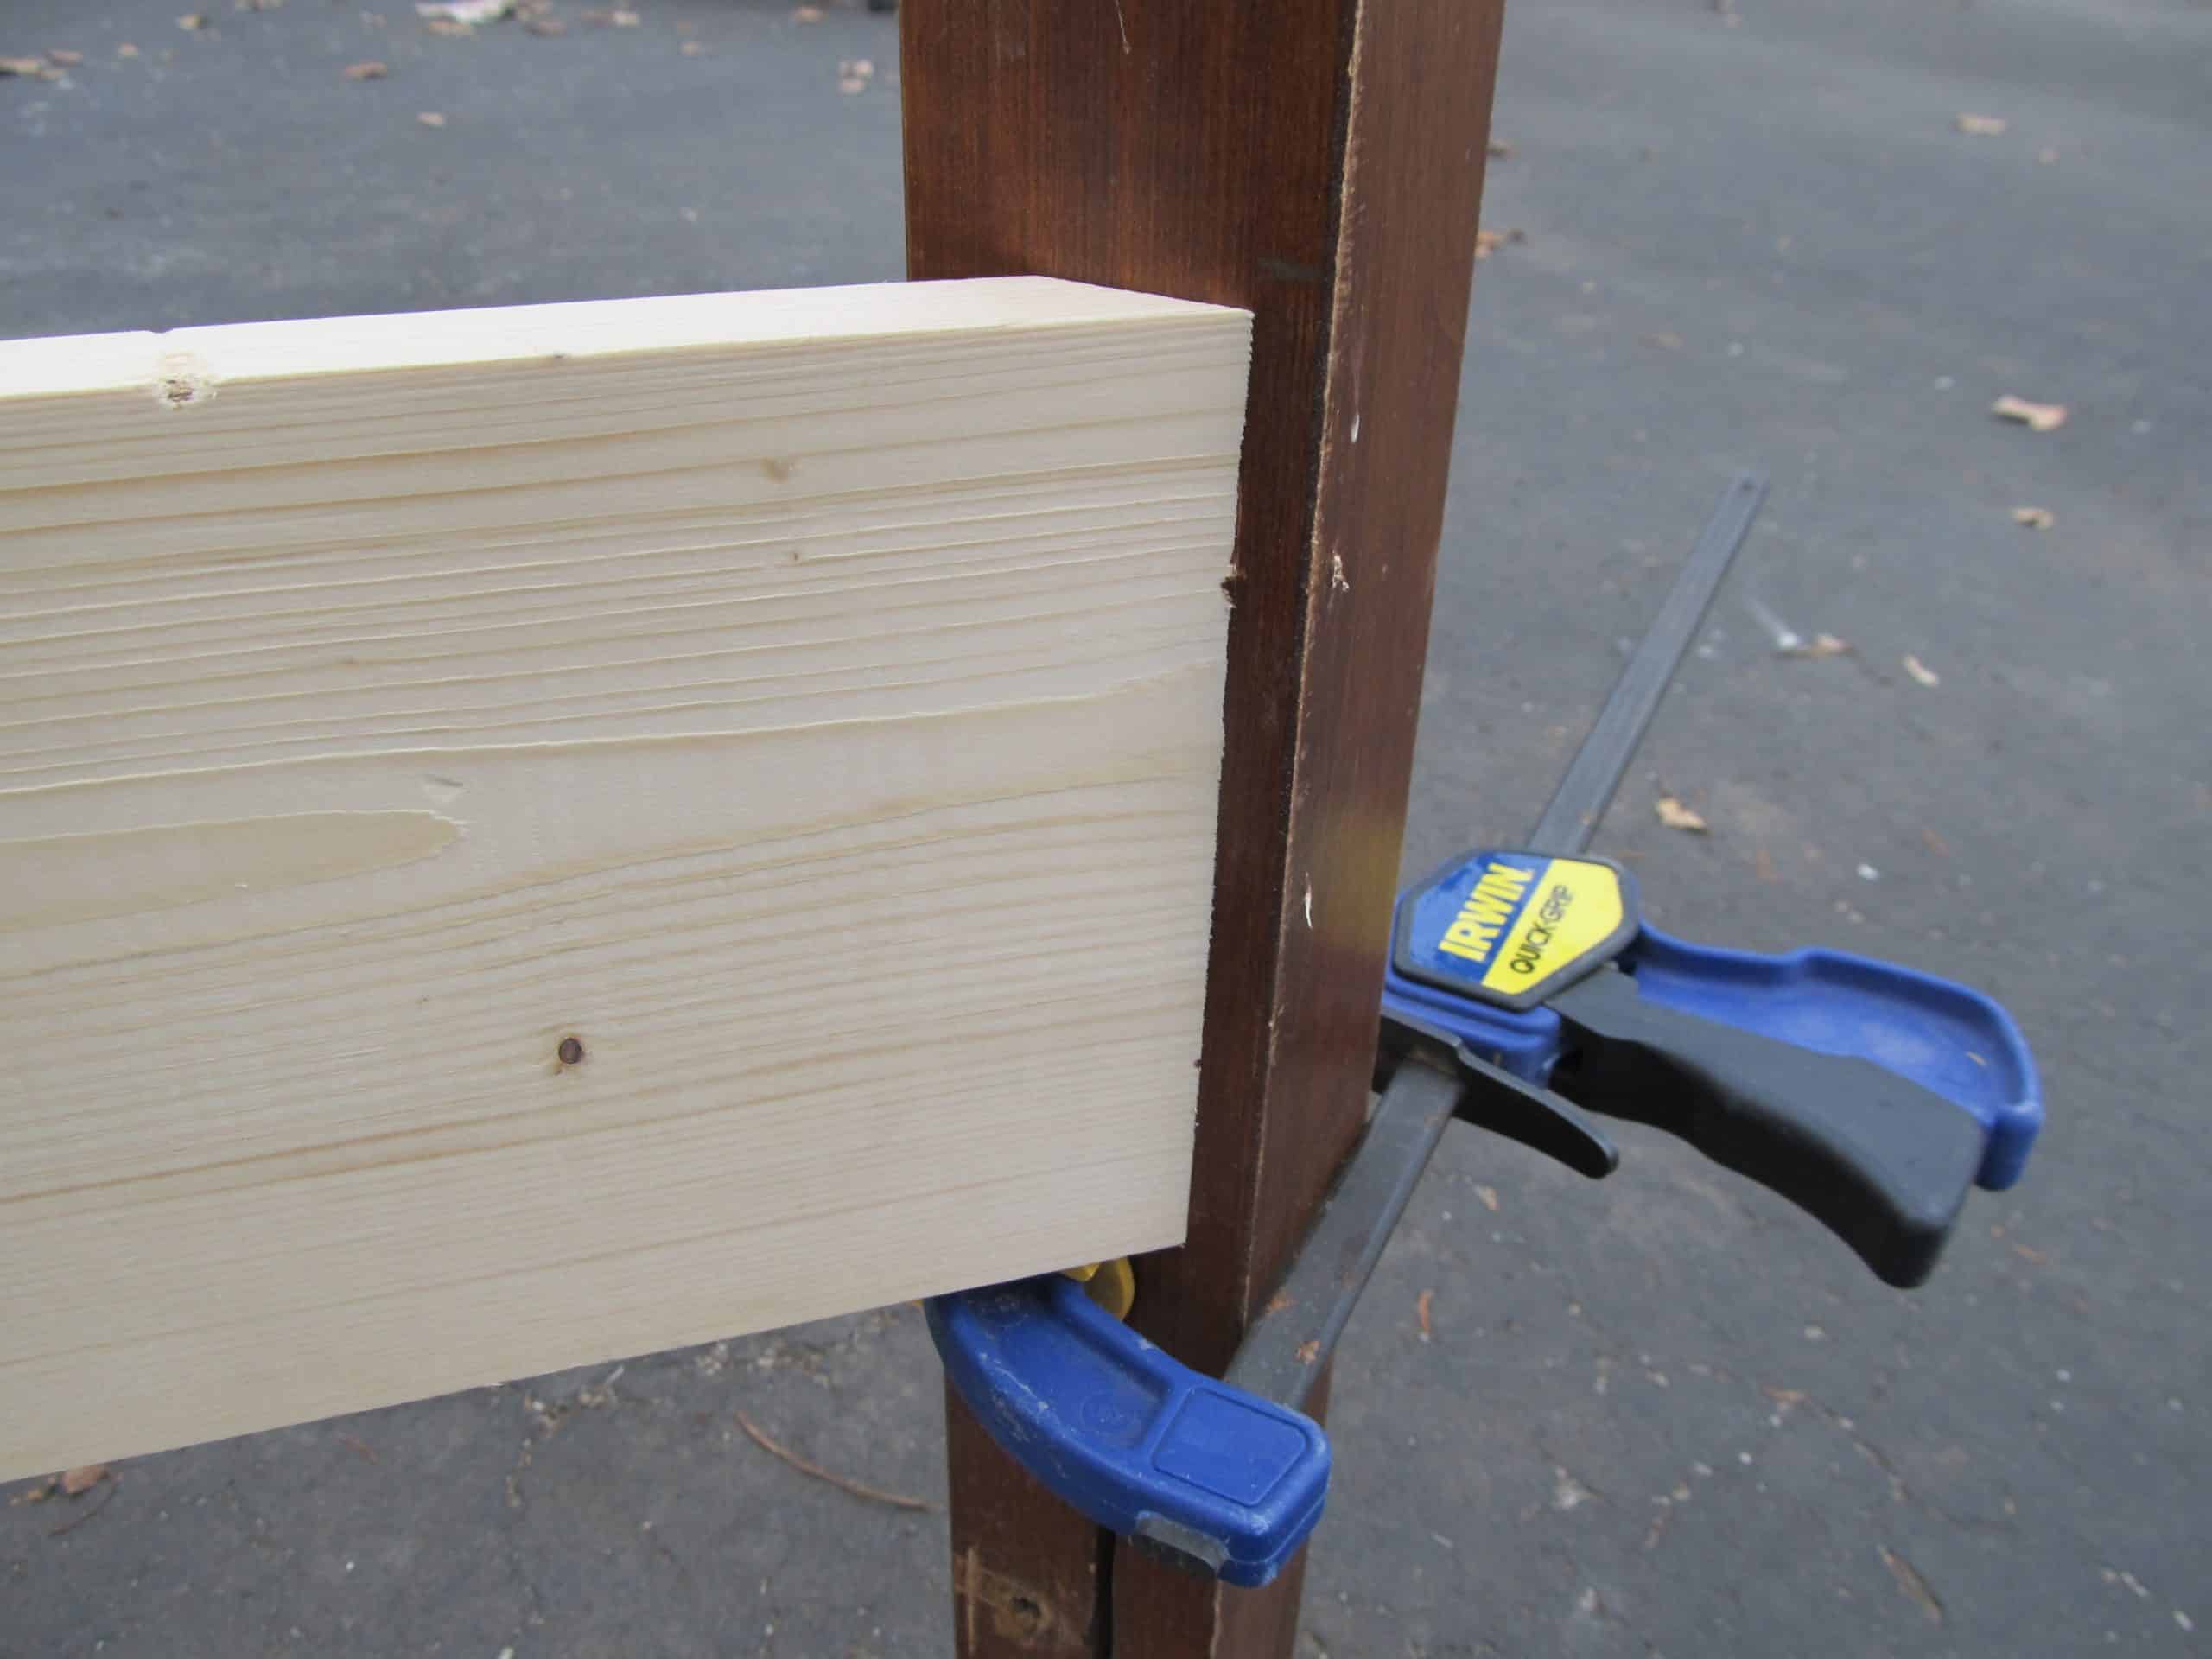
Because of the angle, it was impossible to clamp the 1x to the post. I used my quick clamp to hold the board in the right spot to keep it from slipping down the post.
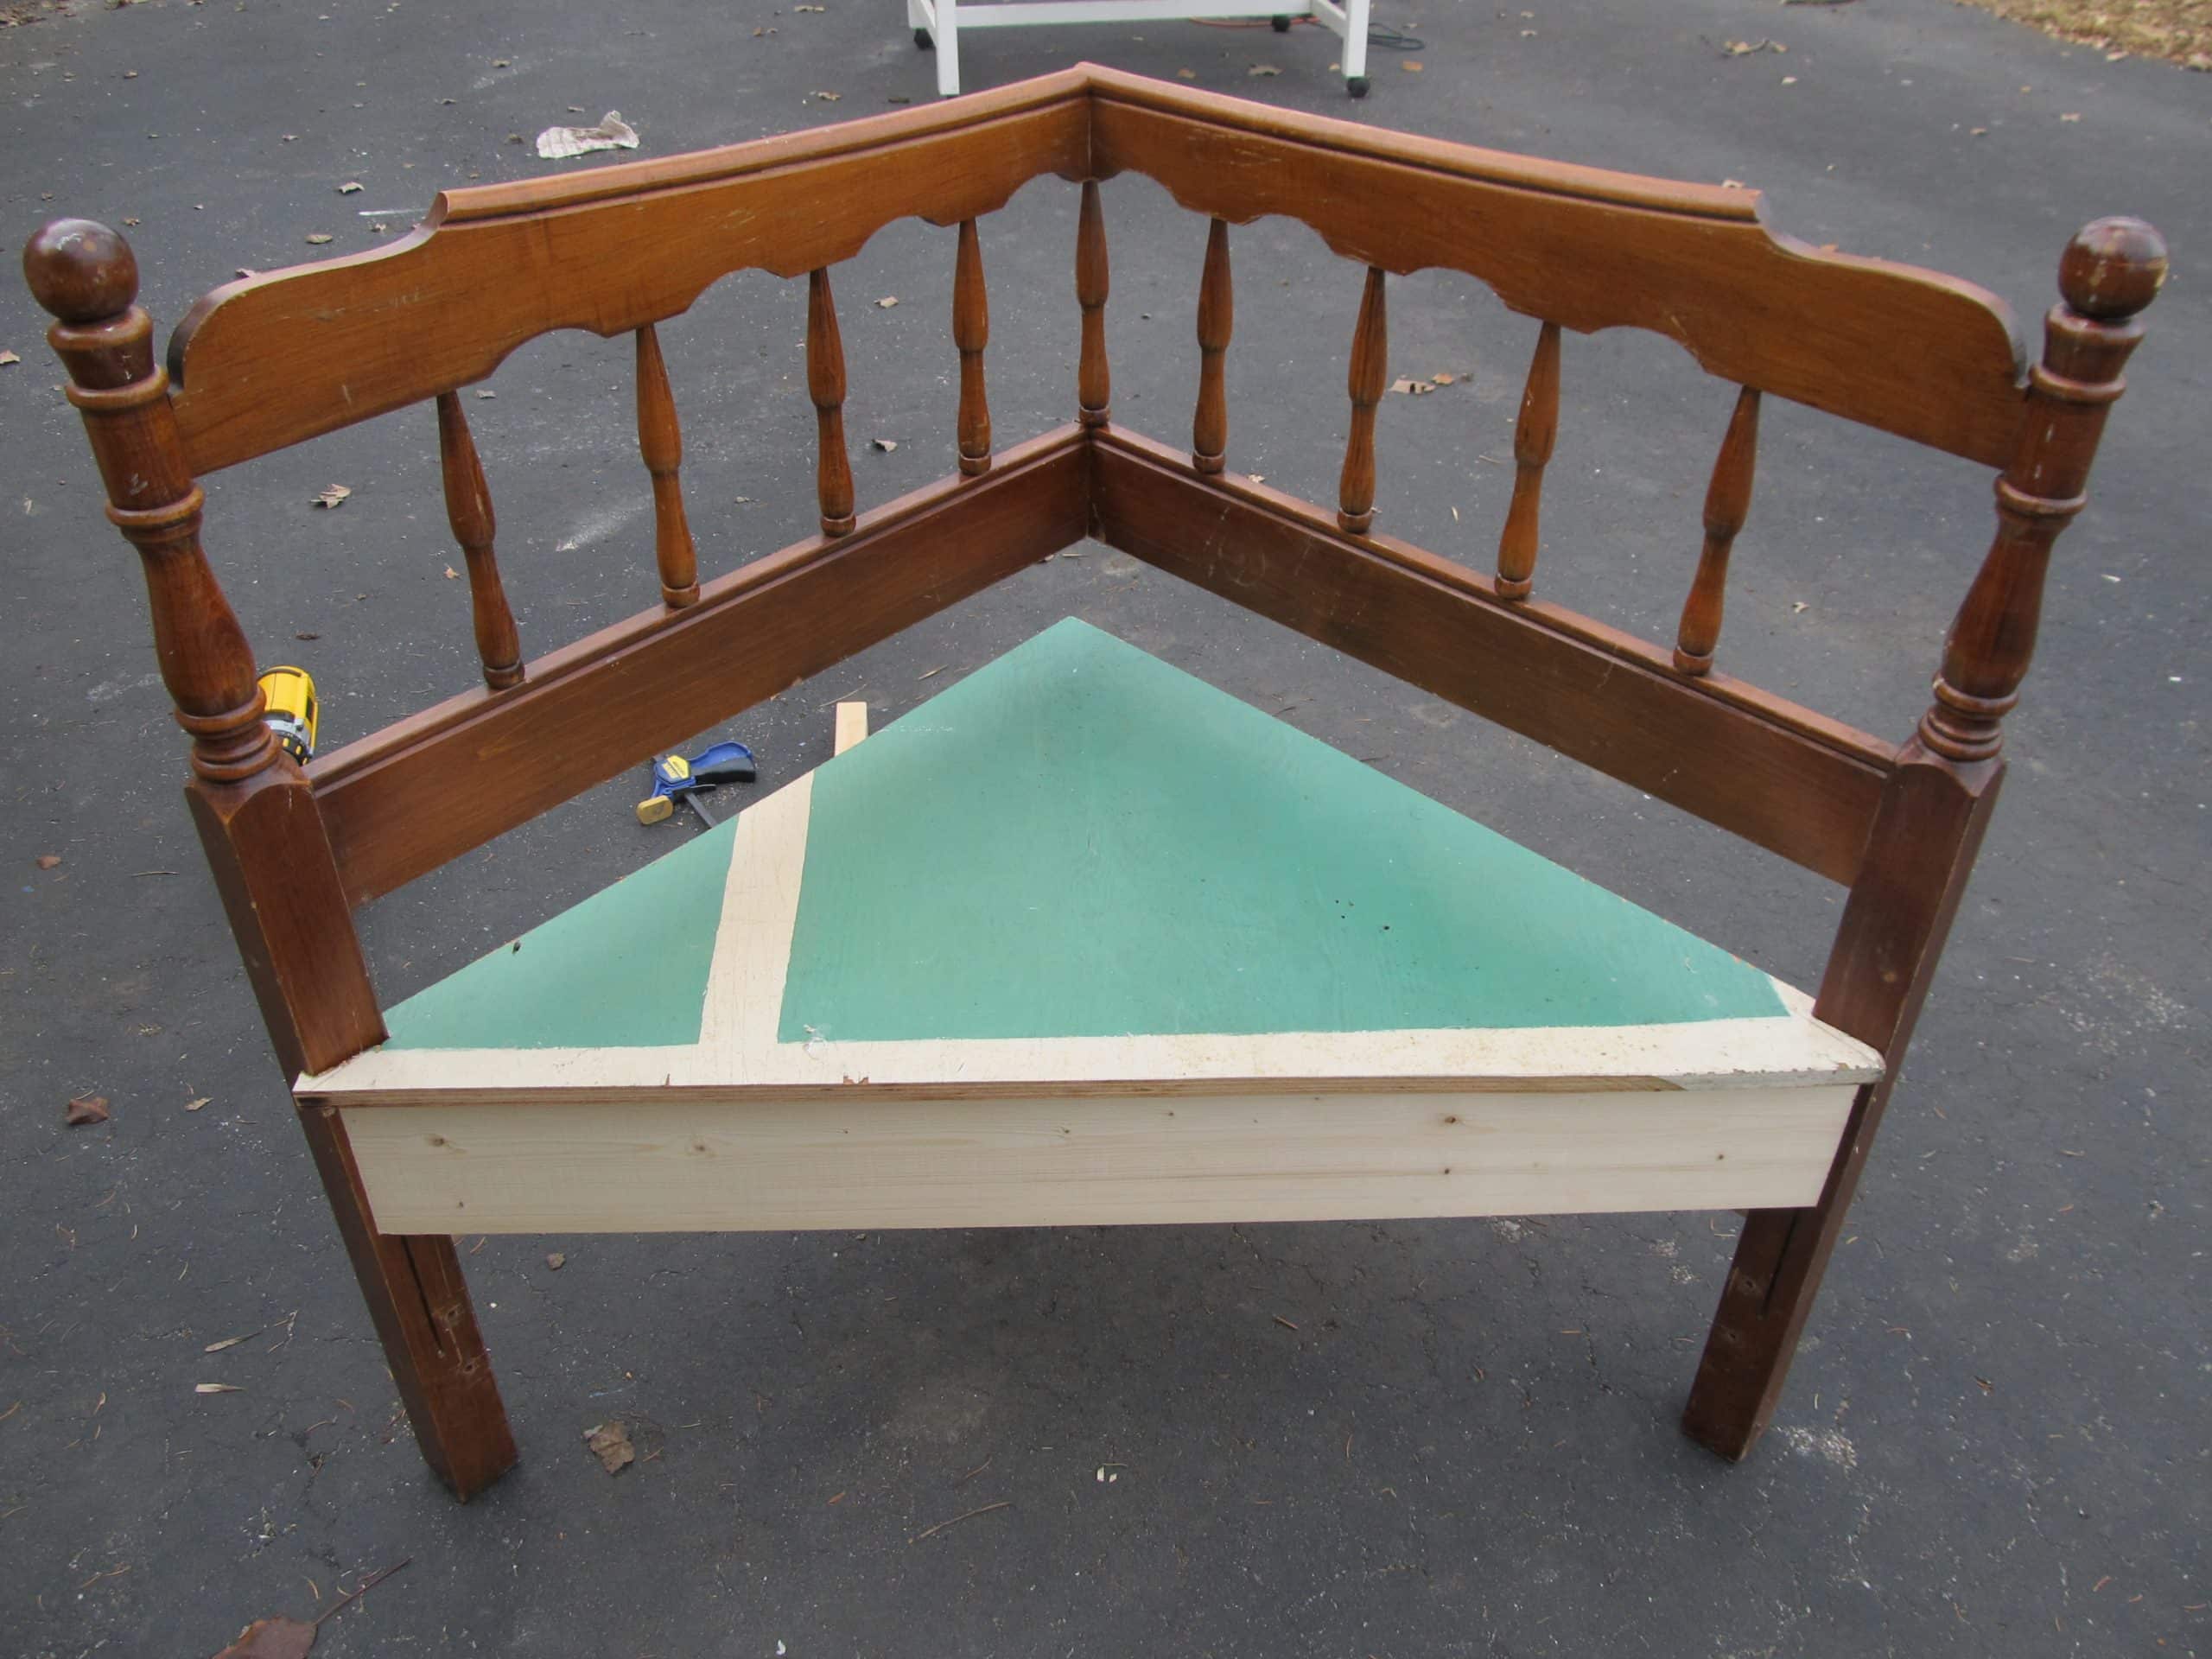
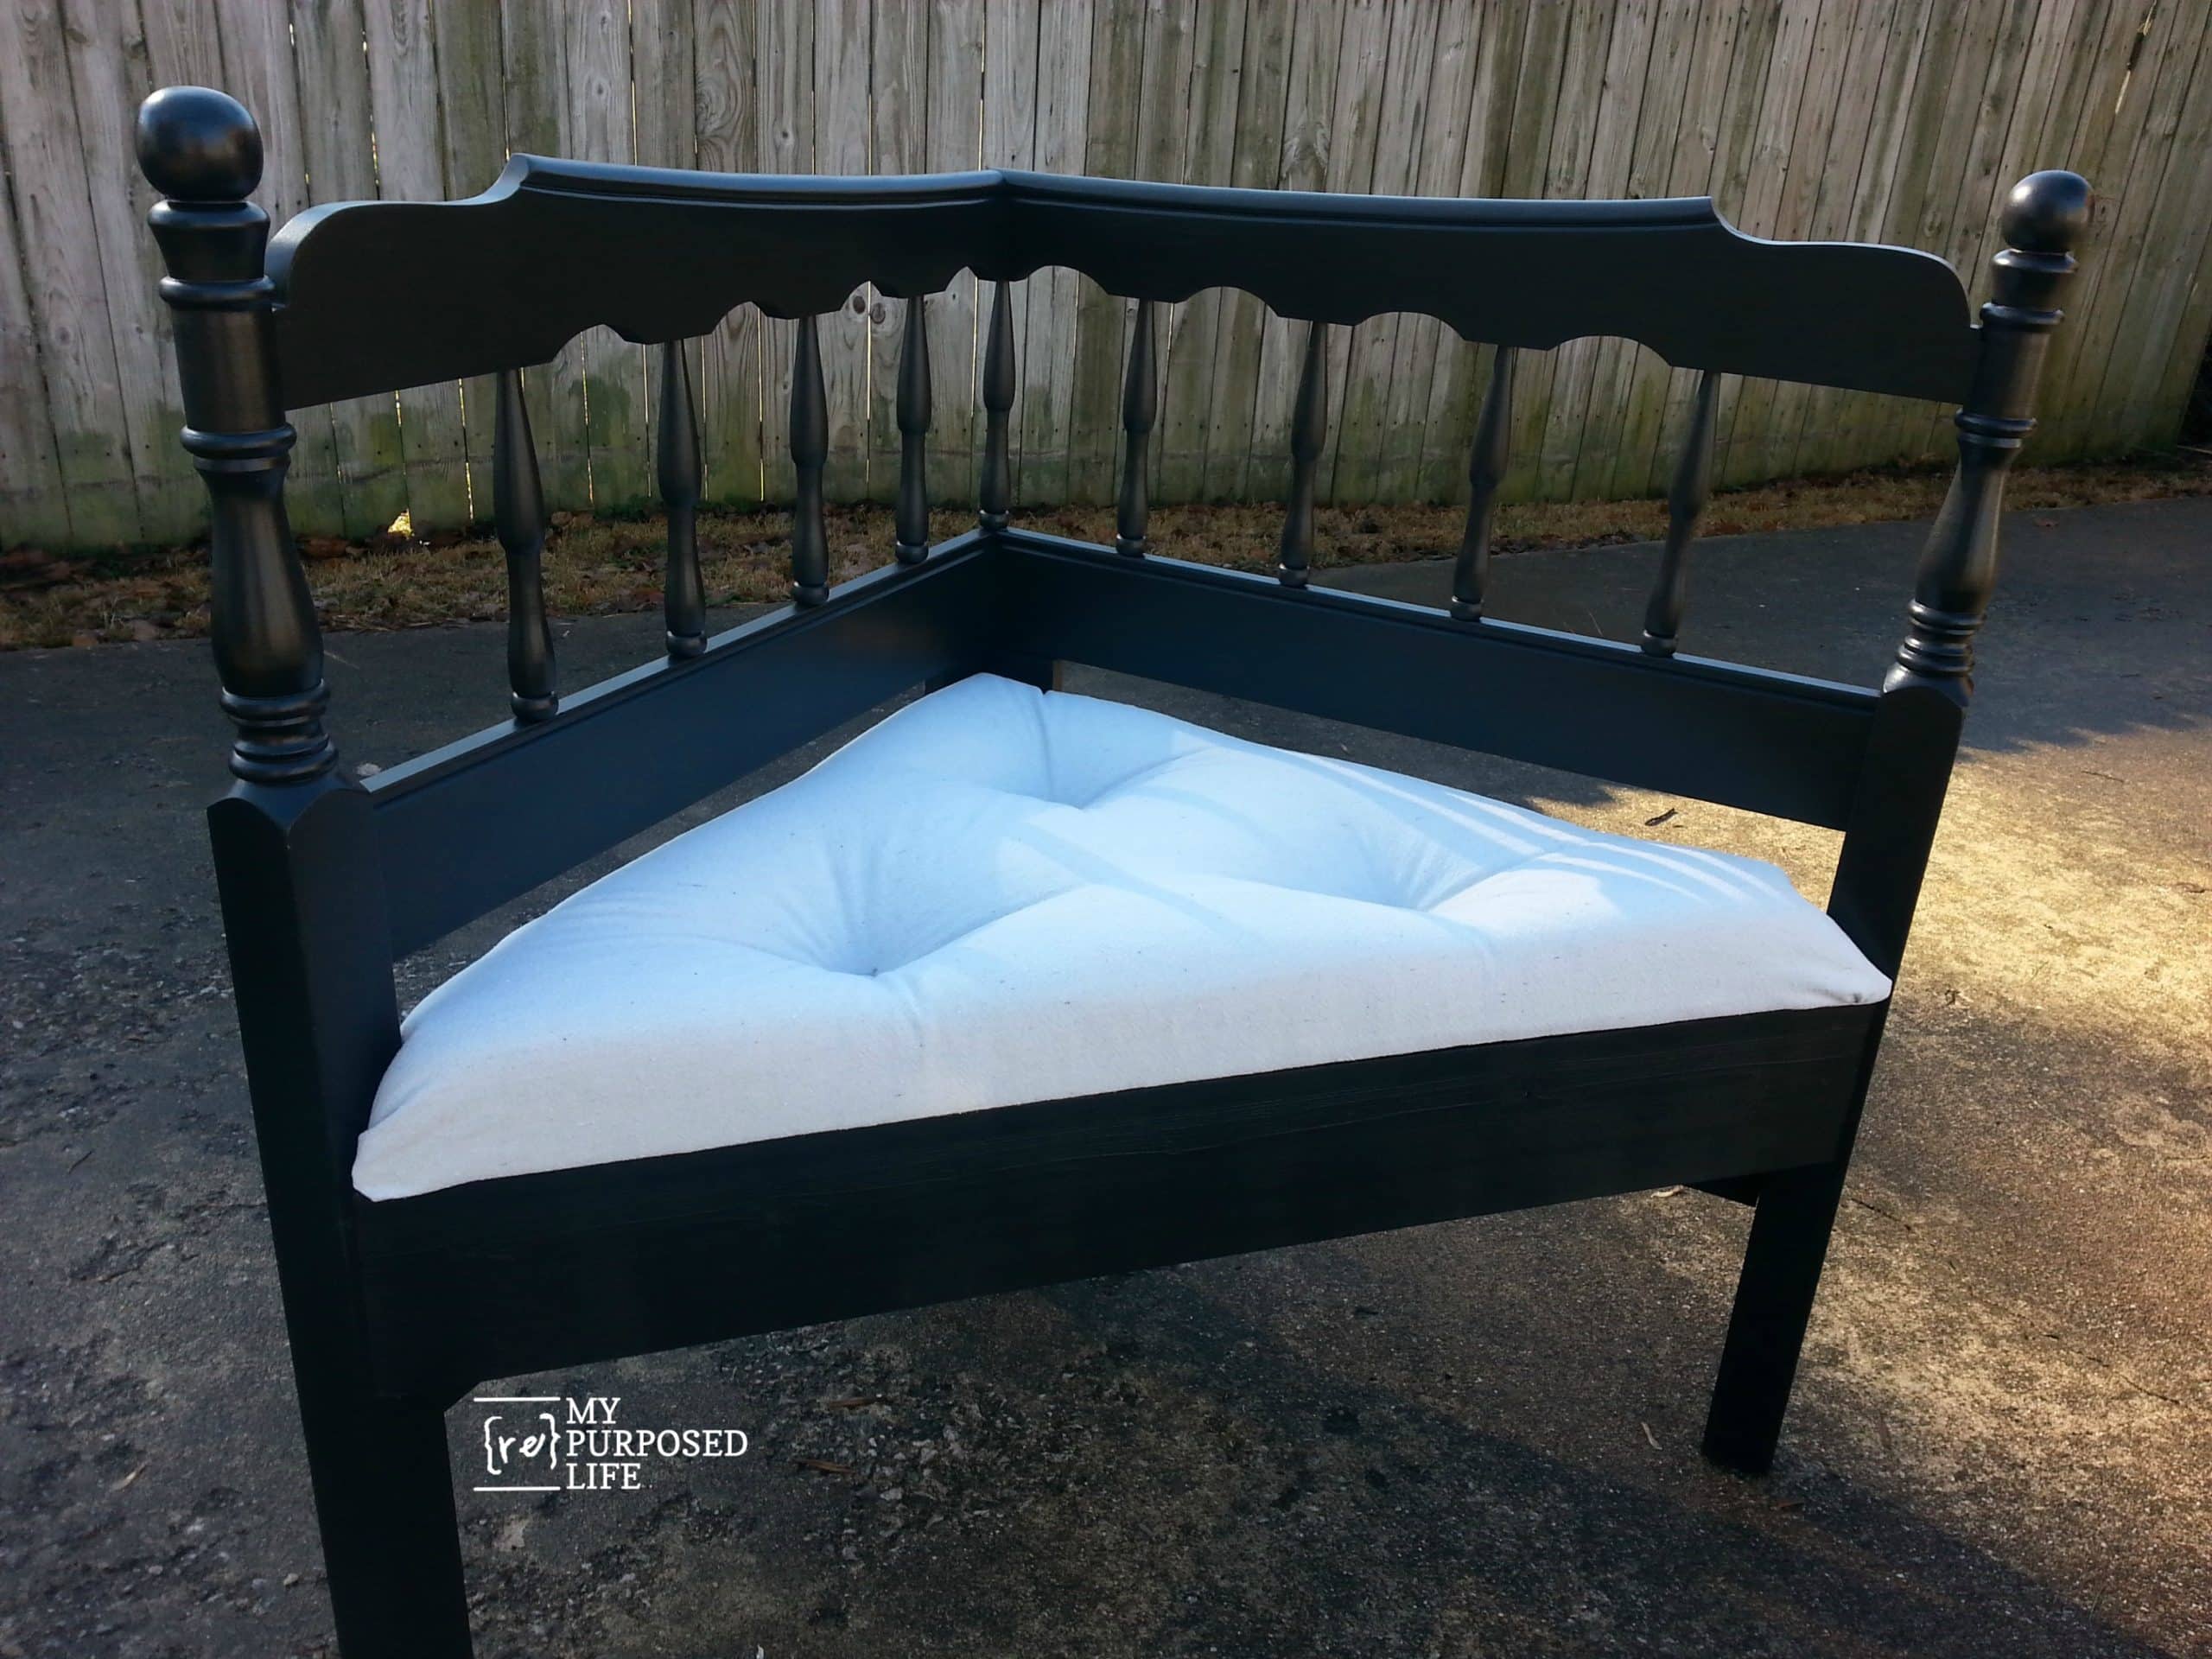
Add a seat to your headboard bench
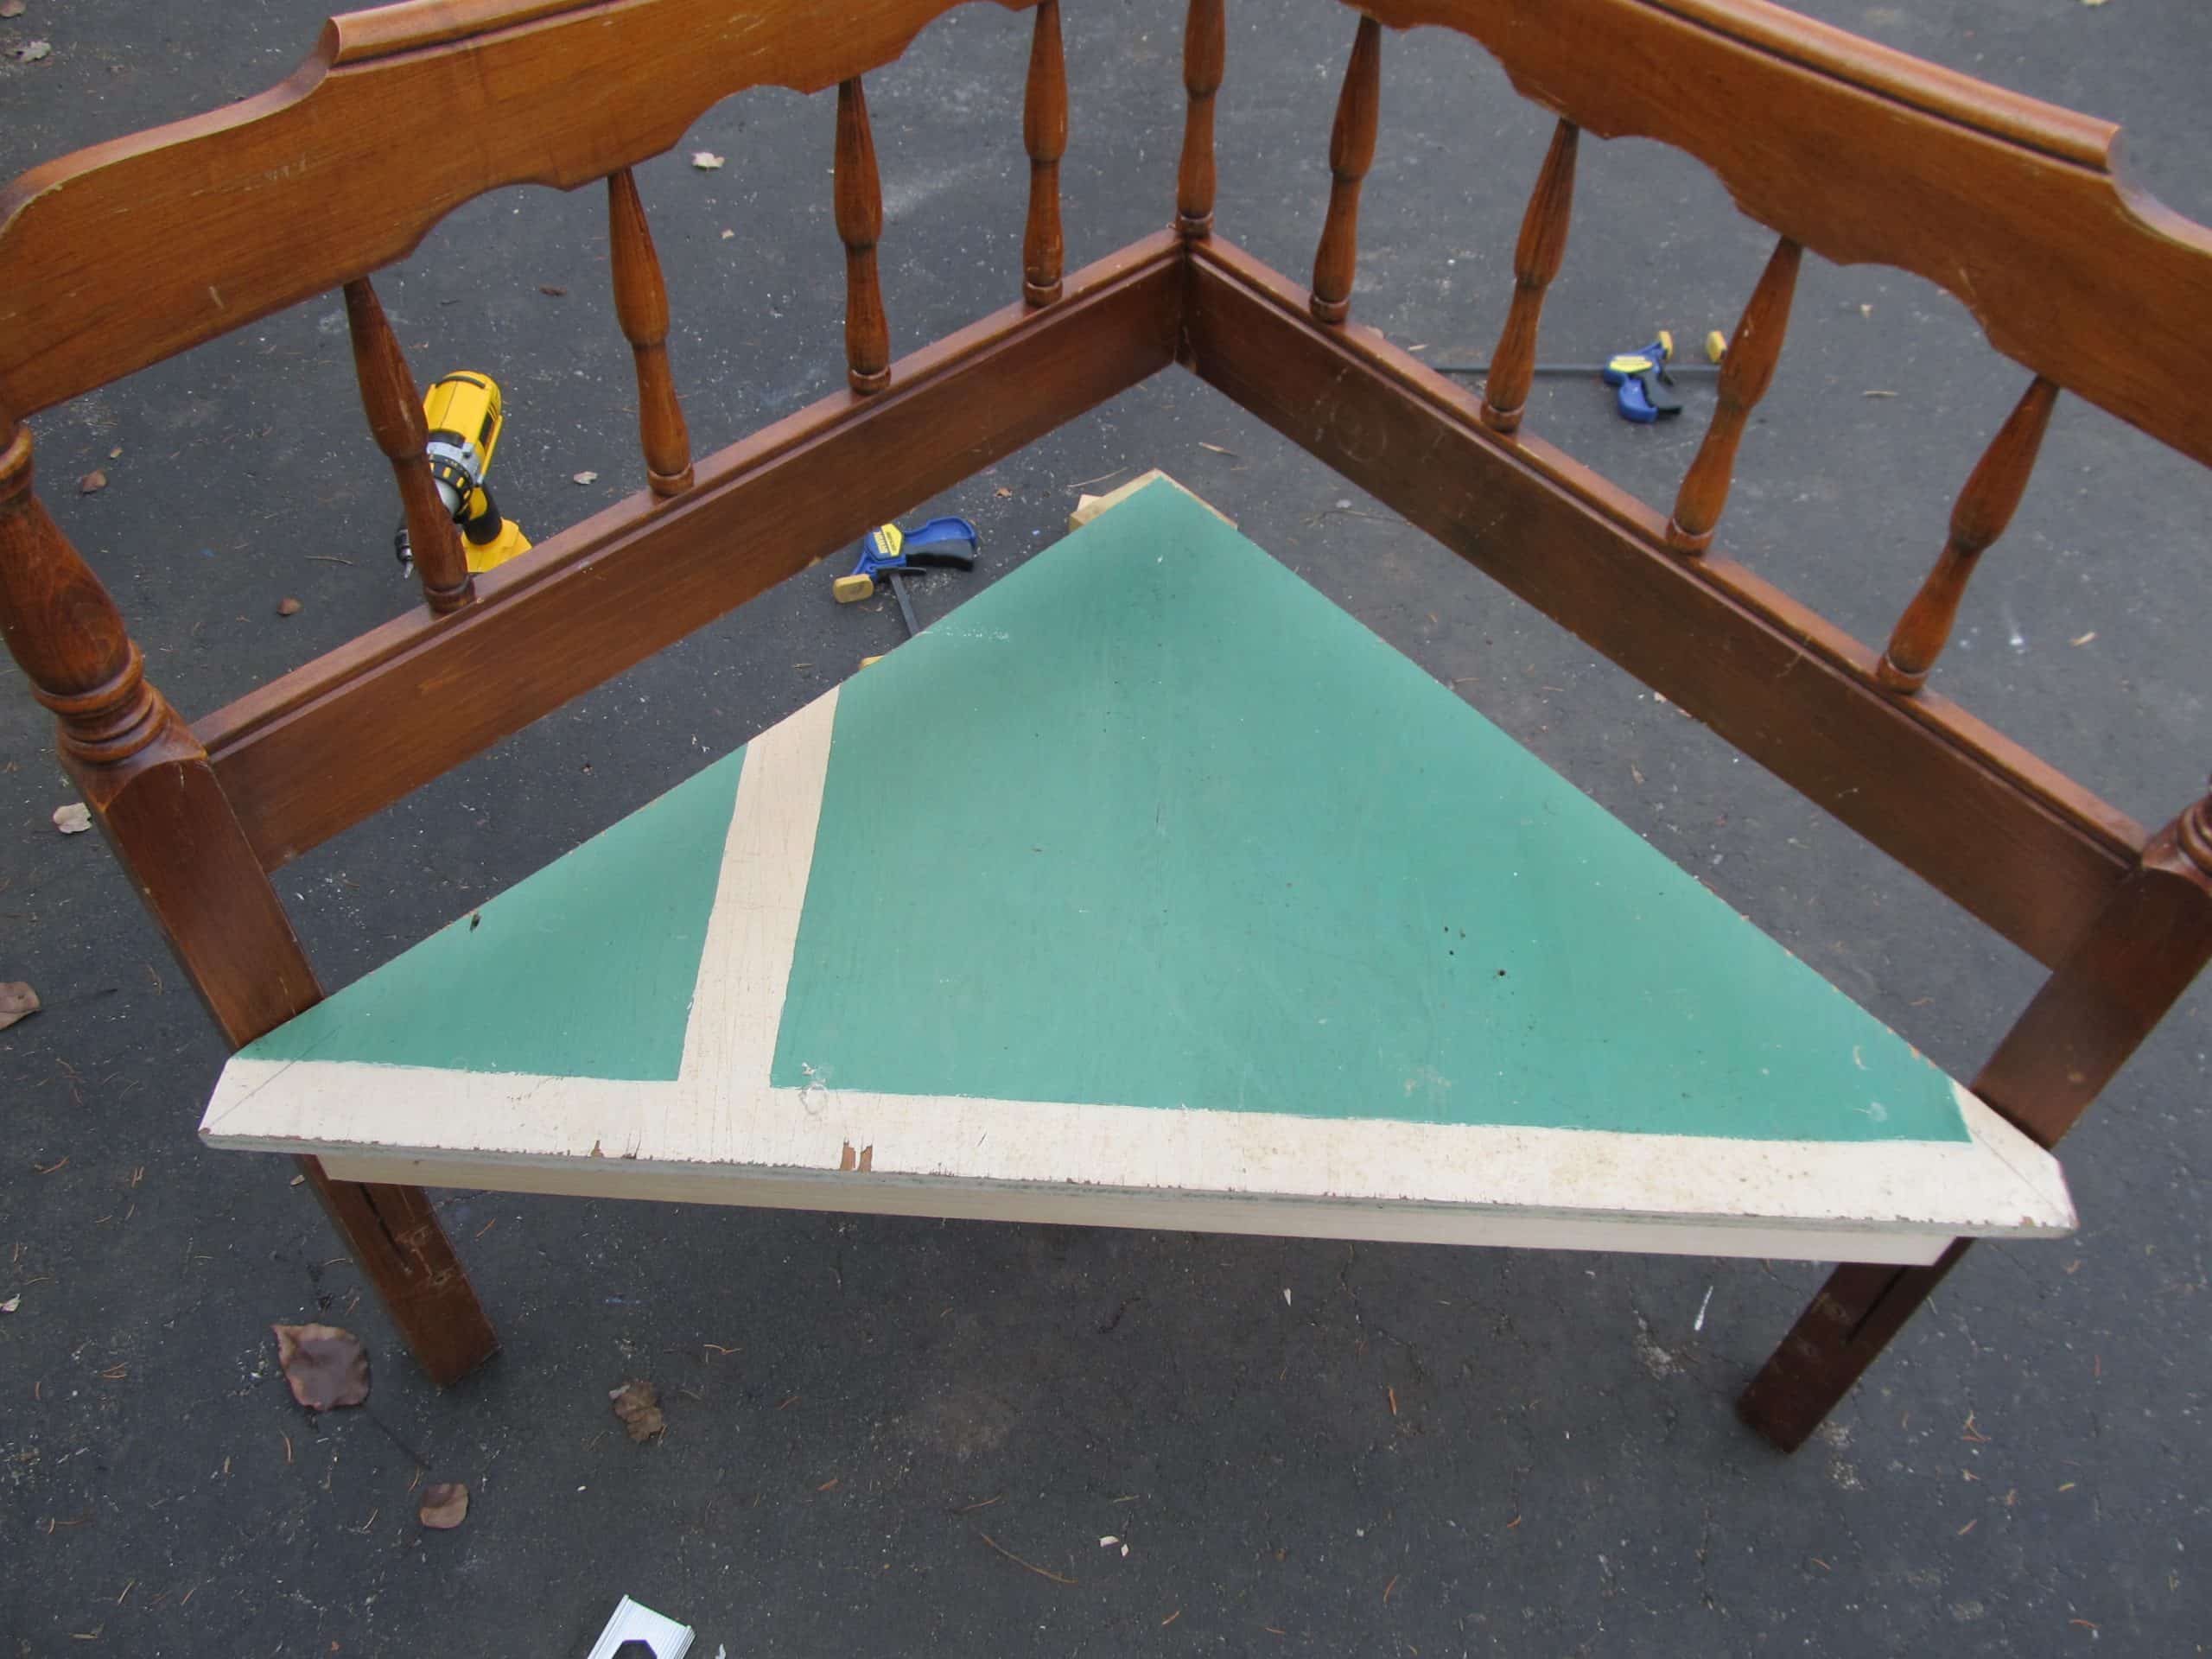
You can see this old piece of scrap plywood I used for the seat. It was easy to cut on my table saw, but the math (of the angle) really had me messed up. I couldn’t get it to fit back far enough. It also wouldn’t slide in from the back. I think I took a lunch break around this time. It was pretty frustrating.
HA! this is how I figure out where to cut the corner bench seat. After setting the bench onto the seat I was able to outline just where it needed to be notched. Was it the right way? I don’t know, but it worked!
The problem was I wanted the front of the seat to have a little bit of an overhang over the front brace board.
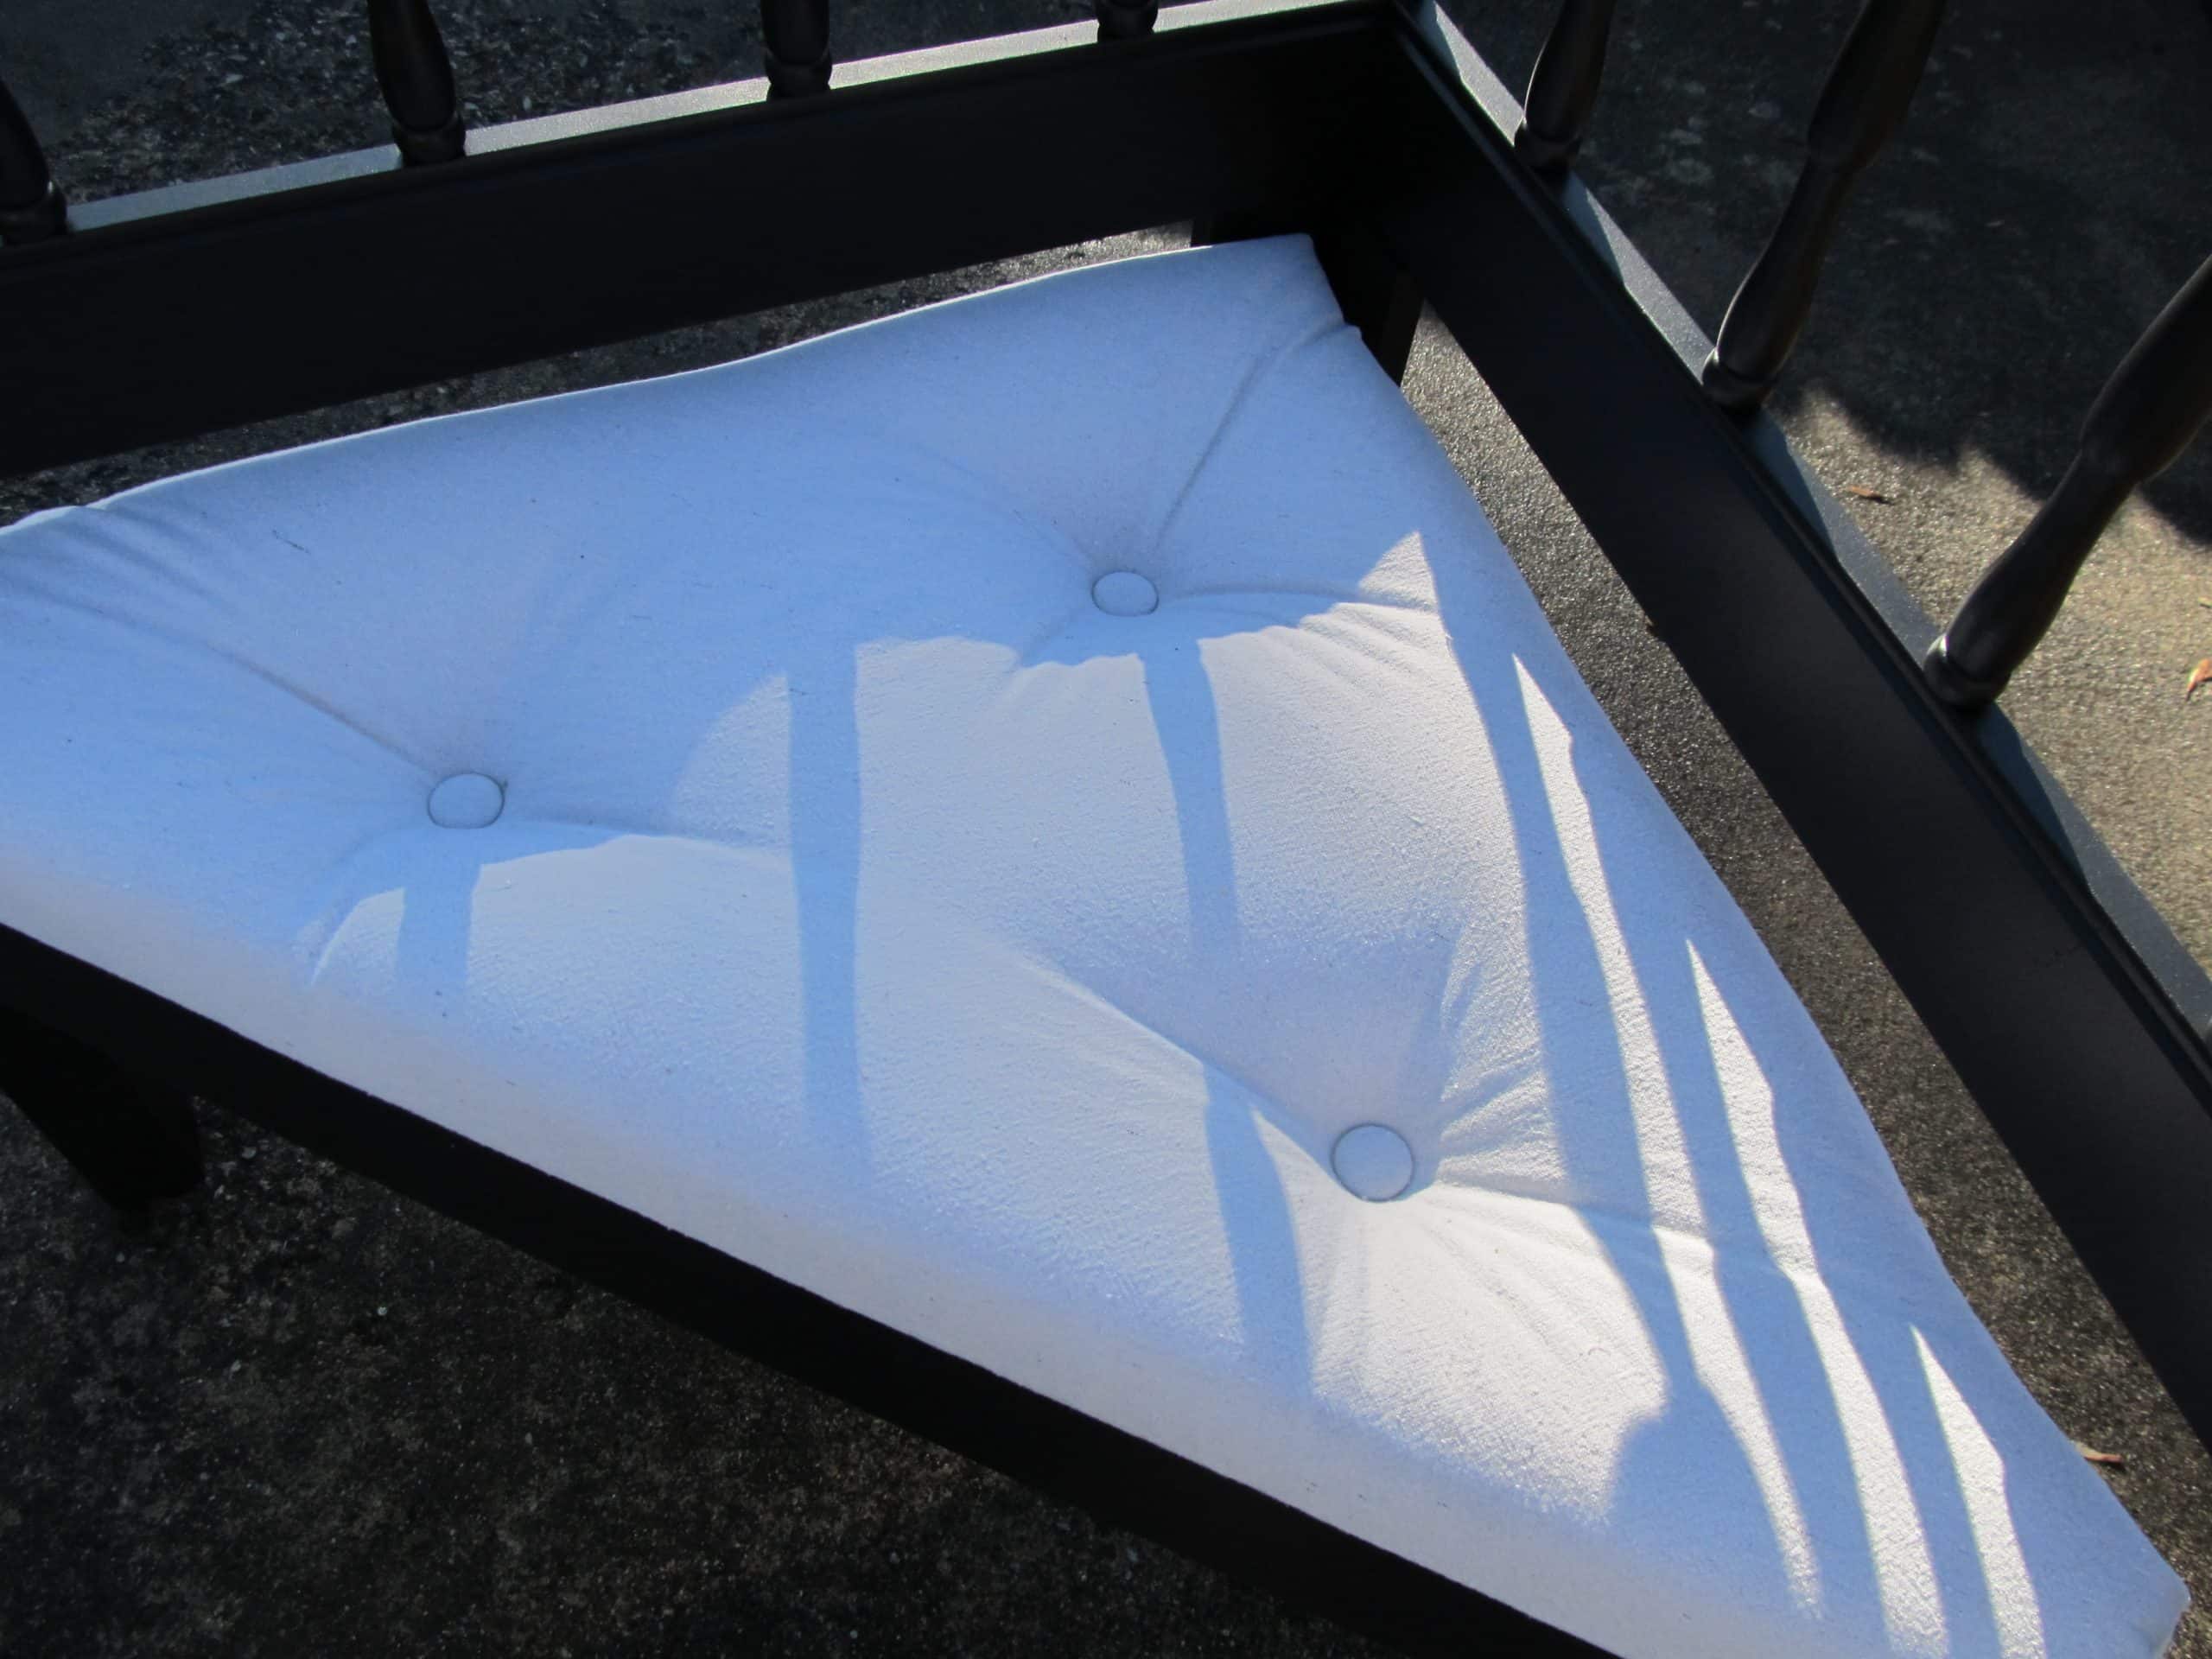
The notches aren’t exactly the same, so I suppose it’s not 100% squared. Hey! I never said I was a perfectionist.
But I think it’s looking pretty darn cute!
I added a couple of small boards to the back leg to help support the top of the headboard. It was sort of suspended in mid-air.
Paint corner bench
Into the paint booth it goes for the HomeRight Finish Max treatment. This is a simple bed, but painting those spindles by hand is not going to happen around here.
This is after one light coat of DIY Chalky Primer with some oops paint. I intended to paint the bench red, but now that I have it primed with black paint…. I'm not sure—what do you think?
I love the finish I get using my HomeRight Finish Max.
I have since painted it with Beluga (Behr), but I don’t have a picture to show you yet.
It seems like this is a period of “non-finished” projects. I need a few warm days to catch up. Right now we are experiencing the Polar Vortex. I hope you are warm wherever you are!
gail
EDITED to ADD new pics
See my article Button Tufting 101 | Three Easy Steps for more details.
See my favorite Mission Style Headboard Bench with Storage-The Complete Tutorial
gail
Gail Wilson is the author and mastermind behind My Repurposed Life. She is obsessed with finding potential in unexpected places and believes that with a little hard work and imagination, any old thing can be made useful again, including herself!
Gail reinvented herself during a midlife crisis and has found purpose again. She hopes you will find new ideas for old things and pick up a few tools along the way.
Mary
Another great job, Gai!!! Mary
Stephanie S.
Thank you for the tutorial. Looks great in black but of course depends where it is going to sit. Love your ideas.
Lisa
How do you attach the back leg to the headboard?
Gail Wilson
Here are more projects to check out.
https://www.myrepurposedlife.com/headboard-corner-bench/
https://www.myrepurposedlife.com/how-to-make-corner-bench-from-headboard/
hopefully one of those projects will help you figure it out. Good luck, have fun!
Beve
Just love the corner bench. Thanks for sharing.
gail@myrepurposedlife.com
Thank you Beve! I think it's time to make another one. 🙂
I appreciate your visit and your comment.
gail
Bob
Love the corner bench. Have a deck on the back of the house I will be building one of these for after I find some head boards this spring at the garage sales. Will use the sprayer for finishing the bench. Keep up the great ideals..
Pam
I so love the benches you make and come out with. You do such a great job. Thanks for sharing Gail.
Jason
Great job. Thanks for sharing the tip about the Kreg Jig (and having the link). I didn't realize that a tool accomplishing that job would be so affordable. That really creates a top notch look and would be a very useful tool on repurposing. I love the addition of the handle on the front of the red one in your title picture.
JMarie813
Actually,...You can have the pieces cut for you at Home Depot,etc.,..so..no worries-!!! :0)
Krista @thehappyhousie
What an amazing reuse- I know I would probably have to paint mine turquoise but it looks stunning in black! (or red... the spindles look so great with a color on them).
Victoria Bolvin
What size headboard do you use for the benches? They are gorgeous!
gail@myrepurposedlife.net
For the corner benches, you need at least a full size headboard. I make regular benches out of twins. I have made regular benches out of fulls but they can be very heavy. (depending on the style of the bed)
thank you for your kind comment!
gail
Terri Hughes
Beautiful as always!
Mo
Patricia from Jan. 7 post. Are you going to sale your Kreg Jig by chance?
Mo
This is a great piece. I think you should paint it red and pop a throw pillow on there. Cute! I have so many outdoor projects that I planned for the first couple of weeks , but the Polar Vortex has got me too 14 degrees here..
Maureen
Love this! such a great idea and the finished product looks incredible!
Kimberly Riner
Looks great! You really inspire me to pick up the tools and get busy! How often do you wake up at night and think of new ideas? 😉
girlfromwva
LOVE IT!!! I looked up the color you have listed and it is so pretty!!! are you going to paint anything the NEW 2014 color this year? the radiant orchid???
Julie @ follow your heart woodworking
I think being self taught is beneficial! You have the freedom to just do whatever, without worry, and you turn out great pieces. Here's a quote for you from early 20th century Ohio woodcarver Ernest Warther, "I know little of the rules of woodworking, so I'm free to violate them."
Pat
No FREE headboard goes UNnoticed around your neighborhood...(or your friend's) I bet!
I like this one. You figured it all out... I would have trouble with the Kreg Jig...we bought that one and used it once, and well... I just haven't used it enough to get the hang of it. The Honey-- can't wrap his mind around it. (so he has closed his mind to using it...even if I suggest it) :/ Oh well.
I like this one black...and some soft comfy grain sack pillows would be cute on there...with some red stripes!
Patricia
Donetta Wolfe
I have a headboard just waiting for your
magic
Sherri R
This is great!! you never cease to amaze me
judy
yes--the Polar Vortex is here in Colorado too
Sharon @ Elizabeth & Co.
Super cute bench and you always have the best tutorials! Stay warm, it's brutal out there!
Cher @ Designs by Studio C
Really awesome, Gail! Sometimes a lunch break is all you need to pull everything together - ha ha!!
Shelley Troy
Your tutorials are great and you give great instructions and pictures. People need to know that it is just like a recipe, you use what you have on hand and experiment....just takes extra effort sometimes:) Sometimes you can find used tools at garage sales and Rome wasn't built in a day. The tools are only part of it..you have to learn to use them which is not always easy..sometimes it is scary! Also remember, ask for a little help..lots of people have tools they aren't using and they may be just looking for something to use them on:) Thanks Gail!
Vicki Sandbothe
This is awesome! What a great idea!
Mindi
This is so AWESOME! Will I ever stop learning from you? Obviously not! I loved how you used your clamp at the bottom of the angled cut because you couldn't clamp it, genius! (that is a good tip.... 🙂 And I am sure Janice above will never read this, but I collected the tools slowly, because I wanted to build so badly, I got my kreg jig off of craig's list for super cheap, I just had to be persistent and patient! I had nothing when I started too, but Gail was the one who inspired me to start, because she is amazing that way, a true teacher!
Oh, and yes we are FREEZING here, below actually. I am building in the kitchen again! 🙂
Danelle - Tattered Treasures
Awesome idea. Deb made a bench out of a head and foot board out of a similar bed… but what a great idea if you only have one side.
katie
Gail this is awesome! I want to find a headboard so I can make one! 🙂
janice
The headboard wood was free but without all those expensive tools you couldn't have done it. It isn't helpful for those of us without access to the tools.
gail@myrepurposedlife.net
I'm sorry you are unable to re-create this project Janice. I am self-taught and have collected my tools over the last 4-5 years. Most aren't all that expensive. My favorite, the Kreg Jig is $40. I have edited the post to show some other benches I've made in years past with less tools.
Have a great day!
gail
Alberto P
I am in the same situation and I am picking up tools here and there. Here is a website of a store near my house that I have been buying items from. http://www.harborfreight.com/#. When I go to yard sales, I am also looking for tools. Like every one is saying, little by little, before you know, it you will have all the tools you need and no project :>.
Holly
Looks great Gail! I'm just waiting for a little warmer weather so I can get some work done. I have orders to start on! 🙂
Victoria Larsen Stencils
Amazingly clever! I get the coolest ideas from you guys and this one is just awesome!
Lisa
I love that! And thank you for showing every step how you make these wonderful items. I enjoy the cleverness as well - wish I had an eighth of your talent!
Sue at Blu
Execellent tutorial girl! You are awesome! I've got a pocket hole jig ready to try...thanks for the inspiration!
Jennifer K. O'Hara
RED all the way baby!
I love this.
I want to learn tools.
I wish my daddio would have taught me more about saws & how to use them.
You are so talented!
Wishing you & yours a Happy Healthy New Year!
Thanks for bringing so many wonderful ideas my way!
♥- jennifer
Terri
Actually it IS warm where I am...about 70 degrees! Sadly, I have nothing to show for it as far as projects I should be doing in these perfect temps! Spending too much time working on Valentine's Day cookies.
I love how this corner bench turned out! Someday I will get one of these made...how lucky that you found a freebie headboard to work with!
Gail Carroll
I really, really, like this project. Appreciate how you express your thought process, makes it so much easier to understand than technical terms.
Susan
I love this corner bench Gail! You are sooooo talented with those tools! Did you teach yourself how to use them? I'm impressed!
gail@myrepurposedlife.net
Susan,
I am self-taught, that's why I get stuck so many times... like I did with this seat. 🙂
gail
Patricia
I really love reading your inspiring transformation of what others perceive as junk! I've seen "free" headboards at garage sales, some out of nice solid wood but no takers - I'll be looking differently now - I can use a great bench like that and your instructions are great! Keep doing what you're doing - I can't wait for summer garage sales so I can try a few of these great projects 🙂
Pam C.
I love this! It's different and unusual from all the other headboard benches I've seen. Well done!!
happy hill
Yet again....fantastic !!!