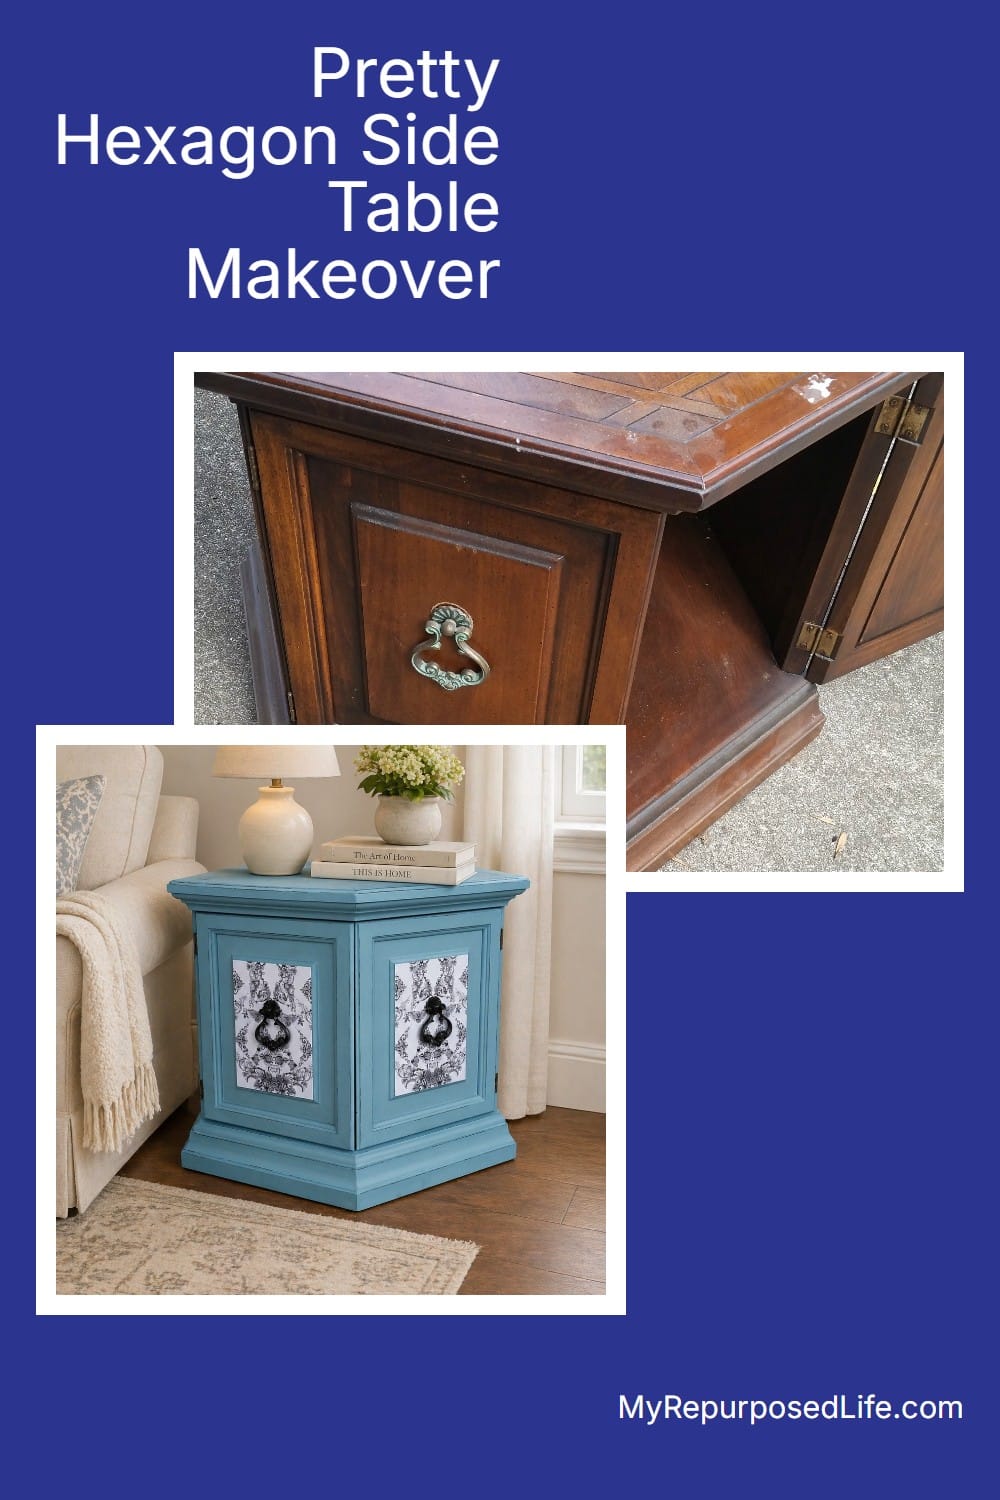
Hexagon Side Table Decoupaged
As an Amazon Associate, I earn from qualifying purchases.
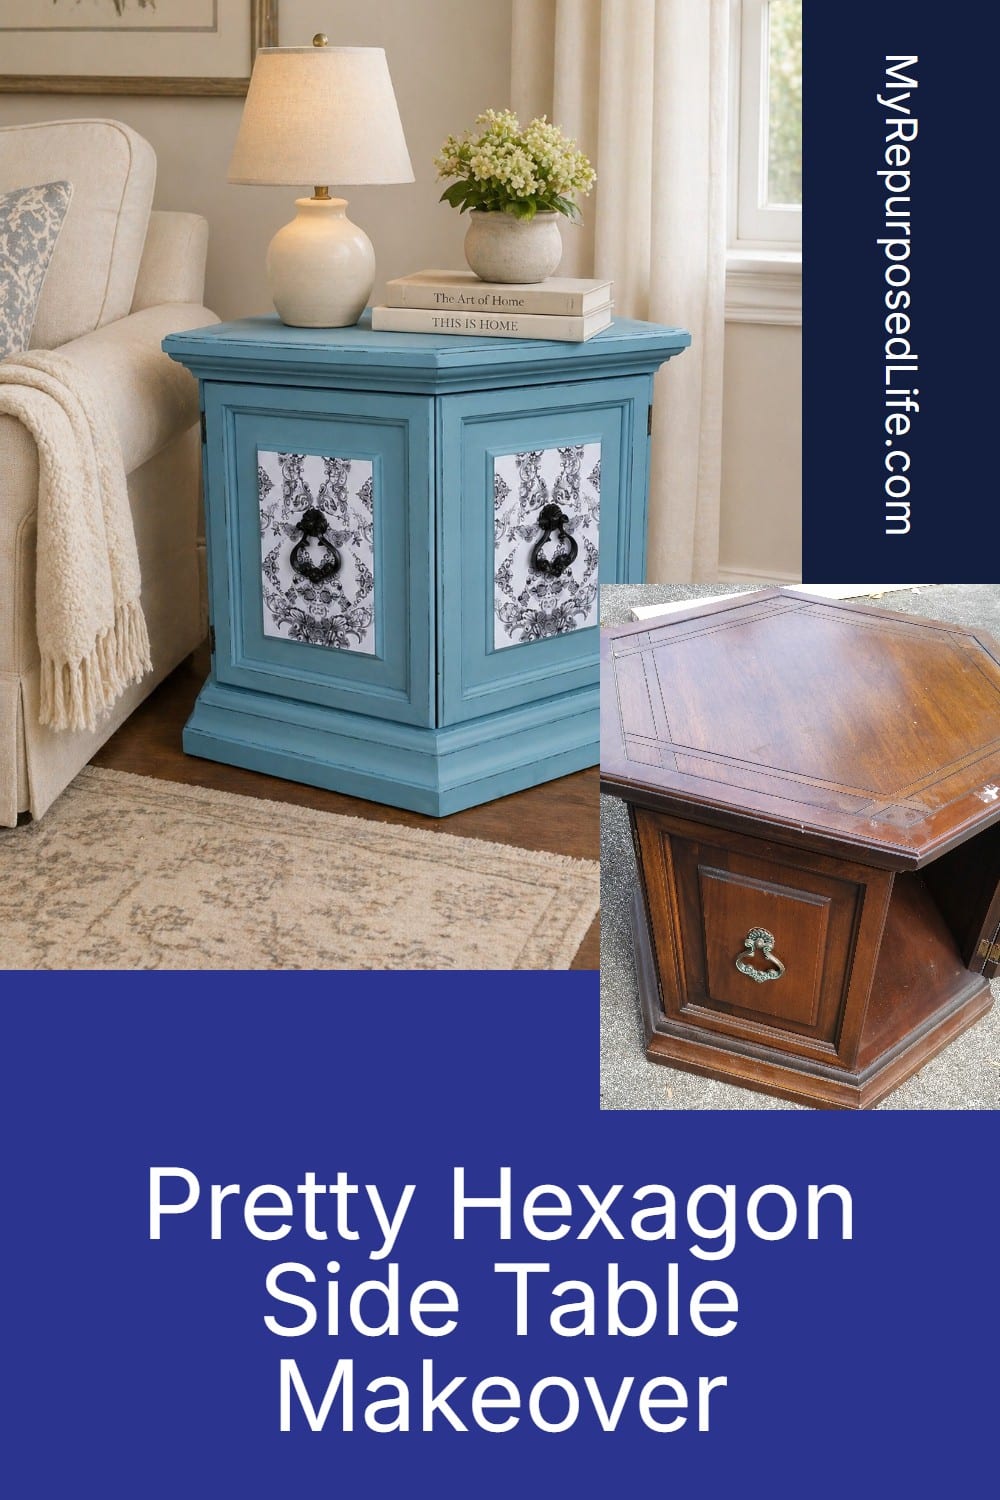
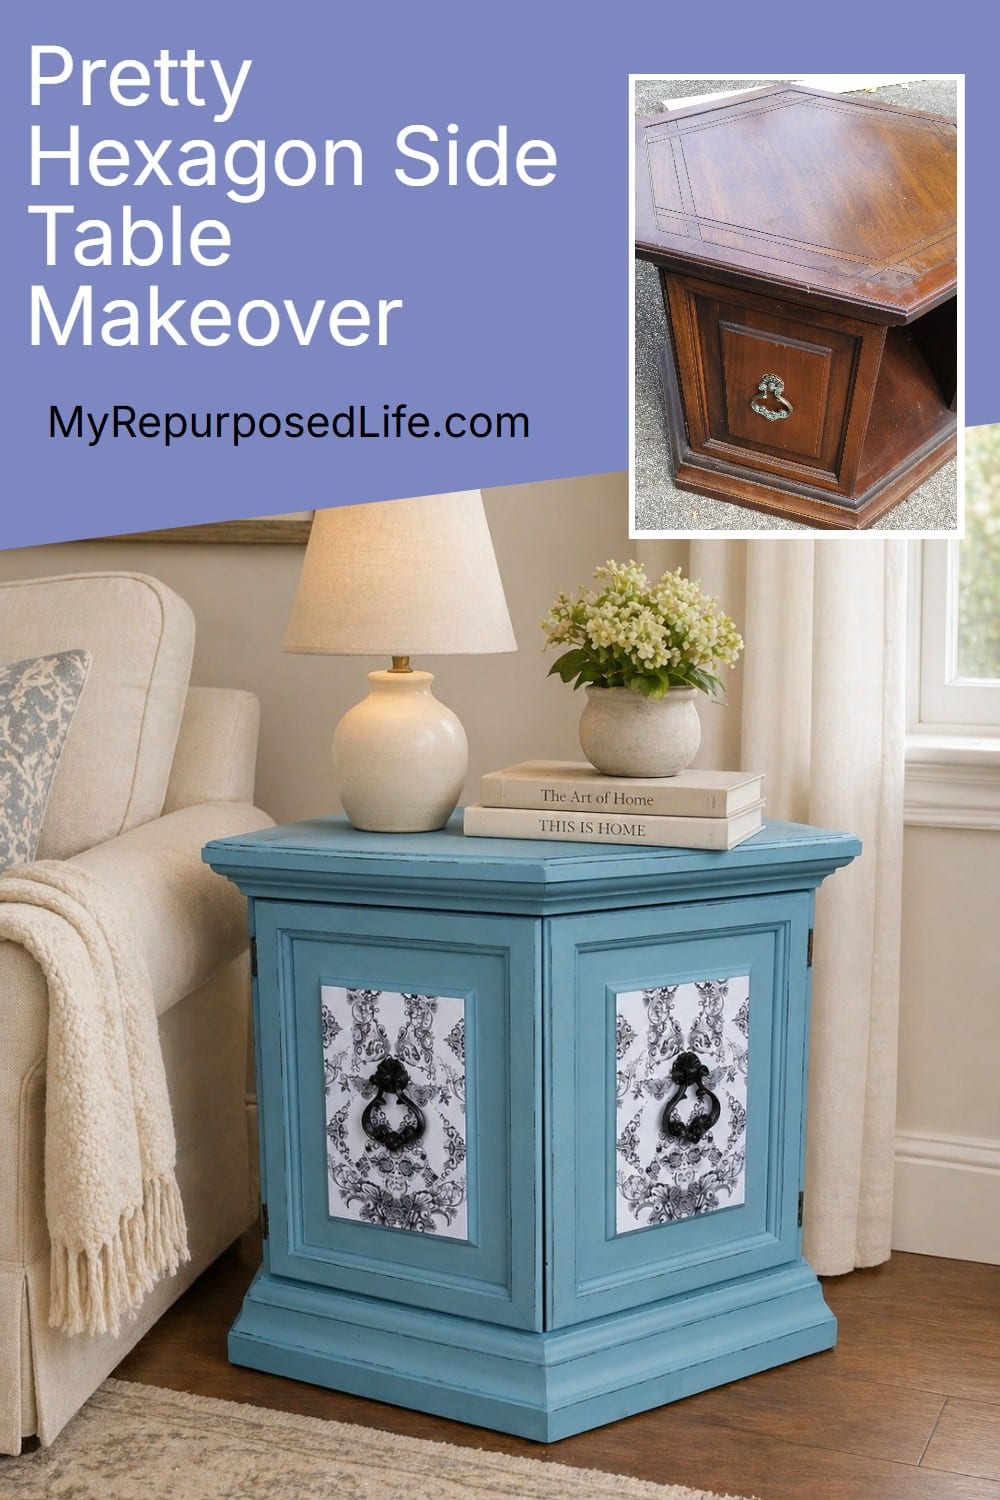
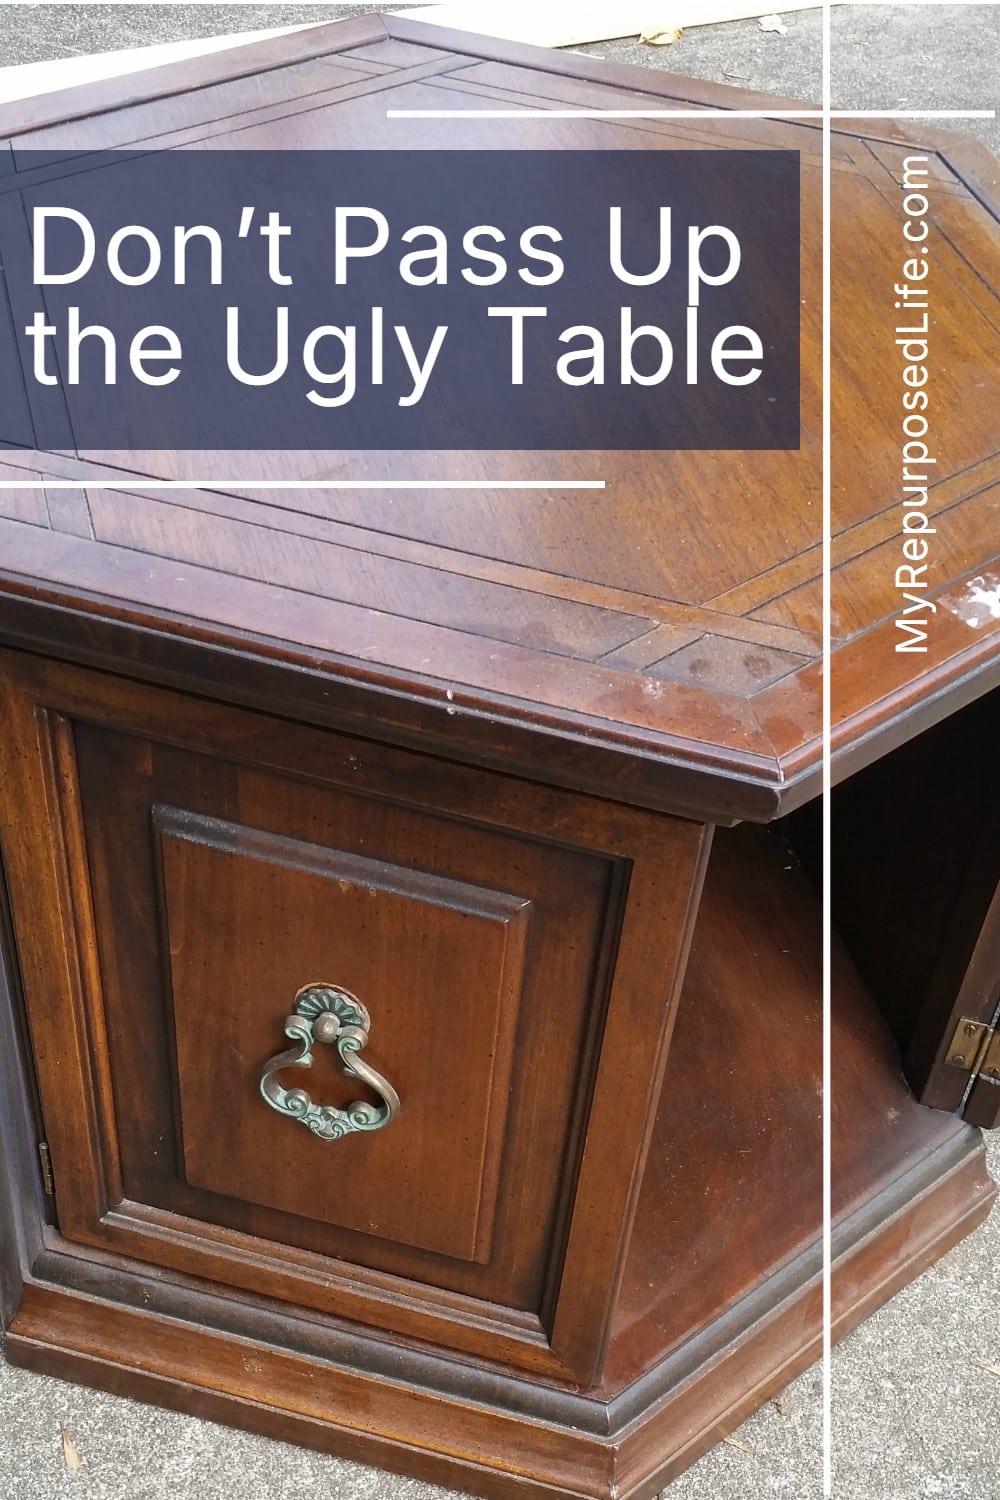
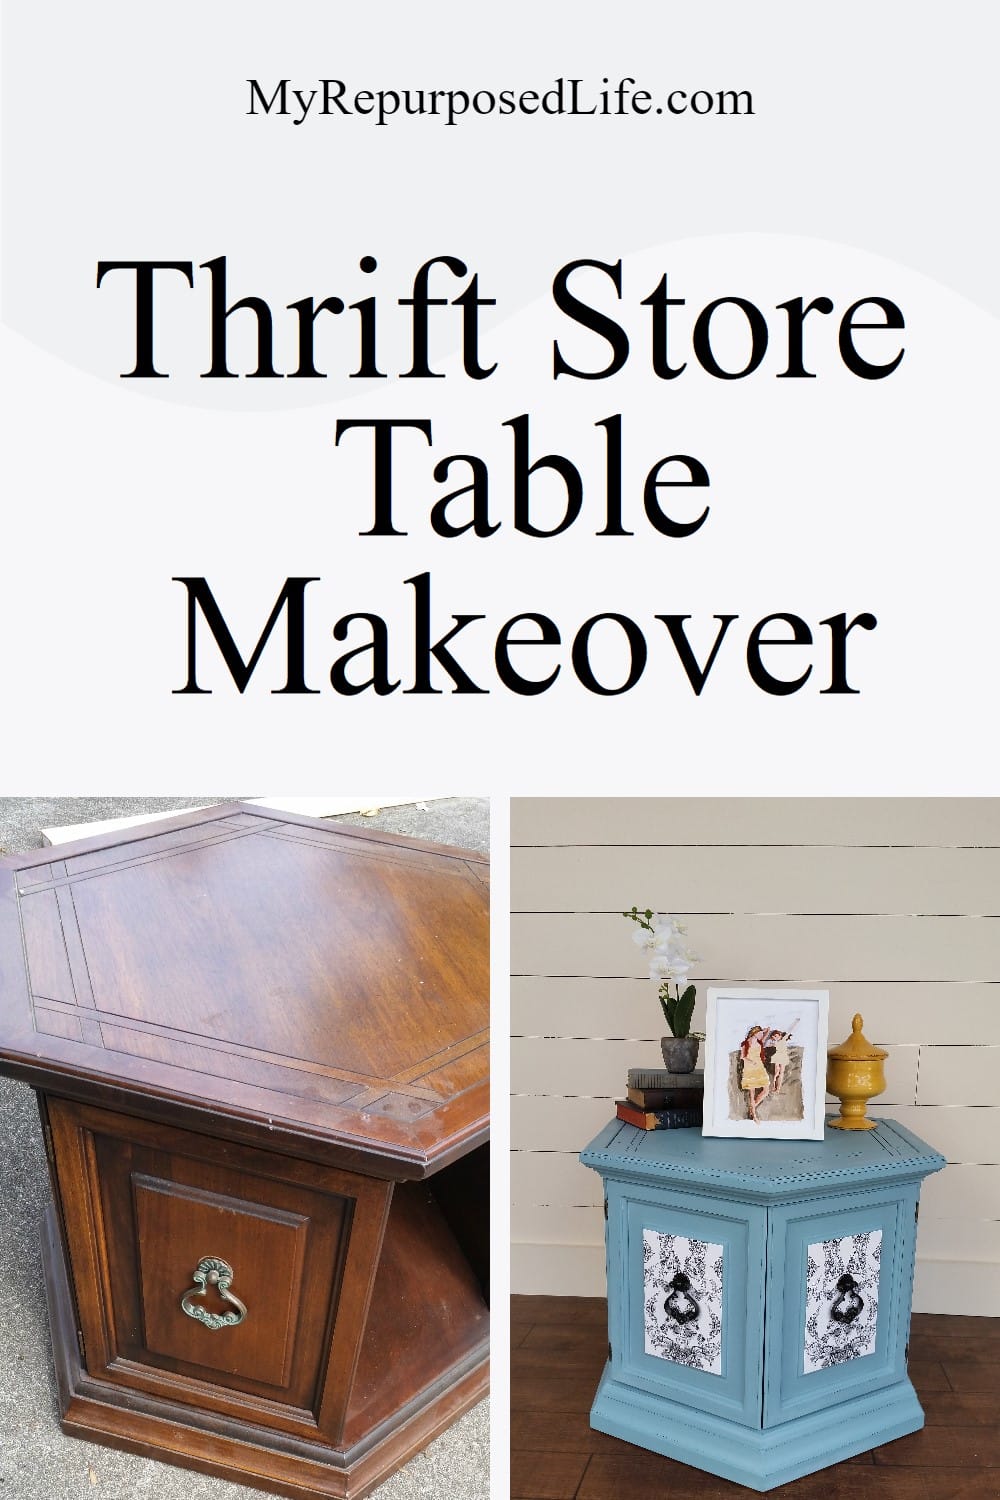
I have a soft spot for odd little tables, especially when they have a fun shape and a tiny price tag. This thrift store hexagon side table had seen better days, but for only $2, it was worth a second look. With paint, a little decoupage, and some simple furniture makeover tricks, this tired brown table became a sweet little accent piece with personality. The best part? You can use wrapping paper, scrapbook paper, napkins, or even leftover wallpaper to get a custom look without spending much at all.
This post is jam-packed with some of my BEST DIY tips!!
Thrift Store Hexagon Side Table

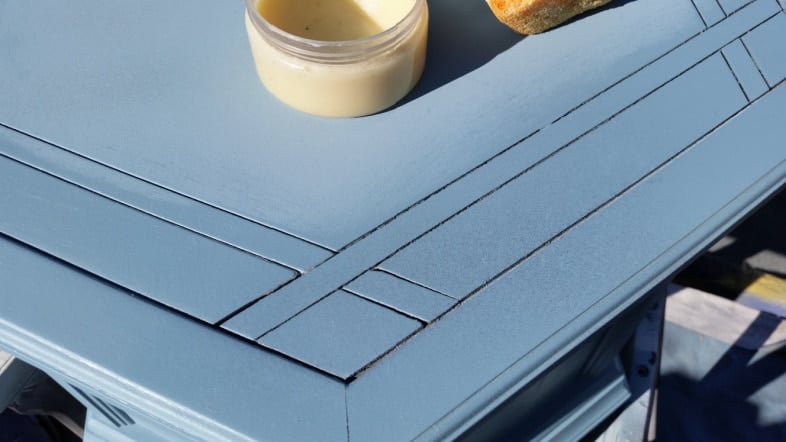
This is what a $2 vintage hexagon side table looks like.
Tip #1: Don’t pass up an ugly (cheap) side table.
I recently took part in a virtual online painting class with Jennifer Allwood. It consisted of several weekly videos of Jennifer showing how she works her magic on furniture pieces.
Clean with TSP
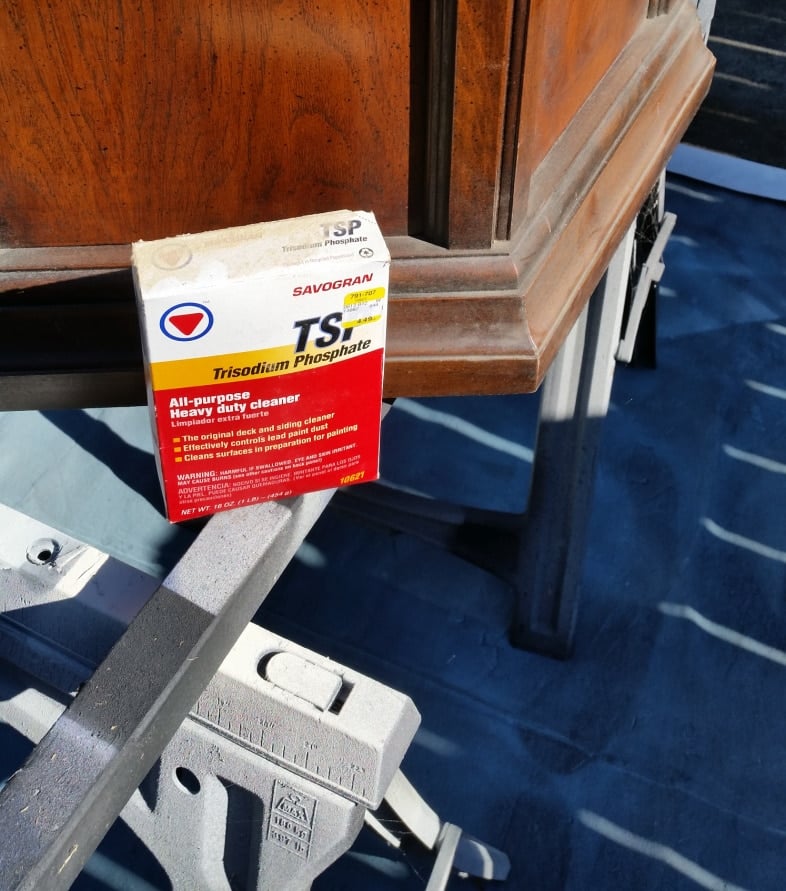
Step one is to clean your project. Now, granted, I typically skip this step and do a quick wipe-down with a cloth. However, this time, I was trying to follow Jennifer’s instructions. I had this TSP in my stash because I do use it when needed. I mixed this powder in a small bucket and used a rag while wearing gloves to protect my hands.
Tip #2: Use TSP to clean all your thrift-store projects.
Cover Hinges with Vaseline

Another great trick I’ve learned (from Refunk My Junk) is to use Vaseline on hinges you don’t want to paint (OR remove)
Notice how clean the table is after the TSP treatment.
Tip # 3: Use Vaseline to coat hinges and protect them from paint.
DIY Chalky Paint Primer made with Plaster of Paris

As usual, I mixed up some DIY Chalky Paint Primer using some Plaster of Paris. This time, I used some Valspar mis-tint paint. This is the method I use for 99% of my projects. Click the link for details on the chalky paint primer.
Tip #4: Use homemade chalk paint as a primer
Easy Painting with Finish Max

I used my Homeright Finish Max to paint the hexagon side table to get the best coverage quickly,

The DIY Chalky Paint Primer is very flat; that’s what makes it a great primer.
Tip #5: Get a flawless finish with a paint sprayer
Sand Between Coats with Brown Craft Paper
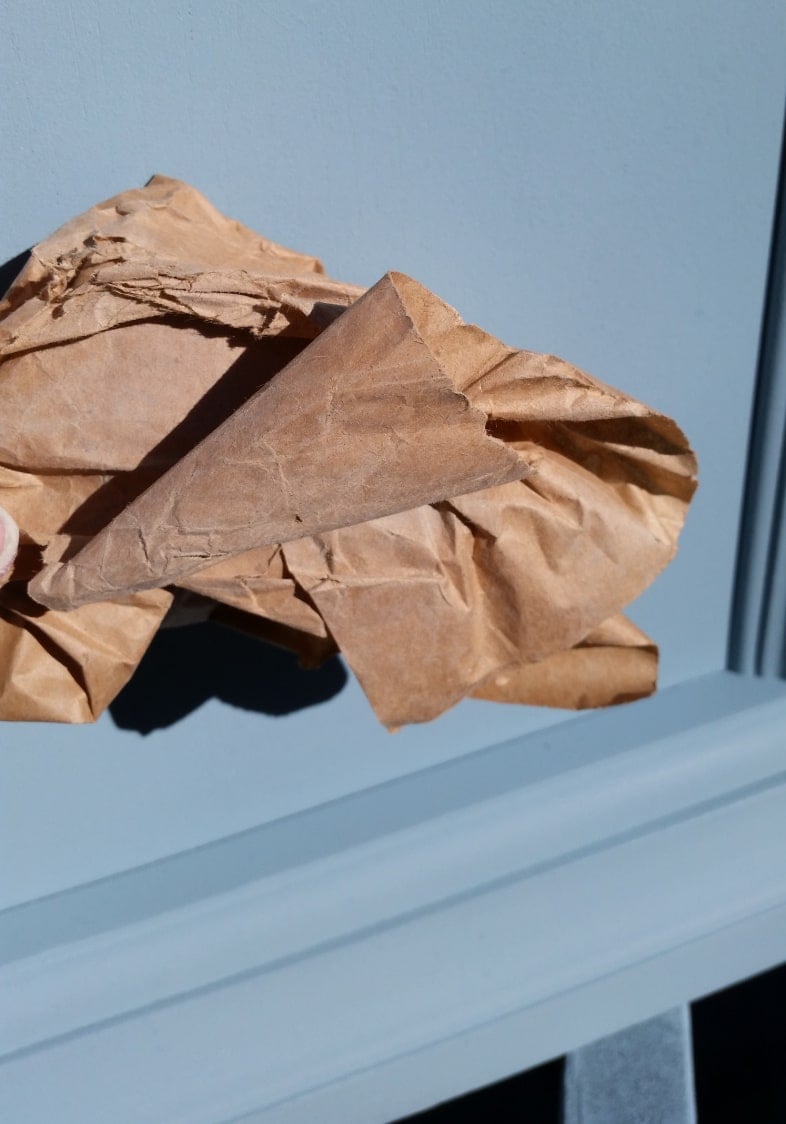
I receive many packages in the mail that are wrapped in thin brown craft paper. This paper sands just as well, if not better than, high-grit sandpaper. A light sanding with the craft paper makes the diy chalky paint primer very smooth.
Tip #6: Use craft paper instead of sandpaper or steel wool in between coats. It’s FREE
Apply Clear Wax with a Damp Sponge

One of the best things I learned from Jennifer was to use a sponge to apply the Heirloom Traditions Wax.
Tip #7: Dampen your sponge before applying wax.
If you look closely, you can see how the wax deepens the color slightly after it is applied with the sponge.
Lightly Distress with an Emery Board

I used a small emery board to apply some light distressing to the entire hexagon side table. Note that the hinges are free of paint due to the vaseline.
Tip #8: Use an emery board for light distressing. Because it has two different grits, you get the perfect distressing every time.
Spray Paint Vintage Hardware

I decided to keep the original vintage hardware but update it with some Krylon Dual Spray Paint.
Tip #9: Use spray paint to update old hardware. Several light coats are best. Follow the directions on the can for dry time. Directions vary by brand and sheen.
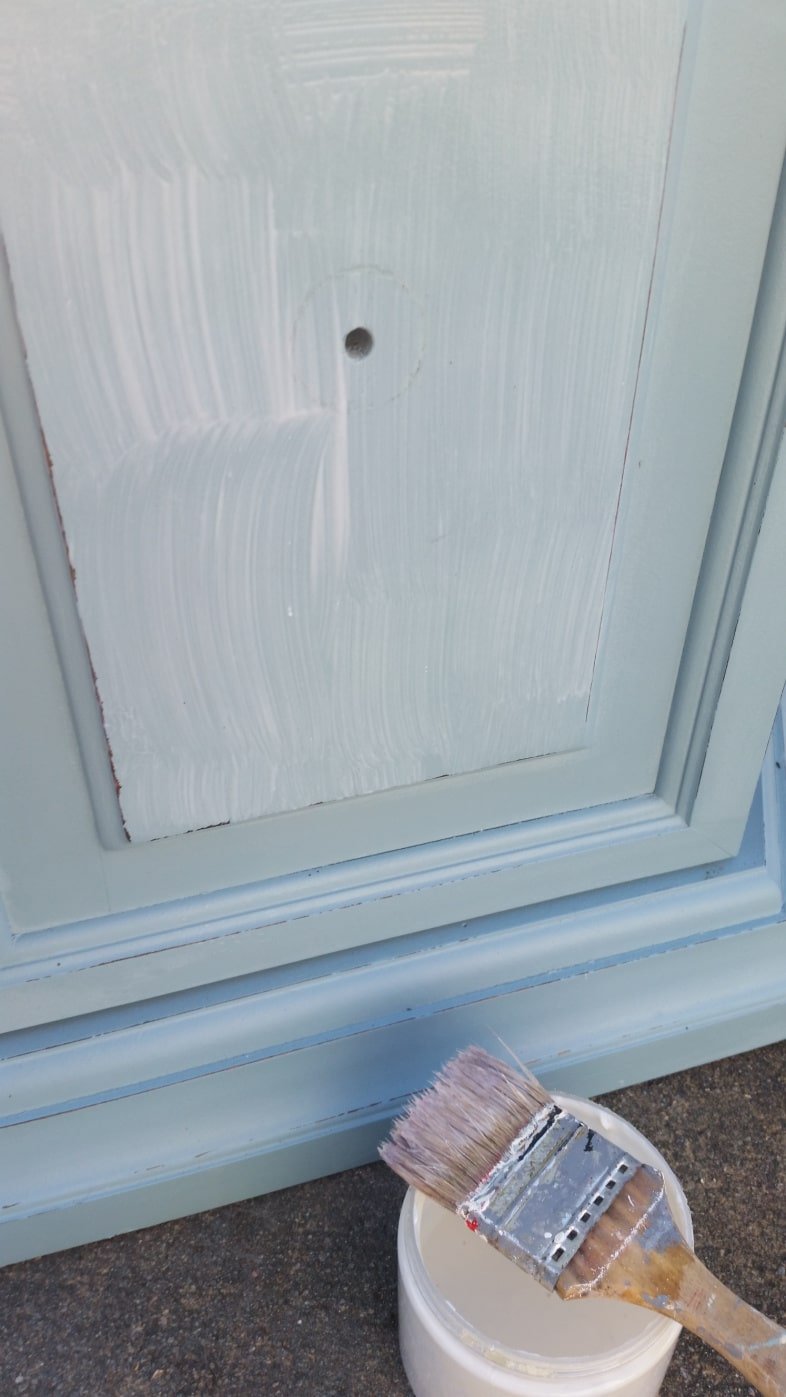
Touch up Doors

Because I wanted this project to be a quickie, I left the doors closed while I sprayed the hexagon table with the Finish Max. After the cabinet dried slightly, I used the remaining paint from the paint cup to touch up the doors. You can see that I used a cheap chip brush to paint the door on the left, on top, and on the side,to give it a “finished” look. I took this picture to show you the before and after of the touch-up.
Decoupage with Wrapping Paper

On a recent trip to IKEA I picked up this pack of wrapping paper. Jennifer had done some decoupage on one of her projects, so I thought this paper would be perfect for my thrift store hexagon table.
Tip #10: Use wrapping paper for decoupaging.
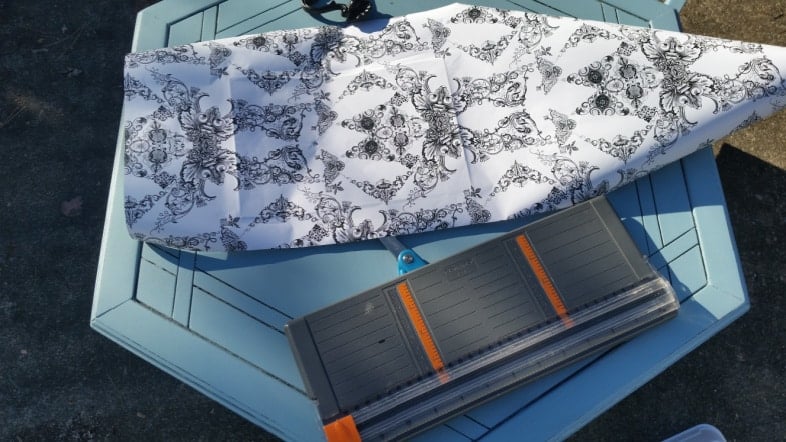
I cut a piece of paper approximately the size of the door. Then I placed the paper on the door and creased the edges so I would know where to cut. I used a Fiskars Paper Cutter to get a nice, straight edge.
For this project, I used some Heirloom Traditions 1 Gel to adhere my wrapping paper to the hexagon table’s doors. I brushed it on with a chip brush, laid the paper on, and then painted on some more of the 1Gel. You could use Mod Podge or any decoupage medium.
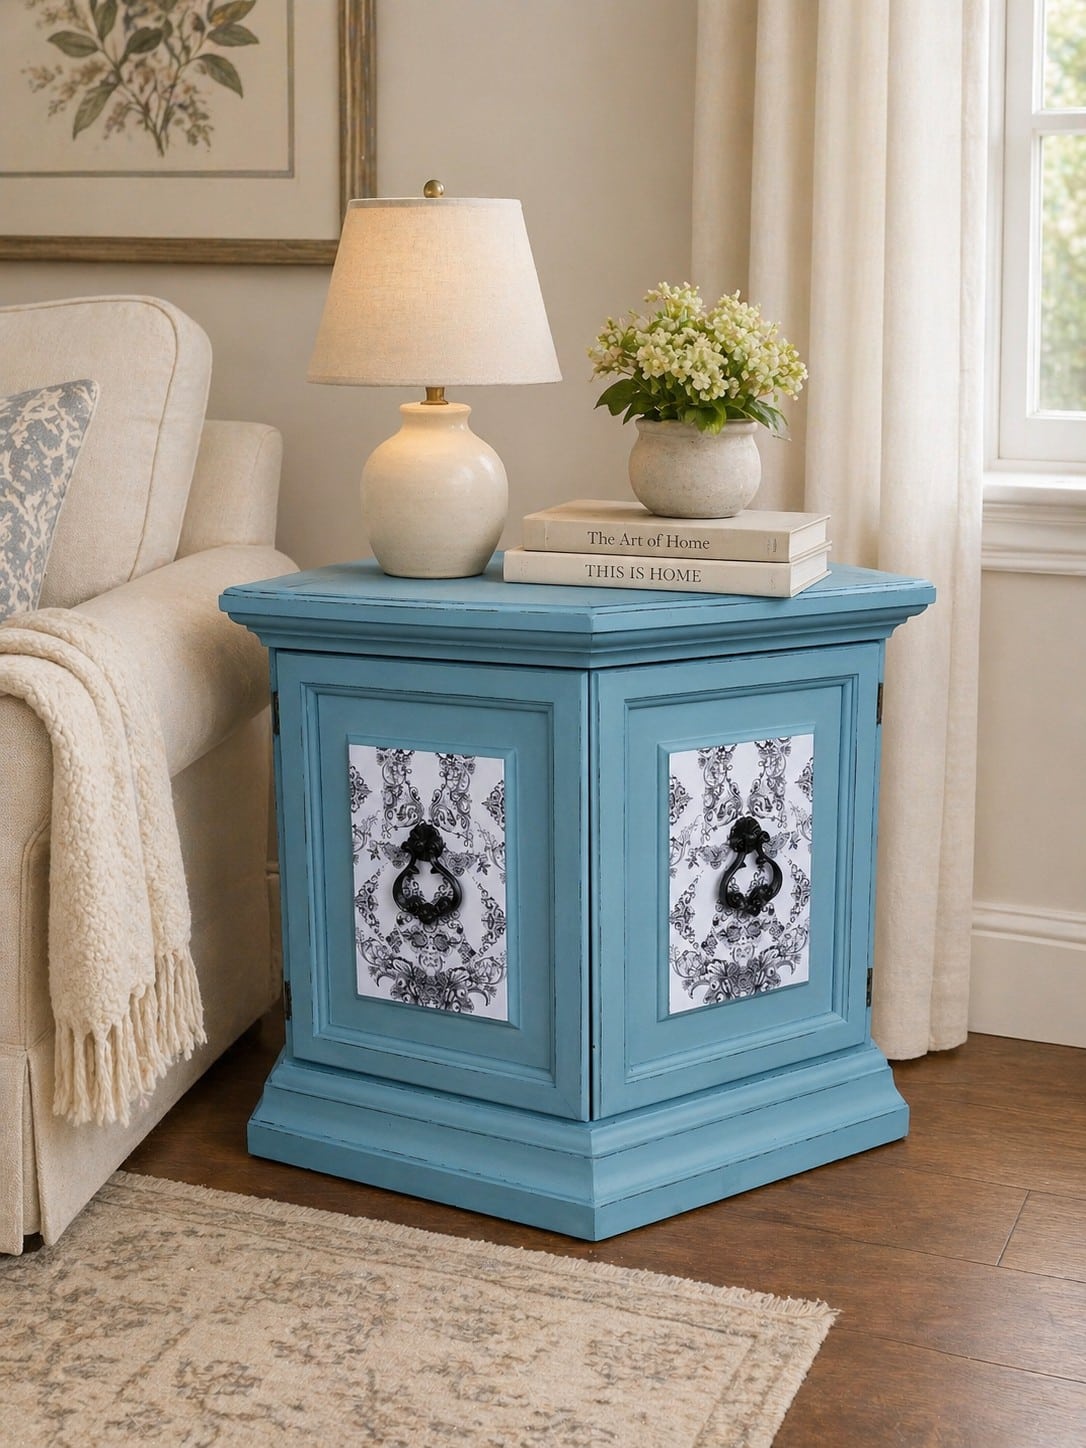
Decoupaged Blue Hexagon Side Table
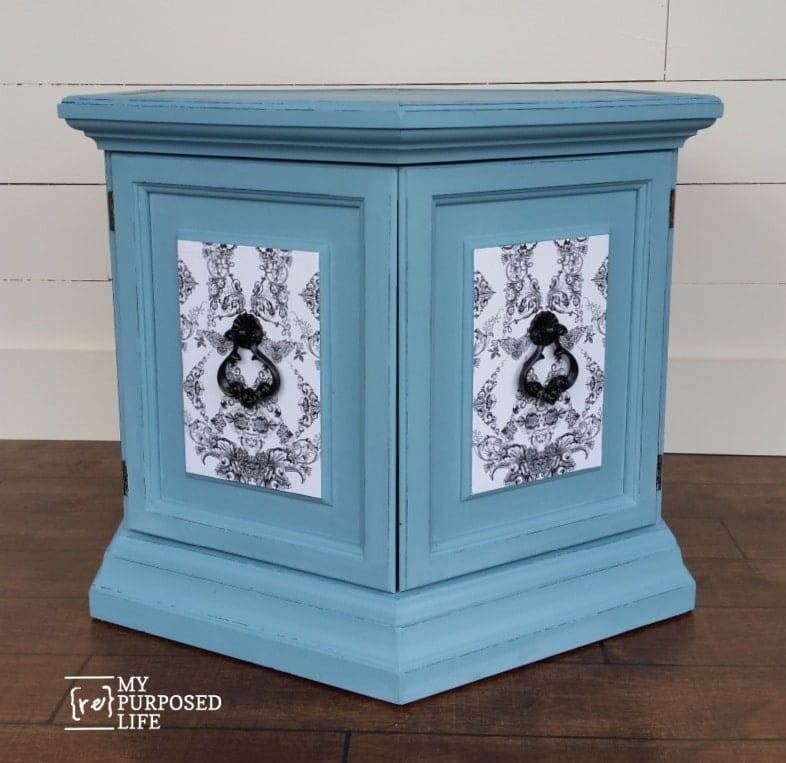
I reattached the hardware, and Voila! I was done! This wrapping paper is funny! Do you see what I see in it? Under the handle?
This is the same blue I used on the Triple Chair Bench, but this table has clear wax, whereas the Triple Chair Bench has white wax.
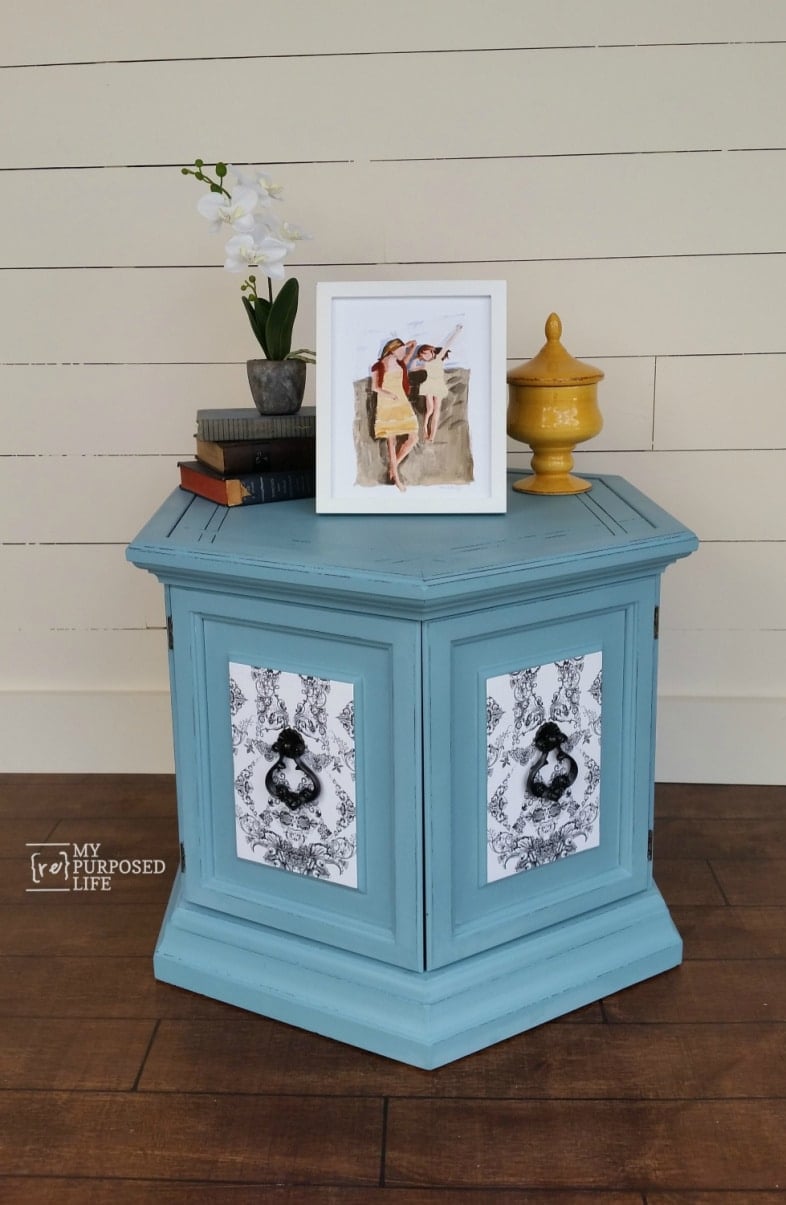
I love how this little thrift store hexagon table turned out!
Styling Suggestion for a Thrift Store Hexagon Table
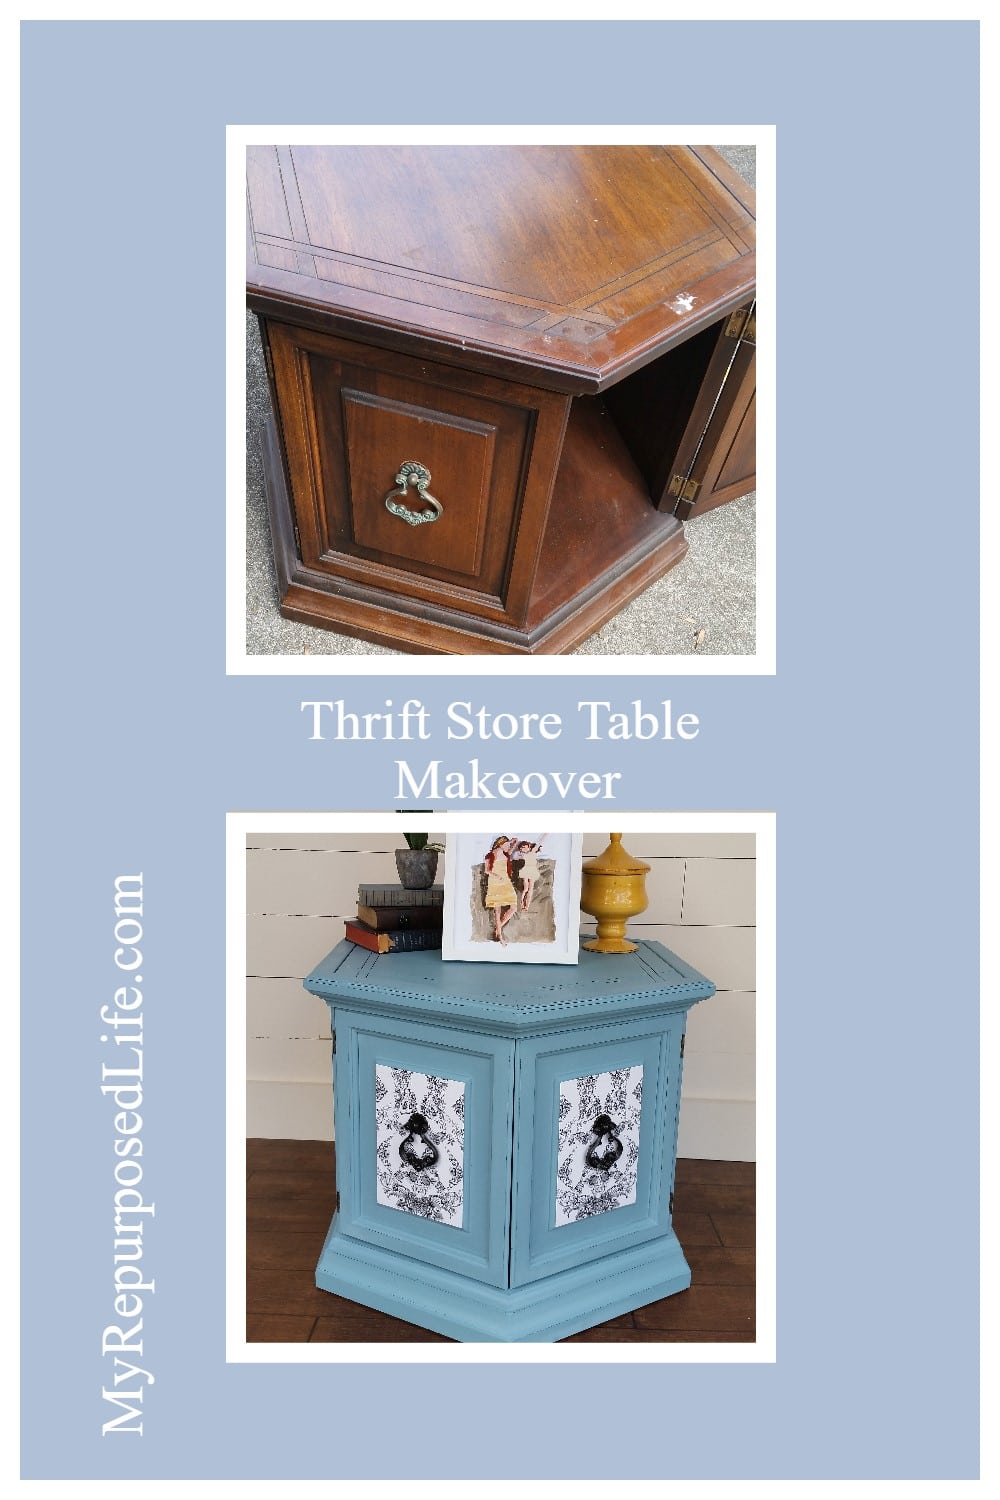
Before & After Hexagon Side Table Makeover
If you love this thrift store makeover, you should see these:
Easy iPad Stand or Tablet Holder