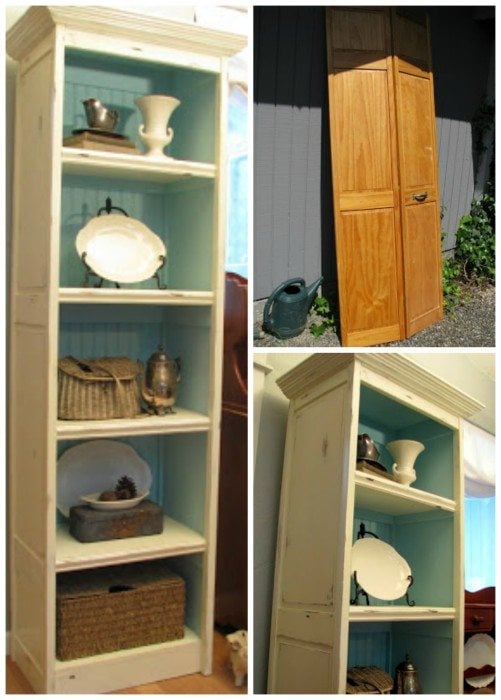
Repurposed Bi-fold Doors Bookcase
As an Amazon Associate, I earn from qualifying purchases.
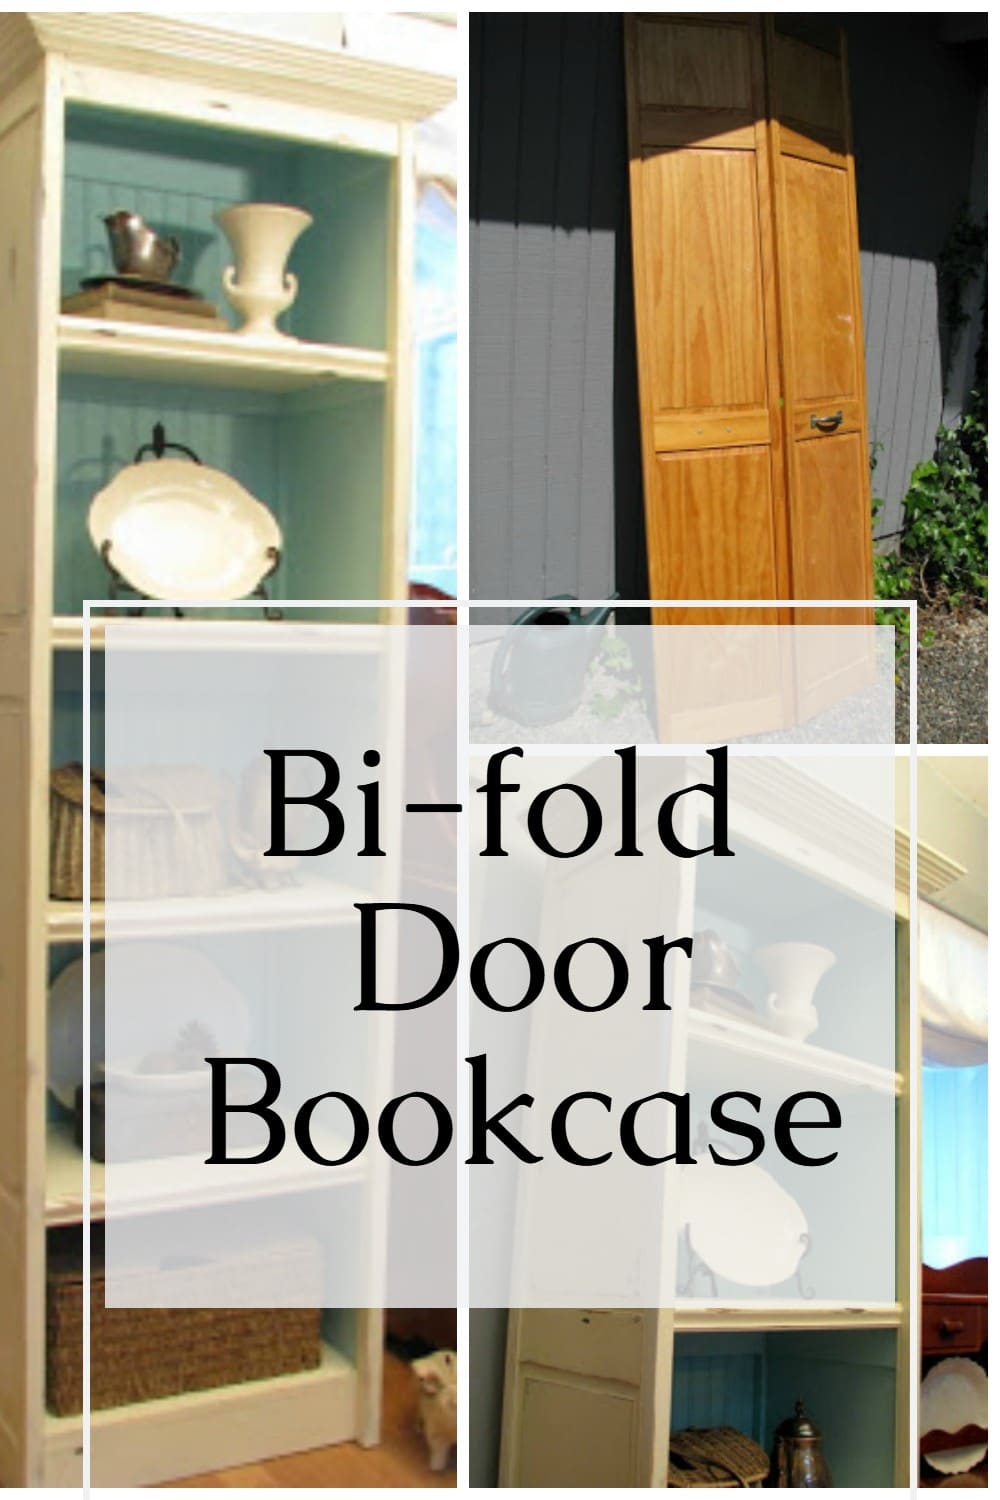
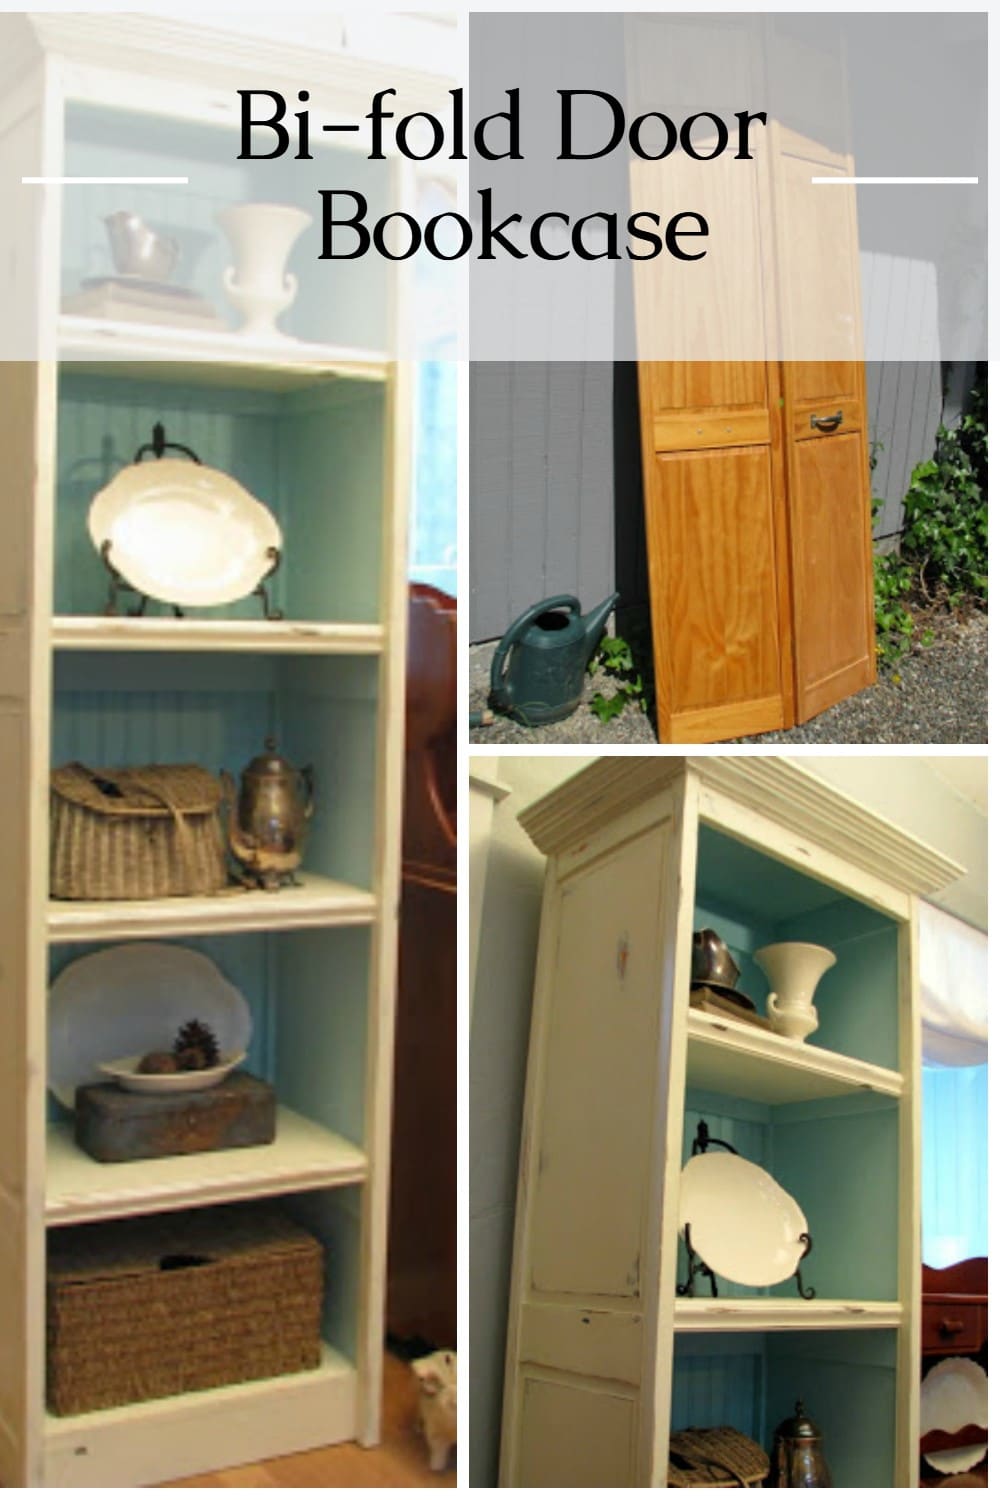
How to make a bookcase out of repurposed bi-fold doors.

Hi, I’m Mimi from the Blue Roof Cabin Blog. I am so happy Gail allowed me to guest post on MRL today. Gail’s blog is my favorite! I love a good repurpose, don’t you?
Repurposed Bi-fold Doors

I started with two bi-fold wood doors I picked up at the Restore.

After removing all the hinges and handles, I first routered a channel into the doors for the back to fit into. I used 1/4″ pine beadboard boards for the back—you know, the kind that comes wrapped up in packages at the big home stores.
To determine the width of my bookcase, I cut the tongue off one of the beadboard boards and dry-fitted them all together. I measured and subtracted for the channels and cut my 1 x 4s accordingly.
Pocket Hole Joinery

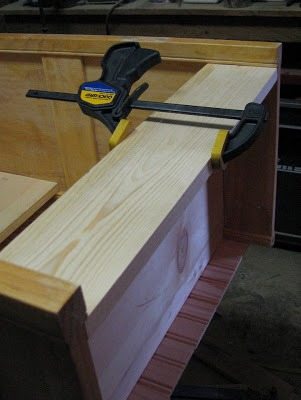
I attached a 1 x 4 to the bottom front similarly.

Attach The Back of the Bookcase

Then, I attached the bead board to the back with glue and nails.

I made the shelves by gluing and clamping together 1 x pine board. I had to notch out the back corner of each shelf with my jigsaw. The shelves were all secured to the bookcase with glue and nails.
Secure Shelves for Bi-fold Doors Bookcase

I wanted more shelves than there were 1 x 4’s so I used 3/8″ x 2″ trim to support the additional shelves. I glued and nailed them to the edges of the bi-fold doors and through the bead board back.
Add Trim to Bookcase

I decided to router the edge of the top board for the top of the bookshelf to continue the crown molding look. I like big crowns.

Because bi-fold doors are designed with a gap between the crown and the middle part of the top, I filled it by gluing and nailing a 1/4″ dowel to the door. Don’t you think it ties in with the bead of the bead board?

I finished the edges of the shelves off with some trim I picked up at the Restore.
It’s Time to Paint the Bi-Fold Door Bookcase

I started by priming the whole cabinet with oil-based primer for the paint finish because the bi-fold doors appeared to have been sealed with oil-based poly. How did I know? I could tell by their lovely yellowness.
So, I decided to do a two-tone and try a new technique I have seen around the blogosphere. I used a flat latex Robin’s Egg Blue color for the inside. For the outside, I tried the vaseline technique to get a chippy look.

The first coat was a layer of dark brown latex. Once that dried, I randomly touched areas I wanted to look “chippy” with the vaseline. The paint won’t stick to where you put the Vaseline. I didn’t go overboard with it because I didn’t want it to look like a spotted cow.

Since I liked the look, I’m so used to sanding to distress that I started sanding and then sanding over the whole thing with my palm sander. I like how the finish turned out, so I finished the entire thing with clear acrylic satin. I have been using chalk paint so much lately that it was fun to play with good old latex again.
Repurposed Bi-fold Door Bookcase

This bi-fold door bookcase turned out tall.

There you have it. If you like this post, I’d love for you to stop by my blog and check out some of my other re-purpose projects like:
Kitchen Island from a Salvaged Door
Salvaged Door into Dining Room Banquette
If you’re not into doors, check out my project gallery for furniture makeovers, re-upholstery projects, and more.
Thanks for reading!
Mimi, you know I love a great door repurpose! I’m also a fan of the Habitat for Humanity ReStore! I love this bookcase; the color is perfect!
gail
See More Door Project Ideas Here
Bookcase made with armoire doors
I believe that this project (not mine) was a solid door. However I have done this project https://www.myrepurposedlife.com/2010/06/door-repurposed-into-blanket-chest.html with a hollow core door, using scraps of lumber to fill the gaps to strengthen the door.
Thanks for stopping by and taking the time to leave a comment/question
gail