• Skip to primary navigation
  • Skip to main content
  • Skip to primary sidebar
  • Start Here
  • Shop Favorites
  • About
    • Welcome To My Repurposed Life Home of Repurposed Furniture
    • More About Gail
    • Disclosure
    • Privacy Information
  • Gallery
    • Repurposed Furniture
  • Repurposed Items
    • Building Supplies
    • Miscellaneous Household Items
    • Picture Frame/Chalk Board
  • DIY
    • Home Reno
    • outdoor living
    • Painting
    • Shop Talk
    • Tips for Around the House
    • Build It
      • Furniture
      • Home Decor
      • Storage
    • Crafts
      • Dollar Store
      • Easy
      • Holidays Seasonal
  • Furniture
    • Chair
    • Desk
    • Dresser/Chest
    • Headboard | Bed Parts | Cribs
    • Kids Furniture
    • Table
    • Kids Furniture
My Repurposed Life® Rescue Re-imagine Repeat
menu icon
go to homepage
subscribe
search icon
Homepage link
  • About
  • Start Here
  • Project Index
  • Furniture
  • Subscribe
    • Email
    • Facebook
    • Instagram
    • Pinterest
    • RSS
    • Twitter
  • ×

    Home » Crafts » IOD roller stamped drop cloth grommet curtains

    IOD roller stamped drop cloth grommet curtains

    Published by Gail | Published February 7, 2017 | Updated June 28, 2021
    As an Amazon Associate I earn from qualifying purchases.

    Pin
    Share
    Tweet

    I love drop cloths for craft projects. I have wanted to make some grommet drop cloth curtains for a while, I’m always late to the party. When Iron Orchid Designs offered to send me some of their new décor roller stamps, I knew they would be perfect for diy curtains.


    *this post contains affiliate links*

    iod roller stampsThese are the two IOD Roller Stamps I got. One is  Iron Gate and  the smaller one is Roma.

    Using a roller stamp on drop cloth curtains

    iron orchid designs roller stampsAlthough my drop cloths are cheap and plentiful, I decided to do a test “roll” on a scrap piece. I lined a tray with some tin foil and poured in a little Repose by Heirloom Traditions Paint This large stamp is Iron Gate, I wasn’t able to find it on Amazon.

    Testing the Roller Stamp Pattern

    iron gate roller stamp testThis is the test run! Easy, pretty, and fun! The sisters said in their video that you can expect to roll about 10’ with each load.

    roma roller stamp on drop clothThere really wasn’t a plan, but I decided to do Roma along the bottom hem, and Iron Gate above that. I was able to load the roller stamp and easily make it all the way across the 6’ drop cloth. It’s a little wavy, but so is the hem of the drop cloth. Winking smile

    Roller Stamping is so EASY

    drop cloth curtain with roller stamp design painted onIsn’t this Repose color (gray) beautiful against the neutral drop cloth material?

    PIN IT!

    drop cloth curtain heirloom traditions paint and IOD roller stampsRemember when I said there wasn’t really a plan? After putting the Roma, and the Iron Gate, I decided to do another Roma border. I LOVE it!

    heirloom traditions repose IOD roller stamps on a trayI was a little intimidated to use these roller stamps, but I shouldn’t have been. It really was fun and easy.

    hang painted drop cloth curtain to dryI hung the drop cloth curtain panels on my diy picket fence to dry. Honestly, I was just so proud of them, I wanted to show them off.

    NOTE: I did not pre-wash my drop cloths. I’ve washed plenty of them before, and I know they get very wrinkled and sort of bumpy. At this point they hadn't been ironed  because I didn’t want to waste my time should I screw it up. I didn’t use a fabric sealer with the paint, so I am not sure how the paint will hold up in the wash.

    How to clean roller stamps

    clean roller stamps with hoseA garden hose was used to clean the paint out of the foam and the stamp. It was much easier to clean than I anticipated.

    cleaning drying iod roller stampsI rolled a dish towel in between the stamp and the roller a couple of times to help get any water out of the foam.

    Add Grommets to Drop Cloth Curtain Panels

    Now on to the next step!

    brown grommetsI ordered three sets of these brown grommets on Amazon.

    top of diy drop cloth grommet curtainsI really don’t like to sew, and since these curtains will probably be temporary and for staging projects with my portable wall  I really took the easy route to attach the grommets to the top of the drop cloth.

    After measuring, I knew I would have to remove about 5” off the top. I did a little “snip” and “rip” removing what I needed. I folded over the raw edge (about 4 ½”) , then folded that over again to make about a 5” .

    Easy Curtain Grommet Tutorial

    measure for grommets

    After doing some math (not my strong suit) I decided on 12 grommets for each 6 ft curtain panel. I started on one side, putting the first grommet slightly away from the hem, and 2 ½” from the top. Because I had three packages of the grommets I was able to use more than one tracing guide. I used my hem guide to help with the spacing. (it is typically stored with my silhouette supplies for gauging vinyl placement)


    how to add grommets

    I cut through 3 layers of the drop cloth, placed the ringed grommet underneath, and the pronged grommet on top. A simple press with my palm and I had my first grommet in place.

    a few things you should know:

    • The grommets are plastic
    • Lining all of your grommets up along your traced lines will speed things up
    • Cutting the circle and immediately doing that grommet is the best way to go, one at a time
    • If the grommet seems stubborn, and doesn’t want to snap, a slight twist of your palm, will line it up so it easily snaps in place.


    2016-09-19 14.45.20Remember, the ringed grommet goes on the “right” side of the curtain panel, and the pronged grommet goes on the “wrong” side of the curtain panel.


    diy grommet curtainsYou can see a purchased grommet curtain that I brought out to use for placement. It didn’t really help.

    Make your own grommet curtains

     diy stamped drop cloth grommet curtain panelAnd, they are done! Well, almost—I still need to iron and hang them.

    PIN IT!

    drop cloth grommet paint roller stamp curtains MyRepurposedLife.com

    Here they are hanging with my latest diy headboard bench. I actually did a video showing you how to make this small headboard bench.


    how to paint stencil roller stamp drop cloth grommet curtains MyRepurposedLife.com

    Now I can say I’ve made grommet drop cloth curtains with fun stenciled (roller stamps) using paint! aka painted drop cloth curtains.

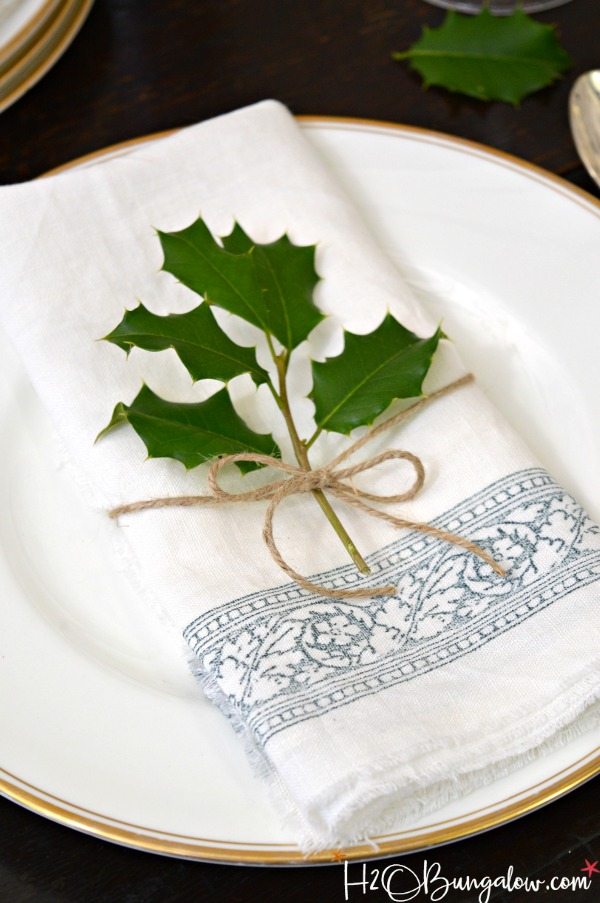
    There are so many ways you can use these roller stamps. My friend Wendi from H2o Bungalow made these awesome DIY Napkins.

    How would you use these fabulous roller stamps?

    gail

    Print Friendly, PDF & Email
    Pin
    Share
    Tweet

    Related Content:

    • Pet Projects - DIY ideas for your furbabies
      Pet Projects - DIY ideas for your furbabies
    • small thrift store footstool makeover
      small thrift store footstool makeover
    • Successful Craft Show Tips
      Successful Craft Show Tips
    • Repurposed tv Stand Dog Bed
      Repurposed tv Stand Dog Bed
    • Picnic Table into Decorative Barn Gate
      Picnic Table into Decorative Barn Gate
    • Rustic Fence as Mantel Decor
      Rustic Fence as Mantel Decor

    Reader Interactions

    Comments

      See comments Cancel reply

      Your email address will not be published. Required fields are marked *

      This site uses Akismet to reduce spam. Learn how your comment data is processed.

    1. LYNN STEVENS

      January 12, 2019 at 5:38 am

      Hi Lynn
      I I'm wondering if I should wash my drop cloth I love the look but I can't take the smell. I bought the same brand that Gail bought....any ideas ?

      Reply
    2. LYNN STEVENS

      January 12, 2019 at 5:34 am

      Hi Gail ,
      I love this look ! I love my new drop cloth curtain. I knew it needed a little something... I can't take the smell though and I'm too afraid to wash it. Do you think if I washed it and I earned it would be okay?

      Reply
      • Gail Wilson

        January 12, 2019 at 9:45 pm

        Lynn,

        If you're going to wash it, I recommend washing it several times - maybe with a little bleach. You can just wash it several times, or wash/dry wash/dry wash/dry. They come out of the wash very wrinkled and a little stiff. 🙂 I've washed and ironed a fair share of drop cloths! 🙂

        good luck!
        gail

    3. Lynn Fowler

      February 16, 2017 at 11:42 am

      Hi Gail, I tried to email you an answer to how well the painting will hold up on your curtains if washed. For some reason, the email didn`t go through. Soooo, if you heat set the paint with an iron, they are washable. I have even used a little bleach in the wash with my pillowcovers I had stenciled and they did fine.

      Reply
      • Gail Wilson

        February 16, 2017 at 11:47 am

        Great to know Lynn! Thanks for sharing your tips for heat setting paint on fabric. I appreciate it.

        gail

    4. Mary-the boondocks blog

      February 11, 2017 at 8:41 pm

      Gail this is such a fun idea. The stamp really makes the curtains look extravagant. Why they look like they came from a high-end store. Great thinking.

      Reply
      • Gail Wilson

        February 11, 2017 at 9:53 pm

        Thank you Mary so much for your kind comment. I appreciate you taking the time to leave a comment.

        gail

    5. Serena @ Thrift Diving

      February 11, 2017 at 10:19 am

      These are so cute, Gai! When I used my roller stamps, I didn't get such good results because I was trying to do a whole PANEL of curtain and not just the bottom and I couldn't figure out how to overlap them so they'd look right. I like how you just did one pass, and used the other one on the top and bottom. I'll give it a go again. These are super cute! I actually need curtains in my other room, so I'll do this. 🙂 Sharing on my FB page!

      Reply
      • Gail Wilson

        February 11, 2017 at 10:03 pm

        Thanks for sharing Serena! 🙂 This was really a lot of fun! I hope your next project goes smoothly!

        gail

    6. Lynn Fowler

      February 08, 2017 at 8:11 pm

      I have painted lots of fabric with regular acrylics and latex house paint. I always let the paint dry then cover with another piece of fabric and heat set the paint with my iron. Works great. I also have DIY drop cloth curtains in my family room. Love them. The paint treatment you did looks great.

      Reply
      • Gail Wilson

        February 09, 2017 at 8:53 am

        Lynn,

        When you heat set with the iron, does it make it washable? I've done printing on fabric (with a printer) and folks are always asking how to make it washable. . .

        gail

    7. sally

      February 08, 2017 at 5:10 pm

      I absolutely LOVE this tutorial Gail and just in time for me to make my drop cloth curtains. thank you for making our products shine like you always do!

      Reply
      • Gail Wilson

        February 08, 2017 at 5:36 pm

        Sally, I love all your products, but this might be my favorite ever. Sooo easy and lots of bang for your buck! 🙂

        gail

    8. Linda Manuel

      February 08, 2017 at 4:54 pm

      Got to find those stencils and do this! I have already made the drop cloth curtains and this sure would dress them up.

      Reply
      • Gail Wilson

        February 08, 2017 at 5:08 pm

        ohhh, Linda--they aren't stencils, they are paint roller stamps. So much easier than stencils. Load it with paint, then go all the way across the bottom in one swipe. sooo easy!

        gail

    9. Patty

      February 08, 2017 at 4:43 pm

      Gail they are absolutely beautiful. I have two "Frenchie" chairs that I bought used several years ago. They have a beautiful silk fabric on them but because of age they split and need to be re-done. I could see them done with this method but with blue paint. Thanks for sharing.

      Reply
      • Gail Wilson

        February 08, 2017 at 5:09 pm

        Patty,

        That sounds very pretty with blue paint. These are so easy, and can be done anywhere, on furniture-walls . . . the ideas are endless!

        gail

    10. chris aka monkey

      February 08, 2017 at 2:22 pm

      wow gail these turned out so cool, i have wanted to make drop cloth curtains for my grandsons room because they are little hellions, but other grommet posts made it look to hard and using those stencils will make them look so much better xx

      Reply
      • Gail Wilson

        February 08, 2017 at 5:10 pm

        Chris,

        I hate to sew! 🙂 I had to find a way to do this without sewing. I know some people use fusing tape instead of sewing....

    11. Donna Moore

      February 08, 2017 at 1:57 pm

      Love what you did. Just the inspiration I needed to do my own DIY draperies. Beautiful. Thank you for sharing.

      Reply
      • Gail Wilson

        February 08, 2017 at 5:12 pm

        So happy to inspire you Donna! These roller stamps aren't just for fabric. They can be used on furniture, walls and more!

        gail

    12. Melissa

      February 07, 2017 at 5:25 pm

      Gorgeous!

      Reply
    13. Dee

      February 07, 2017 at 5:23 pm

      What a cool project. Love the width of the stencil. Good job.

      Reply

    Primary Sidebar

    Hi, there! I’m Gail Wilson, the author and mastermind behind My Repurposed Life. I’m obsessed with finding potential in unexpected places and believe that with a little hard work and imagination, any old thing can be made useful again—myself included! I hope you’ll enjoy the journey and pick up a few tools along the way… literally!

    More about me →

    Join Our Mailing List

    ​

      Click the topics you're interested in below:

      Subscribing above means you agree to our Privacy Policy​

      Footer

      ↑ back to top

      SEEN ON

      Might I Suggest

      • Start Here
      • Furniture Makeovers

      Newsletter

      • Sign Up! for emails and updates

      About

      • Gail's Favorites on Amazon
      • About

      As an Amazon Associate I earn from qualifying purchases.

      Copyright © 2023 My Repurposed Life · Privacy Policy · Disclosure