Reupholster Rocking Chair
As an Amazon Associate, I earn from qualifying purchases.
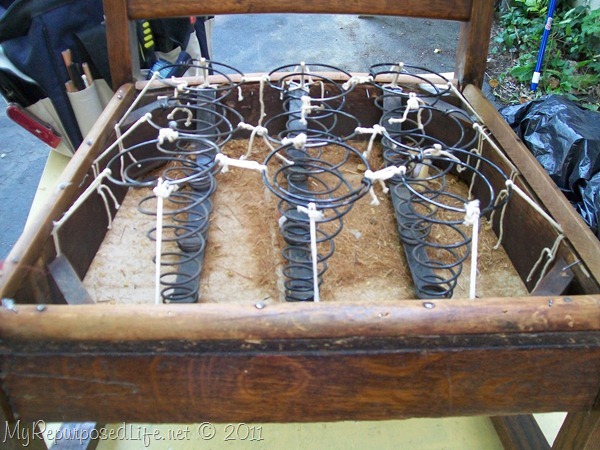
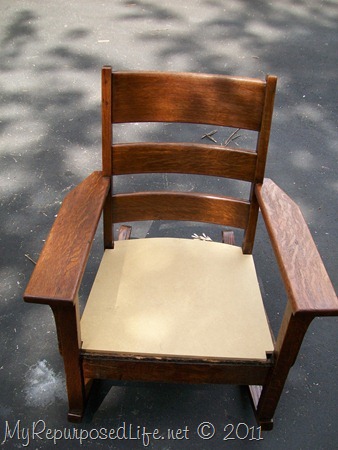
Yesterday, I showed you how to repair and stain an antique rocking chair.


Today, I’m going to show you how to reupholster rocking chair.
I used the seat to make a pattern to cut the foam.
Using a serrated knife is really the only way to cut foam. (a lot of people used electric knives, but I don’t own one)
This is where it gets a little funny. Jan and I both thought the front board should be covered up because it was in such bad shape.
I sent Jan these photos to see which way she’d prefer the front board to be covered.
We both agreed that it would look better to cover the skirt individually and then the cushion separate. You can see some cotton batting in the left corner. I don’t have pictures, but I put the cotton batting over the foam cushion.
This chair is huge, and it about whooped my behind! I was so sore from crawling around the living room floor.
I pulled and tugged on that leather so much. I don’t have any “in progress” pictures. If you’ve ever battled with something like this before, you know that you get so caught up in the “fight” that you forget to pick up your camera till it’s almost over.
Not pictured – To attach the seat to the skirt, I used 4 “L” brackets, one on each of the four sides.
This chair is so large and wide that it was nearly impossible for me to move it around by myself. It’s so wide, that it wouldn’t fit through the bedroom door without turning it over on it’s side. Jan and her husband really love their new chair.
EDITED TO ADD: (Jan’s comment from below)
Hubby loves, loves, loves this chair. A little story about the leather. Hubby had bought it to reupholster a Dukes of Hazard car he had purchased 25 years ago. Unfortunately, the car was stolen last year and all hubby had left of it was this leather.
So this rocker really means a lot to him.
gail

![101_0034[3] 101_0034[3]](https://lh5.ggpht.com/-LcjFFr4dzD0/TlGM1L6nrrI/AAAAAAAAOcs/OcyXvegSz4w/101_0034%25255B3%25255D_thumb.jpg?imgmax=800)
![101_0038[3] 101_0038[3]](https://lh5.ggpht.com/-f9z2fDb10S8/TlGM2Y0-RpI/AAAAAAAAOc0/dZll4oG196w/101_0038%25255B3%25255D_thumb.jpg?imgmax=800)
![101_0042[3] 101_0042[3]](https://lh3.ggpht.com/-XjV9XIPgA_c/TlGM3e4kioI/AAAAAAAAOc8/XB8ty_Sa7Z8/101_0042%25255B3%25255D_thumb.jpg?imgmax=800)
![101_0045[3] 101_0045[3]](https://lh3.ggpht.com/-qKWkd2yTLbA/TlGM5lUzOuI/AAAAAAAAOdE/jXXQo-Pafw0/101_0045%25255B3%25255D_thumb.jpg?imgmax=800)
![101_0050[3] 101_0050[3]](https://lh4.ggpht.com/-Tw9v3XGlqnw/TlGM65yDq7I/AAAAAAAAOdM/faPzdXj_OAE/101_0050%25255B3%25255D_thumb.jpg?imgmax=800)
![101_0055[3] 101_0055[3]](https://lh3.ggpht.com/-DCzXjNXmMzY/TlGM8EQdTdI/AAAAAAAAOdU/mIRQt6SGhJE/101_0055%25255B3%25255D_thumb.jpg?imgmax=800)
![100_9183[3] 100_9183[3]](https://lh6.ggpht.com/-DGz4zE8Ji88/TlGM9P1glyI/AAAAAAAAOdc/s3Uf9aMIwvo/100_9183%25255B3%25255D_thumb.jpg?imgmax=800)
![100_9184[3] 100_9184[3]](https://lh3.ggpht.com/-X7hoAgwzUQ8/TlGM-CxFhZI/AAAAAAAAOdk/XslQLF62SQ0/100_9184%25255B3%25255D_thumb.jpg?imgmax=800)
![100_9185[3] 100_9185[3]](https://lh5.ggpht.com/-CjFCYvMTI0M/TlGM_7d8yVI/AAAAAAAAOds/YutWS4h0g-Y/100_9185%25255B3%25255D_thumb.jpg?imgmax=800)
![100_9186[3] 100_9186[3]](https://lh6.ggpht.com/-d434QpB2vMM/TlGNAyh9U8I/AAAAAAAAOd0/Cslp9LhLzeE/100_9186%25255B3%25255D_thumb.jpg?imgmax=800)
![100_9376[3] 100_9376[3]](https://lh3.ggpht.com/-YbOLpHc-YtA/TlGNB7YOAxI/AAAAAAAAOd8/TTe9YNRWzVs/100_9376%25255B3%25255D_thumb.jpg?imgmax=800)
You did it again! Looks awesome 🙂
that looks to me kind of like an intimidating project, but you make it look so easy!
that looks to me kind of like an intimidating project, but you make it look so easy!
Love it!
Holly
Love it!
Holly
I KNOW THIS IS OFF THE SUBJECT BUT I WOULD LIKE TO PICK YOUR BRAIN…I HAVE SOME LEFT OVER DRAWER FRONTS..WHAT CAN I DO WITH THEM? ITS JUST THE FACES OF THE DRAWER..THE REST OF THE DRAWER AND I JUST COULDNT THROW THEM AWAY
so cool! great job! Boo for stolen cars!
Wow! What a great looking chair! I love the leather, and the way you recovered it looks so good~very professional.
A massive chair like this deserves nothing but leather.
I LOVE it! …great job, Gail!
Pat
I LOVE this chair! When I saw it, it reminded me of one I use to have and gave away because I was redecorating….Ugh! Now, I’m ready for it again! You did a fantastic job, and thanks for sharing the part abut hubbies car. That makes it even more special.
Awesome! Thanks for the great tips. Martha’s got nothing on you! Thanks for sharing. -K
It turned out beautifully. I hate cutting foam, it gives me the chills. I use an electric knife and grin and bear it.