Kid Storage Bench
As an Amazon Associate, I earn from qualifying purchases.
Hello! Greetings from Colorado, it is Mindi again from My Love 2 Create. Sometimes I get inspiration for projects from other sources and sometimes they come because of necessity. Today’s post is one of necessity, but not for me…for my little sister, a Kid Storage Bench.

My sister and her family surprised us this week with a short visit. We were thrilled to have them here! She has 4 adorable little girls 5 and under…yeah I know, crazy, but oh so cute!
I was gearing up for a project and was quite stumped on what to do. So she was helping me by thinking of things that she needed. That was all I needed…a spark, a direction.
How to make a kid storage bench
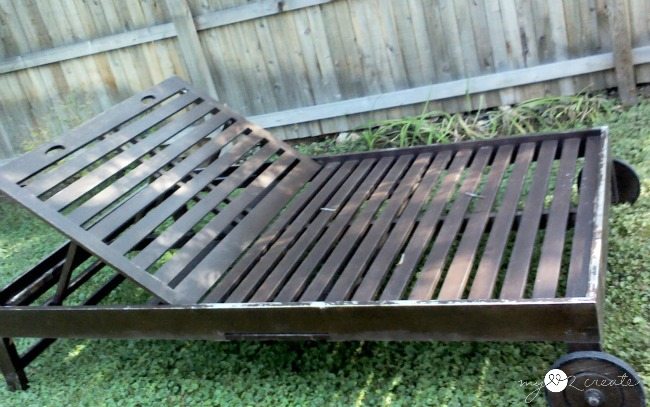
Several months back my father in law texted me a photo of this lounge chair/bed. He asked me if I wanted it, his neighbor was throwing it out, and it was from Pottery Barn. Yes please.
The only problem, this thing was huge, and there was no way it was going to fit in my van. Since I just wanted it for the wood, he cut it up for me.
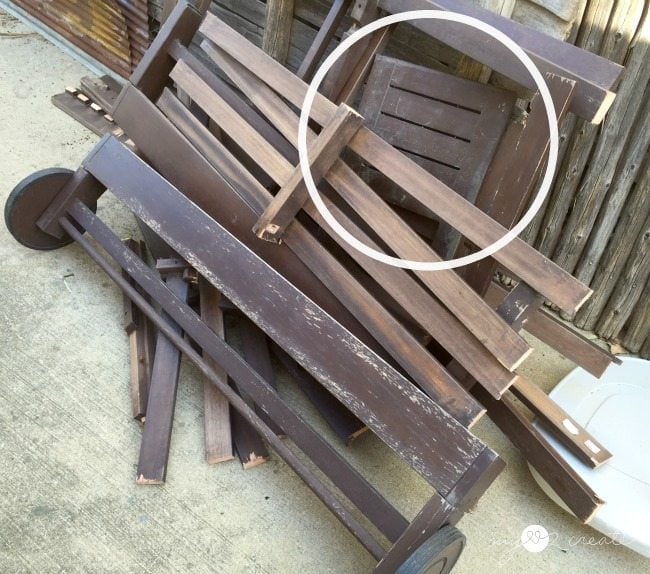
Last week I finally had a chance to go and pick it up. So it was sitting on the side of my house just waiting for a project. When my sister mentioned she needed chairs for her kids table I first thought of the circled pieces above.
Repurposing old outdoor furniture pieces
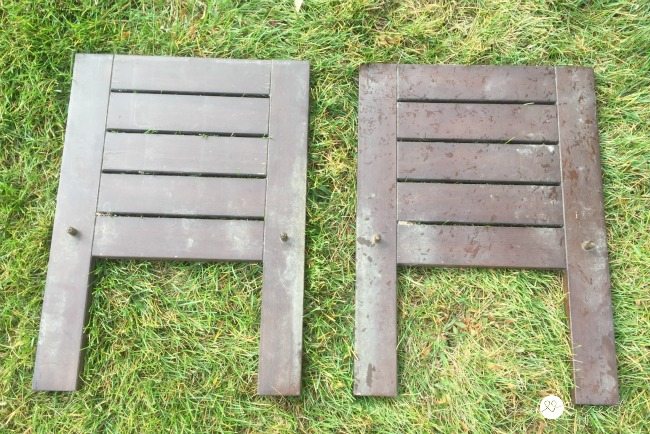
I wondered if I could make these into chairs, but they were just too wide so I nixed that idea. Then I realized they would be super cute as side supports for a bench…and benches are always useful especially benches with storage shelves.
Designing the kid storage bench
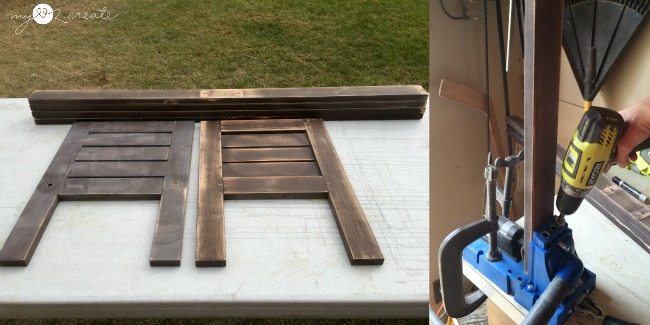 So I set to work cutting support boards from the lounge chair slats. I cut them at 45.5 inches so the kid storage bench would be 47 inches long. Since my sister lives in Ohio, we had to make sure it would fit in her van on the drive home. I used my K5 to drill pocket holes into each end of my 1×3 boards.
Need more details on using a Kreg Jig? See my article How to use a Kreg Jig Pocket Hole System
Kreg Jig pocket holes for construction
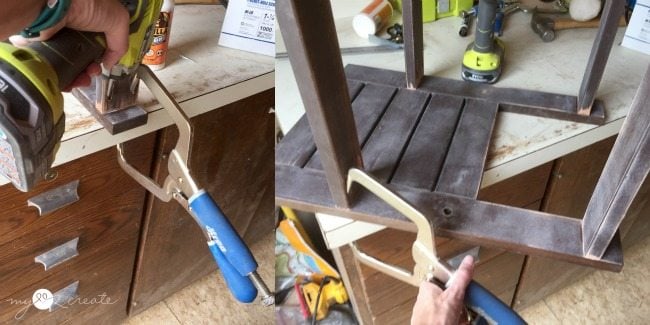 Then I used my handy right angle clamp to attach them to one of the sides with glue and pocket holes. But wait…
 Before I did that I measured where I wanted the support boards for the bench seat and shelf to be, and marked it on the side pieces.
Adding support pieces
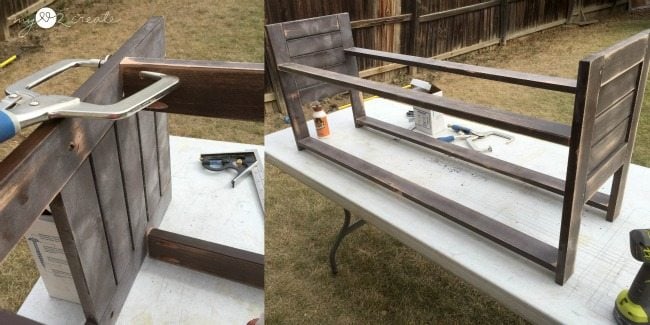 I attached the second side piece to the support boards, and then I was ready to cut some middle support pieces.
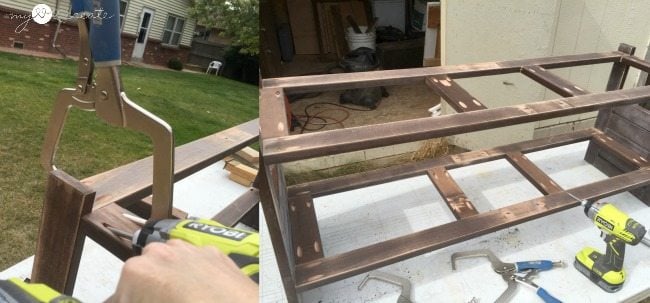 I measured how long they needed to be and then drilled pocket holes to attach them to the longer support pieces. Seriously, I don’t know how I used to build without my right angle clamps…they make my job much easier! You can see I turned the kid storage bench upside down to add the middle support boards.
Making slats for the kid storage bench
 Originally I planned on using slats from the lounge chair as the bench seat and shelf, which would have been fine, but then the whole thing would have had to be painted, since I didn’t have time to strip the lounge chair pieces.
In the end, my love of wood and paint mixed together got the better of me and I ventured behind the shed to see if I could make some of my 80 year old barn wood work instead.
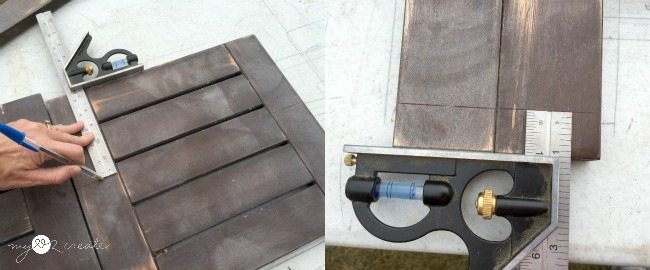
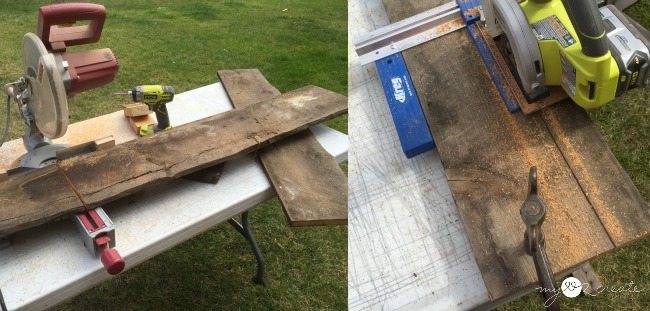
I had to do some thinking, but decided that using two super long boards I could make it work. I cut each board into two pieces, to the right length, and then I used my Kreg Rip Cut and my Ryobi circular saw (my favorite tool combo) to rip them into 7 inch wide boards.
 The kid storage bench is just over 14 inches deep so the boards fit perfectly! Yippee! Above I am dry fitting them. I had already sanded the front board, but not the back, it is amazing the difference in color, and the mess it makes sanding!
Paint and Stain
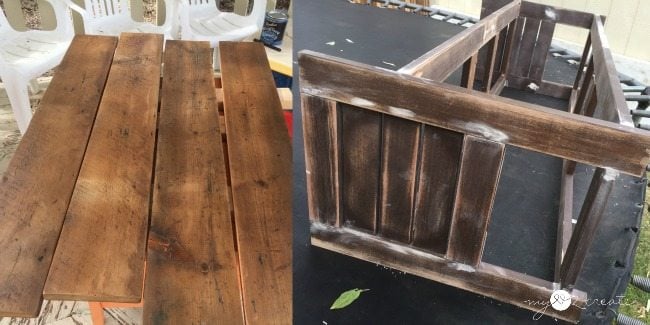 The next step was to get it ready for finishing. On the left, the bench seat and shelf boards were cleaned and sanded and given their first coat of poly. I had my sister apply the poly, I know she is a good helper from when she helped me do my other sister’s closet/laundry room makeover. 🙂 Because of time, we only did two coats of poly, I normally do at least three, and sand with super fine sandpaper between the first and second coat.
On the right I am filling in any holes in the bench base with spackle, when it dried I sanded it down and wiped it clean for painting.
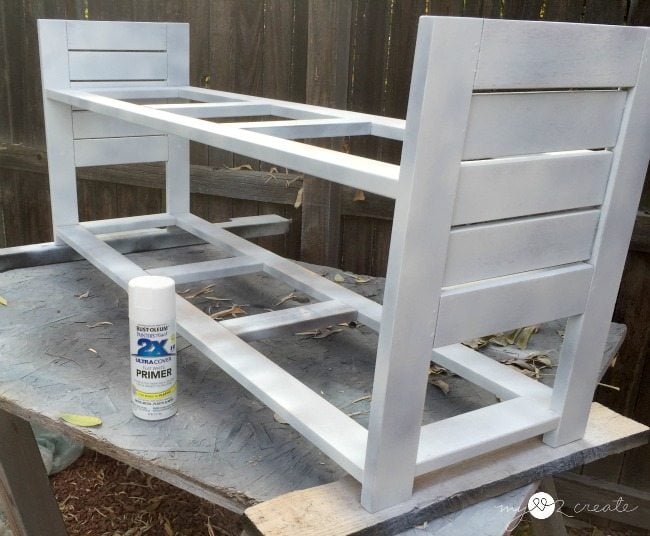 I only used two cans of spray paint for this bench, so I guess it cost just under $8 for the whole thing, not bad! One for priming, and then one for the color, which my sister picked, Rustoleum’s protective enamel in gloss light turquoise.
Add seat and lower shelf
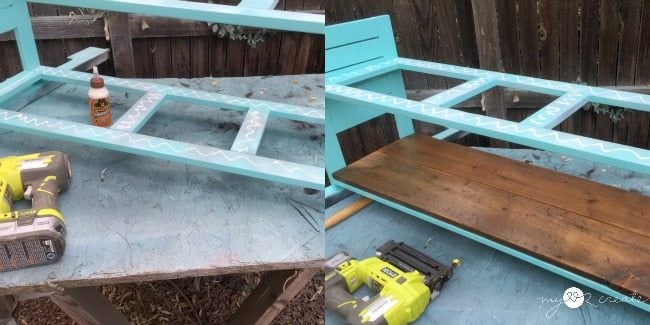 Once everything was dry…or almost dry…I glued and nailed on the reclaimed wood boards and that was it!
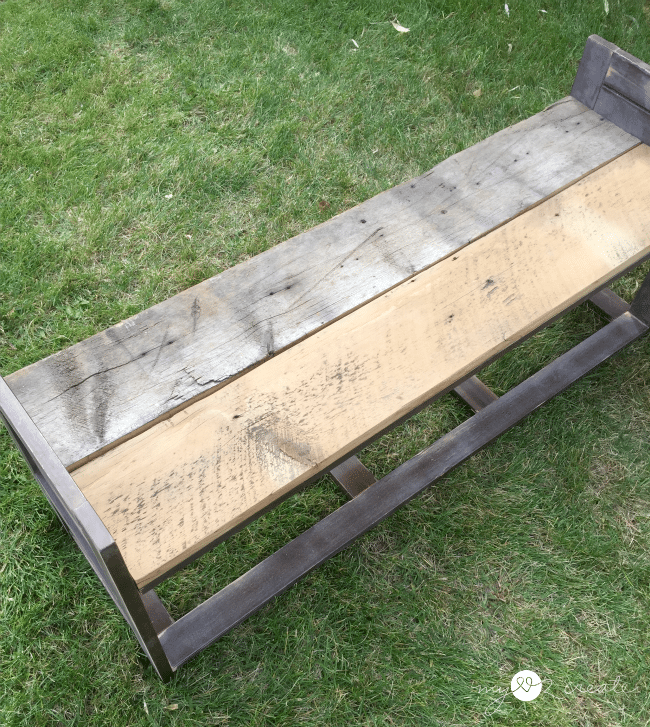
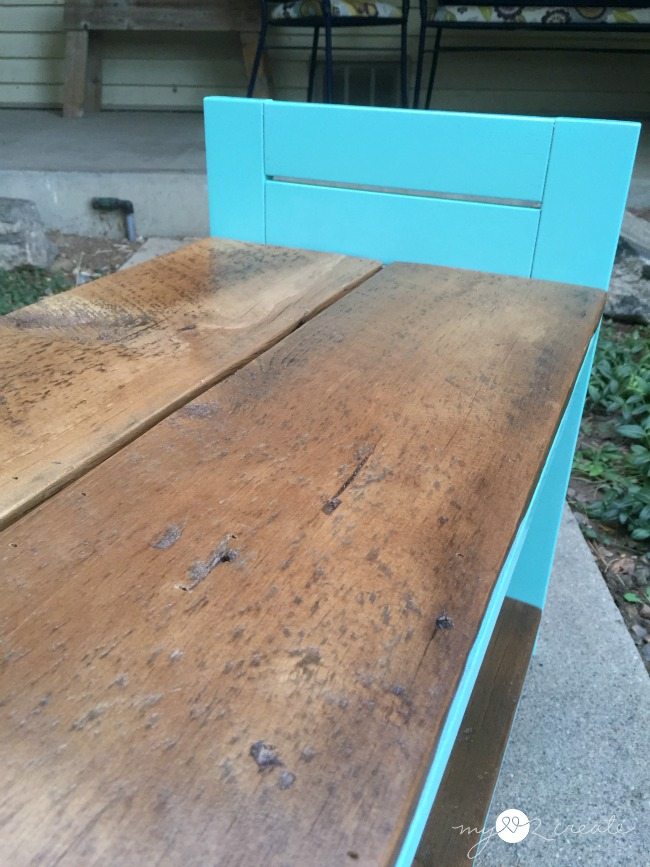
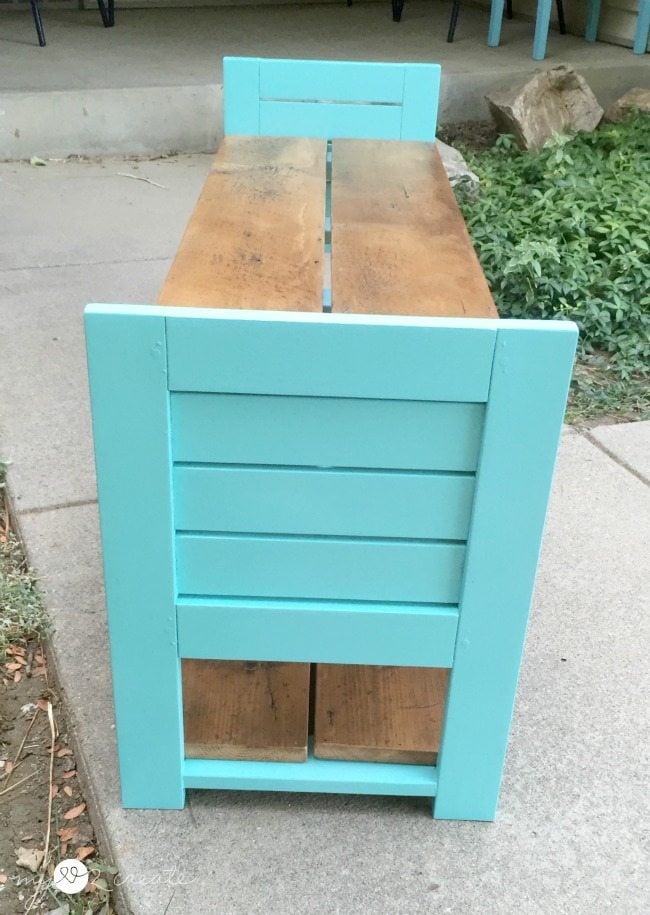
Rustic looking kid storage bench
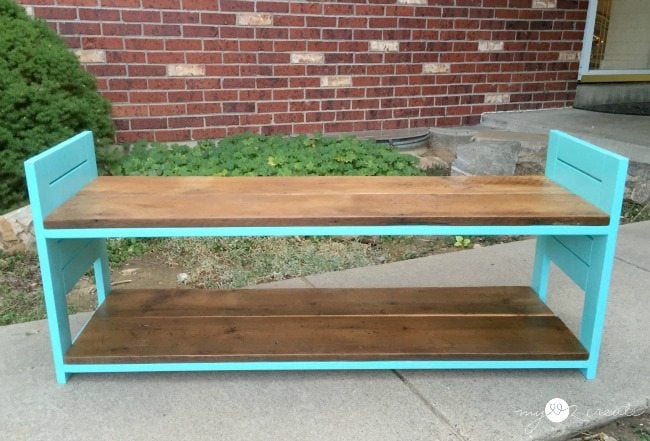 All done! Perfect for four cute little girls to sit on with lots of room for storage bins on the bottom.
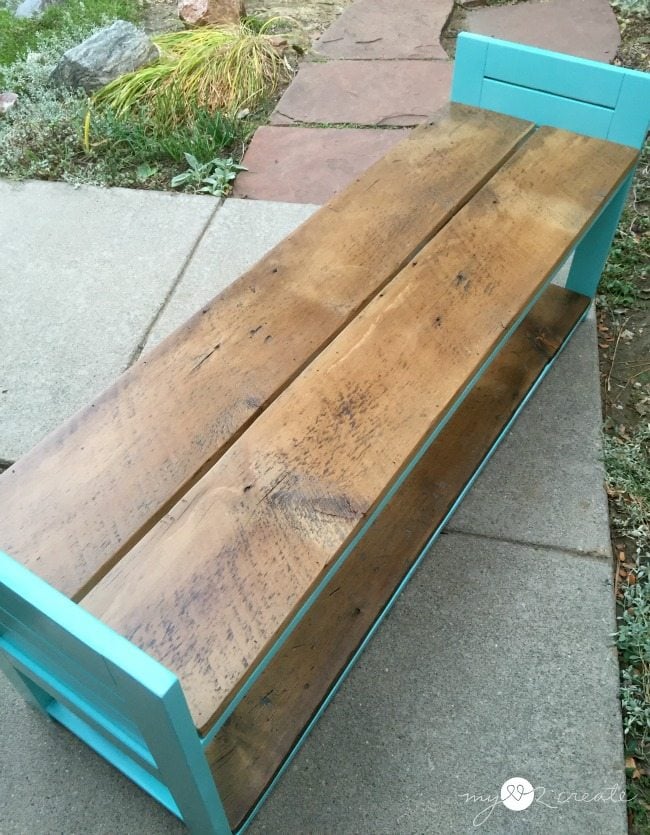 I am so glad I opted for the barn wood…
 It is soooo pretty! I will be sad when I completely run out of it, but I have lots of small scraps that can be used for signs and small projects like my Rustic Ironman Medal Display.
 Last week when I picked up that broken down lounge chair I never imagined this cute little kid storage bench! It gives me a thrill to think of what can be created out of necessity. I love the fun unique sides, they kind of make me happy.
 My sister loves it and I am so excited that I could build it for her sweet little girls! It is on it’s way to Ohio right now and I can’t wait to get a picture of it in it’s new home working hard. 🙂
Please Save & Share on Pinterest!
Do you have any old worn out lounge furniture that might need new life? Ha ha! For more great ideas check out my Project gallery!
Hugs!
Mindi
I love it Mindi!
Hi Gail, i love this bench and I especially love the reclaimed barnwood you used. I know what you mean when you say you will be sad when you run out of it. It’s like losing an old friend ) = Your sister picked a great color, i am a big fan of turquoise and the bench with its new sides looks kind of beachy because of it. Thanks for a great site, always look forward to you. ( =
But where do you store the kids? ; )
This turned out awesome, as usual, Mindi! Even if a person doesn’t have kids, it would look beautiful in any space.
Mindi…. your new kid’s storage bench is adorable! Everything is better with Kreg tools, right? The Kreg Jig the first thing I recommend to a newbie who wants to build.
Love the color combination of the bench, and it’s going to be perfect for your nieces.
thanks for sharing!
gail